Applications
Controls the creation of application shortcuts.
Tip:
You can use the Full Configuration management interface of Citrix DaaS to edit the application settings and then add an executable file path that points to VUEMAppCmd.exe. VUEMAppCmd.exe ensures that the Workspace Environment Management agent finishes processing an environment before Citrix DaaS (formerly Citrix Virtual Apps and Desktops service) and Citrix Virtual Apps and Desktops published applications are started. For more information, see Editing application settings using the Full Configuration management interface.
You can use dynamic tokens to extend Workspace Environment Management actions to make them more powerful.
Application list
Displays a list of your existing application resources. You can use Find to filter the list by name or ID.
A general workflow to add and assign an application is as follows:
-
Go to the Administration Console > Actions > Applications > Application List tab, click Add. Alternatively, right-click the blank area and then select Add in the context menu. The New Application window appears.
-
On the General tab, type the required information and select an application type as needed.
-
On the Options tab, add an icon for the application and configure settings as needed.
-
On the Advanced Settings tab, configure more options for the application.
-
Click OK to save changes and to exit the New Application window.
-
-
Go to the Administration Console > Assignments > Action Assignment tab.
-
Double-click the user or user group to which you want to assign the application.
-
Select the application and click the right arrow (>) to assign it.
-
In the Assign Filter window, select Always True and then click OK. The application moves from the Available pane to the Assigned pane.
-
In the Assigned pane, configure one or more of the following options for the application: Create Desktop, Create Quick Launch, Create Start Menu, Pin To TaskBar, Pin To Start Menu, and Auto Start.
-
The assignment might take some time to take effect, depending on the value you specified for SQL Settings Refresh Delay on the Advanced Settings > Configuration > Service Options tab. Perform the following steps for the assignment to take effect immediately if needed.
-
Go to the Administration Console > Administration > Agents > Statistics tab and then click Refresh.
-
Right-click the agent and then select Refresh Workspace Agent(s) in the context menu.
The General tab
Name. The display name of the application shortcut, as it appears in the application list.
Description. Lets you specify additional information about the application.
Application Type. The type of application the shortcut opens. The user interface differs depending on your selection.
-
Installed application. Lets you create a shortcut that opens an application installed on the user’s machine. If selected, prompts you to complete the following:
- Command Line. Type the full path of the application that resides on the user’s machine. Click Browse to see the listed applications and to understand the file path format.
- Working Directory. Type the full path to a folder on the user’s machine as a working folder for the application. This field populates automatically after you type the full path in the Command Line field.
- Parameters. Type launch parameters for the application if needed.
-
File/Folder. Lets you create a shortcut that opens the target file or folder on the user’s machine when a user clicks the shortcut icon. If selected, prompts you to complete the following:
- Target. Type the full path to the target file or folder.
Note:
While using a non-domain-joined agent, Application Type such as, File/Folder in WEM might not work, if the Target is a network share.
-
URL. Lets you add the URL of an application. If selected, prompts you to complete the following:
- Shortcut URL. Type the URL of an application.
-
StoreFront™ store. Lets you add an application that is based on a StoreFront store. If selected, prompts you to complete the following:
- Store URL. Type the URL of a StoreFront store containing the resource you want to start from the shortcut.
- Store Resource. Add the resource (available from the StoreFront store) that you want to start from the shortcut. Click Browse to browse and select the resource.
Tip:
To add an application based on a StoreFront store, you must provide valid credentials. A dialog appears the first time you click Browse to view store resources. The dialog prompts you to type credentials that you use to log on to Citrix Workspace™ app for Windows. After that, the Store Resources window appears, displaying a list of published applications retrieved by Citrix Workspace app for Windows running on the WEM administration console machine.
Start Menu Integration. Lets you specify where to create the application shortcut on the left side of the Start menu. By default, a new shortcut is created in Programs. To create a custom folder for a shortcut, perform these steps:
-
Click Select path to open the Start Menu Path Selection window.
-
In that window, right-click Programs and click Add from the context menu. The Create New Start Menu Folder window appears.
-
In that window, specify a folder name, click OK.
-
Click Select to exit the Start Menu Path Selection window.
The Options tab
Icon File. Lets you add an icon for the application. Click Select Icon to type the full path for the icon file you uploaded, select the path from the list, and then click Load. For more information, see To select an icon. Icons are stored in the database as strings.
- High Resolution Icons Only. Displays only high-definition icons in the list.
Icon Index. This field automatically populates.
Application State. Controls whether the application shortcut is enabled. When disabled, the agent does not process it even if it is assigned to a user.
-
Maintenance Mode. When enabled, prevents users from running the application shortcut. The shortcut icon contains a warning sign to indicate that the shortcut is unavailable. If users click the shortcut, a message appears, notifying them that the application is unavailable. This option lets you proactively manage scenarios where published applications are in maintenance without disabling or deleting those application shortcuts.

Display Name. The name of the shortcut, as it appears in the user environment.
Hotkey. Lets you specify a hotkey for the user to launch the application with. Hotkeys are case sensitive and typed in the following format (for example): Ctrl + Alt + S.
Action Type. Describes what type of action this resource is.
The Advanced Settings tab
Enable Automatic Self-Healing. When selected, the agent automatically recreates application shortcuts on refresh if the user has moved or deleted them.
Enforce Icon Location. Lets you specify the exact location of the application shortcut on the user’s desktop. Values are in pixels.
Windows Style. Controls whether the application opens in a minimized, normal, or maximized window on the user’s machine.
Do Not Show in Self-Services. Hides the application from the agent menu (self-service interface) accessible from the user’s machine. Users open the agent menu by right-clicking the agent icon in the taskbar when the session agent is running in UI mode. If selected, hides the application from both the My Applications menu and the Manage Applications dialog.
Tip:
The Enable Application Shortcuts option controls whether the My Applications option is available in the agent menu. The option is available from the Administration Console > Advanced Settings > UI Agent Personalization > UI Agent Options tab. For more information, see UI Agent Personalization.
Create Shortcut in User Favorites Folder. Creates an application shortcut in the user’s Favorites folder.
Start menu view
Displays a tree view of your application shortcut resource locations in the Start menu.
Refresh. Refreshes the application list.
Move. Opens up a wizard which allows you to select a location to move the application shortcut to.
Edit. Opens up the application edition wizard.
Delete. Deletes the selected application shortcut resource.
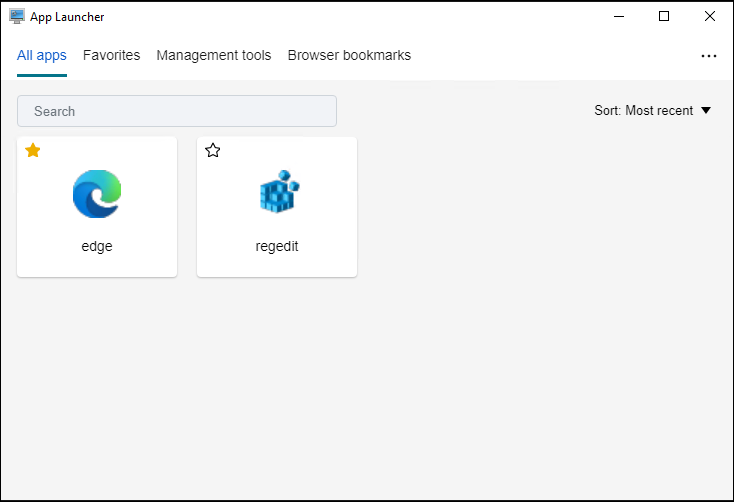
Application launcher
Application launcher aggregates all applications you assigned to your users through the administration console. Using the tool, users can launch all assigned applications in one place.
Tip:
We recommend that you publish this tool as a Citrix® virtual app.
This feature provides the following benefits:
- Assigned applications can be launched faster.
- Users can launch all applications assigned to them in one place.
- Users can quickly access their bookmarked websites. With Profile Management, browser bookmarks can be roamed.
Your users can directly open the application launcher tool (AppLauncherUtil.exe) in their environment. The tool is available in the agent installation folder: %ProgramFiles%\Citrix\Workspace Environment Management Agent\ AppLauncherUtil.exe. After opening the tool, users see the following, reflecting the applications assigned to them:
-
All apps. Shows all assigned applications. Available sorting options: Most recent, A-Z, and Z-A.
-
Favorites. Shows applications marked as favorites.
-
Management tools. Shows the following two tools:
- Taskmgr. Opens Task Manager.
- VUEMUIAgent. Launches the WEM UI agent.
-
Browser bookmarks. Shows websites saved in browser bookmarks. By clicking a bookmark, users can quickly open the browser and get to the target website. Bookmarks can be grouped by browser. This feature supports only Google Chrome and Microsoft Edge. Available sorting options: Most recent, A-Z, and Z-A.
-
Ellipsis icon. There is a Sign out option that lets users sign out of their sessions.
Make sure that the assigned applications are present on the agent machine. If an assigned application is not installed on the agent machine, the application is shown but unavailable for launch.

For an example of how to use this feature, see Aggregate assigned applications in one place.
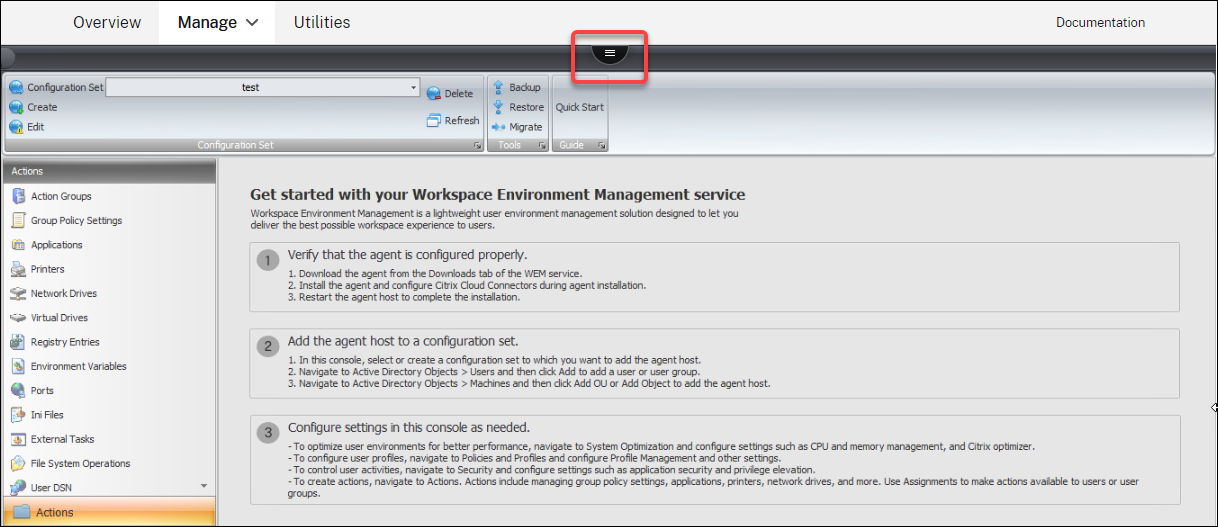
To select an icon
To select an icon, complete the following steps:
-
Hover the mouse cursor over the menu on the Manage tab of the WEM service.
-
Click the Citrix Workspace icon.
-
Click the upload icon to upload the applicable icon file to a Citrix Cloud™ folder.
Note:
We do not retain the icon file for later use. We might delete the file when the file count limit is reached. If necessary, save a local copy of the file. For more information about the file count limit, see Upload files.
-
On the Administration Console > Actions > Applications > Application List tab, click Add.
-
In the New Application window, go to the Options tab and then click Select Icon.
-
In the Icon Selector window, type the full file path for the icon file you uploaded, select the path from the drop-down list, and then click Load. The default folder path is
C:\DefaultUploadFolder\. You must type the full file path in the following format:C:\DefaultUploadFolder\iconname. For example:C:\DefaultUploadFolder\iconname.icoC:\DefaultUploadFolder\iconname.exe
-
In the Icon Selector window, select the applicable icon and then click OK.
Editing application settings using the Full Configuration management interface
Workspace Environment Management (WEM) provides you with client-side tools to troubleshoot issues you experience. The VUEMAppCMD tool (VUEMAppCmd.exe) ensures that the WEM agent finishes processing an environment before published applications are started. It is located in the agent installation folder: %ProgramFiles%\Citrix\Workspace Environment Management Agent\VUEMAppCmd.exe.
Note:
For the 64-bit OS, use
%ProgramFiles(x86)%instead.
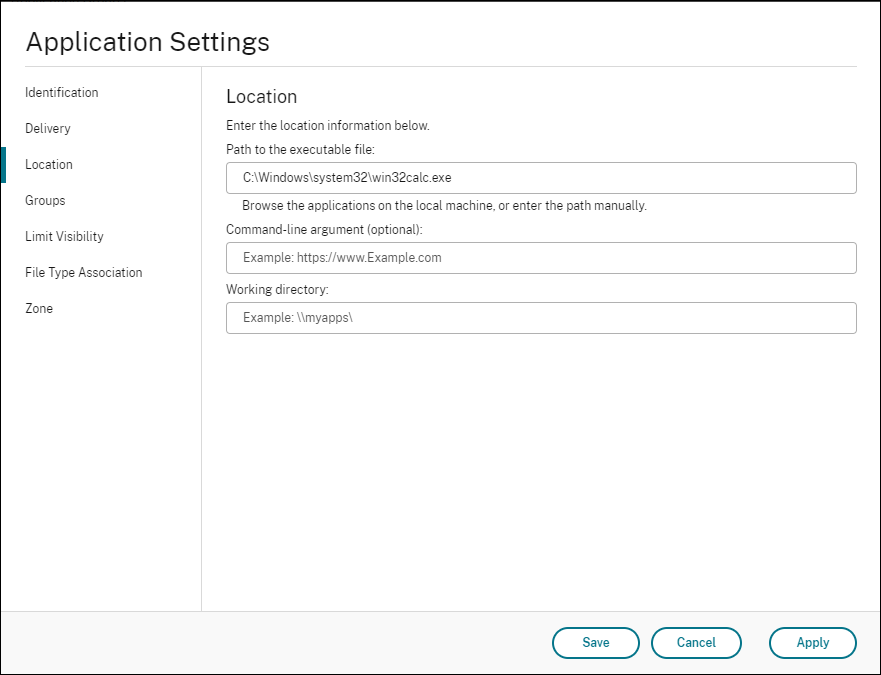
You can use the Full Configuration management interface to edit the application settings and then add an executable file path that points to VUEMAppCmd.exe. To do so, complete the following steps:
-
On the Application node, select the application, click Properties in the action bar, and then go to the Location page.
-
In the Path to the executable file field, type the path for
VUEMAppCmd.exe.- Type the following:
%ProgramFiles%\Citrix\Workspace Environment Management Agent\VUEMAppCmd.exe.
- Type the following:
-
Type the path for the application to be launched in the command-line argument field.
- Type the full path to the application that you want to launch through VUEMAppCmd.exe. Make sure that you wrap the command line for the application in double quotes if the path contains blank spaces.
- For example, suppose you want to launch iexplore.exe through VUEMAppCmd.exe. You can do so by typing the following:
"%ProgramFiles%\Internet Explorer\iexplore.exe".