APNs certificates
Important:
Apple support for the APNs legacy binary protocol ends as of March 31, 2021. Apple recommends that you use the HTTP/2-based APNs provider API instead. As of release 10.13.0, XenMobile Server supports the HTTP/2-based API. For more information, see the news update, “Apple Push Notification Service Update” in https://developer.apple.com/. For help with checking connectivity to APNs, see Connectivity checks.
To enroll and manage iOS and macOS devices in XenMobile®, you set up an Apple Push Notification service (APNs) certificate from Apple.
Workflow summary:
-
Step 1: Create a Certificate Signing Request (CSR) through any of these methods:
-
Step 2: Sign the CSR in XenMobile Tools
-
Step 3: Submit the signed CSR to Apple to obtain the APNs certificate
-
Step 4: Using the same computer used for Step 1, Complete the CSR and export a PKCS #12 file:
-
Step 6: Renew an APNs certificate
Create a Certificate Signing Request
We recommend that you create a CSR by using Keychain Access on macOS. You can also create a CSR by using Microsoft IIS or OpenSSL.
Important:
- For the Apple ID used to create the certificate:
- The Apple ID must be a corporate ID and not a personal ID.
- Record the Apple ID that you use to create the certificate.
- To renew your certificate, use the same organization name and Apple ID. Using a different Apple ID to renew the certificate require device re-enrollment.
If you accidentally or intentionally revoke the certificate, you lose the ability to manage your devices.
- If you used the iOS Developer Enterprise Program to create a mobile device manager push certificate: Be sure to handle any actions for the migrated certificates in the Apple Push Certificates Portal.
Create a CSR by using Keychain Access on macOS
- On a computer running macOS, under Applications > Utilities, start the Keychain Access app.
- Open the Keychain Access menu and then click Certificate Assistant > Request a Certificate From a Certificate Authority.
- The Certificate Assistant prompts you to enter the following information:
- Email Address: Email address of the individual or role account who is responsible for managing the certificate.
- Common Name: Common name of the individual or a role account who is responsible for managing the certificate.
- CA Email Address: Email address of the Certificate Authority.
- Select the Saved to disk and Let me specify key pair information options and then click Continue.
- Enter a name for the CSR file, save the file on your computer, and then click Save.
- Specify the key pair information: Select the Key Size of 2048 bits and the RSA algorithm and then click Continue. The CSR file is ready for you to upload as part of the APNs certificate process.
- Click Done when the Certificate Assistant completes the CSR process.
- To continue, Sign the CSR.
Create a CSR by using Microsoft IIS
The first step for generating an APNs certificate request is to create a Certificate Signing Request (CSR). For Windows, generate a CSR by using Microsoft IIS.
- Open Microsoft IIS.
- Double-click the Server Certificates icon for IIS.
- In the Server Certificates window, click Create Certificate Request.
- Type the appropriate Distinguished Name (DN) information and then click Next.
- Select Microsoft RSA SChannel Cryptographic Provider for the Cryptographic Service Provider and 2048 for bit length and then click Next.
- Enter a file name and specify a location to save the CSR and then click Finish.
- To continue, Sign the CSR.
Create a CSR by using OpenSSL
If you can’t use a macOS device or Microsoft IIS to generate a CSR, use OpenSSL. You can download and install OpenSSL from the OpenSSL website.
-
On the computer where you install OpenSSL, run the following command from a command prompt or shell.
openssl req -new -keyout Customer.key.pem –out CompanyAPNScertificate.csr -newkey rsa:2048 -
The following message for certificate naming information appears. Enter the information as requested.
You are about to be asked to enter information that will be incorporated into your certificate request. What you are about to enter is what is called a Distinguished Name or a DN. There are quite a few fields but you can leave some blank For some fields there will be a default value, If you enter '.', the field will be left blank. ----- Country Name (2 letter code) [AU]:US State or Province Name (full name) [Some-State]:CA Locality Name (eg, city) []:RWC Organization Name (eg, company) [Internet Widgits Pty Ltd]:Customer Organizational Unit Name (eg, section) [:Marketing Common Name (eg, YOUR name) []:John Doe Email Address []:john.doe@customer.com <!--NeedCopy--> -
At the next message, enter a password for the CSR private key.
Please enter the following 'extra' attributes to be sent with your certificate request A challenge password []: An optional company name []: <!--NeedCopy--> -
To continue, sign the CSR as described in the next section.
Sign the CSR
To use a certificate with XenMobile, submit it to Citrix for signing. Citrix signs the CSR with its mobile device management signing certificate and returns the signed file in a .plist format.
-
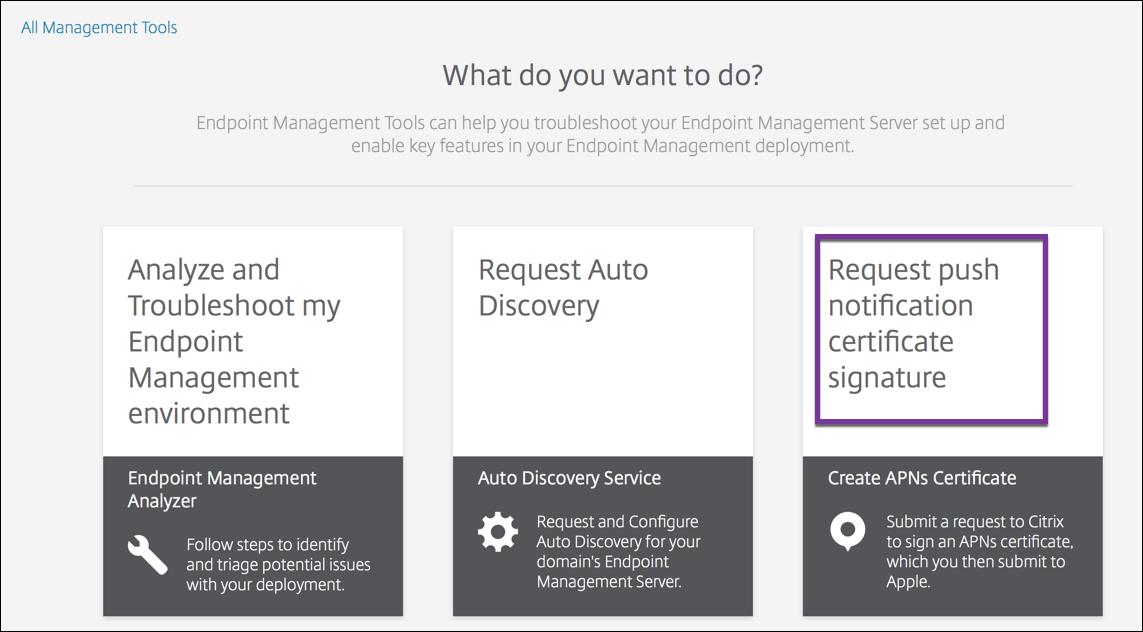
In your browser, go to the Endpoint Management Tools website and then click Request push notification certificate signature.
-
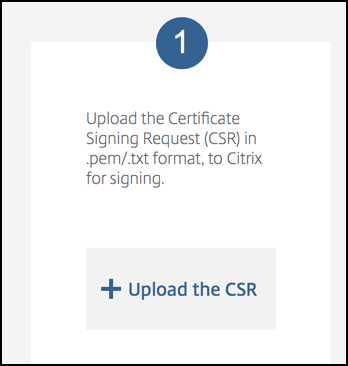
On the Creating a new certificate page, click Upload the CSR.
-
Browse to and select the certificate.
The certificate must be in .pem/txt format.
-
On the Endpoint Management APNs CSR Signing page, click Sign. The CSR is signed and automatically saved to your configured download folder.
-
To continue, submit the signed CSR as described in the next section.
Submit the signed CSR to Apple to obtain the APNs certificate
After receiving your signed Certificate Signing Request (CSR) from Citrix, submit the CSR to Apple to obtain the APNs certificate needed to import into XenMobile.
Note:
Some users have reported problems logging into the Apple Push Portal. As an alternative, log on to the Apple Developer Portal and then follow these steps:
-
In a browser, go to the Apple Push Certificates Portal.
-
Click Create a Certificate.
-
The first time that you create a certificate with Apple: Select the I have read and agree to these terms and conditions checkbox, and then click Accept.
-
Click Choose File, browse to the signed CSR on your computer, and then click Upload. A confirmation message indicates that the upload succeeds.
-
Click Download to retrieve the .pem certificate.
-
To continue, complete the CSR and export a PKCS #12 file as described in the next section.
Complete the CSR and export a PKCS #12 file
After you receive the APNs certificate from Apple, return to Keychain Access, Microsoft IIS, or OpenSSL to export the certificate into a PCKS #12 file.
A PKCS #12 file contains the APNS certificate file and your private key. PFX files usually have the extension .pfx or .p12. You can use .pfx and .p12 files interchangeably.
Important:
Citrix recommends you save or export the personal and public keys from the local system. You need the keys to access the APNs certificates for reuse. Without the same keys, your certificate is invalid and you must repeat the entire CSR and APNs process.
Create a PKCS #12 file by using Keychain Access on macOS
Important:
Use the same macOS device for this task that you used to generate the CSR.
-
On the device, locate the Production identity (.pem) certificate that received from Apple.
-
Start the Keychain Access application and navigate to the Login > My Certificates tab. Drag and then drop the Product identity certificate onto the open window.
-
Click the certificate and expand the left arrow to verify that the certificate includes an associated private key.
-
To begin exporting the certificate into a PCKS #12 (.pfx) certificate, choose the certificate and private key, right-click, and select Export 2 items.
-
Give the certificate file a unique name for use with XenMobile. Don’t include space characters in the name. Then, choose a folder location for the saved certificate, select the .pfx file format, and click Save.
-
Enter a password for exporting the certificate. Citrix recommends that you use a unique, strong password. Also, be sure to keep the certificate and password safe for later use and reference.
-
The Keychain Access app prompts you for the login password or selected keychain. Type the password, and then click OK. The saved certificate is now ready for use with the XenMobile Server.
-
To continue, see Import an APNs certificate into XenMobile.
Create a PKCS #12 file by using Microsoft IIS
Important:
Use the same IIS server for this task that you used to generate the CSR.
-
Open Microsoft IIS.
-
Click the Server Certificates icon.
-
In the Server Certificates window, click Complete Certificate Request.
-
Browse to the Certificate.pem file from Apple. Then, type a friendly name or the certificate name and click OK. Don’t include space characters in the name.
-
Select the certificate that you identified in Step 4, and then click Export.
-
Specify a location and file name for the .pfx certificate and a password, and then click OK.
You need the password for the certificate to import it into XenMobile.
-
Copy the .pfx certificate to the server on which you plan to install XenMobile.
-
To continue, see Import an APNs certificate into XenMobile.
Create a PKCS #12 file by using OpenSSL
If you use OpenSSL to create a CSR, you can also use OpenSSL to create a .pfx APNs certificate.
-
At a command prompt or shell, run the following command.
Customer.privatekey.pemis the private key from your CSR.APNs_Certificate.pemis the certificate that you just received from Apple.openssl pkcs12 -export -in APNs_Certificate.pem -inkey Customer.privatekey.pem -out apns_identity.pfx -
Enter a password for the .pfx certificate file. Remember this password because you use the password again when you upload the certificate to XenMobile.
-
Note the location for the .pfx certificate file. Then, copy the file to the XenMobile Server so you can use the console to upload the file.
-
To continue, import an APNs certificate into XenMobile as described in the next section.
Import an APNs certificate into XenMobile
After you receive the new APNs certificate: Import the APNs certificate into XenMobile to either add the certificate for the first time or to replace a certificate.
-
In the XenMobile console, go to Settings > Certificates.
-
Click Import > Keystore.
-
From Use as, choose APNs.
-
Browse to the .pfx or .p12 file on your computer.
-
Enter a password, and then click Import.
For more information about certificates in XenMobile, see Certificates and Authentication.
Renew an APNs certificate
Important:
If you use a different Apple ID for the renewal process, you must reenroll user devices.
To renew an APNs certificate, do the steps to create a certificate, then go to the Apple Push Certificates Portal. Use that portal to upload the new certificate. After logging on, your existing certificate or a certificate imported from your previous Apple Developers account appears.
In the Certificates Portal, the only difference when renewing the certificate is that you click Renew. You must have a developer account with the Certificates Portal to access the site. To renew your certificate, use the same organization name and Apple ID.
To determine when your APNs certificate expires in the XenMobile console, go to Settings > Certificates. If the certificate expires, do not revoke it.
-
Generate a CSR using Microsoft IIS, Keychain Access (macOS), or OpenSSL. For more information on generating a CSR, see Create a Certificate Signing Request.
-
In your browser, go to Endpoint Management Tools. Then, click Request push notification certificate signature.
-
Click + Upload the CSR.
-
In the dialog box, navigate to the CSR, click Open, and click Sign.
-
When you receive a
.plistfile, save it. -
In the step 3 title, click Apple Push Certificates Portal and sign on.
-
Select the certificate that you want to renew, and then click Renew.
-
Upload the
.plistfile. You receive a .pem file as the output. Save the .pem file. -
Using that .pem file, complete the CSR (according to the method you used to create the CSR in Step 1).
-
Export the certificate as a .pfx file.
In the XenMobile console, import the .pfx file and complete the configuration as follows:
- Go to Settings > Certificates > Import.
- From the Import menu, choose Keystore.
- From the Keystore type menu, choose PKCS #12.
-
From Use as, choose APNs.

- For Keystore file, click Browse and navigate to the file.
- In Password, type the certificate password.
- Type an optional Description.
- Click Import.
XenMobile redirects you back to the Certificates page. The Name, Status, Valid from, and Valid to fields update.