-
-
Firebase Cloud Messaging
-
This content has been machine translated dynamically.
Dieser Inhalt ist eine maschinelle Übersetzung, die dynamisch erstellt wurde. (Haftungsausschluss)
Cet article a été traduit automatiquement de manière dynamique. (Clause de non responsabilité)
Este artículo lo ha traducido una máquina de forma dinámica. (Aviso legal)
此内容已经过机器动态翻译。 放弃
このコンテンツは動的に機械翻訳されています。免責事項
이 콘텐츠는 동적으로 기계 번역되었습니다. 책임 부인
Este texto foi traduzido automaticamente. (Aviso legal)
Questo contenuto è stato tradotto dinamicamente con traduzione automatica.(Esclusione di responsabilità))
This article has been machine translated.
Dieser Artikel wurde maschinell übersetzt. (Haftungsausschluss)
Ce article a été traduit automatiquement. (Clause de non responsabilité)
Este artículo ha sido traducido automáticamente. (Aviso legal)
この記事は機械翻訳されています.免責事項
이 기사는 기계 번역되었습니다.책임 부인
Este artigo foi traduzido automaticamente.(Aviso legal)
这篇文章已经过机器翻译.放弃
Questo articolo è stato tradotto automaticamente.(Esclusione di responsabilità))
Translation failed!
Firebase Cloud Messaging
Note:
Firebase Cloud Messaging (FCM) was previously known as Google Cloud Messaging (GCM). Some XenMobile® console labels and messages use the GCM terminology.
Citrix® recommends that you use Firebase Cloud Messaging (FCM) to control how and when Android devices connect to XenMobile. XenMobile, when configured for FCM, sends connection notifications to Android devices that are enabled for FCM. Any security action or deploy command triggers a push notification to prompt the user to reconnect to the XenMobile Server.
After you complete the configuration steps in this article and a device checks in, the device registers with the FCM service in the XenMobile Server. That connection enables near real-time communication from your XenMobile Service to your device by using FCM. FCM registration works for new device enrollments and previously enrolled devices.
When XenMobile needs to start a connection to the device, it connects to the FCM service. Then, the FCM service notifies the device to connect. This type of connection is similar to what Apple uses for its Push Notification Service.
Prerequisites
- Latest Secure Hub client
- Google developer account credentials
- Google Play services installed on FCM-enabled Android devices
Firewall ports
- Open port 443 on XenMobile to
fcm.googleapis.comandGoogle.com. - Open outgoing Internet communication for device Wi-Fi on ports 5228, 5229, and 5230.
- To allow outgoing connections, FCM recommends allowing ports 5228 through 5230 with no IP restrictions. However, if you require IP restrictions, FCM recommends allowing all the IP addresses in the IPv4 and IPv6 blocks. Those blocks are listed in the Google ASN of 15169. Update that list monthly. For more information about FCM ports, see the Google documentation on FCM ports.
For more information, see Port requirements.
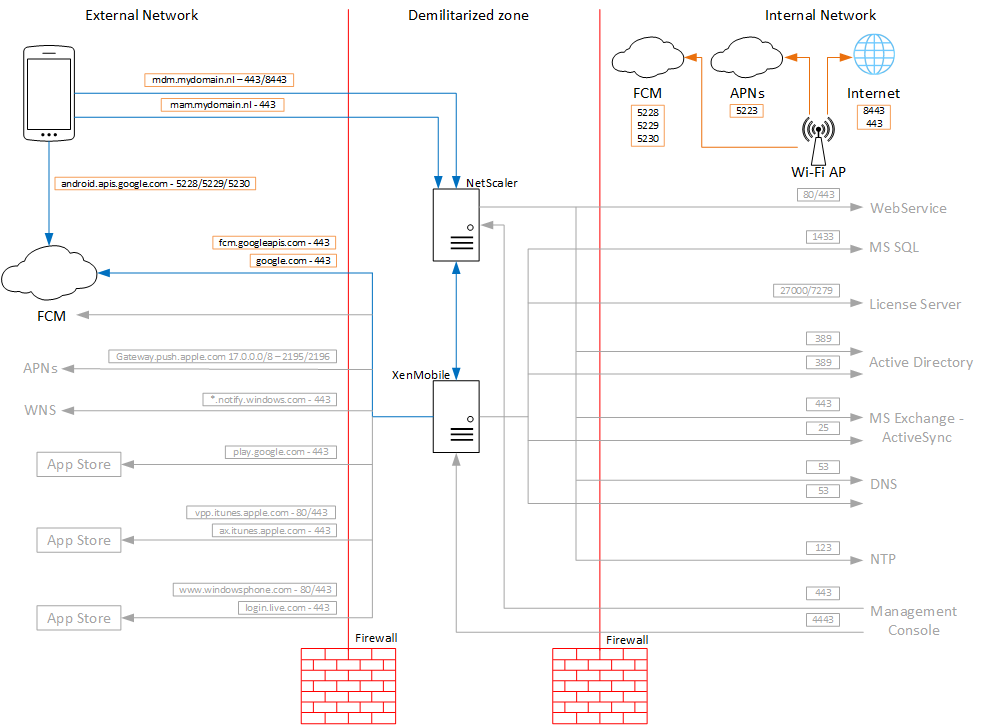
Architecture
This diagram shows the communication flow for FCM in the external and internal network.
To configure your Google account for FCM
-
Sign in to the following URL using your Google developer account credentials:
-
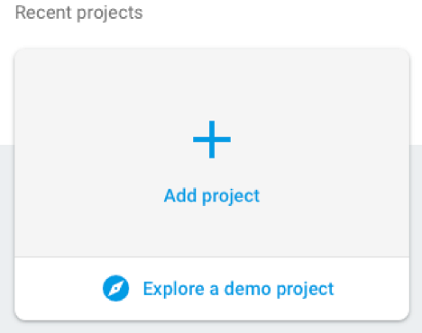
Click Add project.
-
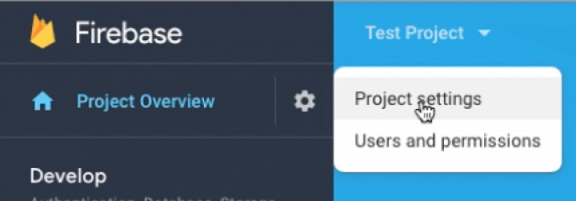
After you create the project, click Project settings.
Note:
Google is going to deprecate the FCM legacy APIs for HTTP, which is currently used in our FCM implementation. The migration deadline is on June 21, 2024. We need to migrate the FCM from legacy FCM API to HTTP v1 API. For more information, see Migrate from legacy FCM APIs to HTTP v1.
-
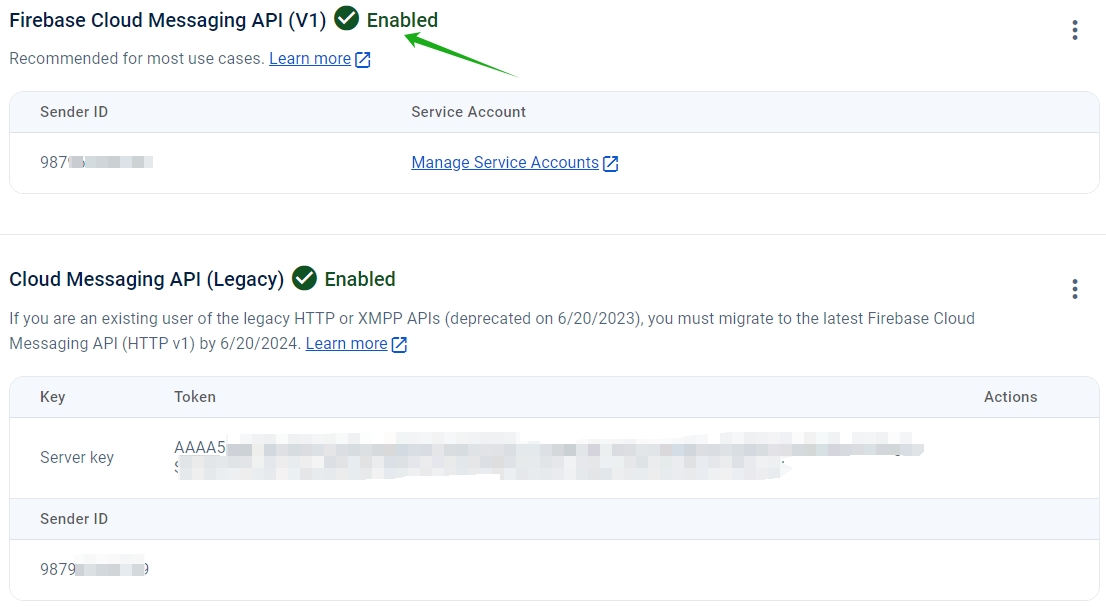
Click the Cloud Messaging tab. Verify that the Firebase Cloud Messaging API is enabled and click Manage Service Accounts.
-
Before migration, you could use the legacy API, ensure the Cloud Messaging API (Legacy) is enabled. Copy the values from Key and Sender ID fields.
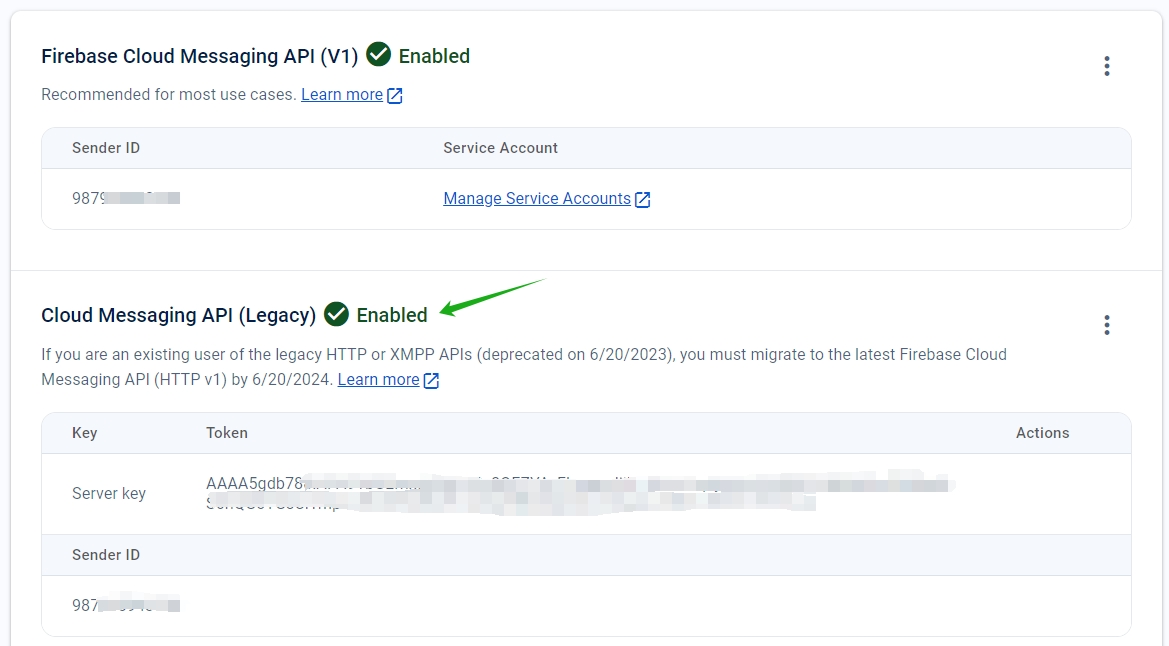
If you don’t have a key listed, click the ellipsis under Actions to add a key.

-
After migration, the legacy API is deprecated from Google. You have to enable the Firebase Cloud Messaging API(V1). For more information, see Migrate from legacy FCM APIs to HTTP v1.
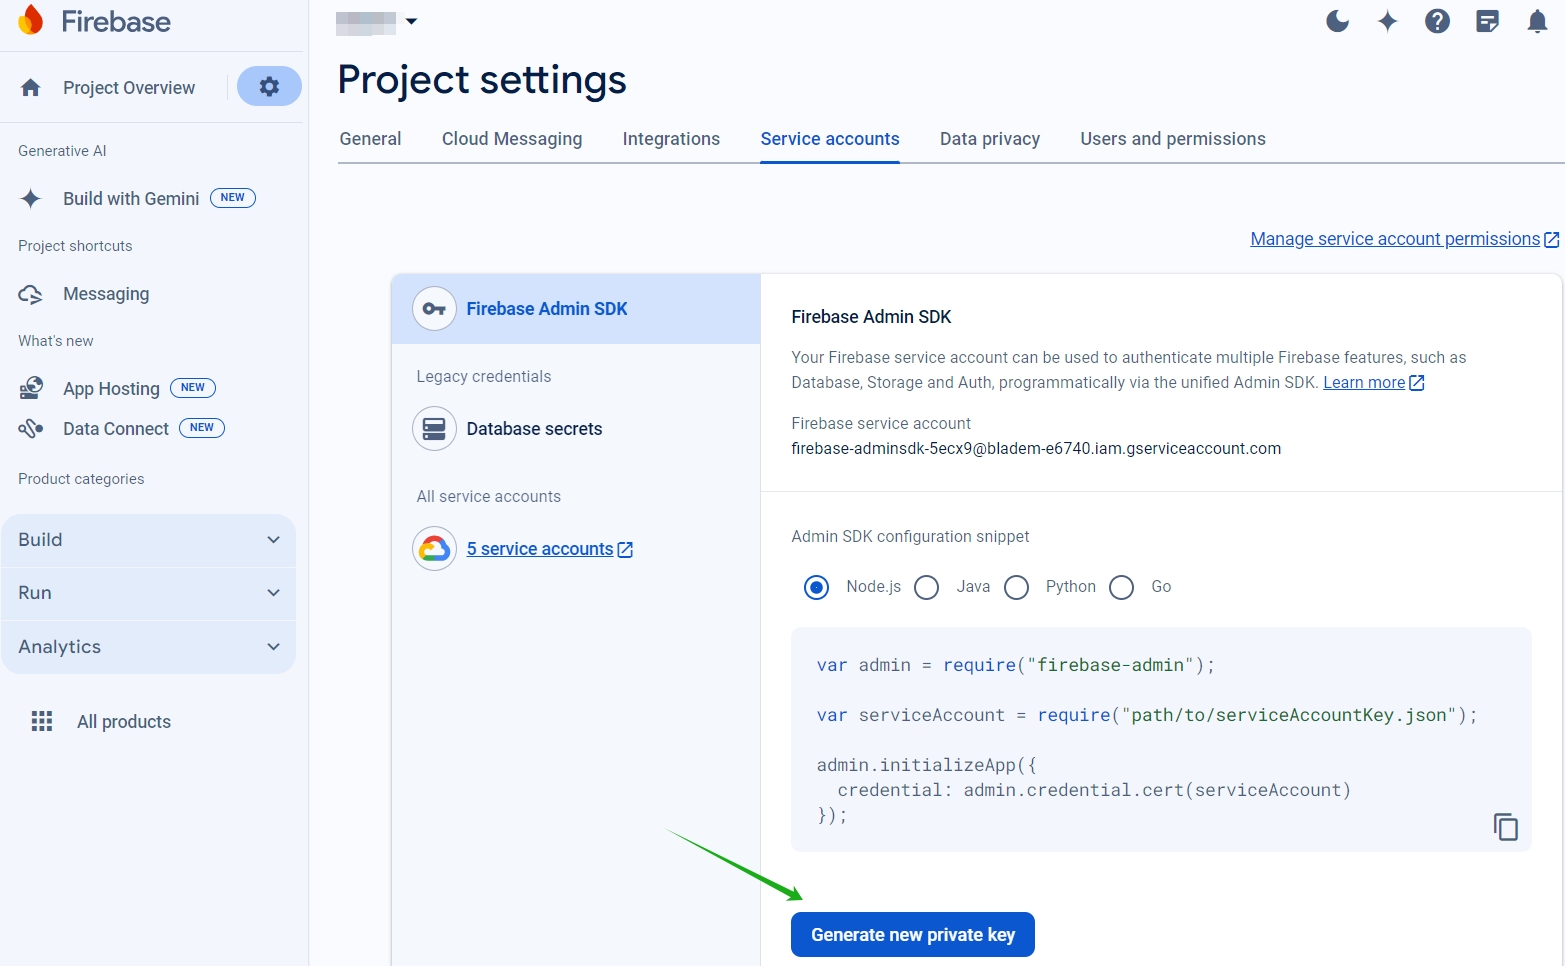
Download the service account JSON file from Service accounts under Project settings. See Provide credentials manually section to generate a private key file for your service account. Click Generate new private key to download the service account key JSON file.
-
For steps to set up an FCM client app on Android, see this Google Developers Cloud Messaging article: https://firebase.google.com/docs/cloud-messaging/android/client.
To configure XenMobile for FCM
In the XenMobile console, go to Settings > Firebase Cloud Messaging.
For Cloud Messaging API (Legacy)
-
Enter the Firebase Cloud Messaging Key from the last step of the Firebase Cloud Messaging configuration in API key field.
-
Enter the Sender ID value from the previous procedure.

For Firebase Cloud Messaging API (V1)
Notes:
- To enable FCM API V1 for XenMobile Server version 10.15 Rolling Patch 7 and later, see the Knowledge Center article CTX677031.
- If you are a new FCM user, skip step 1 and proceed from step 2.
-
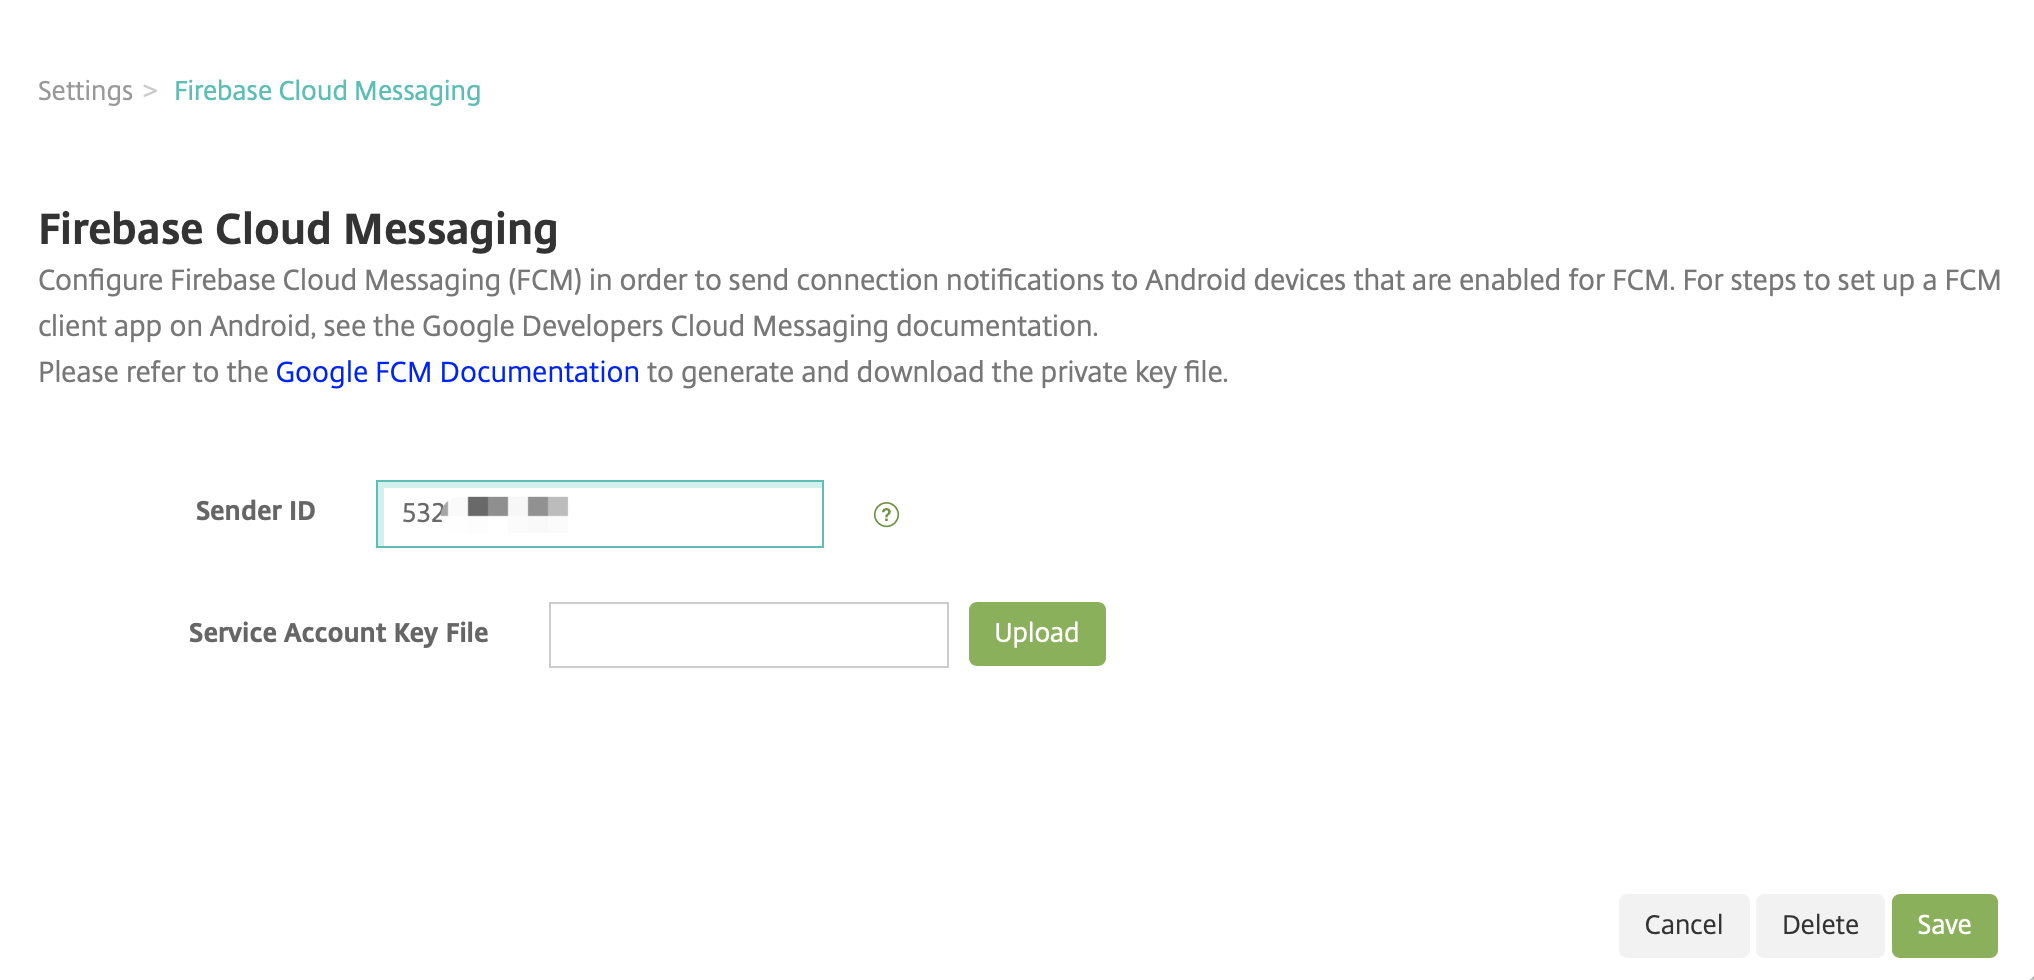
If you are already using FCM, you will notice that the Sender ID is auto-populated with your current FCM project and a new option to upload the Service Account Key File.
-
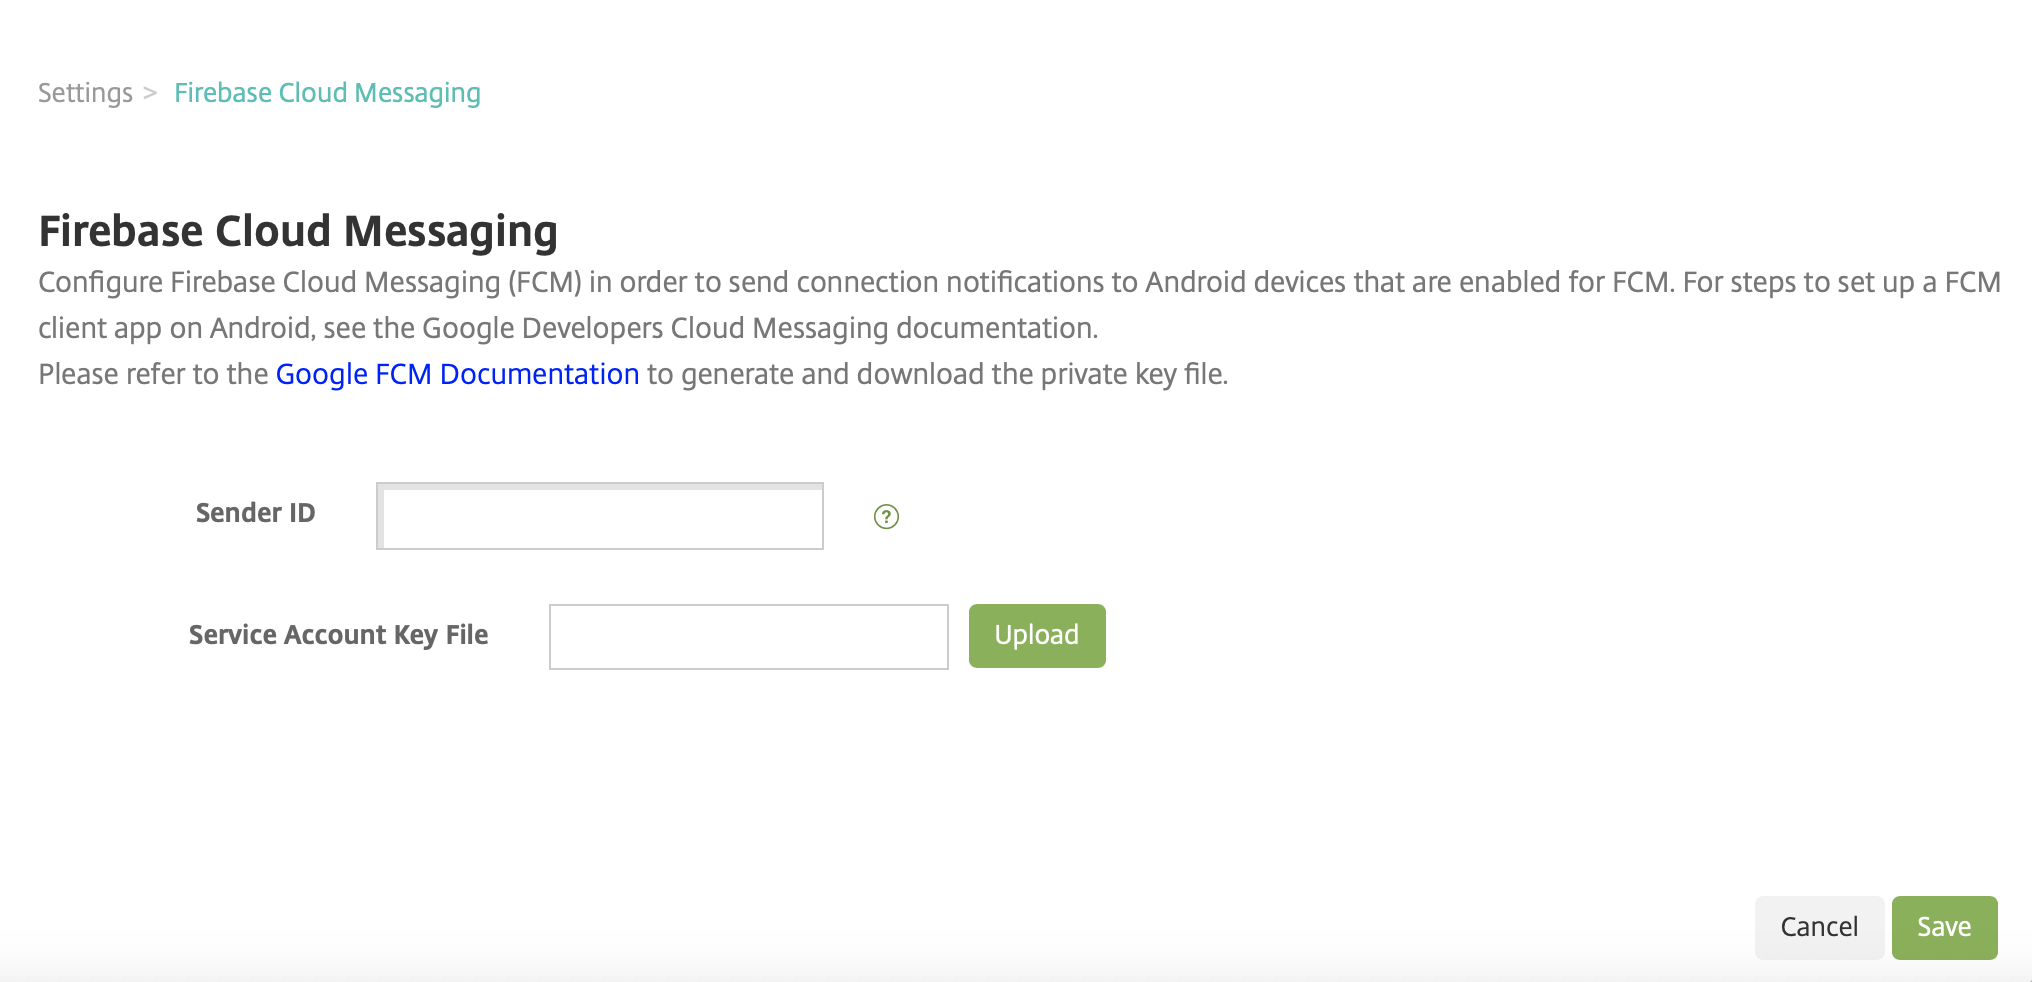
If you are a new FCM user, enter the Sender ID and upload the Service Account Key File from the previous procedure.
-
The uploaded file will be parsed and the corresponding fields will be auto-generated.
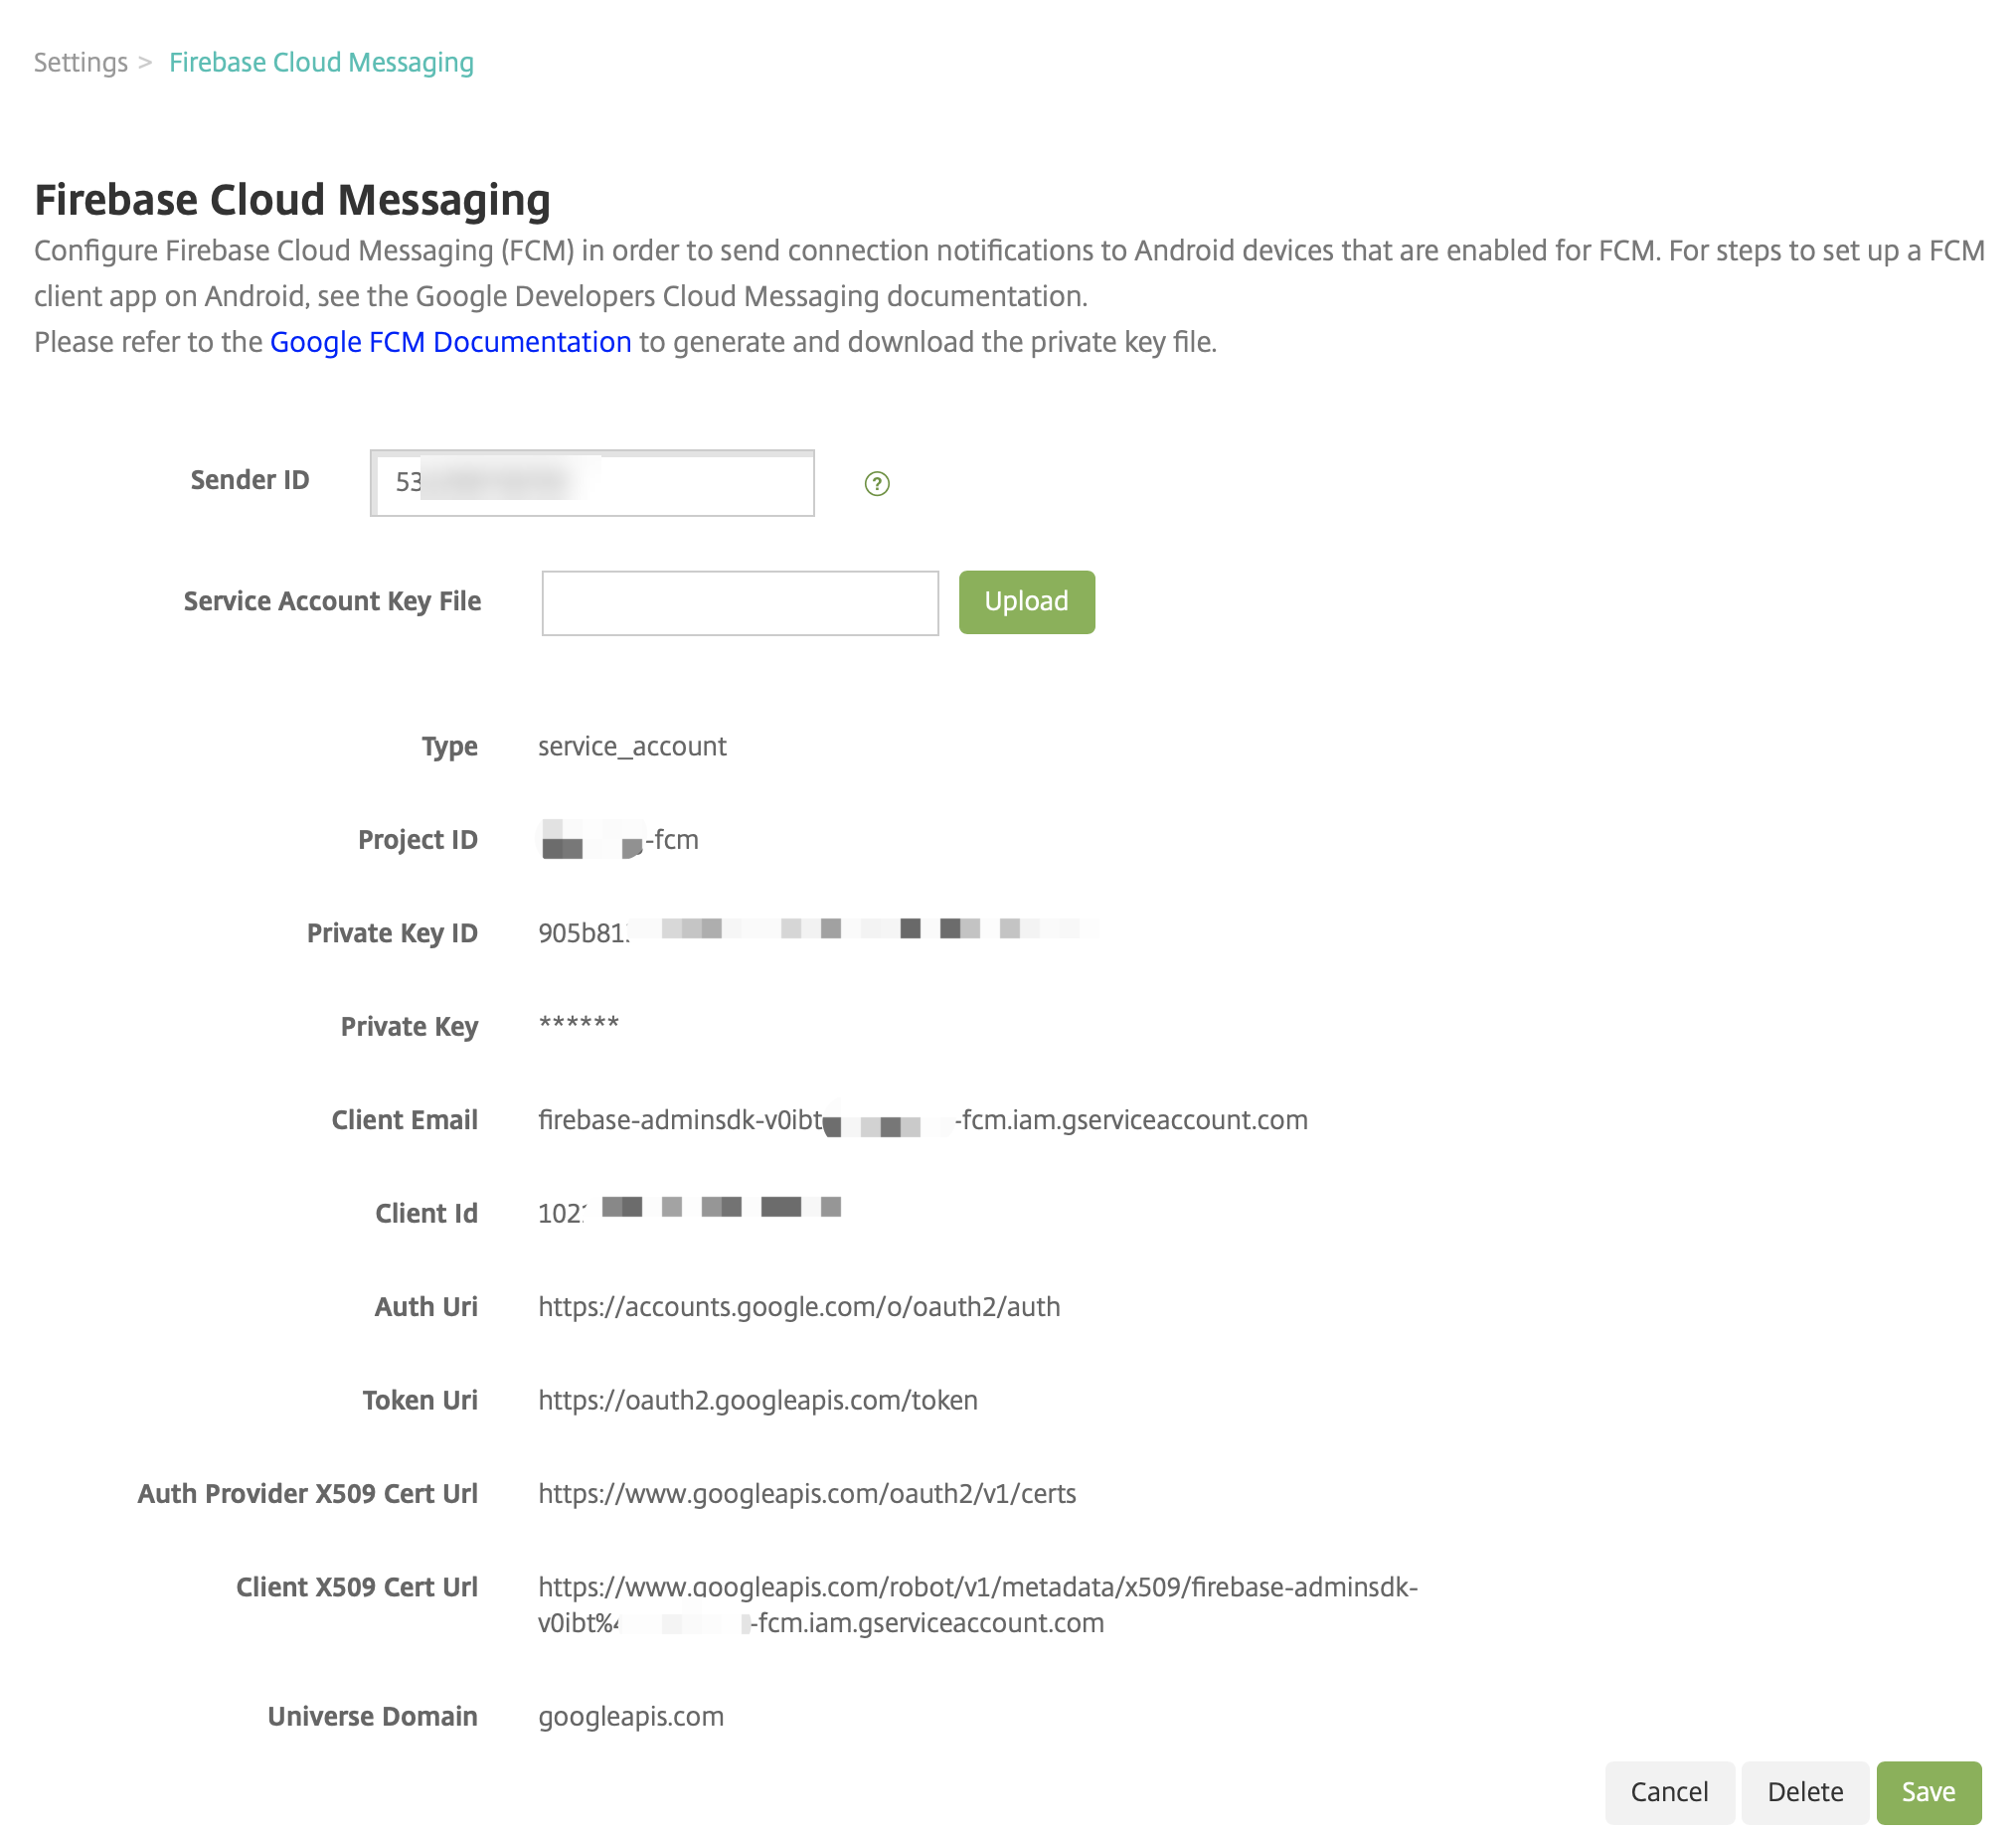
-
Verify the information and click Save.
To test your configuration
-
Enroll an Android device.
-
Leave the device idle for some time, so that it disconnects from XenMobile.
-
Sign in to the XenMobile console, click Manage, select the Android device, and then click Secure.

-
Under Device Actions, click Selective Wipe.
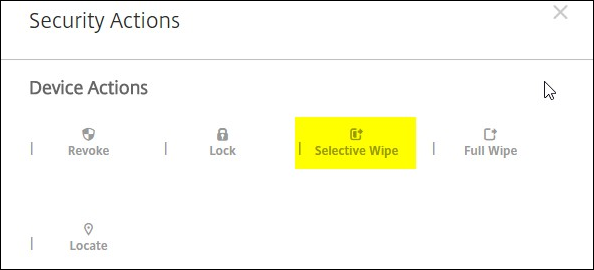
In a successful configuration, selective wipe occurs on the device.
Share
Share
This Preview product documentation is Citrix Confidential.
You agree to hold this documentation confidential pursuant to the terms of your Citrix Beta/Tech Preview Agreement.
The development, release and timing of any features or functionality described in the Preview documentation remains at our sole discretion and are subject to change without notice or consultation.
The documentation is for informational purposes only and is not a commitment, promise or legal obligation to deliver any material, code or functionality and should not be relied upon in making Citrix product purchase decisions.
If you do not agree, select I DO NOT AGREE to exit.