This content has been machine translated dynamically.
Dieser Inhalt ist eine maschinelle Übersetzung, die dynamisch erstellt wurde. (Haftungsausschluss)
Cet article a été traduit automatiquement de manière dynamique. (Clause de non responsabilité)
Este artículo lo ha traducido una máquina de forma dinámica. (Aviso legal)
此内容已经过机器动态翻译。 放弃
このコンテンツは動的に機械翻訳されています。免責事項
이 콘텐츠는 동적으로 기계 번역되었습니다. 책임 부인
Este texto foi traduzido automaticamente. (Aviso legal)
Questo contenuto è stato tradotto dinamicamente con traduzione automatica.(Esclusione di responsabilità))
This article has been machine translated.
Dieser Artikel wurde maschinell übersetzt. (Haftungsausschluss)
Ce article a été traduit automatiquement. (Clause de non responsabilité)
Este artículo ha sido traducido automáticamente. (Aviso legal)
この記事は機械翻訳されています.免責事項
이 기사는 기계 번역되었습니다.책임 부인
Este artigo foi traduzido automaticamente.(Aviso legal)
这篇文章已经过机器翻译.放弃
Questo articolo è stato tradotto automaticamente.(Esclusione di responsabilità))
Translation failed!
Configure clustering
To configure clustering, configure the following two load balancing virtual IP addresses on the Citrix ADC.
- Mobile device management (MDM) load balancing virtual IP address: An MDM load balancing virtual IP address is required to communicate with the XenMobile® nodes that are configured in a cluster. This load balancing is done in SSL Bridge mode.
- Mobile app management (MAM) load balancing virtual IP address: MAM load balancing virtual IP addresses are required for Citrix Gateway to communicate with XenMobile nodes that are configured in a cluster. In XenMobile, by default, all traffic from Citrix Gateway routes to the load balancing virtual IP address on port 8443.
The procedures in this section explain how to create a XenMobile virtual machine (VM) and joining the new VM to an existing VM. Those steps create a cluster setup.
Prerequisites
- You have fully configured the required XenMobile node.
- Configure NTP on all cluster nodes and the XenMobile database. For clustering to work properly, all of those servers must have the same time.
- One public IP address for MDM load balancer and one private IP address for MAM.
- Server certificates.
- One free IP for Citrix Gateway virtual IP address.
- With XenMobile deployed in a cluster setup and in MDM-only or Enterprise mode (MDM+MAM): Modify your Citrix ADC load balancer configuration to use Source IP persistence for all Citrix ADC MDM load balancers, that is, virtual servers set up for ports 8443 and 443. Complete that configuration before user devices upgrade to iOS 11. For more information, see this Citrix Knowledge Center article: https://support.citrix.com/article/CTX227406.
- To install apps from the XenMobile Store on iOS 11 devices, you must enable port 80 on the XenMobile Server.
For reference architectural diagrams for XenMobile 10.x in clustered configurations, see Architecture.
Installing the XenMobile Cluster Nodes
Based on the number of nodes you require, you create XenMobile VMs. You point the new VMs to the same database and provide the same PKI certificate passwords.
-
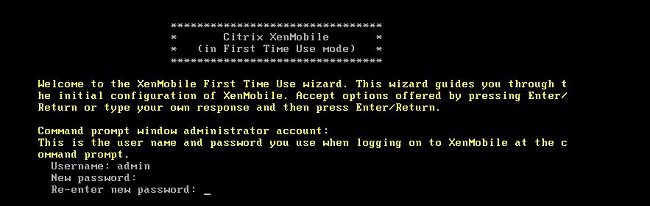
Open the command-line console of the new VM and enter the new password for the administrator account.
-
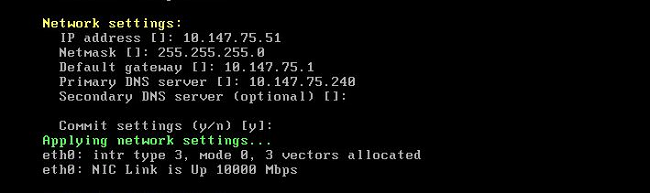
Provide the network configuration details as shown in the following figure.
-
If you want to use the default password for data protection, type y; or, type n and enter a new password.

-
If you want to use FIPS, type y; or, type n.

-
Configure the database so that you point to the same database that the earlier fully configured VM pointed to. You see the message:
Database already exists.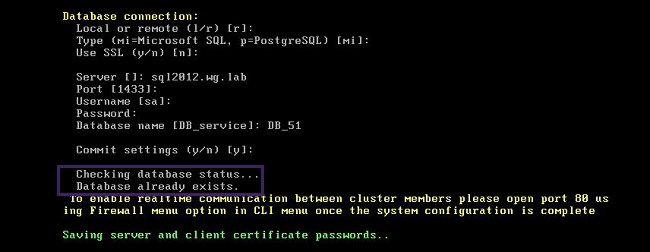
-
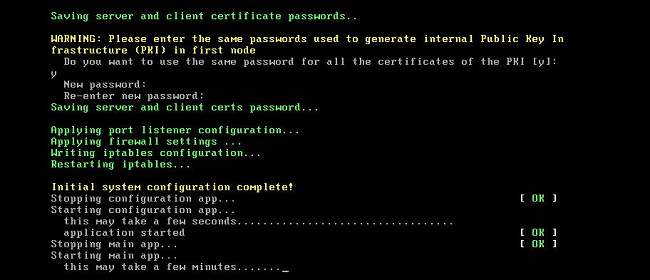
Enter the same passwords for the certificates that you provided for the first VM.
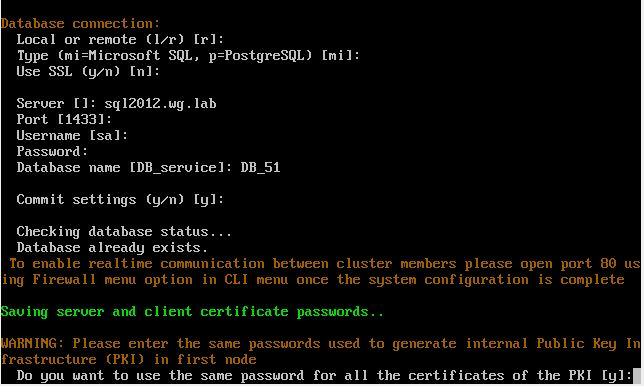
After you have entered the password, the initial configuration on the second node will complete.
-
When the configuration is complete, the server restarts and the logon dialog box appears.
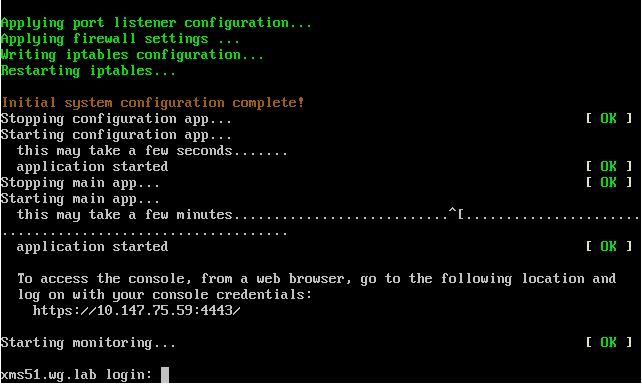
Note:
The logon dialog box is similar to the logon dialog box of the first VM. The match is a way for you to confirm that both VMs are using the same database server.
-
Use the fully qualified domain name (FQDN) of XenMobile to open the XenMobile console in a web browser.
-
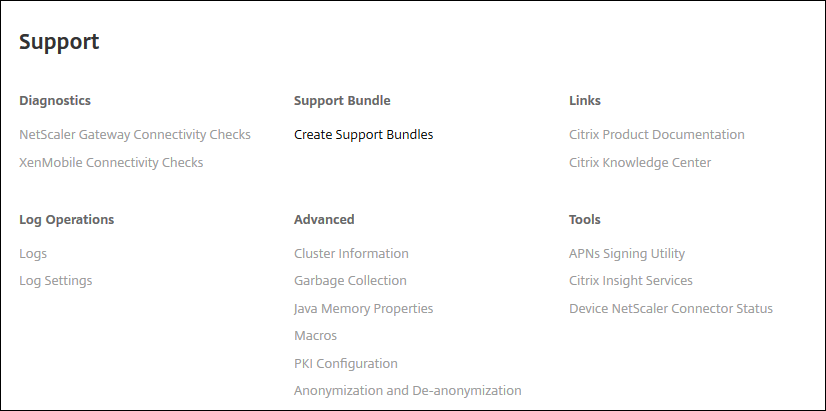
In the XenMobile console, click the wrench icon in the upper-right corner of the console.

The Support page opens.
-
Under Advanced, click Cluster Information.
All the information about the cluster including cluster member, device connection information, tasks, and so on appears. The new node is now a member of the cluster.
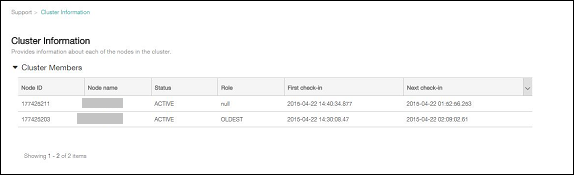
You can add other nodes by following the same steps. The first node added to the cluster has a Role of OLDEST. Nodes added after that show a Role of NONE or null.
To configure load balancing for the XenMobile cluster in Citrix ADC
After you add the required nodes as members of the XenMobile cluster, load balance the nodes so you can access the clusters. Load balancing is done by running XenMobile Wizard available in Citrix ADC. The following steps describe how to load balance XenMobile by running the wizard.
-
Log on to Citrix ADC.
-
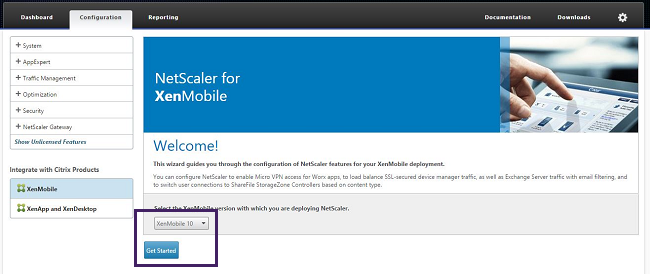
On the Configuration tab, click XenMobile and then click Get Started.
-
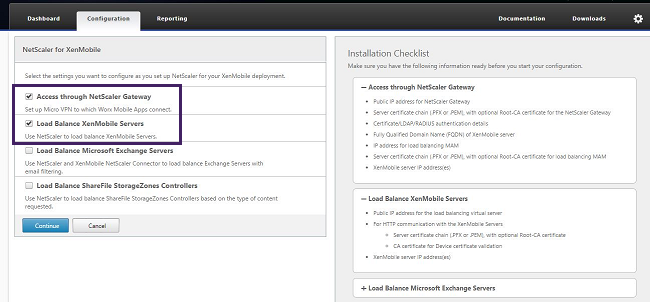
Select the Access through Citrix Gateway checkbox and the Load Balance XenMobile Servers checkbox and then click Continue.
-
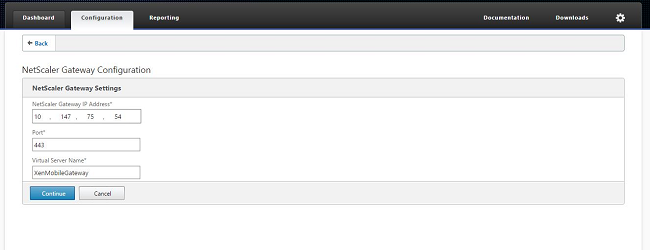
Enter the IP address for Citrix Gateway and then click Continue.
-
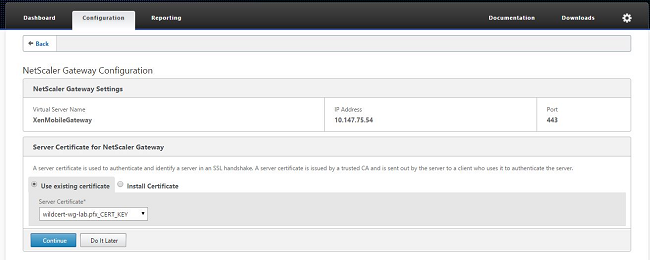
Bind the server certificate to the Citrix Gateway virtual IP address by doing one of the following and then click Continue.
- In Use existing certificate, choose the server certificate from the list.
- Click the Install Certificate tab to upload a new server certificate.
-
Enter the Authentication server details and then click Continue.
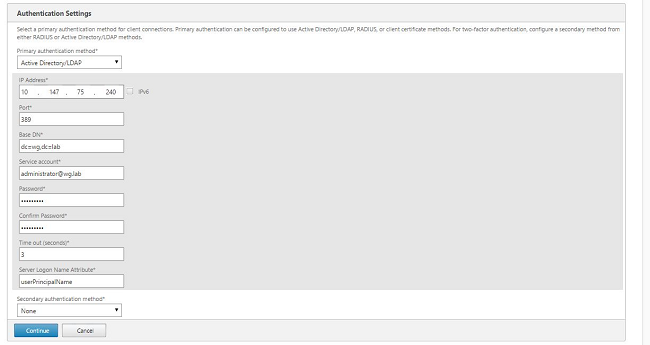
Note:
Ensure that the Server Logon Name Attribute is the same as you provided in the XenMobile LDAP configuration.
-
Under XenMobile settings, enter the Load Balancing FQDN for MAM and then click Continue.
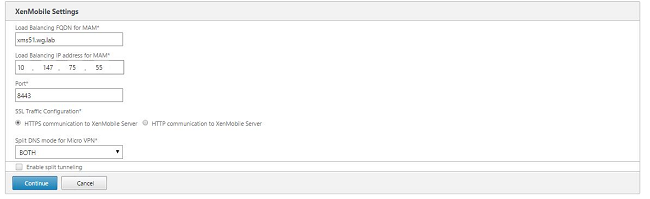
Note:
Ensure that the FQDN of the MAM load balancing virtual IP address and the FQDN of XenMobile are the same.
-
If you want to use SSL Bridge mode (HTTPS), select HTTPS communication to XenMobile Server. However, if you want to use SSL offload, select HTTP communication to XenMobile Server, as shown in the preceding figure. For the purposes of this article, the choice is SSL Bridge mode (HTTPS).
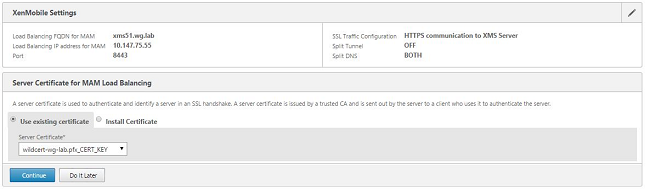
-
Bind the server certificate for the MAM load balancing virtual IP address and then click Continue.
-
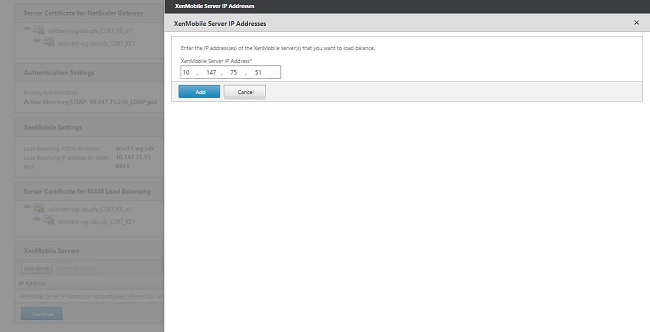
Under XenMobile Servers, click Add Server to add the XenMobile nodes.
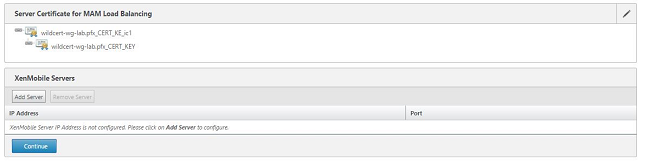
-
Enter the IP address of the XenMobile node and then click Add.
-
Repeat steps 10 and 11 to add more XenMobile nodes that are part of the XenMobile cluster. You see all the XenMobile nodes that you have added. Click Continue.

-
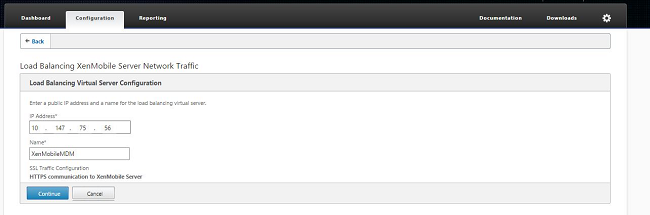
Click Load Balance Device Manager Servers to continue with the MDM load balancing configuration.

-
Enter the IP address to be used for MDM load balancing IP address and then click Continue.
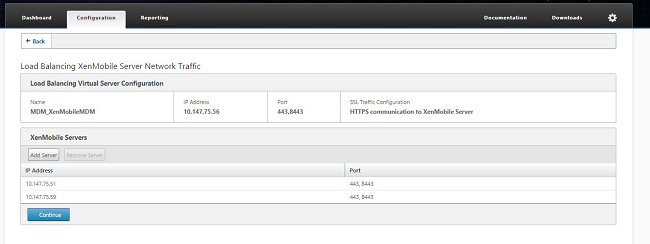
-
Once you see the XenMobile nodes in the list, click Continue and then click Done to finish the process.
You see the virtual IP address status on the XenMobile page.
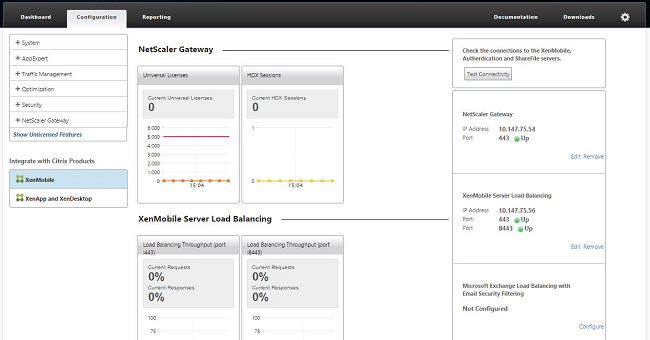
-
To confirm if the virtual IP addresses are up and running, click the Configuration tab and then navigate to Traffic Management > Load Balancing > Virtual Servers.
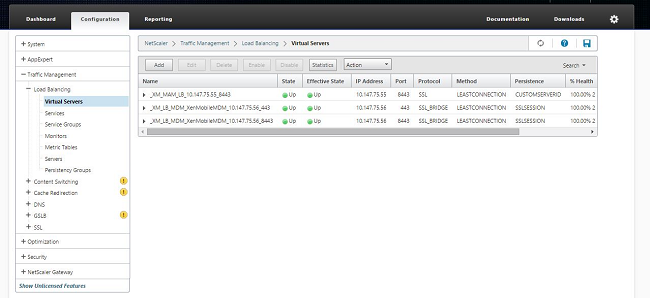
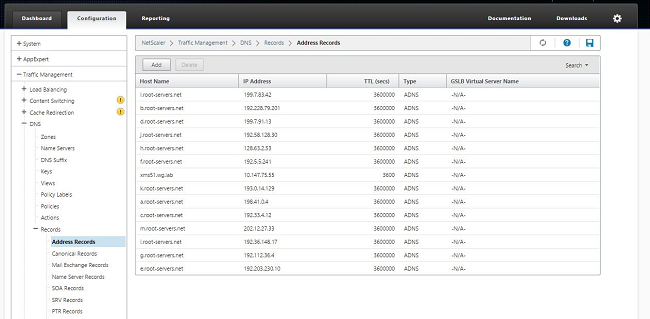
You also see that the DNS entry in the Citrix ADC points to the MAM load balancing virtual IP address.
Share
Share
This Preview product documentation is Citrix Confidential.
You agree to hold this documentation confidential pursuant to the terms of your Citrix Beta/Tech Preview Agreement.
The development, release and timing of any features or functionality described in the Preview documentation remains at our sole discretion and are subject to change without notice or consultation.
The documentation is for informational purposes only and is not a commitment, promise or legal obligation to deliver any material, code or functionality and should not be relied upon in making Citrix product purchase decisions.
If you do not agree, select I DO NOT AGREE to exit.