Support options and Remote Support
You can provide an email address for users to contact support staff. When users request assistance from their devices, they see the email address.
You can also configure how users send logs to the help desk from their devices. You can configure the logs to be sent directly or by email.
-
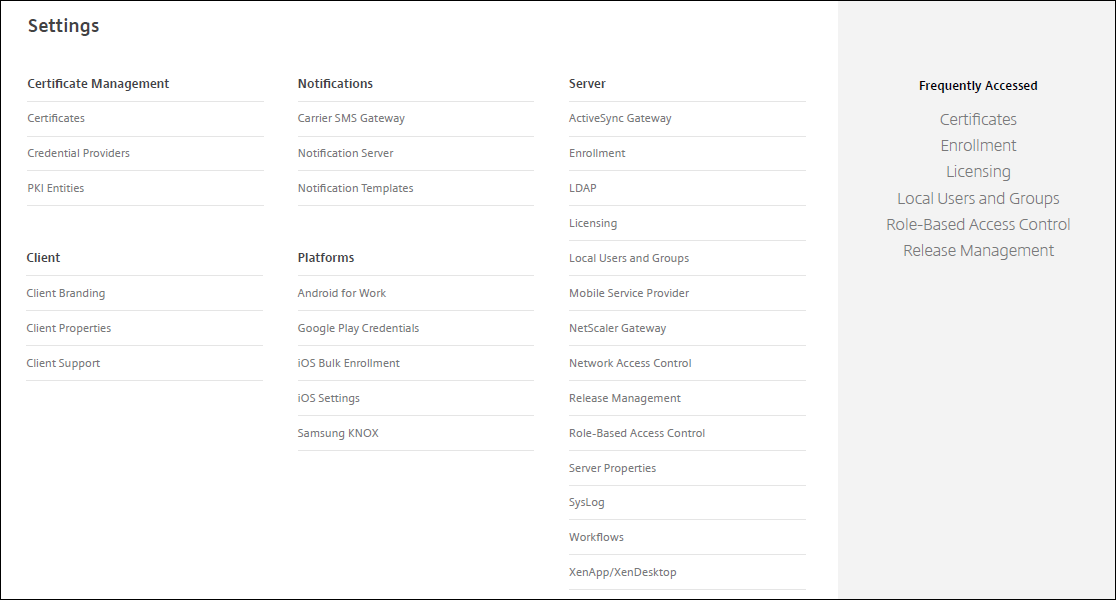
In the XenMobile® console, click the gear icon in the upper-right corner. The Settings page appears.
-
Under Client, click Client Support. The Client Support page appears.
-
Configure the following settings:
- Support email (IT help desk): Type the email address for your IT help desk contact.
-
Send device logs to IT help desk: Select whether device logs are sent directly or by email. The default is by email.
- When you enable directly, settings for Store logs on ShareFile (now called ShareFile) appear. If you enable Store logs on ShareFile, logs are sent directly to Citrix Files. Otherwise, the logs are sent to XenMobile and then emailed to the help desk. Also, the If sending directly fails, use email option appears, which is enabled by default. You can disable this option when you do not want to use the client email to send the logs for a server problem. When, however, you disable this option and a server problem occurs, the logs are not sent.
- When you enable by email, the client email is always used to send the logs.
-
Click Save.
Remote Support
Note:
Remote Support is no longer available for new customers from January 1, 2019. Existing customers can continue to use the product, however Citrix won’t provide enhancements or fixes.
For on-premises XenMobile Server deployments: Remote support enables your help desk representatives to take remote control of managed Android mobile devices. Screen cast is supported on Samsung Knox devices only.
Remote support isn’t available for clustered on-premises XenMobile Server deployments.
During a remote control session:
- Users see on their mobile device an icon indicating a remote control session is active.
- Remote Support users see the Remote Support application window and a Remote Control window that shows a rendering of the controlled device.
By using Remote Support, you can do the following:
- Remotely sign on to a user device and control the screen. Users can watch you navigate their screen, which can also be helpful for training purposes.
- Navigate and repair a remote device in real time. You can change configurations, troubleshoot operating system issues, and disable or stop problematic apps or processes.
- Isolate and contain threats before they spread to other mobile devices by remotely disabling network access, stopping rogue processes, and removing apps or malware.
- Remotely enable the device ringer and call the phone, to help the user to locate the device. When a user can’t find the device, you can wipe it to make sure that your sensitive data is not compromised.
Remote Support also enables support personnel to:
- Display a list of all connected devices within one or more instances of XenMobile.
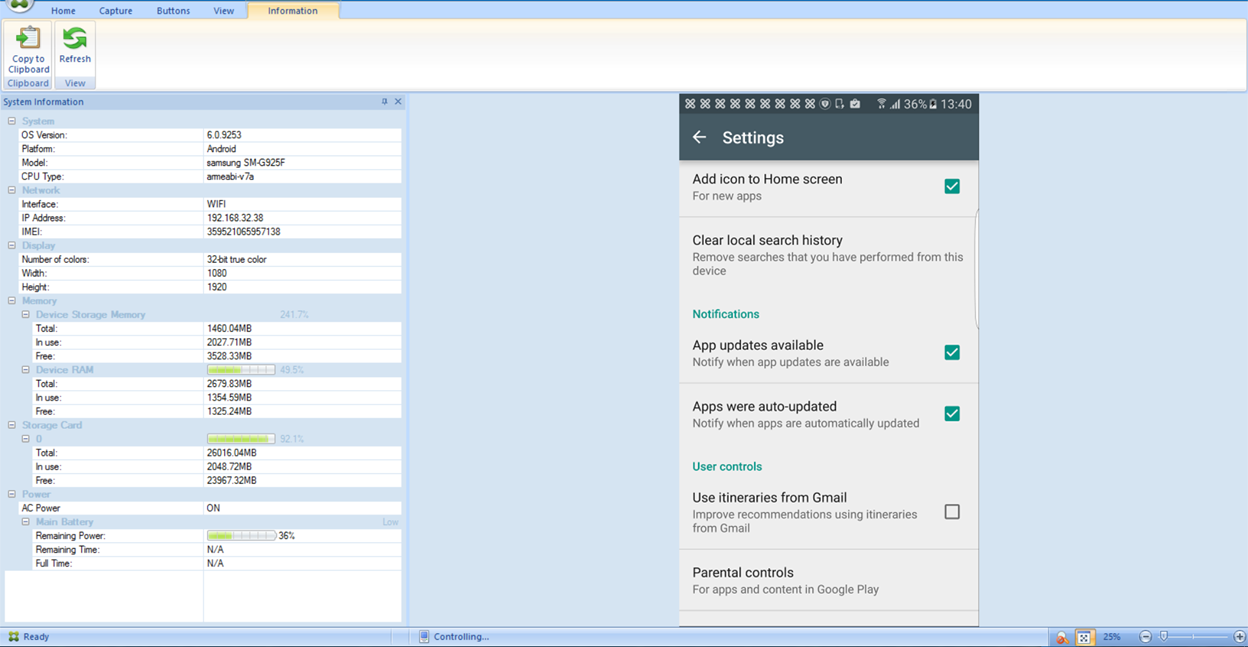
- Display system information including device model, operating system level, International Mobile Station Equipment Identity (IMEI), serial number, memory and battery status, and connectivity.
- Display the users and groups for XenMobile.
- Run the device task manager where you can display active processes, end active processes, and restart the mobile device.
- Run remote file transfer that includes bidirectional file transfer between mobile devices and a central file server.
- Download and install software programs as a batch to one or more mobile devices.
- Configure remote registry key settings on the device.
- Optimize response time over low-bandwidth cellular networks by using real-time device screen remote control.
- Display the device skin for most mobile device brands and models. Display a skin editor to add new device models and map physical keys.
- Enable device screen capture, record, and replay with the ability to capture a sequence of interactions on the device that creates a video AVI file.
- Conduct live meetings by using a shared whiteboard, VoIP-based voice communications and chat among mobile users and support personnel.
Remote Support System Requirements
The Remote Support software installs on Windows-based computers which meet the following requirements. For port requirements, see Port Requirements.
Supported platforms:
- Intel Xeon/Pentium 4 -1 GHz minimum Workstation class
- 512-MB RAM minimum
- 100-MB free disk space minimum
Supported operating systems:
- Microsoft Windows 2003 Server Standard Edition or Enterprise Edition SP1 or later
- Microsoft Windows 2000 Professional SP4
- Microsoft Windows XP SP2 or later
- Microsoft Windows Vista SP1 or later
- Microsoft Windows 10 or Windows 11
- Microsoft Windows 8
- Microsoft Windows 7
To install Remote Support from the command line
Run the following command:
*RemoteSupport*.exe /S
RemoteSupport is the name of the installation program. For example:
XenMobileRemoteSupport-9.0.0.35265.exe /S
You can use the following variables when installing the Remote Support software:
- /S: to install the Remote Support software silently with the default parameters.
- /D=dir: to specify a custom installation directory.
To connect Remote Support to XenMobile
To establish remote support connections to managed devices, you must add a connection from Remote Support to one or more XenMobile Servers that manage the devices. That connection runs over an app tunnel that you define in the Tunnel MDM policy, a device policy for Android devices. Define the app tunnel before you can connect Remote Support to XenMobile. For details, see App tunneling device policies.
-
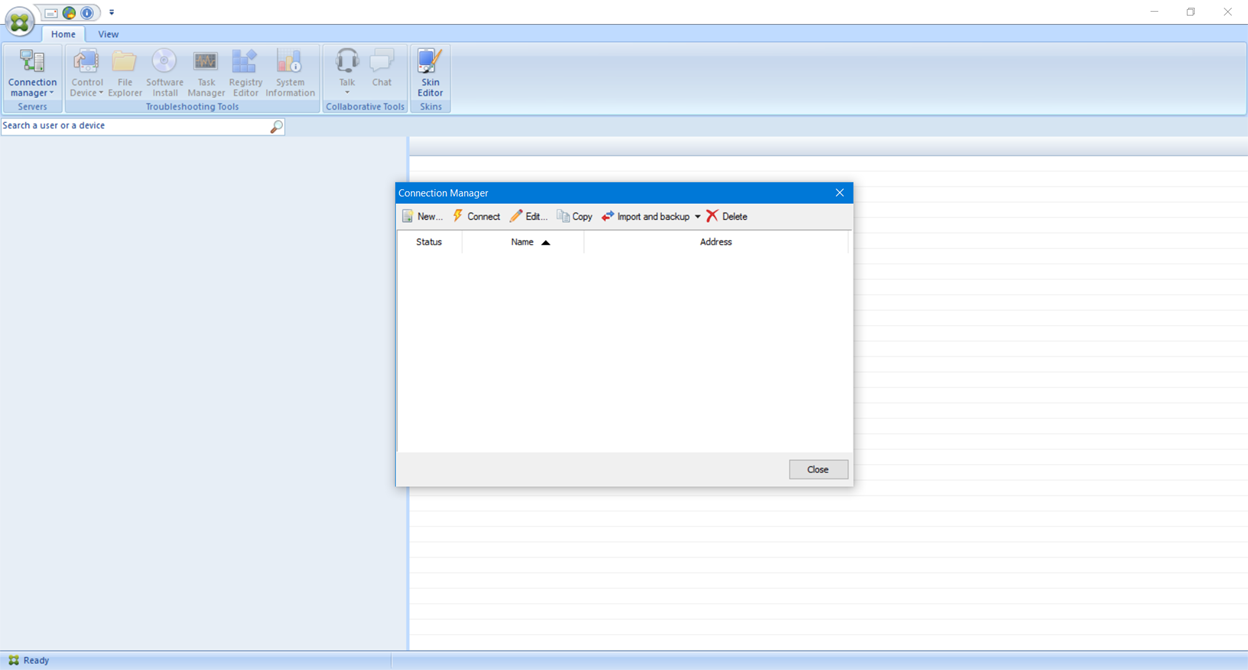
Start the Remote Support software and use your XenMobile credentials to sign on.
-
In Connection Manager, click New.
-
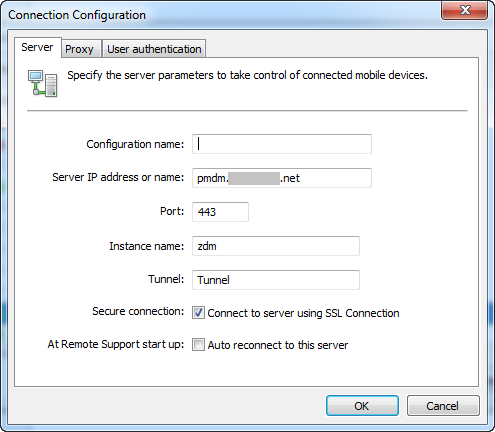
In the Connection Configuration dialog box, on the Server tab, type the following values:
-
In Configuration name, type a name for the configuration entry.
-
In Server IP address or name, type the IP address or the DNS name of the XenMobile Server.
-
In Port, type a TCP port number, as defined in the XenMobile Server configuration.
-
In Instance name, when XenMobile is part of a multitenant deployment, type an instance name.
-
In Tunnel, type the name of the Tunnel policy.
-
Select the Connect to server using SSL Connection checkbox.
-
Select the Auto reconnect to this server checkbox to connect to the configured XenMobile Server each time the Remote Support application starts.
-
-
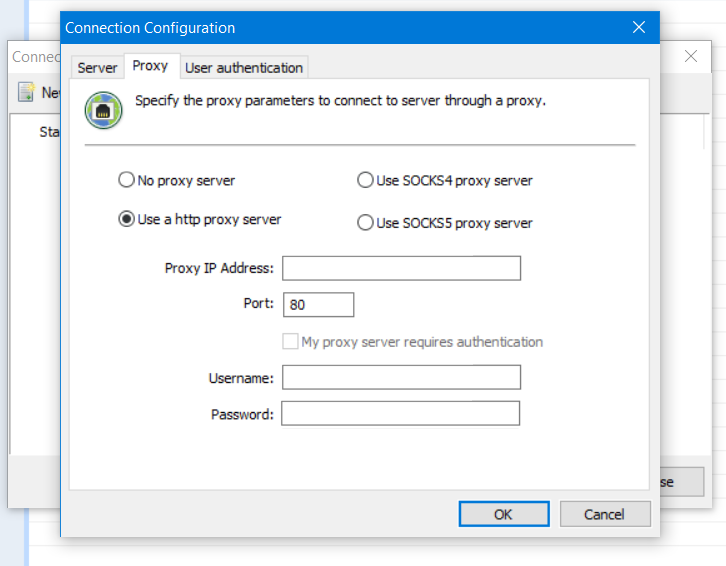
On the Proxy tab, select Use an http proxy server and then type the following information:
-
In Proxy IP Address, type the IP address of the proxy server.
-
In Port, type a TCP port number used by the proxy.
-
Select the My proxy server requires authentication checkbox when the proxy server requires authentication to allow traffic.
-
In Username, type the user name to be authenticated on the proxy server.
-
In Password, type the password to be authenticated on the proxy server.
-
-
On the User Authentication tab, select the Remember my login and password checkbox and enter the credentials.
-
Click OK.
To connect to XenMobile, double-click the connection you created and then enter the user name and password you configured for the connection.
To enable remote support for Samsung Knox devices
You create a Remote Support policy in XenMobile to give you remote access to Samsung Knox devices. You can configure two types of support:
- Basic: Lets you view diagnostic information about the device. For example, system information, processes that are running, task manager (memory and CPU usage), and installed software folder contents.
-
Premium: Lets you remotely control the device screen. For example, control window colors, establish a VoIP session between the help desk and the user, and establish a chat session between the help desk and the user.
Premium support requires that you configure the Samsung MDM License Key device policy in the XenMobile console. When you configure this policy, select the Samsung KNOX platform only. For the Samsung SAFE platform, the ELM key automatically deploys on Samsung devices when they enroll in XenMobile. So, don’t select the Samsung SAFE platform for this policy. For details, see Samsung MDM license key.
For information about configuring the Remote Support Policy, see Remote support device policy.
To use a Remote Support session
After you start Remote Support, the left-side of the Remote Support application window presents XenMobile user groups as you defined in the XenMobile console. By default, only groups that have users who are currently connected appear. You can see the device for each user next to the user entry.
- To see all users, expand each group from the left column. Those users currently connected to the XenMobile Server are indicated with a green icon.
- To display all users, including those not currently connected, click View and select Non-connected devices. Non-connected users appear without the small green icon.
Devices connected to the XenMobile Server but not assigned to a user appear in Anonymous mode. (The string Anonymous appears in the list.) You can control these devices just like the device of a logged-in user.
To control a device, select the device by clicking its row and then clicking Control Device. A rendering of the device appears in the Remote Control window. You can interact with a controlled device in the following ways:
- Control the device screen, including control with colors, in either the main window, or in a separate, floating window.
- Establish a VoIP session between the help desk and the user. Configure VoIP settings.
- Establish a chat session with the user.
- Access the device task manager, to manage items such as memory usage, CPU usage, and running apps.
- Explore the mobile device local directories. Transfer files.
- Display device system information and all installed software.
- Update the mobile device connection status with the XenMobile Server.