Legacy Android Enterprise for Google Workspace (formerly G Suite) customers
Google Workspace (formerly G Suite) customers must use the legacy Android Enterprise settings to configure legacy Android Enterprise.
Requirements for legacy Android Enterprise:
- A publicly accessible domain
- A Google administrator account
- Devices that have managed profile support and that are running Android 5.0+ Lollipop
- A Google account that has Google Play installed
- A Work profile set up on the device
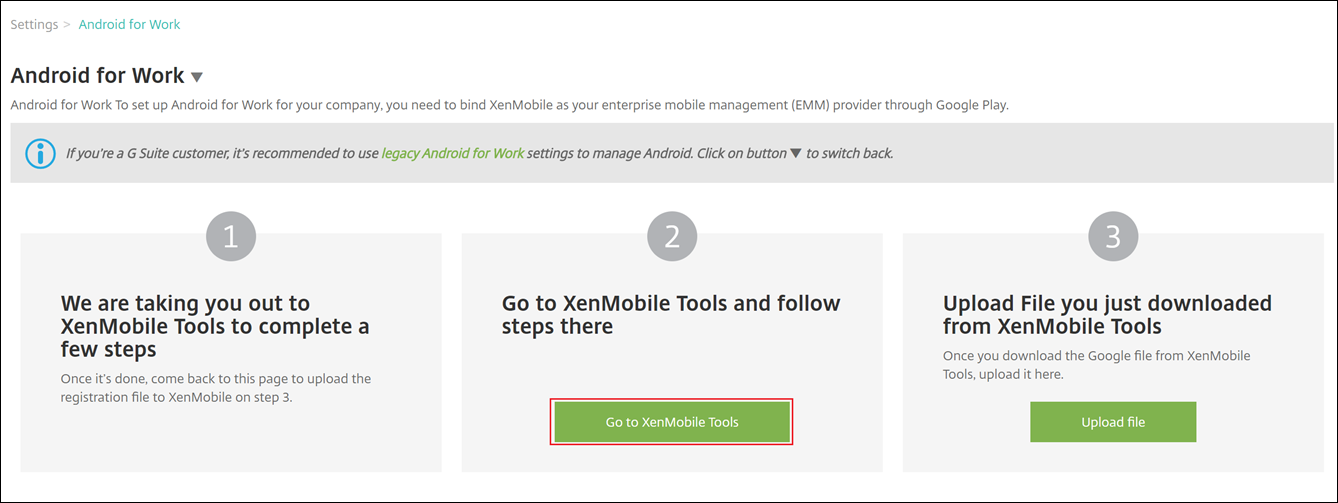
To start configuring a legacy Android Enterprise, click legacy Android Enterprise in the Android Enterprise page in XenMobile® Settings.
Create an Android Enterprise Account
Before you can set up an Android Enterprise account, you must verify your domain name with Google.
If you have already verified your domain name with Google, you can skip to this step: Set up an Android Enterprise service account and download an Android Enterprise certificate.
-
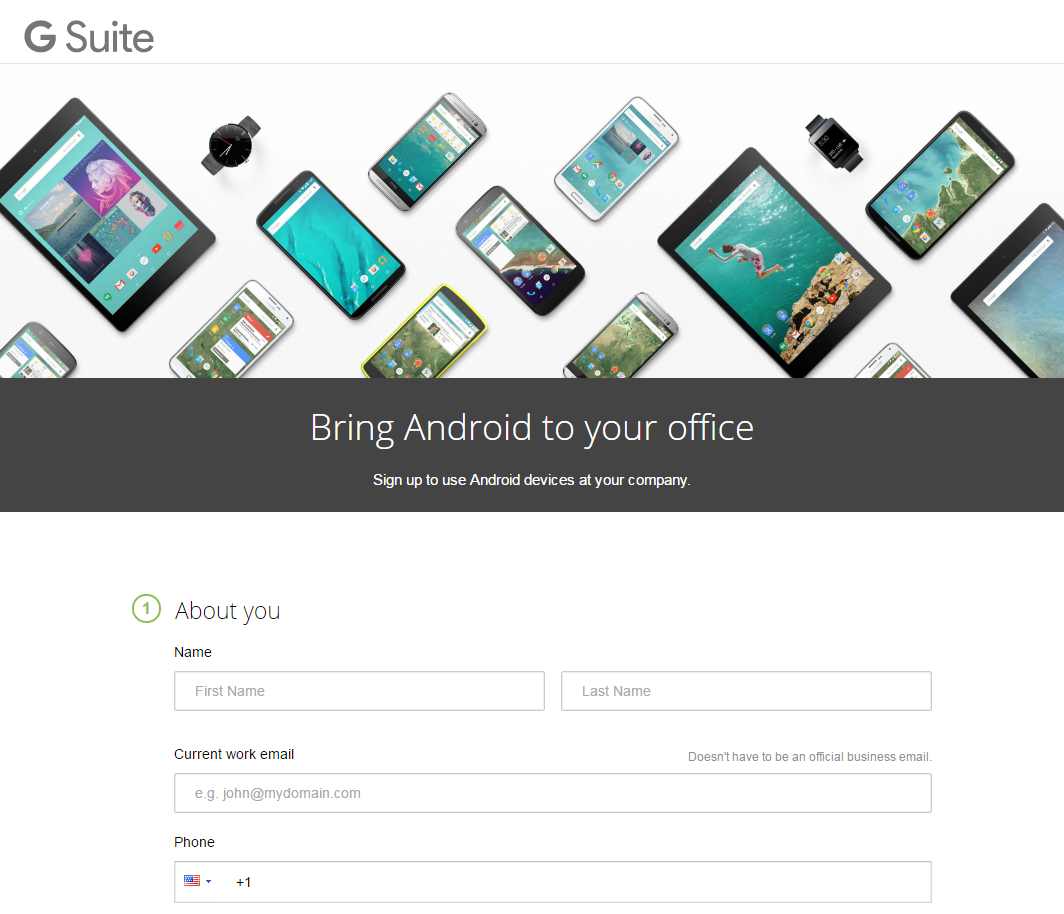
Navigate to https://gsuite.google.com/signup/basic/welcome.
The following page displays where you type your administrator and company information.
-
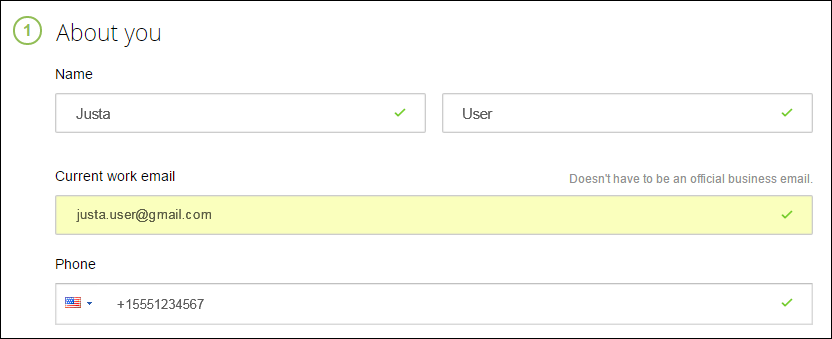
Type your administrator user information.
-
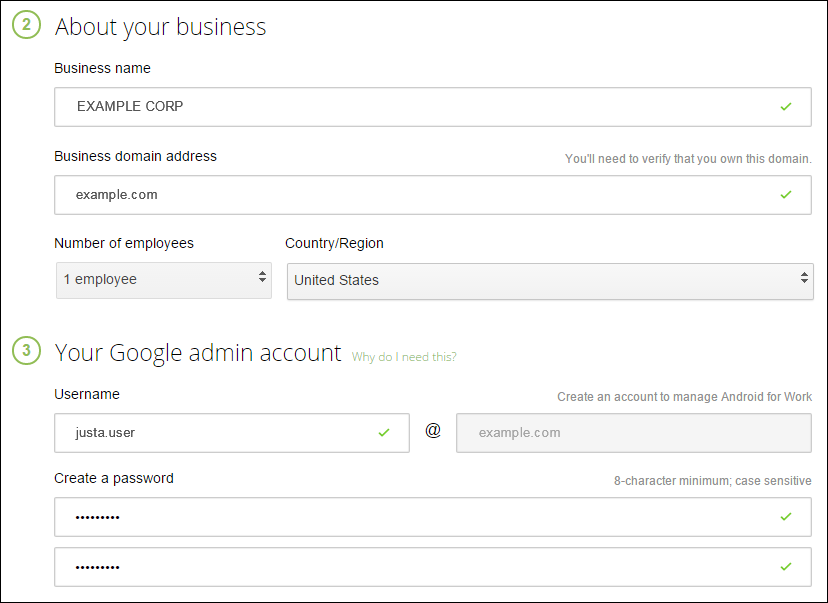
Type your company information, in addition to your administrator account information.
The first step in the process is complete and you see the following page.
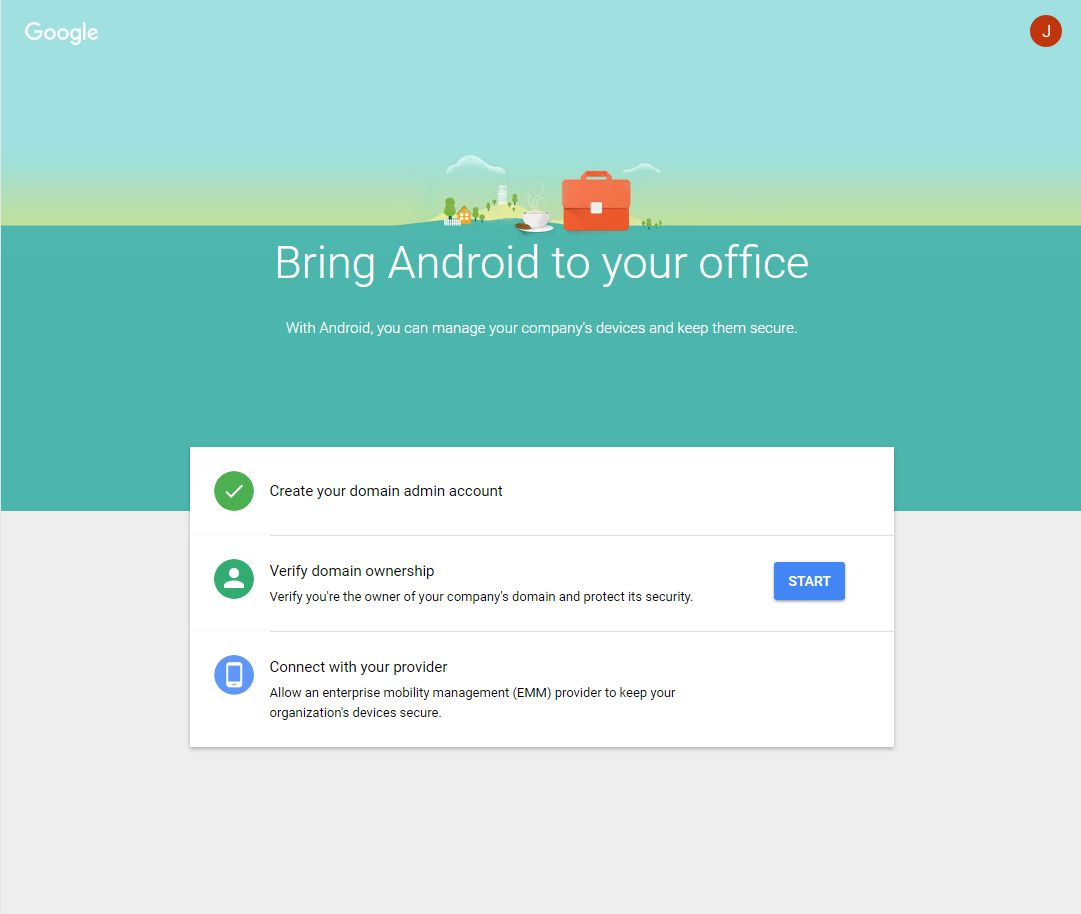
Verify domain ownership
Allow Google to verify your domain in one of the following ways:
- Add a TXT or CNAME record to the website of your domain host.
- Upload an HTML file to the web server of your domain.
- Add a
<meta>tag to your home page. Google recommends the first method. This article does not cover the steps to verify your domain ownership, but you can find the information you need here: https://support.google.com/a/answer/6248925.
-
Click Start to begin the verification of your domain.
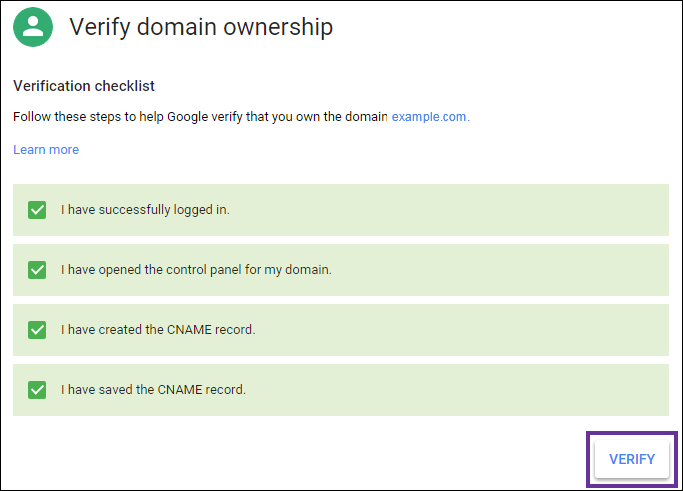
The Verify domain ownership page appears. Follow the instructions on the page to verify your domain.
-
Click Verify.

-
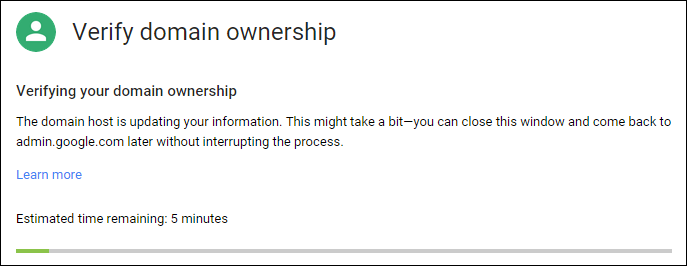
Google verifies your domain ownership.
-
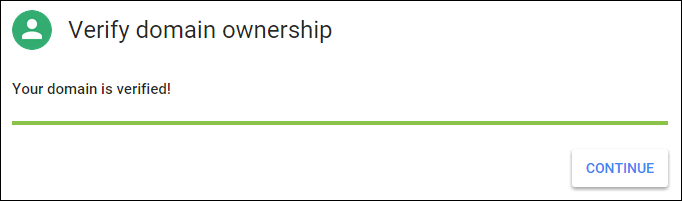
After successful verification, the following page appears. Click Continue.
-
Google creates an EMM binding token that you provide to Citrix® and use when you configure Android Enterprise settings. Copy and save the token; you need it later in the setup procedure.
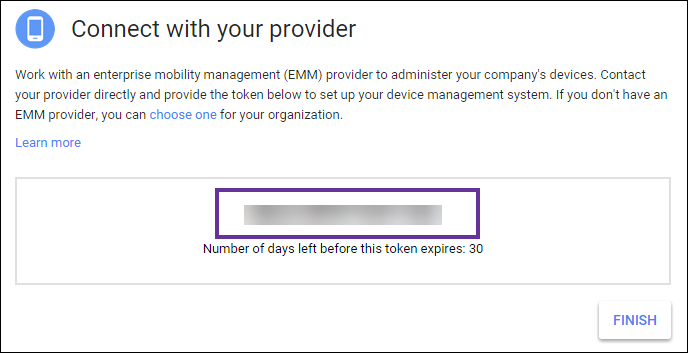
-
Click Finish to complete setting up Android Enterprise. A page appears, indicating that you’ve successfully verified your domain.
After you create an Android Enterprise service account, you can sign in to the Google Admin console to manage your mobility management settings.
Set up an Android Enterprise service account and download an Android Enterprise certificate
To allow XenMobile to contact Google Play and Directory services, you must create a service account using the Google Project portal for developers. This service account is used for server-to-server communication between XenMobile and Google services for Android. For more information about the authentication protocol being used, go to https://developers.google.com/identity/protocols/OAuth2ServiceAccount.
-
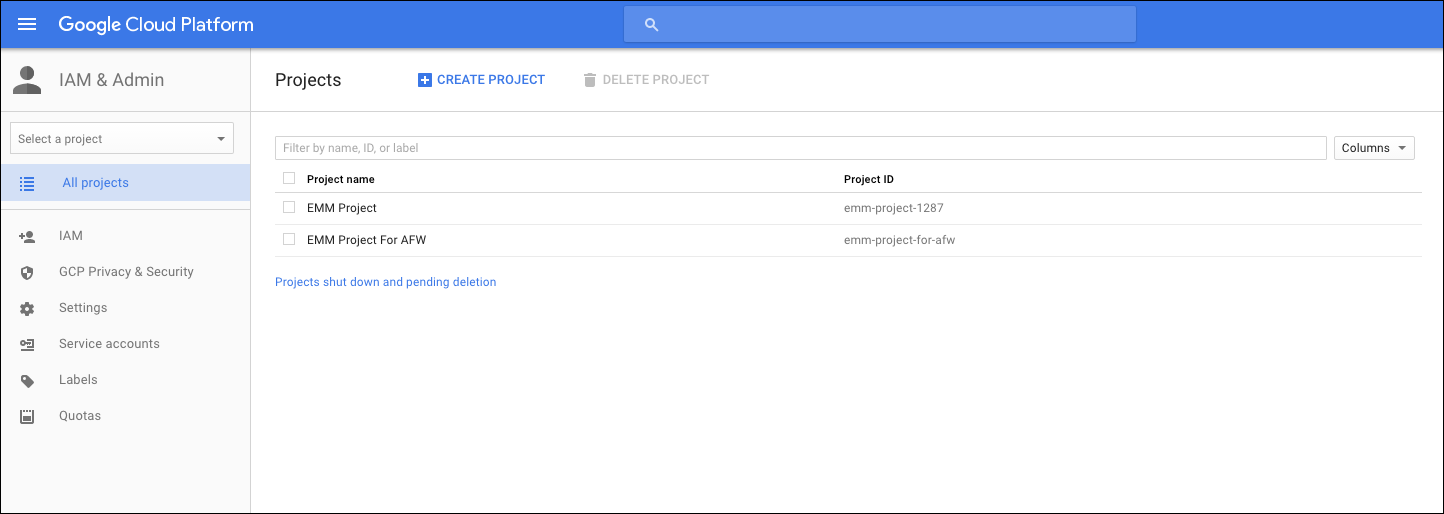
In a web browser, go to https://console.cloud.google.com/project and sign in with your Google administrator credentials
-
In the Projects list, click Create Project.
-
In Project name, type a name for the project.
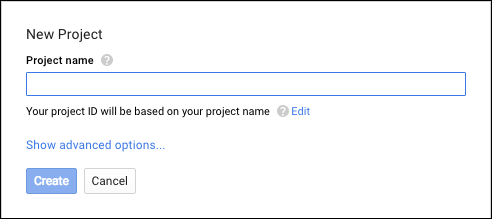
-
On the Dashboard, click Use Google APIs.
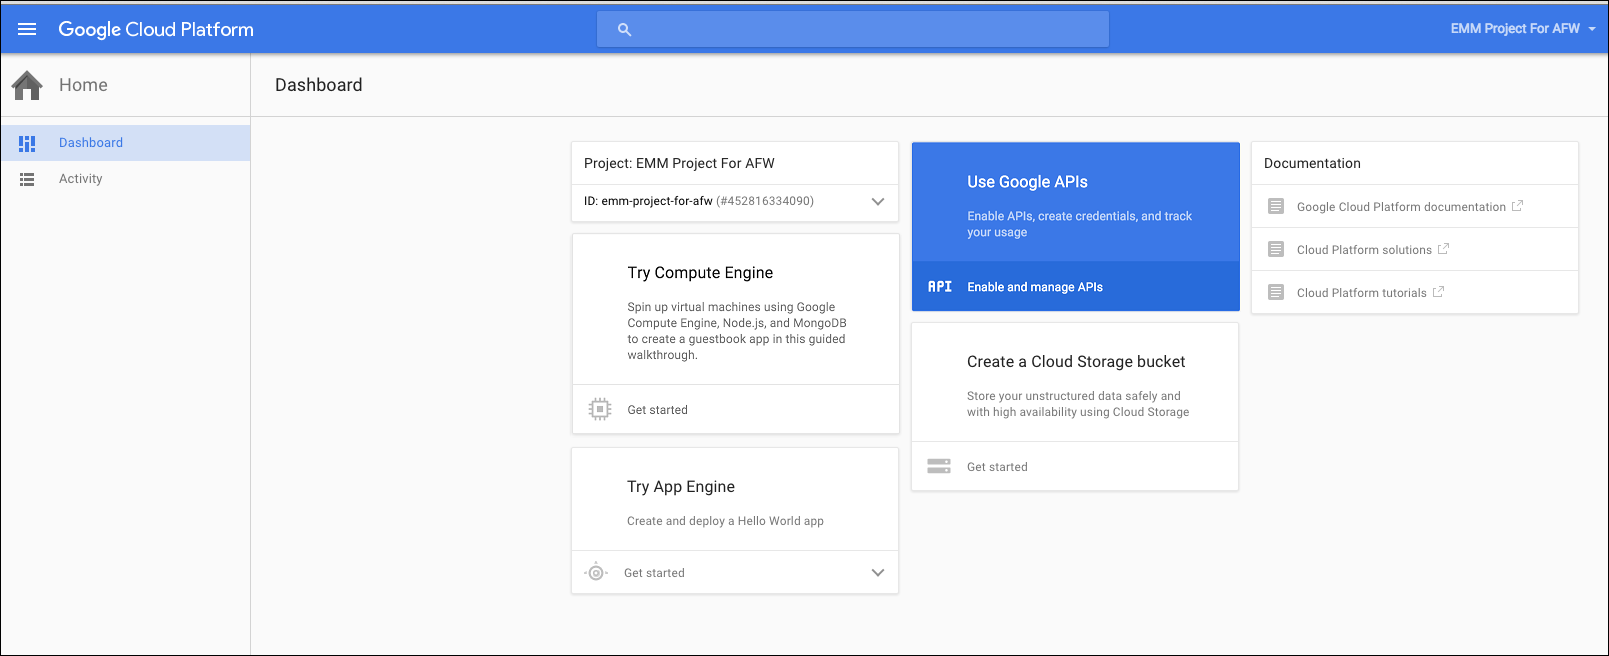
-
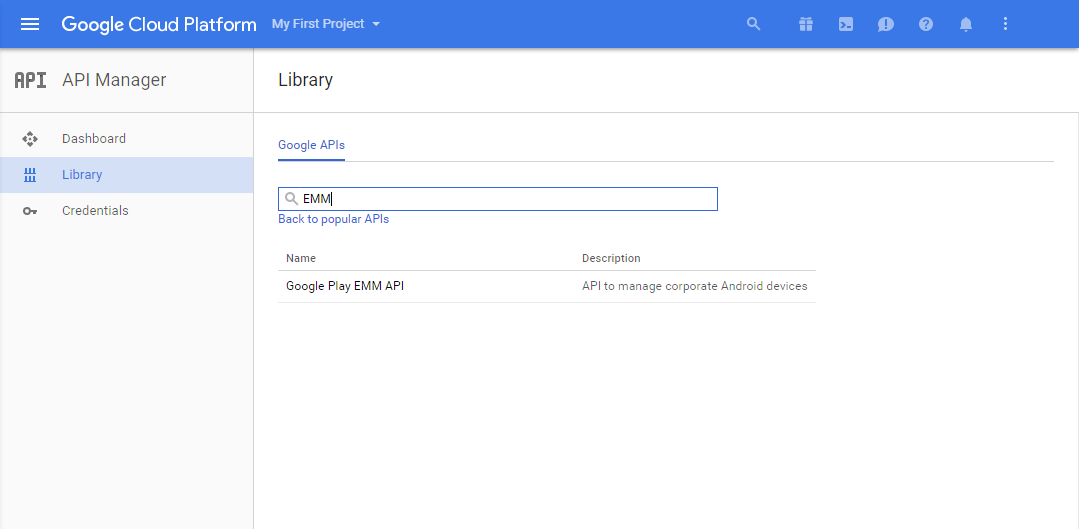
Click Library, in Search, type EMM and then click the search result.
-
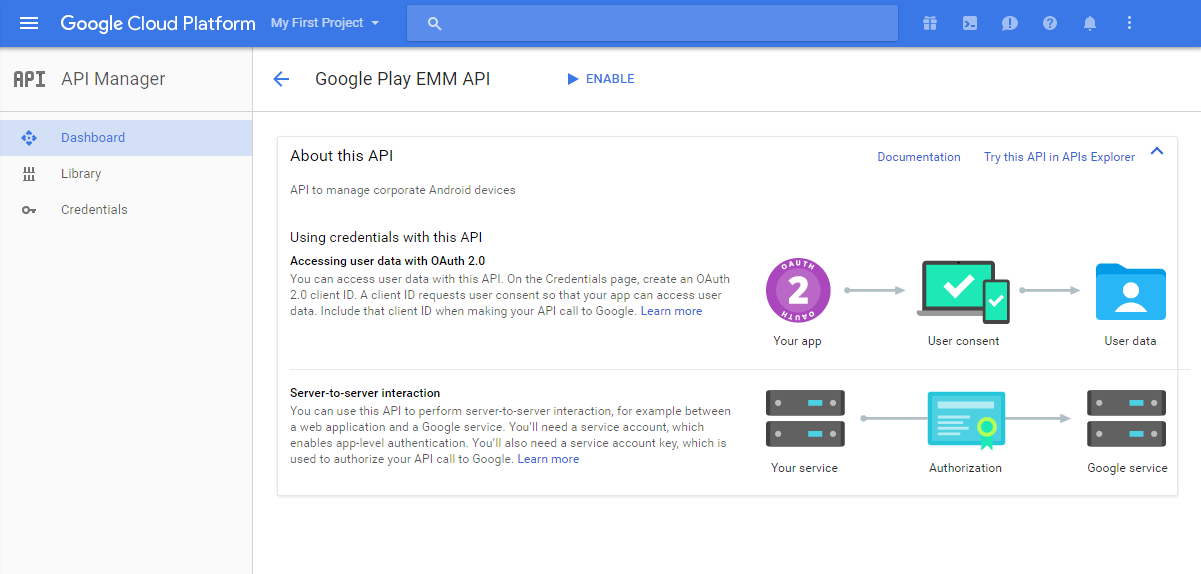
On the Overview page, click Enable.
-
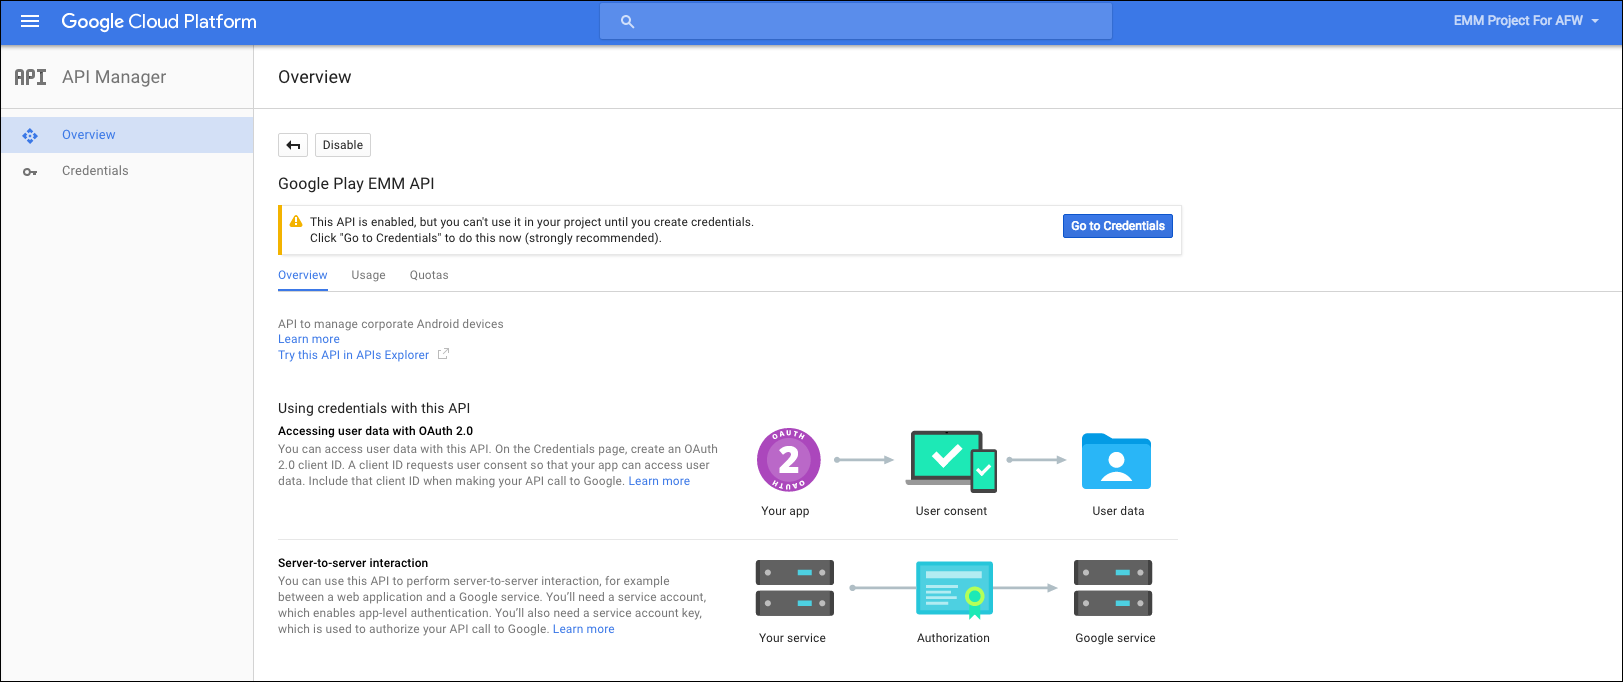
Next to Google Play EMM API, click Go to Credentials.
-
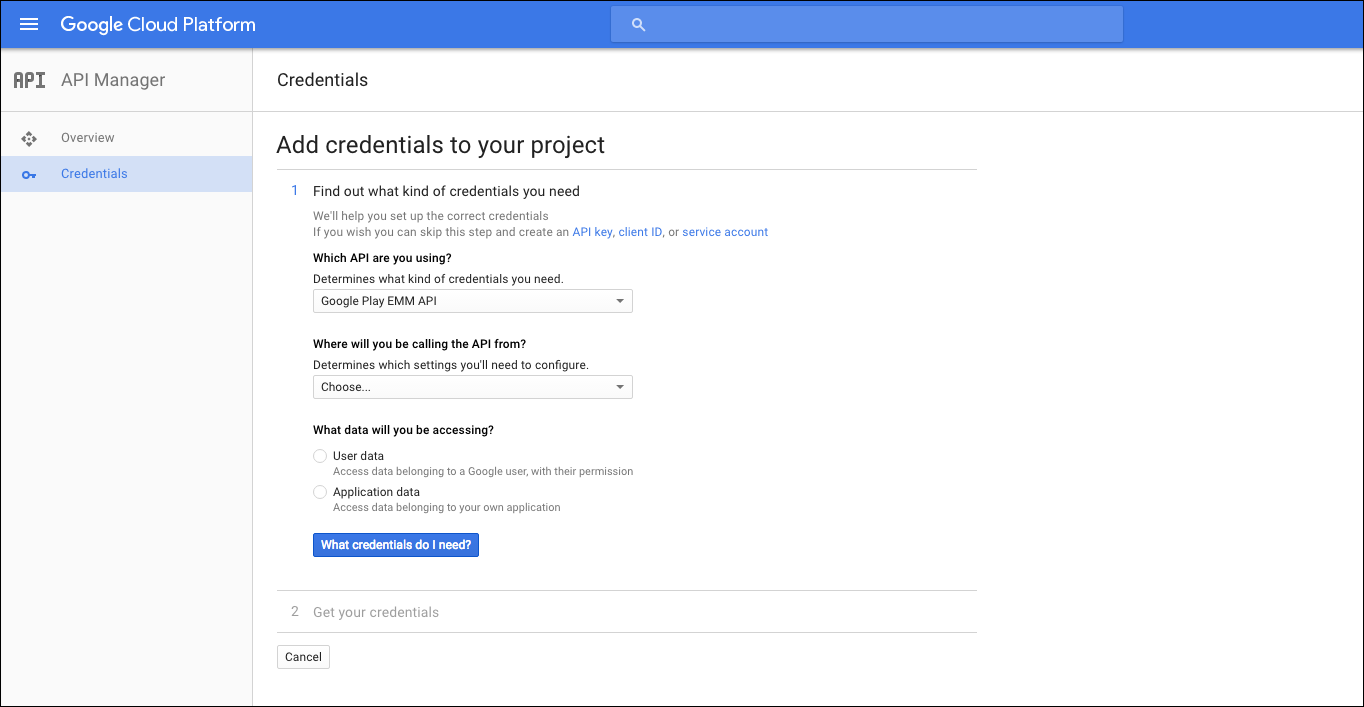
In the Add credentials to our project list, in step 1, click service account.
-
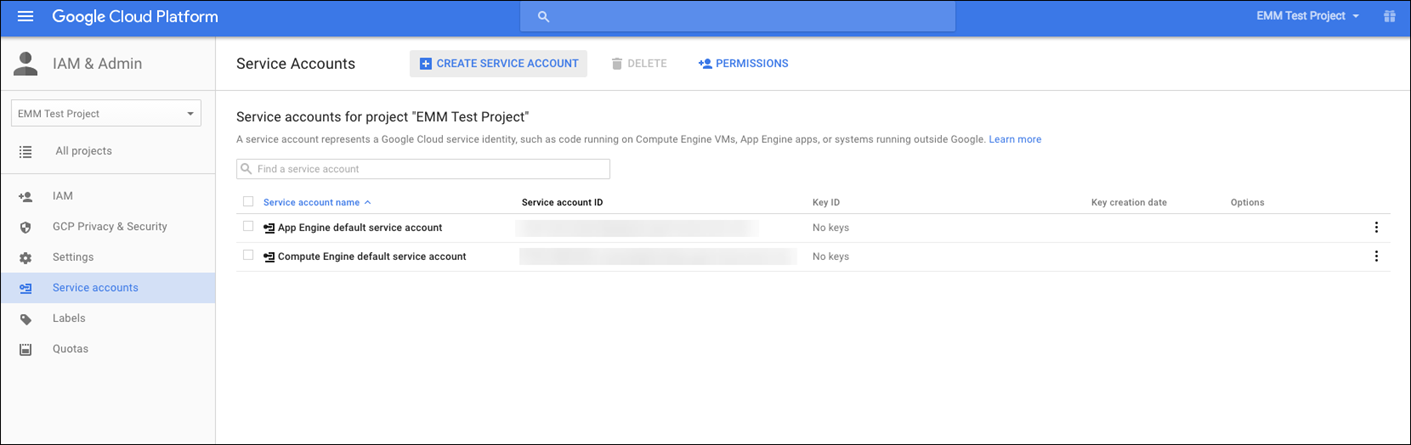
On the Service Accounts page, click Create Service Account.
-
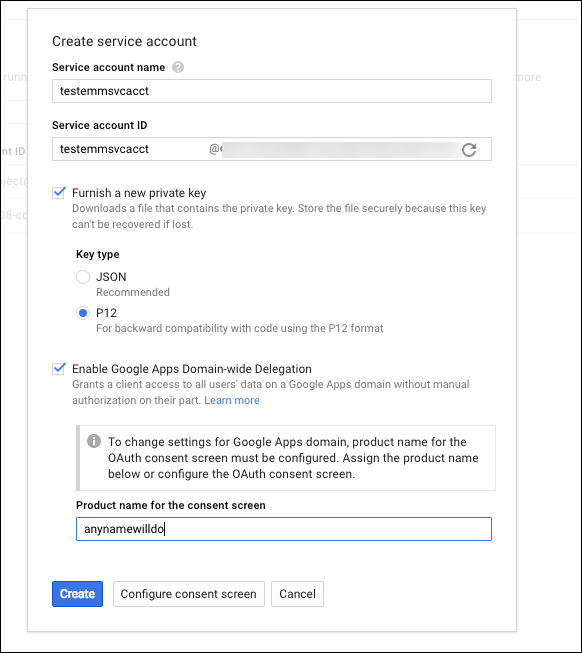
In Create service account, name the account, and select the Furnish a new private key checkbox. Click P12, select the Enable Google Apps Domain-wide Delegation checkbox and then click Create.
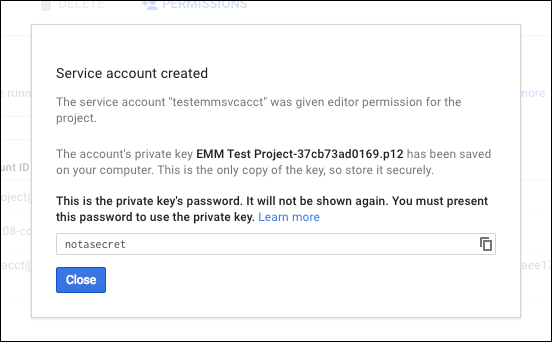
The certificate (P12 file) is downloaded to your computer. Be sure to save the certificate in a secure location.
-
On the Service account created confirmation page, click Close.
-
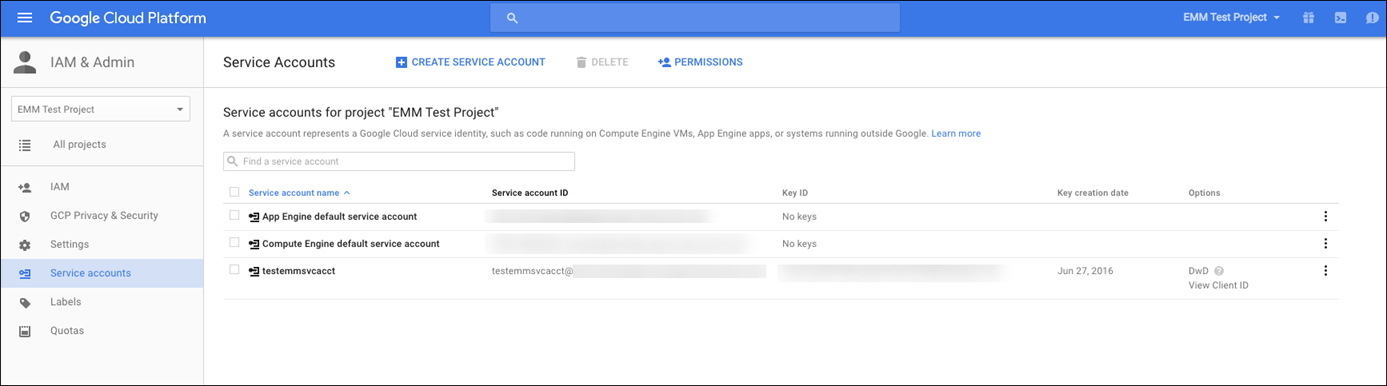
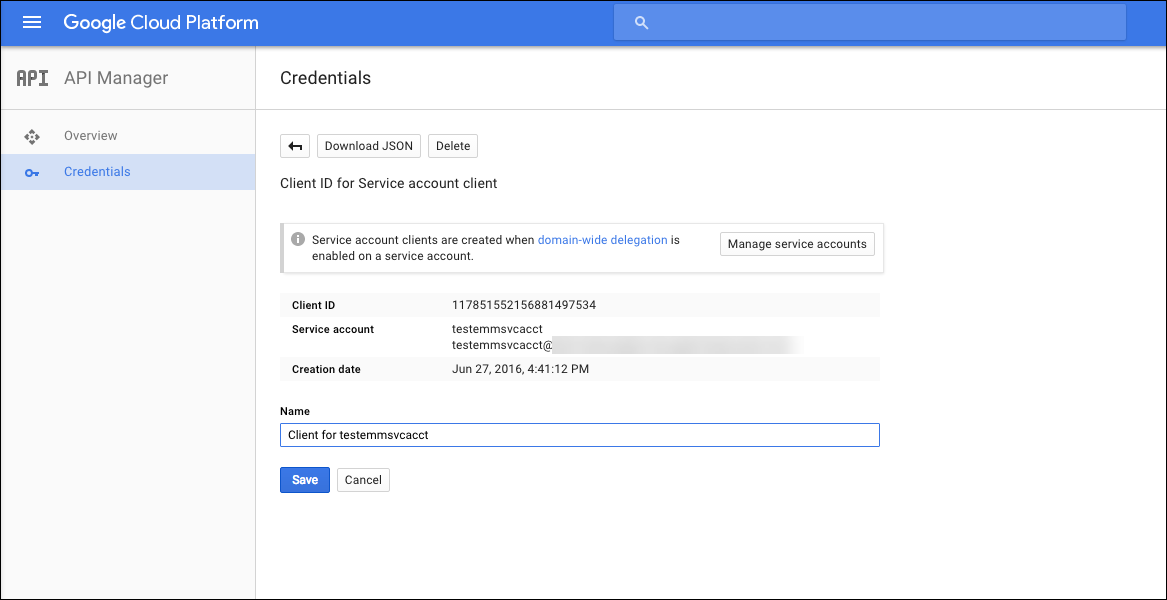
In Permissions, click Service accounts and then under Options for your service account, click View Client ID.
-
The details required for account authorization on the Google admin console display. Copy the Client ID and Service account ID to a location where you can retrieve the information later. You need this information, along with the domain name to send to Citrix support for allowing.
-
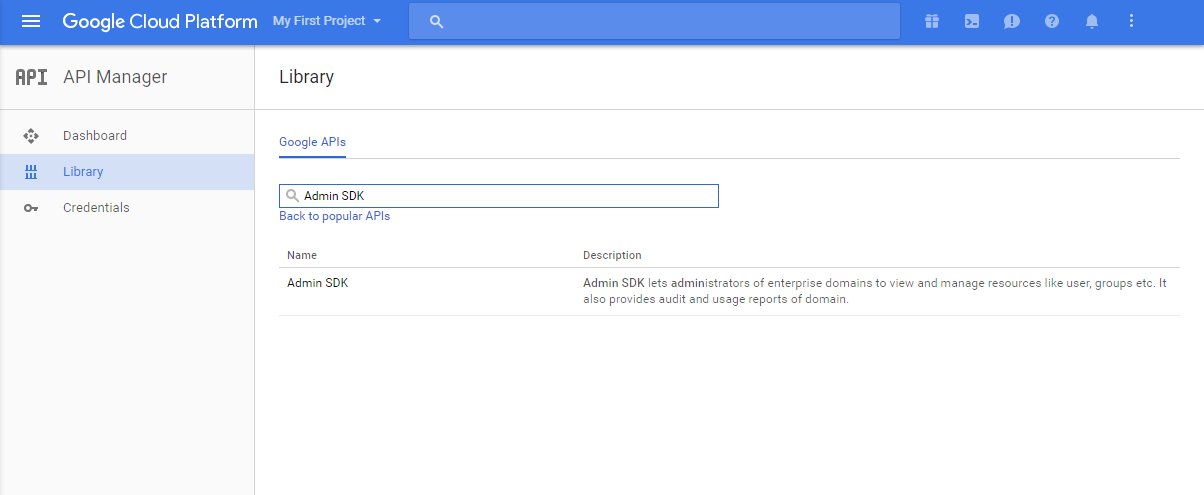
On the Library page, search for Admin SDK and then click the search result.
-
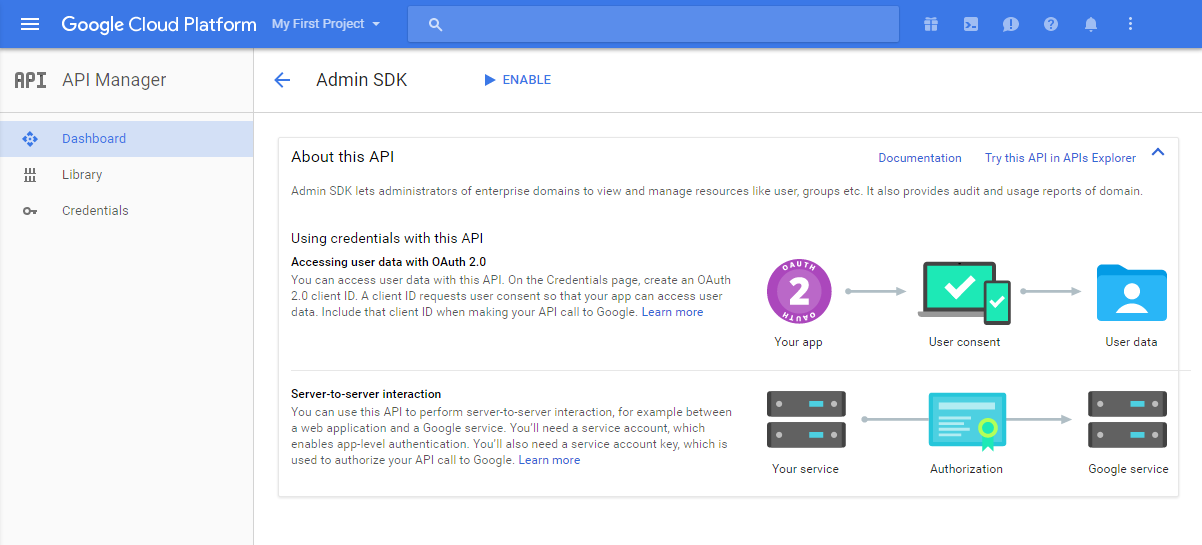
On the Overview page, click Enable.
-
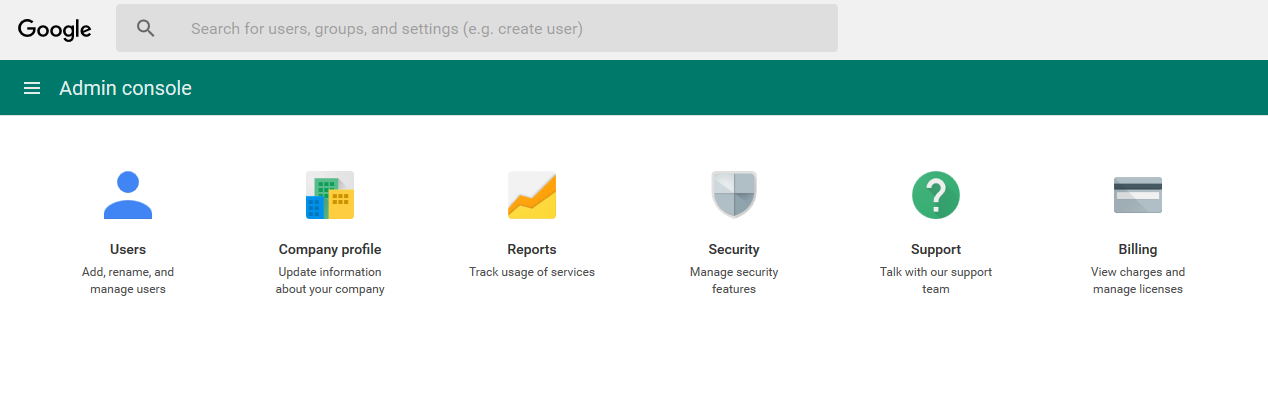
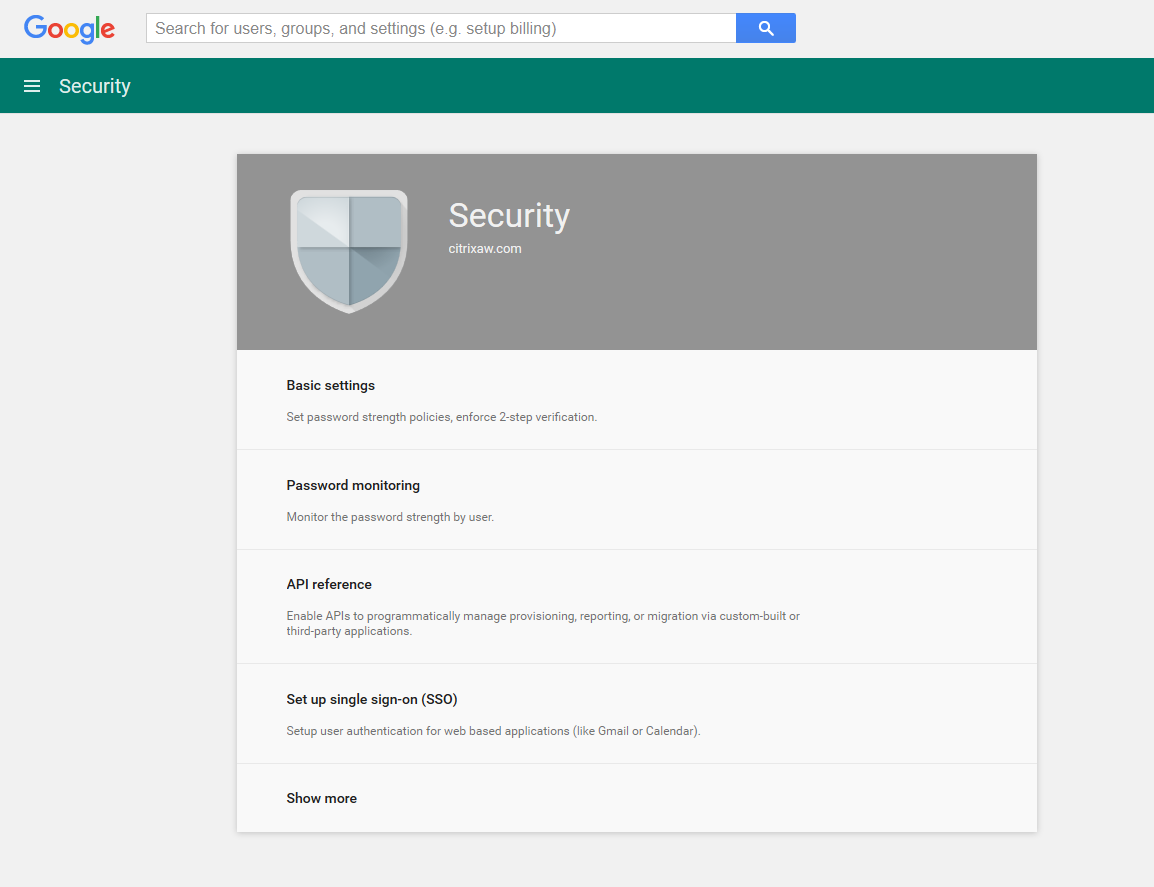
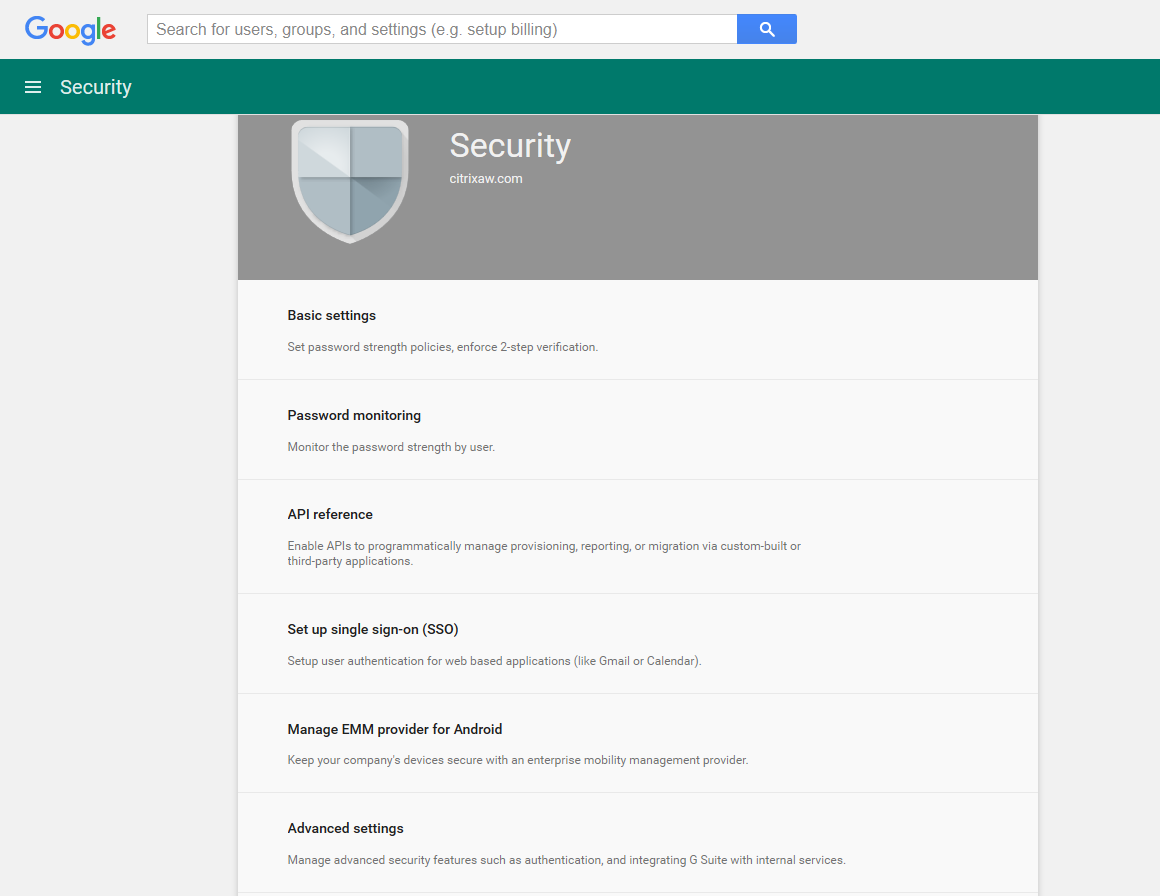
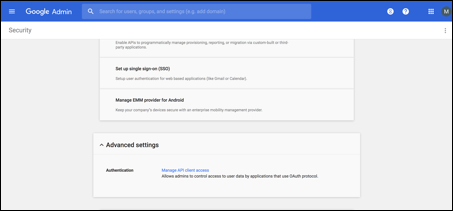
Open the Google admin console for your domain and then click Security.
-
On the Settings page, click Show more and then click Advanced settings.
-
Click Manage API client access.

-
In Client Name, type the client ID that you saved earlier, in One or More API Scopes, type
https://www.googleapis.com/auth/admin.directory.userand then click Authorize.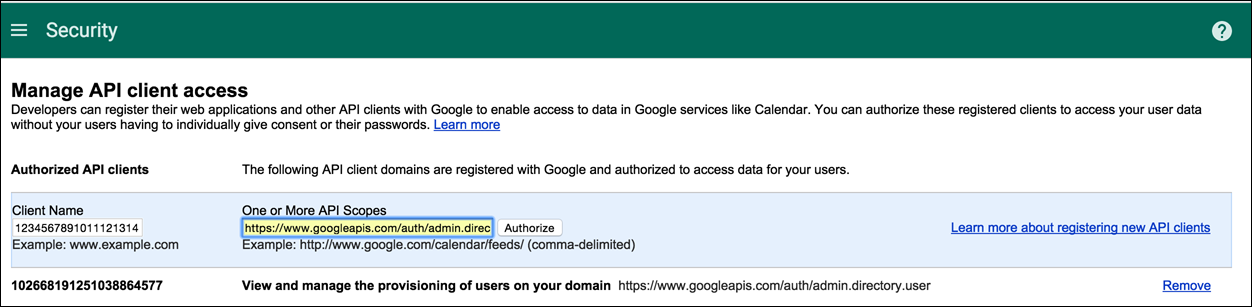
Binding to EMM
Before you can use XenMobile to manage your Android devices, you must contact Citrix Technical Support and provide your domain name, service account, and binding token. Citrix binds the token to XenMobile as your enterprise mobility management (EMM) provider. For contact information for Citrix Technical Support, see Citrix Technical Support.
-
To confirm the binding, sign in to the Google Admin portal and then click Security.
-
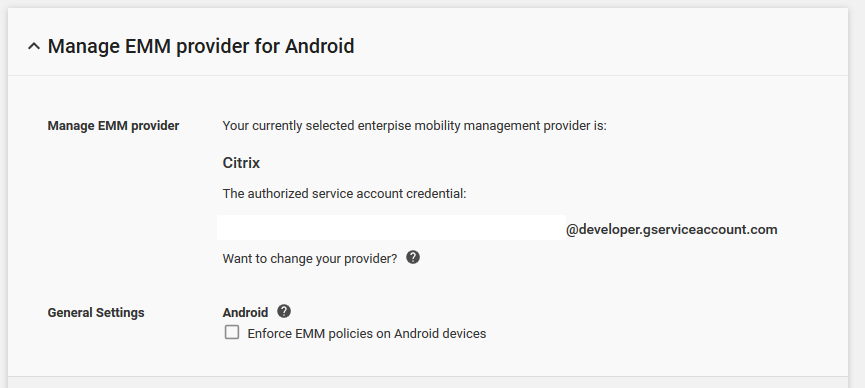
Click Manage EMM provider for Android.
You see that your Google Android Enterprise account is bound to Citrix as your EMM provider.
After you confirm the token binding, you can start using the XenMobile console to manage your Android devices. Import the P12 certificate that you generated in step 14. Set up Android Enterprise server settings, enable SAML-based single-sign-on (SSO), and define at least one Android Enterprise device policy.
Import the P12 certificate
Follow these steps to import your Android Enterprise P12 certificate:
-
Sign in to the XenMobile console.
-
Click the gear icon in the upper-right corner of the console to open the Settings page and then click Certificates. The Certificates page appears.
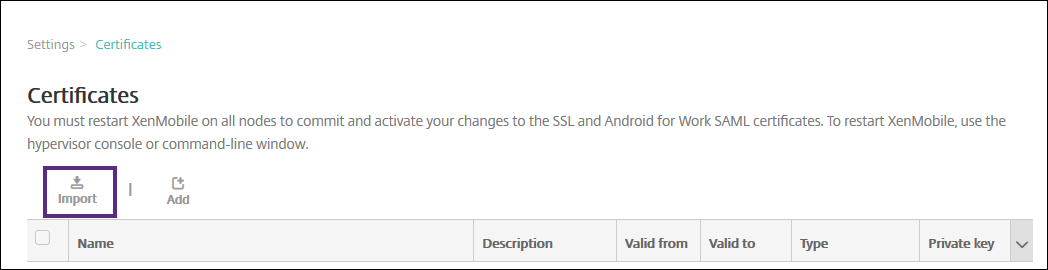
-
Click Import. The Import dialog box appears.
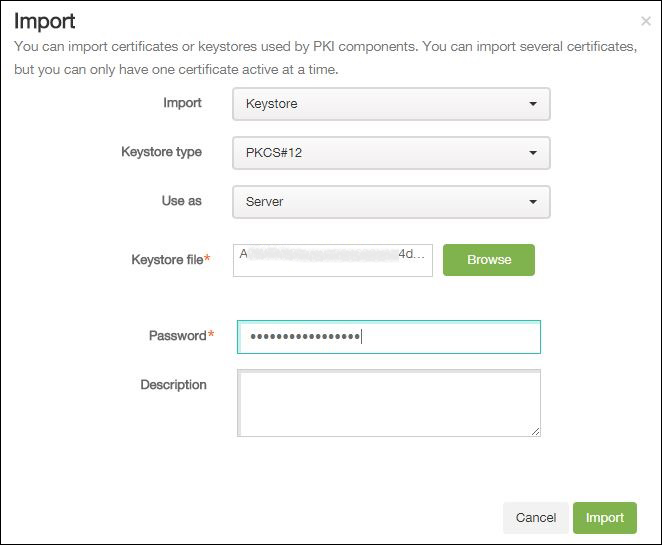
Configure the following settings:
- Import: In the list, click Keystore.
- Keystore type: In the list, click PKCS#12.
- Use as: In the list, click Server.
- Keystore file: Click Browse and navigate to the P12 certificate.
- Password: Type the keystore password.
- Description: Optionally, type a description of the certificate.
-
Click Import.
Set up Android Enterprise server settings
-
In the XenMobile console, click the gear icon in the upper-right corner of the console. The Settings page appears.
-
Under Server, click Android Enterprise. The Android Enterprise page appears.
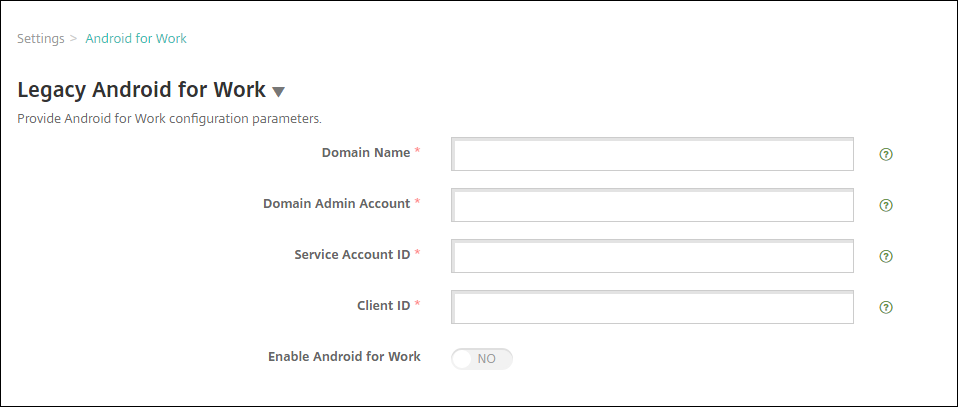
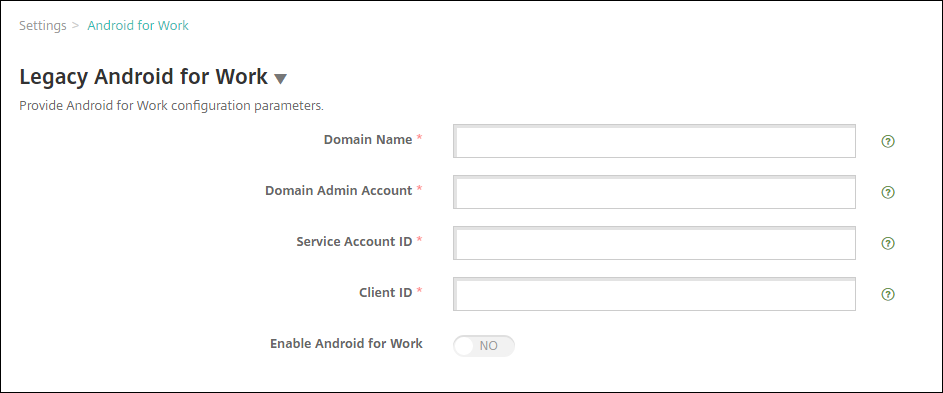
Configure the following settings and then click Save.
- Domain name: Type your Android Enterprise domain name; for example, domain.com.
- Domain Admin Account: Type your domain administrator user name; for example, the email account used for the Google Developer Portal.
-
Service Account ID: Type your service account ID; for example, the email associated in the Google Service Account (
serviceaccountemail@xxxxxxxxx.iam.gserviceaccount.com). - Client ID: Type the numerical client ID of your Google service account.
- Enable Android Enterprise: Select to enable or disable Android Enterprise.
Enable SAML-based single-sign-on
-
Sign in to the XenMobile console.
-
Click the gear icon in the upper-right corner of the console. The Settings page appears.
-
Click Certificates. The Certificates page appears.
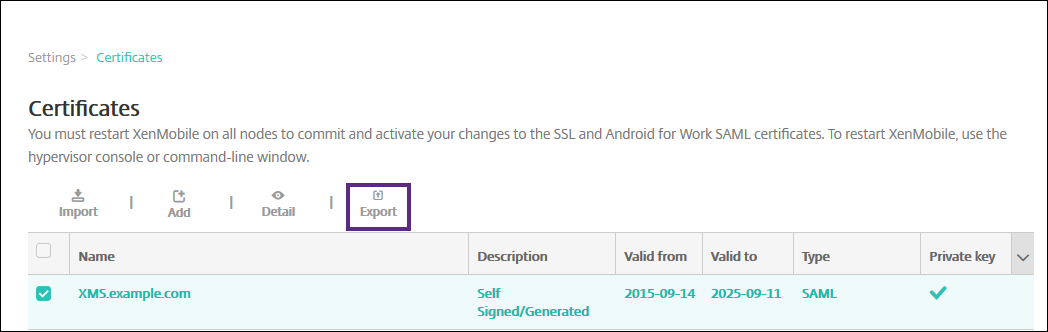
-
In the list of certificates, click the SAML certificate.
-
Click Export and save the certificate to your computer.
-
Sign in to the Google Admin portal by using your Android Enterprise administrator credentials. For access to the portal, see the Google Admin portal.
-
Click Security.
-
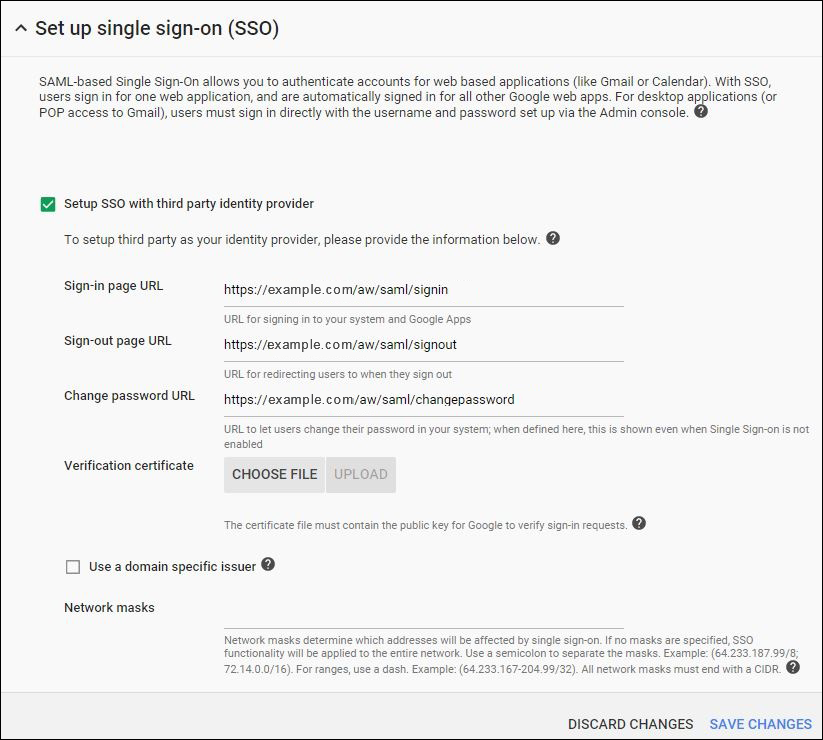
Under Security, click Set up single sign-on (SSO) and then configure the following settings.
-
Sign-in page URL: Type the URL for users signing in to your system and Google Apps. For example:
https://<Xenmobile-FQDN>/aw/saml/signin. -
Sign out page URL: Type the URL to which users are redirected when they sign out. For example:
https://<Xenmobile-FQDN>/aw/saml/signout. -
Change password URL: Type the URL to let users change their password in your system. For example:
https://<Xenmobile-FQDN>/aw/saml/changepassword. If this field is defined, users see this prompt even when SSO is not available. - Verification certificate: Click CHOOSE FILE and then navigate to the SAML certificate exported from XenMobile.
-
Sign-in page URL: Type the URL for users signing in to your system and Google Apps. For example:
-
Click SAVE CHANGES.
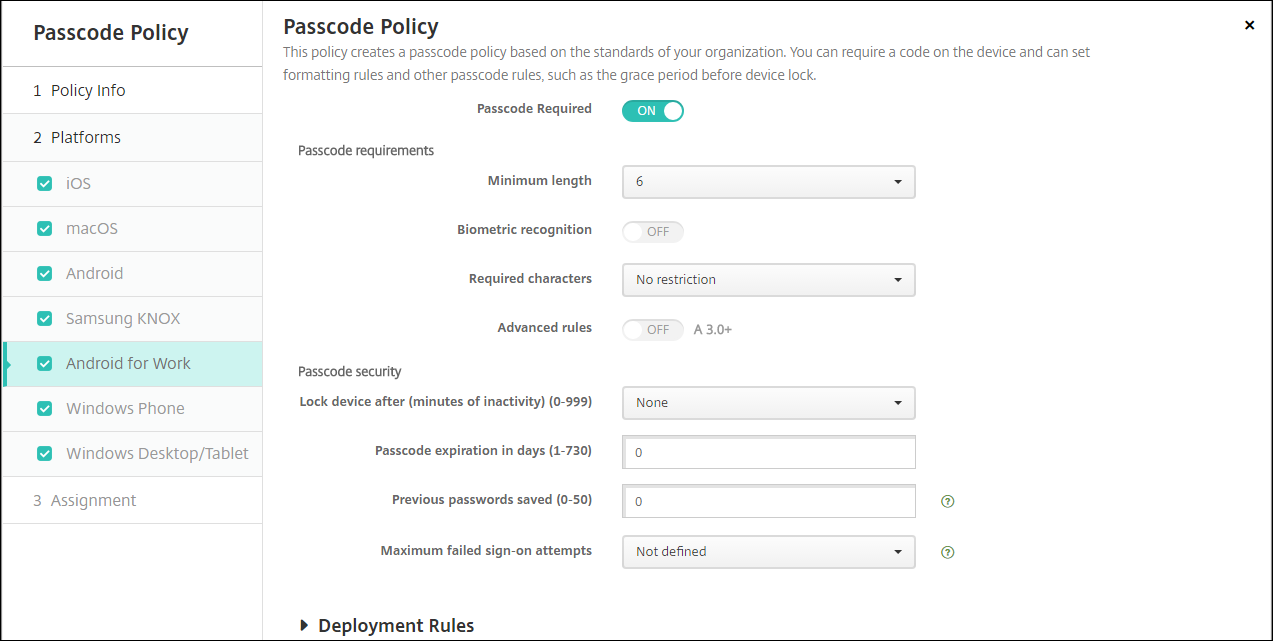
Set up an Android Enterprise device policy
Set up a Passcode policy so that users must establish a passcode on their devices when they first enroll.
The basic steps to setting up any device policy are as follows.
-
Sign on to the XenMobile console.
-
Click Configure, and then click Device Policies.
-
Click Add and then on the Add a New Policy dialog box, select the policy you want to add. In this example, you click Passcode.
-
Complete the Policy Information page.
-
Click Android Enterprise and then configure the settings for the policy.
-
Assign the policy to a Delivery Group.
Configure Android Enterprise account settings
Before you can start managing Android apps and policies on devices, you must set up an Android Enterprise domain and account information in XenMobile. First, complete the Android Enterprise setup tasks on Google to set up a domain administrator and to get a service account ID and a binding token.
-
In the XenMobile web console, click the gear icon in the upper-right corner. The Settings page displays.
-
Under Server, click Android Enterprise. The Android Enterprise configuration page appears.
-
On the Android Enterprise page, configure the following settings:
- Domain Name: Type your domain name.
- Domain Admin Account: Type your domain administrator user name.
- Service Account ID: Type your Google Service Account ID.
- Client ID:: Type the client ID of your Google service account.
- Enable Android Enterprise: Select whether to enable Android Enterprise or not.
-
Click Save.
Set up Google Workspace partner access for XenMobile
Some end-point management features for Chrome use Google partner APIs to communicate between XenMobile and your Google Workspace domain. For example, XenMobile requires the APIs for device policies that manage Chrome features such as Incognito mode and Guest mode.
To enable the partner APIs, you set up your Google Workspace domain in the XenMobile console and then configure your Google Workspace account.
Set up your Google Workspace (formerly G Suite) domain in XenMobile
To enable XenMobile to communicate with the APIs in your Google Workspace domain, go to Settings > Google Chrome Configuration and configure the settings.
- G Suite domain: The Google Workspace domain that hosts the APIs needed by XenMobile.
- G Suite admin account: The administrator account for your G Suite domain.
- G Suite client ID: The client ID for Citrix. Use this value to configure partner access for your Google Workspace domain.
- G Suite enterprise ID: The enterprise ID for your account, filled in from your Google enterprise account.
Enable partner access for devices and users in your Google Workspace domain
-
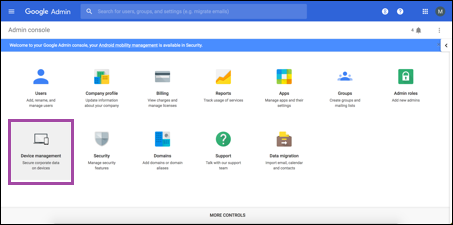
Log in into the Google admin console: https://admin.google.com
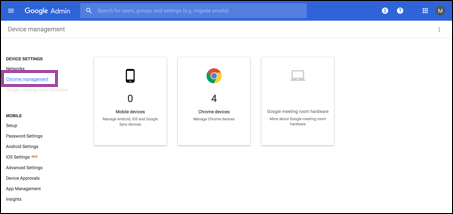
-
Click Device Management.
-
Click Chrome management.
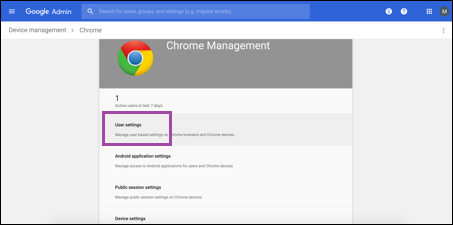
-
Click User settings.
-
Search for Chrome Management - Partner Access.
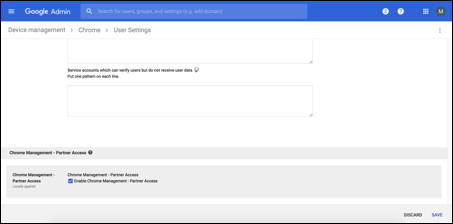
-
Select the Enable Chrome Management - Partner Access checkbox.
-
Agree that you understand and want to enable partner access. Click Save.
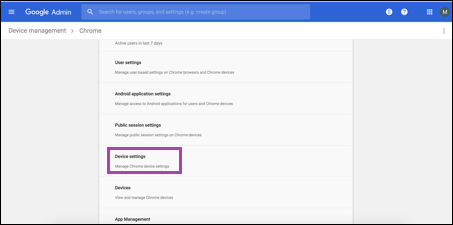
-
In the Chrome management page, click Device Settings.
-
Search for Chrome Management - Partner Access.
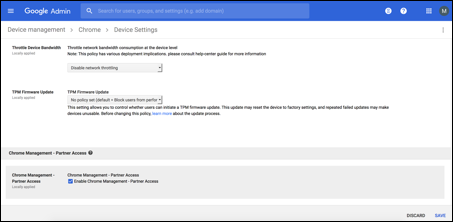
-
Select the Enable Chrome Management - Partner Access checkbox.
-
Agree that you understand and want to enable partner access. Click Save.
-
Go to the Security page and then click Advanced Settings.
-
Click Manage API client Access.
-
In the XenMobile console, go to Settings > Google Chrome Configuration and copy the value of Google Workspace Client ID. Then, return to the Manage API client Access page and paste the copied value to the Client Name field.
-
In One or More API Scopes, add the URL:
https://www.googleapis.com/auth/chromedevicemanagementapi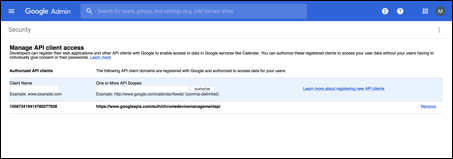
-
Click Authorize.
The message “Your settings have been saved” appears.
Enrolling Android Enterprise devices
If your device enrollment process requires users to enter a user name or user ID, the format accepted depends on how the XenMobile Server is configured to search for users by User Principal Name (UPN) or SAM account name.
If the XenMobile Server is configured to search for users by UPN, users must enter a UPN in the format:
- username@domain
If the XenMobile Server is configured to search for users by SAM users must enter a SAM in one of these formats:
- username@domain
- domain\username
To determine which type of user name your XenMobile Server is configured for:
- In the XenMobile Server console click the gear icon in the upper-right corner. The Settings page appears.
- Click LDAP to view the configuration of the LDAP connection.
-
Near the bottom of the page, view the User search by field:
- If it is set to userPrincipalName, the XenMobile Server is set for UPN.
- If it is set to sAMAccountName, the XenMobile Server is set for SAM.
Unenrolling an Android Enterprise enterprise
You can unenroll an Android Enterprise enterprise using the XenMobile Server console and XenMobile Tools.
When you perform this task, the XenMobile Server opens a popup window for XenMobile Tools. Before you begin, ensure that the XenMobile Server has permission to open popup windows in the browser you are using. Some browsers, such as Google Chrome, require you to disable popup blocking and add the address of the XenMobile site to the popup block allow list.
Warning:
After an enterprise is unenrolled, Android Enterprise apps on devices already enrolled through it are reset to their default states. The devices will no longer be managed by Google. Re-enrolling them in an Android Enterprise enterprise may not restore previous functionality without further configuration.
After the Android Enterprise enterprise is unenrolled:
- Devices and users enrolled through the enterprise have the Android Enterprise apps reset to their default state. Android Enterprise App Permissions and Android Enterprise App Restrictions policies previously applied no longer have an effect.
- Devices enrolled through the enterprise are managed by XenMobile, but are unmanaged from the Google perspective. No new Android Enterprise apps can be added. No Android Enterprise App Permissions or Android Enterprise App Restrictions policies can be applied. Other policies, such as Scheduling, Password, and Restrictions can still be applied to these devices.
- If you try to enroll devices in Android Enterprise, they are enrolled as Android devices, not Android Enterprise devices.
To unenroll an Android Enterprise enterprise:
-
In the XenMobile console, click the gear icon in the upper-right corner. The Settings page appears.
-
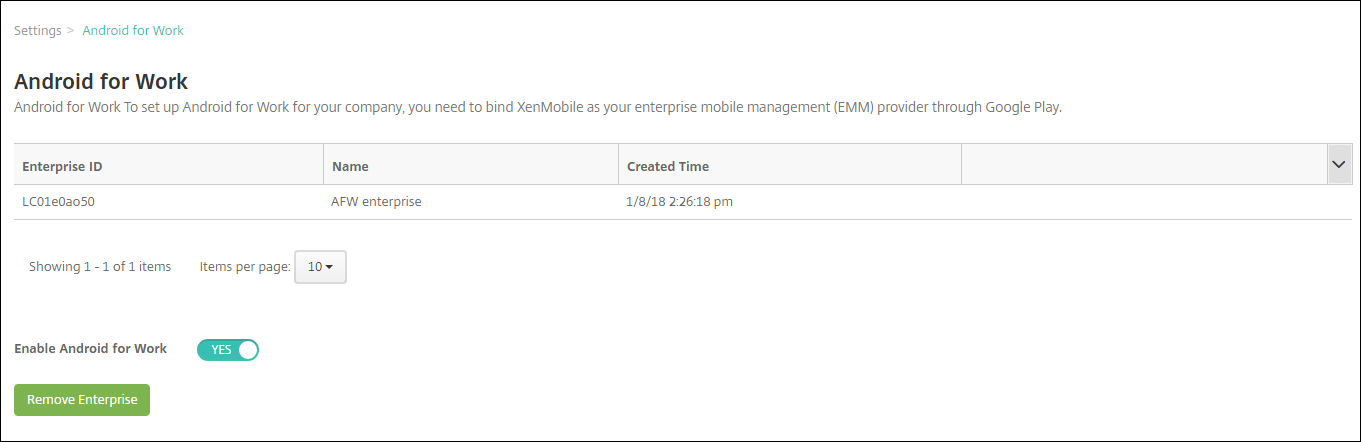
On the Settings page, click Android Enterprise.
-
Click Remove Enterprise.
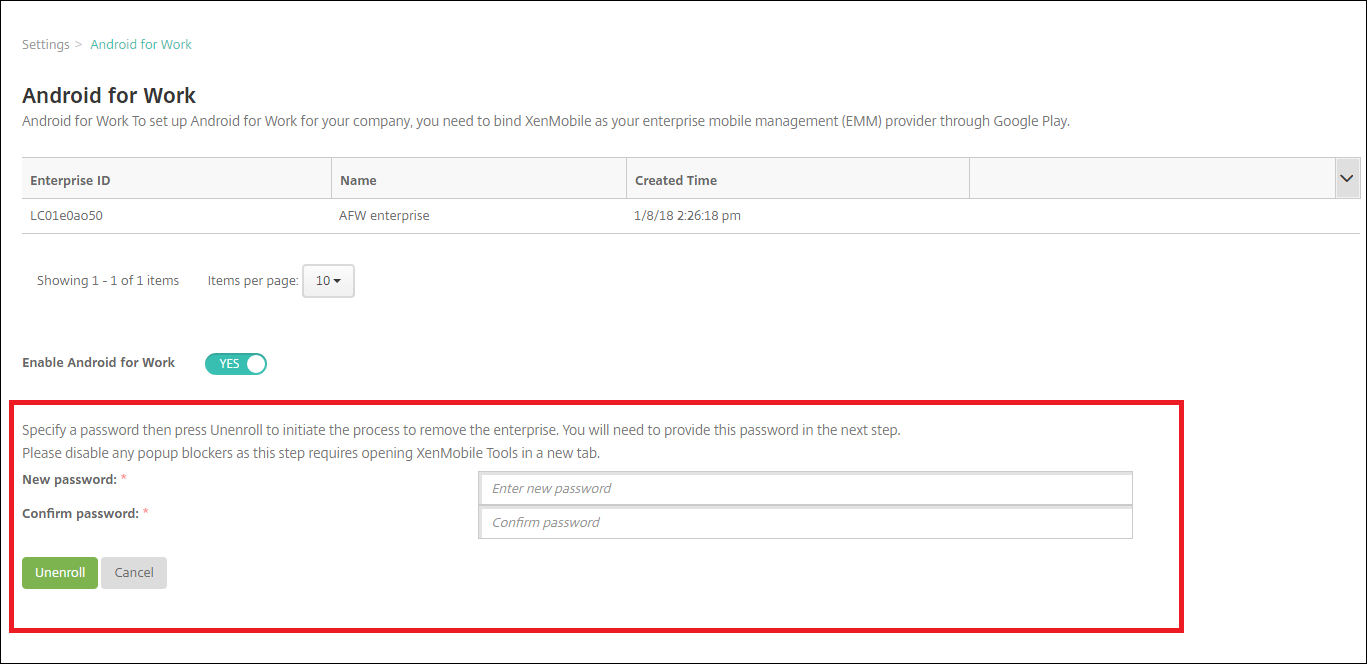
-
Specify a password. You’ll need this password for the next step to complete the unenrollment. Then click Unenroll.
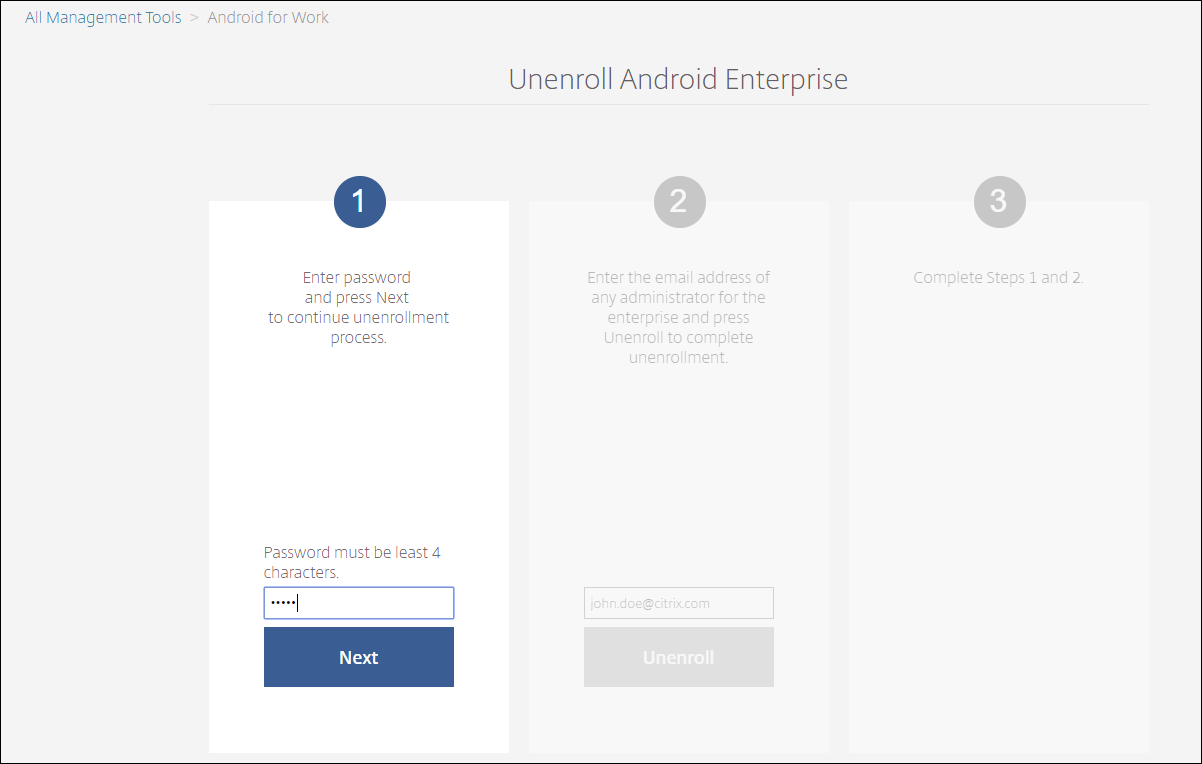
-
When the XenMobile Tools page opens, enter the password you created in the previous step.
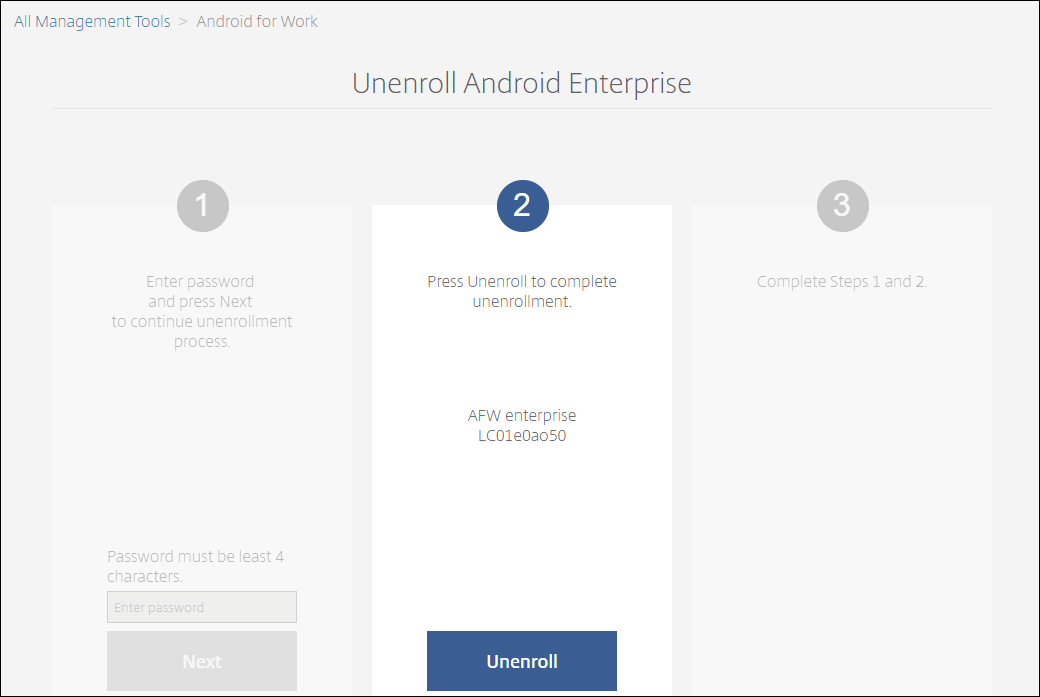
-
Click Unenroll.
Provisioning fully managed devices in Android Enterprise
Only company-owned devices can be fully managed devices for Android Enterprise. On fully managed devices the entire device, not just the work profile, is controlled by the company or organization. Fully managed devices are also known as work-managed devices.
XenMobile supports these methods of enrollment for fully managed devices:
- afw#xenmobile: With this enrollment method, the user enters the characters “afw#xenmobile” when setting up the device. This token identifies the device as managed by XenMobile and downloads the Secure Hub.
- QR code: QR code provisioning is an easy way to provision a distributed fleet of devices that do not support NFC, such as tablets. The QR code enrollment method can be used on fleet devices that have been reset to their factory settings. The QR code enrollment method sets up and configures fully managed devices by scanning a QR code from the setup wizard.
- Near field communication (NFC) bump: The NFC bump enrollment method can be used on fleet devices that have been reset to their factory settings. An NFC bump transfers data through between two devices using near-field communication. Bluetooth, Wi-Fi, and other communication modes are disabled on a factory-reset device. NFC is the only communication protocol that the device can use in this state.
afw#xenmobile
The enrollment method is used after powering on a new or factory reset devices for initial setup. Users enter “afw#xenmobile” when prompted to enter a Google account. This action downloads and installs Secure Hub. Users then follow the Secure Hub set-up prompts to complete the enrollment.
In this enrollment method is recommended for most customers because the latest version of Secure Hub is downloaded from the Google Play store. Unlike with other enrollment methods, you do not provide Secure Hub for download from the XenMobile Server.
Prerequisites:
- Supported on all Android devices running on Android 5.0 and later.
QR code
To enroll a device in device mode using a QR code, you generate a QR code by creating a JSON and converting the JSON to a QR code. Device cameras scan the QR code to enroll the device.
Prerequisites:
- Supported on all Android devices running Android 7.0 and above.
Create a QR code from a JSON
Create a JSON with the following fields.
These fields are required:
Key: android.app.extra.PROVISIONING_DEVICE_ADMIN_COMPONENT_NAME
Value: com.zenprise/com.zenprise.configuration.AdminFunction
Key: android.app.extra.PROVISIONING_DEVICE_ADMIN_SIGNATURE_CHECKSUM
Value: qn7oZUtheu3JBAinzZRrrjCQv6LOO6Ll1OjcxT3-yKM
Key: android.app.extra.PROVISIONING_DEVICE_ADMIN_PACKAGE_DOWNLOAD_LOCATION
Value: https://path/to/securehub.apk
Note:
If Secure Hub is uploaded onto the Citrix XenMobile Server as an enterprise app, it can be downloaded from
https://<fqdn>:4443/*instanceName*/worxhome.apk. The path to the Secure Hub APK must be accessible over the Wi-Fi connection that the device connects to during provisioning.
These fields are optional:
-
android.app.extra.PROVISIONING_LOCALE: Enter language and country codes.
The language codes are two-letter lowercase ISO language codes (such as en) as defined by ISO 639-1. The country codes are two-letter uppercase ISO country codes (such as US) as defined by ISO 3166-1. For example, enter en_US for English as spoken in the United States.
-
android.app.extra.PROVISIONING_TIME_ZONE: The time zone in which the device is running.
Enter an Olson name of the form area/location. For example, America/Los_Angeles for Pacific time. If you don’t enter one, the time zone is automatically populated.
-
android.app.extra.PROVISIONING_LOCAL_TIME: Time in milliseconds since the Epoch.
The Unix epoch (or Unix time, POSIX time, or Unix timestamp) is the number of seconds that have elapsed since January 1, 1970 (midnight UTC/GMT). The time doesn’t include leap seconds (in ISO 8601: 1970-01-01T00:00:00Z).
-
android.app.extra.PROVISIONING_SKIP_ENCRYPTION: Set to true to skip encryption during profile creation. Set to false to force encryption during profile creation.
A typical JSON looks like the following:

Validate the JSON that is created using any JSON validation tool, such as https://jsonlint.com. Convert that JSON string to a QR code using any online QR code generator, such as https://goqr.me.
This QR code gets scanned by a factory-reset device to enroll the device in work-managed device mode.
To enroll the device
To enroll a device as a fully managed device, the device must be in factory reset state.
- Tap the screen six times on the welcome screen to launch the QR code enrollment flow.
-
When prompted, connect to Wi-Fi. The download location for Secure Hub in the QR code (encoded in the JSON) is accessible over this Wi-Fi network.
Once the device successfully connects to Wi-Fi, it downloads a QR code reader from Google and launches the camera.
-
Point the camera to the QR code to scan the code.
Android downloads Secure Hub from the download location in the QR code, validate the signing certificate signature, install Secure Hub and sets it as the device owner.
For more information, see this Google guide for Android EMM developers: https://developers.google.com/android/work/prov-devices#qr_code_method.
NFC bump
To enroll a device as a fully managed device using NFC bumps requires two devices: One that is reset to its factory settings and one running the XenMobile Provisioning Tool.
Prerequisites:
- Supported on all Android devices running Android 5.0, Android 5.1, Android 6.0 and above.
- A XenMobile Server version 10.4 that is enabled for Android Enterprise.
- A new or factory-reset device, provisioned for Android Enterprise as a fully managed device. You can find steps to complete this prerequisite later in this article.
- Another device with NFC capability, running the configured Provisioning Tool. The Provisioning Tool is available in Secure Hub 10.4 or on the Citrix downloads page.
Each device can have only one Android Enterprise profile, managed by an enterprise mobility management (EMM) app. In XenMobile, Secure Hub is the EMM app. Only one profile is allowed on each device. Attempting to add a second EMM app removes the first EMM app.
Data transferred through the NFC bump
Provisioning a factory-reset device requires you to send the following data through an NFC bump to initialize the Android Enterprise:
- Package name of the EMM provider app that acts as device owner (in this case, Secure Hub).
- Intranet/Internet location from which the device can download the EMM provider app.
- SHA1 hash of EMM provider app to verify if the download is successful.
- Wi-Fi connection details so that a factory-reset device can connect and download the EMM provider app. Note: Android now does not support 802.1x Wi-Fi for this step.
- Time zone for the device (optional).
- Geographic location for the device (optional).
When the two devices are bumped, the data from the Provisioning Tool is sent to the factory-reset device. That data is then used to download Secure Hub with administrator settings. If you don’t enter time zone and location values, Android automatically configures the values on the new device.
Configuring the XenMobile Provisioning Tool
Before doing an NFC bump, you must configure the Provisioning Tool. This configuration is then transferred to the factory-reset device during the NFC bump.
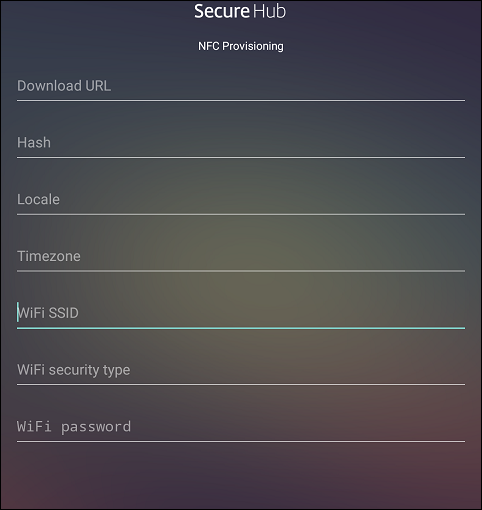
You can type data into the required fields or populate them through a text file. The steps in the next procedure describe how to configure the text file and contain descriptions for each field. The app doesn’t save information after you type it, so you might want to create a text file to keep the information for future use.
To configure the Provisioning Tool by using a text file
Name the file nfcprovisioning.txt and place the file in the /sdcard/ folder on the SD card of the device. The app can then read the text file and populate the values.
The text file must have the following data:
android.app.extra.PROVISIONING_DEVICE_ADMIN_PACKAGE_DOWNLOAD_LOCATION=<download_location>
This line is the intranet/internet location of the EMM provider app. After the factory-reset device connects to Wi-Fi following the NFC bump, the device must have access to this location for downloading. The URL is a regular URL, with no special formatting required.
android.app.extra.PROVISIONING_DEVICE_ADMIN_PACKAGE_CHECKSUM=<SHA1 hash>
This line is the checksum of the EMM provider app. This checksum is used to verify that the download is successful. Steps to get the checksum are discussed later in this article.
android.app.extra.PROVISIONING_WIFI_SSID=<wifi ssid>
This line is the connected Wi-Fi SSID of the device on which the Provisioning Tool is running.
android.app.extra.PROVISIONING_WIFI_SECURITY_TYPE=<wifi security type>
Supported values are WEP and WPA2. If the Wi-Fi is unprotected, this field must be empty.
android.app.extra.PROVISIONING_WIFI_PASSWORD=<wifi password>
If the Wi-Fi is unprotected, this field must be empty.
android.app.extra.PROVISIONING_LOCALE=<locale>
Enter language and country codes. The language codes are two-letter lowercase ISO language codes (such as en) as defined by ISO 639-1. The country codes are two-letter uppercase ISO country codes (such as US) as defined by ISO 3166-1. For example, type en_US for English as spoken in the United States. If you don’t type any codes, the country and language are automatically populated.
android.app.extra.PROVISIONING_TIME_ZONE=<timezone>
The time zone in which the device is running. Type an Olson name of the form area/location. For example, America/Los_Angeles for Pacific time. If you don’t enter a name, the time zone is automatically populated.
android.app.extra.PROVISIONING_DEVICE_ADMIN_PACKAGE_NAME=<package name>
This data isn’t required, because the value is hardcoded into the app as Secure Hub. It’s mentioned here only for the sake of completion.
If there is a Wi-Fi protected by using WPA2, a completed nfcprovisioning.txt file might look like the following:
android.app.extra.PROVISIONING_DEVICE_ADMIN_PACKAGE_DOWNLOAD_LOCATION=https://www.somepublicurlhere.com/path/to/securehub.apk
android.app.extra.PROVISIONING_DEVICE_ADMIN_PACKAGE_CHECKSUM=ga50TwdCmfdJ72LGRFkke4CrbAk\u003d
android.app.extra.PROVISIONING_WIFI_SSID=Protected_WiFi_Name
android.app.extra.PROVISIONING_WIFI_SECURITY_TYPE=WPA2
android.app.extra.PROVISIONING_WIFI_PASSWORD=wifiPasswordHere
android.app.extra.PROVISIONING_LOCALE=en_US
android.app.extra.PROVISIONING_TIME_ZONE=America/Los_Angeles
If there is an unprotected Wi-Fi, a completed nfcprovisioning.txt file might look like the following:
android.app.extra.PROVISIONING_DEVICE_ADMIN_PACKAGE_DOWNLOAD_LOCATION=https://www.somepublicurlhere.com/path/to/securehub.apk
android.app.extra.PROVISIONING_DEVICE_ADMIN_PACKAGE_CHECKSUM=ga50TwdCmfdJ72LGRFkke4CrbAk\u003d
android.app.extra.PROVISIONING_WIFI_SSID=Unprotected_WiFi_Name
android.app.extra.PROVISIONING_LOCALE=en_US
android.app.extra.PROVISIONING_TIME_ZONE=America/Los_Angeles
To get the Secure Hub checksum
To get the checksum of any app, add the app as an enterprise app.
-
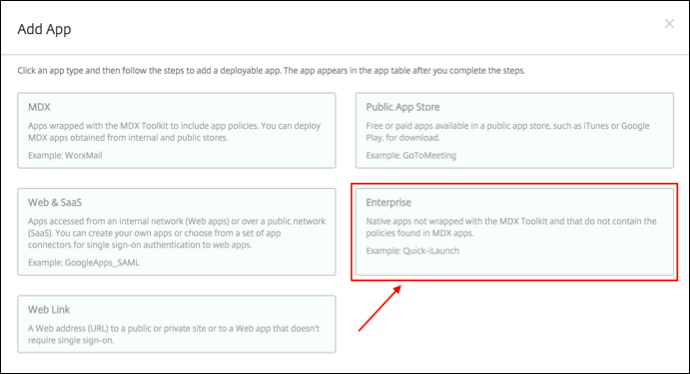
In the XenMobile console, go to Configure > Apps and then click Add.
The Add Apps window appears.
-
Click Enterprise.
The App information page displays.
-
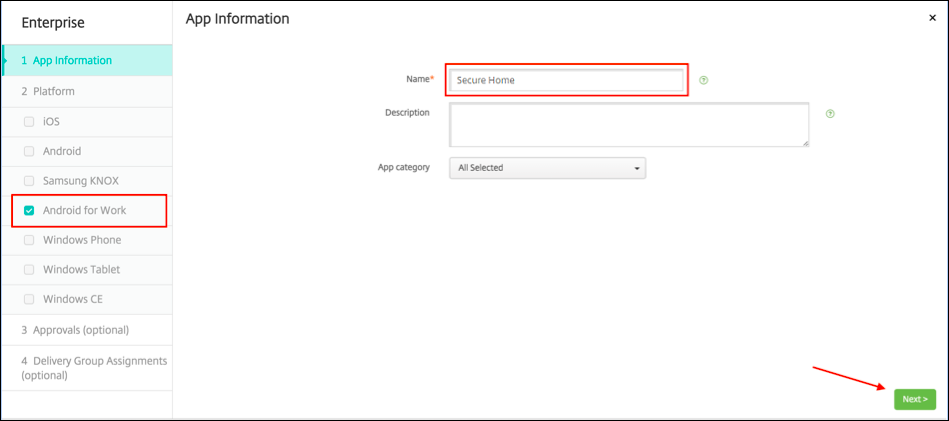
Select the following configuration and then click Next.
The Android Enterprise Enterprise App page appears.
-
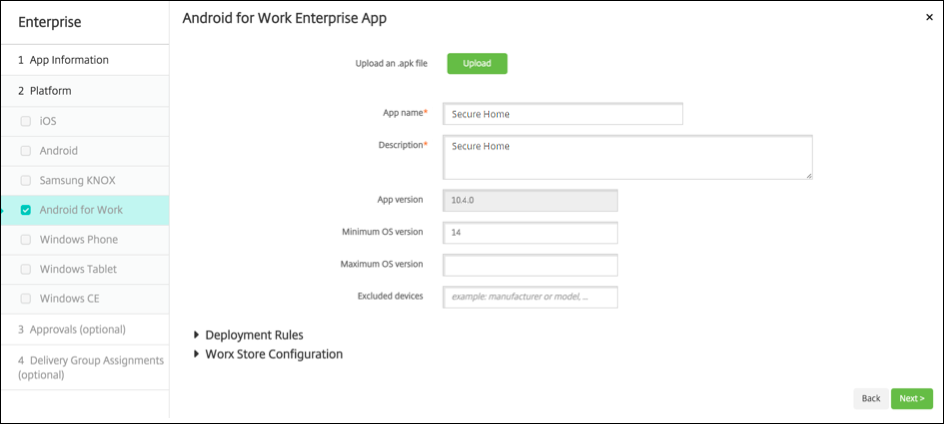
Provide the path to the .apk and then click Next to upload the file.
Once the upload is complete, the details of the uploaded package appear.
-
Click Next to open the page to download the JSON file, which you then use to upload to Google Play. For Secure Hub, uploading to Google Play is not required, but you need the JSON file to read the SHA1 value from it.
A typical JSON file looks like the following:

-
Copy the file_sha1_base64 value and use it in the Hash field in the Provisioning Tool.
Note:
The hash must be URL safe.
- Convert any + symbols to -
- Convert any / symbols to _
- Replace the trailing \u003d with =
If you store the hash in the nfcprovisioning.txt file on the SD card of the device, the app does the safety conversion. However, if you opt to type the hash manually, it’s your responsibility to make sure its URL safety.
Libraries used
The Provisioning Tool uses the following libraries in its source code:
-
v7 appcompat library, Design support library, and v7 Palette library by Google under Apache license 2.0
For information, see Support Library Features Guide.
-
Butter Knife by Jake Wharton under Apache license 2.0
Provision work profile device in Android Enterprise
On work profile devices in Android Enterprise, you securely separate the corporate and personal areas on a device. For example, BYOD devices can be work profile devices. The enrollment experience for work profile devices is similar to Android enrollment in XenMobile. Users download Secure Hub from Google Play and enroll their devices.
By default, the USB Debugging and Unknown Sources settings are disabled on a device when it is enrolled in Android Enterprise as a work profile device.
Tip:
When enrolling devices in Android Enterprise as work profile devices, always go to Google Play. From there, enable Secure Hub to appear in the user’s personal profile.
In this article
- Create an Android Enterprise Account
- Set up an Android Enterprise service account and download an Android Enterprise certificate
- Binding to EMM
- Import the P12 certificate
- Set up Android Enterprise server settings
- Enable SAML-based single-sign-on
- Set up an Android Enterprise device policy
- Configure Android Enterprise account settings
- Set up Google Workspace partner access for XenMobile
- Enrolling Android Enterprise devices
- Unenrolling an Android Enterprise enterprise
- Provisioning fully managed devices in Android Enterprise
- Provision work profile device in Android Enterprise