Notifications
You can use notifications in XenMobile® for the following purposes:
- To communicate with select groups of users for several system-related functions. You can also target these notifications for certain users. For example, all users with iOS devices, users whose devices are out of compliance, users with employee-owned devices, and so on.
- To enroll users and their devices.
- To automatically notify users (using automated actions) when certain conditions are met. For example:
- When a user device is about to be blocked from the corporate domain because of a compliance issue.
- When a device has been jailbroken or rooted
For details about automated actions, see Automated Actions.
To send notifications with XenMobile, you must configure a gateway and a notification server. You can set up a notification server in XenMobile to configure Simple Mail Transfer Protocol (SMTP) and Short Message Service (SMS) gateway servers to send email and text (SMS) notifications to users. You can use notifications to send messages over two different channels: SMTP or SMS.
- SMTP is a connection-oriented, text-based protocol in which a mail sender communicates with a mail receiver by issuing command strings and supplying necessary data, typically over a Transmission Control Protocol (TCP) connection. SMTP sessions consist of commands originated by an SMTP client (the person sending the message) and corresponding responses from the SMTP server.
- SMS is a text messaging service component of phone, Web, or mobile communication systems. SMS uses standardized communications protocols to enable fixed-line or mobile phone devices to exchange short text messages.
You can also set up a Carrier SMS Gateway in XenMobile to configure notifications that are sent through an SMS gateway of a carrier. Carriers use SMS gateways to send or receive SMS transmissions to or from a telecommunications network. These text-based messages use standardized communications protocols to allow fixed-line or mobile phone devices to exchange short text messages.
Prerequisites
- Before configuring the SMS gateway, consult your system administrator to determine the server information. It’s important to know whether the SMS server is hosted on an internal corporate server, or whether the server is part of a hosted email service. In that case, you need information from the website of the service provider.
- Configure the SMTP notifications server to send messages to users. If the server is hosted on an internal server, contact your system administrator for configuration information. If the server is a hosted email service, locate the appropriate configuration information on the website of the service provider.
- You can use one active SMTP server and one active SMS server simultaneously. Both of those communication channels allow one active configuration.
- Open port 25 from XenMobile located in your network DMZ to point back to the SMTP server on your internal network. That enables XenMobile to send notifications successfully.
Configure an SMTP server and SMS gateway
-
In the XenMobile console, click the gear icon in the upper-right corner of the console. The Settings page appears.
-
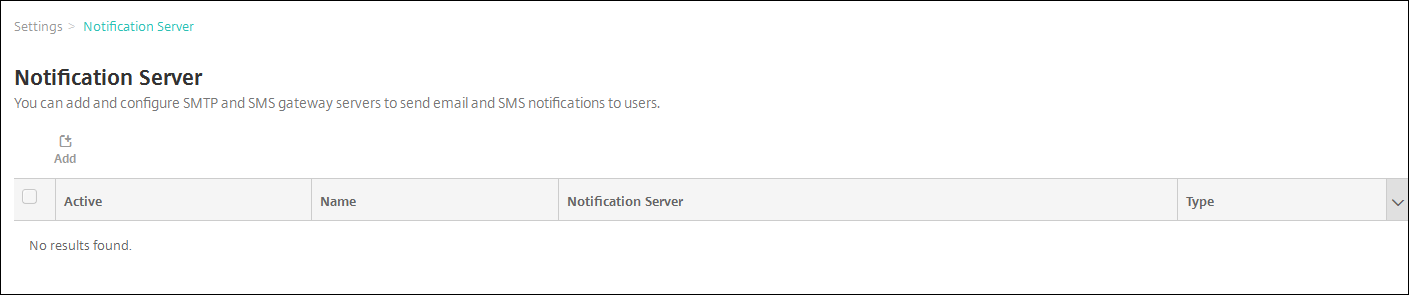
Under Notifications, click Notification Server. The Notification Server page appears.
-
Click Add. A menu appears with options to configure an SMTP server or an SMS gateway.
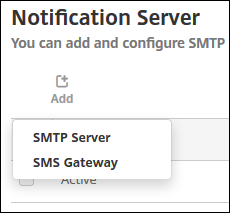
- To add an SMTP server, click SMTP Server and then see To add an SMTP server for the steps to configure this setting.
- To an SMS gateway, click SMS Gateway and then see To add an SMS gateway for the steps to configure this setting.
Add an SMTP server
-
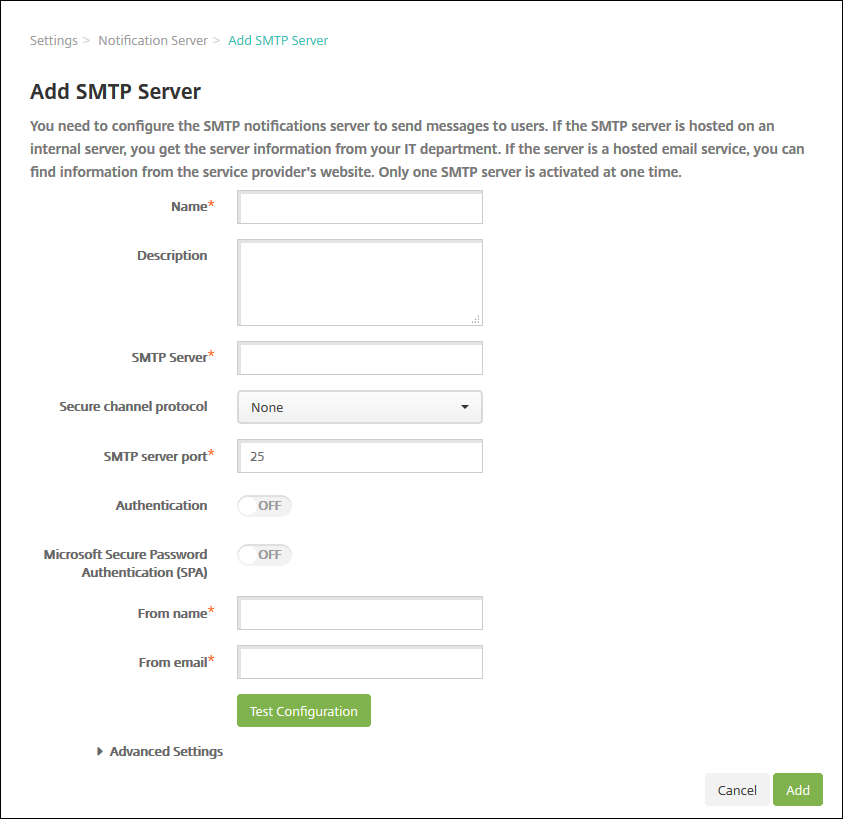
Configure these settings:
- Name: Type the name associated with this SMTP server account.
- Description: Optionally, enter a description of the server.
- SMTP Server: Type the host name for the server. The host name must be a fully qualified domain name (FQDN) or an IP address.
- Secure channel protocol: Click SSL, TLS, or None in the drop-down list for the secure channel protocol used by the server (if the server is configured to use secure authentication). The default is None.
- SMTP server port: Type the port used by the SMTP server. By default, the port is set to 25. If SMTP connections use the SSL secure channel protocol, the port is set to 465.
- Authentication: Select ON or OFF. The default is OFF.
- If you enable Authentication, configure these settings:
- User name: Type the user name for authentication
- Password: Type the authentication user’s password.
Important:
To use OAuth with Microsoft Exchange Online, you must first register your application in Microsoft Entra ID. After registration, enable Authentication and Microsoft Exchange Online OAuth 2.0.
- If you enable Authentication and Microsoft Exchange Online OAuth 2.0, configure the following settings:
- User name: Type the user name for authentication.
- Tenant ID: Type the tenant ID of your Microsoft Entra ID directory.
- Client ID: Type the client (application) ID of your registered application. You can find it in Azure portal > your registered application > Application (client) ID.
- Client Secret: Type the client secret of your registered application. You can find it in Azure portal > your registered application > Certificates & secrets.
- Microsoft Secure Password Authentication (SPA): If the SMTP server is using the SPA, click ON. The default is OFF.
- From Name: Type the name displayed in the From box when a client receives a notification email from this server. For example, Corporate IT.
- From email: Type the email address used if an email recipient replies to the notification sent by the SMTP server.
-
Click Test Configuration to send a test email notification.
-
Expand Advanced Settings and then configure these settings:
- Number of SMTP retries: Type the number of times to retry a failed message sent from the SMTP server. The default is 5.
- SMTP Timeout: Type the duration to wait (in seconds) when sending an SMTP request. Increase this value if message sending is continuously failing because of timeouts. Use caution when decreasing this value; it can increase the number of timed out and undelivered messages. The default is 30 seconds.
- Maximum number of SMTP recipients: Type the maximum number of recipients per email message sent by the SMTP server. The default is 100.
-
Click Add.
Add an SMS gateway
Note:
XenMobile only supports Nexmo SMS messaging. If you do not already have an account to use Nexmo messaging, visit their website to create one.
-
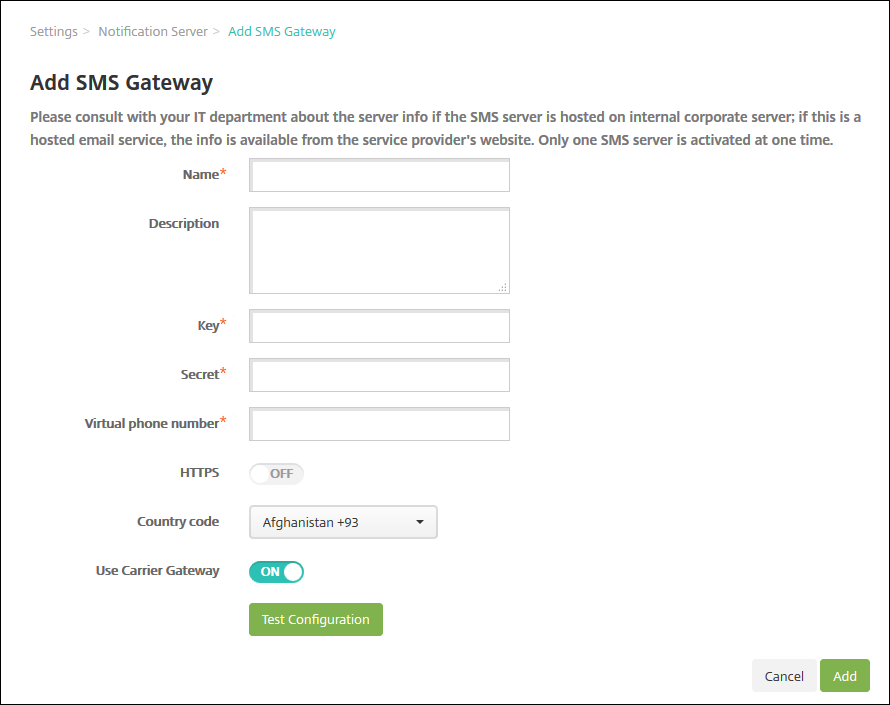
Configure the following settings:
- Name: Type a name for the SMS Gateway configuration. This field is required.
- Description: Optionally, type a description of the configuration.
- Key: Type the numerical identifier provided by the system administrator when activating the account. This field is required.
- Secret: Type a secret provided by the system administrator that is used to access your account when a password is lost or stolen. This field is required.
- Virtual Phone Number: This field is used when sending to North American phone numbers (with the +1 prefix). You must type a Nexmo virtual phone number and you must only use digits in this field. You can buy virtual phone numbers on the Nexmo website.
- HTTPS: Select whether to use HTTPS to transmit SMS requests to Nexmo. The default is OFF.
Important:
Leave HTTPS set to ON unless you have guidance from Citrix Support to turn it to OFF.
- Country Code: Click the default SMS country code prefix in the drop-down list for recipients in your organization. This field always starts with a + symbol. The default is Afghanistan +93.
-
Click Test Configuration to send a test message using the current configuration. Connection errors, such as authentication or virtual phone number errors, are detected and appear immediately. Messages are received in the same time frame as messages sent between mobile phones.
-
Click Add.
Add a carrier SMS gateway
You can set up a Carrier SMS Gateway in XenMobile to configure notifications that are sent through a carrier’s SMS gateway. Carriers use Short Message Service (SMS) gateways to send or receive SMS transmissions to or from a telecommunications network. These text-based messages use standardized communications protocols to allow fixed-line or mobile phone devices to exchange short text messages.
-
In the XenMobile console, click the gear icon in the upper-right corner of the console. The Settings page appears.
-
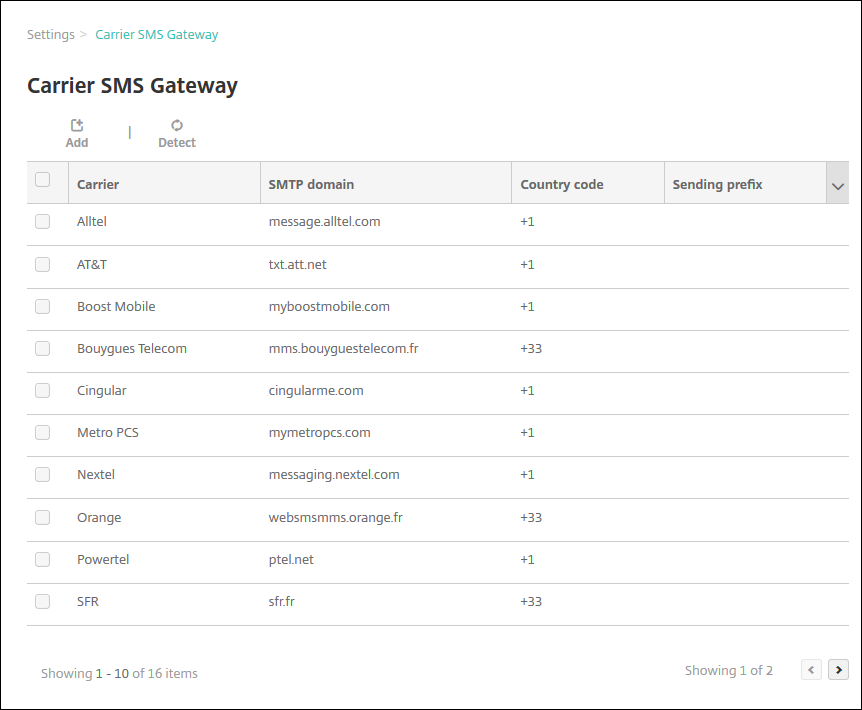
Under Notifications, click Carrier SMS Gateway. The Carrier SMS Gateway page opens.
-
Do one of the following:
- Click Detect to automatically discover a gateway. A dialog box appears indicating that there are no new carriers detected or listing the new carriers detected among enrolled devices.
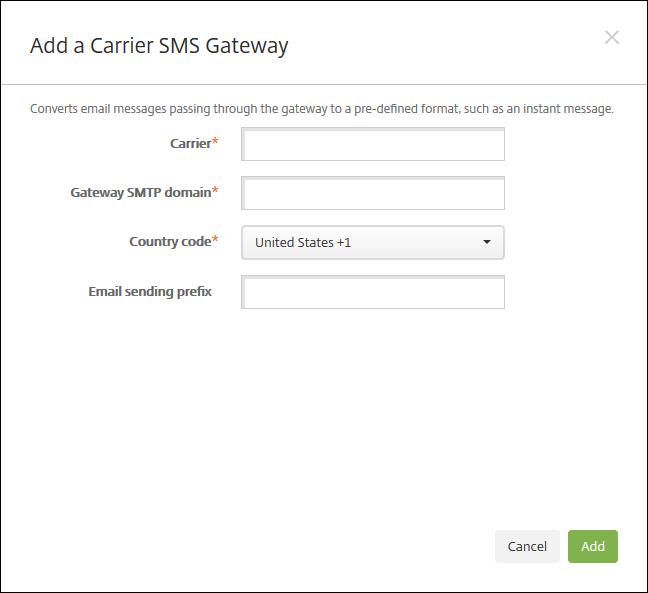
- Click Add. The Add a Carrier SMS Gateway dialog box appears.
Note:
XenMobile only supports Nexmo SMS messaging. If you do not already have an account to use Nexmo messaging, visit their website to create one.
-
Configure these settings:
- Carrier: Type the name of the carrier.
- Gateway SMTP domain: Type the domain associated with the SMTP gateway.
- Country code: IClick the country code for the carrier in the drop-down list.
- Email sending prefix: Optionally, specify an email sending prefix.
-
Click Add to add the new carrier or click Cancel to not add the new carrier.
Create and update notification templates
You can create or update notification templates in XenMobile to be used in automated actions, enrollment, and standard notification messages sent to users. You configure the notification templates to send messages over three different channels: Secure Hub, SMTP, or SMS.
XenMobile includes many predefined notification templates that reflect the distinct types of events that XenMobile automatically responds to for every device in the system.
Note:
If you plan to use SMTP or SMS channels to send notifications to users, you must set up the channels before you can activate them. XenMobile prompts you to set up the channels when you add notification templates if they aren’t already set up.
-
In the XenMobile console, click the gear icon in the upper-right corner of the console. The Settings page appears.
-
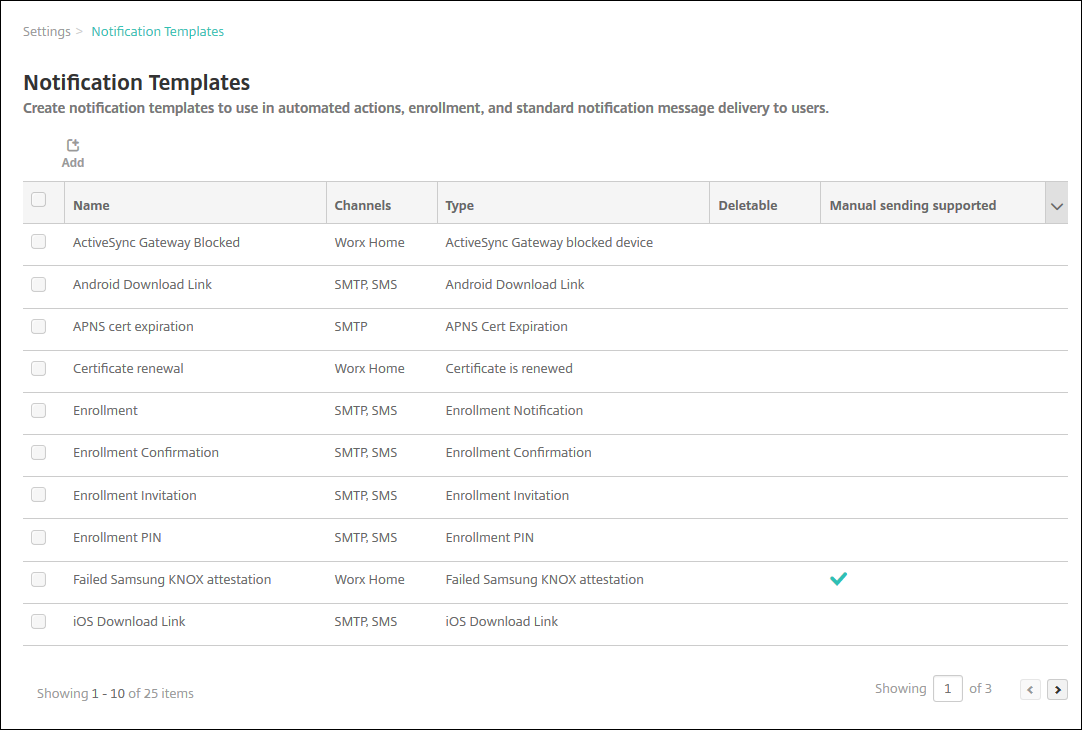
Click Notification Templates. The Notification Templates page appears.
Add a notification template
-
Click Add. If no SMS gateway or SMTP server has been set up, a message appears about the use of SMS and SMTP notifications. You can choose to set up the SMTP server or SMS gateway now or set them up later.
If you choose to set up SMS or SMTP server settings now, you’re redirected to the Notification Server page on the Settings page. After setting up the channels you want to use, you can return to the Notification Template page to continue adding or modifying notification templates.
Important:
If you choose to set up SMS or SMTP server settings later, you won’t be able to activate those channels when you add or edit a notification template, which means those channels won’t be available for sending user notifications.
-
Configure these settings:
- Name: Type a descriptive name for the template.
- Description: Type a description for the template.
- Type: Click the notification type in the drop-down list. Only supported channels for the selected type appear. Only one APNS Cert Expiration template is allowed, which is a predefined template. This means you can’t add a new template of this type.
Note:
For some template types, the phrase Manual sending supported appears below the type. This means that the template is available in the Notifications list on the Dashboard and on the Devices page to let you manually send the notification to users. Manual sending isn’t available in any template that uses the following macros in the Subject or Message field on any channel:
- ${outofcompliance.reason(allowlist_blocklist_apps_name)}
- ${outofcompliance.reason(smg_block)}
-
Under Channels, configure the information for each channel to be used with this notification. You can choose any or all channels. The channels you choose depends on how you want to send notifications:
- If you choose Secure Hub, only iOS and Android devices receive the notifications, which appear in the device’s notification tray.
- If you choose SMTP, most users receive the message because they’ve enrolled with their email addresses.
- If you choose SMS, only users using devices with a SIM card receive the notification.
Secure Hub:
- Activate: Click to enable the notification channel.
- Message: Type the message to be sent to the user. This field is required if you’re using Secure Hub. For information about using macros in a message, see Macros.
- Sound File: Click the notification sound in the drop-down list that the user hears when the notification is received.
SMTP:
-
Activate: Click to enable the notification channel.
You can activate the SMTP notification only after you set up the SMTP server.
- Sender: Type an optional sender for the notification, which can be a name, an email address, or both.
- Recipient: This field has a pre-built macro for all but Ad Hoc notifications to make sure that notifications are sent to the correct SMTP recipient address. Citrix recommends that you do not modify macros in templates. You can also add recipients (for example, the corporate administrator) in addition to the user by adding their addresses separated by a semi-colon (;). To send Ad Hoc notifications, you can enter specific recipients on this page, or you can select devices from the Manage > Devices page and send notifications from there. For details, see Devices.
- Subject: Type a descriptive subject for the notification. This field is required.
- Message: Type the message to be sent to the user. For information about using macros in a message, see Macros.
SMS:
-
Activate: Click to enable the notification channel.
You can activate the SMTP notification only after you set up the SMTP server.
- Recipient: This field has a pre-built macro for all but Ad Hoc notifications to make sure that notifications are sent to the correct SMS recipient address. Citrix recommends that you do not modify macros in templates. To send Ad Hoc notifications, you can enter specific recipients, or you can select devices from the Manage > Devices page.
- Message: Type the message to be sent to the user. This field is required. For information about using macros in a message, see Macros.
-
Click Add. When all channels are correctly configured, they appear in this order on the Notification Templates page: SMTP, SMS, and Secure Hub. Any channels not correctly configured appear after the correctly configured channels.
Edit a notification template
-
Select a notification template. The edit page specific to that template appears where you can make changes to all but the Type field, and activate or deactivate channels.
-
Click Save.
Delete a notification template
You can delete only notification templates that you’ve added. You can’t delete predefined notification templates.
-
Select an existing notification template.
-
Click Delete. A confirmation dialog box appears.
-
Click Delete to delete the notification template or click Cancel to cancel deleting the notification template.