Security
App Protection
DISCLAIMER
App Protection policies work by filtering access to required functions of the underlying operating system. Specific API calls are required to capture screen or keyboard presses. This feature means that App Protection policies can provide protection even against custom and purpose-built hacker tools. However, as operating systems evolve, new ways of capturing screens and logging keys can emerge. While we continue to identify and address them, we can’t guarantee full protection in specific configurations and deployments.
App Protection is an add-on feature that provides enhanced security when you use Citrix Virtual Apps and Desktops. The feature restricts the ability of clients to be compromised with keylogging and screen-capturing malware. App Protection prevents exfiltration of confidential information such as user credentials and sensitive information that are displayed on the screen. The feature prevents users and attackers from taking screenshots and from using keyloggers to glean and exploit sensitive information.
Notes:
This feature is supported when Citrix Workspace app is installed by using the tarball, Debian, and Red Hat Package Manager (RPM) packages. Also, x64 and ARM64 are the only supported architectures.
This feature is supported in on-premises deployments of Citrix Virtual Apps and Desktops. Also, in deployments using the Citrix Virtual Apps and Desktops Service with StoreFront.
App Protection requires that you install an add-on license on your License Server. A Citrix Virtual Desktops license must also be present. For information on Licensing, see the Configure section in the Citrix Virtual Apps and Desktops.
Starting with version 2108, the App Protection feature is now fully functional. The App Protection feature supports apps and desktop sessions and is enabled by default. However, you must configure the App Protection feature in the AuthManConfig.xml file to enable it for the authentication manager and the Self-Service plug-in interfaces.
Starting with this version, you can launch protected resources from Citrix Workspace app while Mozilla Firefox is running.
Prerequisite:
App Protection works best with the following operating systems along with the Gnome Display Manager:
- 64-bit Ubuntu 18.04, Ubuntu 20.04, and Ubuntu 22.04
- 64-bit Debian 9, Debian 10 and Debian 11
- 64-bit CentOS 7
- 64-bit RHEL 7
- ARM64 Raspberry Pi OS (Based on Debian 11 (bullseye))
Installing the App Protection component:
When you install the Citrix Workspace app using the tarball package, the following message appears.
“Do you want to install the App Protection component? Warning: You can’t disable this feature. To disable it, you must uninstall Citrix Workspace app. For more information, contact your system administrator. [default $INSTALLER_N]:”
Enter Y to install the App Protection component.
By default, the App Protection component isn’t installed.
Restart your machine for the changes to take effect. App Protection work as expected only after you restart your machine.
Installing the App Protection component on RPM packages:
Starting with Version 2104, App Protection is supported on the RPM version of Citrix Workspace app.
To install App Protection, do the following:
- Install Citrix Workspace app.
- Install the App Protection
ctxappprotection<version>.rpmpackage from the Citrix Workspace app installer. - Restart the system for the changes to take effect.
Installing the App Protection component on Debian packages:
Starting with Version 2101, App Protection is supported on the Debian version of Citrix Workspace app.
For silent installation of the App Protection component, run the following command from the terminal before installing Citrix Workspace app:
export DEBIAN_FRONTEND="noninteractive"
sudo debconf-set-selections <<< "icaclient app_protection/install_app_protection select yes"

sudo debconf-show icaclient
* app_protection/install_app_protection: yes

sudo apt install -f ./icaclient_<version>._amd64.deb
<!--NeedCopy-->
Starting with Version 2106, Citrix Workspace app introduces an option to configure the anti-keylogging and anti-screen-capturing functionalities separately for both the authentication manager and Self-Service plug-in interfaces.
Configuring App Protection for authentication manager:
Navigate to $ICAROOT/config/AuthManConfig.xml and edit the file as follows:
/opt/Citrix/ICAClient/config$ cat AuthManConfig.xml | grep -i authmananti -A 1
    <key>AuthManAntiScreenCaptureEnabled</key>
    <value>true</value>
    <key>AuthManAntiKeyLoggingEnabled</key>
    <value>true</value>

<!--NeedCopy-->
Configuring App Protection for the Self-Service plug-in interface:
Navigate to $ICAROOT/config/AuthManConfig.xml and edit the file as follows:
/opt/Citrix/ICAClient/config$ cat AuthManConfig.xml | grep -i protection -A 4
<!-- Selfservice App Protection configuration -->
    <Selfservice>
      <AntiScreenCaptureEnabled>true</AntiScreenCaptureEnabled>
      <AntiKeyLoggingEnabled>true</AntiKeyLoggingEnabled>
    </Selfservice>

<!--NeedCopy-->
Known issues:
- When you minimize a protected screen, App Protection continues to run in the background.
Limitation:
- Sometimes, you can’t launch protected resources when an application that is installed from the Snap Store is running. As a workaround, identify the application that causes the issue from the Citrix Workspace app log file. Also, close the application. For more information, see Configure allow list for the apps using LD_Preload functionalities
- When you’re trying to take a screenshot of a protected window, the entire screen, including the non-protected apps in the background, are grayed out.
App Protection support for eLux® 7
Starting with this release, Citrix Workspace app for Linux supports App Protection on eLux 7. This integration provides enhanced security by helping protect against keylogging and screen capture threats when accessing virtual apps and desktops from eLux 7 devices. With App Protection enabled, organizations can better safeguard sensitive information and ensure compliance with security policies, even on thin client endpoints running eLux 7. For more information about App Protection, see the App Protection documentation.
Inactivity Timeout for Citrix Workspace app
The inactivity timeout feature signs you out of the Citrix Workspace app based on a value that the admin sets. From the 2303 version and later,admins can specify the amount of idle time that is allowed before a user is automatically signed out of the Citrix Workspace app. You’re automatically signed out when no activity from the mouse, keyboard, or touch occurs for the specified interval of time, within the Citrix Workspace app window. The inactivity timeout does not affect the already running Citrix Virtual Apps and Desktops and Citrix DaaS sessions or the StoreFront stores.
Note:
This feature is applicable only on cloud deployments.
As a prerequisite, you must enable this feature in the AuthManConfig.xml file. Navigate to $ICAROOT/config/AuthManConfig.xml and add the following entries:
<key>ITOEnabled</key>
<value>true</value>
<!--NeedCopy-->
Admins can configure the timeout in Workspace Configuration. For more infomation, see Set inactivity timeout for Web and Workspace app desktop and mobile.
The end-user experience is as follows:
- A notification appears three minutes before you’re signed out, with an option to stay signed in, or sign out.
- Users can click Stay signed in to dismiss the notification and continue using the app, in which case the inactivity timer is reset to its configured value. You can also click Sign out to end the session for the current store.
Note:
The inactivity timeout feature doesn’t support distributions that have Wayland as the default graphics protocol. For distributions that have Wayland, uncomment either of the following:
WaylandEnable=falsein/etc/gdm/custom.confor in/etc/gdm3/custom.conf.
Persistent login
From the Citrix Workspace app 2303 version and later, the persistent login feature enables you to stay logged in for up to the duration (2–365 days) configured by your admin. When this feature is enabled, you need not provide login credentials for the Citrix Workspace app during the configuration period.
With this functionality, the SSO to Citrix DaaS sessions is extended up to a period of 365 days. This extension is based on the lifetime of Long-Lived Tokens. Your credentials are cached by default for 4 days or Lifetime whichever is lower. And then extended when you become active within these 4 days by connecting to the Citrix Workspace app.
Configure the persistent login feature
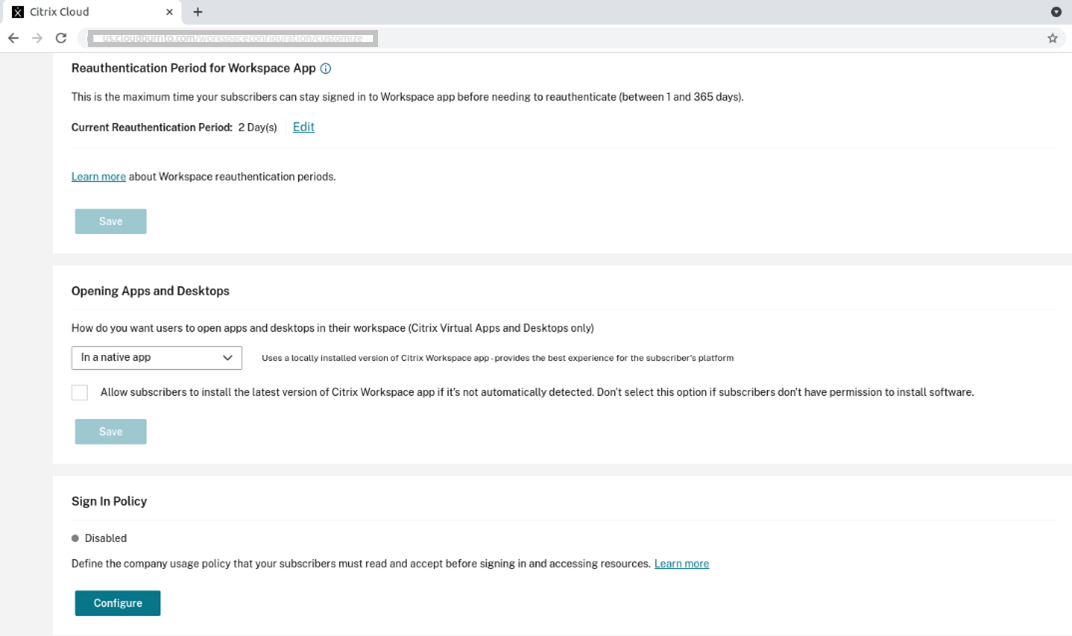
An admin needs to configure the persistent login on the Workspace environment using the following procedure:
- Sign in to Citrix Cloud.
- In the Citrix Cloud console, click the menu in the upper left corner of the screen.
- Select the Workspace Configuration option > Customize > Preferences.
- Scroll down to Reauthentication Period for Workspace App.
- Click Edit next to the Current Reauthentication Period field.
- Enter the required days in the Current Reauthentication Period field.
- You must enter two days or more in the Current Reauthentication Period field.
For more information, see the instructions in the Reauthentication Period for Workspace App section in the following image:
Experience with enhanced authentication
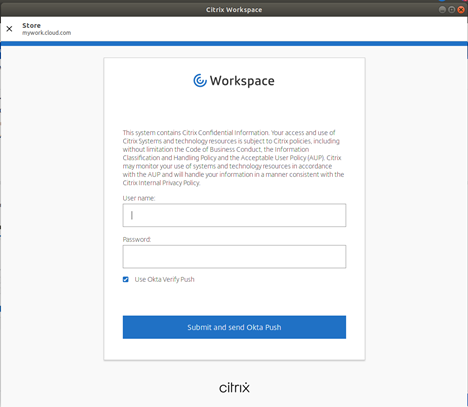
The persistent login window is embedded within the self-service window.
-
Access the Citrix Workspace app. The authentication window appears.
-
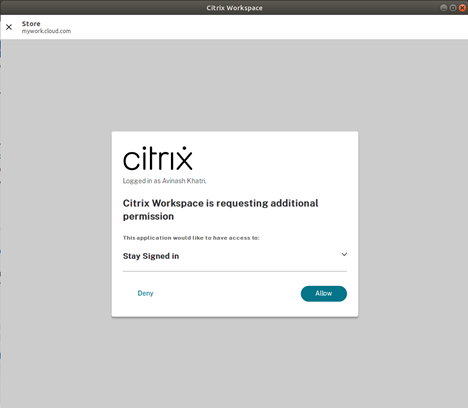
Sign in with your credentials. You are redirected to the Permission prompt to accept.
-
Click Allow.
Note:
If you select Deny for consent, you would see a second login prompt and you need to sign in to Citrix Workspace app for every 24 hours.
Disable the persistent login feature
An admin can disable the persistent login feature in the Citrix Cloud UI or in the AuthManConfig.xml file. However, the value set in the AuthManConfig.xml file overrides the value set in the Citrix Cloud UI.
Using Citrix Cloud UI
- Sign in to Citrix Cloud.
- In the Citrix Cloud console, click the menu in the upper left corner of the screen.
- Select the Workspace Configuration option > Customize > Preferences.
- Scroll down to Reauthentication Period for Workspace App.
- Click Edit next to the Current Reauthentication Period field.
- Enter one day in the Current Reauthentication Period field.
Using the AuthManConfig.xml file
To disable the persistent login feature, do the following
- Navigate to
<ICAROOT>/config/AuthManConfig.xmlfile. -
Set the values as follows:
<AuthManLite>
    <primaryTokenLifeTime>1.00:00:00</primaryTokenLifeTime>
    <secondaryTokenLifeTime>0.01:00:00</secondaryTokenLifeTime>
    <longLivedTokenSupport>true</longLivedTokenSupport>
    <nativeLoggingEnabled>true</nativeLoggingEnabled>
    <platform>linux</platform>
    <saveTokens>true</saveTokens>
    <compressedGroupsEnabled>true</compressedGroupsEnabled>
</AuthManLite>
<!--NeedCopy-->
Seamless Integration of deviceTRUST®
Starting with version 2503, deviceTRUST is included with Citrix Workspace app for unified deployment, ensuring seamless integration and management.
Note:
This feature is currently supported only on the Ubuntu operating system. Verify the Ubuntu versions as given in Supported Linux distributions.
The following are the behavior and specifications of the deviceTRUST integration:
- By default, Citrix Workspace app for Linux installs deviceTRUST using the packaged version included in the installer.
- The failure of deviceTRUST installation doesn’t impact the installation of Citrix Workspace app.
- If you already have deviceTRUST Client Extension version 23.1 or earlier installed, it doesn’t get updated or removed automatically. However, deviceTRUST Agent version 23.1 or earlier continue to work with the existing installation.
For more information on installing deviceTRUST component on Debian packages, see Install using a Debian package.