Configure Okta as a SAML provider for store authentication
This article describes the required steps for configuring an Okta SAML application and the connection between Citrix Cloud™ and your SAML provider. Some of these steps describe actions that you perform in your SAML provider’s administration console.
Prerequisites
Before you complete the tasks in this article, ensure that you’ve met the following prerequisites:
- Citrix Support has enabled the SendNameIDPolicyInSAMLRequest feature in Citrix Cloud. This feature is enabled upon request. For more information about these features, see Required cloud features for SAML using Okta.
- You have an Okta organization that uses one of the following Okta domains:
- okta.com
- okta-eu.com
- oktapreview.com
- You have synchronized your Active Directory (AD) with your Okta organization.
- Sign Authentication Requests is enabled in your Okta organization.
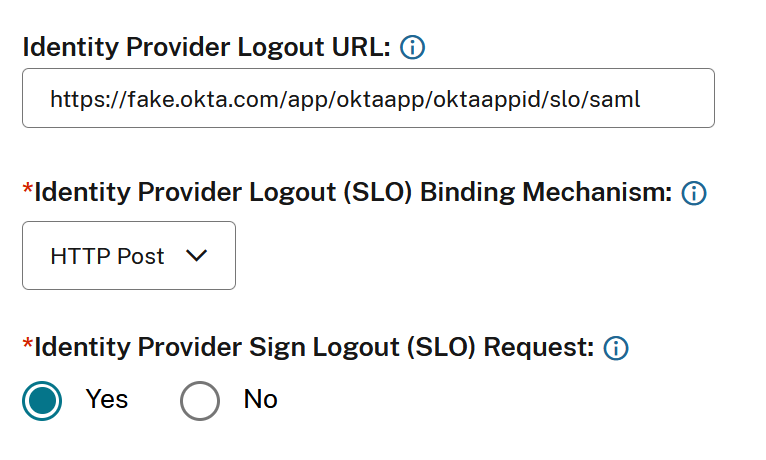
- Identity Provider Single Logout (SLO) is configured within both Citrix Cloud and Okta SAML applications. When SLO is configured, and the end user signs out of their store, they also sign out of Okta and all other service providers that share the Okta SAML application.
- Identity Provider Sign Logout (SLO) Requests is enabled within Citrix Cloud.
- Identity Provider Logout Binding (SLO) is HTTPPost within Citrix Cloud.
Required cloud features for SAML using Okta
Before you complete the tasks in this article, you must contact Citrix Support to enable the SendNameIDPolicyInSAMLRequest feature. This feature enables Citrix Cloud to supply the NameID policy as Unspecified in the SAML request to your SAML provider. This feature is enabled for use with Okta only.
You can request these features by signing in to your Citrix account and opening a ticket through the Citrix Support web site.
Requirements
This article includes a task in which you create a SAML application in the Okta Admin console. This application requires a SAML signing certificate for your Citrix Cloud region.
You can extract this certificate from the Citrix Cloud SAML metadata for your region using an extraction tool such as the one located at https://www.rcfed.com/SAMLWSFed/MetadataCertificateExtract. Citrix recommends acquiring the Citrix Cloud SAML certificate beforehand so you can supply it when needed.
The steps in this section describe how to acquire the signing certificate using the extraction tool at https://www.rcfed.com/SAMLWSFed/MetadataCertificateExtract.
To acquire the Citrix Cloud metadata for your region:
-
In the extraction tool of your choice, enter the metadata URL for your Citrix Cloud region:
- For European Union, United States, and Asia Pacific-South regions, enter
https://saml.cloud.com/saml/metadata. - For the Japan region, enter
https://saml.citrixcloud.jp/saml/metadata. - For the Citrix Cloud Government region, enter
https://saml.cloud.us/saml/metadata.
- For European Union, United States, and Asia Pacific-South regions, enter
- Click Load. The extracted certificate appears below the URL that you entered.
- Click Download to download the certificate in PEM format.
Sync accounts with the Okta AD agent
To use Okta as a SAML provider, you must first integrate your on-premises AD with Okta. To do this, you install the Okta AD agent in your domain and add your AD to your Okta organization. For guidance for deploying the Okta AD agent, see Get started with Active Directory integration on the Okta web site.
Afterward, you import your AD users and groups to Okta. When importing, include the following values associated with your AD accounts:
- SID
- UPN
- OID
To synchronize your AD users and groups with your Okta organization:
- Install and configure the Okta AD agent. For complete instructions, refer to the following articles on the Okta website:
- Add your AD users and groups to Okta by performing a manual import or an automated import. For more information about Okta import methods and instructions, refer to Manage Active Directory users and groups on the Okta website.
Configure an Okta SAML application for store authentication
- Sign in to your Okta organization using an administrator account with permissions to add and configure SAML applications.
-
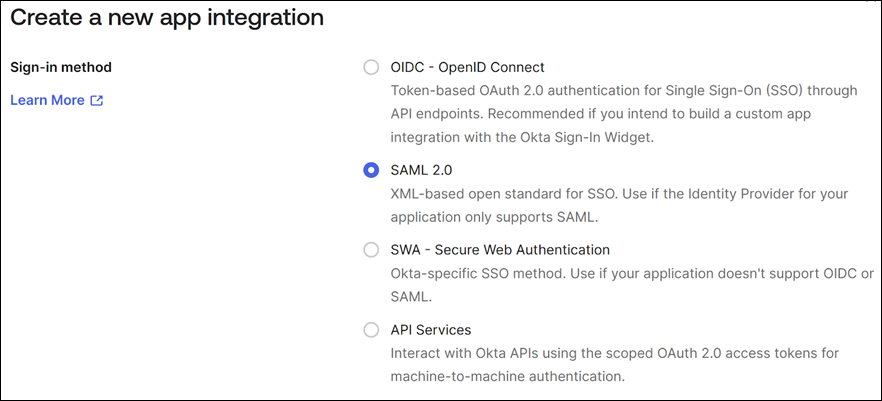
In the Admin console, select Applications > Applications > Create App Integration and then select SAML 2.0. Select Next.
-
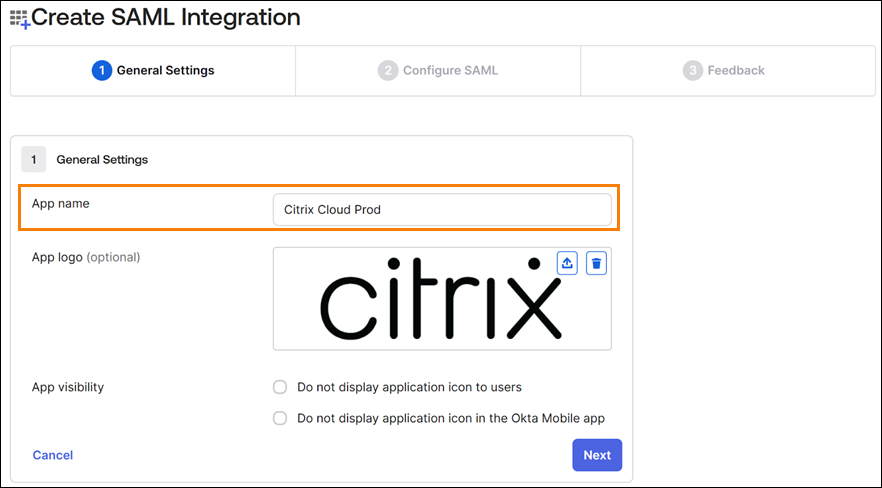
In App Name, enter a friendly name for the application. Select Next.
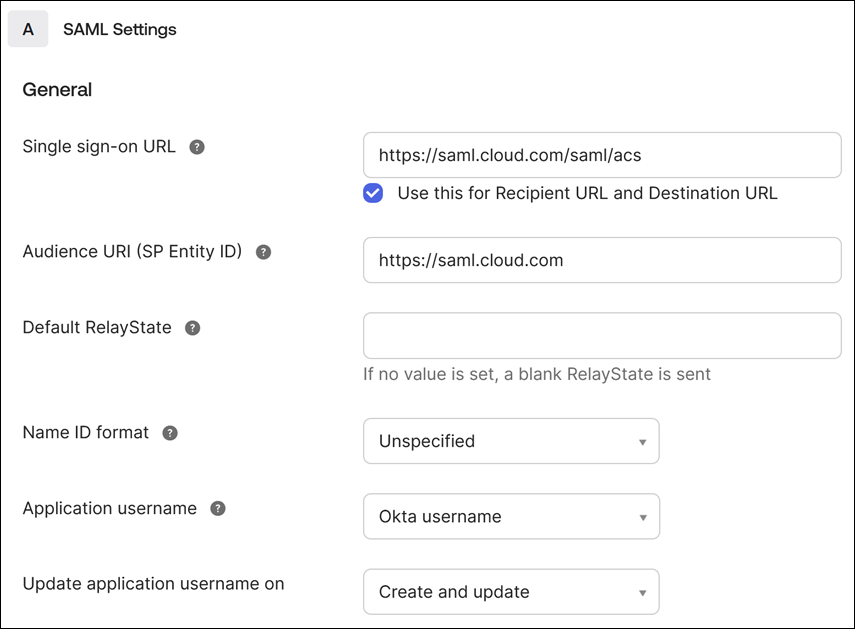
- In the SAML Settings section, configure the Citrix Cloud Service Provider (SP) connection:
- In Single sign-on URL, enter the URL that corresponds to the Citrix Cloud region for your Citrix Cloud customer:
- If your customer ID is in the European Union, United States, or Asia Pacific-South regions, enter
https://saml.cloud.com/saml/acs. - If your customer ID is in the Japan region, enter
https://saml.citrixcloud.jp/saml/acs. - If your customer ID is in the Citrix Cloud Government region, enter
https://saml.cloud.us/saml/acs.
- If your customer ID is in the European Union, United States, or Asia Pacific-South regions, enter
- Select Use this for Recipient and Destination URL.
- In Audience URI (SP Entity ID), enter the URL that corresponds to the Citrix Cloud region for your Citrix Cloud customer:
- If your customer ID is in the European Union, United States, or Asia Pacific-South regions, enter
https://saml.cloud.com. - If your customer ID is in the Japan region, enter
https://saml.citrixcloud.jp. - If your customer ID is in the Citrix Cloud Government region, enter
https://saml.cloud.us.
- If your customer ID is in the European Union, United States, or Asia Pacific-South regions, enter
- In Name ID Format, select Unspecified. The NameID policy that Citrix Cloud sends within the SAML request must match the NameID format specified within the Okta SAML application. If these items don’t match, enabling Sign Authentication Request results in an error from Okta.
-
In Application username, select Okta username.
As an example of this configuration, the following image illustrates the correct configuration for US, EU, and Asia Pacific-South regions:
Important:
The Name ID setting must be configured as Unspecified. Using a different value for this setting causes the SAML sign-in to fail.
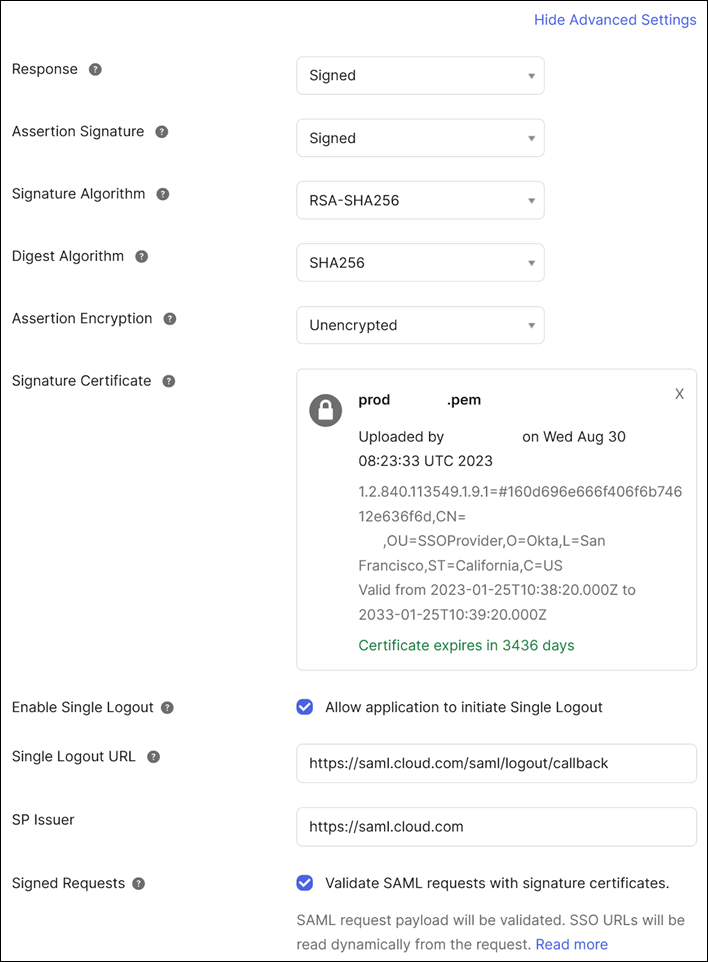
- Click Show Advanced Settings and configure the following settings:
- In Response, select Signed.
- In Assertion Signature, select Signed.
- In Signature Algorithm, select RSA-SHA256.
- In Assertion Encryption, select Unencrypted.
- In Signature Certificate, upload the SAML signing certificate for your Citrix Cloud region in PEM format. For instructions for acquiring the SAML signing certificate, see Requirements in this article.
- In Enable Single Logout, select Allow application to initiate Single Logout.
- In Single Logout URL, enter the URL that corresponds to your Citrix Cloud region:
- For European Union, United States, and Asia Pacific-South regions, enter
https://saml.cloud.com/saml/logout/callback. - For the Japan region, enter
https://saml.citrixcloud.jp/saml/saml/logout/callback. - For Citrix Cloud Government, enter
https://saml.cloud.us/saml/logout/callback.
- For European Union, United States, and Asia Pacific-South regions, enter
- In SP Issuer, enter the value that you entered earlier in Audience URI (SP Entity ID) (Step 4c of this task).
-
In Signed Requests, select Validate SAML requests with signature certificates.
The following image illustrates the correct configuration for US, EU, and Asia Pacific-South regions:
-
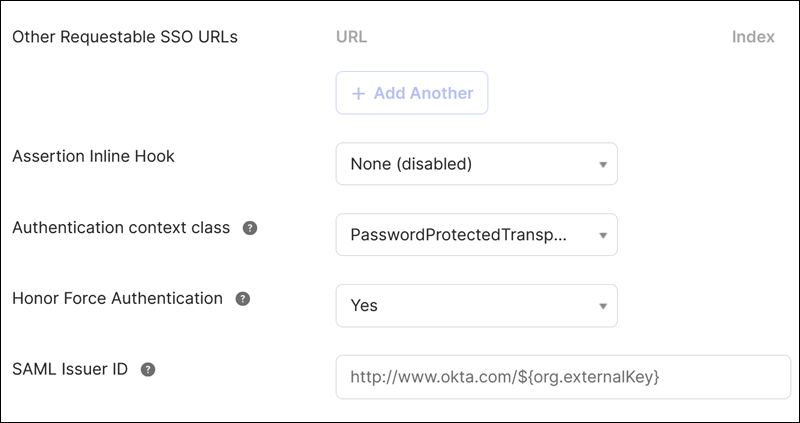
For all remaining advanced settings, accept the default values.
- In Single sign-on URL, enter the URL that corresponds to the Citrix Cloud region for your Citrix Cloud customer:
-
Under Attribute Statements (optional), enter the values for Name, Name format, and Value as shown in the following table:
Name Name format Value cip_upn Unspecified user.cip_upn displayName Unspecified user.displayName firstName Unspecified user.givenName lastName Unspecified user.familyName 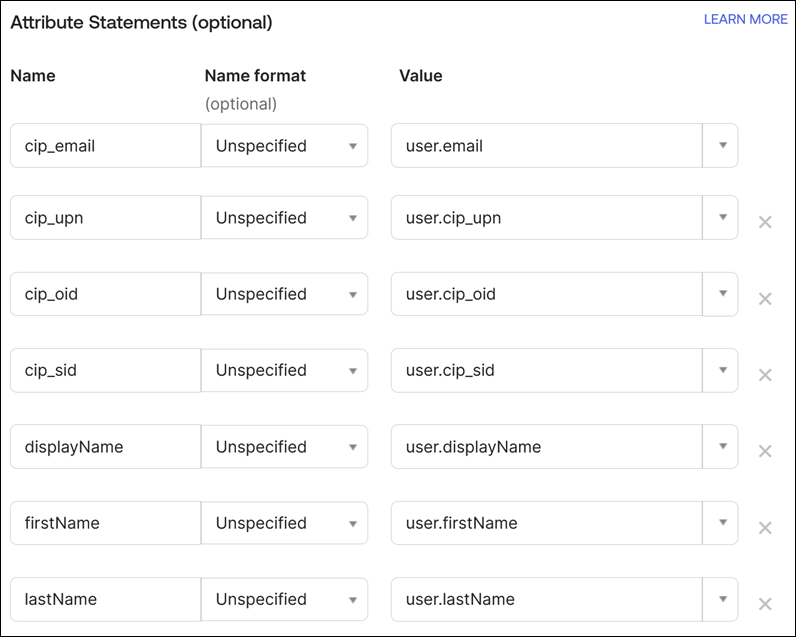
-
Select Next. The Okta configuration statement appears.
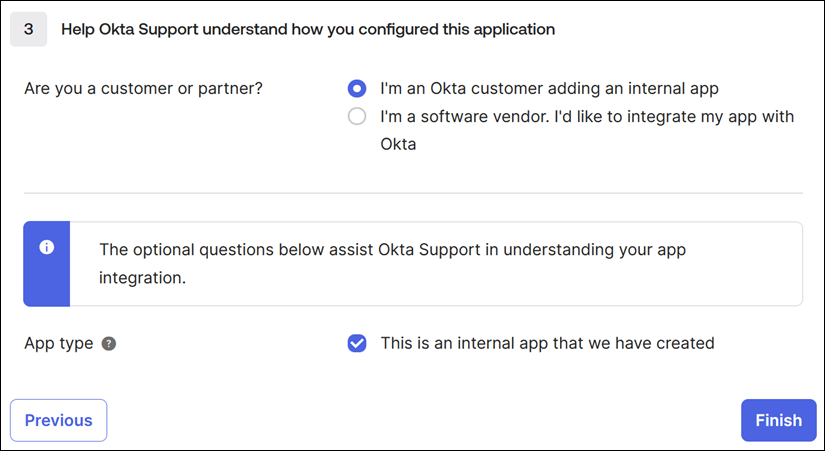
- In Are you a customer or partner?, select I’m an Okta customer adding an internal app.
- In App type, select This is an internal app that we have created.
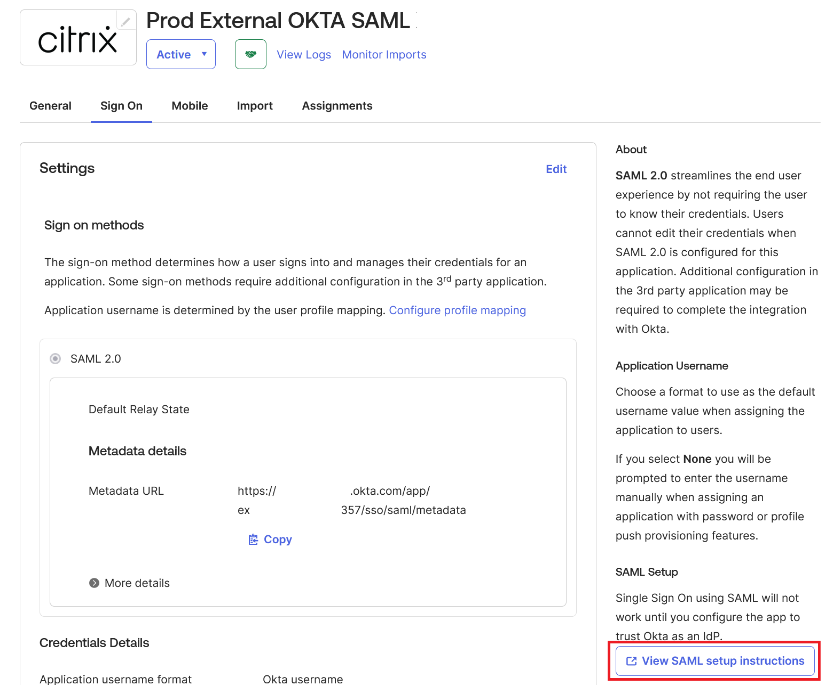
- Select Finish to save your configuration. The profile page for your SAML application appears and displays the contents of the Sign On tab.
After configuration, select the Assignments tab and assign users and groups to the SAML application.
Configure the Citrix Cloud SAML connection
All Citrix logon flows need to be Service Provider initiated using either a store URL or a Citrix Cloud GO URL.
Use the default recommended values for the SAML connection within Identity and Access Management → Authentication →Add an identity provider → SAML.
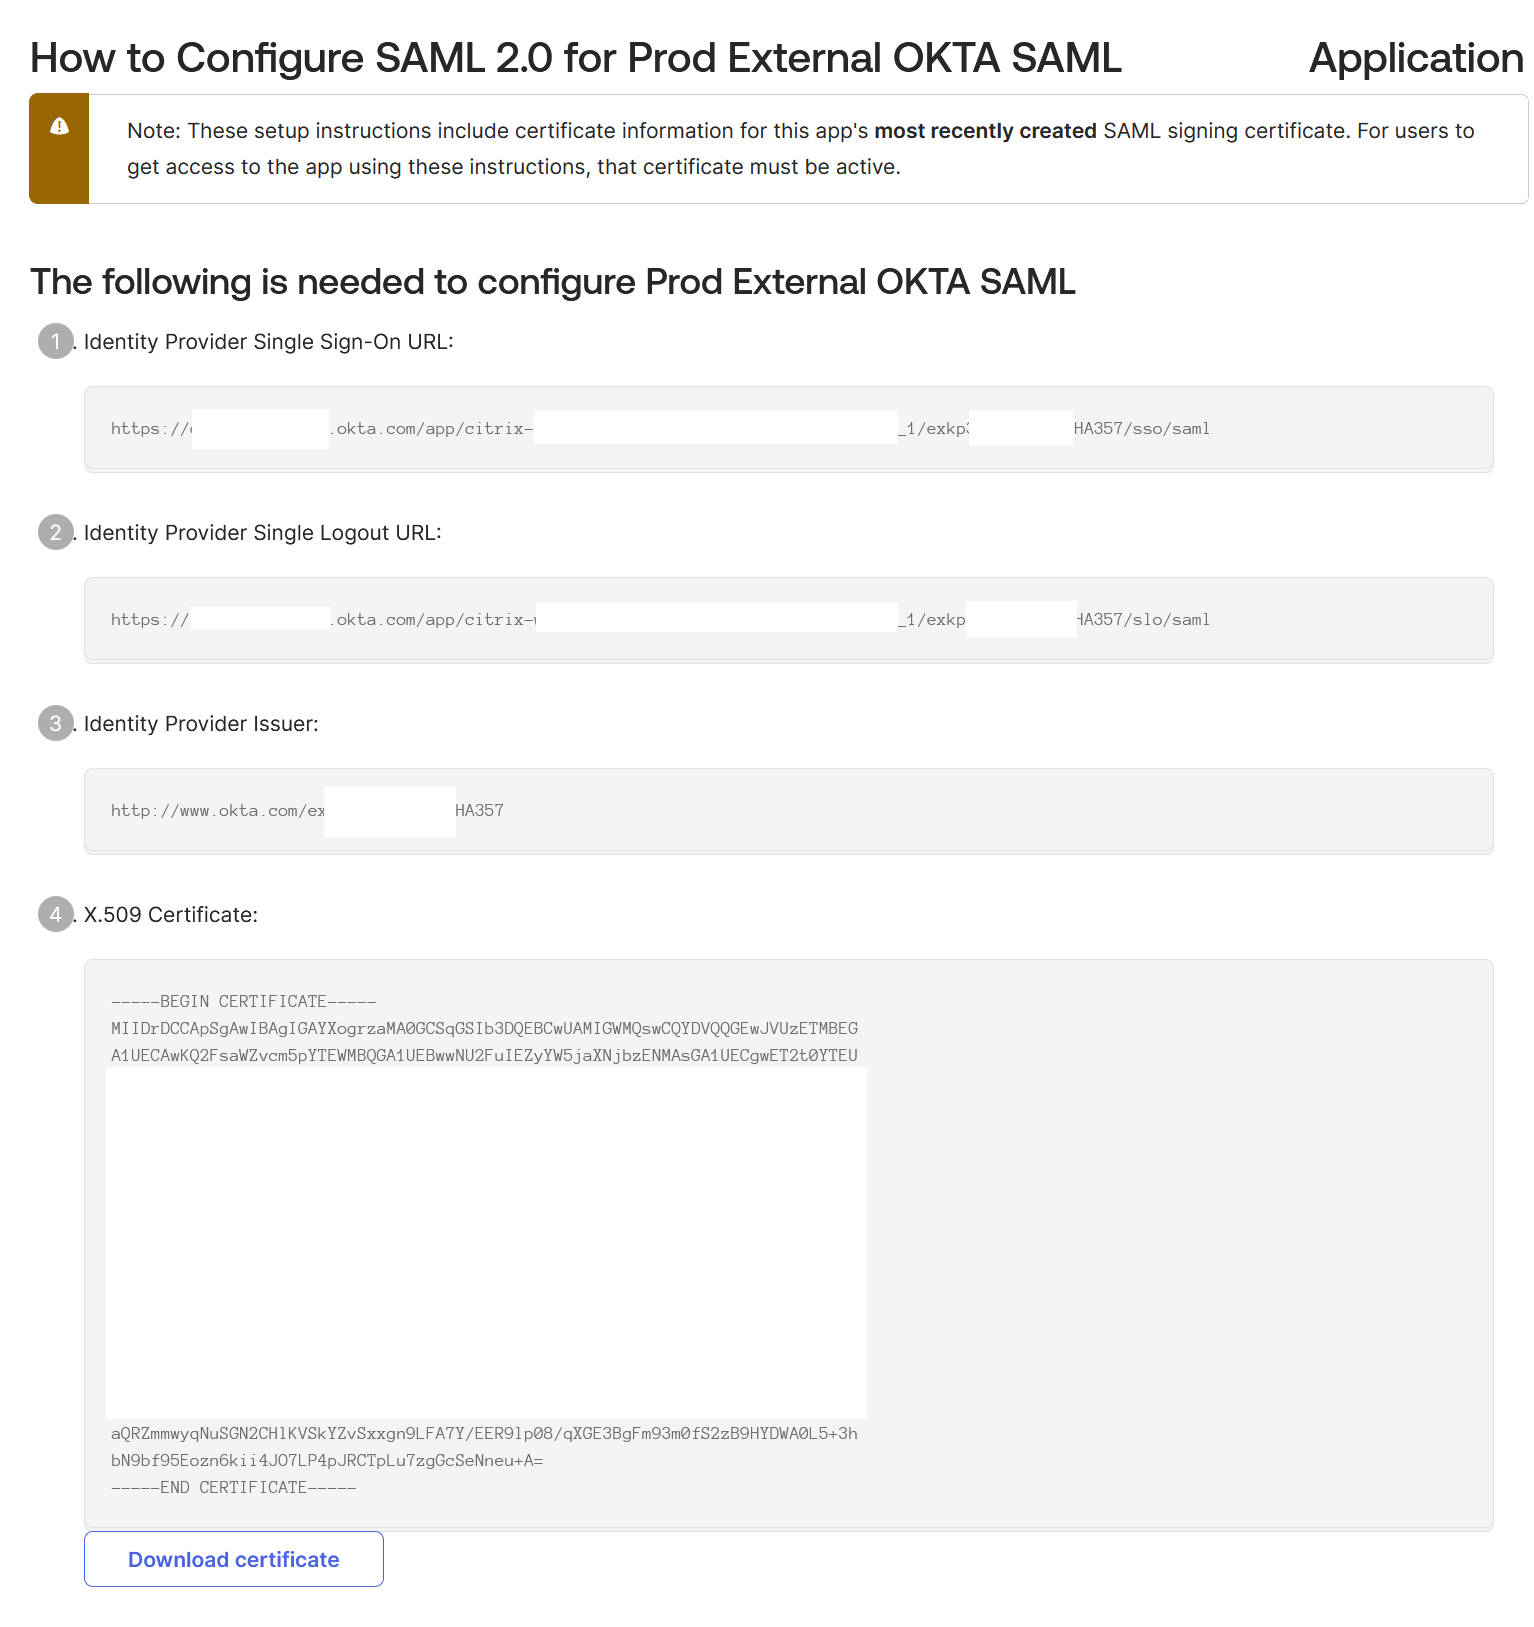
Obtain the Okta SAML application SAML endpoints to enter into Citrix Cloud from your Okta portal.
Important:
Okta does not require a scoped entity ID. This document assumes Scoped Entity ID is disabled. See Citrix documentation on scoped entity ID for an explanation as to what a scoped entity ID is and when it is required. Use the default Citrix Cloud SAML connection settings and leave Scoped Entity ID disabled.

| In this field in Citrix Cloud | Enter this value |
|---|---|
| Entity ID | http://www.okta.com/<oktaSAMLappID> |
| Sign Authentication Request | Yes |
| SSO Service URL | https://<youroktatenant>.okta.com/app/<oktatenantname>_<samlappname>/<samlappID>/sso/saml |
| SSO Binding Mechanism | HTTP Post |
| SAML Response | Sign Either Response Or Assertion |
| Authentication Context | Unspecified, Exact |
| Logout URL | https://<youroktatenant>.okta.com/app/<oktatenantname>_<samlappname>/<samlappID>/slo/saml |
| Sign Logout Request | Yes |
| SLO Binding Mechanism | HTTP Post |