Configure ADFS as a SAML provider for store authentication
This article describes how to configure the relying party trust that Citrix Cloud™ requires for signing in to stores or Citrix Cloud using SAML.
After you complete the steps in this article, you can configure the SAML connection between your ADFS server and Citrix Cloud as described in Connect SAML as an identity provider in Citrix Cloud. For guidance for entering the correct ADFS values for your SAML connection, see SAML configuration in Citrix Cloud in this article.
Prerequisites
The instructions in this article assume that you have an operating ADFS server deployment with Citrix FAS in your environment. Citrix FAS is required to provide single sign-on to VDAs during session launch.
For more information, refer to the following articles:
- Citrix FAS documentation:
- Citrix Tech Zone: Reference Architecture: Federated Authentication Service
Configure a relying party trust for Citrix Cloud
- From the AD FS management console, expand the AD FS node in the left pane.
-
Right-click Relying Party Trust and select Add Relying Party Trust.
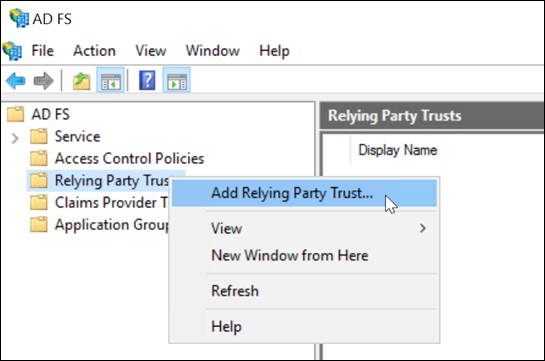
The Add Relying Party Trust wizard appears.
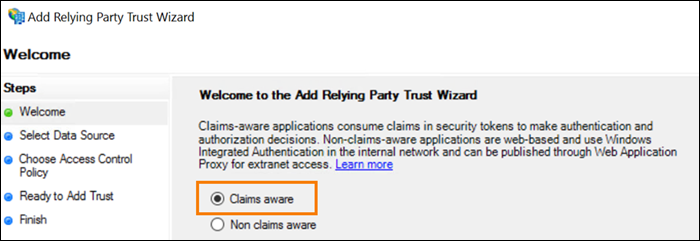
-
Select Claims aware and then select Next.
-
In Federation metadata address, enter
https://saml.cloud.com/saml/metadata.xml. Select Next.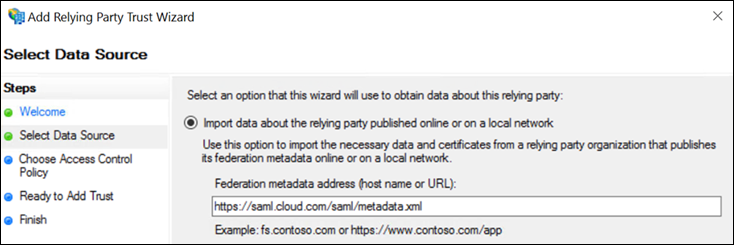
-
For the display name, enter
CitrixCloudProd. Select Next.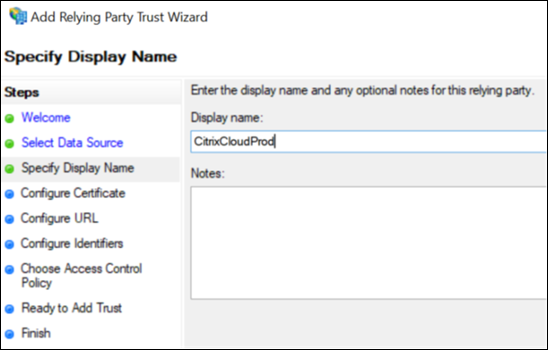
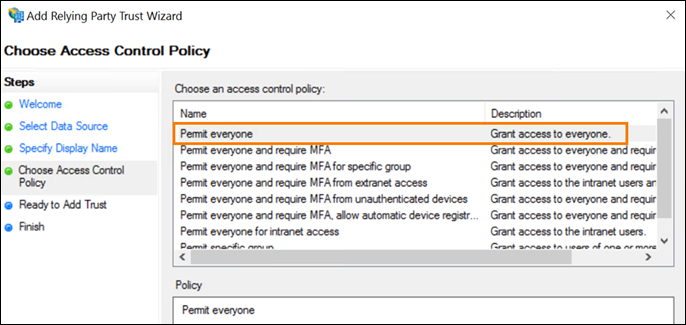
-
For the access control policy, select Permit everyone. Select Next.
- On the Ready to Add Trust screen, select Next.
-
On the Finish screen, select Configure claims issuance policy for this application. Select Next.
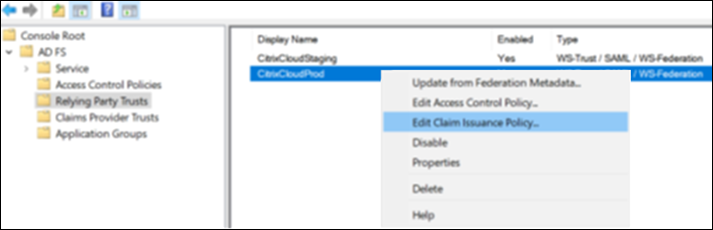
- Right-click the newly-created relaying party trust and select Edit Claim Issuance Policy.
- Click Add Rule and then select Send LDAP Attributes as Claims. Select Next.
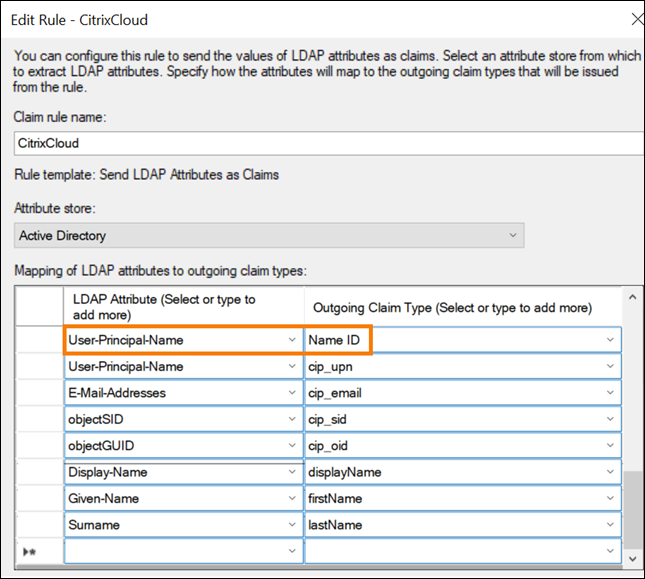
- In Claim rule name, enter
CitrixCloud. - In Attribute store, select Active Directory.
-
Under Mapping of LDAP attributes to outgoing claim types, add the following LDAP attributes, exactly as shown:
LDAP attribute Outgoing Claim Type User-Principal-Name Name ID User-Principal-Name cip_upn Display-Name displayName Given-Name givenName Surname familyName Important:
The NameID must always be the first claim added to the list of claims otherwise Single Logout (SLO) will not function correctly.
-
Select Finish.
-
Right click on the newly created Relaying Party trust called “CitrixCloudProd” and select properties.
-
Select the Endpoints tab and click Add SAML.
-
Select the SAML logout from the endpoint type dropdown list.
-
Select the POST from the binding dropdown list.
-
Enter
https://saml.cloud.com/saml/logout/callback>into both Trusted URL: and Response URL: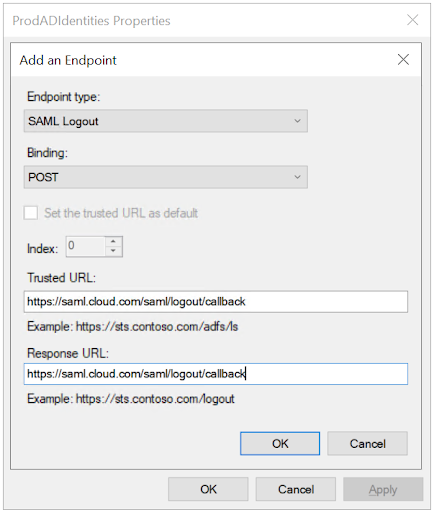
- Click OK and Apply.
Modify a Citrix Cloud relying party trust using PowerShell
If you’ve configured your ADFS server using the default “out of the box” configuration, the steps in this section enable you to update it so it meets the Citrix-recommended configuration. This task is required to resolve an issue where SAML Single Logout from Citrix Cloud or the store fails if the nameidentifier attribute isn’t included in the claim rule set or isn’t the first SAML attribute in the claim rule set.
Note:
You don’t need to perform this task if you created your claim rule set using the steps in Configure a relying party trust for Citrix Cloud in this article.
To complete this task, you replace the existing rule set with a new claim rule set using PowerShell. The ADFS management console doesn’t support this type of operation.
- On the ADFS server, locate the PowerShell ISE. Right-click and select Run as administrator.
-
Back up your existing ADFS claim rules to a text file:
Get-ADFSRelyingPartyTrust -name "CitrixCloudProd" | Select-Object -ExpandProperty IssuanceTransformRules | Out-File "$env:USERPROFILE\desktop\claimrulesbackup.txt" <!--NeedCopy--> - Download the claimrules.txt file that Citrix provides at https://github.com/citrix/sample-scripts/tree/master/citrix-cloud.
- Copy the claimrules.txt file to your desktop.
-
Import the required claim rules using the claimrules.txt file:
Set-ADFSRelyingPartyTrust -Name "CitrixCloudProd" `
                      -MetadataUrl "https://saml.cloud.com/saml/metadata" `
                      -AutoUpdateEnabled $True `
                      -IssuanceTransformRulesFile "$env:USERPROFILE\desktop\claimrules.txt" `
                      -SignedSamlRequestsRequired $True `
                      -SamlResponseSignature "MessageAndAssertion" `
                      -Enabled $True
<!--NeedCopy-->
Update SAML signing settings for the relying party trust using PowerShell
By default, ADFS relying party trusts have the following settings:
- EncryptClaims: True
- SignedSamlRequestsRequired: False
- SamlResponseSignature: AssertionOnly
For increased security, Citrix recommends using signed SAML requests for both Single Sign-on (SSO) and Single Logout. This section describes how to update the signing settings of an existing relying party trust using PowerShell so they meet the Citrix-recommended configuration.
-
Obtain the current RelyingPartyTrust configuration on your ADFS server.
Get-ADFSRelyingPartyTrust -TargetName "CitrixCloudProd" <!--NeedCopy--> -
Update the CitrixCloudProd relying party trust settings.
Set-ADFSRelyingPartyTrust -Name "CitrixCloudProd" `
                      -SignedSamlRequestsRequired $True `
                      -SamlResponseSignature "MessageAndAssertion"
<!--NeedCopy-->
SAML configuration in Citrix Cloud
When you configure the SAML connection in Citrix Cloud (as described in Add SAML provider metadata to Citrix Cloud), you’ll enter the values for ADFS as follows:
Use the default recommended values for the SAML connection within Identity and Access Management > Authentication > Add an identity provider > SAML.
| In this field in Citrix Cloud | Enter this value |
|---|---|
| Entity ID |
https://adfs.YourDomain.com/adfs/services/trust, where YourDomain.com is your ADFS server domain. |
| Sign Authentication Request | Yes |
| SSO Service URL |
https://adfs.YourDomain.com/adfs/ls, where YourDomain.com is your ADFS server domain. |
| SSO Binding Mechanism | HTTP Post |
| SAML Response | Sign Either Response Or Assertion |
| Authentication Context | Unspecified, Exact |
| Logout URL |
https://adfs.YourDomain.com/adfs/ls, where YourDomain.com is your ADFS server domain. |
| Sign Logout Request | Yes |
| SLO Binding Mechanism | HTTP Post |
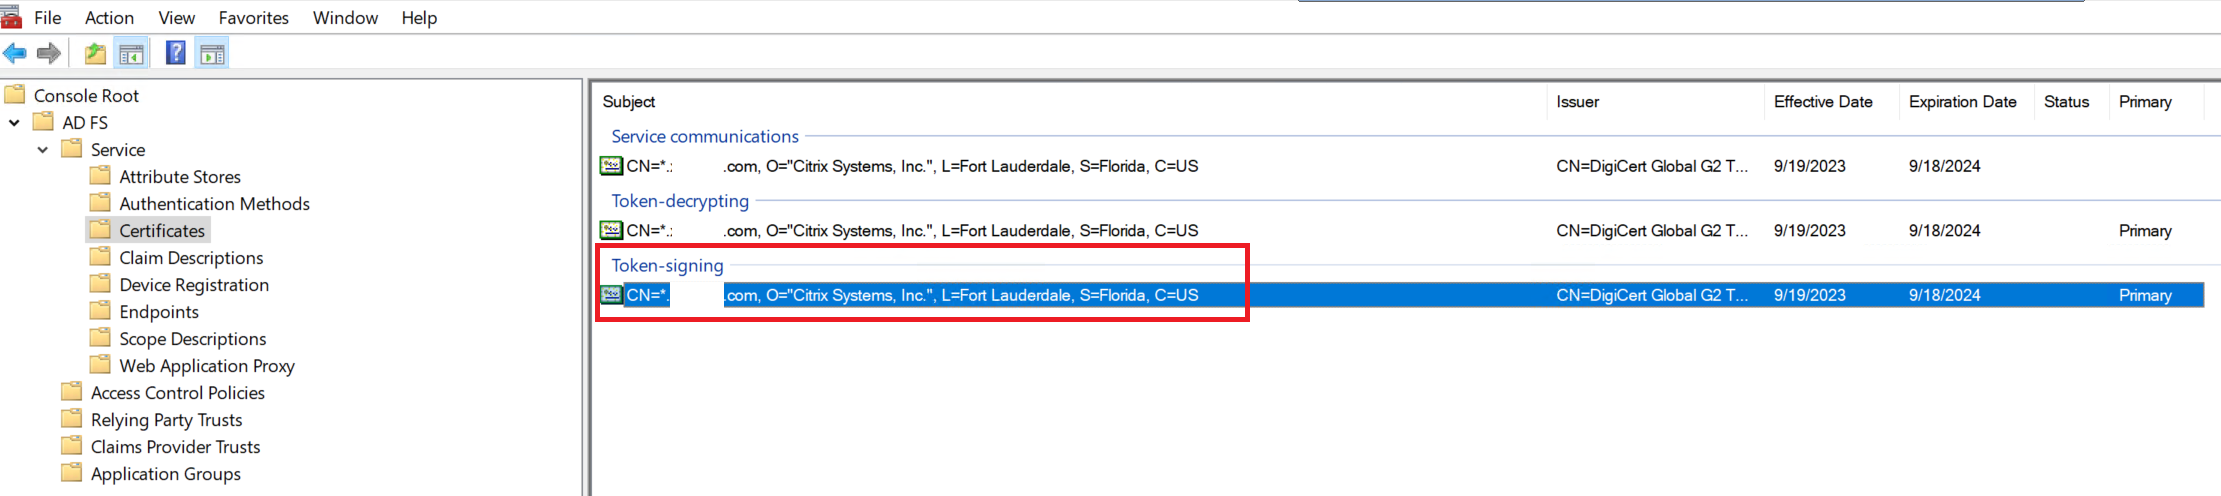
Export the ADFS signing certificate from within the MMC ADFS management console. See the screen shot below for which of the 3 certificates is the correct one to upload into Citrix Cloud within the SAML connection.