Email based discovery
Email based discovery service allows end users to sign in automatically to the store on their Citrix Workspace™ app using their email addresses. Thus, users don’t need to enter their store URLs.
Setup email based discovery for cloud stores
To enable email based discovery for cloud stores, do the following steps:
Claim a domain
To claim a domain:
- Sign in to Citrix Cloud.
- Navigate to Workspace configuration > Email Discovery.
- Click Add Domain.
-
Enter the domain that you want to claim (For example,
ace.example.com).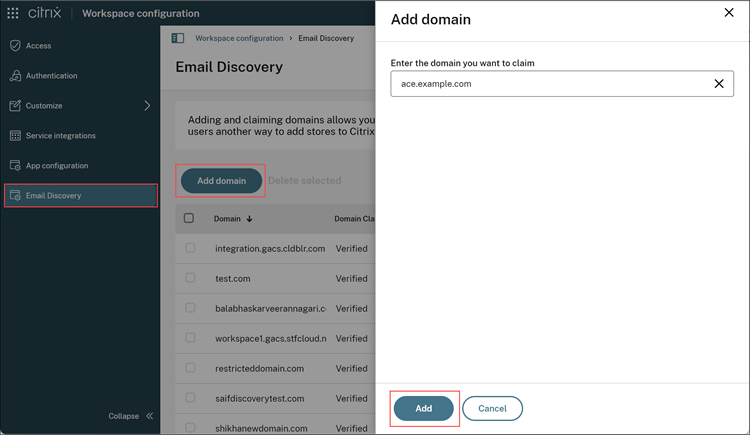
-
Click Add.
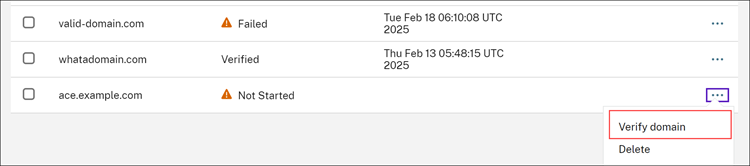
You can see the domain is added on the Email Discovery page.
The domain claim status is shown as Not Started. You need to verify the domain as shown in the following steps:
-
Click the ellipsis menu (…), and then select Verify domain.
-
Copy the DNS token displayed on the screen, and click Start Check.
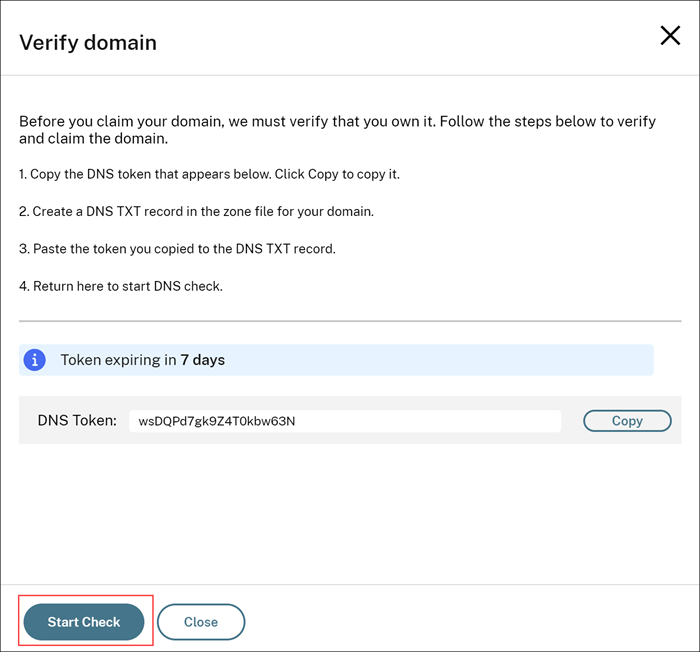
The status of your domain changes to Pending.
Once the verification is completed, the status of your domain changes from Pending to Verified.
Note:
You can claim a maximum of 10 domains. If you want to claim more than 10 domains, contact Citrix Support and provide your Customer ID.
Create a domain to URL mapping
Once the domain is verified, you can map URLs as shown in the following steps:
- Navigate to Workspace configuration > Email Discovery.
-
Go to the domain that you have added and click the mapped store URL.

-
Select the claimed URLs from the dropdown menu.
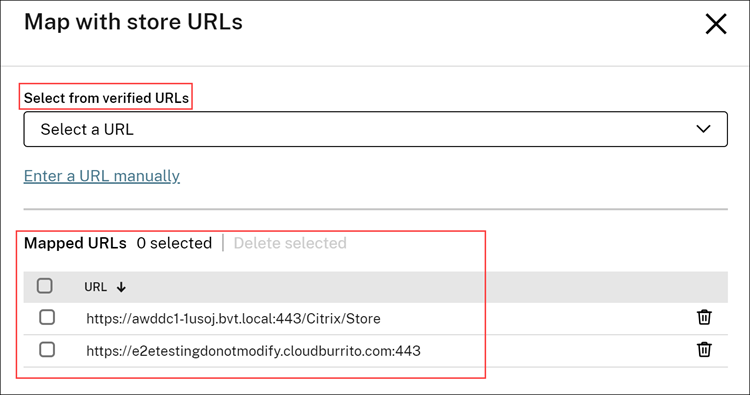
- Click Save.
Alternatively, you can map a URL manually using the Enter a URL manually option. For that:
-
Click the Enter a URL manually option.
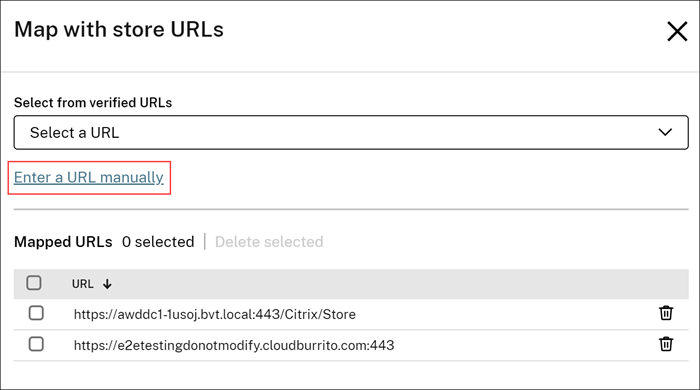
- Enter the store URL that you want to map to this domain.
- Click Add.
Note:
It is mandatory to include port number 443 in the store URL. For example,
https://example.cloud.com:443.
Setup email-based discovery for on-premises stores
To enable email-based discovery for on-premises stores, you need to perform the following steps:
Claim a domain
To claim a domain:
- Go to the AutoDiscovery service.
- Navigate to Claims > Domains > Add Domain.
- Enter the domain that you want to claim (for example, ace.example.com).
- Click Confirm.
- Copy the DNS token that appears on the screen to the clipboard.
- To create a DNS TXT record, go to the service-provider portal and add the DNS token.
-
To start the verification process:
- Navigate to Claims > Domains.
- Go to the domain that you added and click the ellipsis menu.
- Select Verify Domain.
- Click Start DNS Check.
Once the verification is completed, the status of your domain changes from pending to verified.
Note:
You can claim a maximum of 10 domains. If you want to claim more than 10 domains, contact Citrix Support and provide your Customer ID and URL.
Create a domain to URL mapping
To create a domain to URL mapping:
- Navigate to Claims > Domains.
- Go to the domain that you added and click the ellipsis menu.
- Click Add Another Server URL.
- Enter the store URL that you want to map to this domain and save.
Note:
It is mandatory to include port number 443 in the store URL. For example,
https://storefront.example.com:443.