Deploy in the cloud
This page deploys the Citrix SecurSpaces™ 1-Click VM to AWS, Azure or Google Cloud. The installer creates the VM, installs the platform, and configures DNS and TLS certificates.
Prerequisites
- Docker on your local machine.
- Credentials for AWS, Azure or Google Cloud, with the permissions in Cloud permissions.
- On AWS or Google Cloud, inbound access to the ports in Open the required ports.
- An administrator email address.
- A machine capacity. See Sizing.
Open the required ports
The VM needs three inbound ports:
| Port | Used for |
|---|---|
| 443 | The SecurSpaces console and the Cloud IDE, over HTTPS |
| 2222 | SSH connections from local IDEs to workspaces |
| 22 | SSH access to the VM itself, for administration |
What you have to do depends on the cloud provider.
Azure. No action needed. The installer creates a network security group that allows all three ports from any address.
AWS. Open the ports yourself. The installer does not create a security group, so the VM uses the default security group of your default VPC, which does not allow inbound traffic from the internet. Before you deploy, add inbound rules for TCP ports 443, 2222, and 22 to that security group.
GCP. Open the ports yourself. The installer does not create firewall rules. It places the VM on the
default network with the network tag https-server. Before you deploy, create firewall rules on the
default network that allow TCP ports 443, 2222, and 22 to instances with the https-server tag.
Warning:
Allow these ports only from the addresses your evaluators connect from, rather than from any address. On Azure, the rules the installer creates allow any address; restrict their source after deployment if your security policy requires it.
Cloud permissions
The installer deploys with the cloud identity you sign in with when it prompts for cloud credentials. That identity needs permission to create the VM and the resources around it. What it needs depends on the cloud provider.
Opening the ports in Open the required ports on AWS or GCP is a separate, manual step. Whoever does it needs permission to change the security group or create firewall rules, which the permissions below do not include.
Azure
Sign in with a user account or a service principal. It needs permission to create the VM, its network, and a load balancer.
The installer asks for a resource group, and suggests strong-network-demo-rg. If the resource group
already exists, the installer uses it. If it does not, the installer creates it. Which scope you grant
depends on that:
| Resource group | Grant the role at |
|---|---|
| Already exists | The resource group |
| Created by the installer | The subscription |
To avoid granting a role on the whole subscription, create the resource group yourself first and grant the role on it.
Choose one of the following.
Built-in role. Assign Contributor at the scope from the table. This is the simplest option.
Narrower built-in roles. Assign both Virtual Machine Contributor and Network Contributor at that scope. The installer creates no storage account, so no storage role is needed.
Custom role. For the fewest permissions, create a custom role with these actions and assign it at that
scope. Replace {subscription-id} with your subscription ID:
{
    "Name": "SecurSpaces 1-Click VM deployer",
    "IsCustom": true,
    "Description": "Deploy a SecurSpaces 1-Click VM",
    "Actions": [
        "Microsoft.Compute/virtualMachines/*",
        "Microsoft.Compute/disks/*",
        "Microsoft.Compute/virtualMachines/extensions/*",
        "Microsoft.Network/virtualNetworks/*",
        "Microsoft.Network/publicIPAddresses/*",
        "Microsoft.Network/networkInterfaces/*",
        "Microsoft.Network/networkSecurityGroups/*",
        "Microsoft.Network/loadBalancers/*",
        "Microsoft.Resources/resourceGroups/*",
        "Microsoft.Resources/subscriptions/resourceGroups/read"
    ],
    "NotActions": [],
    "DataActions": [],
    "NotDataActions": [],
    "AssignableScopes": ["/subscriptions/{subscription-id}"]
}
<!--NeedCopy-->
For example, to assign the narrower built-in roles to a service principal on an existing resource group:
az role assignment create \
  --assignee <service-principal-id> \
  --role "Virtual Machine Contributor" \
  --scope "/subscriptions/<subscription-id>/resourceGroups/<resource-group-name>"

az role assignment create \
  --assignee <service-principal-id> \
  --role "Network Contributor" \
  --scope "/subscriptions/<subscription-id>/resourceGroups/<resource-group-name>"
<!--NeedCopy-->
AWS
The identity needs permission to create an EC2 instance, a key pair, and an Elastic IP address. The installer creates no security group and attaches no IAM role to the VM, so neither security group nor IAM permissions are needed.
Choose one of the following.
Managed policy. Attach AmazonEC2FullAccess. This is the simplest option.
Custom policy. For the fewest permissions, attach a policy with these actions:
{
    "Version": "2012-10-17",
    "Statement": [
        {
            "Effect": "Allow",
            "Action": [
                "ec2:RunInstances",
                "ec2:TerminateInstances",
                "ec2:DescribeInstances",
                "ec2:DescribeInstanceStatus",
                "ec2:DescribeInstanceTypes",
                "ec2:DescribeImages",
                "ec2:DescribeAvailabilityZones",
                "ec2:CreateKeyPair",
                "ec2:DeleteKeyPair",
                "ec2:DescribeKeyPairs",
                "ec2:AllocateAddress",
                "ec2:ReleaseAddress",
                "ec2:AssociateAddress",
                "ec2:DisassociateAddress",
                "ec2:DescribeAddresses",
                "ec2:CreateTags",
                "ec2:DescribeTags",
                "ec2:DescribeVolumes",
                "ec2:CreateVolume",
                "ec2:DeleteVolume",
                "ec2:AttachVolume",
                "ec2:DetachVolume"
            ],
            "Resource": "*"
        }
    ]
}
<!--NeedCopy-->
GCP
The identity needs permission to create a Compute Engine instance and a static external IP address in the project you select. The installer attaches no service account to the VM, so no service account permissions are needed.
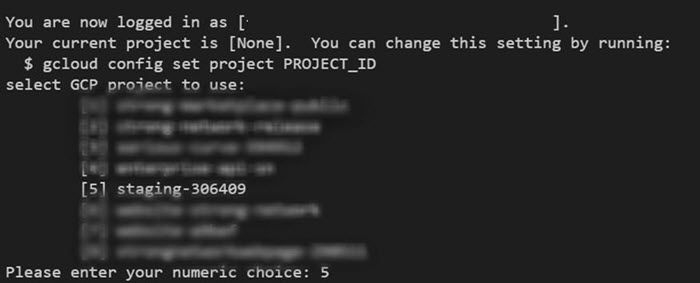
The installer also lists your projects so you can pick one, and checks that the Compute Engine API is enabled in it. If the API is not enabled, the installer tries to enable it.
Choose one of the following.
Predefined roles. Grant Compute Admin (roles/compute.admin). This is the simplest option. For
narrower access, grant Compute Instance Admin (v1) (roles/compute.instanceAdmin.v1) and Compute
Network User (roles/compute.networkUser) instead.
Custom role. For the fewest permissions, create a role with these permissions:
{
    "title": "SecurSpaces 1-Click VM deployer",
    "description": "Deploy a SecurSpaces 1-Click VM on GCP",
    "stage": "GA",
    "includedPermissions": [
        "compute.instances.create",
        "compute.instances.delete",
        "compute.instances.get",
        "compute.instances.list",
        "compute.instances.setMetadata",
        "compute.instances.setTags",
        "compute.instances.start",
        "compute.instances.stop",
        "compute.addresses.create",
        "compute.addresses.delete",
        "compute.addresses.get",
        "compute.addresses.list",
        "compute.addresses.use",
        "compute.disks.create",
        "compute.disks.delete",
        "compute.disks.get",
        "compute.disks.list",
        "compute.disks.use",
        "compute.images.get",
        "compute.images.list",
        "compute.images.useReadOnly",
        "compute.zones.get",
        "compute.zones.list",
        "compute.regions.get",
        "compute.regions.list",
        "compute.machineTypes.get",
        "compute.machineTypes.list",
        "compute.networks.get",
        "compute.subnetworks.use",
        "compute.subnetworks.useExternalIp",
        "resourcemanager.projects.get",
        "serviceusage.services.list"
    ]
}
<!--NeedCopy-->
Whichever option you choose, the identity also needs serviceusage.services.list, so the installer can
confirm the Compute Engine API is enabled. Without it, the installer cannot tell that the API is enabled and
keeps asking you to enable it. If the API is not yet enabled, enable it yourself before you deploy, or grant
serviceusage.services.enable so the installer can do it.
Run the installer
-
Create a directory for the deployment files and run the installer in it:
mkdir -p ~/sds-cloud-deployment
cd ~/sds-cloud-deployment
docker run -it --rm -v ${PWD}:/strong-network/shared strongnetwork/strong_installer:<version>
<!--NeedCopy-->
Replace
<version>with the release to deploy, for example2026.9.1. -
At the
sds-cliprompt, enter:deploy-demo <!--NeedCopy--> -
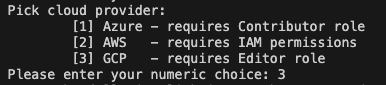
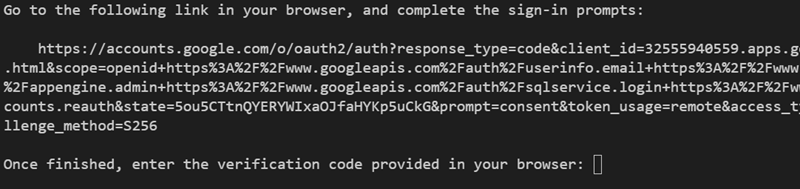
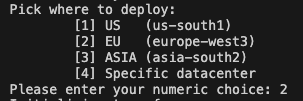
Complete the prompts:
Prompt Enter Administrator credentials Email address and password VM size Your machine capacity Cloud provider AWS, Azure or GCP Cloud credentials Your cloud identity. For GCP, select a project from the list. Region US, EU or Asia, or a specific datacenter 

-
Wait for the installer to finish. Note the platform URL and the administrator credentials it displays.
Caution:
The installer output and the deployment directory contain credentials and cloud state. Store them privately, and keep the directory: you need it to remove the cloud resources.
The VM is running and the platform URL is available.
Next step
Continue with Validate the deployment.