This content has been machine translated dynamically.
Dieser Inhalt ist eine maschinelle Übersetzung, die dynamisch erstellt wurde. (Haftungsausschluss)
Cet article a été traduit automatiquement de manière dynamique. (Clause de non responsabilité)
Este artículo lo ha traducido una máquina de forma dinámica. (Aviso legal)
此内容已经过机器动态翻译。 放弃
このコンテンツは動的に機械翻訳されています。免責事項
이 콘텐츠는 동적으로 기계 번역되었습니다. 책임 부인
Este texto foi traduzido automaticamente. (Aviso legal)
Questo contenuto è stato tradotto dinamicamente con traduzione automatica.(Esclusione di responsabilità))
This article has been machine translated.
Dieser Artikel wurde maschinell übersetzt. (Haftungsausschluss)
Ce article a été traduit automatiquement. (Clause de non responsabilité)
Este artículo ha sido traducido automáticamente. (Aviso legal)
この記事は機械翻訳されています.免責事項
이 기사는 기계 번역되었습니다.책임 부인
Este artigo foi traduzido automaticamente.(Aviso legal)
这篇文章已经过机器翻译.放弃
Questo articolo è stato tradotto automaticamente.(Esclusione di responsabilità))
Translation failed!
Install on a local VM
This page installs Citrix SecurSpaces™ on an Ubuntu VM or host that you have prepared. You run the installer on a separate machine, the installer host. It generates a deployment script that you run on the target host.
To prepare a VM first, see Prepare a XenServer VM or Prepare a Hyper-V VM.
Prerequisites
- A target host that meets the 1-Click VM requirements, with no Docker, Kubernetes or K3s installed.
- An installer host with Docker, outbound HTTPS access to Docker Hub, and 20 GB of free disk space.
- An administrator email address.
- A machine capacity. See Sizing.
Check the target host
-
On the target host, run:
cat /etc/os-release grep -o 'avx[^ ]*' /proc/cpuinfo | head -1 free -h df -h / hostname -I <!--NeedCopy--> - Check that:
- The operating system is Ubuntu 22.04 or 24.04.
- The AVX command returns output. If it does not, use a different host.
- The memory and disk match your machine capacity.
- Note the IP address that client devices will use.
Run the installer
-
On the installer host, create a private directory and run the installer in it:
mkdir -p ~/sds-local-deployment
cd ~/sds-local-deployment
docker run -it --rm -v ${PWD}:/strong-network/shared strongnetwork/strong_installer:<version>
<!--NeedCopy-->
Replace
<version>with the release to deploy, for example2026.9.1. On Windows, see Run later steps from Windows.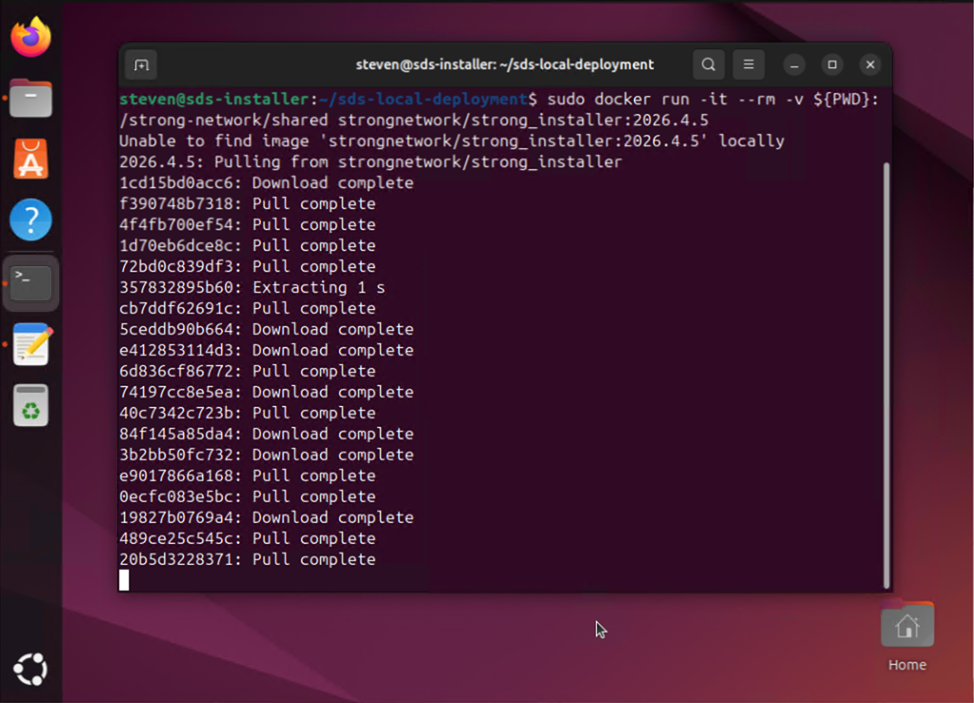
-
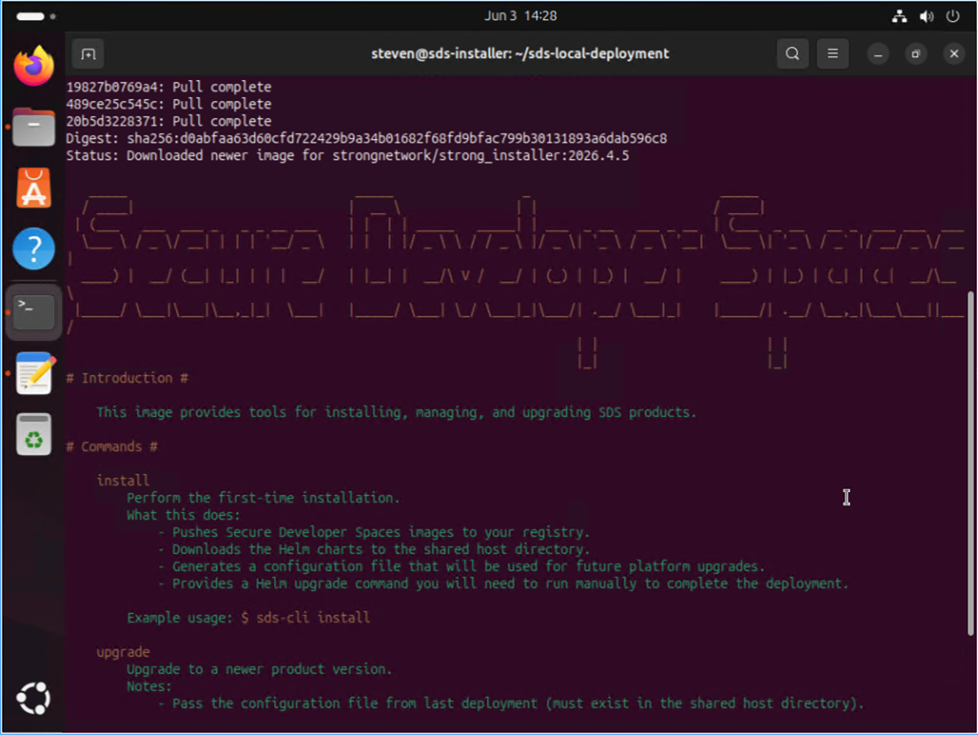
If the installer offers a newer version, select No to stay on the version you chose.
The sds-cli prompt opens. It accepts SecurSpaces CLI subcommands only. See
SDS CLI.
Generate the deployment script
-
At the
sds-cliprompt, enter this command on one line:deploy-demo --deployment-location=local <!--NeedCopy-->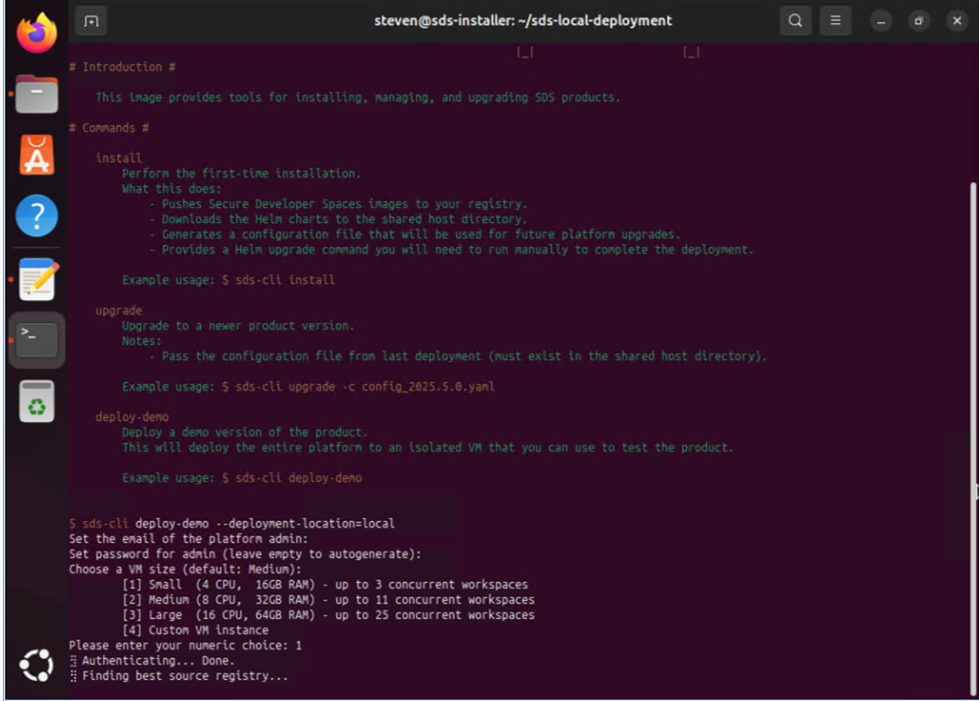
-
Complete the prompts:
Prompt Enter Administrator email The address you sign in with Administrator password A strong password, or leave empty to generate one Machine capacity The capacity that matches the target host. The default is Medium. Region 1 US, 2 EU or 3 Asia 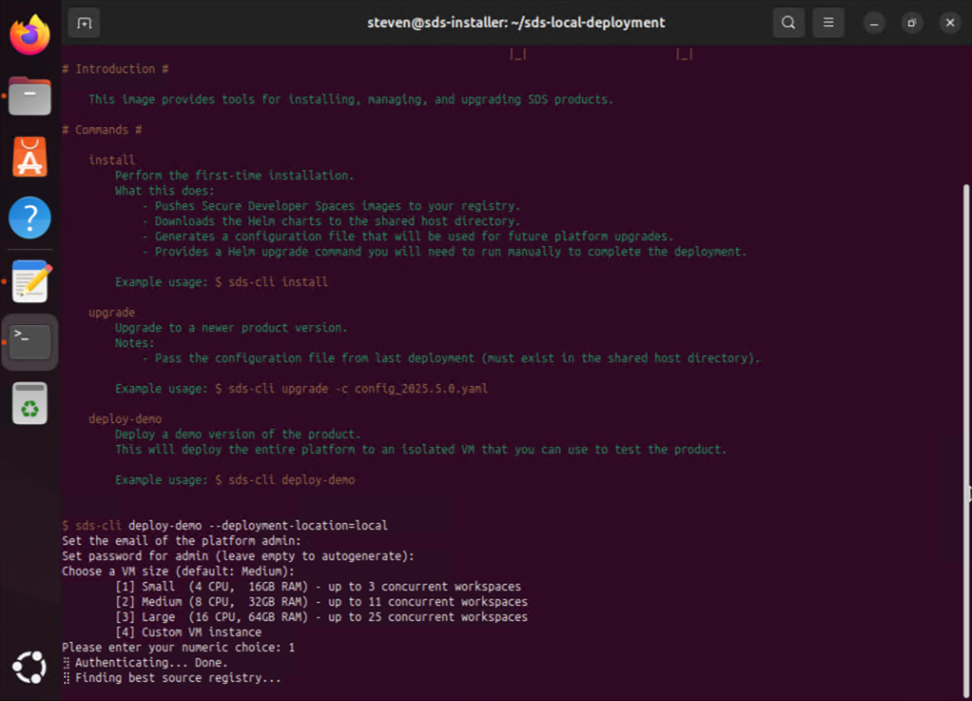
- Under Generated Local Deployment Script, copy the script from
#!/bin/bashup to, but not including, the separator line. - Save it on the installer host as
deploy.sh, in UTF-8 without BOM and with LF line endings. - Note the assigned URL, for example
<name>.try.sds.citrix.com, and the administrator credentials.
Caution:
The script and the installer output contain secrets. Store them privately.
Leave the installer open for the next step.
Associate the IP address with DNS
Important:
Complete this step within 1 hour of generating the script. You can run the script at the same time.
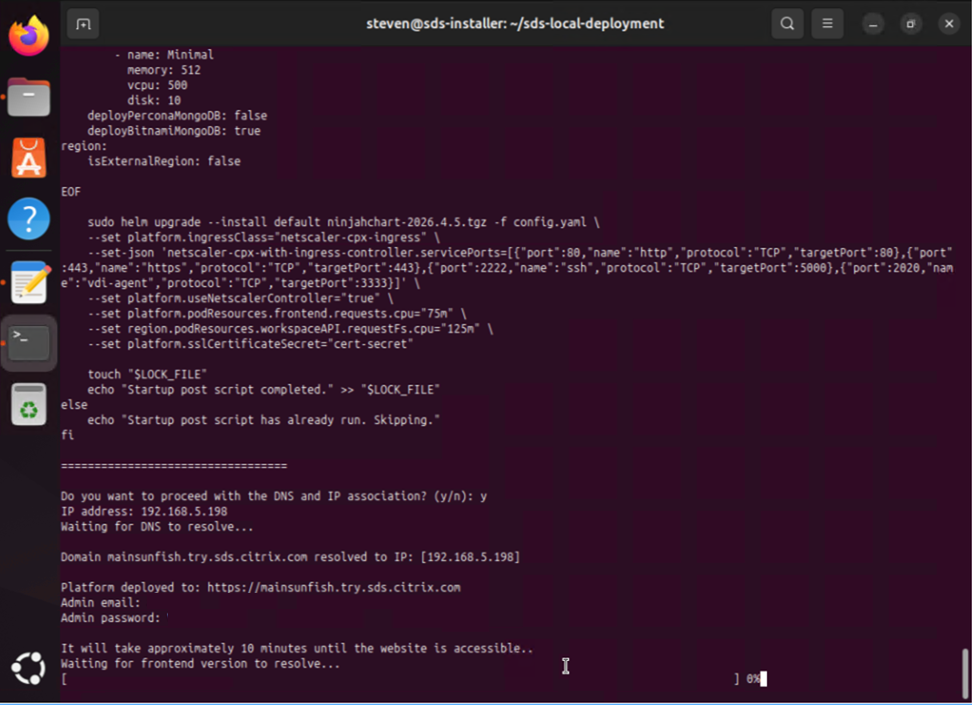
- When the installer asks whether to proceed with the DNS and IP association, enter
y. -
Enter the target host’s IP address.
-
From a client device, check that the assigned hostname resolves to that address:
nslookup <name>.try.sds.citrix.com
<!--NeedCopy-->
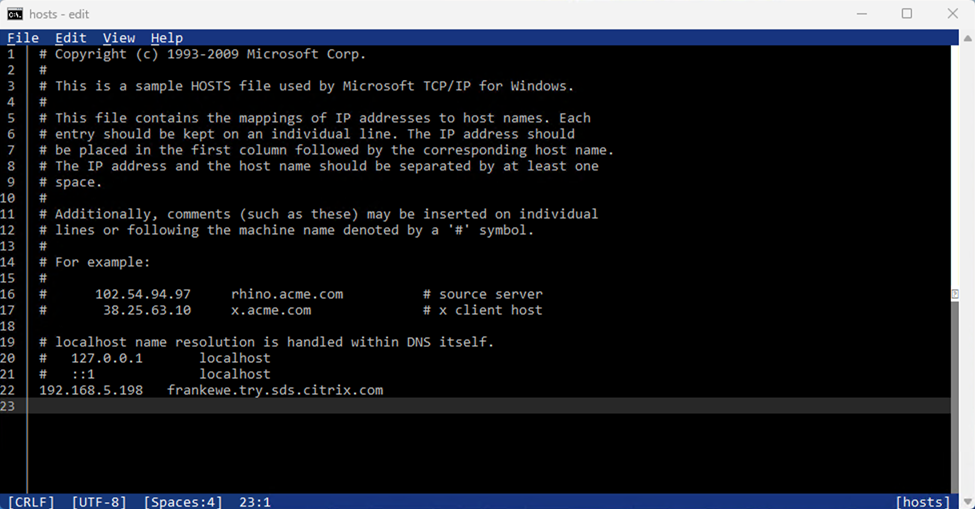
If client devices cannot resolve the hostname, add a record to their DNS server, or add this line to the hosts file on each client device:
<host-ip>  <name>.try.sds.citrix.com
<!--NeedCopy-->
Run the deployment script
-
Copy
deploy.shto the target host, and connect to it:scp deploy.sh <user>@<host-ip>:~/deploy.sh ssh <user>@<host-ip> <!--NeedCopy--> -
On the target host, restrict the file’s permissions and run it:
chmod 600 ~/deploy.sh
sudo sh -c 'umask 077; exec bash ~/deploy.sh'
<!--NeedCopy-->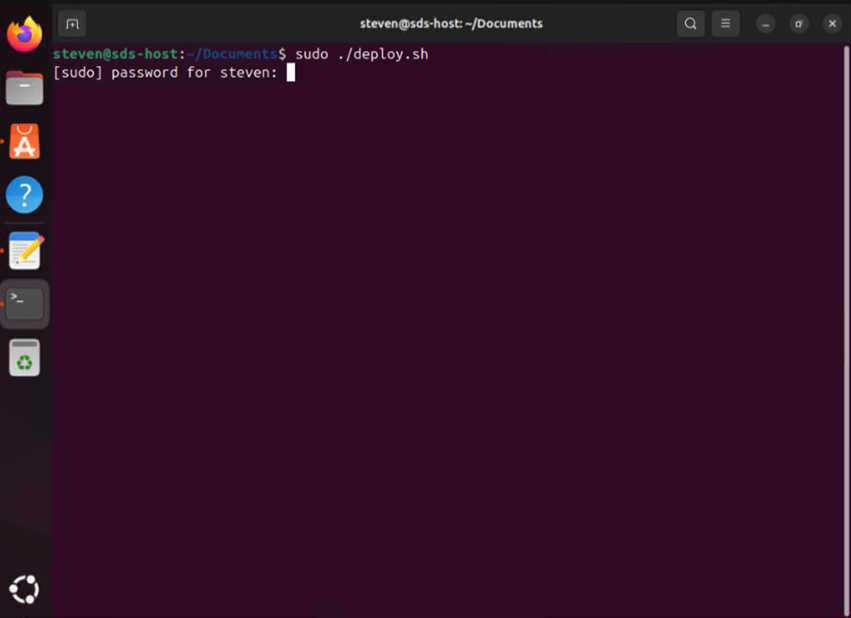
-
When the script finishes, check the cluster:
sudo kubectl get nodes
sudo kubectl get pods -A
<!--NeedCopy-->
Wait until the node is
Readyand every pod shows all its containers ready in the READY column.
Wait for initialization
A background job applies the evaluation license and creates sample data after the script finishes.
-
Find the job and follow its log:
sudo kubectl get jobs sudo kubectl logs job/<job-name> <!--NeedCopy--> -
Wait for
One Click VM Demo Data Successfully Initialized.in the log.
Caution:
Until initialization finishes, the setup wizard can show a License step with Community selected. Do not select Community. Wait, then reload the page.
Troubleshooting
| Issue | Resolution |
|---|---|
| The installer container does not start | Make sure Docker is running and can reach Docker Hub. |
unknown command at the sds-cli prompt |
Enter the subcommand on one line, without sds-cli, a path or line-continuation characters. |
| The script fails immediately | Make sure deploy.sh contains only the script, starts with #!/bin/bash, and uses LF line endings without BOM. |
| The script fails later | The target host is not clean. Restore a clean snapshot or reinstall Ubuntu, then run the script again. |
| The platform URL does not resolve | Check the DNS record or hosts file. If more than 1 hour has passed, run the installer again to generate a new script. |
Next step
Continue with Validate the deployment.
Share
Share
This Preview product documentation is Citrix Confidential.
You agree to hold this documentation confidential pursuant to the terms of your Citrix Beta/Tech Preview Agreement.
The development, release and timing of any features or functionality described in the Preview documentation remains at our sole discretion and are subject to change without notice or consultation.
The documentation is for informational purposes only and is not a commitment, promise or legal obligation to deliver any material, code or functionality and should not be relied upon in making Citrix product purchase decisions.
If you do not agree, select I DO NOT AGREE to exit.