应用商店配置
应用商店
本文档是一份参考文档,旨在帮助您在安装 Citrix Workspace 应用程序后设置环境。
-
应用商店将用户的可用应用程序和桌面聚合到一个位置。用户可以拥有多个应用商店,并根据需要进行切换。管理员提供包含预配置资源和设置的应用商店 URL。您可以通过 Citrix Workspace 应用程序访问这些应用商店。
-
应用商店类型
您可以在 Citrix Workspace 应用程序中添加以下应用商店类型:
StoreFront™
StoreFront 是一种本地服务器,它将已发布的虚拟应用程序和桌面、Web 和 SaaS 应用程序聚合到一个易于用户使用的应用商店中。有关详细信息,请参阅 StoreFront 文档。
Citrix Workspace 应用程序可以直接连接到 StoreFront,也可以通过 Citrix Gateway 连接。
-
Citrix Workspace™
- Citrix Workspace 是一种云服务,提供与 StoreFront 类似的功能,由 Citrix 作为服务进行管理。有关详细信息,请参阅 Citrix Workspace 概述。
自定义 Web 应用商店
此功能允许从适用于 Windows 的 Citrix Workspace 应用程序访问您组织的自定义 Web 应用商店。要使用此功能,管理员必须将域或自定义 Web 应用商店添加到全局应用程序配置服务允许的 URL 中。
-
有关为最终用户配置自定义 Web 应用商店 URL 的详细信息,请参阅 全局应用程序配置服务。
- 您可以在 Citrix Workspace 应用程序的“添加帐户”屏幕中提供自定义 Web 应用商店 URL。自定义 Web 应用商店将在本机 Citrix Workspace 应用程序窗口中打开。
-
要删除自定义 Web 应用商店,请转至“帐户”>“添加或删除帐户”,选择自定义 Web 应用商店 URL,然后单击“删除”。
将应用商店添加到 Citrix Workspace 应用程序
您可以使用以下方法向用户提供访问虚拟应用程序和桌面所需的帐户信息:
- [向用户提供帐户信息以手动输入](#provide-users-with-account-information-to-enter-manually)
向用户提供帐户信息以手动输入
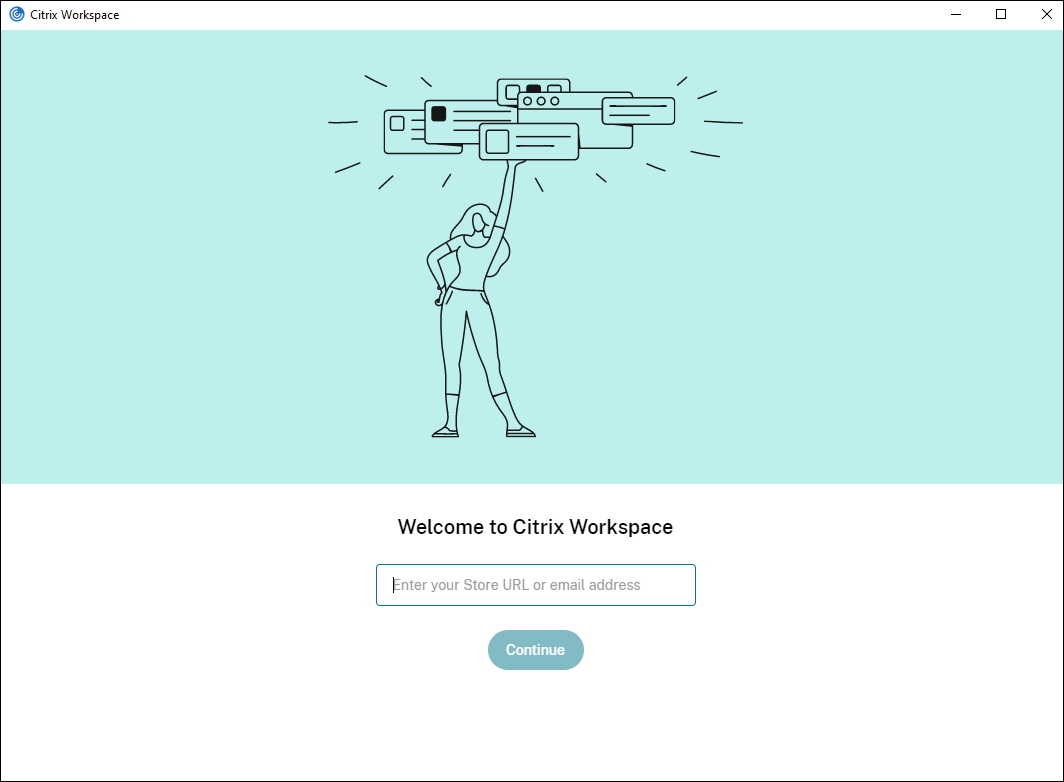
成功安装 Citrix Workspace 应用程序后,将显示以下屏幕。用户需要输入电子邮件或服务器地址才能访问应用程序和桌面。当用户输入新帐户的详细信息时,Citrix Workspace 应用程序会尝试验证连接。如果成功,Citrix Workspace 应用程序会提示用户登录帐户。
要使用户能够手动设置帐户,请务必分发连接到其虚拟应用程序和桌面所需的信息。
    -  要连接到 Workspace 应用商店,请提供 Workspace URL。
-  如果客户端无需通过 Citrix Gateway 即可访问 StoreFront 部署,则您有以下选项:
-  要显示服务器上所有非隐藏应用商店的列表供用户选择,请提供基本 URL。例如:`https://servername.company.com`。
-  要连接到特定应用商店,请提供应用商店 URL。例如:`https://servername.company.com/Citrix/Store`。请注意,这与应用商店网站 URL 不同。
-  如果用户必须通过 Citrix Gateway 连接到 StoreFront,则您有以下选项:
-  要显示为远程访问配置的所有应用商店,请提供 Citrix Gateway 完全限定域名。
-  要连接到特定应用商店,请向用户提供 Citrix Gateway 完全限定域名和应用商店名称,格式如下:

    **CitrixGatewayFQDN?MyStoreName:**

    例如,如果名为“SalesApps”的应用商店已为 `server1.com` 启用远程访问,并且名为 **HRApps** 的应用商店已为 `server2.com` 启用远程访问,则用户必须输入:

    -  `server1.com?SalesApps` 以访问 SalesApps,或
    -  `server2.com?HRApps` 以访问 **HRApps**。

    **CitrixGatewayFQDN?MyStoreName** 格式要求新用户通过输入 URL 来创建帐户,并且不适用于基于电子邮件的发现。
Citrix Workspace 应用程序配置了应用商店 URL 后,可以从配置文件菜单中的“帐户”选项管理该帐户。
在配置了代理身份验证的客户端计算机上,如果代理凭据未存储在 Windows 凭据管理器中,则会出现身份验证提示,要求您输入代理凭据。Citrix Workspace 应用程序随后会将代理服务器凭据保存在 Windows 凭据管理器中。这会带来无缝登录体验,因为您无需在访问 Citrix Workspace 应用程序之前手动将凭据保存在 Windows 凭据管理器中。
配置基于电子邮件的帐户发现
-  当您为基于电子邮件的帐户发现配置 Citrix Workspace 应用程序时,用户在首次安装和配置 Citrix Workspace 应用程序时输入其电子邮件地址,而不是服务器 URL。Citrix Workspace 应用程序从全局应用程序配置服务或 DNS 读取配置以查找应用商店 URL。

-  #### 全局应用程序配置服务
您可以使用全局应用程序配置服务配置电子邮件发现。有关详细信息,请参阅配置云应用商店设置或配置本地应用商店设置。
DNS SRV 记录
对于 StoreFront 应用商店,您可以使用 DNS SRV 记录来配置 Citrix Workspace 应用程序必须为电子邮件域使用哪个 StoreFront 服务器。
在您的电子邮件域的 DNS 服务器上,添加一个具有以下属性的 SRV 记录:
| 属性 | 值 |
|---|---|
| 服务 | _citrixreceiver |
| 协议 | TCP |
| 目标 | 您的 设备(支持本地和远程用户)或 StoreFront 服务器(仅支持本地用户)的完全限定域名 (FQDN) 和端口,格式为 servername.domain:port。 |
- 如果您的环境包含内部和外部 DNS 服务器,您可以在内部 DNS 服务器上添加一个指定 StoreFront 服务器 FQDN 的 SRV 记录,并在外部服务器上添加另一个指定 FQDN 的记录。通过此配置,本地用户将获得 StoreFront 详细信息,而远程用户将收到 连接信息。
DNS discoverReceiver 记录
对于 StoreFront 应用商店,作为其他方法的替代方案,您可以在电子邮件域上为 StoreFront 服务器 discoverReceiver 创建一个 DNS 别名。例如,如果您的电子邮件域是 example.com,请创建一个名为 discoverReceiver.example.com 的 DNS 别名。如果在指定域中未找到 SRV 记录,Citrix Workspace 应用程序将搜索名为 “discoverReceiver” 的计算机以识别 StoreFront 服务器。
如果您使用此机制,请确保 discoverReceiver 作为主题备用名称包含在您的 StoreFront 服务器的 HTTPS 证书中。
通过 CLI 添加应用商店
以管理员身份使用命令行界面安装适用于 Windows 的 Citrix Workspace 应用程序。
有关详细信息,请参阅命令行参数列表。
向用户提供预配文件
StoreFront 提供预配文件,用户可以打开这些文件以连接到应用商店。
您可以使用 StoreFront 创建包含帐户连接详细信息的预配文件。安装 Citrix Workspace 应用程序后,用户只需打开文件即可配置 Citrix Workspace 应用程序。有关详细信息,请参阅 StoreFront 文档中的为用户导出应用商店预配文件。
如果用户通过 Web 浏览器访问应用商店,他们可以自行前往帐户设置并下载预配文件。
使用组策略对象管理模板
要使用组策略对象管理模板添加或指定 Citrix StoreFront 或 Gateway:
- 通过运行
gpedit.msc打开 Citrix Workspace 应用程序组策略对象管理模板。 - 在计算机配置节点下,转到管理模板 > 经典管理模板 (ADM) > Citrix 组件 > Citrix Workspace > StoreFront。
- 选择Citrix Gateway URL/StoreFront 帐户列表。
- 选择已启用选项,然后单击显示。如果启用此策略设置,您可以输入 StoreFront 帐户和 NetScaler Gateway URL 列表。
- 在值字段中输入 URL。
-
指定与 Citrix Workspace 应用程序一起使用的应用商店 URL:
STORE0="storename;http[s]://storeurl/discovery;[On, Off]; [storedescription]"值:
-
storename- 用户为此应用商店看到的名称。 -
storeurl- 应用商店的 URL。 -
[On, Off]- 应用商店的启用状态。 -
storedescription- 用户为此应用商店看到的描述,例如 HR 应用商店。
-
-
添加或指定 Citrix Gateway URL。输入 URL 名称,以分号分隔:
示例:
STORE0= HRStore;https://ag.mycompany.com#Storename;On;Store在上述示例中,
#Storename是 Citrix Gateway 后面的应用商店名称。
注意:
- Citrix Gateway 应用商店 URL 必须位于列表中的第一位(参数 STORE0)。
- 在多应用商店设置中,只允许一个 Citrix Gateway 应用商店 URL 配置。
- 使用此方法配置的 Citrix Gateway 应用商店 URL 不支持使用 Citrix Gateway 的 PNA Services 站点。
- 指定 Citrix Gateway 应用商店 URL 时,不需要
/Discovery参数。
从版本 1808 开始,对 Citrix Gateway URL/StoreFront 帐户列表策略所做的更改将在应用程序重新启动后的会话中应用。无需重置。
注意:
Citrix Workspace 应用程序版本 1808 及更高版本在全新安装时不需要重置。如果升级到 1808 或更高版本,则必须重置 Citrix Workspace 应用程序才能使更改生效。
限制:
- Citrix Gateway URL 必须首先列出,然后是 StoreFront URL。
- 不支持多个 Citrix Gateway URL。
注意:
用户还可以使用 Web 浏览器访问应用商店。用户可以从 Web 浏览器登录 Citrix 应用商店,并从 Web 打开虚拟应用程序或桌面。虚拟应用程序或桌面的打开使用本机安装的 Citrix Workspace app 的功能。
在这种情况下,可能需要向用户隐藏“添加帐户”提示。这可以通过以下设置实现:
- 重命名 Citrix 可执行文件:将 CitrixWorkspaceApp.exe 重命名为 CitrixWorkspaceAppWeb.exe 以更改“添加帐户”对话框的行为。重命名文件后,“添加帐户”对话框不会从“开始”菜单中显示。
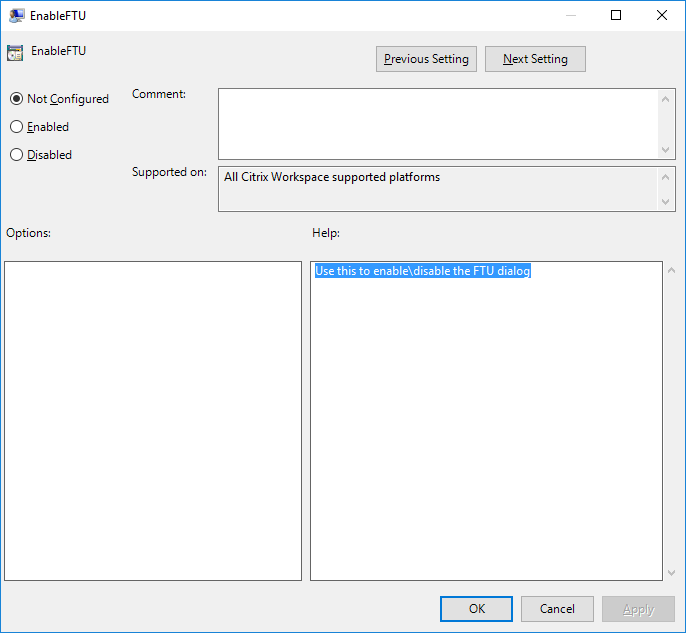
- 组策略对象管理模板:要从 Citrix Workspace app 安装向导中隐藏“添加帐户”选项,请在本地组策略对象管理模板中的“自助服务”节点下禁用 EnableFTUpolicy,如以下图像所示。这是一个每计算机设置,因此该行为适用于所有用户。
通过应用商店网站要求使用 Citrix Workspace app
您可以配置 StoreFront 和 Citrix Workspace,以便当用户在其浏览器中打开应用商店网站时,它会自动打开 Citrix Workspace app 并添加应用商店。
有关 Citrix Workspace 应用商店的详细信息,请参阅自定义应用商店访问。
有关 StoreFront 应用商店的详细信息,请参阅要求使用 Citrix Workspace app。
- 有关通过网关访问的 StoreFront 应用商店的详细信息,请参阅[通过网关连接时要求使用 Citrix Workspace app](/zh-cn/storefront/current-release/integrate-with-citrix-gateway-and-citrix-adc/require-app)。
域名服务名称解析
您可以配置适用于 Windows 的 Citrix Workspace app,使其使用 Citrix XML Service 请求服务器的域名服务 (DNS) 名称而不是 IP 地址。
重要:
除非您的 DNS 环境专门配置为使用此功能,否则 Citrix 建议您不要在服务器上启用 DNS 名称解析。
默认情况下,DNS 名称解析在服务器上禁用,在 Citrix Workspace app 上启用。当服务器上禁用 DNS 名称解析时,任何 Citrix Workspace app 对 DNS 名称的请求都会返回一个 IP 地址。无需在 Citrix Workspace app 上禁用 DNS 名称解析。
要为特定用户设备禁用 DNS 名称解析:
如果您的服务器部署使用 DNS 名称解析,并且您遇到特定用户设备的问题,则可以为这些设备禁用 DNS 名称解析。
注意:
- > 不正确地使用注册表编辑器可能会导致严重问题,可能需要重新安装操作系统。我们不保证可以解决因不正确使用注册表编辑器而导致的问题。请自行承担使用注册表编辑器的风险。在编辑注册表之前,请务必对其进行备份。
- 将字符串注册表项 xmlAddressResolutionType 添加到
HKEY\_LOCAL\_MACHINE\Software\Wow6432Node\Citrix\ICA Client\Engine\Lockdown Profiles\All Regions\Lockdown\Application Browsing。
-
- 将值设置为 IPv4-Port。
- 为用户设备的每个用户重复此操作。
连接
Citrix Workspace app 为用户提供对虚拟应用程序和桌面的安全自助访问,以及对 Windows、Web 和软件即服务 (SaaS) 应用程序的按需访问。Citrix StoreFront 或使用 Web Interface 创建的旧版网页管理用户访问。
使用 Citrix Workspace UI 连接到资源
Citrix Workspace app 主页显示根据用户帐户设置(即他们连接到的服务器)以及 Citrix Virtual Apps and Desktops 或 Citrix DaaS 管理员配置的设置可供用户使用的虚拟应用程序和桌面。使用“首选项”>“帐户”页面,您可以配置 StoreFront 服务器的 URL,或者,如果配置了基于电子邮件的帐户发现,则可以通过输入电子邮件地址进行配置。
连接到应用商店后,自助服务会显示以下选项卡:“收藏夹”、“桌面”和“应用程序”。要打开会话,请单击相应的图标。要将图标添加到“收藏夹”,请单击“…”图标并选择“添加到收藏夹”。
StoreFront 到 Workspace URL 迁移
StoreFront 到 Workspace URL 迁移使您能够以最少的用户交互,将最终用户从 StoreFront 应用商店无缝迁移到 Workspace 应用商店。
假设所有最终用户都在其 Citrix Workspace app 中添加了 StoreFront 应用商店 storefront.com。作为管理员,您可以在 Global App Configuration service 中配置 StoreFront URL 到 Workspace URL 的映射 {‘storefront.com’:’xyz.cloud.com’}。Global App Configuration service 会将此设置推送到所有已添加 StoreFront URL storefront.com 的 Citrix Workspace app 实例,无论这些设备是托管设备还是非托管设备。
检测到此设置后,Citrix Workspace app 会将映射的 Workspace URL xyz.cloud.com 添加为另一个应用商店。当最终用户启动 Citrix Workspace app 时,Citrix Workspace 应用商店会打开。以前添加的 StoreFront 应用商店 storefront.com 仍保留在 Citrix Workspace app 中。用户始终可以使用 Citrix Workspace app 中的“切换帐户”选项切换回 StoreFront 应用商店 storefront.com。管理员可以控制从用户端点的 Citrix Workspace app 中删除 StoreFront 应用商店 storefront.com。此删除可以通过 Global App Configuration service 完成。
要启用此功能,请执行以下步骤:
-
使用 Global App Configuration service 配置 StoreFront 到 Workspace 的映射。有关详细信息,请参阅 Global App Configuration service。
-
编辑应用程序配置服务中的有效负载:
{
 "serviceURL": {
"url": "https://storefront.acme.com:443",
"migrationUrl": [
  {
    "url": "https://sampleworkspace.cloud.com:443",
    "storeFrontValidUntil": "2023-05-01"
  }
 ]
},
"settings": {
"name": "Productivity Apps",
"description": "Provides access StoreFront to Workspace Migration",
"useForAppConfig": true,
"appSettings": {
  "windows": [
    {
      "category": "root",
      "userOverride": false,
      "assignmentPriority": 0,
      "assignedTo": [
        "AllUsersNoAuthentication"
     ],
      "settings": [
      {
       "name": "Hide advanced preferences",
        "value": false
      }
     ]
    }
   ]
  }
 }
}
<!--NeedCopy-->
Note:
If you’re configuring the payload for the first time, use
POST. If you’re editing the existing payload configuration, usePUTand check that you have the payload that consists of all the supported settings. -
Specify the StoreFront URL
storefront.comas the value for URL in the serviceURL section. -
Configure the Workspace URL
xyz.cloud.cominside the section migrationUrl. -
Use storeFrontValidUntil to set the timeline for the removal of the StoreFront store from the Citrix Workspace app. This field is optional. You can set the following value based on your requirement:
- Valid date in the format (YYYY-MM-DD)
Note:
If you have provided a past date, then the StoreFront store is removed immediately upon URL migration. If you have provided a future date, then the StoreFront store is removed on the set date.
- Valid date in the format (YYYY-MM-DD)
After the app config service settings are pushed, the following screen appears:
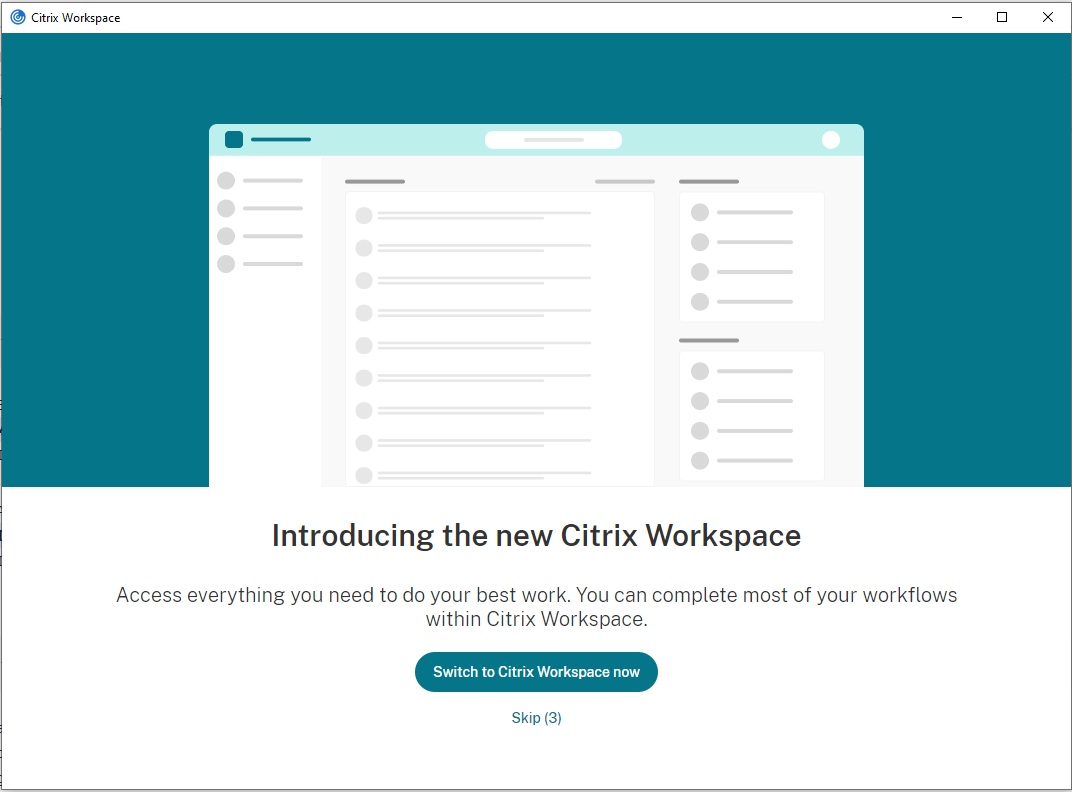
When the user clicks Switch to Citrix Workspace now, the Workspace URL is added to Citrix Workspace app and the authentication prompt appears. Users have a limited option to delay the transition up to three times.
Support for local app discovery within the Citrix Workspace app
Starting with the 2112.1 release, admins can configure the discovery and enumeration of locally installed apps within the Citrix Workspace app. You can configure this feature by using the Global App Configuration service. For more information, see Global App Configuration service. This feature is ideal for devices that runs in the kiosk mode and for those applications that can’t be virtualized within the Citrix Workspace.
Support for GACS claimed URLs for the US Gov region
Starting with version 2507, Citrix Workspace app supports discovery of Global App Config Service (GACS) claimed URLs for the US Gov region alongside commercial cloud deployments.
You can select the region from which Citrix Workspace app retrieves discovery endpoints using the GACS Discovery Region policy setting.
-
Open the Citrix Workspace app Group Policy Object administrative template by running
gpedit.msc. -
Under the Computer Configuration node, go to Administrative Templates > Citrix Components > Citrix Workspace > Global App Config Service.
-
Select the GACS Discovery Region option.

-
Select Enabled.
-
Select one of the following options:
- US Gov - Discovery endpoint uses the U.S. region.
- Default - Discovery endpoints uses the default global endpoint.
For more information, see the following: