Automatic connection of Citrix Infrastructure Monitor
The new automatic connection feature simplifies the onboarding process by automatically performing the following steps:
- Downloading and installing Citrix Infrastructure Monitor
- Validating connection
You only need to manually add the component details in the automatic connection. The manual connection process remains unchanged, requiring users to download the agent, install it on the target machine, and provide necessary details.
To accommodate this change, the UI now has the following two tabs:
- Automatic Connection
- Manual Connection
The automatic connection process includes a checkbox to ensure all prerequisites are met before entering credentials.
The goal of automatic connection is to make the onboarding process as seamless as possible for users.
Prerequisites
You can remotely install the Citrix Infrastructure Monitor service onto machines from the Director UI. Remote installation from the Director UI requires the following for the Provisioning Service and StoreFront™ machines:
- You must have Local admin privileges on the target machine where Citrix Infrastructure Monitor will be installed.
- WMI must be available on the target machine. Ensure that WMI is allowed through your firewall. For more details, refer to Setting up a Remote WMI Connection.
- RPC must be available on the target machine. The administrative shares (Admin$ and C$) must be accessible from the Delivery Controller™ machine.
- The target machine must have a resolvable DNS host name.
If these requirements cannot be met in your environment, refer to the Manual onboarding of Citrix Infrastructure Monitor.
Register Citrix Infrastructure Monitor automatically
You can register Citrix Infrastructure Monitor using the Director UI. Complete the registration on the Director UI using the following steps:
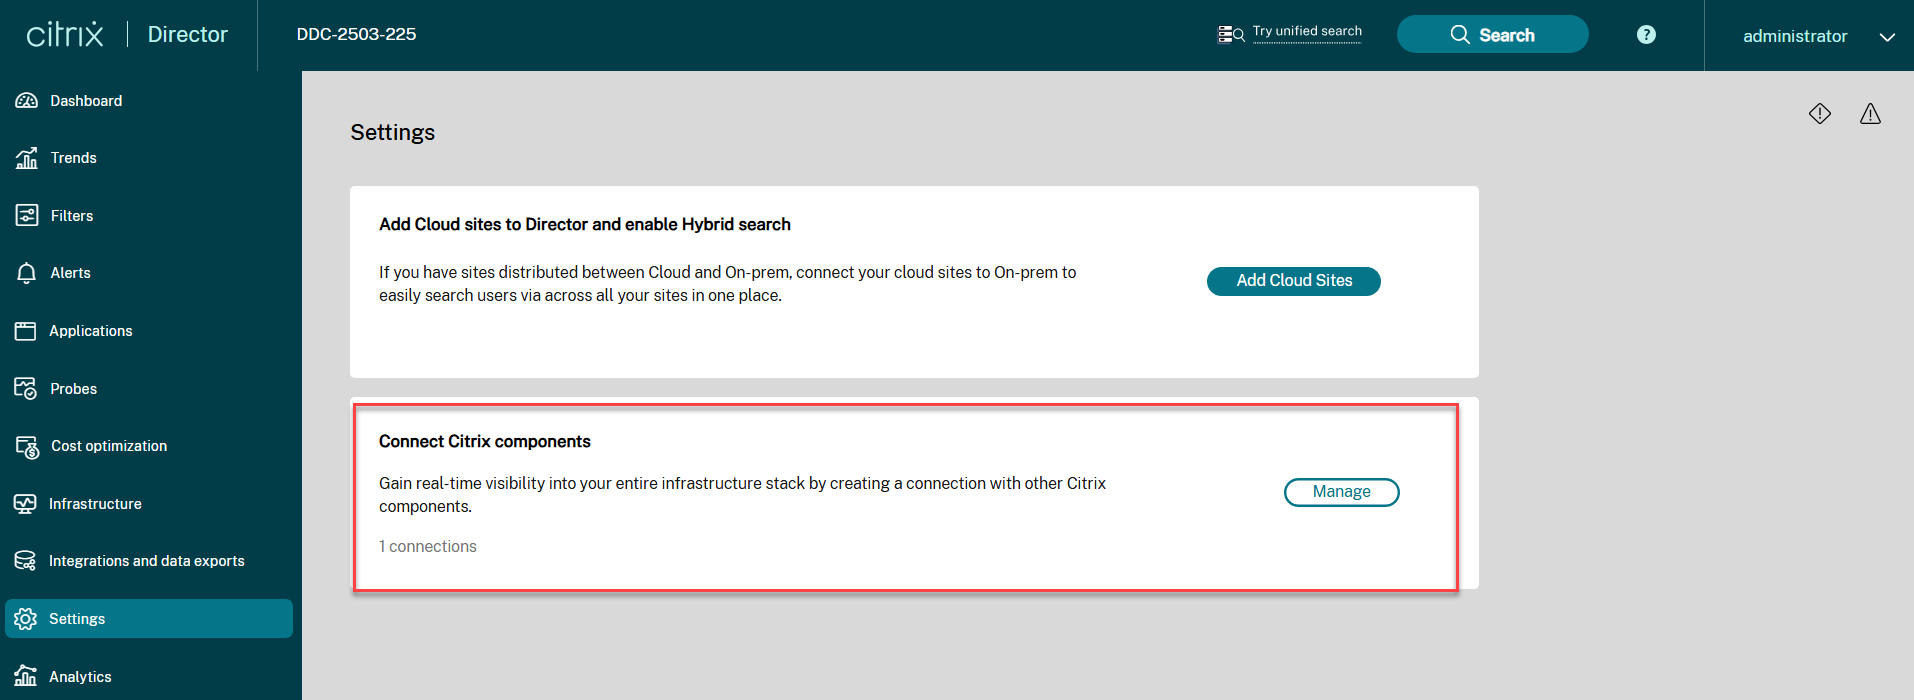
Step 1: Navigate to the Connect Citrix Components page
Click Settings > Connect Citrix Components > Manage.
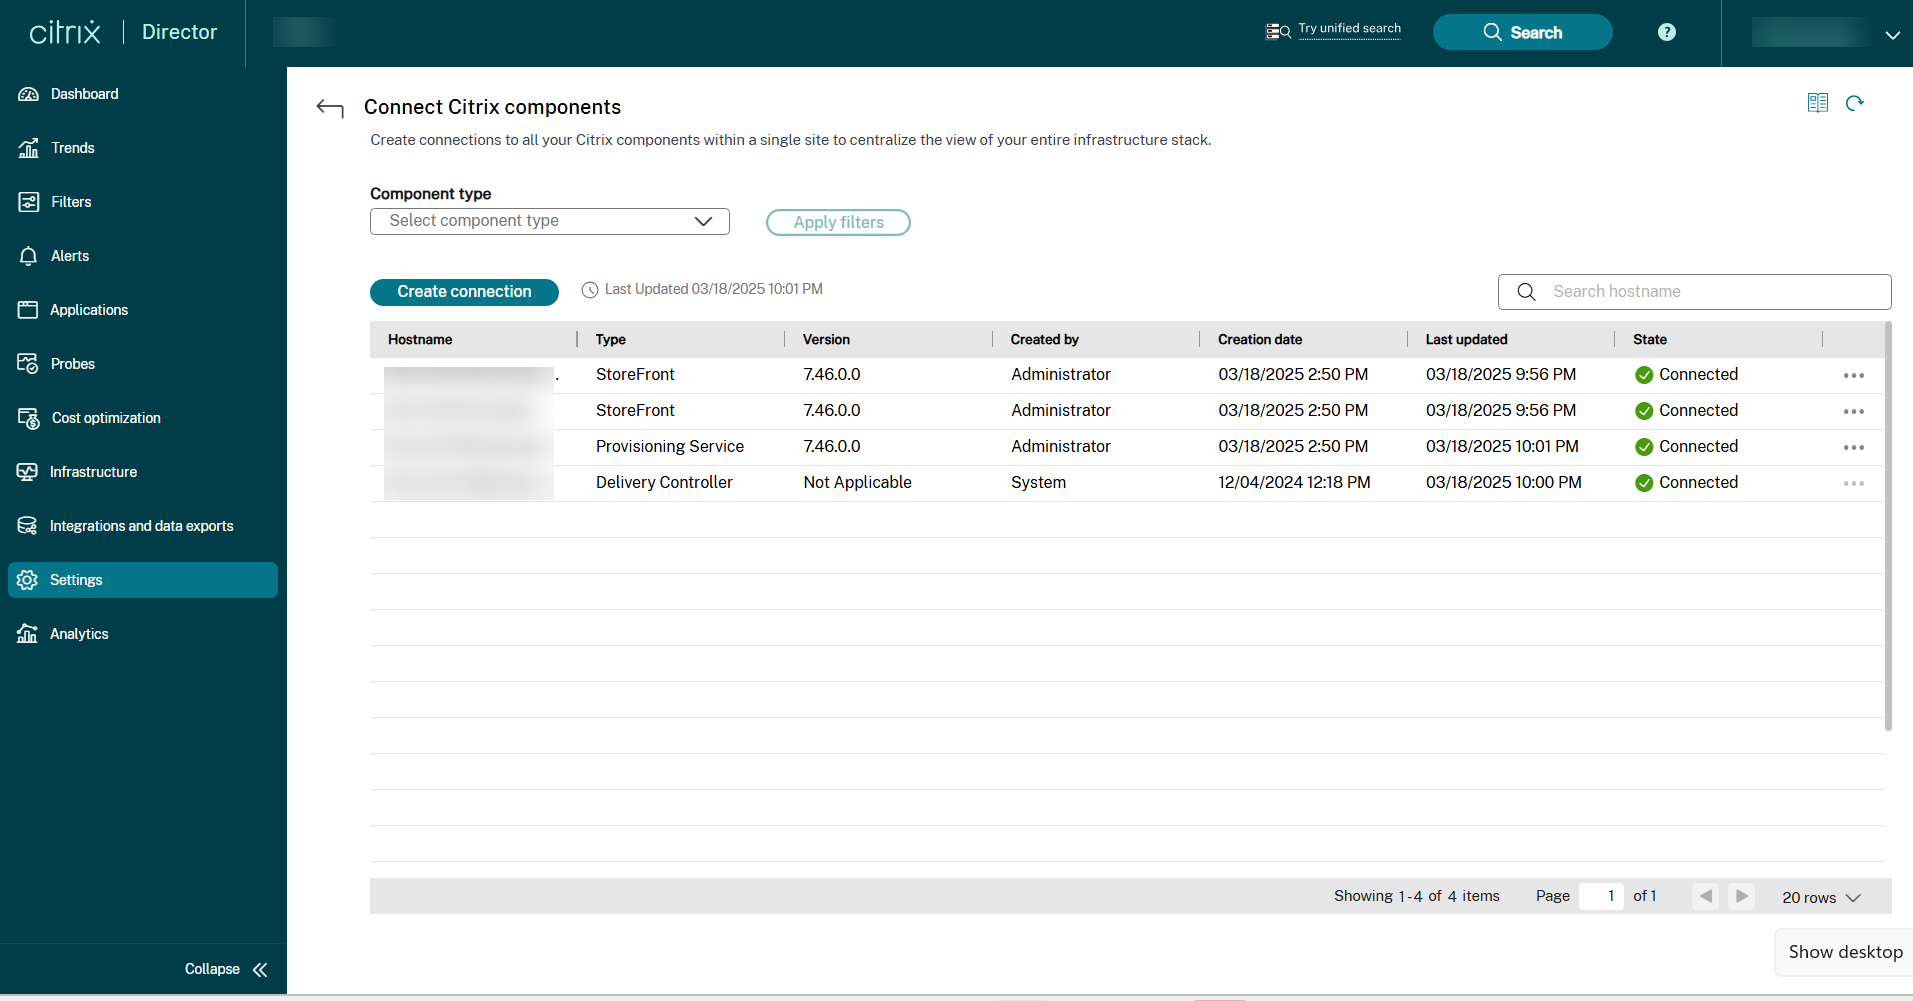
Step 2: Enter component details
On the Connect Citrix Components screen, click Create connection. The Create a connection window appears. The Automatic Connection tab is highlighted by default.
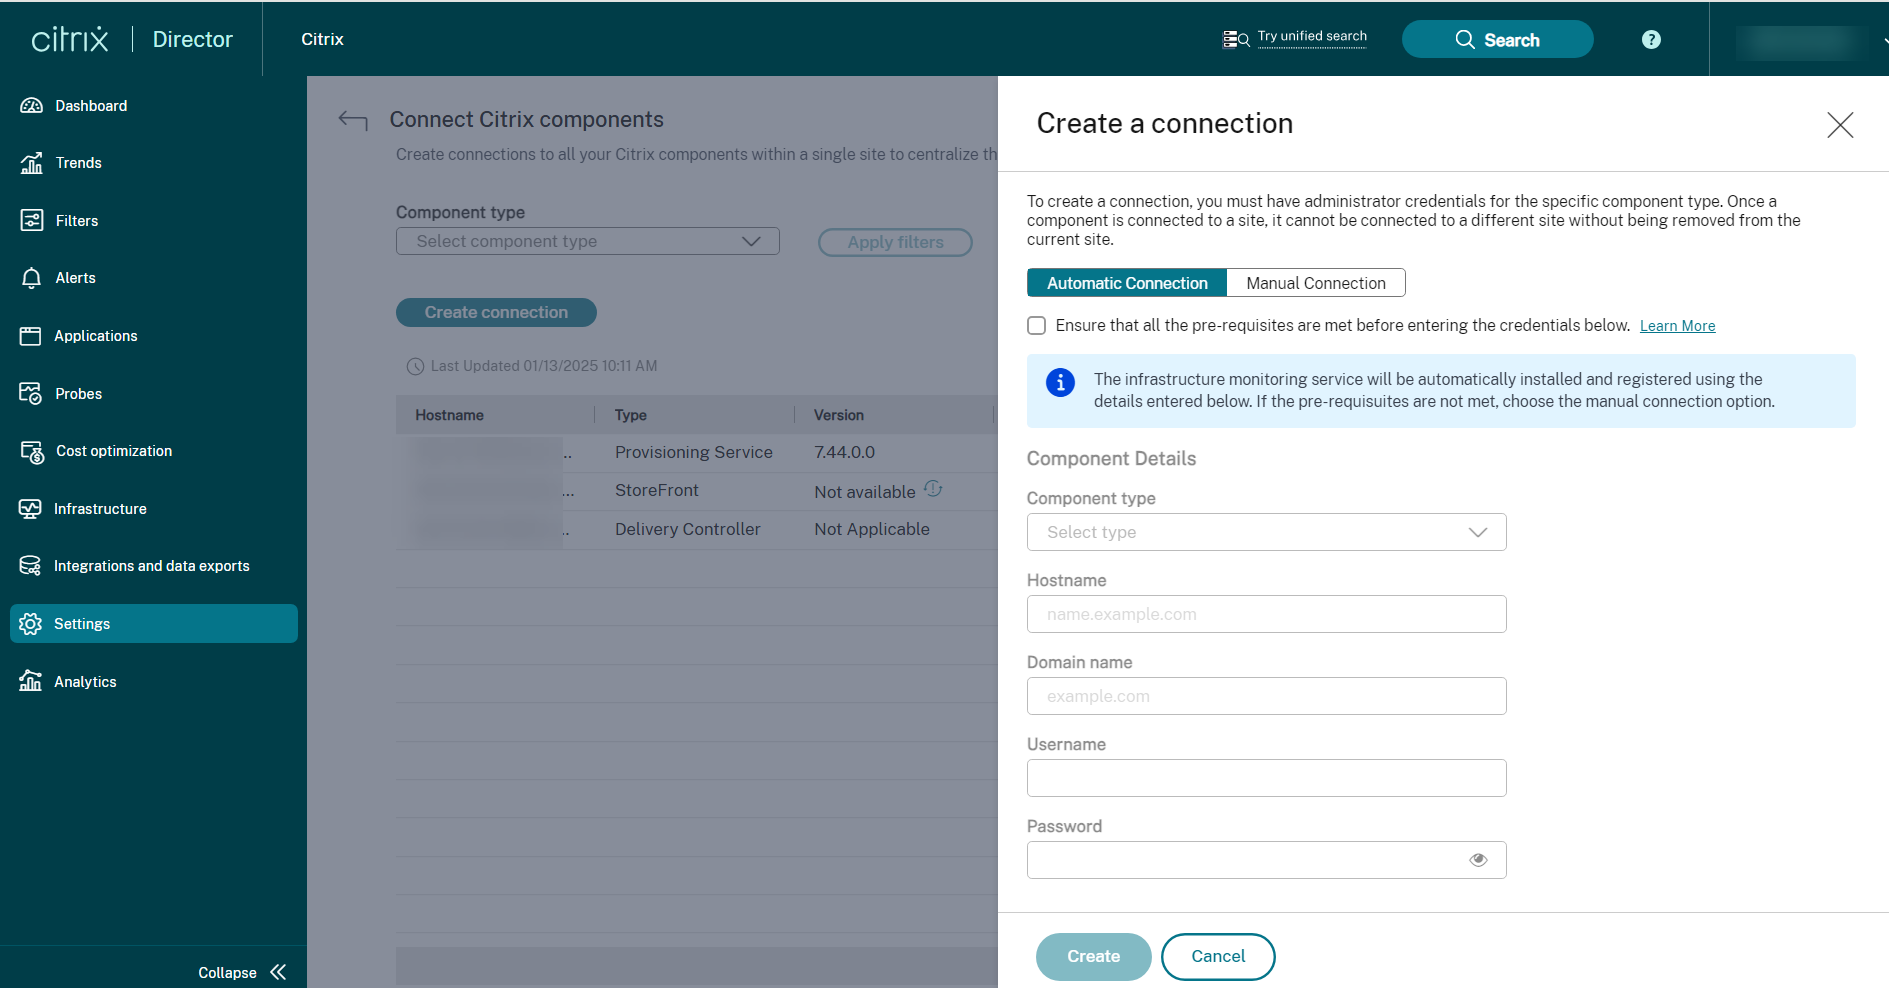
Populate the component details required to establish a secure connection.
- Select a component type from the drop-down list. The component can be Provisioning Service or StoreFront.
- Enter the host name.
- Enter the domain name.
- Enter the user name of the Provisioning Service or StoreFront machine.
- Enter the password of the Provisioning Service or StoreFront machine.
The infrastructure monitoring service will be automatically installed and registered using the preceding details.
Step 3: Create a connection
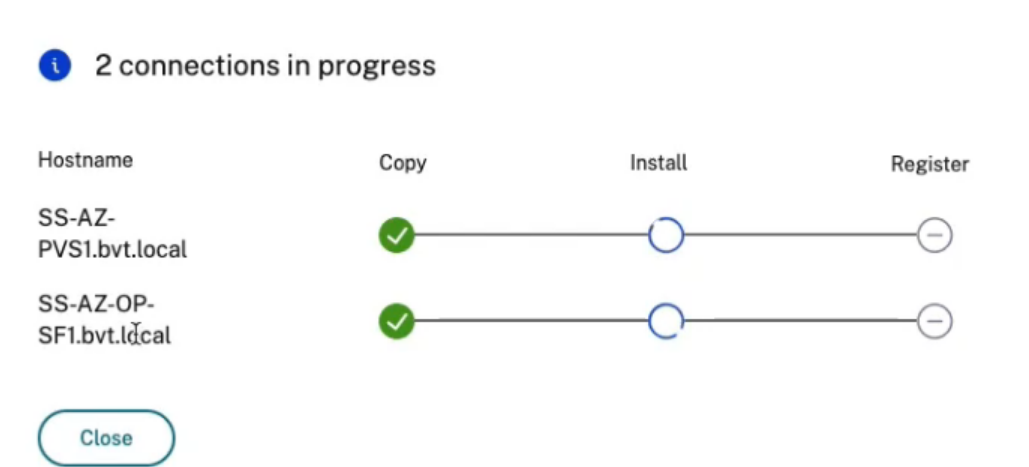
Once the details are populated, click Create. Certain pre-checks are performed before the request is accepted. These checks validate that prerequisites are met before proceeding. Once the prerequisites are met, the automatic connection process shows a progress bar indicating the steps: copying, installing, and registering. If any step fails, the user sees a retry option.
Click View details to view the details of the automatic connection process.
The MSI file is downloaded and then copied to the installation location, where it is installed and registered. Once completed, the created connection becomes available in the list of connections on the Connect Citrix Components page.
In case the connection fails, you can retry the connection. Retry needs you to provide admin credentials.
Error handling
The system performs pre-checks for prerequisites and displays error messages if any checks fail.
Note:
The pre-checks occur in a specific order. For example, to check for WMI errors, the credentials must be correct.
The following table shows the error messages and corresponding solutions:
| Error scenario | Description |
|---|---|
| Invalid FQDN format | The FQDN format is invalid. To resolve the issue, correct the FQDN format. |
| Unreachable FQDN | The FQDN machine isn’t reachable. |
| Invalid credentials | Your username or password is not valid. |
| HTTPS is not set up on the remote machine. | The environment variable for enabling HTTPS is not set in the remote machine while HTTPS is enabled in Monitor configuration. To resolve the issue, set the value at System Properties > Advanced > Environment Variables > Edit system variable. |
| HTTPS is incorrectly set up on the remote machine | The environment variable for enabling HTTPS is set in the remote machine while HTTPS is disabled in Monitor configuration. To resolve the issue, remove the value at System Properties > Advanced > Environment Variables > Edit system variable. |
| Windows Management Instrumentation (WMI) is blocked on the remote machine. | The check box in the Allowed apps and features section in the Windows firewall defender for WMI is not selected. To resolve the issue, ensure that the WMI has access through the firewall. |
| SMB port is blocked on the remote machine. | The port 445 must be enabled for inbound TCP connections from the Delivery Controller. |
| Admin Share is disabled on the remote machine | Prerequisites for automatic connection aren’t met. |
Upgrade process
If you are using a previous version of Citrix Infrastructure Monitor, you have the option to upgrade. This is applicable only for Provisioning Service and StoreFront. The automatic upgrade displays a progress bar and requires admin credentials.

You can choose to upgrade automatically or manually.
The upgrade prompt appears only when there is a new version available. Registration is not required for the upgrade. After upgrading, it takes approximately 5 minutes for the latest version to be reflected.