[Optional] Steps to Configure HTTPS for Citrix Infrastructure Monitor
Note:
Citrix Infrastructure Monitor service works in HTTP mode as well and in this case, the following configuration isn’t required. However, we recommend you to use in https mode. Perform the following steps only if you need to configure https for Citrix Infrastructure Monitor.
Step 1: Upload the certificate to the machine
-
Get a
PFXcertificate for your machine where Citrix Infrastructure Monitor is installed. For more information on PFX file generation, see How to create a PFX file.Note:
You can use password protected PFX files also.
-
Upload the certificate to the machine to any location.
Step 2: Import the certificate to computer certificates
- Click Start > Run > type
mmc, and then click OK. The Console 1 - [Console Root] window appears. -
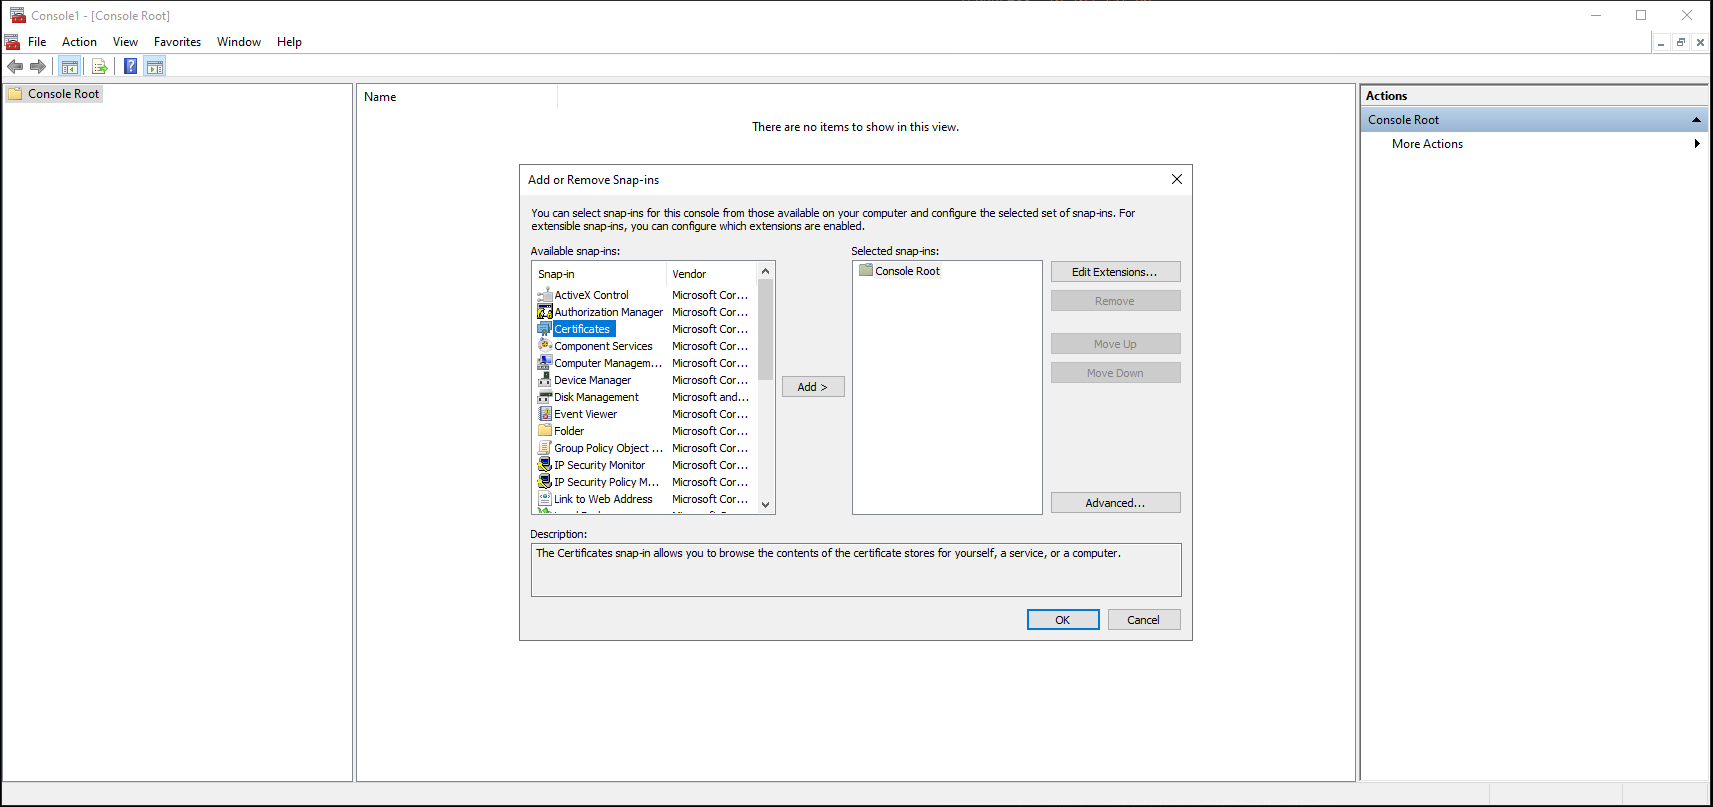
On the File menu, click Add/Remove Snap-in. The Add or Remove Snap-ins window appears.
-
Under Snap-in, double-click Certificates. The Certificates snap-in window appears.

-
Select Computer account, and then click Next. The Select Computer window appears.
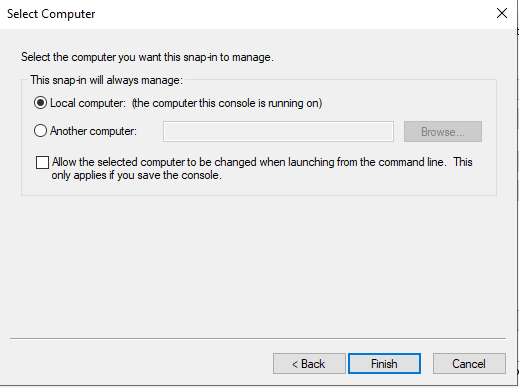
- Select Local computer.
- Click Finish. The Certificates (Local Computer) section appears on the list of selected snap-ins for the new console.
- Click OK.
-
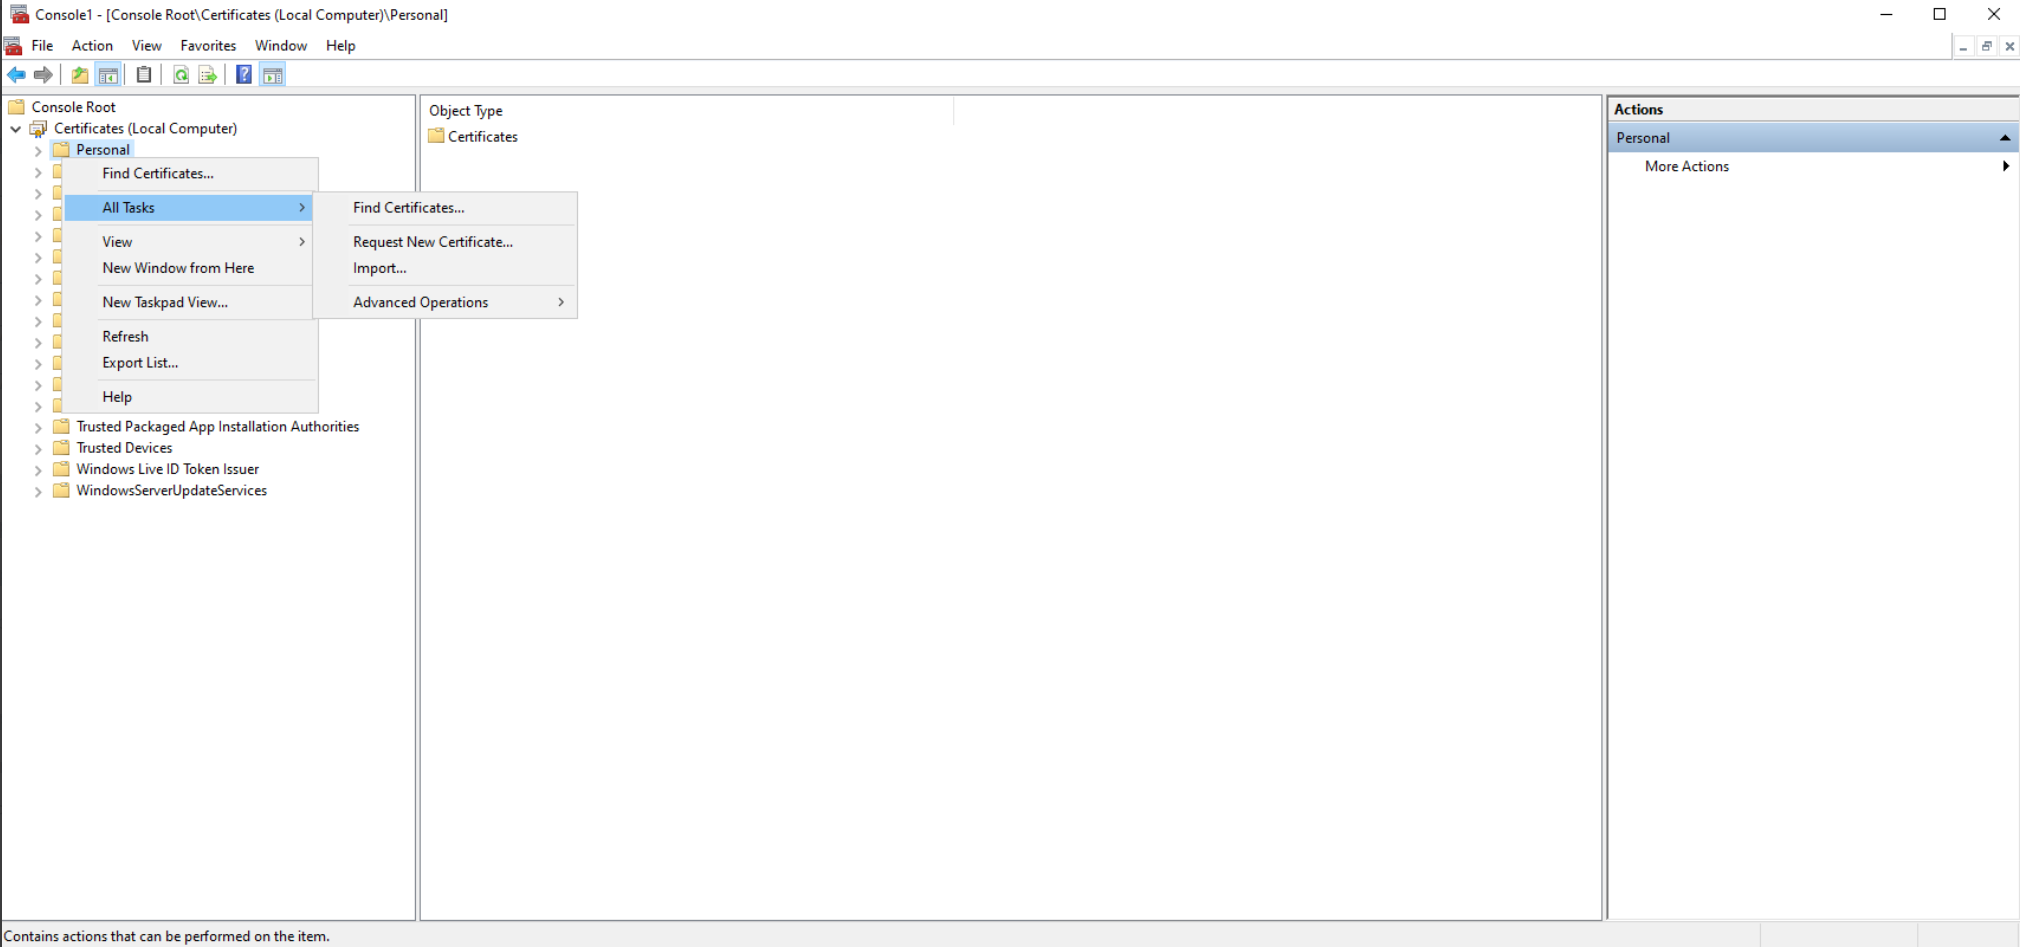
Expand Certificates, right-click Personal > All Tasks > Import. The Welcome to the Certificate Import Wizard appears.
-
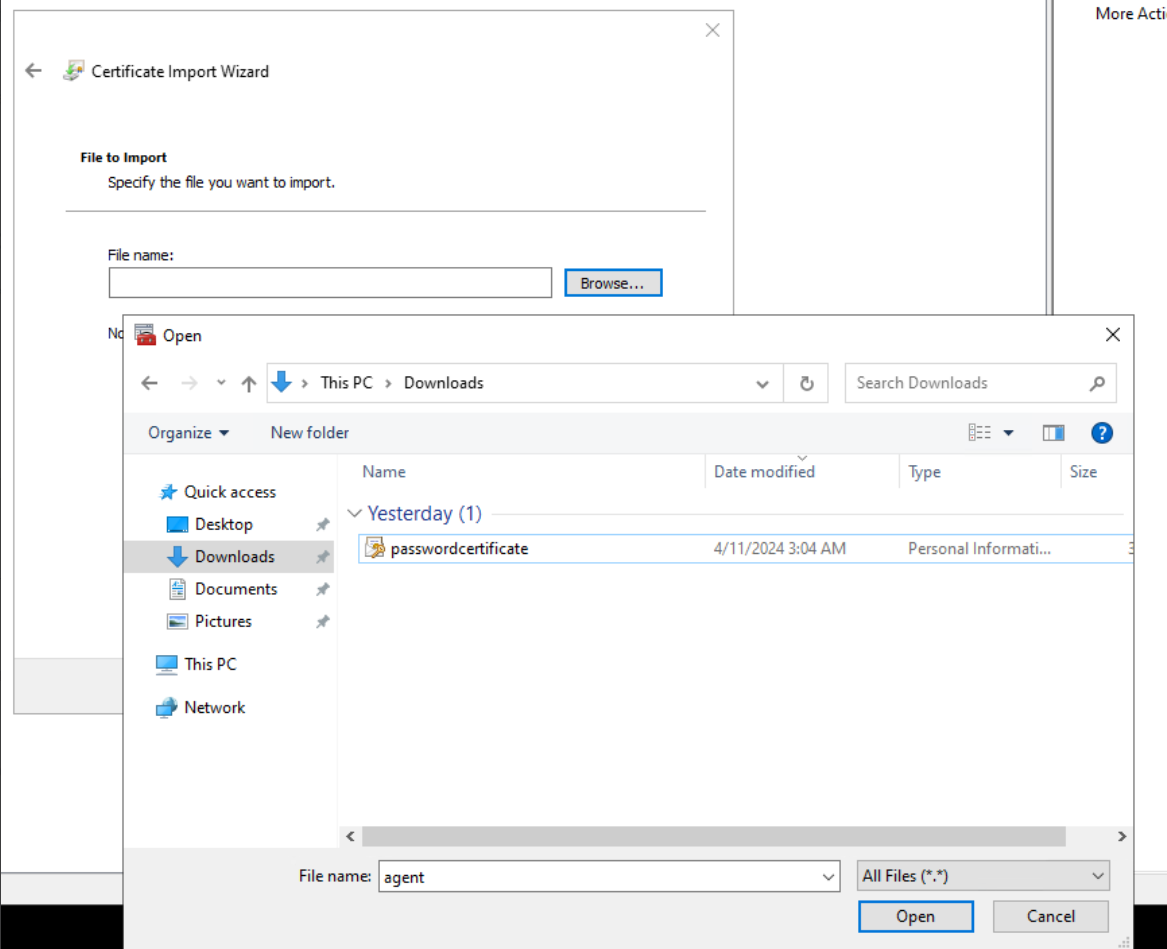
Select Next > Browse Files. Navigate to the location where you uploaded the PFX file, change the file type to All files and then select the respective PFX certificate.
- Enter the PFX Password. You can leave it blank if there is no password.
- Click Next.
-
For the Certificate Store, make sure that the Place all certificates in the following store option is selected and the Certificate store is selected as Personal.
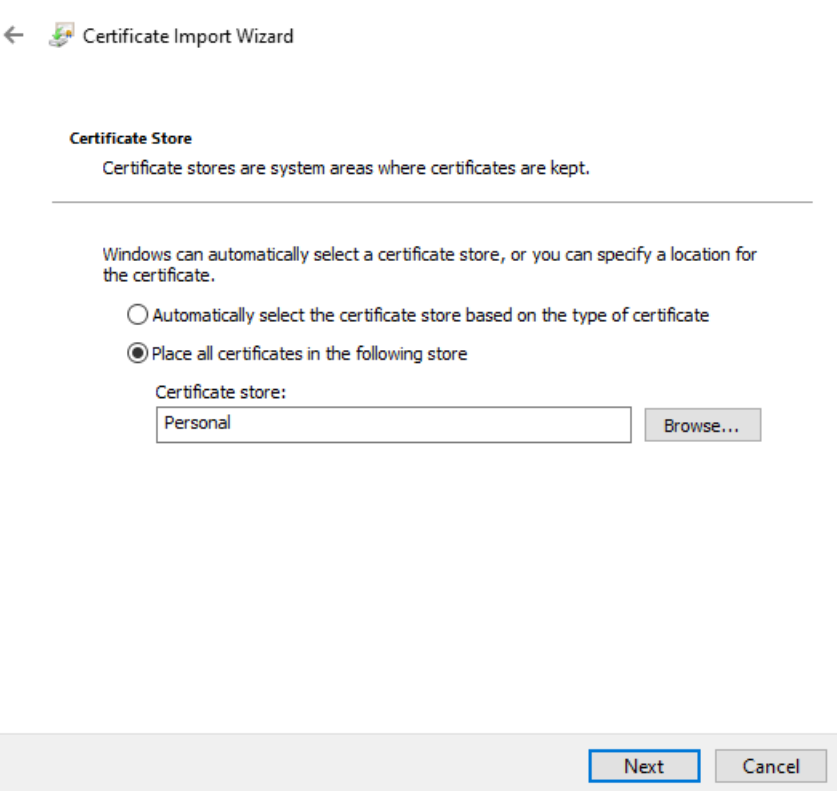
- Click Next.
- Review the details and click Finish.
- Wait for confirmation. The The import was successful message appears.
- Navigate to Certificates > Personal and ensure that the certificate is present.
- Delete the PFX certificate file from the machine.
Step 3: Provide read access to certificate
- Right-click on the imported certificate > All Tasks > Manage Private Keys.
- In the dialog that opens, select Add, and then search for Network Service. Click OK.
- Select NETWORK SERVICE under Group or user names.
- Allow Read access under Permissions for NETWORK SERVICE.
- Click OK.
Step 4: Obtain the Thumbprint
- Double-click on the imported certificate.
- In the dialog that opens, navigate to the Details tab and scroll to the bottom.
-
Click Thumbprint.
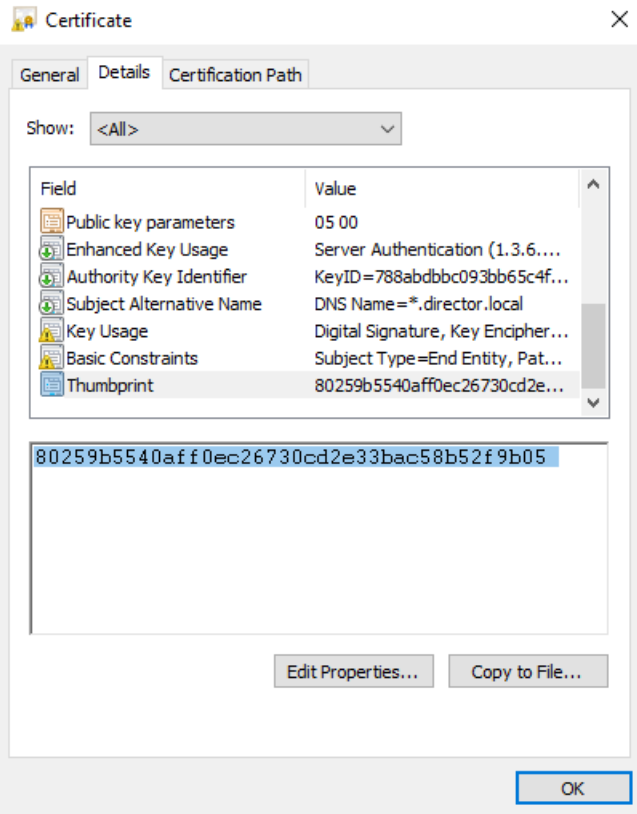
- Copy the value and keep it ready for the next step.
Step 5: Setting the environment variable
- Open Control Panel.
- Search for environment and select Edit the system environment variables.
-
Under System Variables (for all users), click New.
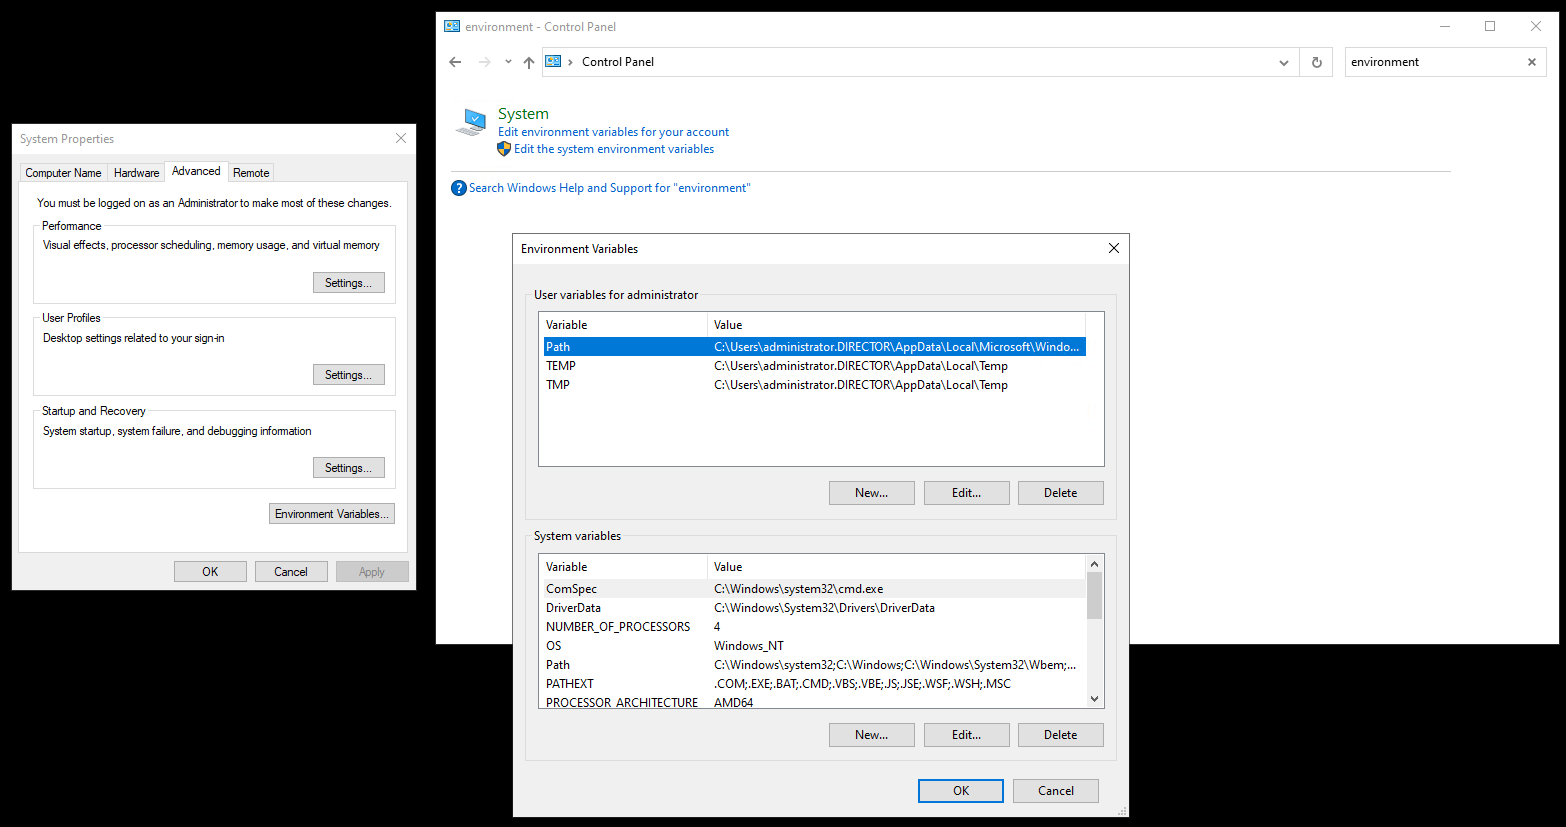
- Specify the Variable name as DIRECTOR_AGENT_HTTPS_CERTIFICATE_THUMBPRINT.
- Specify the thumbprint from the previous step under Variable value.
- Click OK.
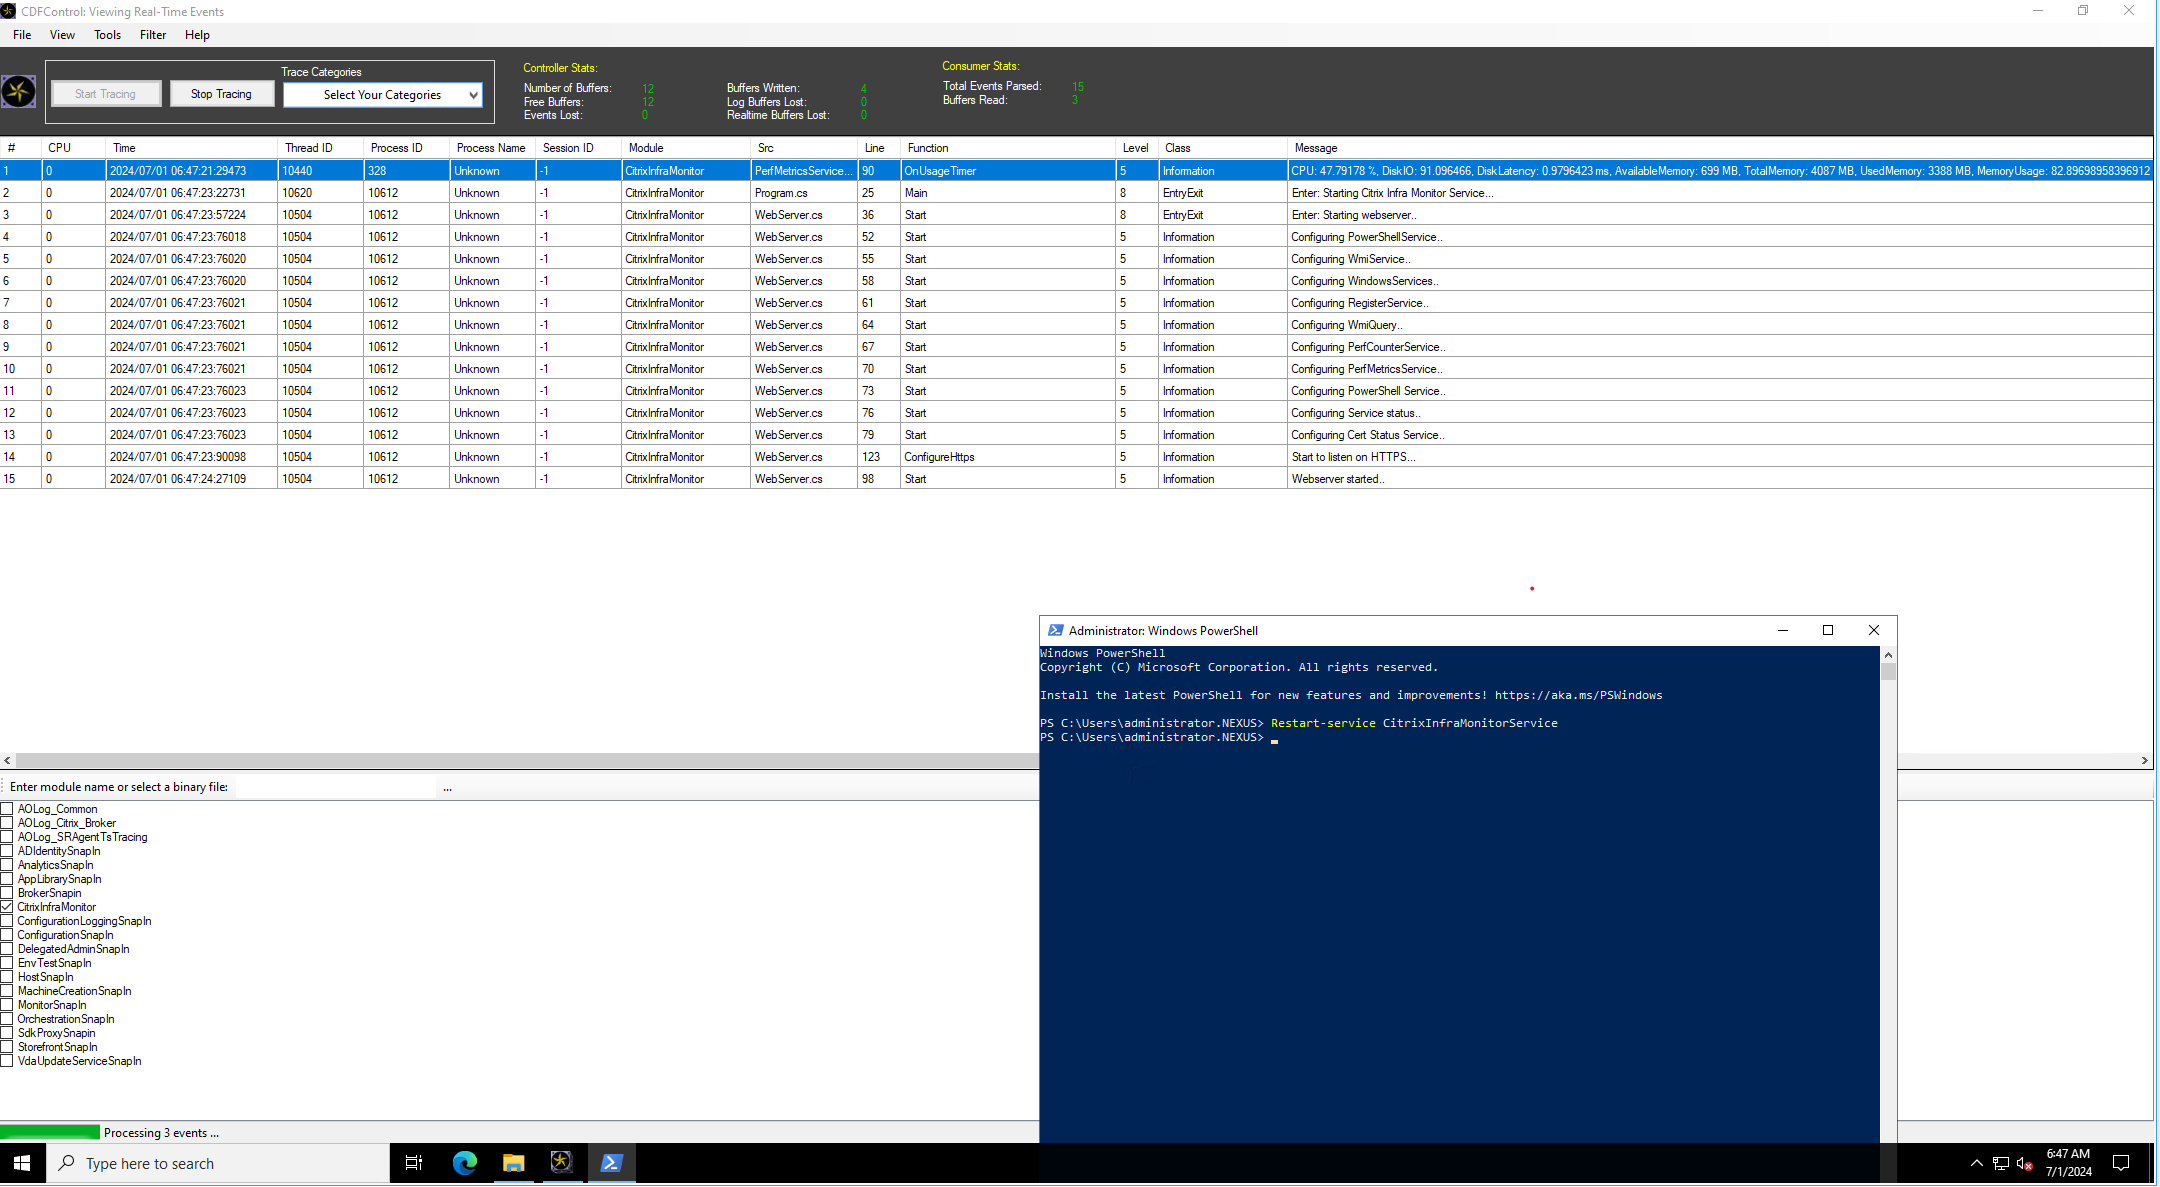
Step 6: Restart CitrixInfraMonitorService
-
Open PowerShell and run the following command:
Restart-Service CitrixInfraMonitorService <!--NeedCopy--> -
Ensure that the HTTPS is enabled by capturing the CitrixInfraMonitorService module and looking for the log line Start to listen on HTTPS….
Step 7: Enable HTTPs in Monitor configuration
Run the following command on a Delivery Controller™ machine:
Set-MonitorConfiguration -DirectorAgentEnableHttps $true
<!--NeedCopy-->
In this article
- Step 1: Upload the certificate to the machine
- Step 2: Import the certificate to computer certificates
- Step 3: Provide read access to certificate
- Step 4: Obtain the Thumbprint
- Step 5: Setting the environment variable
- Step 6: Restart CitrixInfraMonitorService
- Step 7: Enable HTTPs in Monitor configuration