Install and uninstall
You can download Citrix Workspace app from the Download page of Citrix or from your company’s download page (if available).
You can install the package by:
-
Running an interactive Windows-based installation wizard.
Or
-
Typing the installer file name, installation commands, and installation properties using the command-line interface. For information about installing Citrix Workspace app using a command-line interface, see Using command-line parameters.
Note:
Verify that you have installed all the required system requirements, as mentioned at System requirements section.
Use the
CitrixWorkspaceApp.exe /CleanInstallcommand when upgrading to a newer version of Citrix Workspace app.For downgrades, Citrix recommends that you uninstall the existing version and then install the desired version.
Installation with administrator and non-administrator privileges:
Both users and administrators can install Citrix Workspace app. Administrator privileges are required only when using pass-through authentication, single sign-on, App Protection, and Microsoft Teams VDI plug-in with Citrix Workspace app for Windows.
The following table describes the differences when Citrix Workspace app is installed as an administrator or a user:
| Installation folder | Installation type | |
|---|---|---|
| Administrator | For 64-bit: C:\Program Files\Citrix\ICA Client and for 32-bit: C:\Program Files (x86)\Citrix\ICA Client | Per-system installation |
| User | %USERPROFILE%\AppData\Local\Citrix\ICA Client | Per-user installation |
Note:
Administrators can override the user-installed instance of Citrix Workspace app and continue with the installation successfully.
Command to cleanup and install Citrix Workspace app
Use the /CleanInstall command to cleanup any leftover traces such as files and registry values from a previous uninstall and then freshly install the new version of the Citrix Workspace app.
For example:
CitrixWorkspaceApp.exe /CleanInstall
<!--NeedCopy-->
Note:
The difference between the
forceinstallandcleaninstallcommands is thatforceinstallruns in case of an unsupported version upgrade or any failure, whereascleaninstallalways cleans up before performing the required action, whether it is an install or an upgrade.
Enhanced installation process for Citrix Workspace™ app with App Protection
Previously, when App Protection was enabled, the /cleanInstall switch was not supported, and the user had to manually uninstall and reboot the machine before retrying installation. Starting with the 2503 version, when App Protection is enabled and the /CleanInstall command is run, Citrix Workspace app automatically uninstalls, reboots the machine based on user selection, and reinstalls the app during the reboot. The following message appears during the process:
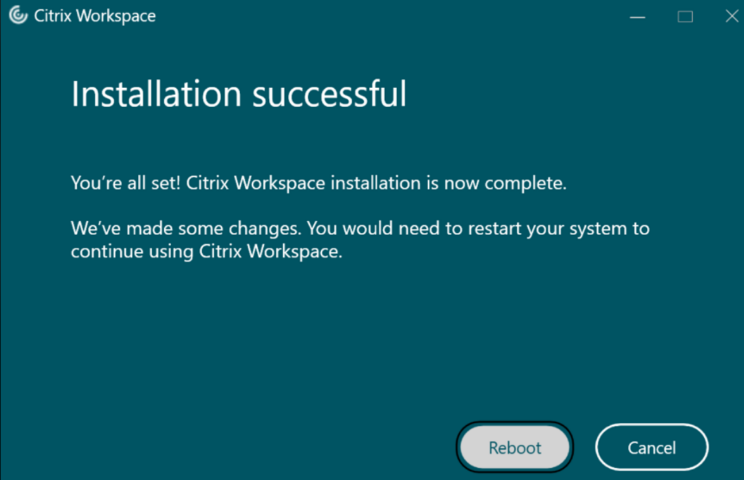
- If the user clicks Reboot, Citrix Workspace app reinstalls during the reboot.
- If the user clicks Cancel, Citrix Workspace app will be installed upon the next reboot. As a result, Citrix Workspace app is not available when searching for the app in the system.
Note:
- For silent installations, Citrix Workspace app is available only after the next user-initiated reboot.
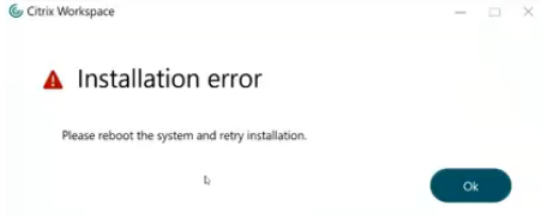
- If the user retries the installation before reboot, the following prompt appears to reboot the system:
User interface based installation
You can install Citrix Workspace app for Windows by manually running the CitrixWorkspaceApp.exe installer package.
-
Launch the
CitrixWorkspaceApp.exefile.The system verifies the prerequisites required for Citrix Workspace app and if requires, installs it automatically.
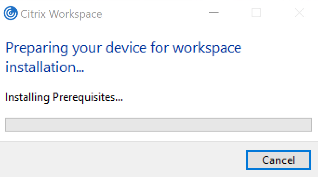
After installing the prerequisites, the Welcome to Citrix Workspace Installer screen appears.
- Click Continue. The Citrix License Agreement page appears.
- Read and accept the Citrix License Agreement and continue with the installation. Citrix Workspace app installation continues and successfully completes.
-
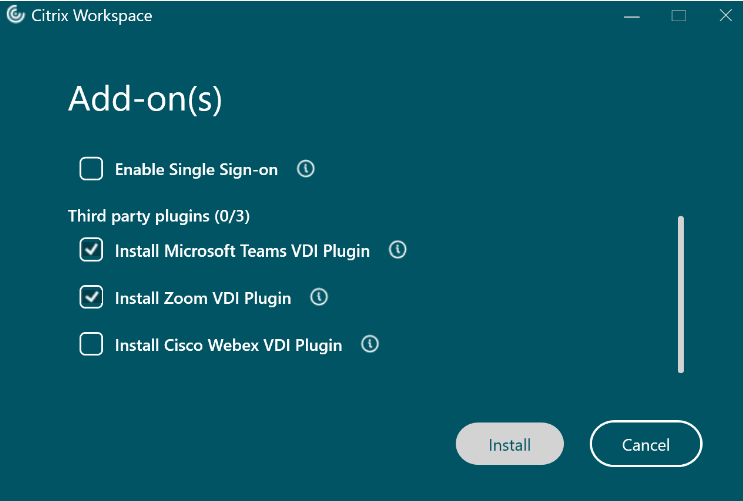
When installing with administrator privileges, you can choose the following from the Add-on(s) page:
- Start App Protection after installation
- Enable single sign-on
- Install Microsoft Teams VDI Plugin
- Starting with the Citrix Workspace app for Windows version 2508, this option is selected by default. Users can clear this option to prevent installation of the Microsoft Teams VDI Plugin.
- Install Zoom VDI Plugin
- Starting with the Citrix Workspace app for Windows version 2511, this option is selected by default. Users can clear this option to prevent installation of the Zoom VDI Plugin.
- Install Cisco WebEx VDI Plugin
Citrix Workspace app installation continues and successfully completes.
Important:
Starting with Citrix Workspace app for Windows 2311.1 version, the
TrolleyExpressis replaced withCWAInstaller-<date and timestamp>. For example, the log is recorded atC:\Program Files (x86)\Citrix\Logs\CTXWorkspaceInstallLogs-20231225-093441.
Using Windows Store
- Navigate to Microsoft Store.
- Search for Citrix Workspace.
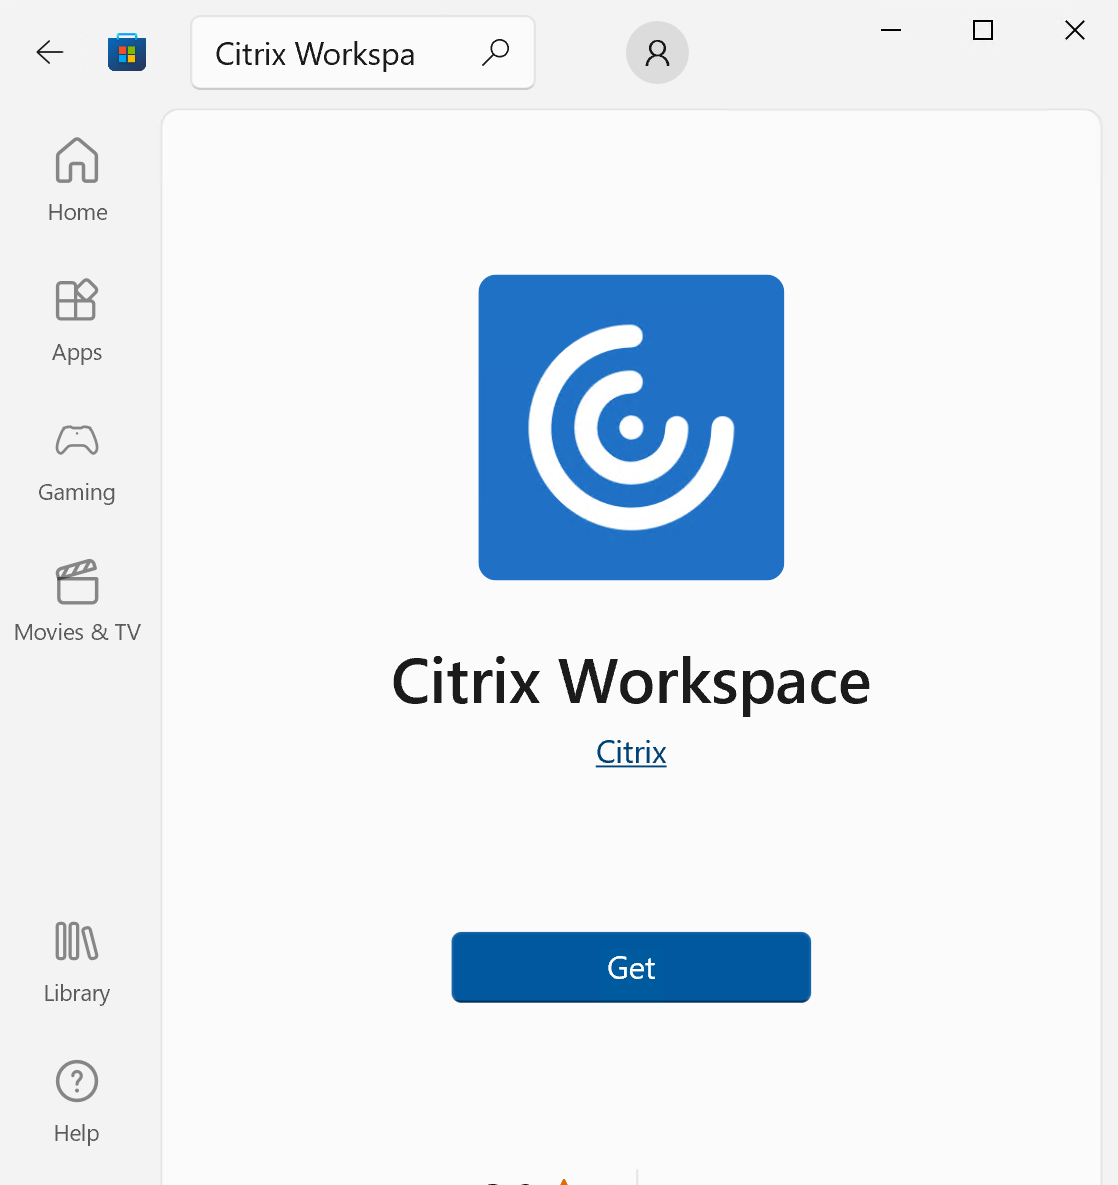
- Click Get. Citrix Workspace app is installed.
Note:
Third-party plugins and plugin management components, such as Microsoft Teams VDI Plugin or Zoom plugin management, are not supported when installing Citrix Workspace app through the Windows Store.
Command-line based installation
You can customize the Citrix Workspace app installer by specifying different command-line options. The installer package self-extracts to the system temp directory before launching the setup program. The space requirement includes program files, user data, and temp directories after launching several applications.
To install the Citrix Workspace app using the Windows command line, launch the command prompt and type the following on a single line:
- installer file name,
- installation commands, and
- installation properties
The available installation commands and properties are as follows:
CitrixWorkspaceApp.exe [commands] [properties]
List of command-line parameters
The parameters are broadly classified as follows:
- Common parameters
- Update parameters
- Install parameters
- HDX features parameters
- Preferences and user interface parameters
- Authentication parameters
Common parameters
| Command | Description |
|---|---|
? Or help
|
Lists all the installation commands and properties. |
/silent |
Disables installation dialogs and prompts during installation. |
/forceinstall |
This switch is effective when cleaning up any existing configuration or entries of Citrix Workspace app in the system. Use this switch when upgrading from an unsupported version of Citrix Workspace app version and when the installation or upgrade is unsuccessful. |
Note:
The
forceinstallswitch is the replacement for thercuswitch. Thercuswitch is deprecated as of Version 1909. For more information, see Deprecation.The difference between the
forceinstallandcleaninstallcommands is thatforceinstallruns in case of an unsupported version upgrade or any failure, whereascleaninstallalways cleans up before performing the required action, whether it is an install or an upgrade.
Auto-update parameters
Detect available update
- Command:
AutoUpdateCheck - Description: This command indicates that Citrix Workspace app detects when an update is available.
The possible values are the following:
| AutoUpdateCheck command values | Description | Example |
|---|---|---|
| Auto (default) | You’re notified when an update is available. |
CitrixWorkspaceApp.exe AutoUpdateCheck=auto. |
| Manual | You aren’t notified when an update is available. Check for updates manually. | CitrixWorkspaceApp.exe AutoUpdateCheck=manual |
| Disabled | Disables auto-updates. |
CitrixWorkspaceApp.exe AutoUpdateCheck=disabled. |
Note:
The
AutoUpdateCheckis a mandatory parameter that you must set to configure other parameters likeAutoUpdateStream,DeferUpdateCount,AURolloutPriority.
Select the version for update
- Command
AutoUpdateStream - Description - If you have enabled auto-update, you can choose the version you want to update. See Lifecycle Milestones for more information.
The possible values are the following:
| AutoUpdateStream command value | Description | Example |
|---|---|---|
| LTSR | Auto-updates to Long Term Service Release cumulative updates only. |
CitrixWorkspaceApp.exe AutoUpdateStream=LTSR. |
| Current | Auto-updates to the latest version of Citrix Workspace app. | CitrixWorkspaceApp.exe AutoUpdateStream=Current |
Defer notifications for update
- Command:
DeferUpdateCount - Description: Indicates the number of times that you can defer notifications when an update is available. For more information, see Citrix Workspace Updates.
The possible values are the following:
| DeferUpdateCount command value | Description | Example |
|---|---|---|
| -1(default) | Allows deferring notifications any number of times | CitrixWorkspaceApp.exe DeferUpdateCount=-1 |
| 0 | Indicates that you receive one notification (only) for every available update. Doesn’t remind you again about the update. | CitrixWorkspaceApp.exe DeferUpdateCount=0 |
| Any other number ‘n’ |
|
CitrixWorkspaceApp.exe DeferUpdateCount=<n> |
Note:
Starting with Citrix Workspace app for Windows version 2207, the auto-update feature is improved and the
DeferUpdatCountparameter in not applicable.
Set rollout priority
- Command:
AURolloutPriority - Description: When a new version of the app is available, Citrix rolls out the update for a specific delivery period. With this parameter, you can control at what time during the delivery period you can receive the update.
The possible values are the following:
| AURolloutPriority command value | Description | Example |
|---|---|---|
| Auto (default) | You receive the updates during the delivery period as configured by Citrix. | CitrixWorkspaceApp.exe AURolloutPriority=Auto |
| Fast | You receive the updates at the beginning of the delivery period. | CitrixWorkspaceApp.exe AURolloutPriority=Fast |
| Medium | You receive the updates at the mid-delivery period. | CitrixWorkspaceApp.exe AURolloutPriority=Medium |
| Slow | You receive the updates at the end of the delivery period. | CitrixWorkspaceApp.exe AURolloutPriority=Slow |
Store configuration parameters
Configure store
- Command:
ALLOWADDSTORE - Description: Allows you to configure the stores (HTTP or https) based on the specified parameter.
The possible values are the following:
| ALLOWADDSTORE command value | Description | Example |
|---|---|---|
| S(default) | Allows you to add or remove secure stores only (configured with HTTPS). | CitrixWorkspaceApp.exe ALLOWADDSTORE=S |
| A | Allows you to add or remove both secure stores (HTTPS) and non-secure stores (HTTP). Not applicable if Citrix Workspace app is per-user installed. | CitrixWorkspaceApp.exe ALLOWADDSTORE=A |
| N | Never allow users to add or remove their own store. | CitrixWorkspaceApp.exe ALLOWADDSTORE=N |
Save the store credentials locally
- Command:
ALLOWSAVEPWD - Description: Allows you to save the store credentials locally. This parameter applies only to stores using the Citrix Workspace app protocol.
The possible values are the following:
| ALLOWSAVEPWD command value | Description | Example |
|---|---|---|
| S (default) | Allows saving the password for secure stores only (configured with HTTPS). | CitrixWorkspaceApp.exe ALLOWSAVEPWD=S |
| N | Does not allow saving the password. | CitrixWorkspaceApp.exe ALLOWSAVEPWD=N |
| A | Allows saving the password for both secure stores (HTTPS) and non-secure stores (HTTP). | CitrixWorkspaceApp.exe ALLOWSAVEPWD=A |
Examples of store configuration using command-line installation
To specify the StoreFront store URL:
CitrixWorkspaceApp.exe /silent
STORE0="AppStore;https://testserver.net/Citrix/MyStore/discovery;on;HR App Store"

<!--NeedCopy-->
To specify the Citrix Gateway store URL:
CitrixWorkspaceApp.exe STORE0=HRStore;https://ag.mycompany.com#Storename;On;Store
<!--NeedCopy-->
Where, Storename indicates the name of the store that needs to be configured.
Note:
- The Citrix Gateway store URL configured using this method does not support the PNA Services Sites that are using Citrix Gateway.
- The “Discovery” parameter is not required when specifying a Citrix Gateway store URL.
To configure multiple stores:
CitrixWorkspaceApp.exe  STORE0="StoreFront Store;https://testserver.net/Citrix/MyBackupStore/discovery;on; StoreFrontStore"

STORE1="NetScaler Store;https://ag.mycompany.com#Storename;On;NetScaler Store"
<!--NeedCopy-->
Note:
It’s mandatory to include
discoveryin the store URL for successful pass-through authentication.
The following table provides description for the parameters of store URL:
| Parameter | Description |
|---|---|
| Store name | The name that the user sees for the store. |
| Store URL | The URL for the store. |
| Store enabled state | The state can be on or off. |
| Store description | The description that the user sees for the store. |
Example for StoreFront™:
SalesStore;https://sales.mycompany.com/Citrix/Store/discovery;On;Store for Sales staff.
Install parameters
Start App Protection
- Command:
startAppProtection - Description: Start App Protection component and provides enhanced security by restricting the ability of clients to be compromised by keylogging and screen-capturing malware.
- Example:
CitrixWorkspaceApp.exe startAppProtection
For more information, see the App Protection documentation.
Note:
The
startAppProtectionswitch is the replacement for theincludeAppProtectionswitch. TheincludeAppProtectionswitch is deprecated as of Version 2212. For more information, see Deprecation.
Exclude Citrix Enterprise Browser binaries
- Command: Run the following command to exclude Citrix Enterprise Browser™
CitrixWorkspaceapp.exe ADDLOCAL=ReceiverInside,ICA_Client,BCR_Client,USB,DesktopViewer,AM,SSON,SelfService,WebHelper
<!--NeedCopy-->
- Description: Excludes the Citrix Enterprise Browser binaries.
You can exclude the Citrix Enterprise Browser binaries only in the following cases:
- Fresh install
- Upgrade from a version that doesn’t include the Citrix Enterprise Browser binaries.
Note:
Starting with version 2511, Citrix Enterprise Browser is no longer supported in Citrix Workspace app for Windows. If needed, users and administrators can install Citrix Enterprise Browser separately by downloading it directly from the Citrix Downloads page under the Citrix Enterprise Browser section.
Exclude EPA Client from automatic installation
- Command:
CitrixWorkspaceApp.exe InstallEPAClient=N - Description: Stops the automatic installation of the EPA Client.
- For example, using the following command
CitrixWorkspaceapp.exe ADDLOCAL=ReceiverInside,ICA_Client,BCR_Client,USB,DesktopViewer,AM,SSON,SelfService,WebHelper InstallEPAClient=N
<!--NeedCopy-->
You can exclude the EPA in the following cases:
- Fresh install
- Upgrade from a version that doesn’t include the EPA.
Specify custom installation directory
- Command:
INSTALLDIR - Description: Specifies the custom installation directory for the Citrix Workspace app installation. The default path is
C:\Program Files\Citrix. - Example:
CitrixWorkspaceApp.exe INSTALLDIR=C:\custom path\Citrix.
Note:
The Program Files folder is protected by the operating system. If you want to use a custom folder other than Program Files, ensure that the folder has the right permission and it is protected.
Install one or more of the specific components
- Command:
ADDLOCAL - Description: Use the
ADDLOCALkey to install one or more of the specific components of the Citrix Workspace app. Using this key, if you install any specific components, the Citrix Workspace app installs all the mandatory components by default.
Note:
When upgrading the Citrix Workspace app, the installer does not honor exclusion commands (such as,
BCR_Client) for components that are already present in the base version. To remove a component during an upgrade process, fully uninstall the existing Citrix Workspace app before installing the new version with the required exclusion parameters.We recommended you to use the
ADDLOCALkey only if you want to install any of the specific components of Citrix Workspace app. By default, if noADDLOCALparameter is specified, all the supported components are installed while installing the Citrix Workspace app.
The following table lists the components that the ADDLOCAL key supports:
| ADDLOCAL key | Component Name | Description |
|---|---|---|
ReceiverInside |
Receiver | Provides workspace SDK services to the Self-service plug-in. |
ICA_Client |
HDX™ Engine | This component handles the ICA file or session launch process. |
BCR_Client |
BCR client | Plug-in to handle browser content redirection. |
USB |
USB Client | Plug-in to take care of the USB redirection. |
DesktopViewer |
Desktop Viewer Client | UI framework for virtual desktop. |
AM |
AuthManager | Authentication Manager - Authorizes user to Citrix Workspace app. |
SSON |
SSON | Single sign-on component – Supports single sign-on. |
SELFSERVICE |
Self-service | Plug-in for the Citrix Workspace for native launch. |
WebHelper |
Web Helper | Helper to connect browser with native workspace app. |
CitrixEnterpriseBrowser |
Browser | Native browser that enables users to open web or SaaS apps from Citrix Workspace app in a secure manner. |
For example, using the following command, you can install the components mentioned in the command:
CitrixWorkspaceapp.exe ADDLOCAL=ReceiverInside,ICA_Client,BCR_Client,USB,DesktopViewer,AM,SSON,SelfService,WebHelper,CitrixEnterpriseBrowser
<!--NeedCopy-->
Note:
Starting with version 2212, the App Protection feature is installed by default. As a result,
AppProtectionis no longer a valid option for theADDLOCALcommand.
Limitation:
When you install Citrix Workspace app using ADDLOCAL parameters, the Devices and Preferences window might not respond from the Connection Center. This issue occurs only when you install Citrix Workspace app without the DesktopViewer parameter. As a workaround, include the DesktopViewer parameter as well. [HDX-67173]
Install Third Party plug-ins
Citrix Workspace app supports the following third-party plug-ins and plug-in management components:
Microsoft Teams VDI Plugin
Starting with the Citrix Workspace app for Windows version 2508, this component is installed by default.
Fresh installations and manual updates
- The installation option is selected by default.
- Users can clear the option based on their preference.
Automatic updates
- The component is installed by default if not already present.
- Existing installations are upgraded when a newer version is available.
To prevent installation of the Microsoft Teams VDI plugin, administrators can use the following command line:
CitrixWorkspaceapp.exe /InstallMSTeamsPlugin=N
Starting with the Citrix Workspace app for Windows version 2508, during upgrades, the application remembers the previous selection. To install the Microsoft Teams VDI plugin during an upgrade (if previously unselected), administrators can use following command line:
CitrixWorkspaceapp.exe /InstallMSTeamsPlugin=Y
Zoom VDI Plugin Management
Starting with the Citrix Workspace app for Windows version 2511, this component is installed by default.
Fresh installations and manual updates
- The installation option is selected by default.
- Users can clear the option based on their preference.
Automatic updates
- The component is installed by default if not already present.
- Existing installations are upgraded when a newer version is available.
To prevent installation of the Zoom VDI plugin, administrators can use the following command line:
CitrixWorkspaceapp.exe Installzoomplugin=N
WebEx VDI Plugin Installer Engine
To install the WebEx VDI Plugin Installer Engine:
Fresh installations and manual updates
- The installation option is cleared by default.
- Users can select the option based on their preference.
Automatic updates
- The component is not installed by default.
- Existing installations are upgraded when installed with a previous version of Citrix Workspace app and a newer component version is available.
To install WebEx VDI Plugin Installer Engine, administrators can use the following command line:
CitrixWorkspaceapp.exe ADDONS=WebexVDIPlugin
Note:
Third-party components are fetched from respective third-party CDNs rather than packaged with Citrix Workspace app. Customers must ensure necessary network access from endpoints for successful component installation on both online and offline Citrix Workspace app packages.
Third-party component installation failure does not impact Citrix Workspace app installation.
Failed components can be reinstalled by re-running the installer or during an upgrade.
Citrix Workspace app does not manage uninstall of third-party plugins when uninstalling Citrix Workspace app.
Citrix Workspace app preserves component selections across updates. For example, if the Microsoft Teams plugin is deselected during installation, it will not be automatically installed in subsequent versions.
Citrix recommends enabling Citrix Workspace app auto-updates to receive the latest versions of third-party components as they become available.
These Plug-in(s) are third party software and are not created, developed or managed by Cloud Software Group. Cloud Software Group has no obligations or liability for any third party services or software. By downloading and/or utilizing such software, YOU HEREBY ACKNOWLEDGE AND AGREE THAT SUCH SOFTWARE IS PROVIDED BY CLOUD SOFTWARE GROUP ON AN “AS IS” BASIS WITHOUT WARRANTY OF ANY KIND, AS AVAILABLE, AND YOUR ACCESS TO AND/OR USE OF THE SOFTWARE OR ANY RELATED ASSETS IS AT YOUR SOLE RISK. You acknowledge that you are governed by such software’s respective third party license(s).
Install Citrix Casting™
Important:
For Citrix Workspace app LTSR version 2402 and later, Citrix casting cannot be installed even with the
IncludeCitrixCastingcommand. To use this feature, you must use an older version of Citrix Workspace app. For more information, see the Deprecation page.
- Command:
IncludeCitrixCasting - Description: Installs Citrix Casting during installation.
For more information on Citrix Casting, see Citrix Casting.
UberAgent parameters
- Command:
InstallUberAgent - Description: The UberAgent add-on delivers advanced monitoring and diagnostics for Citrix Workspace app, providing detailed insights into user experience and application performance. This integration is available exclusively on managed devices, streamlining deployment and reducing administrative overhead.
Using the following command-line installation:
Use the command /InstallUberAgent to install or upgrade the UberAgent plugin.
Use the command /InstallUberAgent /SkipUberAgentUpgrade to install the plugin without upgrading it if UberAgent is already present. This option is ideal for VDAs or devices where UberAgent deployment is managed separately from Citrix Workspace app.
Note:
This component can be installed through command-line only.
Session Recording add-on support
- Command:
InstallSRAgent - Description: The Session Recording add-on extends session monitoring capabilities directly to the endpoint device, providing comprehensive oversight of user activity across various applications and endpoint environments. This integration streamlines deployment and reduces administrative overhead.
Using the following command-line installation:
Use the command /InstallSRAgent to install or upgrade the Session Recording agent for endpoints devices.
Use the command /InstallSRAgent /SkipSRAgentUpgrade to install the plugin without upgrading it if Session Recording agent is already present. This option is ideal for devices where Session Recording agent deployment is managed separately from Citrix Workspace app.
Note:
This component can be installed through command-line only.
If you are using the Citrix Workspace app x86 installer, the x64 version of .NET Desktop Runtime 8.0.15 or later (up to 8.x) is required on this machine to complete the installation.
Command-line installation
To install or upgrade the Session Recording add-on, use the following command-line option:
/InstallSRAgent
To install the add-on without upgrading it if the Session Recording agent is already present. use the below command-line option. This option is ideal for devices where Session Recording agent deployment is managed separately from Citrix Workspace app.
HDX features parameters
Set bidirectional content redirection
- Command:
ALLOW_BIDIRCONTENTREDIRECTION - Description: Indicates if bidirectional content redirection between the client and the host is enabled. For more information, see the Bidirectional content redirection policy settings section in the Citrix Virtual Apps and Desktops documentation.
The possible values are the following:
| ALLOW_BIDIRCONTENTREDIRECTION command value | Description | Example |
|---|---|---|
| 0 (default) | Indicates that the bidirectional content redirection is disabled. | CitrixWorkspaceApp.exe ALLOW_BIDIRCONTENTREDIRECTION=0 |
| 1 | Indicates that the bidirectional content redirection is enabled. | CitrixWorkspaceApp.exe ALLOW_BIDIRCONTENTREDIRECTION=1 |
Set local app access
- Command:
FORCE_LAA - Description: Indicates that Citrix Workspace app is installed with the client-side Local App Access component. Install the workspace app with administrator privileges for this component to work. For more information, see the Local App Access section in the Citrix Virtual Apps and Desktops documentation.
The possible values are the following:
| FORCE_LAA command value | Description | Example |
|---|---|---|
| 0 (default) | Indicates that the Local App Access component isn’t installed. | CitrixWorkspaceApp.exe FORCE_LAA =0 |
| 1 | Indicates that the client-end Local App Access component is installed. | CitrixWorkspaceApp.exe FORCE_LAA =1 |
Set URL redirection feature on the user device
- Command:
ALLOW_CLIENTHOSTEDAPPSURL - Description: Enables the URL redirection feature on the user device. For more information, see the Local App Access section in the Citrix Virtual Apps and Desktops documentation.
The possible values are the following:
| ALLOW_CLIENTHOSTEDAPPSURL command value | Description | Example |
|---|---|---|
| 0 (default) | Disables the URL redirection feature on the user device. | CitrixWorkspaceApp.exe ALLOW_CLIENTHOSTEDAPPSURL=0 |
| 1 | Enables the URL redirection feature on the user devices. | CitrixWorkspaceApp.exe ALLOW_CLIENTHOSTEDAPPSURL=1 |
Display icons for documents or files
- Command:
LEGACYFTAICONS - Description: Specifies if you want to display icons for documents or files that have file type association with subscribed applications.
The possible values are the following:
| LEGACYFTAICONS command value | Description | Example |
|---|---|---|
| False (default) | Display icons for documents or files that have file type associations with subscribed applications. When set to false, the operation system generates an icon for the document that doesn’t have a specific icon assigned to it. The icon generated by the operation system is a generic icon overlaid with a smaller version of the application icon. | CitrixWorkspaceApp.exe LEGACYFTAICONS=False |
| True | Doesn’t display icons for documents or files that have file type associations with subscribed applications. | CitrixWorkspaceApp.exe LEGACYFTAICONS=True |
Preference and user interface parameters
Specify the directory for the shortcuts on the Start menu and desktop
| command value | Description | Directory name | Example |
|---|---|---|---|
CitrixWorkspaceApp.exe STARTMENUDIR |
Specifies the directory for the shortcuts in the Start menu. | By default, applications appear under Start > All Programs. You can specify the relative path of the shortcuts in the Programs folder. |
To place shortcuts under Start > All Programs > Workspace, specify STARTMENUDIR=Workspace. |
CitrixWorkspaceApp.exe DESKTOPDIR |
Specifies the directory for shortcuts on the Desktop. | You can specify the relative path of the shortcuts. | To place shortcuts under Start > All Programs > Workspace, specify DESKTOPDIR=Workspace. |
Note:
When using the DESKTOPDIR option, set the
PutShortcutsOnDesktopkey toTrue.
Control access to the self-service
- Command:
SELFSERVICEMODE - Description: Controls access to the self-service Citrix Workspace app user interface.
The possible values are the following:
| SELFSERVICEMODE command value | Description | Example |
|---|---|---|
| True | Indicates that the user has access to the self-service user interface. | CitrixWorkspaceApp.exe SELFSERVICEMODE=True |
| False | Indicates that the user does not have access to the self-service user interface. | CitrixWorkspaceApp.exe SELFSERVICEMODE=False |
Control session pre-launch
- Command:
ENABLEPRELAUNCH - Description: Controls session pre-launch. For more information, see Application launch time.
The possible values are the following:
| ENABLEPRELAUNCH command value | Description | Example |
|---|---|---|
| True | Indicates that session pre-launch is enabled. | CitrixWorkspaceApp.exe ENABLEPRELAUNCH=True |
| False | Indicates that session pre-launch is disabled. | CitrixWorkspaceApp.exe ENABLEPRELAUNCH=False |
Hide Shortcuts and Reconnect option
- Command:
DisableSetting - Description: Hides the Shortcuts and Reconnect option from being displayed in the Advanced Preferences sheet. For more information, see Hiding specific settings from the Advanced Preferences sheet.
The possible values are the following:
| DisableSetting command value | Description | Example |
|---|---|---|
| 0 (default) | Displays both Shortcuts and Reconnect options in the Advanced Preferences sheet. | CitrixWorkspaceApp.exe DisableSetting=0 |
| 1 | Displays only the Reconnect option in the Advanced Preferences sheet. | CitrixWorkspaceApp.exe DisableSetting=1 |
| 2 | Displays only the Shortcuts option in the Advanced Preferences sheet. | CitrixWorkspaceApp.exe DisableSetting=2 |
| 3 | Both Shortcuts and Reconnect options are hidden from the Advanced Preferences sheet. | CitrixWorkspaceApp.exe DisableSetting=3 |
Enable Customer Experience Improvement Program
- Command:
EnableCEIP - Description: Indicates your participation in the Customer Experience Improvement Program (CEIP). For more information, see CEIP.
The possible values are the following:
| EnableCEIPcommand value | Description | Example |
|---|---|---|
| True (default) | Opt in to the Citrix Customer Improvement Program (CEIP) | CitrixWorkspaceApp.exe EnableCEIP=True |
| False | Opt out of the Citrix Customer Improvement Program | CitrixWorkspaceApp.exe EnableCEIP=False |
Enable always-on tracing
- Command:
EnableTracing - Description: Controls the Always-on tracing feature.
The possible values are the following:
| EnableTracing command value | Description | Example |
|---|---|---|
| True (default) | Enables the Always-on tracing feature. | CitrixWorkspaceApp.exe EnableTracing=true |
| False | Disables the Always-on tracing feature. | CitrixWorkspaceApp.exe EnableTracing=false |
Specify the name to identify the user device
- Command:
CLIENT_NAME - Description: Specifies the name used to identify the user device to the server.
-
<ClientName>- Specifies the name used identify the user device on the server. The default name is%COMPUTERNAME%. - Example:
CitrixReceiver.exe CLIENT_NAME=%COMPUTERNAME%.
Set client name same as the computer name
- Command:
ENABLE_DYNAMIC_CLIENT_NAME - Description: Allows the client name to be the same as the computer name. When you change the computer name, the client name changes too.
The possible values are the following:
| ENABLE_DYNAMIC_CLIENT_NAME command value | Description | Example |
|---|---|---|
| Yes (default) | Allows the client name to be the same as the computer name. | CitrixWorkspaceApp.exe ENABLE_DYNAMIC_CLIENT_NAME=Yes |
| No | Does not allow the client name to be the same as the computer name. Specify a value for the CLIENT_NAME property. |
CitrixWorkspaceApp.exe ENABLE_DYNAMIC_CLIENT_NAME=No |
Authentication parameters
Include single sign-on
- Command:
/includeSSON - Description: Requires you to install as an administrator. Indicates that the Citrix Workspace app is installed with the single sign-on component. See Domain pass-through authentication for more information.
- Example:
CitrixWorkspaceApp.exe /includeSSON
Starting with Citrix Workspace app for Windows version 2503, the system installs SSON by default in dormant mode. You can enable SSON post-installation using the Group Policy Object (GPO) policy. To enable, navigate to User Authentication > Local user name and password and select the Enable pass-through authentication checkbox.
Note:
You must reboot the system after updating the GPO policy for the SSON setting to take effect
The
includeSSONcommand supports only fresh installation of Citrix Workspace app.
Enable single sign-on
- Command:
ENABLE_SSON - Description: Enables single sign-on when the Citrix Workspace app is installed with the
/includeSSONcommand. For more information, see Domain pass-through authentication.
The possible values are the following:
| ENABLE_SSON command value | Description | Example |
|---|---|---|
| Yes (default) | Indicates that single sign-on is enabled. | CitrixWorkspaceApp.exe ENABLE_SSON=Yes |
| No | Indicates that a single sign-on is disabled. | CitrixWorkspaceApp.exe ENABLE_SSON=No |
Uninstall Citrix Workspace app
Uninstall using Windows-based uninstaller
You can uninstall Citrix Workspace app for Windows from the Control Panel. For more information, see the Uninstall Citrix Workspace app for Windows section.
Note:
During Citrix Workspace app installation, you get a prompt to uninstall the Citrix HDX RTME package. Click OK to continue the uninstallation.
Uninstall using the command-line interface
You can uninstall Citrix Workspace app, from a command line by typing the following command:
CitrixWorkspaceApp.exe /uninstall
<!--NeedCopy-->
For silent uninstallation of Citrix Workspace app, run the following switch:
CitrixWorkspaceApp.exe /silent /uninstall
<!--NeedCopy-->
Note:
Citrix Workspace app installer doesn’t control GPO related registry keys, so they are kept after uninstallation. If you find any entries, update them using
gpeditor delete them manually.
Troubleshooting
Error codes
- For installer related error codes, see MsiExec.exe and InstMsi.exe error messages.
- For system related error codes, see System error codes.
Installer log location
By default, the installer logs are located at the following location:
| Installation log folder | Installation type | |
|---|---|---|
| Administrator | For 64-bit: C:\Program Files (x86)\Citrix\Logs and for 32-bit: C:\Program Files\Citrix\ICA Client | Per-system installation |
| User | %USERPROFILE%\AppData\Local\Citrix\Logs | Per-user installation |
Note:
Starting with Citrix Workspace app for Windows 2311.1 version, the
TrolleyExpressis replaced withCWAInstaller-<date and timestamp>. For example, the log is recorded atC:\Program Files (x86)\Citrix\Logs\CTXWorkspaceInstallLogs-20231225-093441.
Reset Citrix Workspace app
Resetting Citrix Workspace app restores the default settings.
The following items are reset when you reset Citrix Workspace app:
- All the configured accounts and stores.
- Apps delivered by the self-service plug-in, their icons, and registry keys.
- File type associations created by the self-service plug-in.
- Cached files and saved passwords.
- Per-user registry settings.
- Per-machine installations, and their registry settings.
- Citrix Gateway registry settings for Citrix Workspace app.
Run the following command from the command line interface to reset the Citrix Workspace app:
"C:\Program Files (x86)\Citrix\ICA Client\SelfServicePlugin\CleanUp.exe" -cleanUser
<!--NeedCopy-->
For silent reset, use the following command:
"C:\Program Files (x86)\Citrix\ICA Client\SelfServicePlugin\CleanUp.exe" /silent -cleanUser
<!--NeedCopy-->
Note:
Use uppercase U in the parameter.
Resetting Citrix Workspace app does not impact the following:
- Citrix Workspace app or plug-in installation.
- Per-machine ICA® lockdown settings.
- Group policy object (GPO) administrative template configurations for Citrix Workspace app.