Example using UEM / MDM
In case of deployment for Citrix VDA for macOS in scale, you can use a UEM (Unified Endpoint Management) or MDM (Mobile Device Management) tool to assist or automate the whole process.
Note:
Microsoft .NET 6.0 is required before processing the following steps. You may also deploy the .NET package to target devices directly from the Jamf Pro.
General Workflow:
| Roles | Responsibilities |
|---|---|
| IT Admin
|
|
| End User
|
|
In this section, we use Jamf PRO as an example to provide a possible workflow and steps that you could reference.
Key steps include
Section 1 - Deploy the virtual delivery agent for macOS package
This section describes the steps to install the virtual delivery agent for macOS on Mac devices and enroll the devices to the Citrix DaaS.
Add the package for virtual delivery agent for macOS:
-
Double click the Apple Disk Image (.dmg) file provided by Citrix.
-
Copy the package file Citrix VDA for macOS.pkg in it to another location.
Note:
We will upload this file to the Jamf Pro console later.
-
Login to the Jamf Pro console, and navigate to Settings -> Computer management -> Packages.
-
Click New to add a new package.
-
Enter a display name for the package and upload the package file copied in step 1.
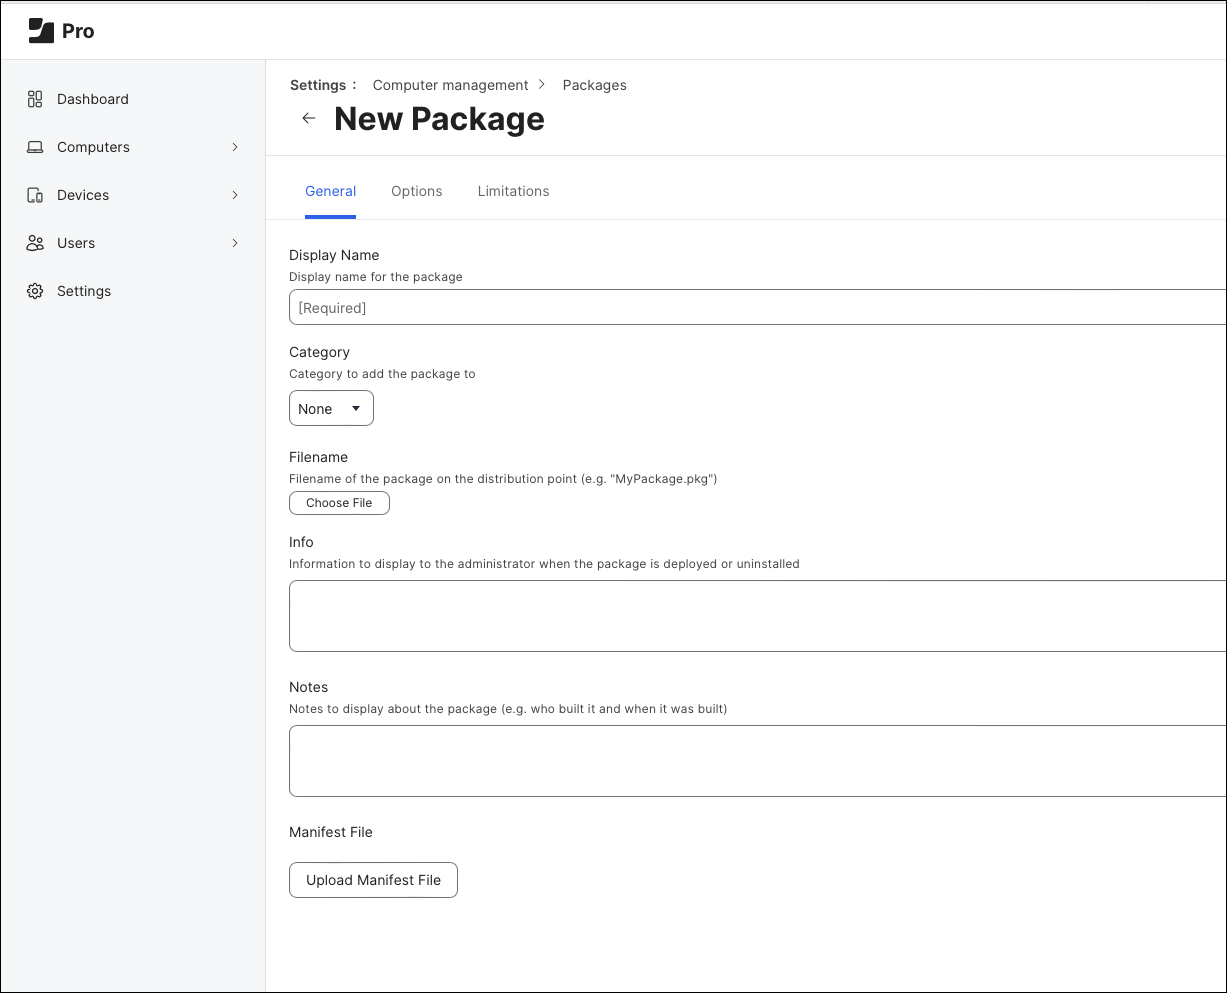
-
Save the package.
Add a script to enroll the Mac devices to Citrix DaaS:
-
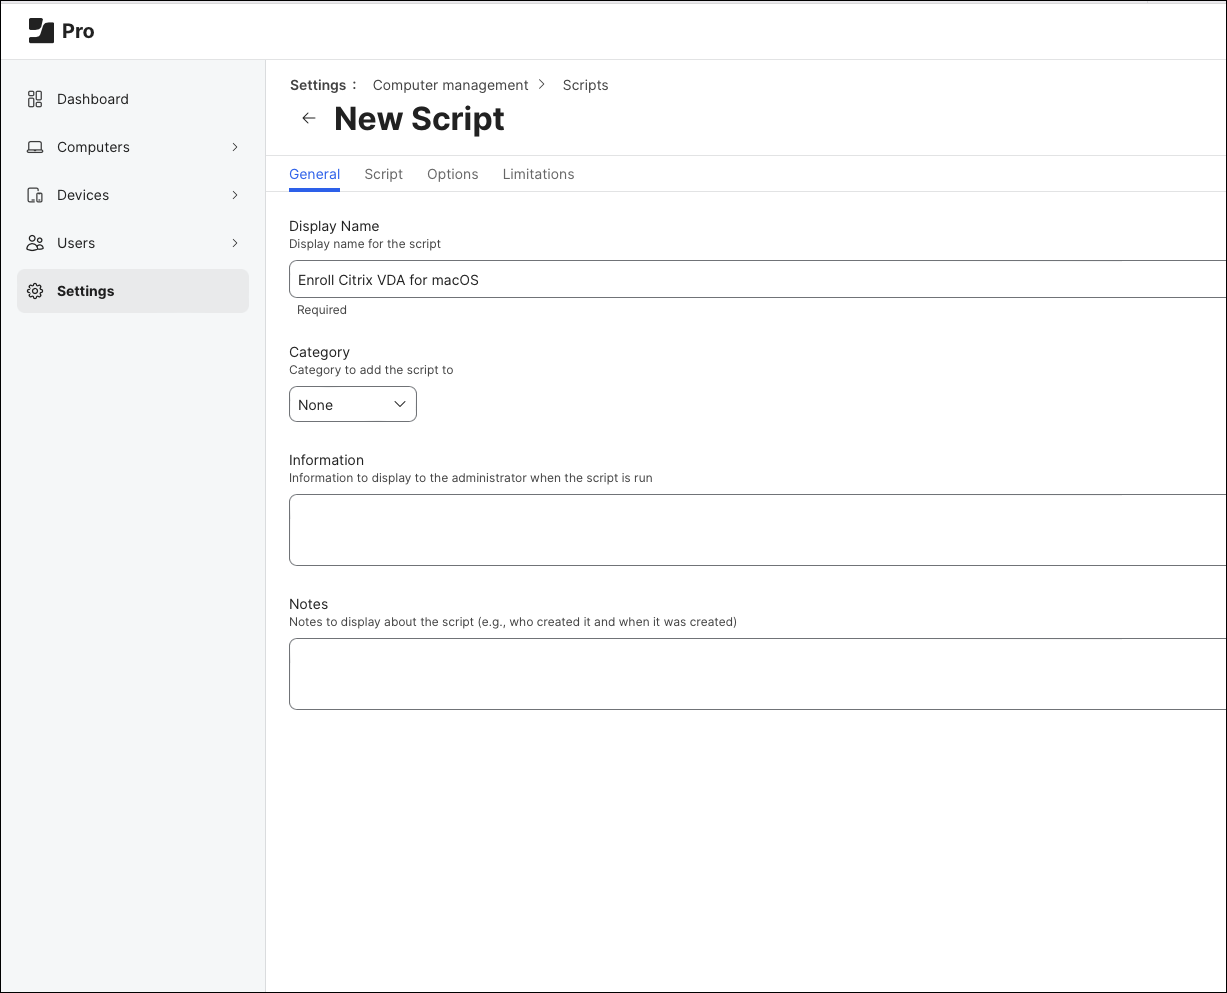
Login to the Jamf Pro console, and navigate to Settings -> Computer management -> Scripts.
-
Click New to add a new script.
-
Enter the following fields for the script.
Leave the other fields with default values or enter values based on your environment.
-
Display Name: Enroll Mac Devices to Citrix DaaS (you can change this name on your own)
-
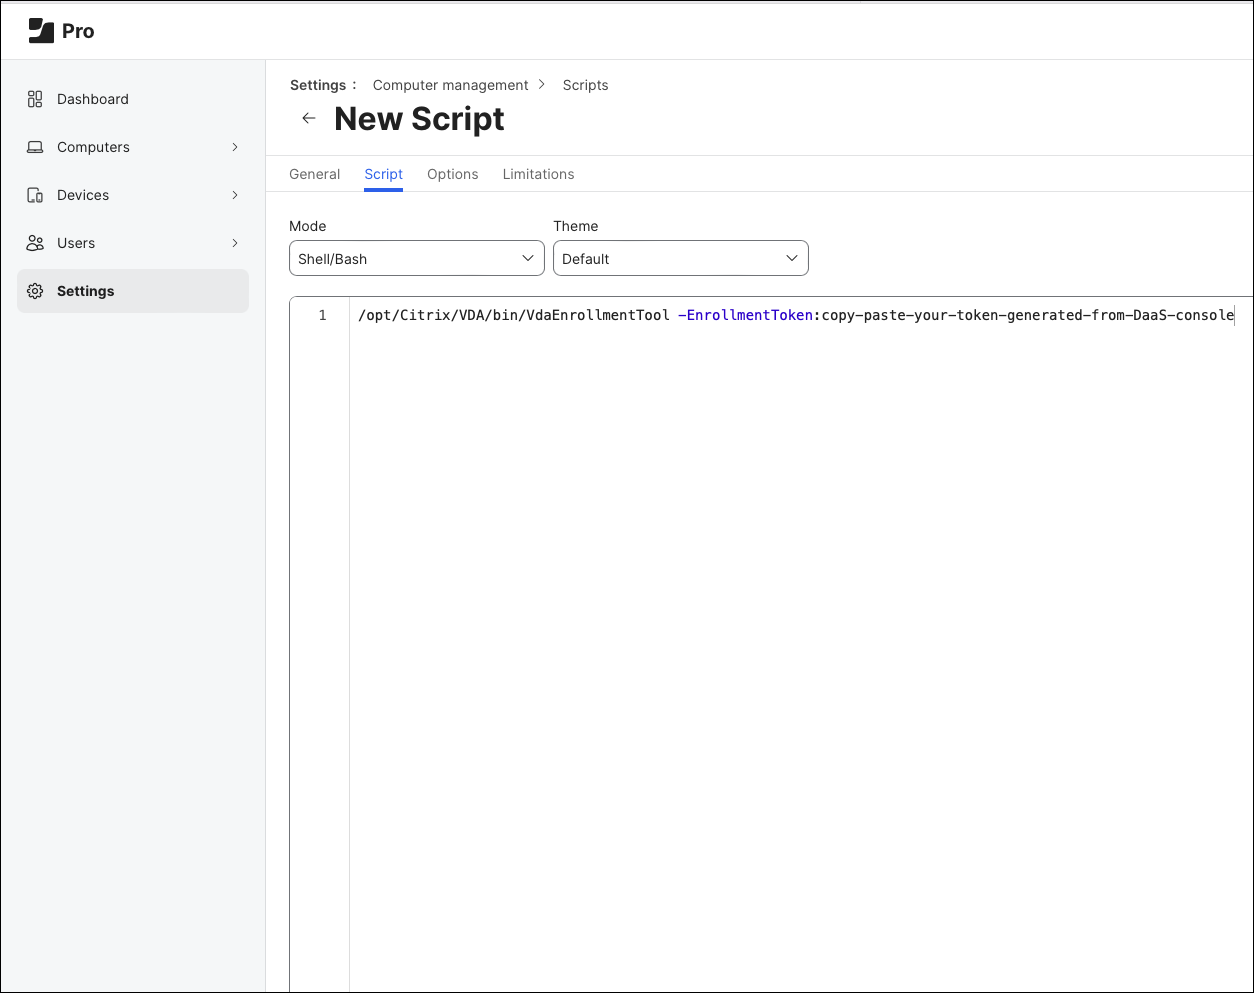
Script: Select Shell/Bash for the mode and enter the following as the content. Replace the enrollment token with your own token in the script that was described in Steps to prepare in DaaS management console
/opt/Citrix/VDA/bin/VdaEnrollmentTool -EnrollmentToken:eyJhbGciOiJSUzI(use-your-own-enrollment-token-here)-Restart
Priority: After

-
-
Save the script.
Add a policy to install the package and execute the script:
-
Login to the Jamf Pro console, and navigate to Computers -> Policies.
-
Click New to add a new policy.
-
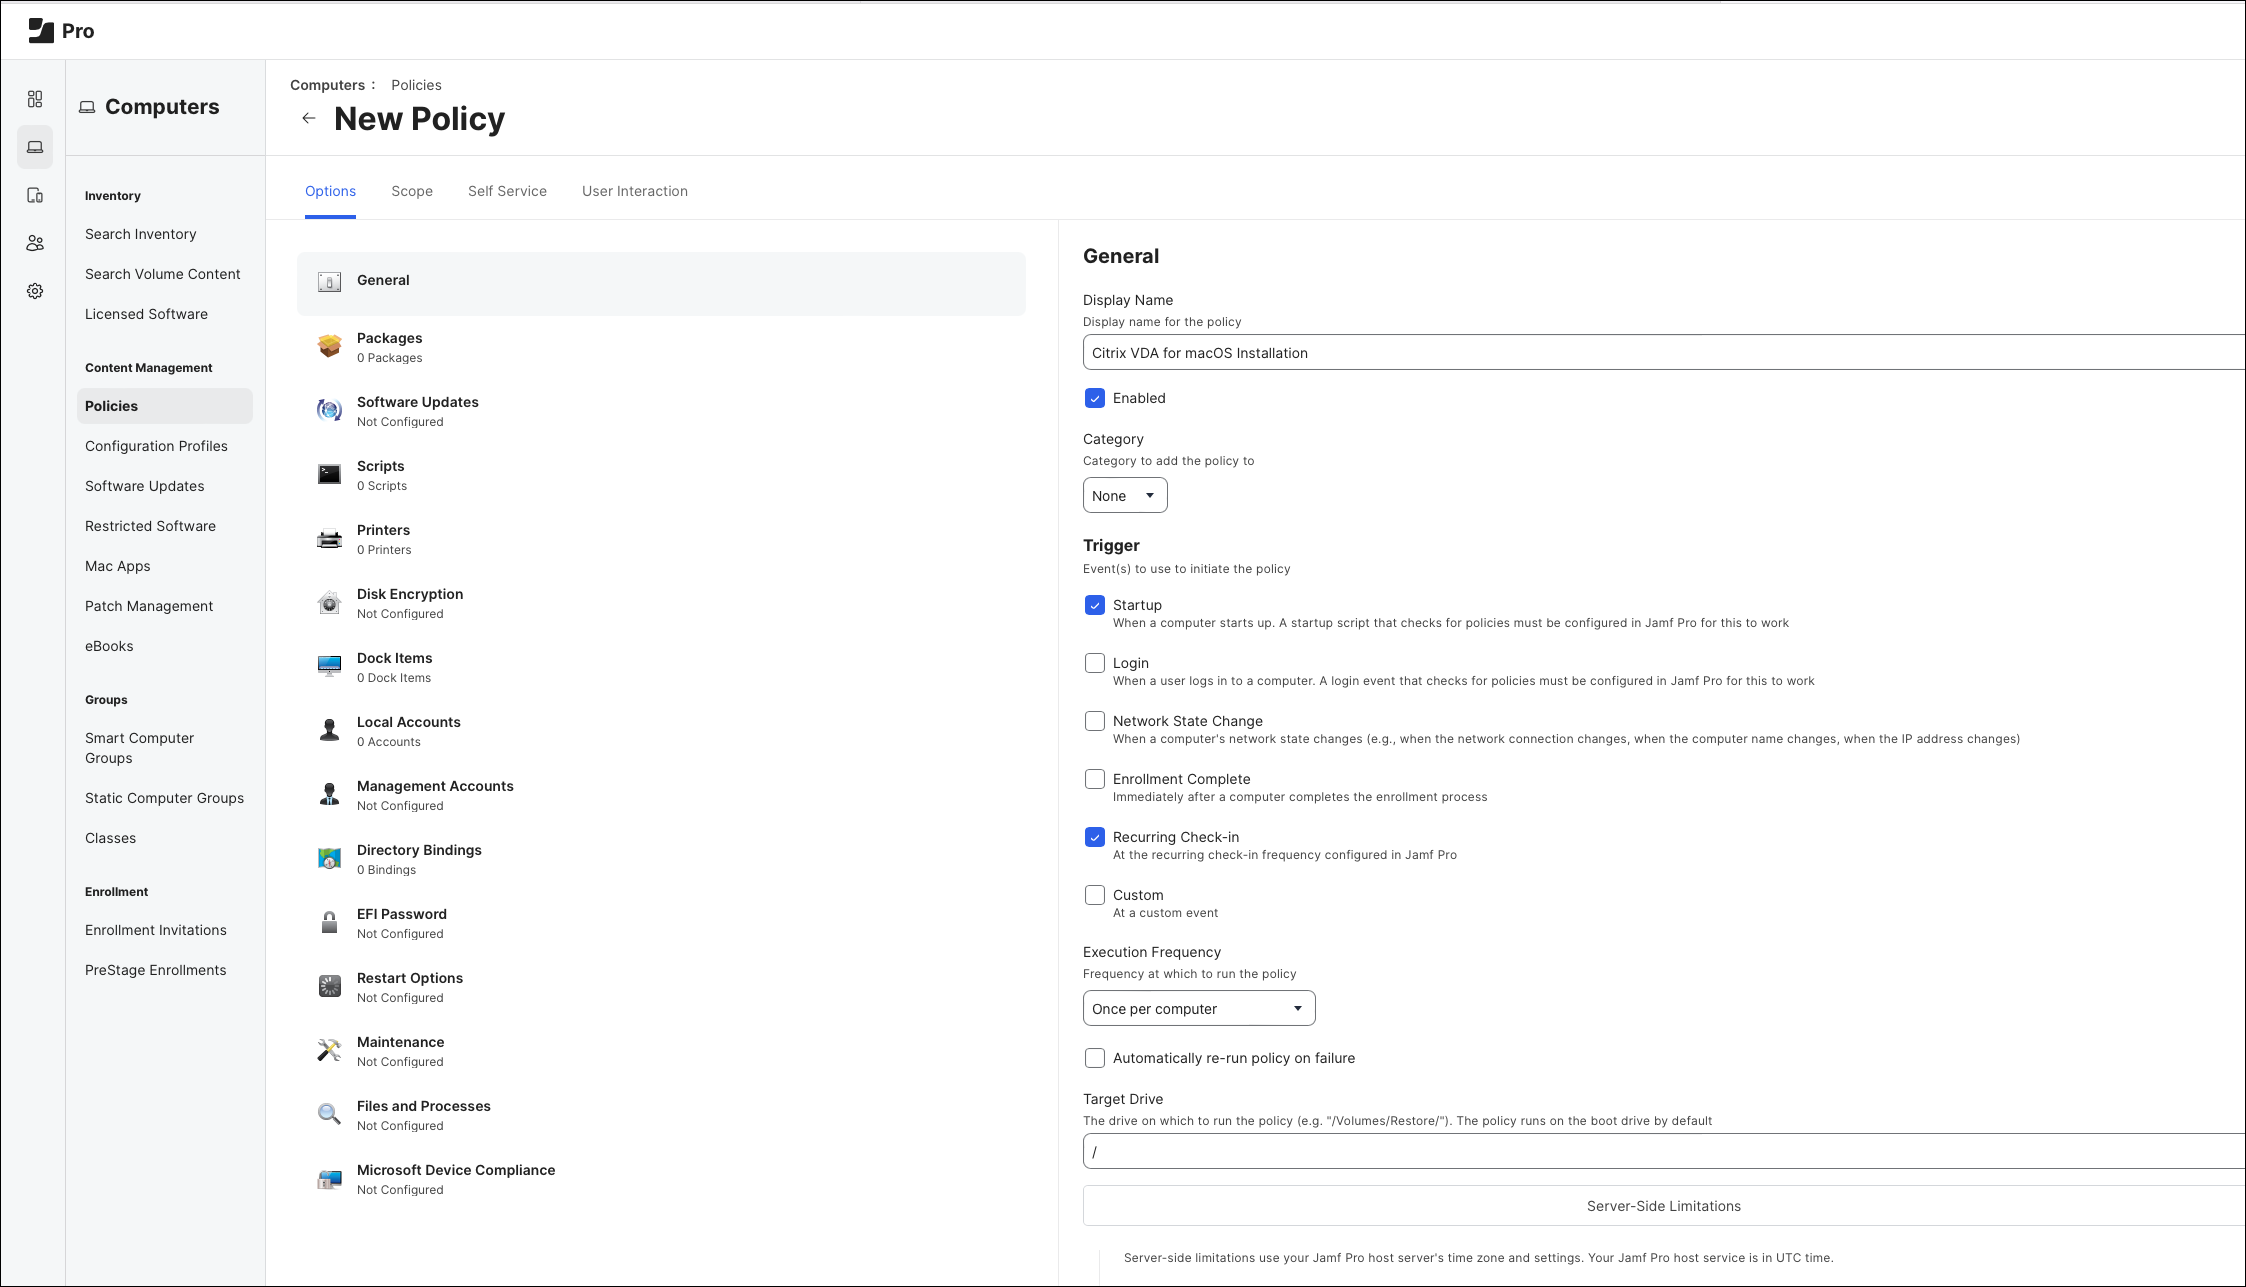
Enter the following fields for the General part.
-
Display Name: Install VDA for macOS (you can change this name on your own)
-
Trigger: Enter required details. This guide uses Recurring Check-in as the trigger events. Enter values based on your environment.
-
Execution frequency: Once per computer.
-
-
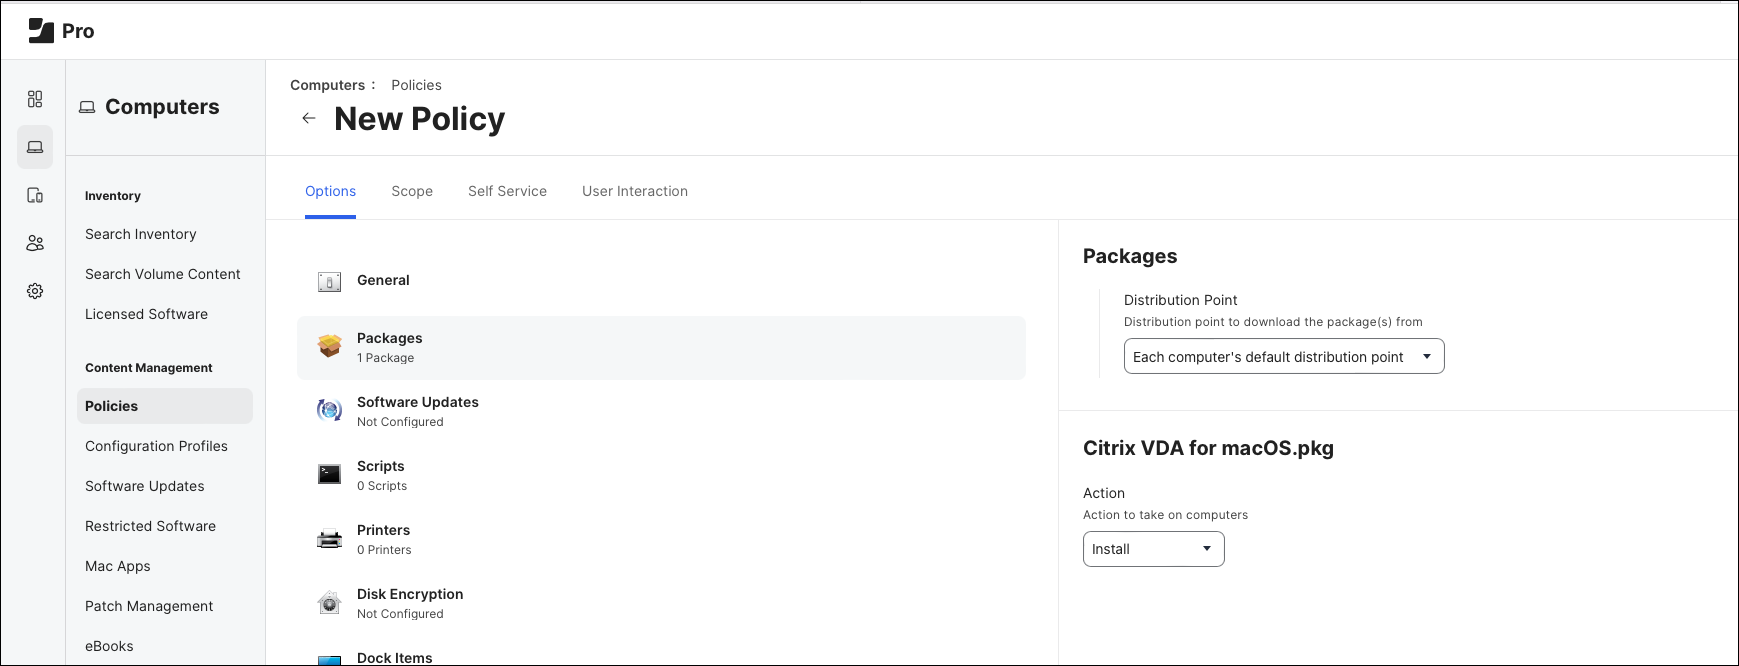
Click Packages, and add the package we created in the previous steps.
-
Select Install for the action to take on computers.
-
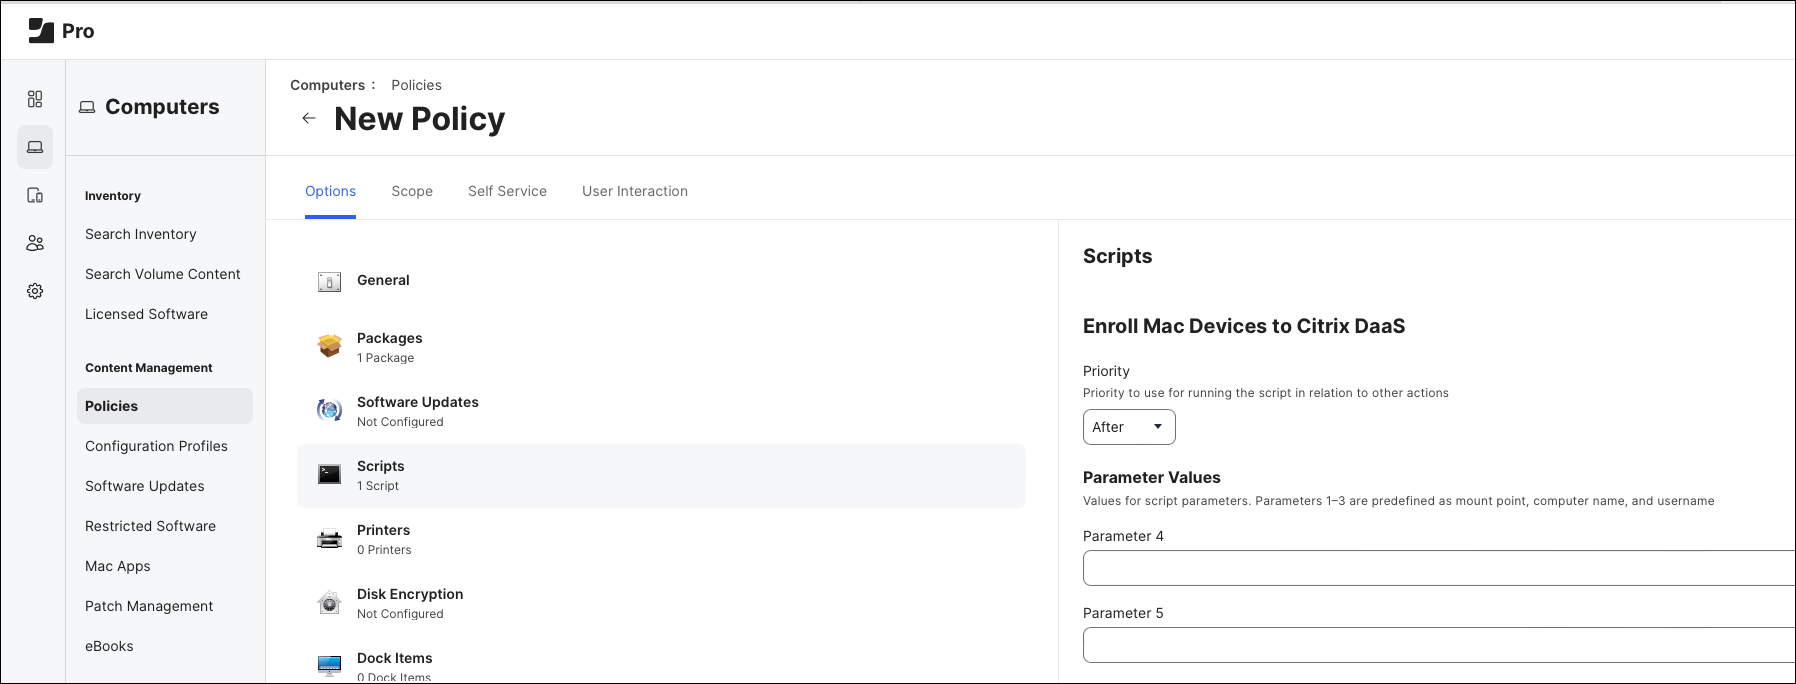
Click Scripts and add the script we created in the previous steps.
-
Select After for the priority.
-
Click the Scope tab, and specify the scope for this policy.
-
Click Save to save the policy.
When the policy is pushed to the managed devices, the virtual delivery agent for macOS is installed according to the trigger events you specify for the policy. You can then go to the Citrix DaaS console to view or assign the devices.
Section 2 - Create a Privacy Preferences Policy Control profile
In this section, we will create a PPPC profile for the virtual delivery agent for macOS.
This allows the virtual delivery agent to access Accessibility, and also allows a standard user to allow the virtual delivery agent to access Screen Recordings.
-
Login to the Jamf Pro console, and navigate to Computers -> Configuration Profiles.
-
Click New to add a new configuration profile.
-
Enter a display name for the new profile, e.g. Privacy Settings - Citrix VDA for macOS.
-
Select Privacy Preferences Policy Control.
-
Click Configure.
-
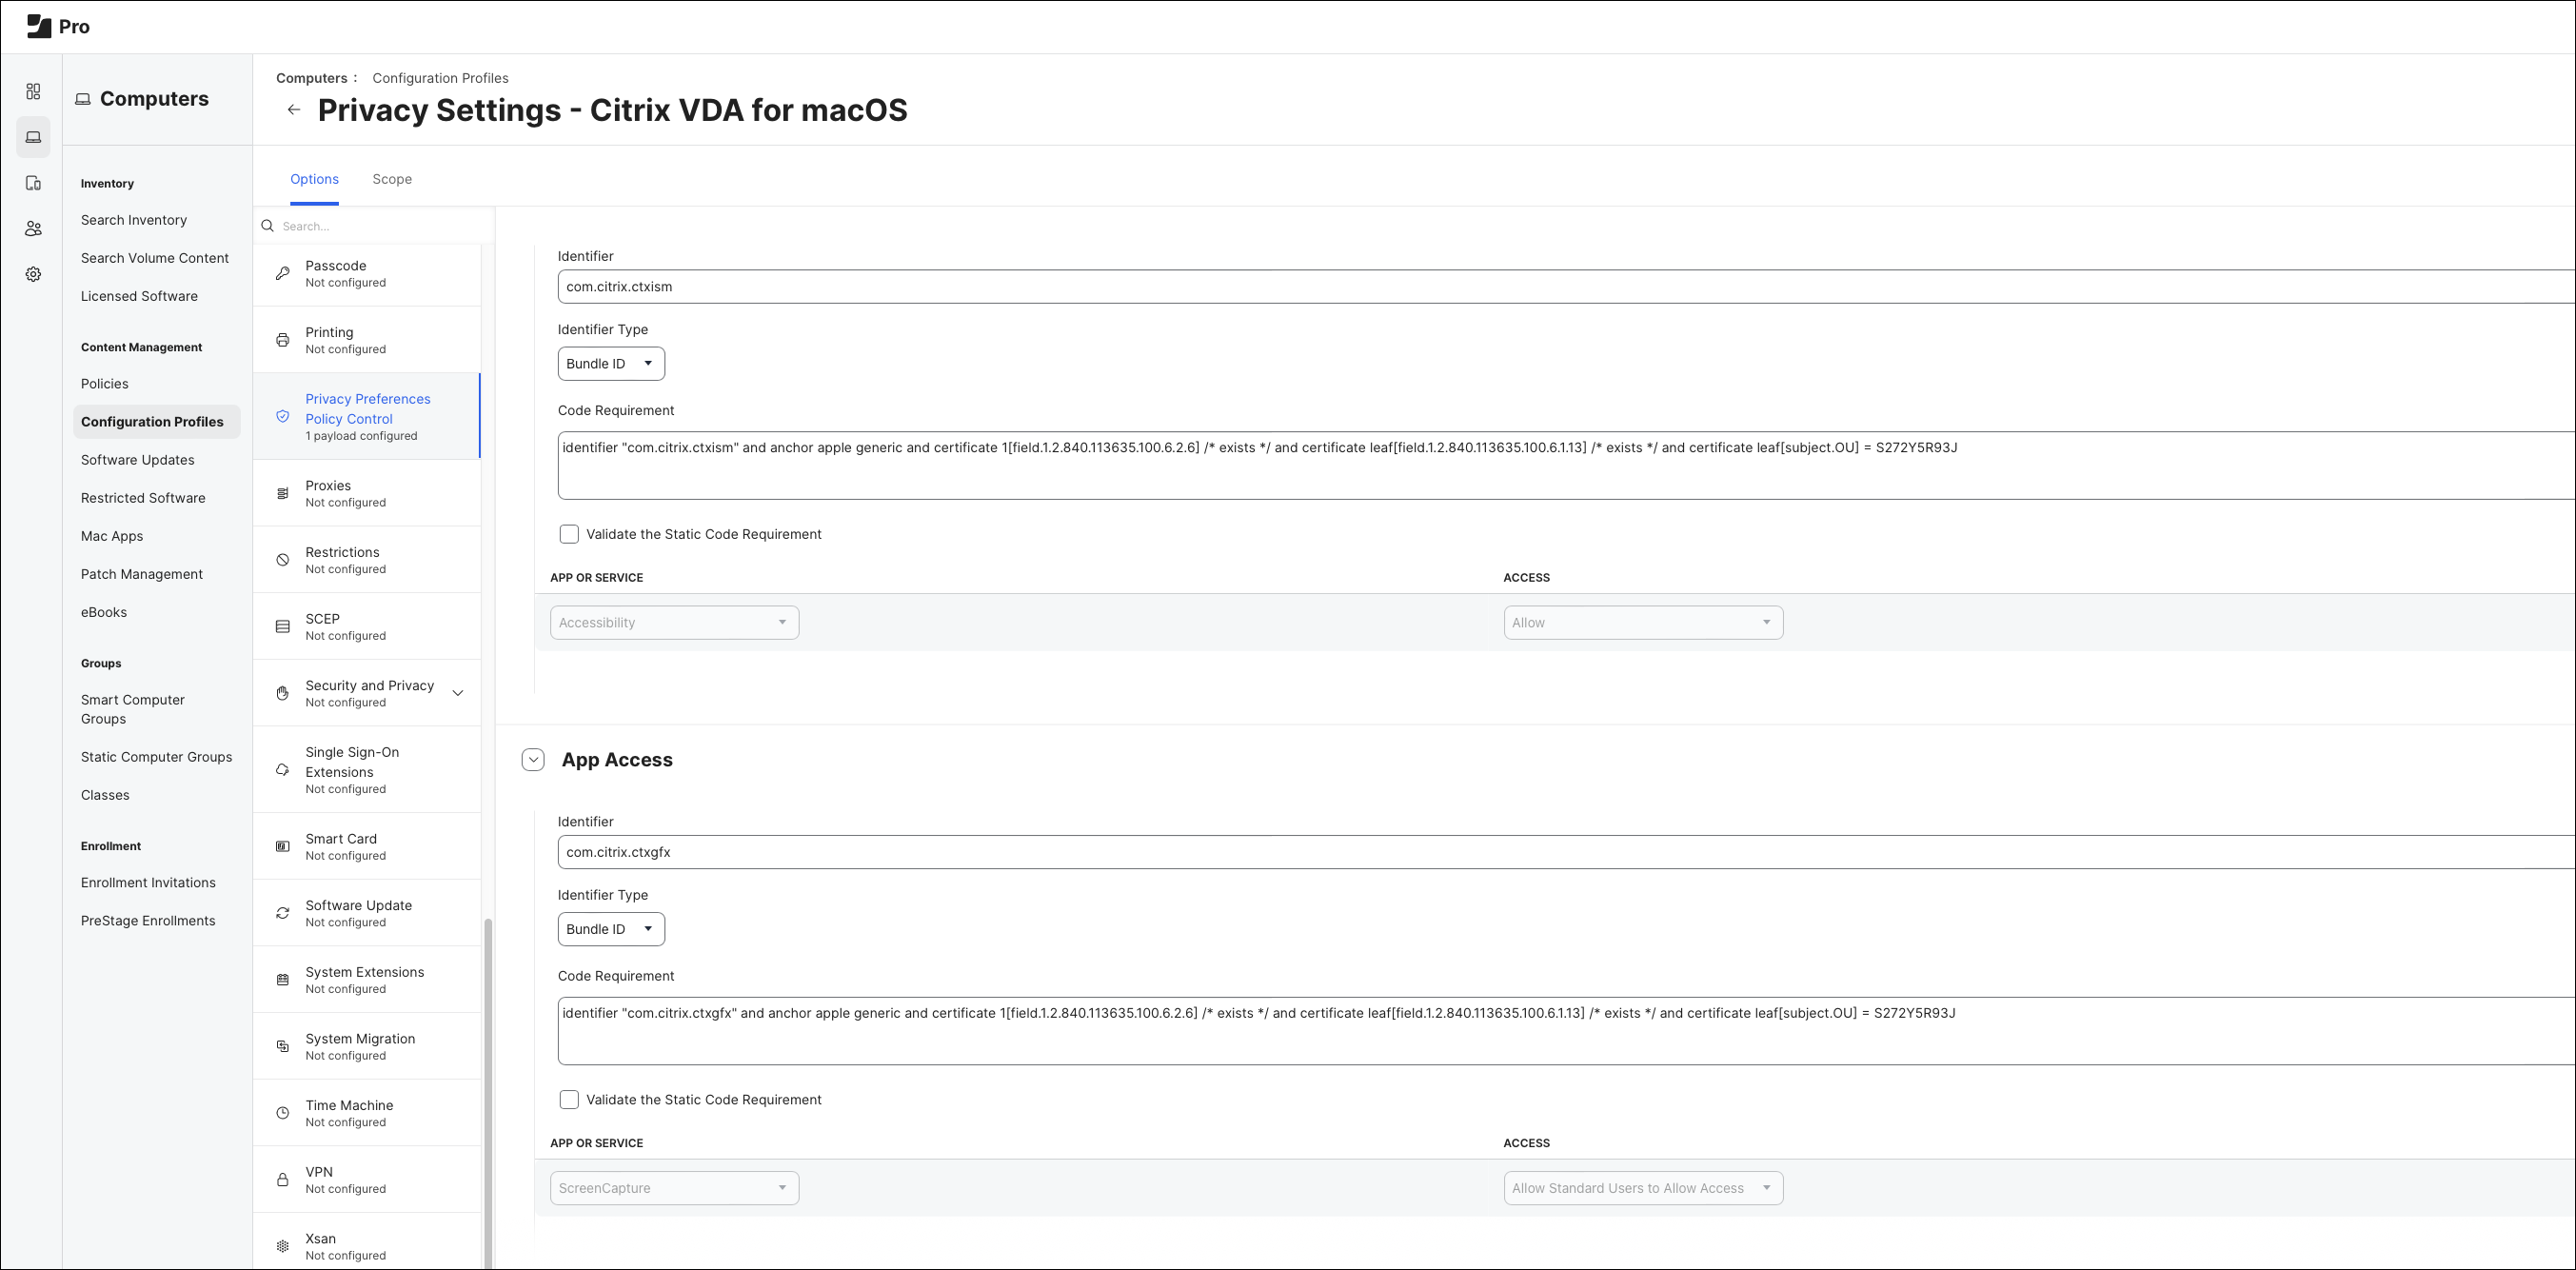
Add the following App Access configuration:
-
Identifier: com.citrix.ctxgfx
-
Identifier Type: Bundle ID
-
Code Requirement: identifier “com.citrix.ctxism” and anchor apple generic and certificate 1[field.1.2.840.113635.100.6.2.6] /exists/ and certificate leaf[field.1.2.840.113635.100.6.1.13] /exists/ and certificate leaf[subject.OU] = S272Y5R93J
-
APP or SERVICE: add a new item and select Accessibility and Allow.
-
-
Add the following App Access configuration.
-
Identifier: com.citrix.ctxgfx
-
Identifier Type: Bundle ID
-
Code Requirement: identifier “com.citrix.ctxism” and anchor apple generic and certificate 1[field.1.2.840.113635.100.6.2.6] /exists/ and certificate leaf[field.1.2.840.113635.100.6.1.13] /exists/ and certificate leaf[subject.OU] = S272Y5R93J
-
APP or SERVICE: Add a new item and select ScreenCapture and Allow Standard Users to Allow Access.
-
-
Specify the scope for the configuration profile on your own needs.
-
Save the configuration profile.
After the configuration profile is pushed and installed to the managed devices, the Accessibility privacy permission is automatically allowed for the Citrix VDA but for the Screen Recording permission, it will still need a standard user to approve before the Citrix VDA can access it.
Section 3 - Allow Screen Recording for Citrix VDA on managed devices
This section describes the steps to allow screen recording for Citrix VDA on the managed devices.
When the configuration profile created in the previous step is installed on the managed devices, the screen recording permission still needs to be allowed manually to make Citrix VDA work.
-
Logon to the target Mac devices using any standard or admin user.
Note:
You may consider enabling remote desktop for the target devices to allow remote access if the target devices cannot be accessed locally.
Check the Remote Commands for Computers for more information from the Jamf Pro docs. After this command is performed on a target device, users can then remotely access this device using any VNC clients.
-
Open the System Settings app, and navigate to Privacy & Security.
-
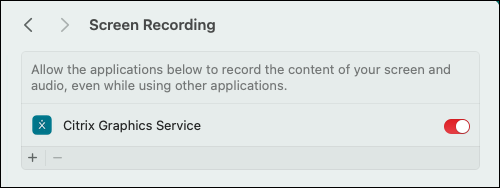
Click Screen & System Audio Recording.
-
Find Citrix Graphics Service in the list and click the toggle to enable it.
After the permission is properly configured, this target device will be ready for session launches from Citrix Workspace App.