Session recording file export
The session recording file export feature provides a secure and verifiable method for exporting session recordings to meet critical needs such as digital evidence, fraud investigations, and regulatory compliance. It allows authorized administrators to export selected session recordings into a universal MP4 format.
Key capabilities of this feature include:
- Role-Based Access Control: Ensures that only authorized users can perform export operations.
- Mandatory Justification: Requires a reason for each export, enhancing the traceability of operations.
- Comprehensive Activity Logging: All export activities are recorded in detail for auditing purposes.
Prerequisites
Before you begin the configuration, please ensure your environment meets all of the following requirements:
- The Session Recording Agent, Session Recording Server, and Session Recording Web Player are all installed or have been upgraded to version 2511 or later.
- Session recording media task service version 2511 or later is installed. Refer to the official setup guide.
How to use recording file export
How to export Session Recording files
Note:
Only administrators who have been assigned as full admin can perform export operations. You can refer to Playback permissions for more details.
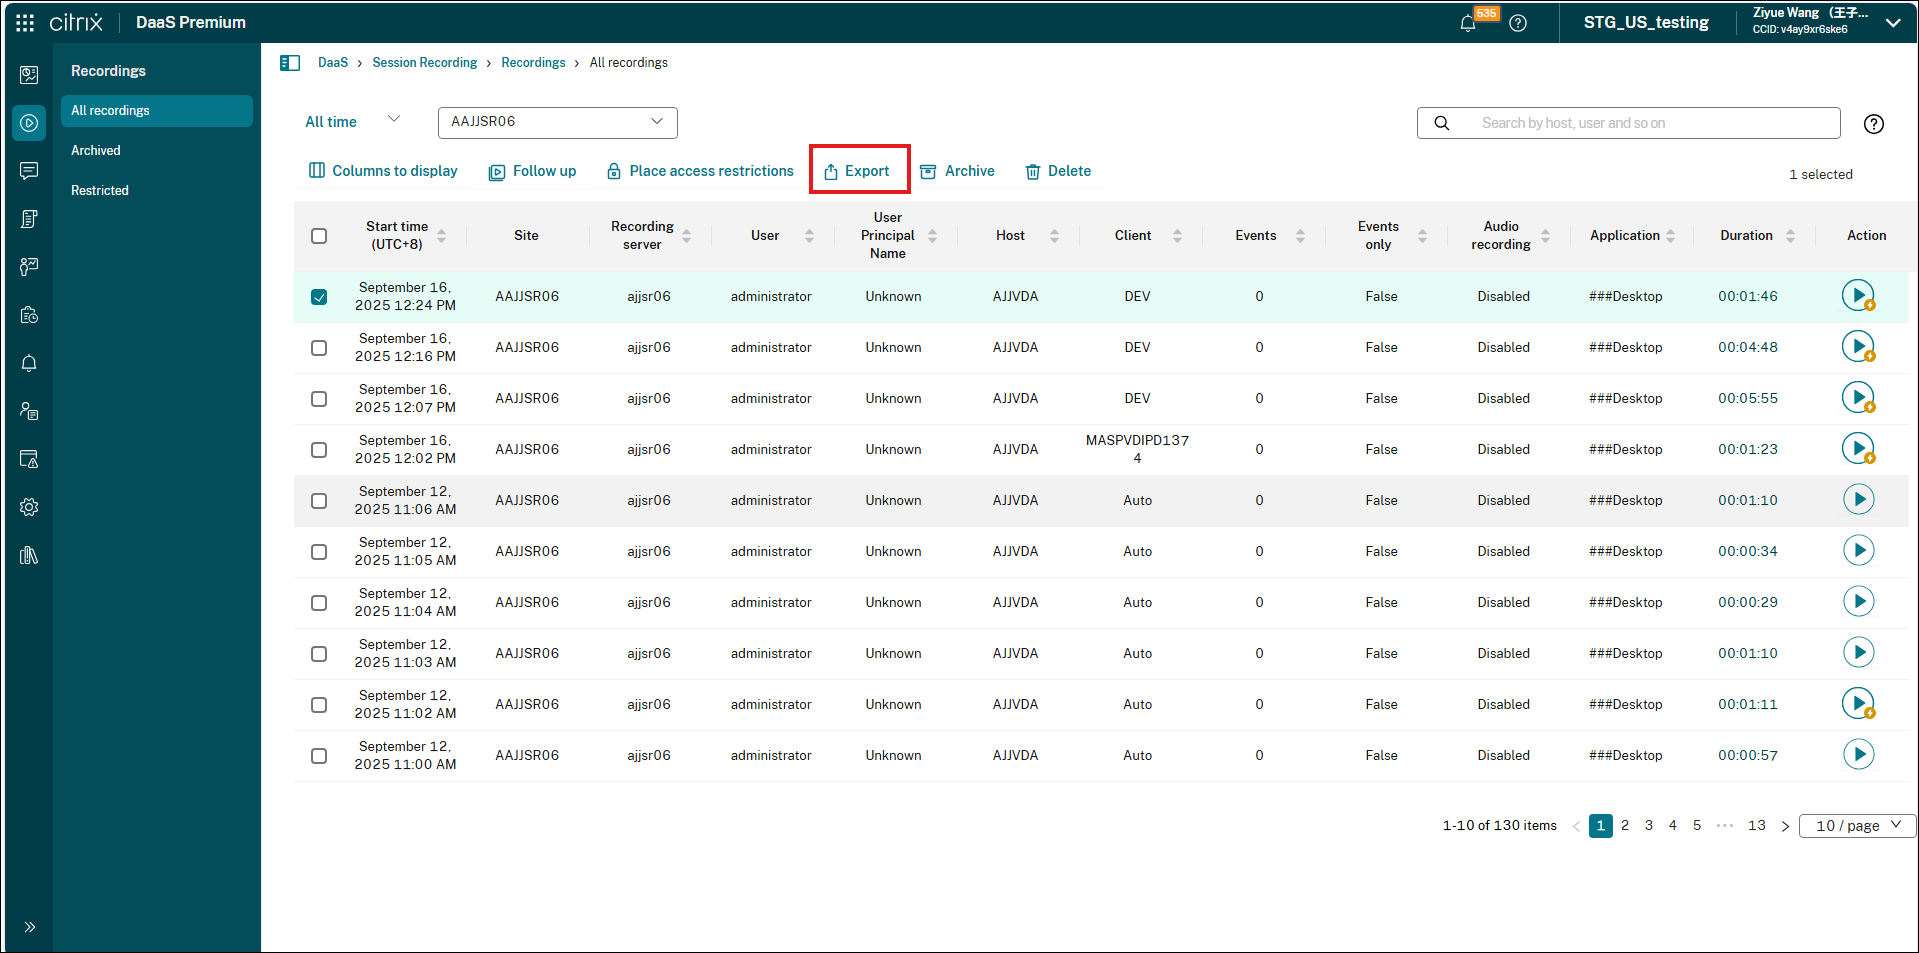
- Select All Recordings from the left navigation of the Session Recording service.
- Select one or more recordings that you need to export.
-
Click the Export button located above the list.
-
Check the export files under the following folder on the machine running media task service:
%ProgramData%\Citrix\SessionRecording\SRTask\Cache.
How to monitor export tasks and audit logs
-
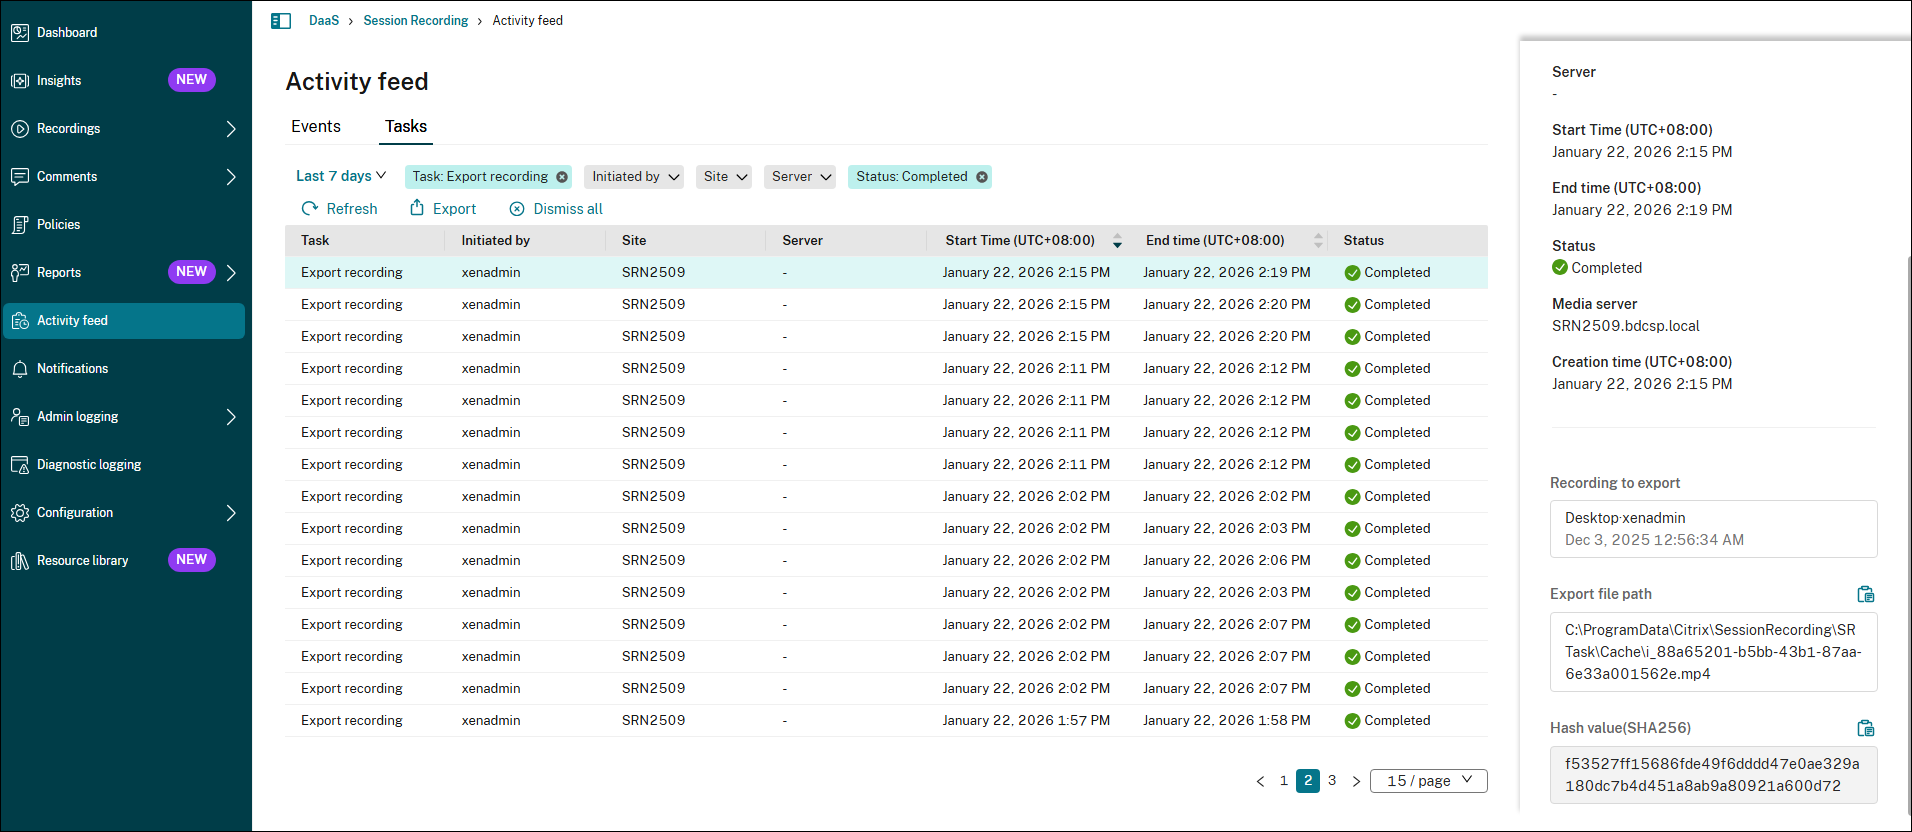
To view export status:
- In the Session Recording service view, select Activity Feed from the left navigation.
- Switch to Tasks tabs to view the information about tasks that happened in the past.
- This page displays the real-time status of all export tasks, including “In Progress,” “Completed,” “Pending,” or “Failed.”
-
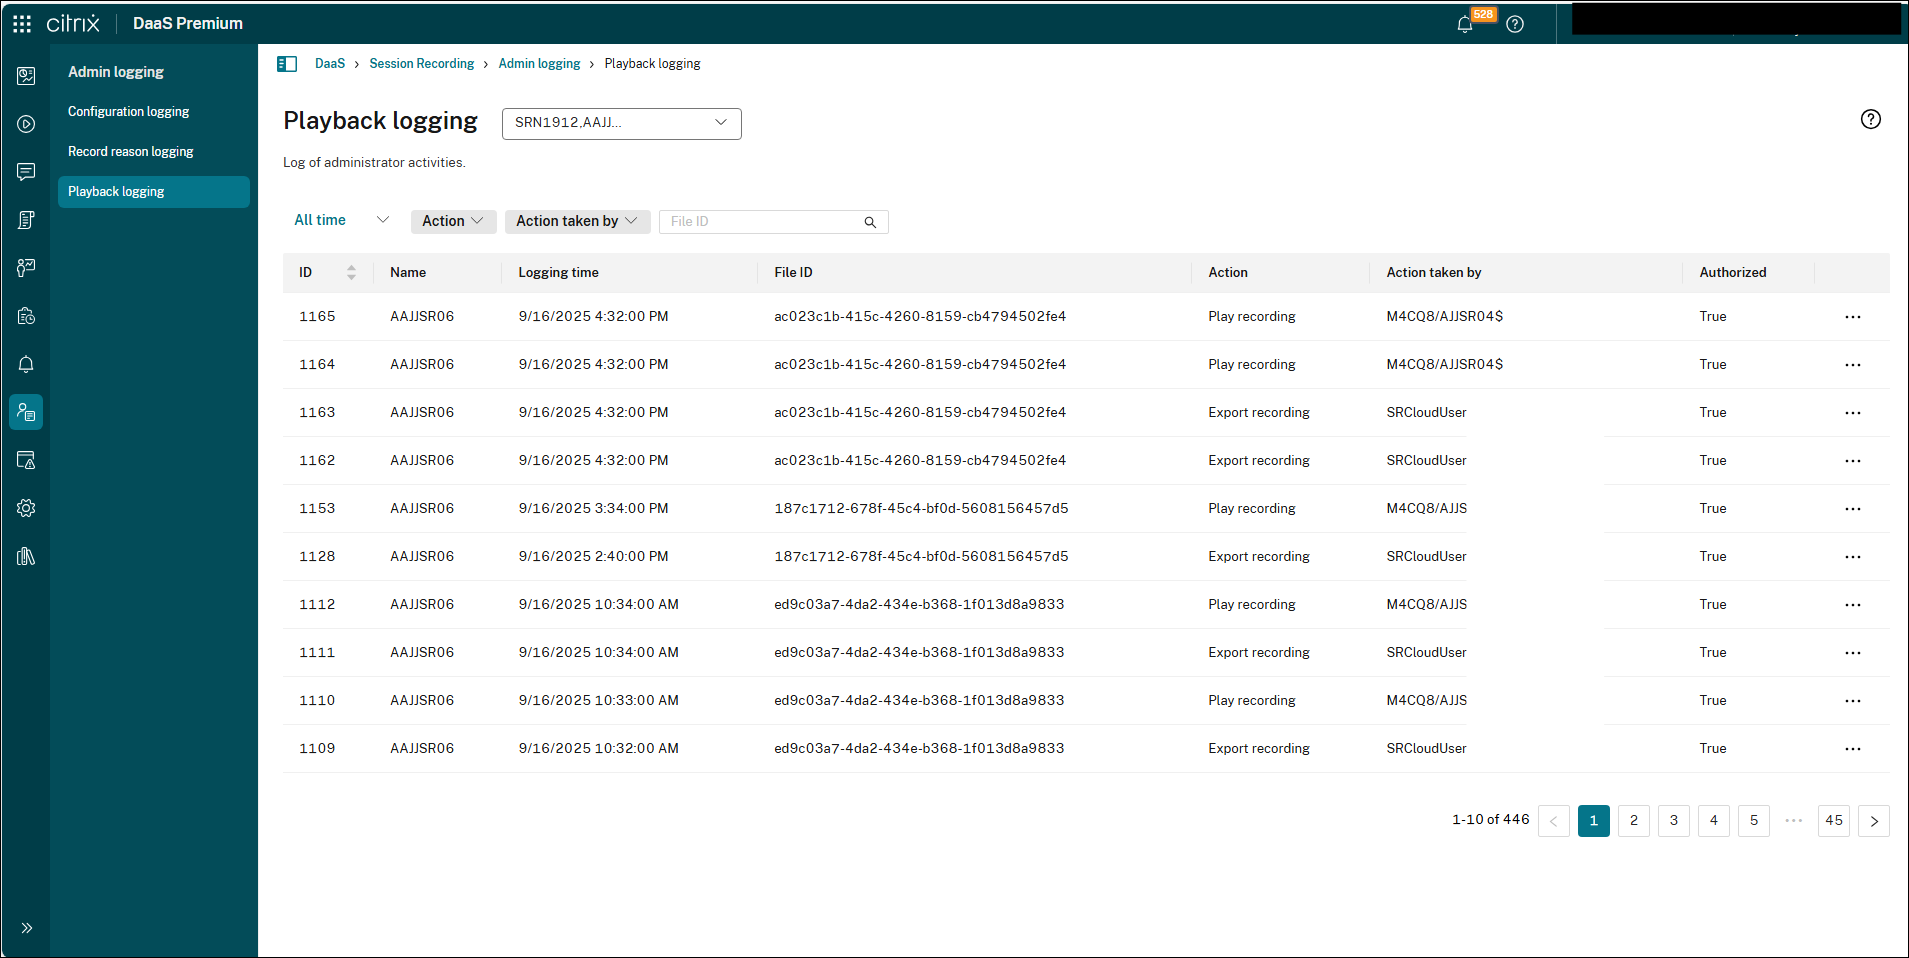
To audit export activities:
- Navigate to Admin Logging -> Playback Logging.
-
Here you can view the export records for all recordings (Action will be Export recording), along with details such as the user who performed the action and the timestamp.