Configure authentication
Select authentication methods
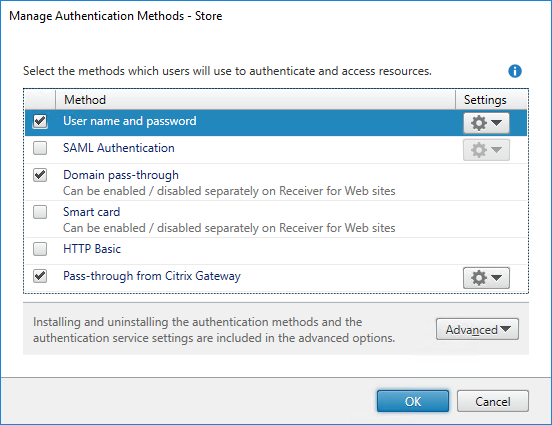
For each store you can choose one or more authentication methods that are available when logging in to the store through Citrix Workspace app.
- Select the Store node in the left pane of the Citrix StoreFront management console and, in the Actions pane, click Manage Authentication Methods.
- Specify the access methods that you want to enable for your users.
For available authentication methods, see Authentication.
Modifying the authentication methods for a store also updates the authentication methods used when accessing the store through a web browser. To change authentication methods when logging on through a web browser see Authentication Methods.
Select authentication methods using PowerShell SDK
To configure authentication using the PowerShell SDK:
-
Call Get-STFAuthenticationService to get the authentication service for a store or a virtual directory and to view its current configuration.
-
On the authentication service, enable or disable the required authentication protocols. To get a list of available protocols, run Get-STFAuthenticationServiceProtocol. To enable the protocols, run Enable-STFAuthenticationServiceProtocol with a list of protocols to enable. To disable the protocols, run Disable-STFAuthenticationServiceProtocol with the list of protocols to disable.
Authentication method settings
Some authentication methods have additional settings. Select the Settings drop down list to see available options. For more information see the page for that authentication method:
- User name and password settings
- SAML authentication settings
- Pass-through from Citrix Gateway settings
Shared authentication service settings
You can configure one store to share the authentication service of another store, enabling single sign-on between them.
- Open Manage Authentication Methods.
- From the Advanced drop-down menu, select Shared authentication service settings.
- Click the Use shared authentication service check box and select a store from the Store name drop-down menu.
Note:
There is no functional difference between a shared and dedicated authentication service. An authentication service shared by more than two stores is treated as a shared authentication service and any configuration changes affect the access to all the stores using the shared authentication service.
Install or uninstall authentication methods
If you have installed a new custom authentication method on the server then you must also install it for each existing store where you wish to use it. From the Manage authentication methods screen select Advanced then Install or uninstall authentication methods.