
Step 2: Set up the first data center
In this step, you are prompted to enter the details required to configure Citrix SecurAccess™ ZTNA on your NetScaler.
Note:
Ensure NetScaler meets all prerequisites.
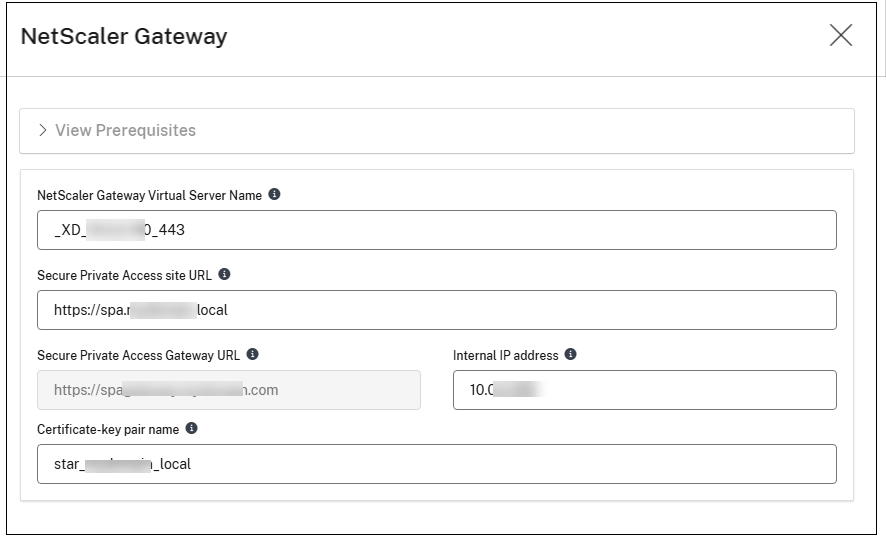
-
NetScaler Gateway virtual server name: Enter the name of the NetScaler Gateway virtual server that is already configured with your StoreFront deployment. This virtual server is used to enumerate applications configured in Citrix SecurAccess ZTNA within the Citrix Store.Note:This input is not required if you skipped the Chrome Enterprise Premium configuration.
-
Citrix SecurAccess ZTNA site URL: Enter the load balancer URL that directs traffic to the Citrix SecurAccess ZTNA services running on your Cloud Connectors.This load balancer must be configured to use HTTPS on port 443. If you have not yet created this load balancer, see Citrix SecurAccess ZTNA load balancer for instructions before proceeding.
-
Citrix SecurAccess ZTNA Gateway URL: This URL is the public address for the NetScaler Gateway that is shared with the users. It is utilized to connect to internal applications.If you are configuring a multi-data center, multi-site deployment, this will be the public address of the global server load balancing (GSLB) domain URL. It will be pre-populated if the URL was entered earlier during Step 1: Set up Google Chrome Enterprise Premium.
-
Internal IP address: Enter the private IPv4 address that is used for your Citrix SecurAccess ZTNA gateway. This IP address is assigned to the NetScaler Gateway virtual server during the configuration in Step 3 - Configure and Analyze.
-
Certificate-key pair name: Enter the name of the SSL certificate-key pair that is already configured on your NetScaler.
-
Click Save. Once saved, a Shared Secret is displayed. You need this shared secret value for configuration in Step 3 - Configure and Analyze.