Connector Appliance for Secure Private Access
The Connector Appliance is a Citrix component hosted in your hypervisor. It serves as a channel for communication between Citrix Cloud and your resource locations, enabling cloud management without requiring any complex networking or infrastructure configuration. Connector Appliance enables you to manage and focus on the resources that provide value to your users.
All connections are established from the Connector Appliance to the cloud using the standard HTTPS port (443) and the TCP protocol. No incoming connections are accepted. TCP port 443, with the following FQDNs are permitted outbound:
- *.nssvc.net
- *.netscalermgmt.net
- *.citrixworkspacesapi.net
- *.citrixnetworkapi.net
- *.citrix.com
- *.servicebus.windows.net
- *.adm.cloud.com
Configure Secure Private Access with Connector Appliance
-
Install two or more Connector Appliances in your Resource Location.
For more information about setting up your Connector Appliances, see Connector Appliance for Cloud Services.
-
To configure Secure Private Access to connect to on-premises web apps by using KCD, configure KCD by completing the following steps:
-
Join your Connector Appliance to an Active Directory domain.
Joining an Active Directory forest enables you to use Kerberos Constrained Delegation (KCD) when configuring Secure Private Access, but it does not enable identity requests or authentication to use the Connector Appliance.
-
Connect to the Connector Appliance administration webpage in your browser by using the IP address provided in the Connector Appliance console.
-
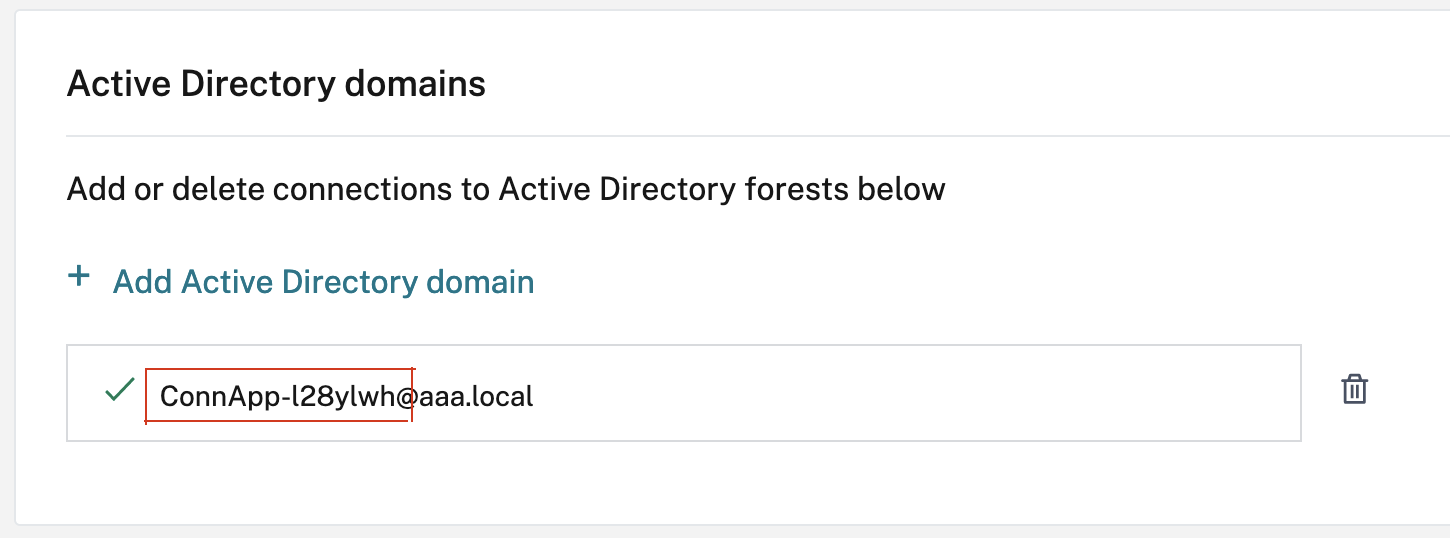
In the Active Directory domains section, click + Add Active Directory domain.
If you don’t have an Active Directory domains section in your administration page, contact Citrix to request enrollment in the preview.
-
Enter the domain name in the Domain Name field. Click Add.
-
The Connector Appliance checks the domain. If the check is successful, the Join Active Directory dialog opens.
-
Enter the user name and password of an Active Directory user that has join permission for this domain.
-
The Connector Appliance suggests a machine name. You can choose to override the suggested name and provide your own machine name that is up to 15 characters in length. Make a note of the machine account name.
This machine name is created in the Active Directory domain when the Connector Appliance joins it.
-
Click Join.
-
-
Configure Kerberos Constraint Delegation for web server without a load balancer.
- Identify the connector appliance computer name. You can get this name either from the place where you hosted or simply from the connector UI.
- On your Active Directory controller, look for the connector appliance computer.
- Go to the properties of the Connector Appliance computer account, and navigate to the Delegation tab.
-
Choose Trust the computer for delegation to specified services only. and then select Use any authentication protocol.
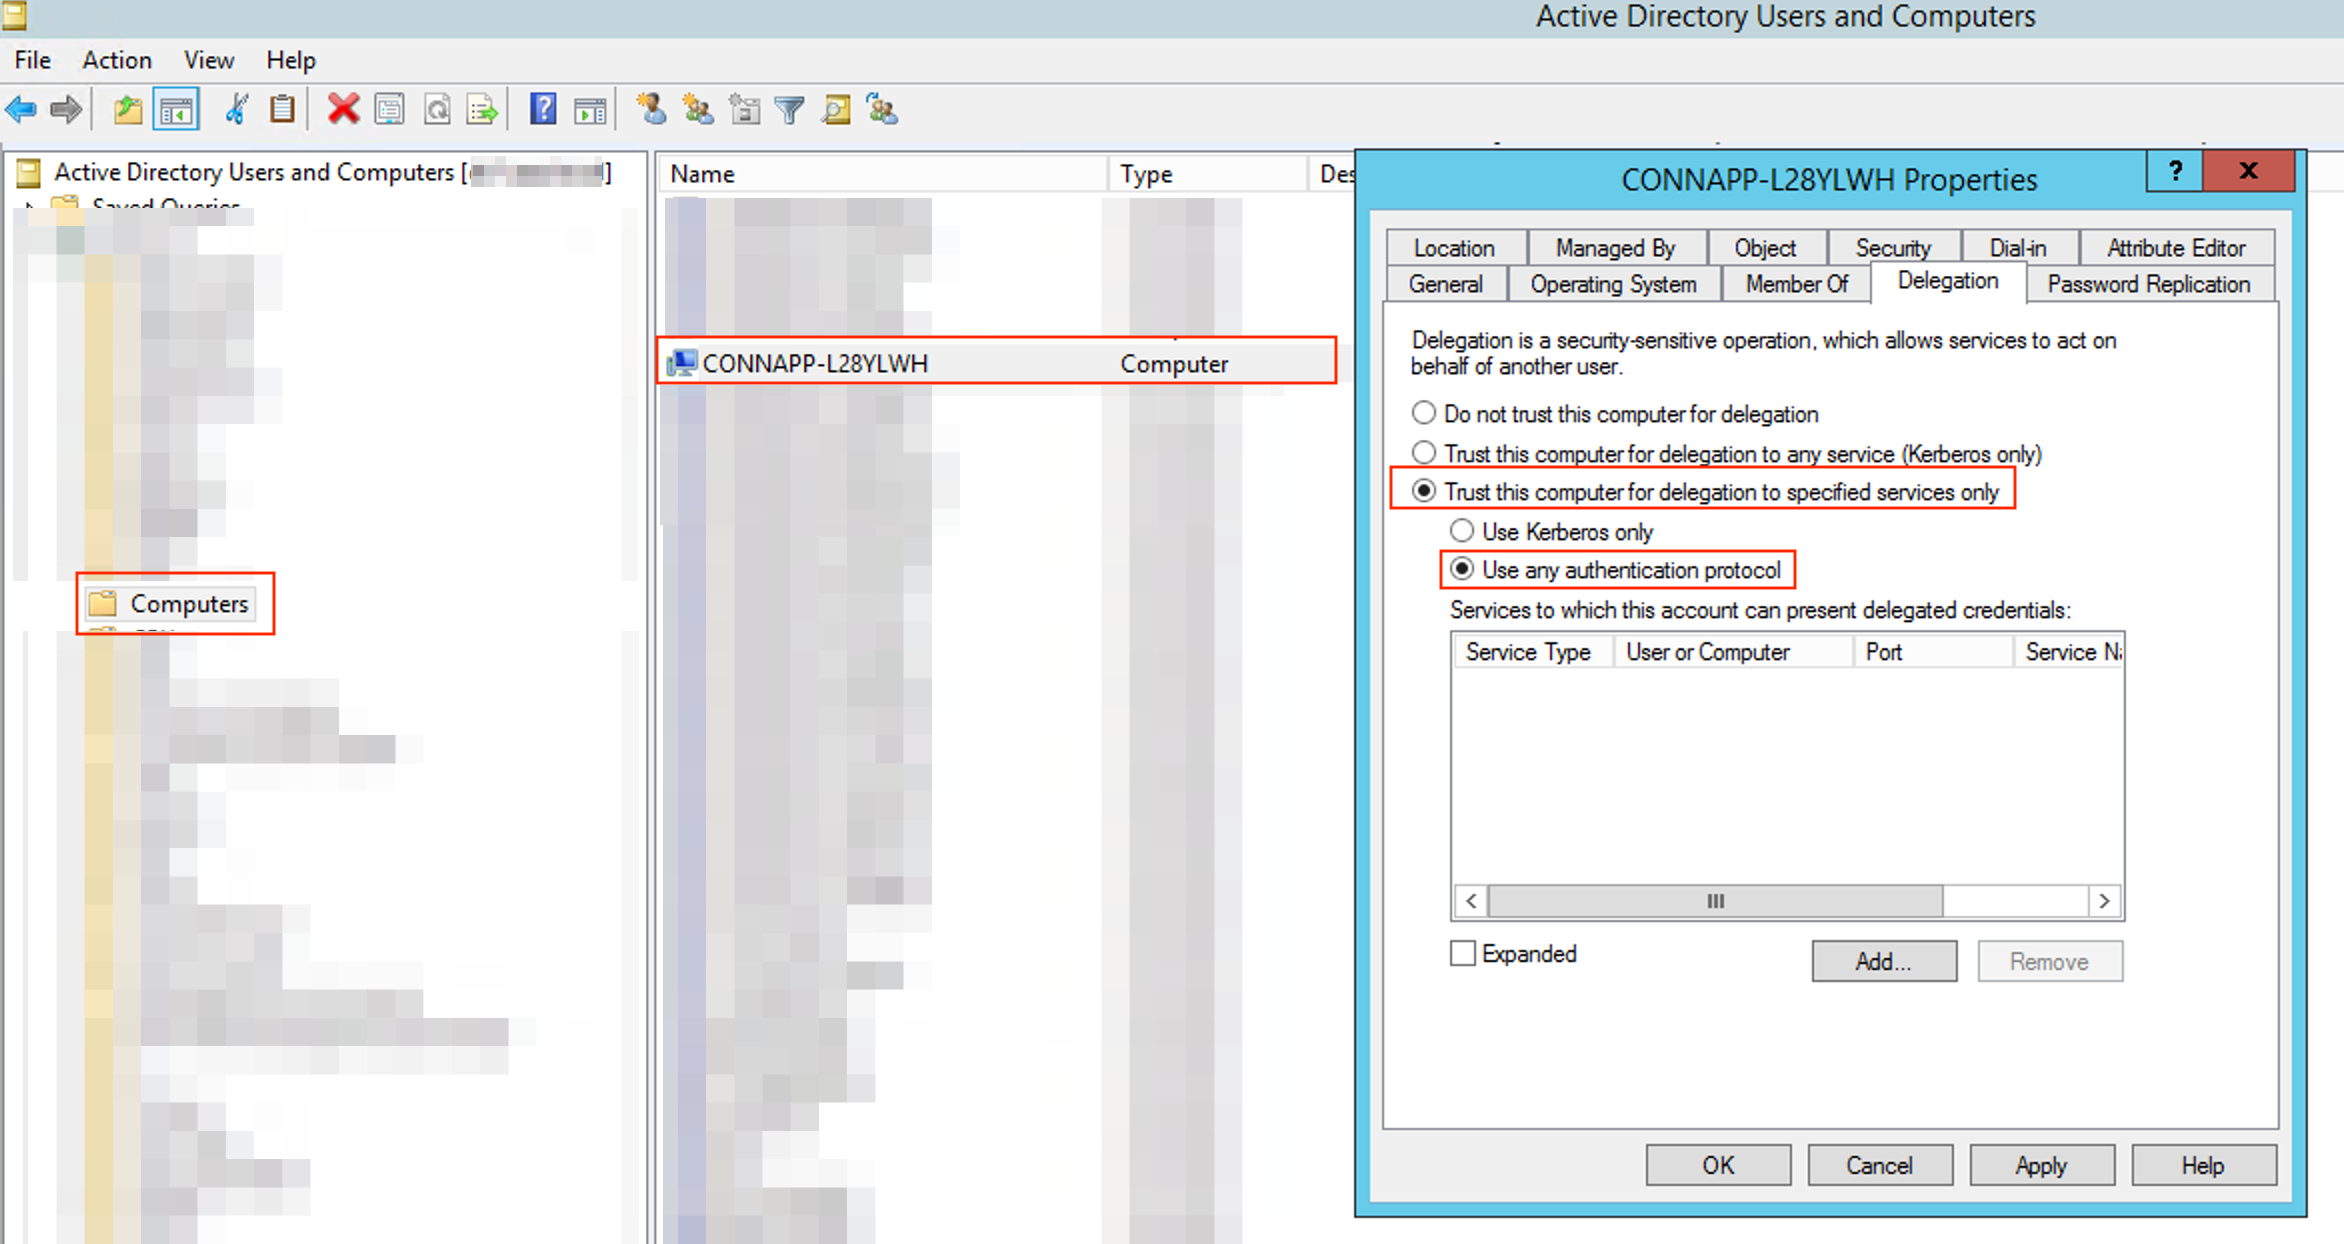
- Click Add.
- Click Users or Computers.
- Enter the target web server computer name, and then click Check Names. In the preceding image, KCD2K8 is the web server.

- click OK.
-
Select the service type http.
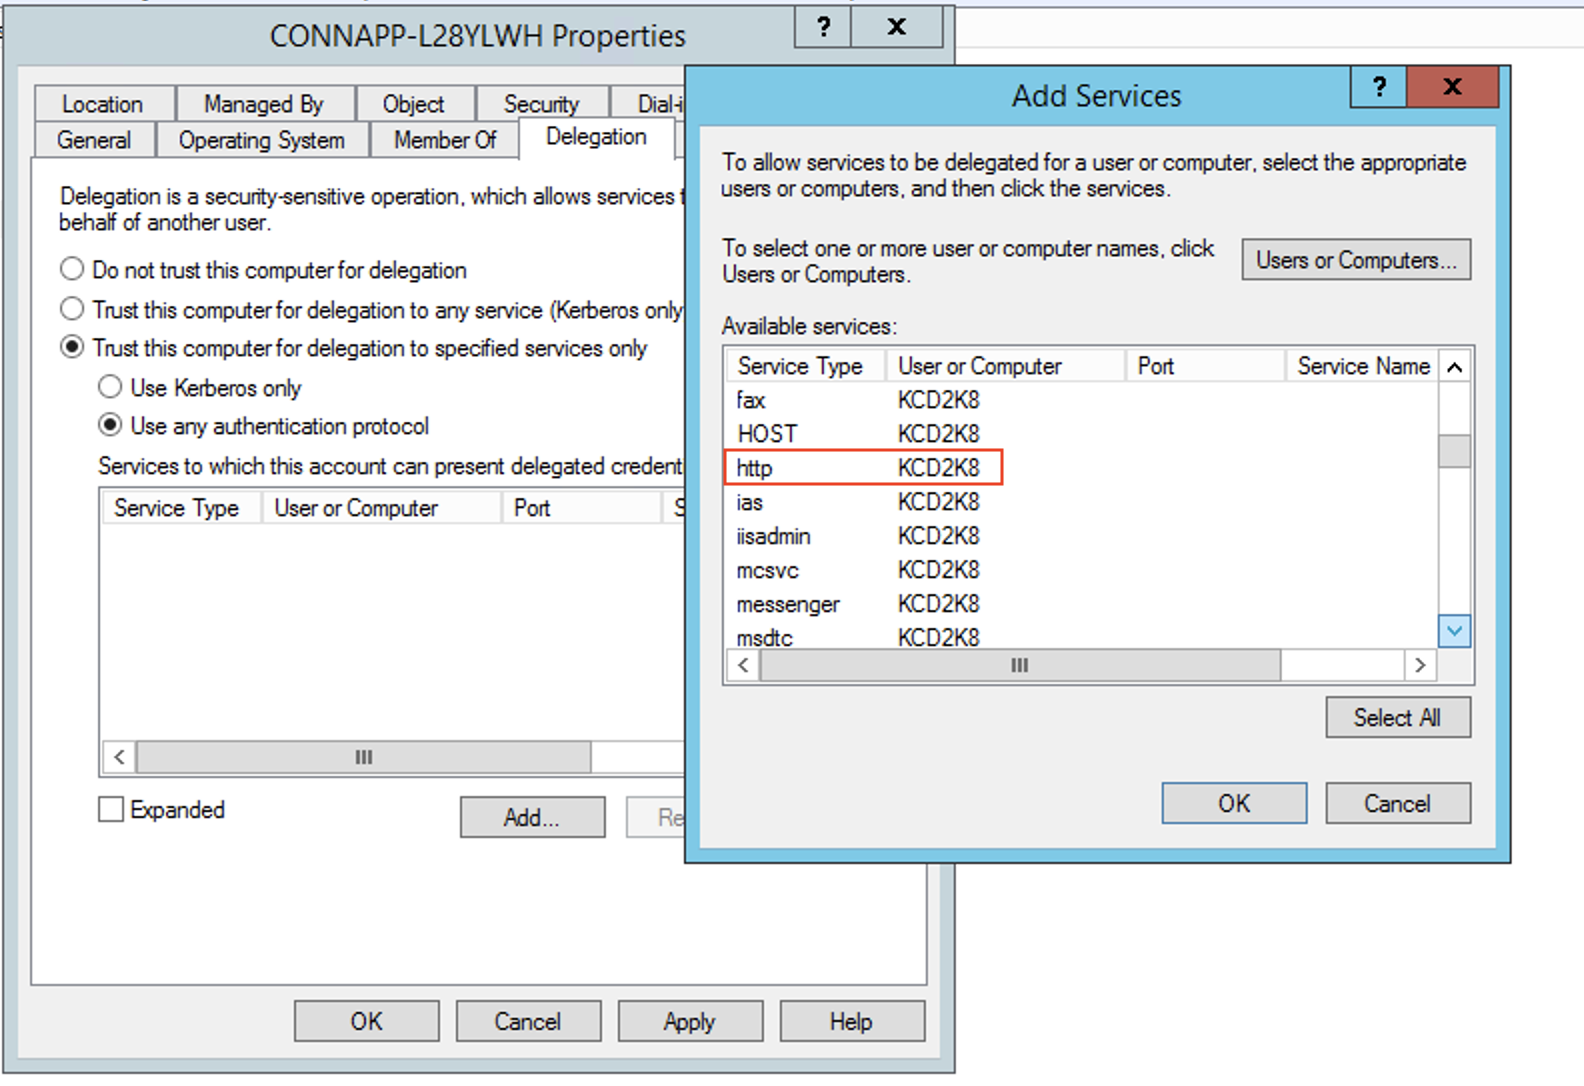
- Click OK.
-
Click Apply, and then click OK.
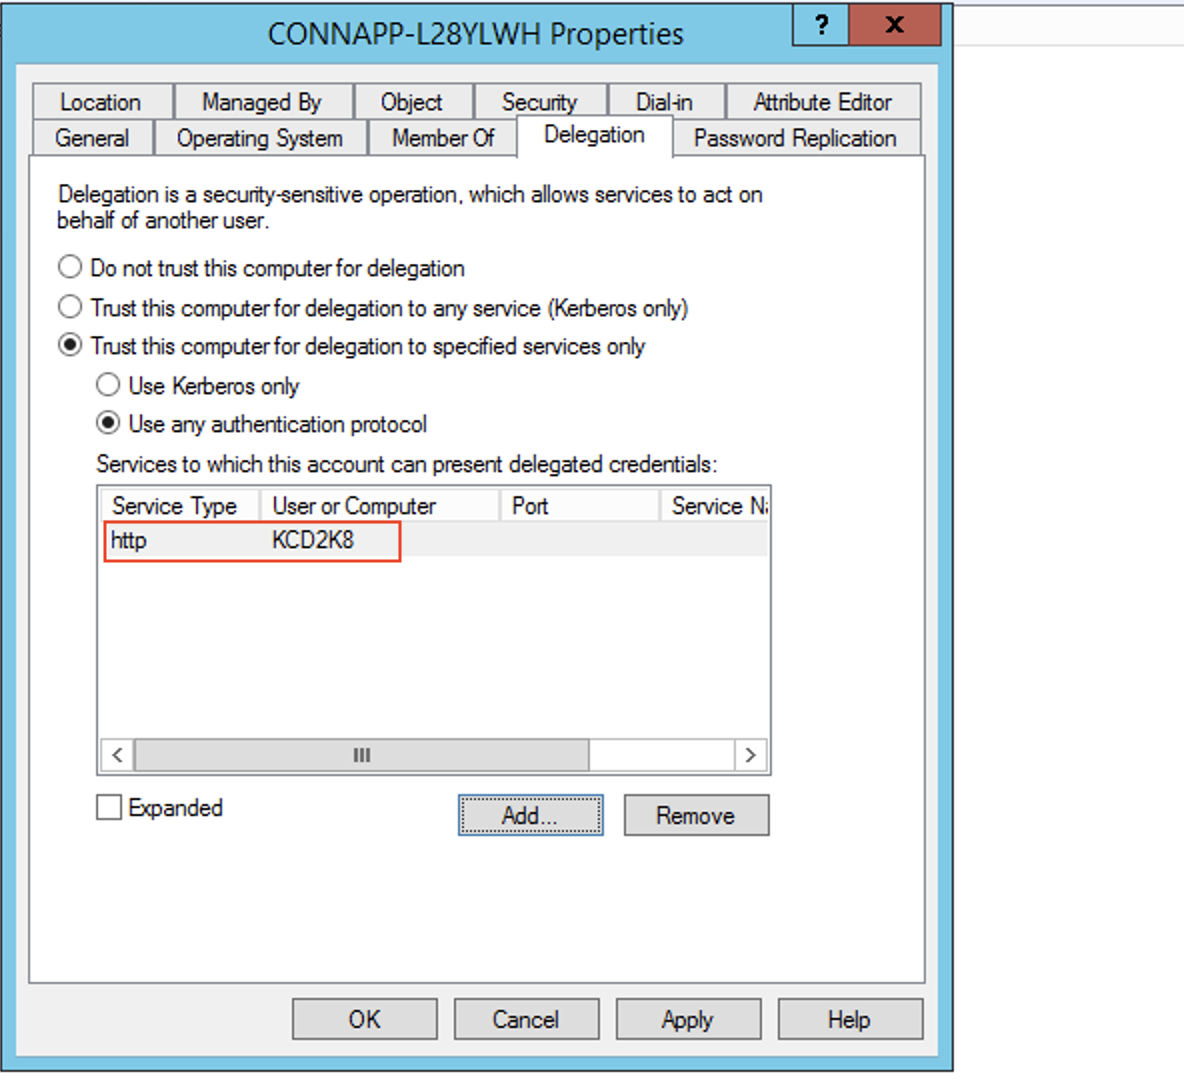
This completes the procedure for adding delegation for a web server.
-
Configure Kerberos Constraint Delegation (KCD) for a web server behind a load balancer.
-
Add the load balancer SPN to the service account by using the following
setspncommand.setspn -S HTTP/<web_server_fqdn> <service_account>
-
Confirm the SPNs for the service account using the following command.
setspn -l <service_account>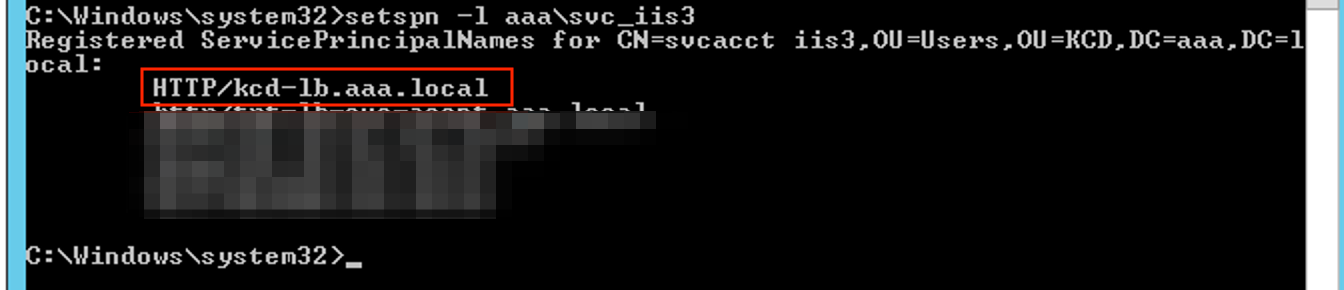
-
Create a delegation for the connector appliance computer account.
- Follow the steps to Configure Kerberos Constraint Delegation for the webserver without a load balancer to identify the CA machine and navigate to the Delegation UI.
- In select Users and Computers, select service account (for example, aaa\svc_iis3).
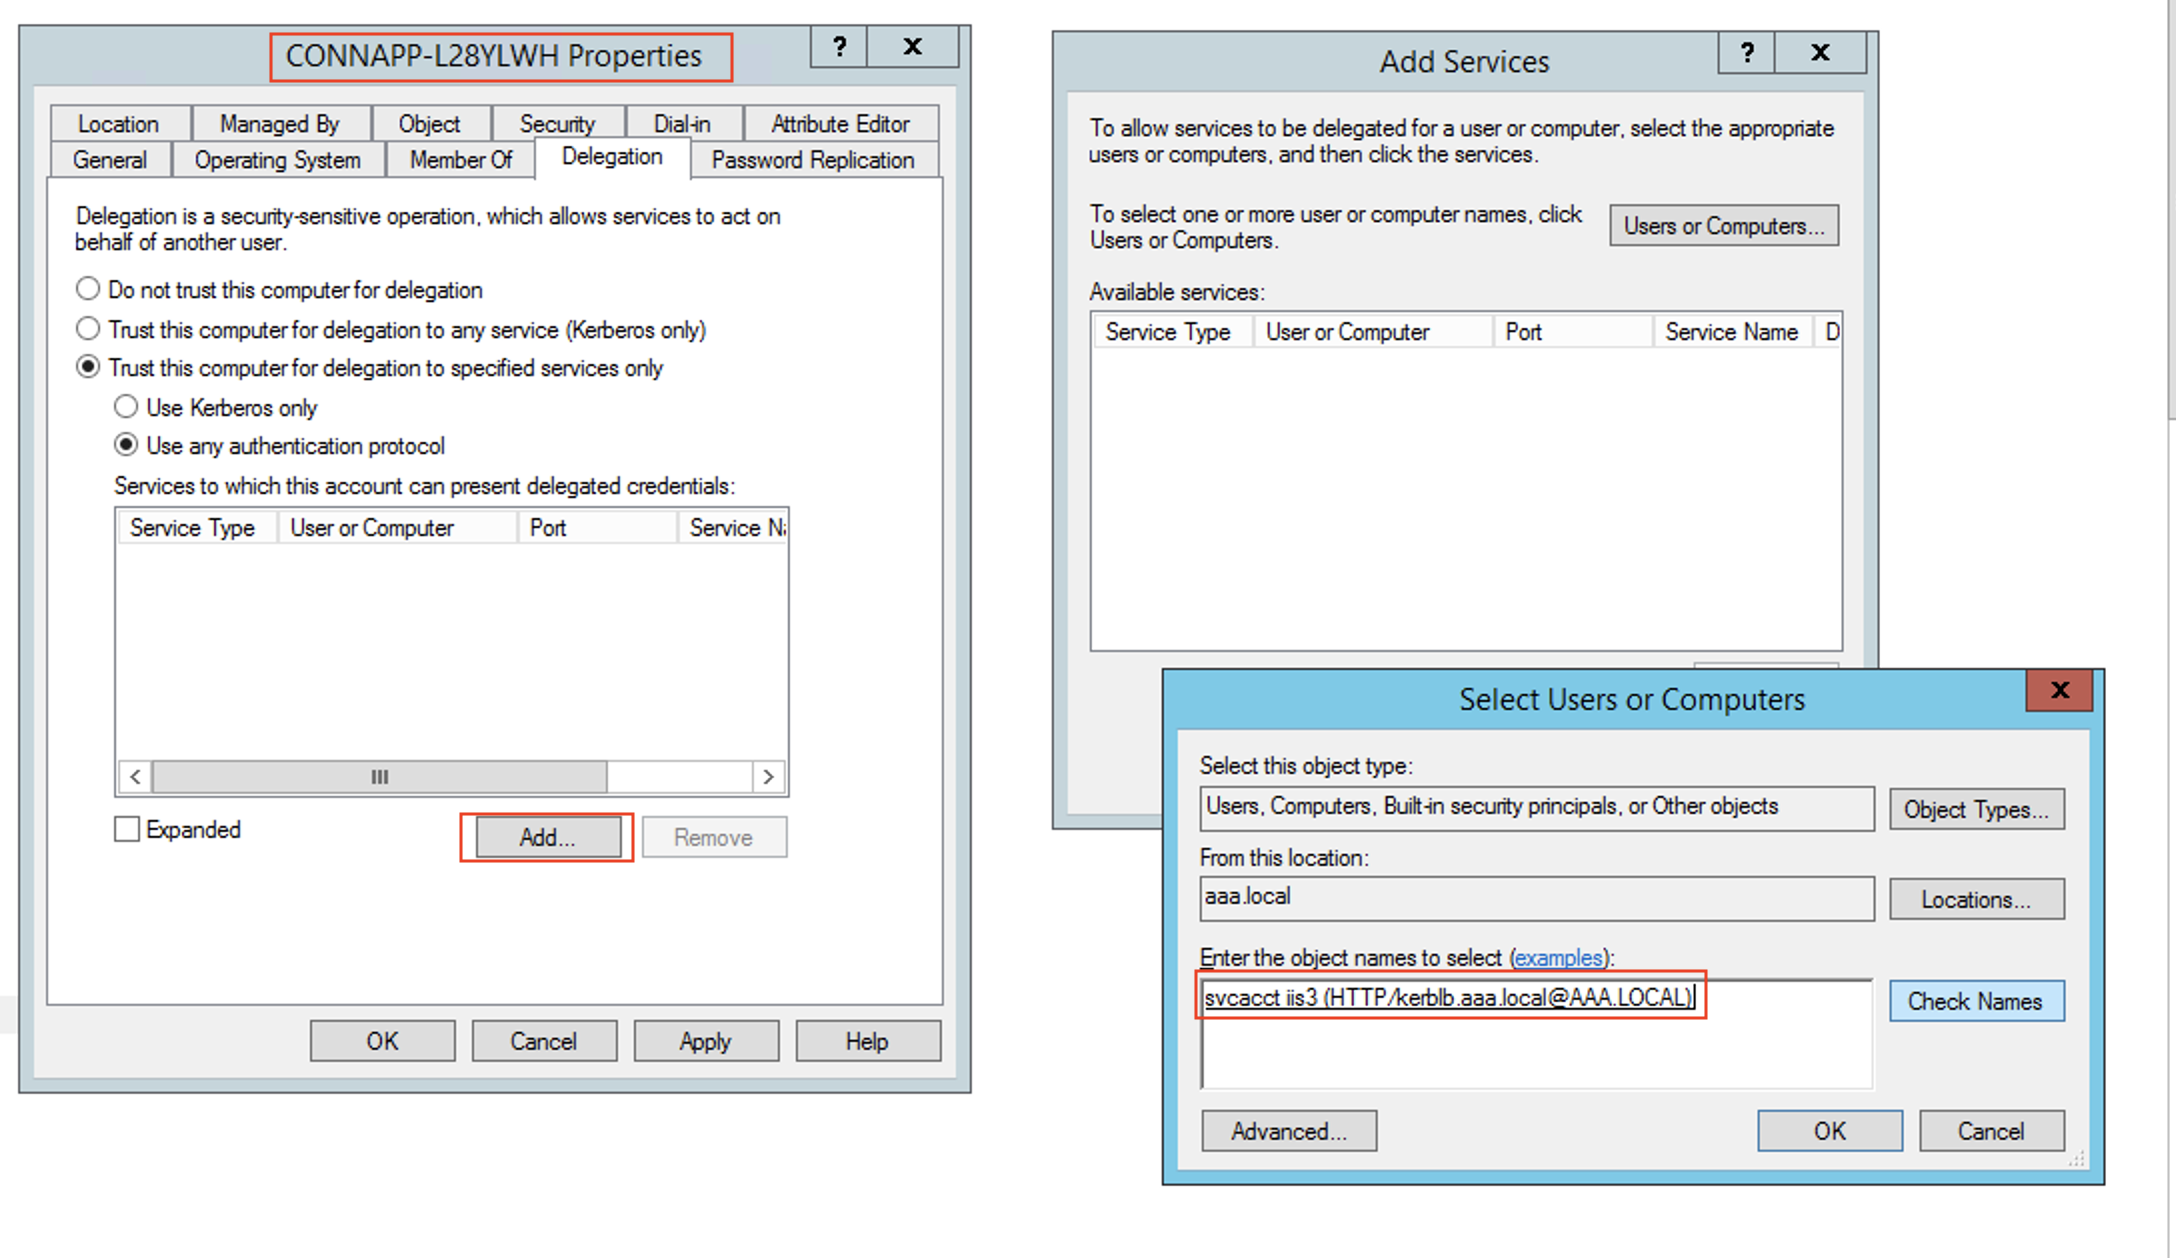
- In the services, select the entry ServiceType: HTTP and User or Computer: web server (for example,
kcd-lb.aaa.local)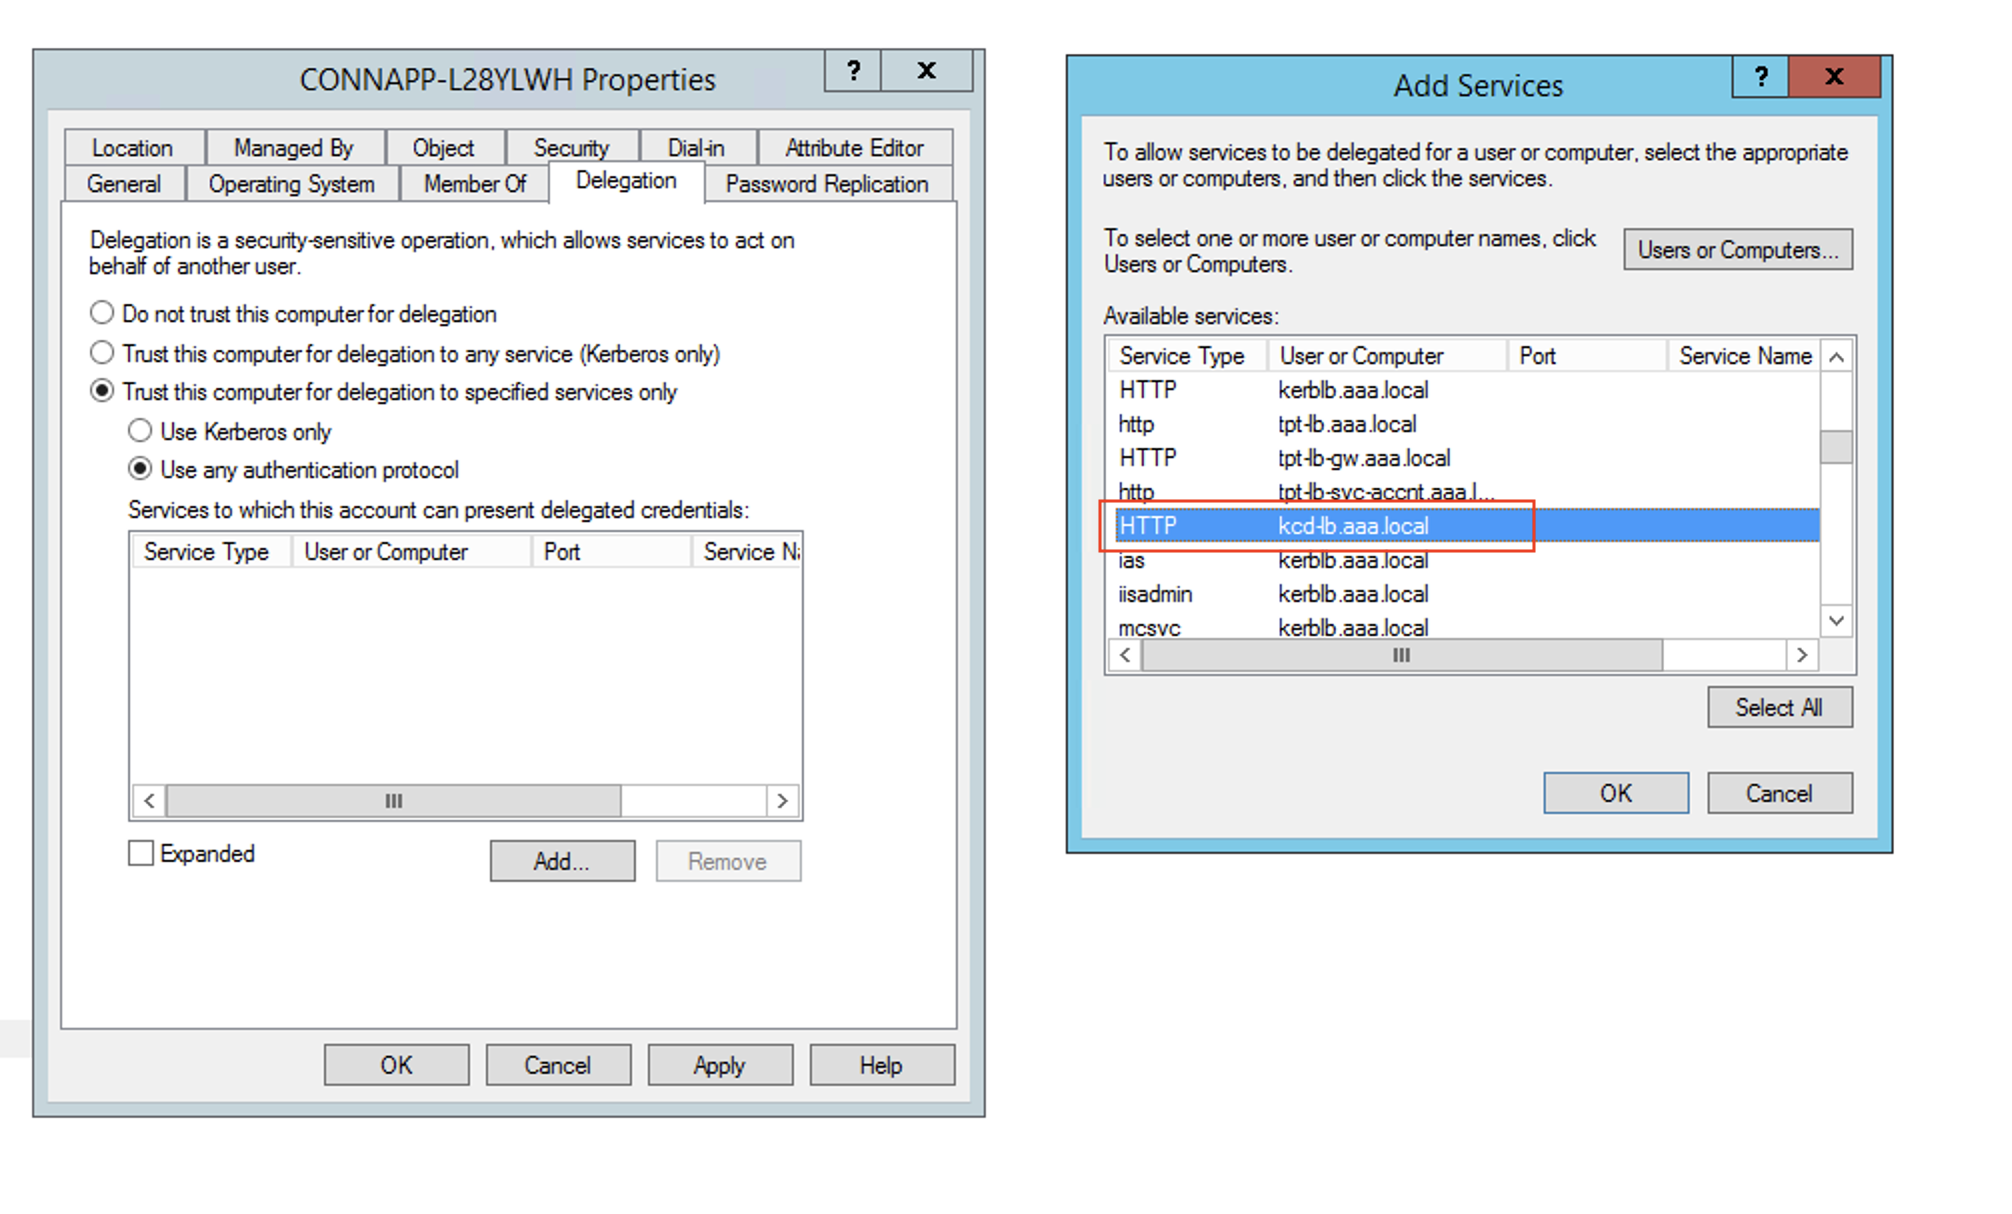
- Click OK.
- Click Apply, and then click OK.
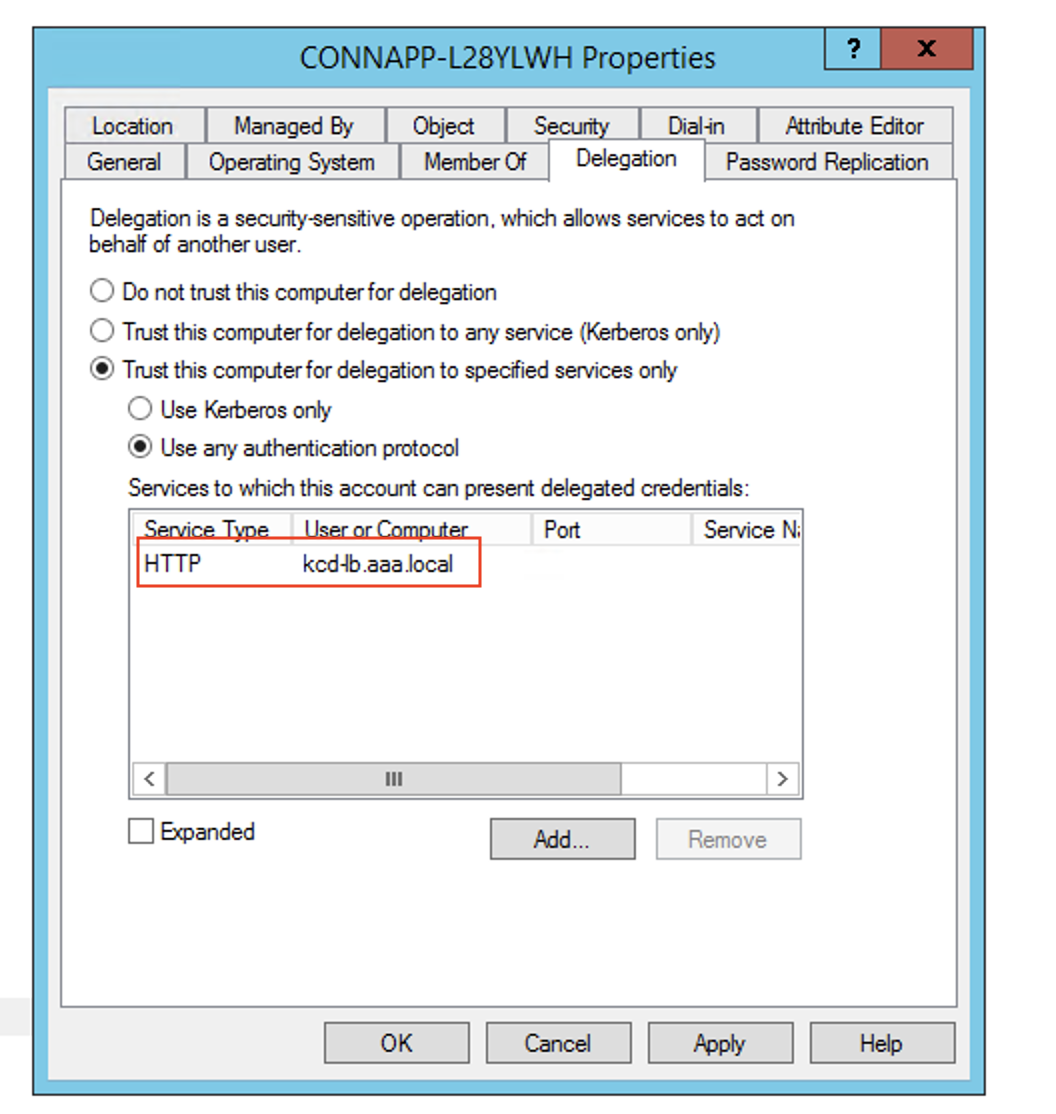
-
-
Configure Kerberos Constrained Delegation (KCD) for a group managed service account.
-
Add SPN to the group managed service account if not already done.
setspn -S HTTP/<web_server_fqdn> <group_manged_service_account> -
Confirm the SPN using following command.
setspn -l <group_manged_service_account>
Because the group managed service account cannot be shown in
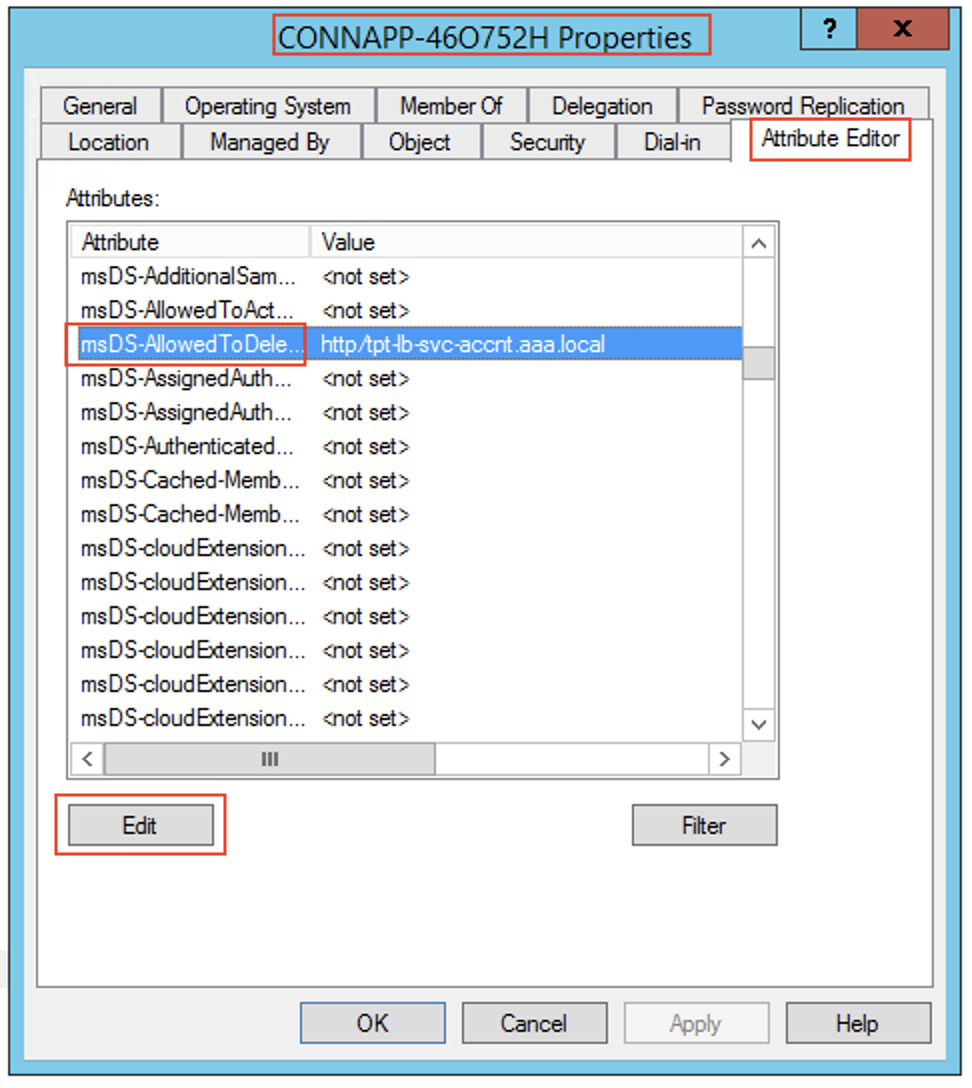
Users and Computerssearch while adding the delegation entry for the computer account, you cannot add the delegation for a computer account using the usual method. Therefore, you can add this SPN as being delegated entry to the CA computer account by going through the attribute editor- In the Connector Appliance computer properties, navigate to the Attribute Editor tab, and look for the
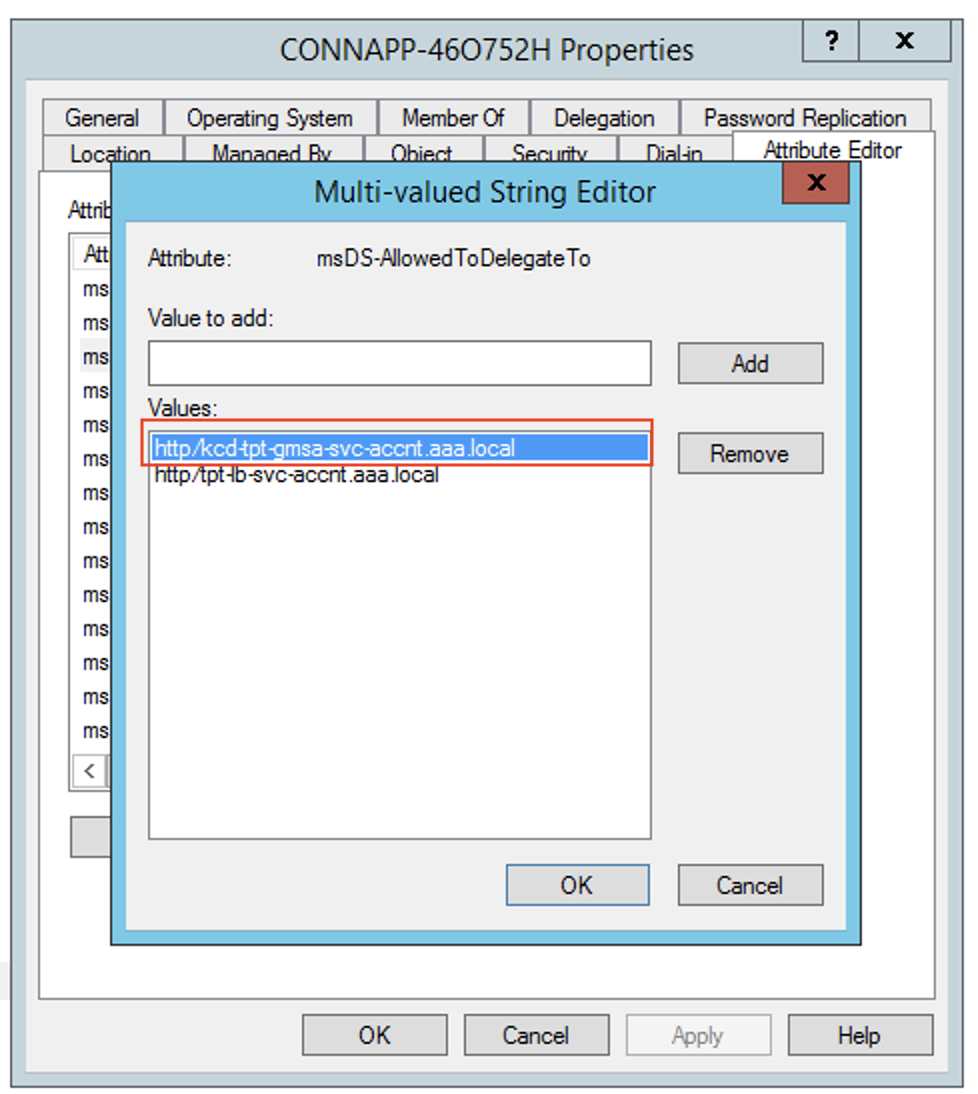
msDA-AllowedToDeleteToattribute. - Edit the
msDA-AllowedToDeleteTo attribute, and then add the SPN.
 )
) )
) -
-
Migrate from Citrix Gateway Connector to Citrix Connector Appliance.
- As SPNs is already set to service account while configuring the gateway connector, you do not need to add any more SPNs for the service account if no new kerberos app is configured. You can view the list of all SPNs assigned for the service account by following command and assign them as delegated entries for the CA computer account.
setspn -l <service_account>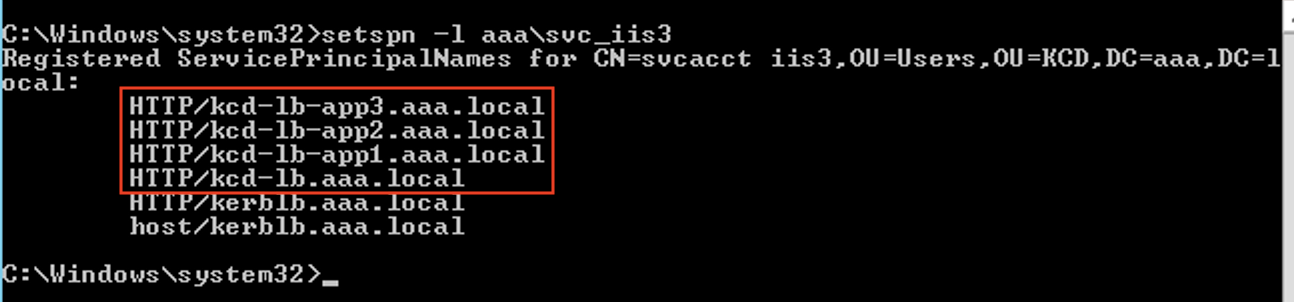
In this example, the SPNs (
kcd-lb.aaa.local, kcd-lb-app1.aaa.local, kcd-lb-app2.aaa.local, kcd-lb-app3.aaa.local) are configured for KCD.- Add the required SPNs to the connector appliance computer account as the delegated entry. For details, step Create a delegation for the connector appliance computer account.
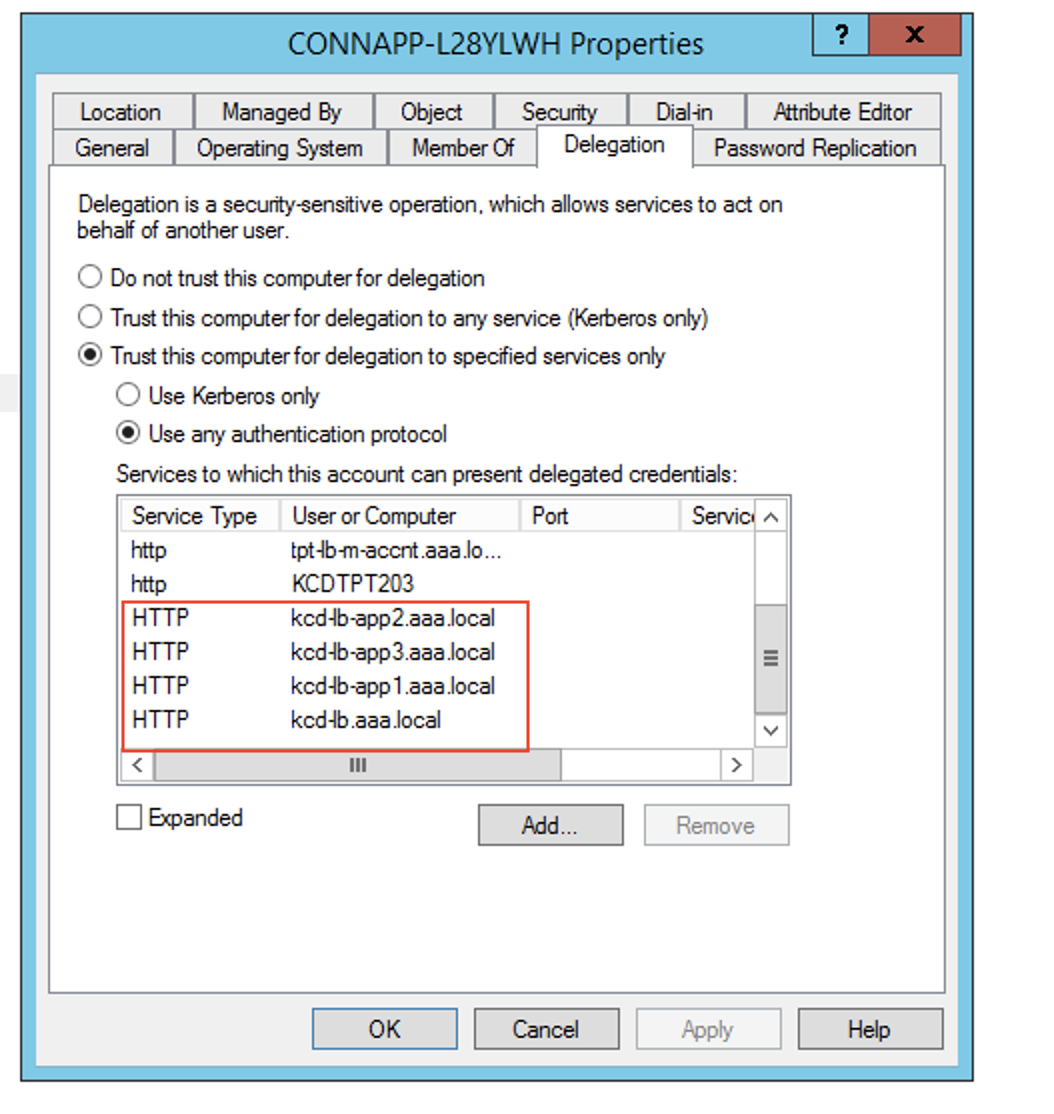
In this example, the required SPN is added as delegated entires for the CA computer account.
Note: These SPN were added to the service account as delegated entries while configuring the gateway connector. As you are moving away from service account delegation, those entires can be removed from the service account Delegation tab.
-
Follow the Citrix Secure Private Access documentation to set up the Citrix Secure Private Access service. During the set up, Citrix Cloud recognizes the presence of your Connector Appliances and uses them to connect to your resource location.
-
Validating your Kerberos configuration
If you use Kerberos for single sign-on, you can verify that the configuration on your Active Directory controller is correct from the Connector Appliance administration page. The Kerberos validation feature enables you to validate a Kerberos realm-only mode configuration or a Kerberos Constrained Delegation (KCD) configuration.
- Go to the Connector Appliance administration page.
- From the Connector Appliance console in your hypervisor, copy the IP address to your browser address bar.
- Enter the password that you set when you registered your Connector Appliance.
- From the Admin menu on the top right, select Kerberos Validation.
- In the Kerberos Validation dialog, choose the Kerberos Validation Mode.
- Specify or select the Active Directory Domain.
- If you are validating a Kerberos realm-only mode configuration, you can specify any Active Directory domain.
- If you are validating a Kerberos Constrained Delegation configuration, you must select from a list of domains in the joined forest.
- Specify the Service FQDN. The default service name is assumed to be
http. If you specify “computer.example.com”, this is considered the same ashttp/computer.example.com. - Specify the Username.
- If you are validating a Kerberos realm-only mode configuration, specify the Password for that user name.
- Click Test Kerberos.
If the Kerberos configuration is correct, you see the message Successfully validated Kerberos setup. If the Kerberos configuration is not correct, you see an error message that provides information on the validation failure.