Get started with Citrix® StoreFront Cloud
This article outlines the main steps involved in setting up Citrix® StoreFront Cloud and related components, from beginning to end. For a summary of the steps involved, see Workflow overview.
If you are setting up Citrix® StoreFront Cloud, there are the following broad steps:
- Prepare for Citrix® StoreFront Cloud in Citrix Cloud™.
- Configure end-user access and authentication.
- Customize stores with your enterprise-specific preferences, such as logos and security policies.
- Configure store resiliency and optimization.
- Roll out Citrix® StoreFront Cloud to end-users.
Migration from StoreFront
If you are an existing customer using NetScaler and StoreFront then consider the following:
- It is recommended that you first migrate from on-prem CVAD deployments to DaaS before you migrate from on-prem StoreFront to Citrix® StoreFront Cloud. For more information, see Migrating from on-premises to cloud and the Tech Zone deployment guide. You can transition to Citrix® StoreFront Cloud with your existing on-premises Virtual Apps and Desktops deployment. This process is called site aggregation. This has performance and resilience limitations so is only recommended for simple deployments.
- You can configure your existing NetScaler gateway as an IdP for authenticating end-users. However in many cases it can be replaced by one of the other authentication methods available in Citrix Cloud. For mroe information see Identity and access management.
- You can continue to use your NetScaler gateway as an HDX proxy for remote access to DaaS resources. However it is recommended that you instead migrate to Citrix Gateway Serice. For more information, see External connectivity.
Step 1: Prepare for Citrix® StoreFront Cloud in Citrix Cloud
Before using Citrix® StoreFront Cloud you must have completed the following.
- Review the system requirements.
- Have a Citrix Cloud account. For more information, see Signing up for Citrix Cloud.
- Have an Citrix Cloud administrator account with the role StoreFront Cloud. For more information, see Add administrators who can configure store.
- Set up at least one service to be accessed from Citrix® StoreFront Cloud. For example:
- Citrix DaaS Get started: Plan and build a deployment.
- Secure Private Access onboarding and set up
- Get started with Remote Browser Isolation.
- Connect an existing on-premise Citrix Virtual Apps and Desktops site using on-premise site aggregation.
Step 2: Configure end-user access and authentication
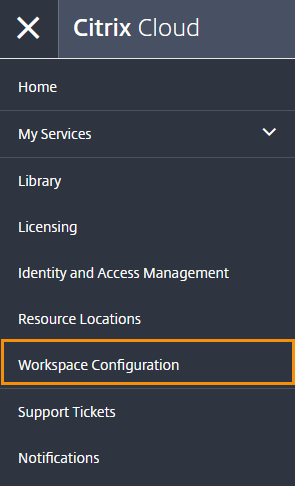
Once you logged into Citrix Cloud, you can access StoreFront Cloud from the main menu.
If you do not see this option then ensure you have the StoreFront Cloud permission, see Modify administrator permissions.
This step involves configuring access controls, including the authentication methods, the store URL and external connectivity to resources.
Note:
There are two ways for users to access their store. One is through the natively installed Citrix Workspace app for simple, secure access to Citrix Cloud services and stores. The other way to access Citrix® StoreFront Cloud is through a web browser. For more information, see User access.
Configure store access
You must choose what URL(s) your users use to access their store. By default Citrix® StoreFront Cloud generates a cloud URL based on your customer id but you can change this or add a custom URL from a domain that you own. For more information, see Configure store url.
Configure authentication to stores
Defining how end-users authenticate to sign in to their stores is a two-step process:
- Under Identity and Access Management, configure Identity and access management.
- Under StoreFront Cloud > Authentication, choose one of the authentication methods delivered by the identity providers you configured in the first step. For more information, see Configure authentication.
If you’re using a federated identity provider, you can also enable single sign-on (SSO) to VDAs with the Citrix Federated Authentication Service (FAS).
Configure remote access to virtual apps and desktops
By default users must be able to reach their virtual apps and desktops directly over the network. You can configure Citrix Gateway server, or a NetScaler gateway, to allow remote access to your virtual apps and desktops. For more information, see External connectivity.
Step 3: Customize stores
You can customize the experience of stores for different users and to meet specific organizational requirements in StoreFront Cloud, for example:
- The appearance of stores, including logos and colors.
- Interaction options, such as allowing users to create Favorites and automatically launching desktops.
- Privacy and security settings. This includes setting a timeout period, creating a sign-in policy, and allowing users to change their passwords from within their stores.
For more information, see Customize store experience.
Step 4: Configure store resiliency and optimization
For information on improving the efficiency and availability of your DaaS through Citrix® StoreFront Cloud, visit Optimize DaaS in Citrix® StoreFront Cloud. This includes information on how to:
- Optimize connectivity with Direct Workload Connection.
- Ensure service continuity during an outage for offline resilience.
- Configure single sign-on (SSO) to virtual apps and desktops with Citrix Federated Authentication Service (FAS).
Step 5: Roll out Citrix® StoreFront Cloud to end-users
The broad activities for this step include:
- Testing stores.
- Verify that you can log in through the browser and into the Citrix Workspace app.
- Launch and use all available apps and desktops.
- Check that customizations such as branding and announcements are dispalyed as expected.
- Check that notifications are displaying the expected actions and activities.
- Onboarding users.
- Communicate Citrix® StoreFront Cloud capabilities with users.
- Share the store URL.
- Guide users to install the Citrix Workspace app.