Enable outbound SSH
By default the SecurSpaces proxy service blocks outbound SSH connections from workspaces. Until you enable one of the two options below, a developer who tries to reach an external host over SSH has the connection closed.
This page is for project owners and security officers. For the developer side — generating a key, registering it, and connecting — see Connect to external servers and services via SSH.
Choose an option
| Consideration | Personal SSH Identity | Connected SSH Services |
|---|---|---|
| Best for | Individual developers who each need their own key, for example to authenticate with Azure DevOps or GitHub | Teams where several people connect to the same SSH service |
| Who sets it up | You enable the toggle; each developer generates and registers their own key | You create the service resource and attach it to workspaces; developers connect with no further setup |
| Key ownership | Each user owns their key | The platform or an administrator holds the key |
| Registration effort | Each user registers their public key on every target service | Registered once, and everyone using the workspace connects |
| Scope | User level, across every workspace where the toggle is on | Resource level, attached per workspace or template |
| Best fit | Access to personal accounts and services | Shared infrastructure such as build servers, staging VMs, and cloud instances |
Option 1: Enable Personal SSH Identity
Requires the Security permission set to Manage, which project owners and security officers hold.
With Personal SSH Identity the platform generates and holds a key pair for each user. The private key is applied when the developer connects and is never exposed inside the workspace.
You can enable the setting on a single workspace, or on a template so that every workspace created from it inherits the setting.
On a workspace
-
Go to the project's Workspaces tab.
-
Create or edit a workspace.
-
In the left panel, select Security Settings.
-
Switch Enable Personal SSH Identity on.
-
Select Review and Launch, or Next, to save.
On a workspace template
-
Go to the project's Workspaces tab and select the Templates view.
-
Create or edit a template.
-
In Security Settings, switch Enable Personal SSH Identity on.
-
Save the template.
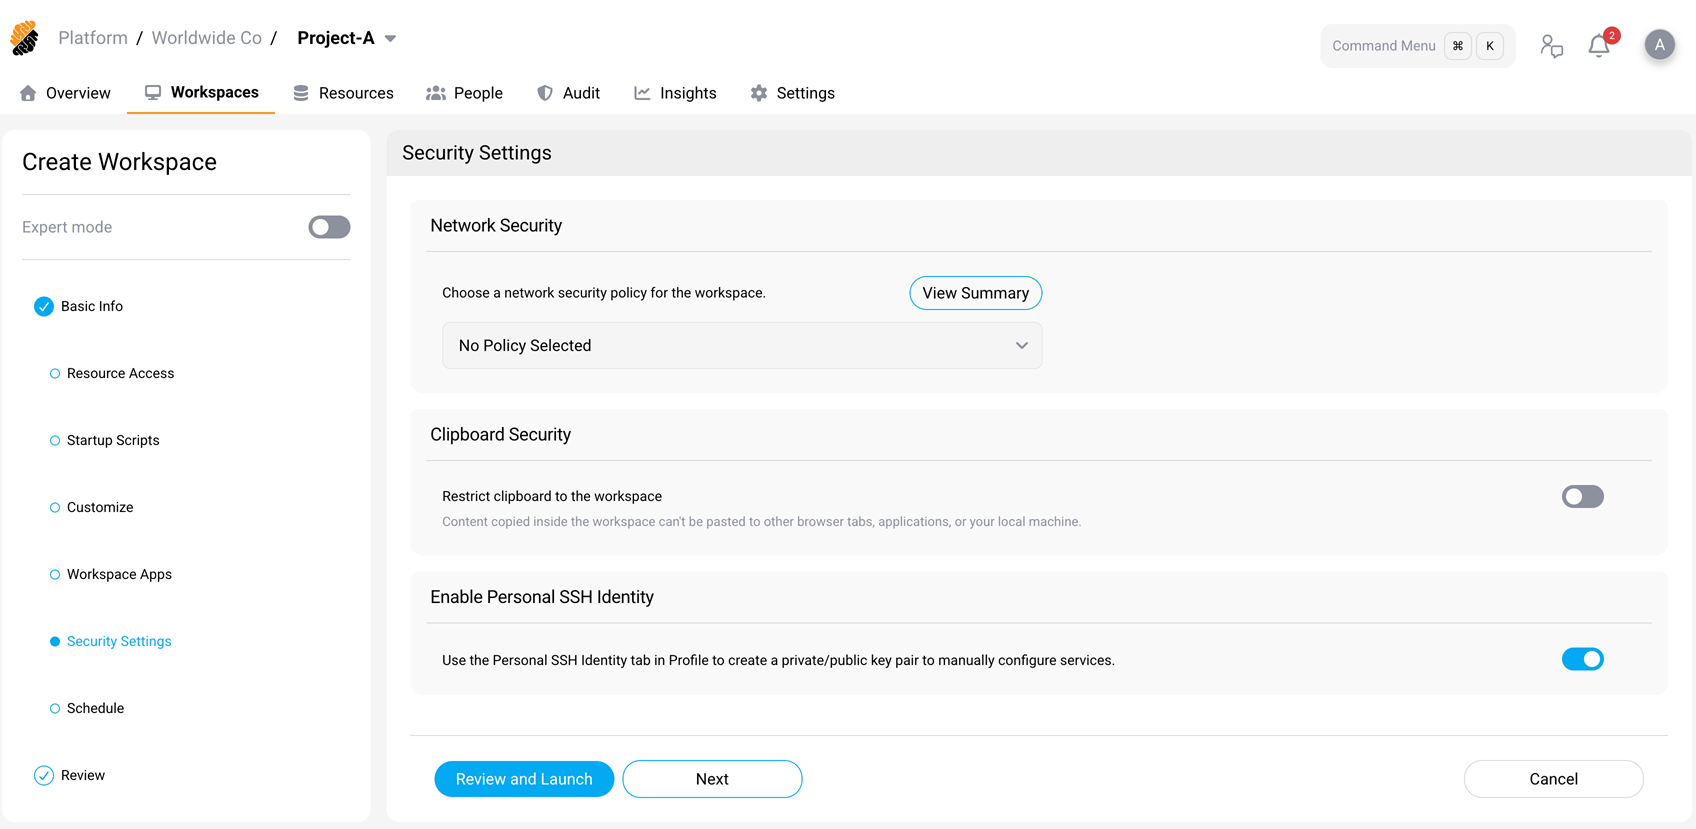
Outbound SSH is now allowed from that workspace. Each developer then generates their own key in their profile and registers the public key on the target service. See Personal SSH Identity.
Option 2: Attach a Connected SSH Service
Creating the service requires the Resources permission set to Manage.
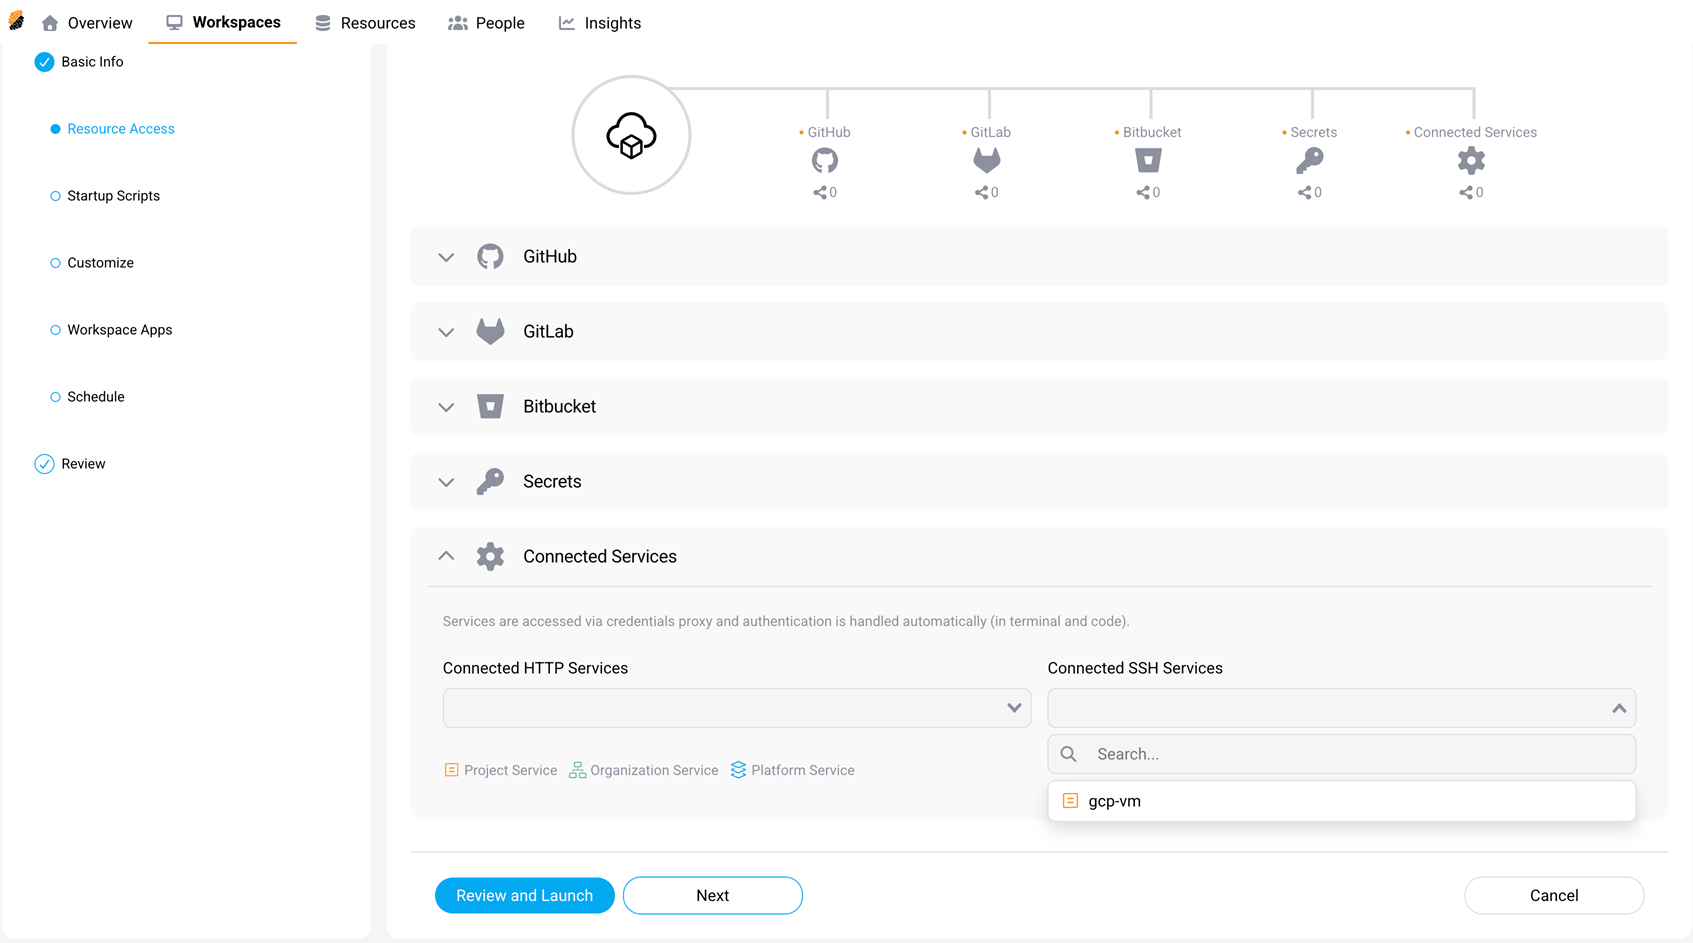
A Connected SSH Service defines a target host once, with its credentials, and shares it across workspaces. Developers connect with
ssh <service-name> and never handle a key.
-
Create the service as a project resource. For the form and its fields, see Connected SSH Services.
-
Attach it to a workspace:
-
Create or edit a workspace.
-
In the left panel, select Resource Access.
-
Under Connected Services, open the Connected SSH Services list.
-
Select your service.
-
Select Review and Launch, or Next, to save.
-