
Manage workspaces
Workspaces are managed from the Overview and Workspaces pages. Once one or more workspaces have been assigned to you, they appear on both pages mentioned above. The last used workspace will be automatically started based on the schedule in your profile. In addition, a workspace might be paused automatically based on the settings of your platform after a period of inactivity.
View Workspaces
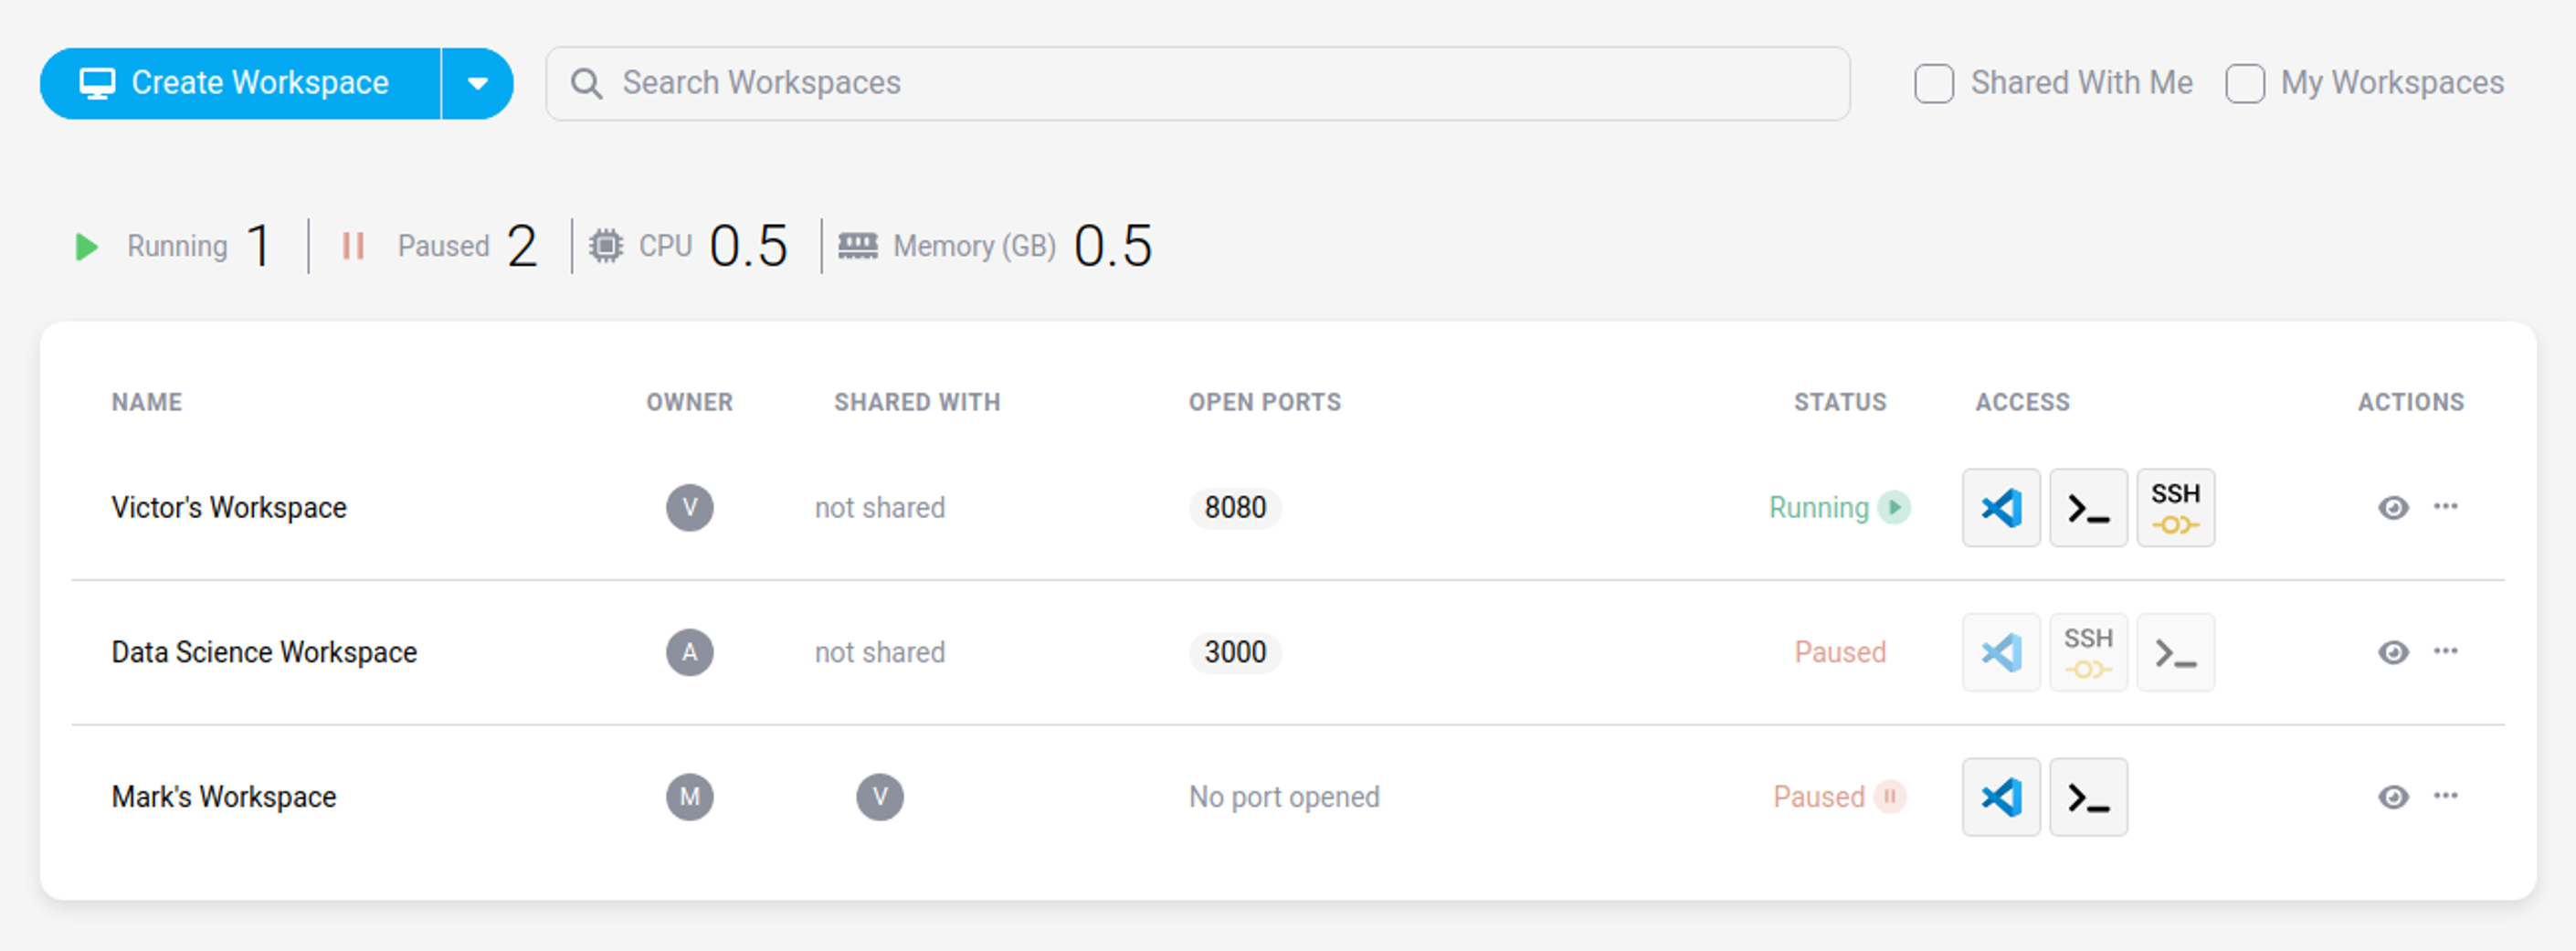
The list of your workspaces (owned by you or shared with you) is displayed on the Overview and Workspaces pages. The status of the workspace is displayed next to its name.
-
To open a paused workspace, click on the "start" button. This will open the workspace's Cloud IDE in your browser.
-
To open a running workspace, click on the "running" button. This will open the workspace's Cloud IDE in your browser.
-
To open your workspace using a CLI terminal, click on the drop-down menu next "running text" and then on the "Open Terminal" button.
Workspaces Actions
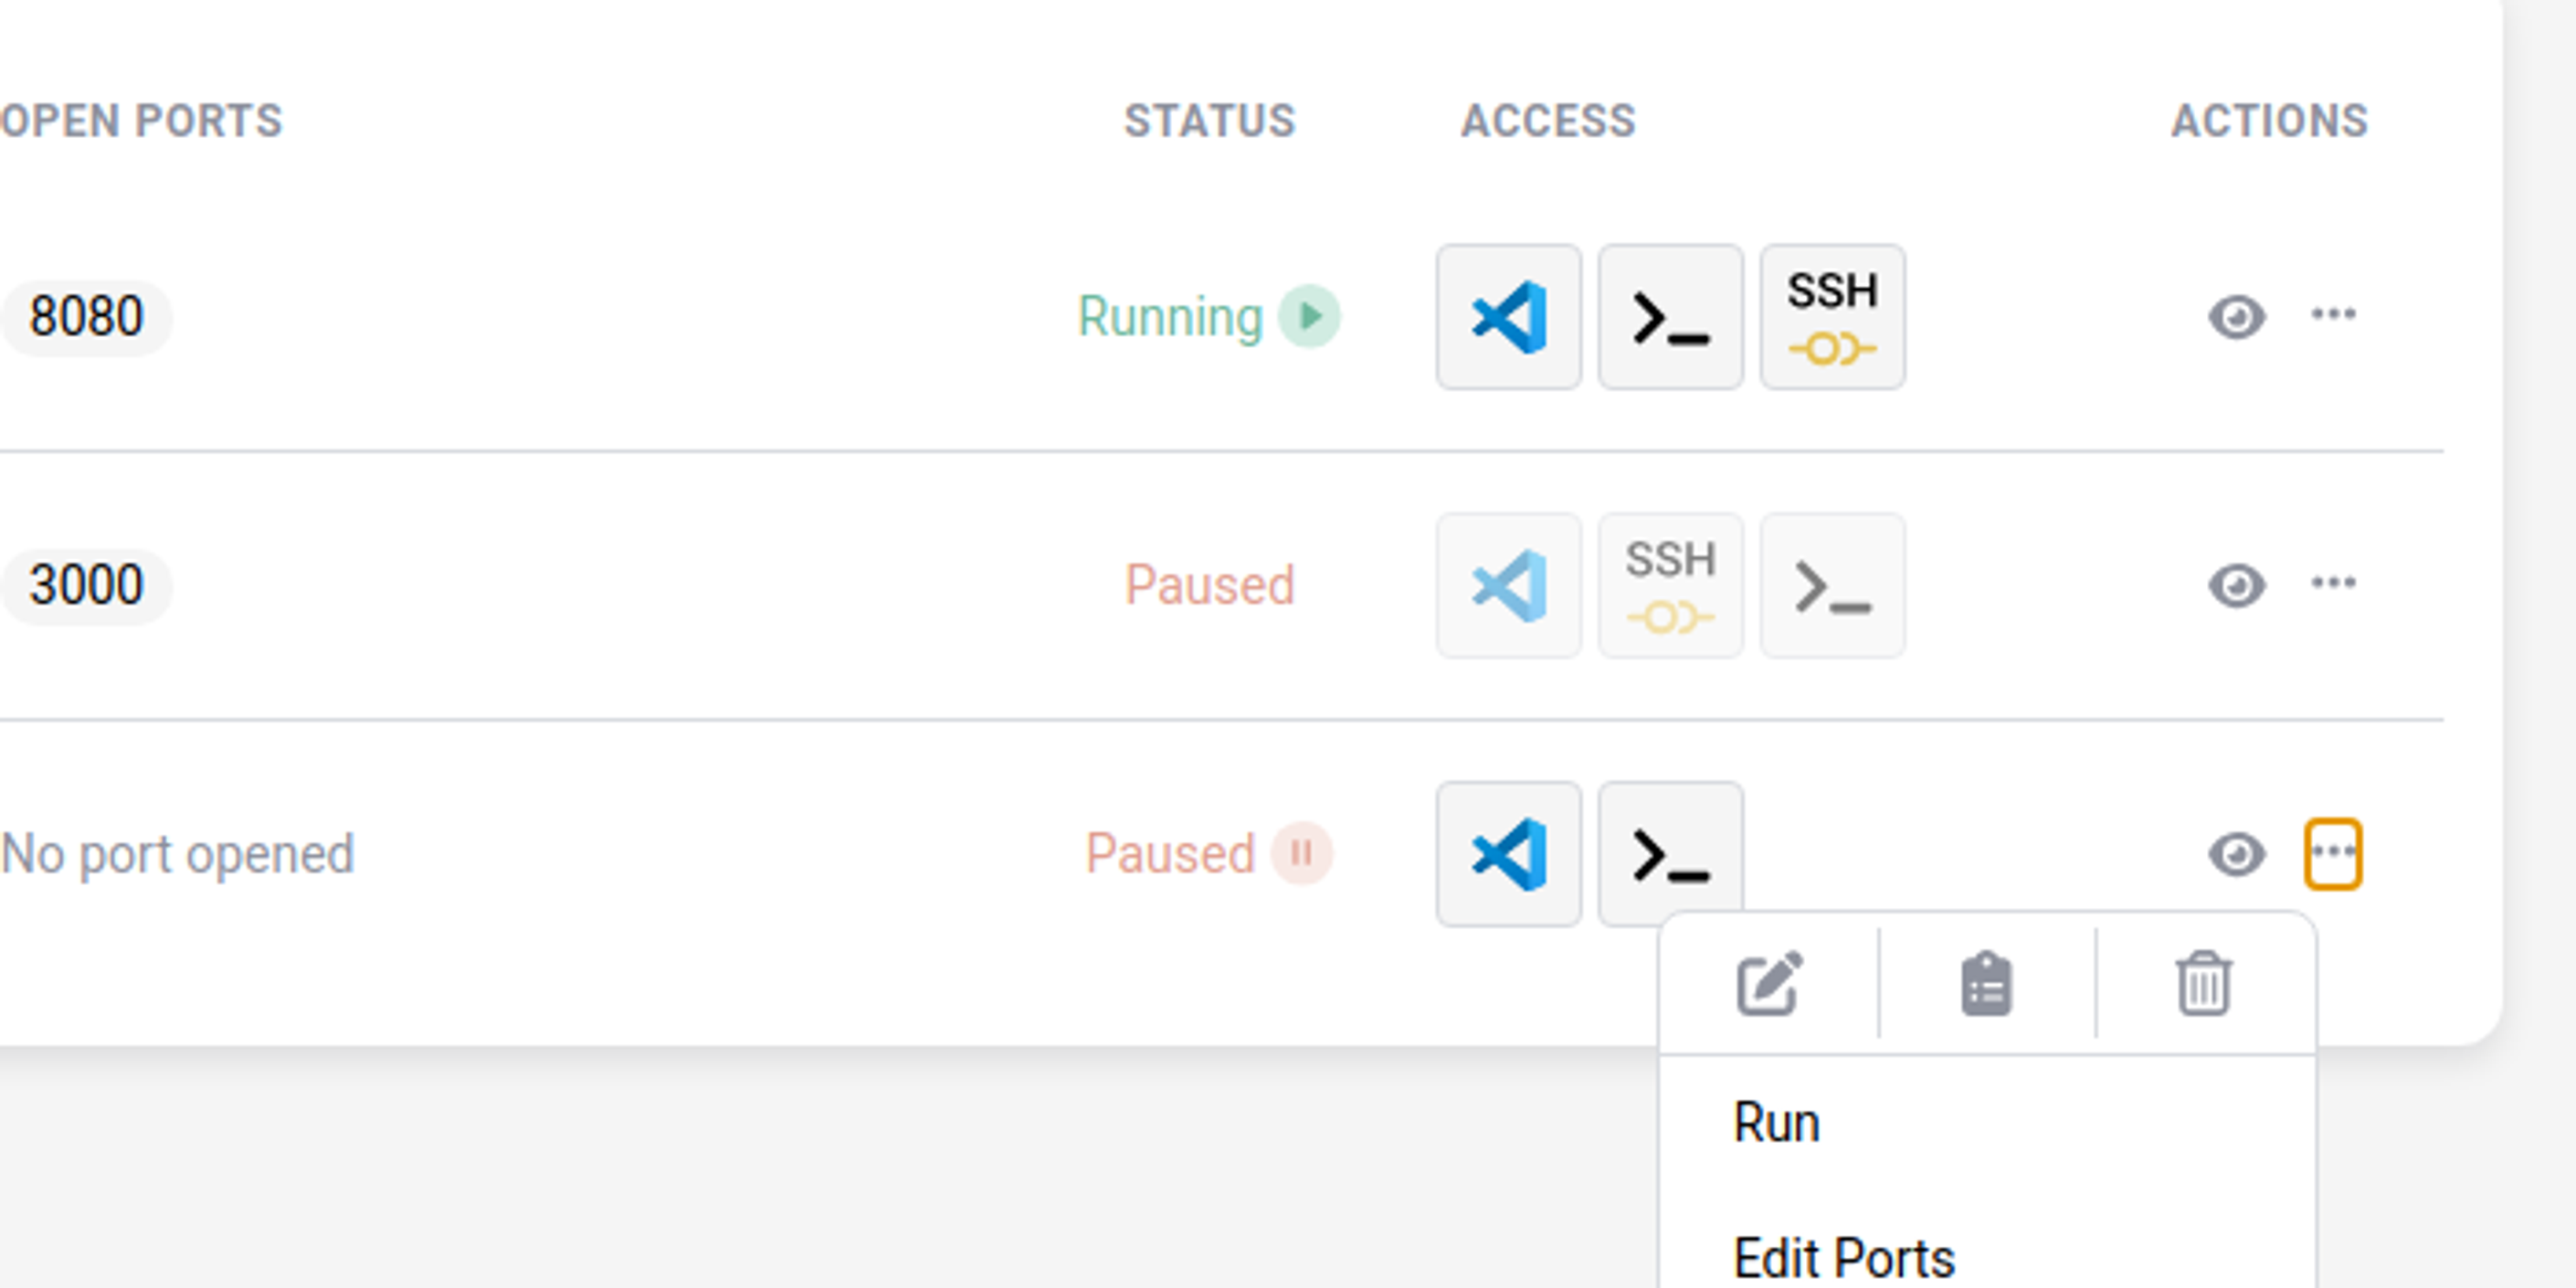
By clicking on the "..." icon on a workspace, you can select additional actions as explained below.
-
Run or Pause allow you to start and pause the workspace, respectively.
-
Edit allows you to change the workspace' settings as selected when creating it.
-
Delete erases its configuration and local files. You will need to confirm the action by inserting the name of the workspace.
-
Edit Ports lets you manage workspace apps running on the ports of your workspace.
-
Update redeploys the workspace to synchronize it with its latest configuration.
-
Share lets you share the workspace with another member of the project. See Share a workspace (Only if Workspace is yours).
-
Save As Template lets you save the workspace's configuration as a template for later reuse (requires the Workspaces permission set to Manage Project).
Share a workspace
Share a workspace to work in it together with another member of the project, for example to pair on a problem. Only the owner can share a workspace.
-
On the workspace, select ... > Share.
-
Under Select User, select the project member.
-
Optionally, select Set Expiration date and choose when their access ends.
-
Copy the link and send it to them.
The person you share with needs a project role that allows workspace access. If the workspace has confidential or regulated repositories, their role also needs access to that information. For what they can do in the workspace, see Work with a shared workspace.
To stop sharing, edit the workspace and remove the person from Shared With. Their access ends at once, including a session they have open. Access with an expiration date ends within a minute of that date.
Sharing and unsharing are recorded in the audit log as
SharedWithUser and UnsharedWithUser events. See Audit event catalog.
Important:
A person you share a workspace with works as you. Git operations, connections to code repositories and connected services, and other traffic from the workspace use your credentials, and the platform records them under your name. Share a workspace only with people you trust to act on your behalf, and set an expiration date when you can.
Recover a deleted workspace
A deleted workspace moves to a recycling bin and can be restored from Project General Settings until it expires. The retention period is 7 days by default, but your platform administrator can set it to anywhere from 1 to 99 days, so check with them if you are unsure how long you have. See Workspaces pending deletion.
Note:
Only a project owner can recover a workspace. If you do not have the necessary privileges, contact the owner of your project.