Schedule cloud client upgrades
You install the Session Recording cloud client on each Session Recording server that you want to connect to the cloud. Citrix® checks for upgrades for the Session Recording cloud client automatically. You can upgrade the cloud client immediately or specify a time to upgrade the cloud client automatically.
Upgrade the cloud client immediately or automatically
To upgrade the cloud client immediately or automatically, choose either of the following methods:
Method 1: Click Cloud client version in the row of the target Session Recording server
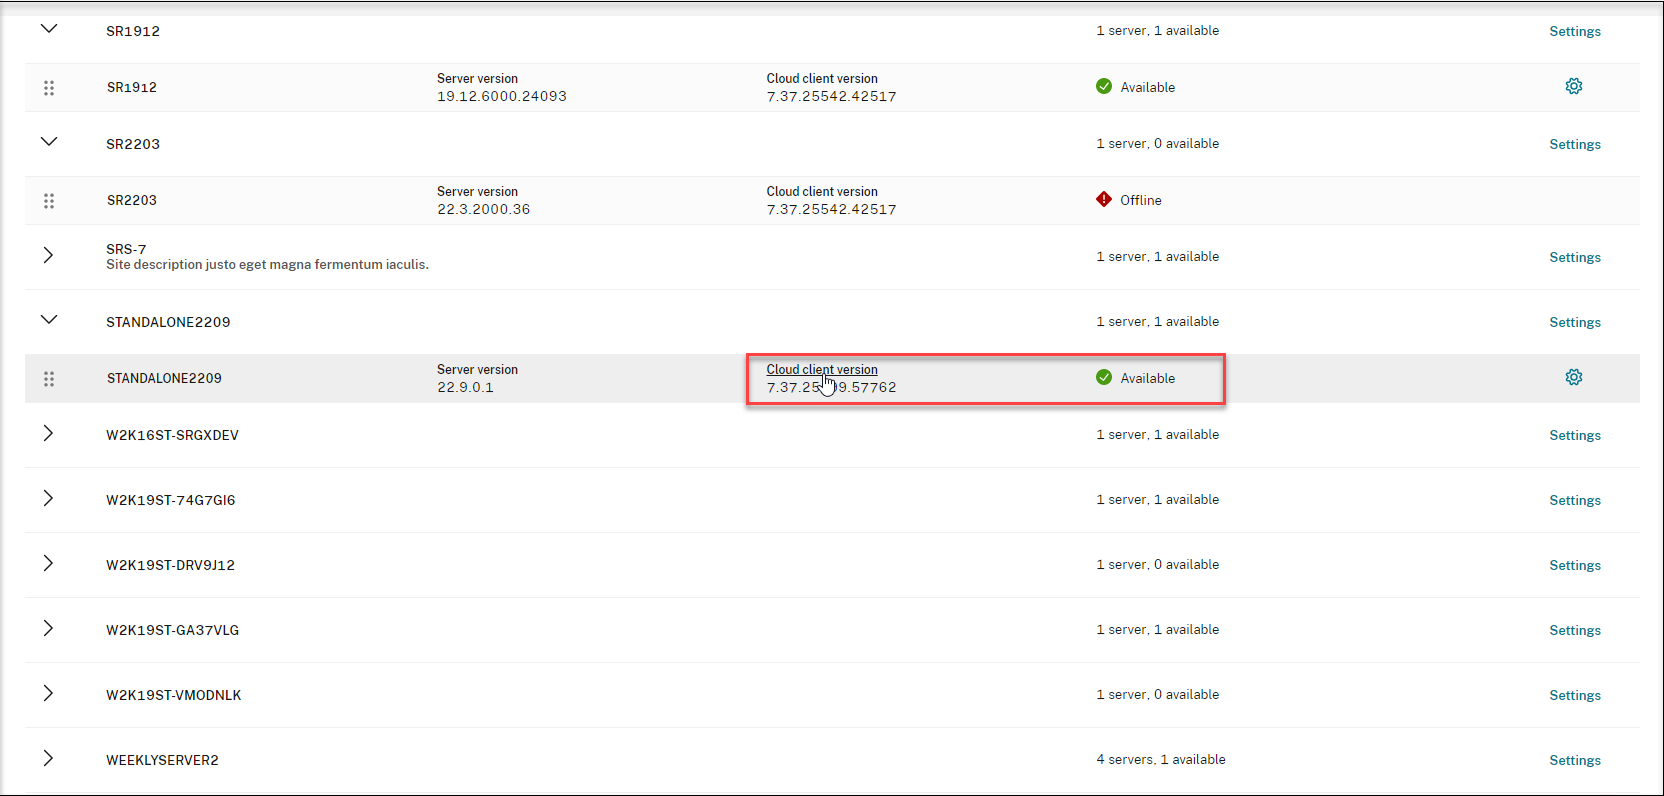
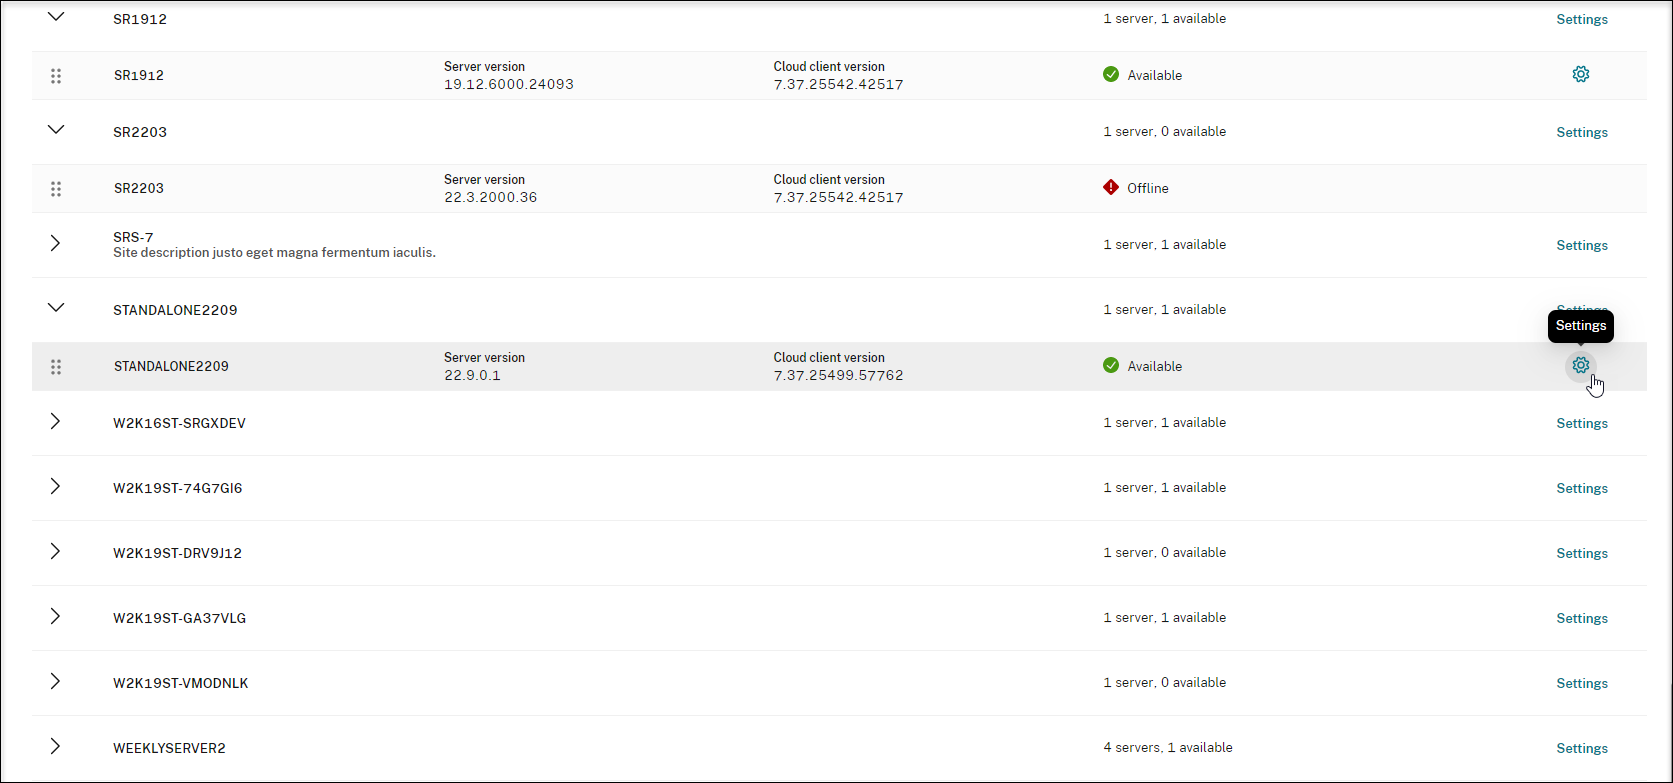
- Locate the target Session Recording server by selecting Configuration > Server Management from the left navigation of the Session Recording service.
- Ensure that the Session Recording server is in Available status.
-
Click Cloud client version in the row of the Session Recording server.
Cloud client version is not clickable if the server is not in Available status.
-
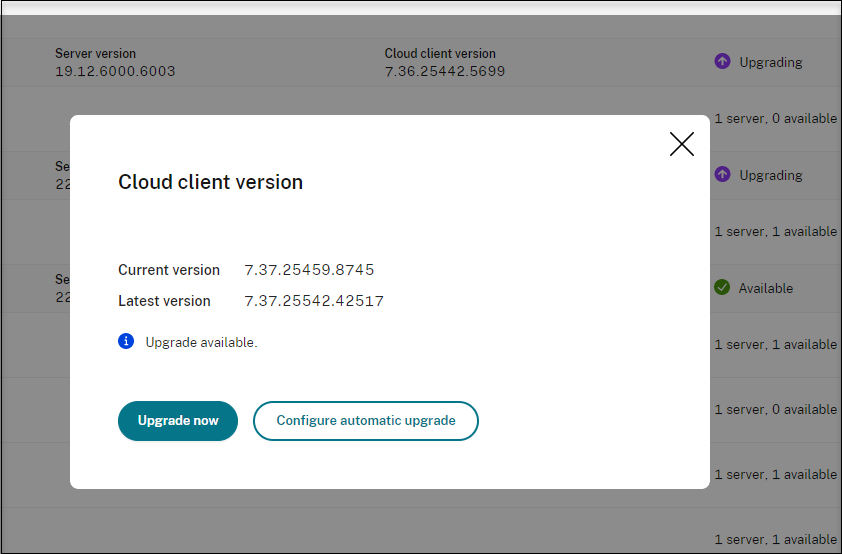
Click Upgrade now or Configure automatic upgrade.
-
Click Upgrade now.
Upgrade now is not available if the version of your cloud client is already up to date. After clicking Upgrade now, you are not prompted to confirm the upgrade.
-
Click Configure automatic upgrade.
After clicking Configure automatic upgrade, you are taken to the Cloud client upgrades page where you can specify a time to upgrade the cloud client automatically.
By default, automatic upgrade is enabled and occurs from 2:00 AM through 3:00 AM every day. You can clear the Enable automatic upgrade check box to allow only manual upgrades.
If you select the Enable automatic upgrade check box, you can specify a custom time slot that suits your needs. The time shown here is the time on the Session Recording server.
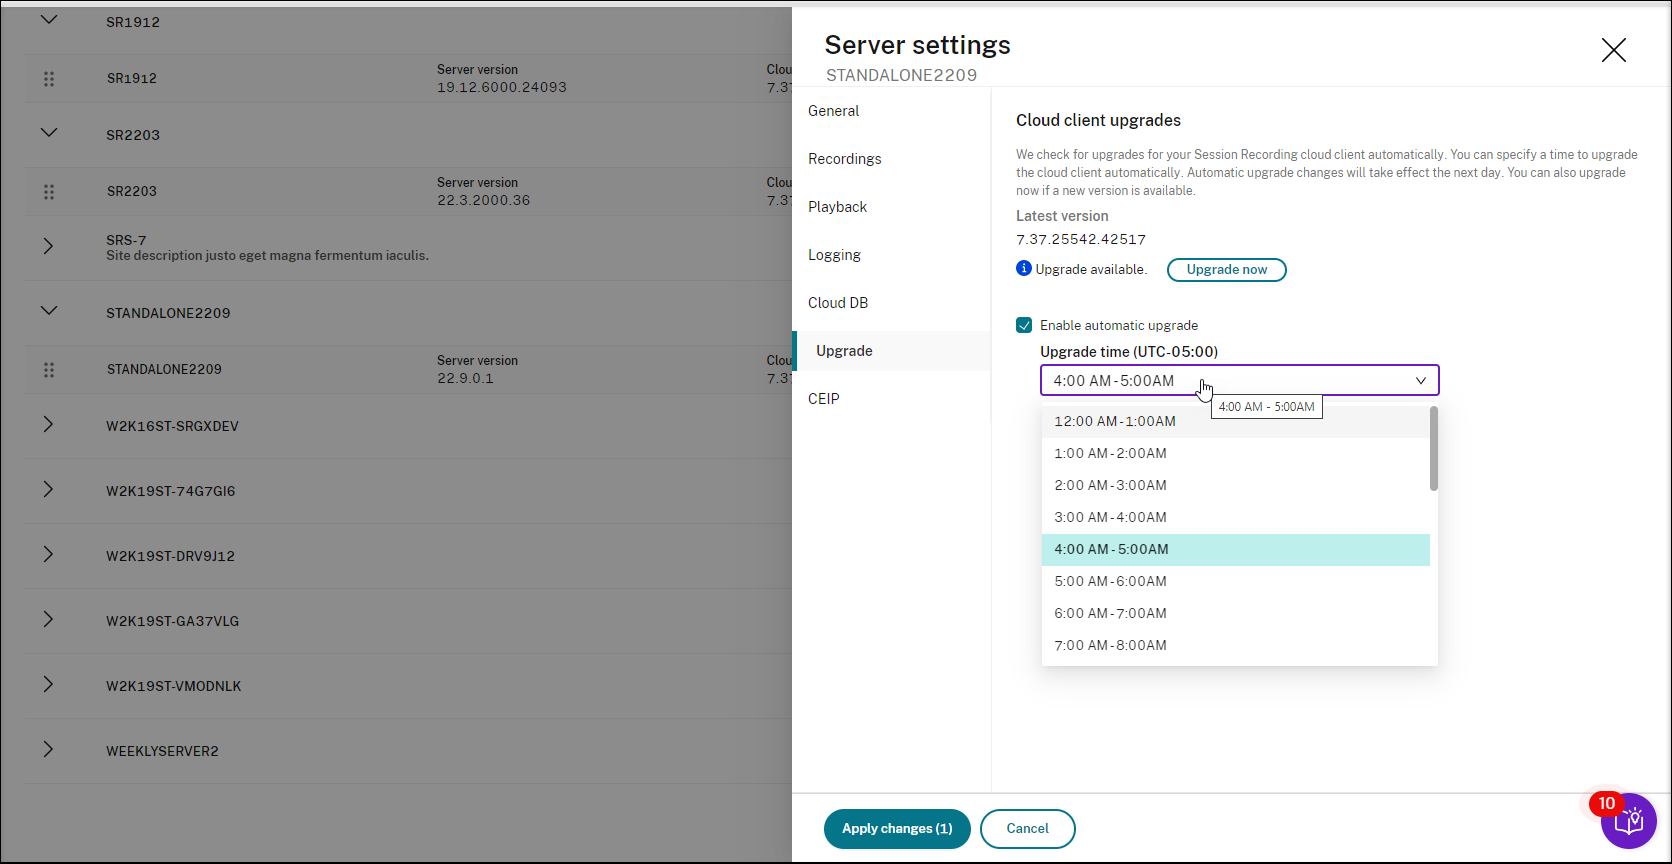
Your automatic upgrade settings take effect the next day.
-
Method 2: Click the settings icon in the row of the target Session Recording server
- Locate your target Session Recording server by selecting Configuration > Server Management from the left navigation of the Session Recording service.
- Ensure that the Session Recording server is in Available status.
-
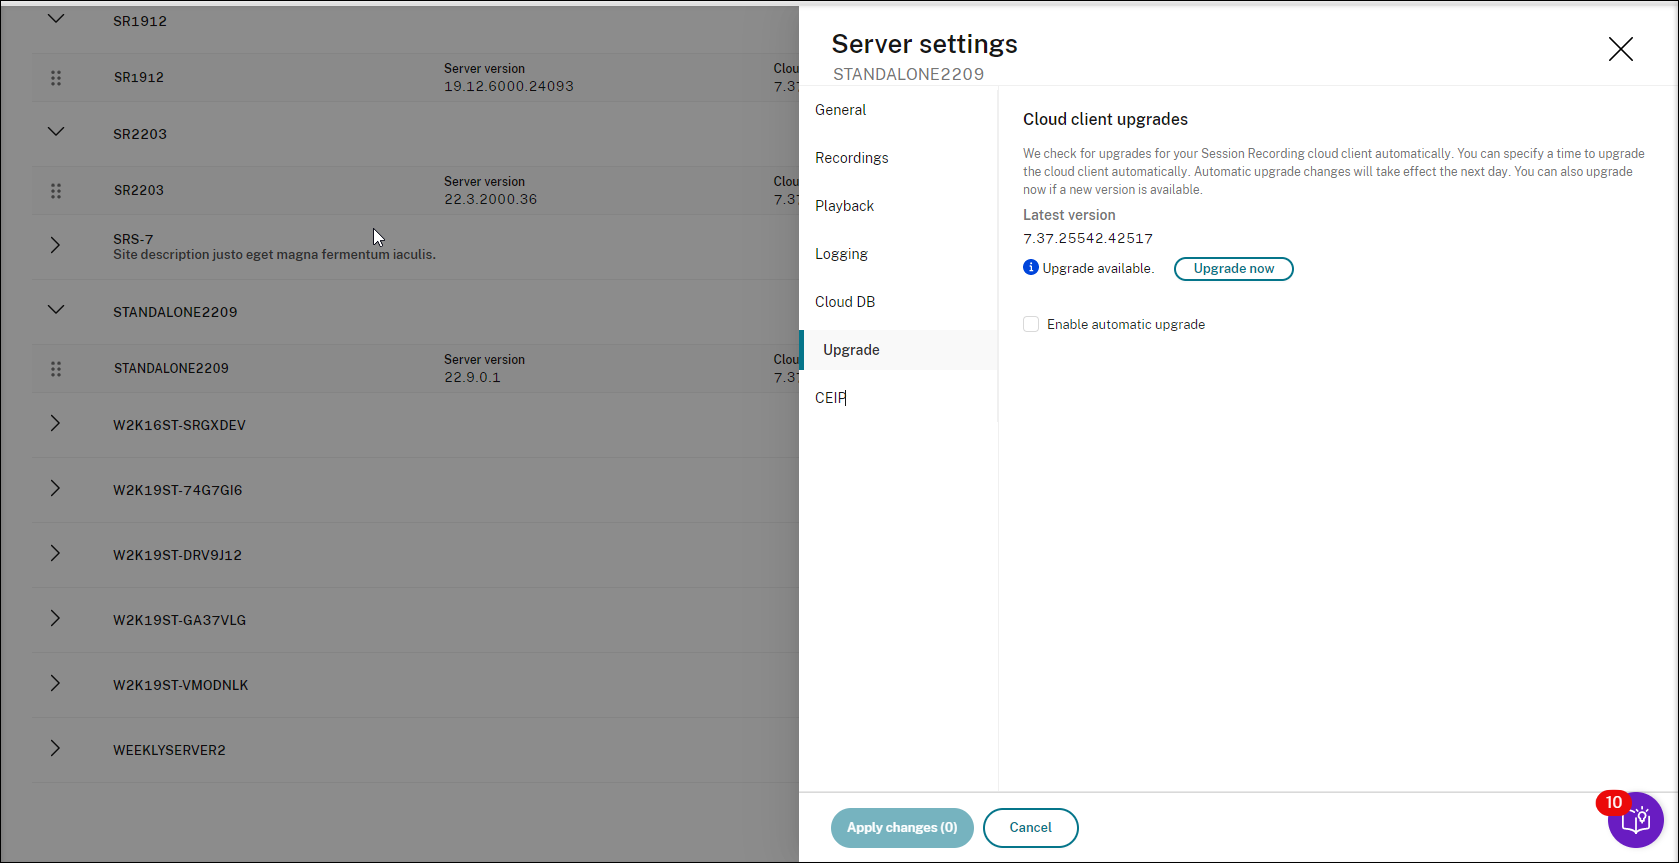
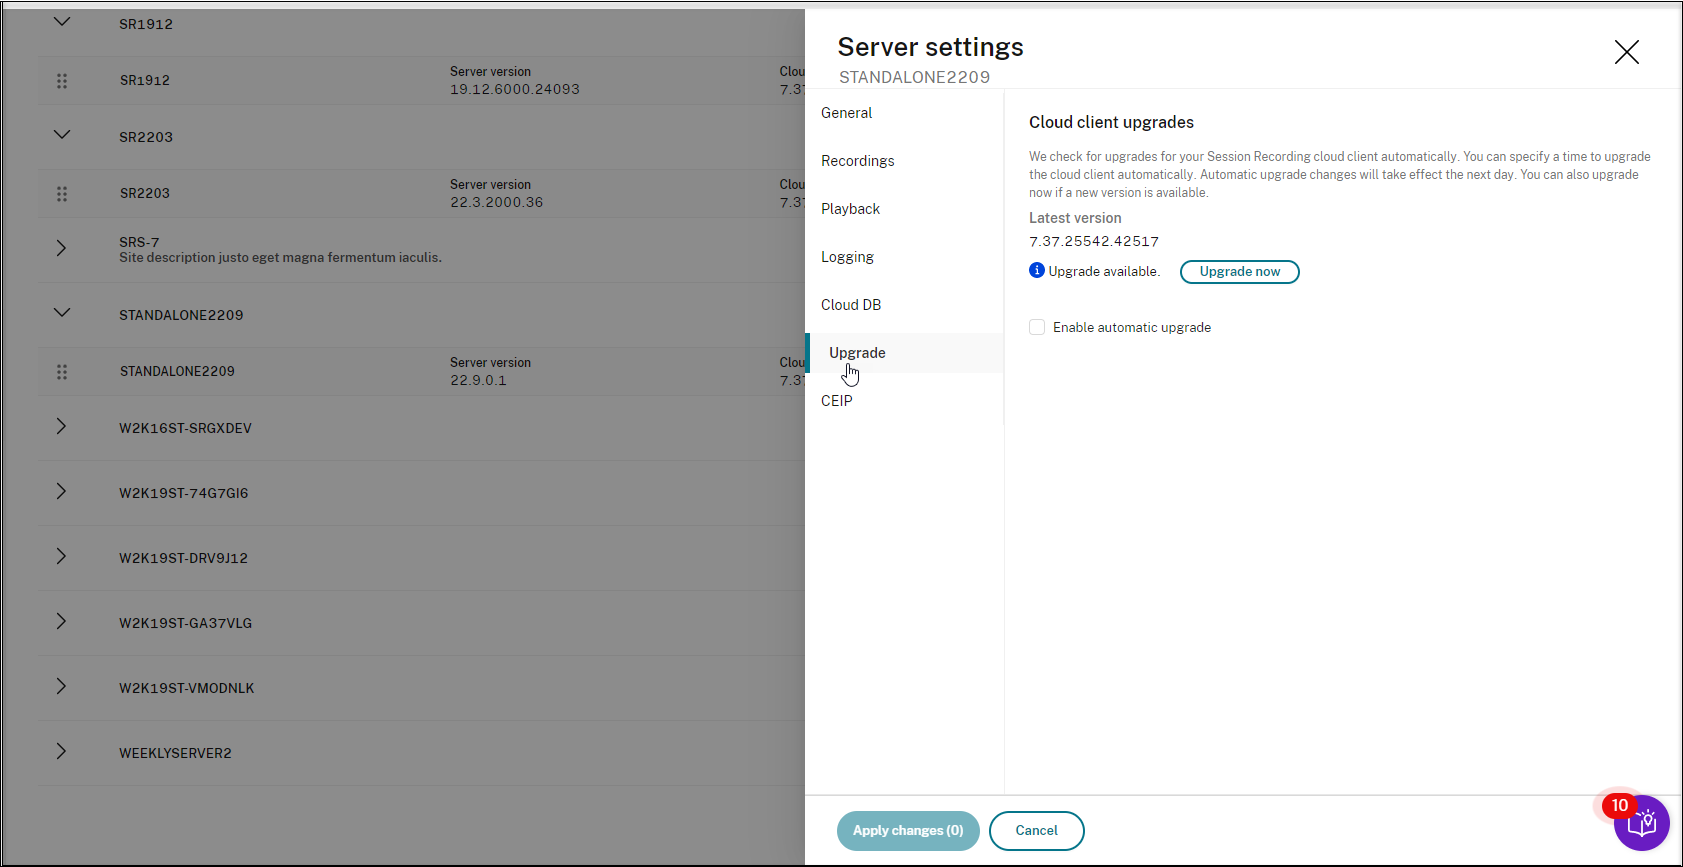
Click the settings icon in the row of the Session Recording server. The Server settings window appears.
-
Click Upgrade in the left navigation.
-
Click Upgrade now or set Enable automatic upgrade.
-
Click Upgrade now.
Upgrade now is not available if the version of your cloud client is already up to date. After clicking Upgrade now, you are prompted to confirm the upgrade.
-
Set Enable automatic upgrade.
Note:
Ensure that the time you set for automatic cloud client upgrades is earlier than the time you set for automatic archiving and deletion of recordings. Otherwise, automatic archiving and deletion might fail.
-