Manage websites
When you create a store, a website is created for it automatically which users can access through either through a browser or through Citrix Workspace app. You must have at least one website. You can add additional websites to existing stores. This allows you to provide different URLs with different configurations to your users. However multiple websites can only be accessed through a web browser as Citrix Workspace Apps are configured to use one specific website for a store, see Configure Workspace app website.
Important:
In multiple server deployments, use only one server at a time to make changes to the configuration of the server group. Ensure that the Citrix StoreFront management console is not running on any of the other servers in the deployment. Once complete, propagate your configuration changes to the server group so that the other servers in the deployment are updated.
View websites
To view the websites for a store:
- From the management console, select the Stores node in the left pane.
- Select the store you wish to configure.
- In the Actions pane, select Manage websites.
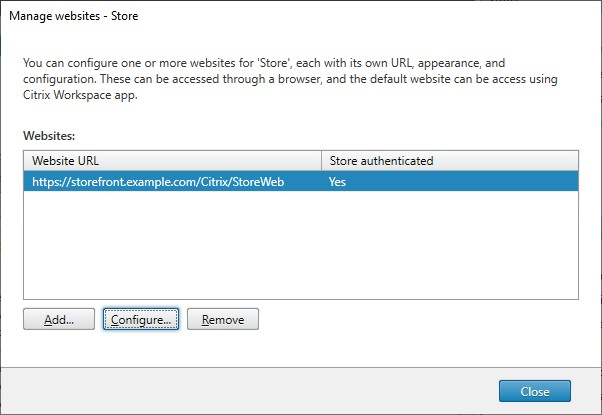
From the Manage websites screen, you can perform the following actions:
| Action | Detail |
|---|---|
| Create a website | Create websites, which enable users to access stores through a web page or Workspace app. |
| Configure a website | Modify settings for your website. |
| Remove a website | Remove a Citrix Receiver™ for Web site. |
PowerShell
To get a list of websites, use cmdlet Get-STFWebReceiverService.
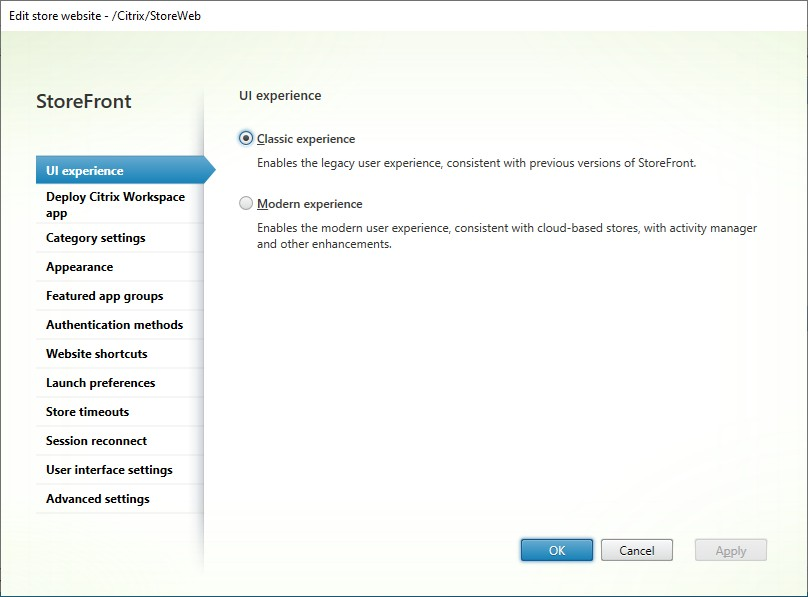
Configure a website
To configure a website:
-
Select a web site and press Configure…
-
Modify the settings on the appropriate tabs.
- UI Experience
- Deploy Citrix Receiver/Workspace app
- Category Settings
- Customize Appearance
- Featured App Groups
- Authentication Methods
- Website Shortcuts
- Launch preferences
- Session Settings
- Workspace Control
- Client Interface Settings
- Pinned links
- Custom announcements
- Dialog after log in
- Advanced Settings
-
Once you have finished your changes, click OK.
-
To configure App Protection you must use PowerShell. Ensure you close StoreFront management console before running PowerShell commands.
Create a website
When you create a store, a website is created for it automatically. You can add additional websites to existing stores. This allows you to provide different URLs with different configurations to your users. However multiple websites can only be accessed through a web browser as Citrix Workspace Apps are configured to use one specific website for a store, see Configure Workspace app website.
-
Select Add….
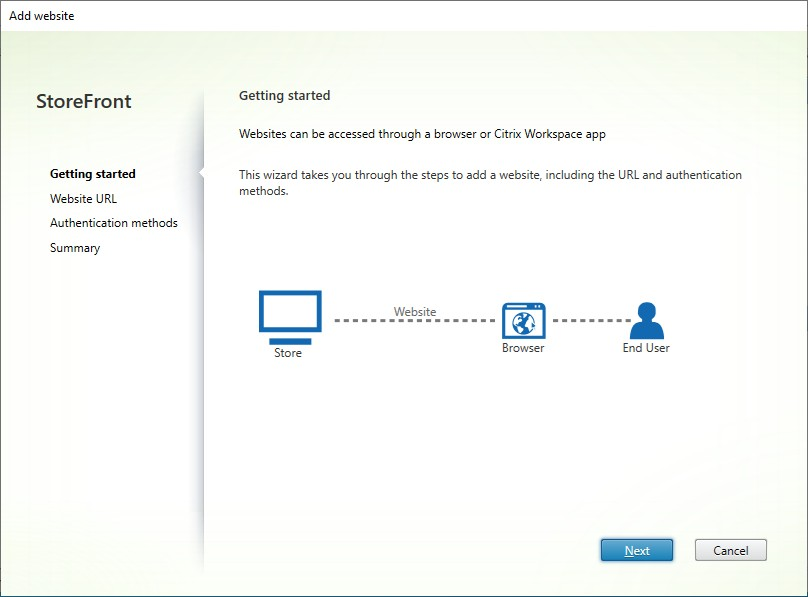
-
On the Getting started tab, select Next.
-
Type the desired Web Site Path, choose if you want to this to be the default website for the base URL and select Next.

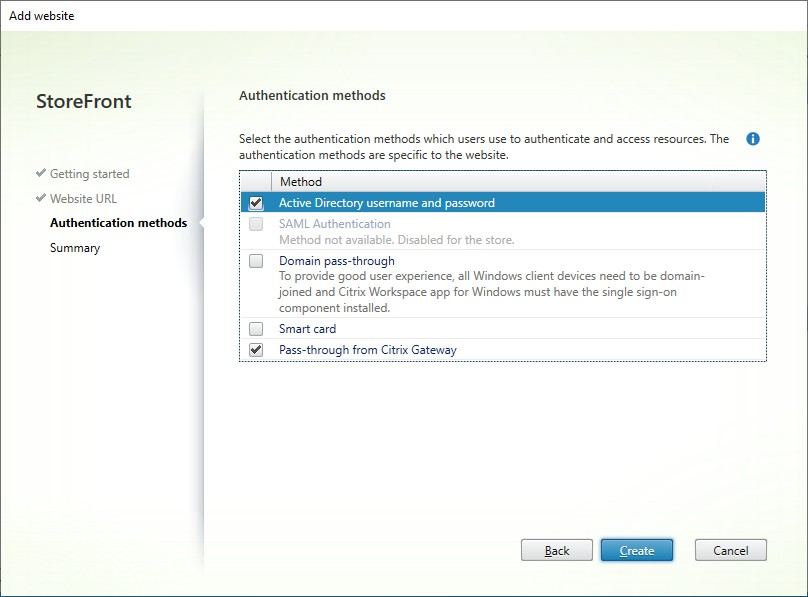
-
Tick or untick the desired authentication methods. Some methods are only available if they have been configured for the store. Press Next.
-
When the site has been created, click Finish.
-
Select the newly created site and press Edit to configure your web site as required, see Configure Websites.
PowerShell
To create a website using PowerShell, run cmdlet Add-STFWebReceiverService.
Remove a website
-
Select the Store node in the left pane of the Citrix StoreFront management console, select the store for which you want to create the Citrix Receiver for Web site, and click Manage websites in the Actions pane.
-
Select a site and click Remove. When you remove a site, users can no longer use that webpage to access the store.
PowerShell
To remove a website using PowerShell, run cmdlet Remove-STFWebReceiverService.