Configure PIV smart card authentication
This article lists the configuration required on the Director Server and in the Active Directory to enable the smart card authentication feature.
Note:
Smart card authentication is supported only for users from the same Active Directory domain.
Director server configuration
Perform the following configuration steps on the Director server:
-
Install and enable the Client Certificate Mapping Authentication. Follow the Client Certificate Mapping authentication using Active Directory instructions in the Microsoft document, Client Certificate Mapping Authentication.
-
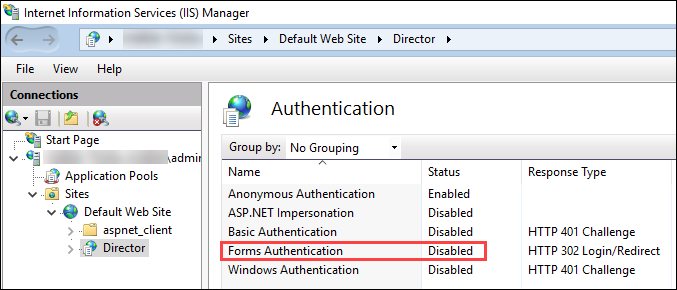
Disable Forms Authentication on the Director site.
Start IIS Manager.
Go to Sites > Default Web Site > Director.
Select Authentication.
Right-click Forms Authentication, and select Disable.
-
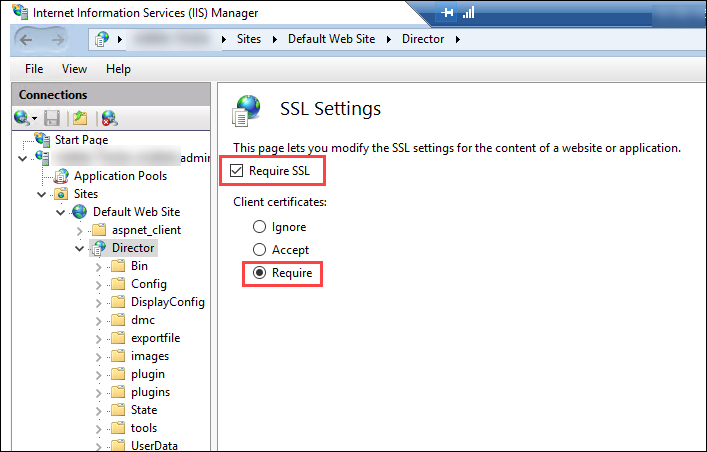
Configure the Director URL for the more secure https protocol (instead of HTTP) for client certificate authentication.
-
Start IIS Manager.
-
Go to Sites > Default Web Site > Director.
-
Select SSL Settings.
-
Select Require SSL and Client certificates > Require.
-
-
Update web.config. Open the web.config file (available in c:\inetpub\wwwroot\Director) using a text editor.
Under the <system.webServer> parent element, add the following snippet as the first child element:
<defaultDocument>
   <files>
       <add value="LogOn.aspx"/>
   </files>
</defaultDocument>
Active Directory configuration
By default the Director application runs with the Application Pool identity property. Smart card authentication requires delegation for which the Director application identity must have Trusted Computing Base (TCB) privileges on the service host.
Citrix recommends that you create a separate service account for Application Pool identity. Create the service account and assign TCB privileges as per the instructions in the Microsoft MSDN article, Protocol Transition with Constrained Delegation Technical Supplement.
Assign the newly created service account to the Director application pool. The following figure shows the properties dialog of a sample service account, Domain Pool.

Configure the following services for this account:
- Delivery Controller™: HOST, HTTP
- Director: HOST, HTTP
- Active Directory: GC, LDAP
To configure,
-
In the user account properties dialog, click Add.
-
In the Add Services dialog, click Users or Computers.
-
Select the Delivery Controller host name.
-
From the Available services list, select HOST and HTTP Service Type.
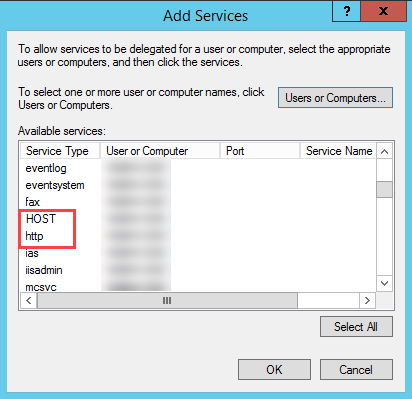
Similarly, add Service Types for Director and Active Directory hosts.
Create Service Principal Name records
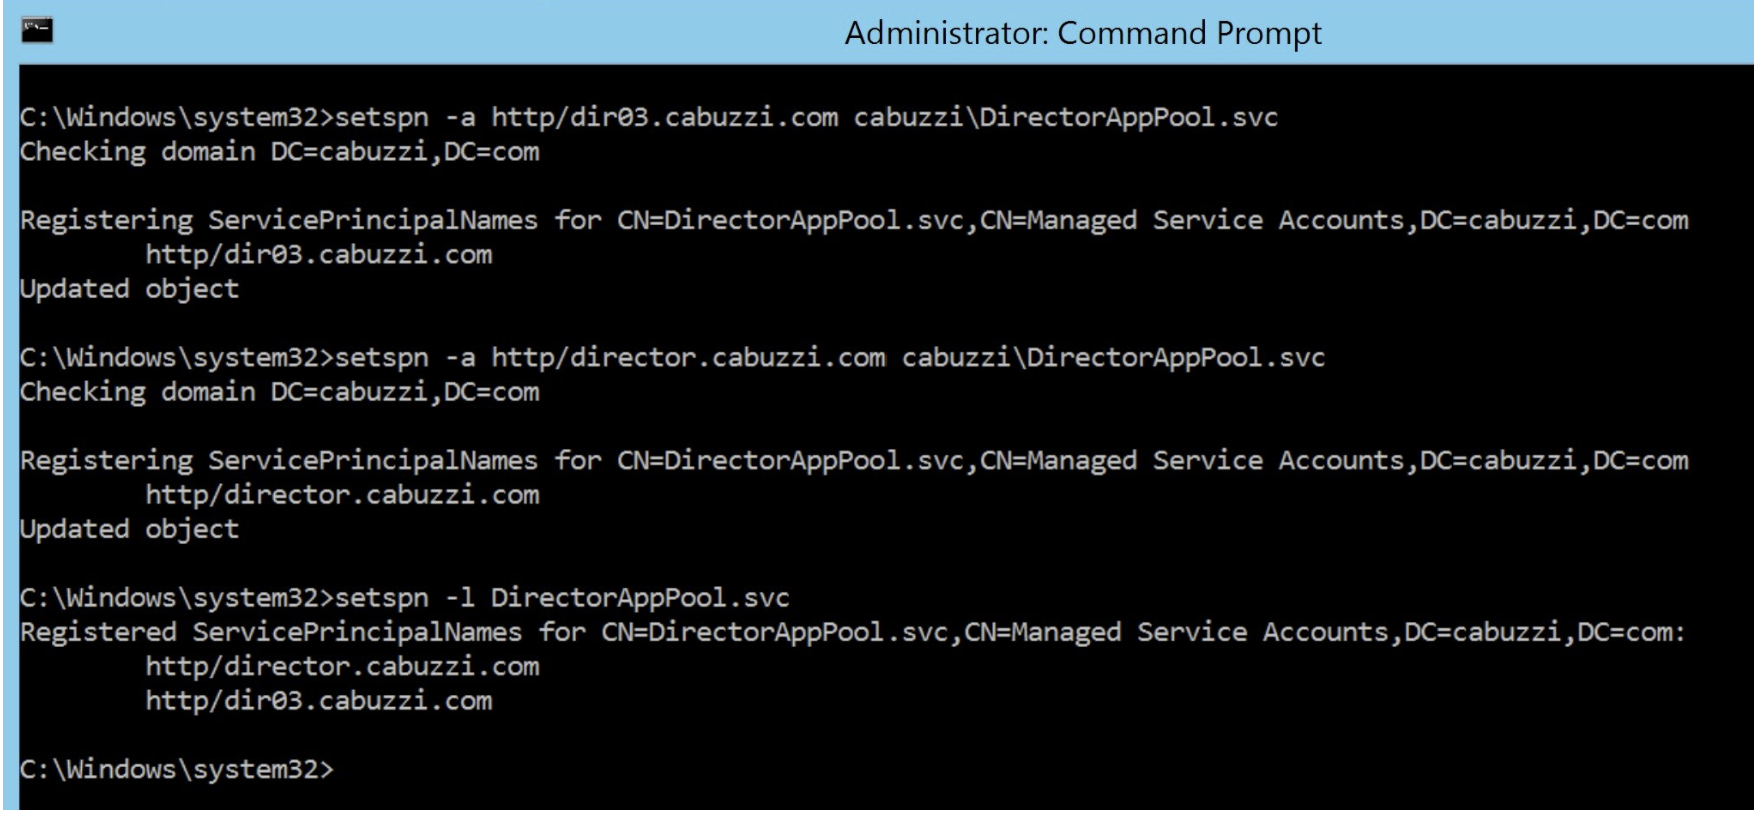
You must create a service account for each Director server and load-balanced Virtual IPs (VIP) used to access a pool of Director servers. You must create service principal name (SPN) records to configure a delegation to the newly created service account.
-
Use the following command to create an SPN record for a Director server:
setspn -a http/<directorServer>.<domain_fqdn> <domain>\<DirectorAppPoolServiceAcct> <!--NeedCopy--> -
Use the following command to create an SPN record for a load-balanced VIP:
setspn -S http/<DirectorFQDN> <domain>\<DirectorAppPoolServiceAcct> <!--NeedCopy--> -
Use the following command to view or test the created SPNs:
 setspn –l <DirectorAppPoolServiceAcct>

 <!--NeedCopy-->
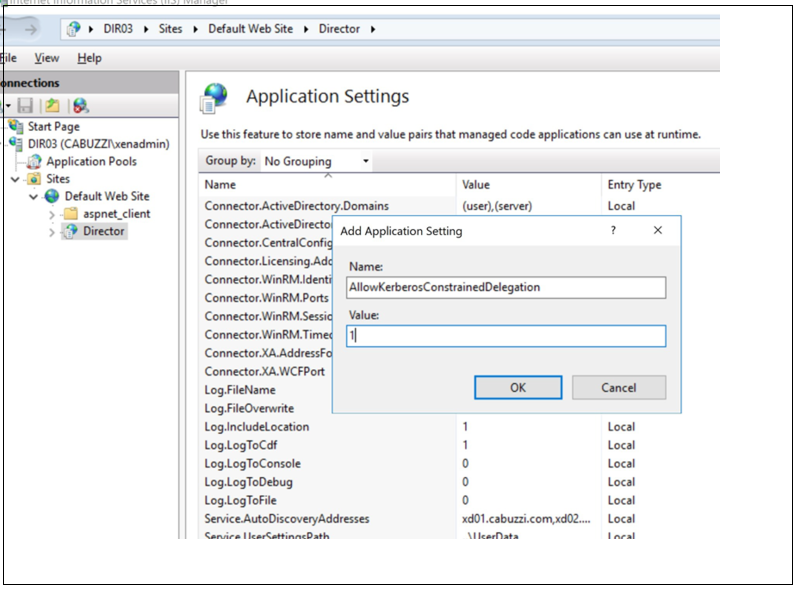
- Select the Director virtual directory in the left pane and double click Application Settings. Inside the Application Settings window, click Add and ensure AllowKerberosConstrainedDelegation is set to 1.
-
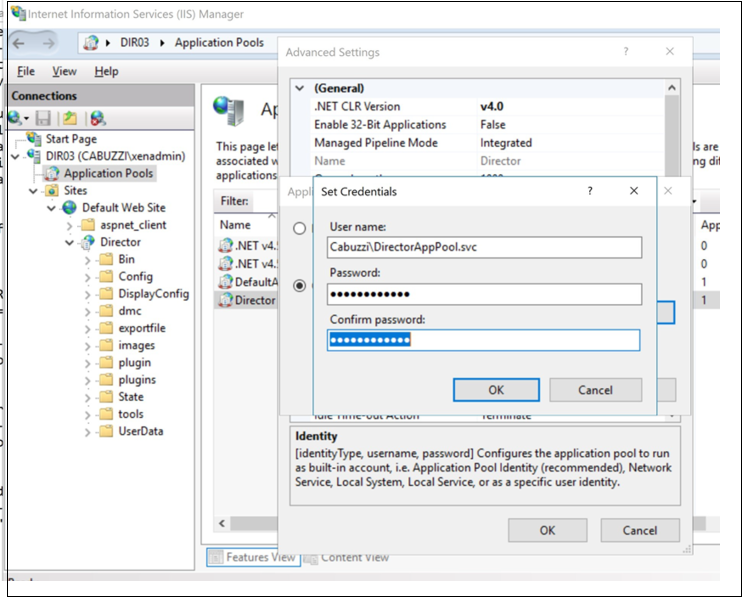
Select Application Pools in the left-hand pane, then right-click the Director application pool and select Advanced Settings.
-
Select Identity, click the ellipses (“…”) to enter the service account domain\logon and password credentials. Close the IIS console.
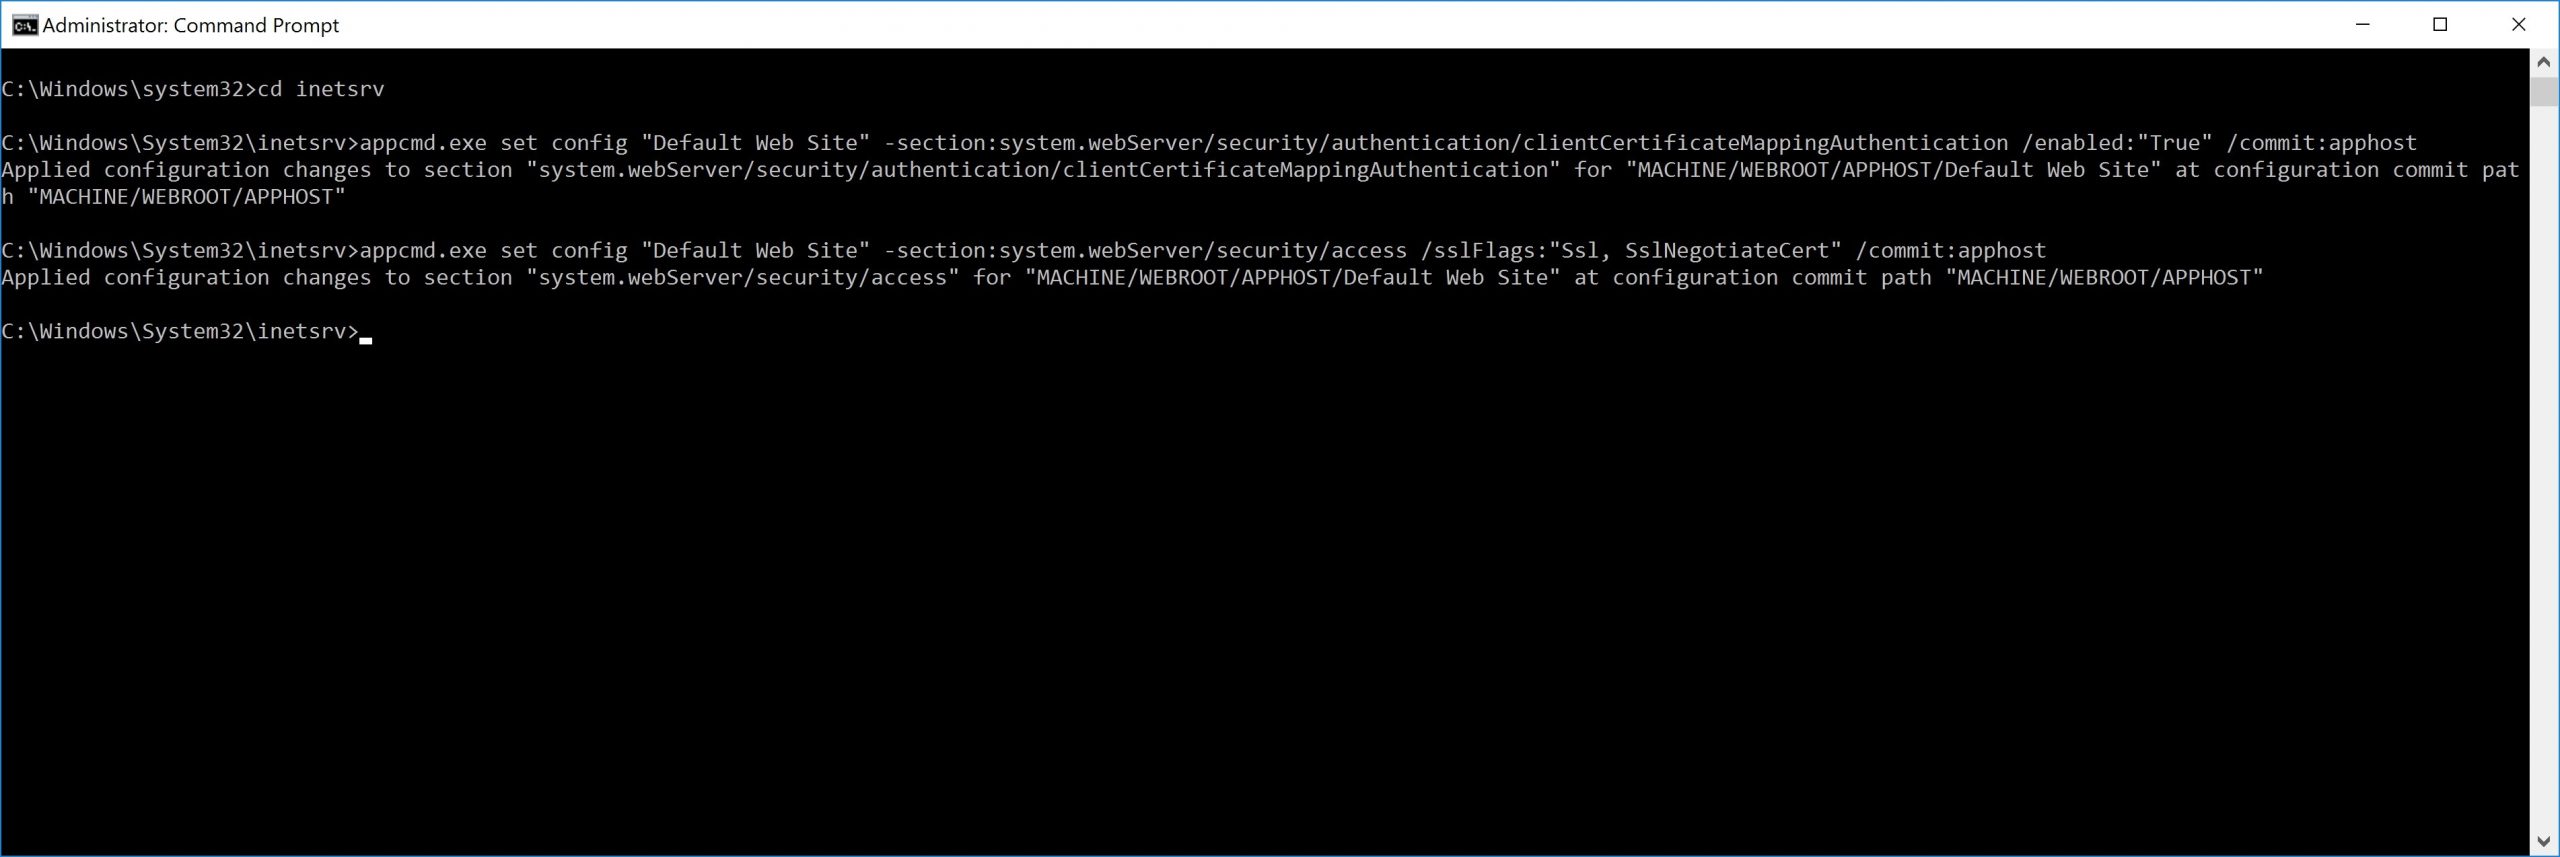
- From an elevated command prompt, change the directory to C:\Windows\System32\inetsrv and enter the following commands:
   appcmd.exe set config “Default Web Site” -section:system.webServer/security/authentication/clientCertificateMappingAuthentication /enabled:”True” /commit:apphost

<!--NeedCopy-->
    appcmd.exe set config “Default Web Site” -section:system.webServer/security/access /sslFlags:”Ssl, SslNegotiateCert” /commit:apphost
<!--NeedCopy-->
Firefox browser configuration
To use the Firefox browser, install the PIV driver available at OpenSC 0.17.0. For installation and configuration instructions, see Installing OpenSC PKCS#11 Module in Firefox, Step by Step. For information on the usage of the smart card authentication feature in Director, see the Use Director with PIV based smart card authentication section in the Director article.