Create a Workspace
A workspace is created from the Workspaces Page. A workspace is, in essence, an online Cloud Development Environment (CDE) accessible via a Cloud IDE, a terminal or an SSH connection. Using an SSH connection is possible from a locally installed IDE supporting development from a remote container.
-
Basic Set-Up
- Basic info
- Resource Access Control
-
Data Loss Prevention
Permission: Security::Manage - Custom Work Schedule
- Launch it
- From an existing Workspace
- From a template
Basic Set-Up
You can create a workspace by pressing the “Create Workspace” button.
You will need to select the following information:
Basic Info
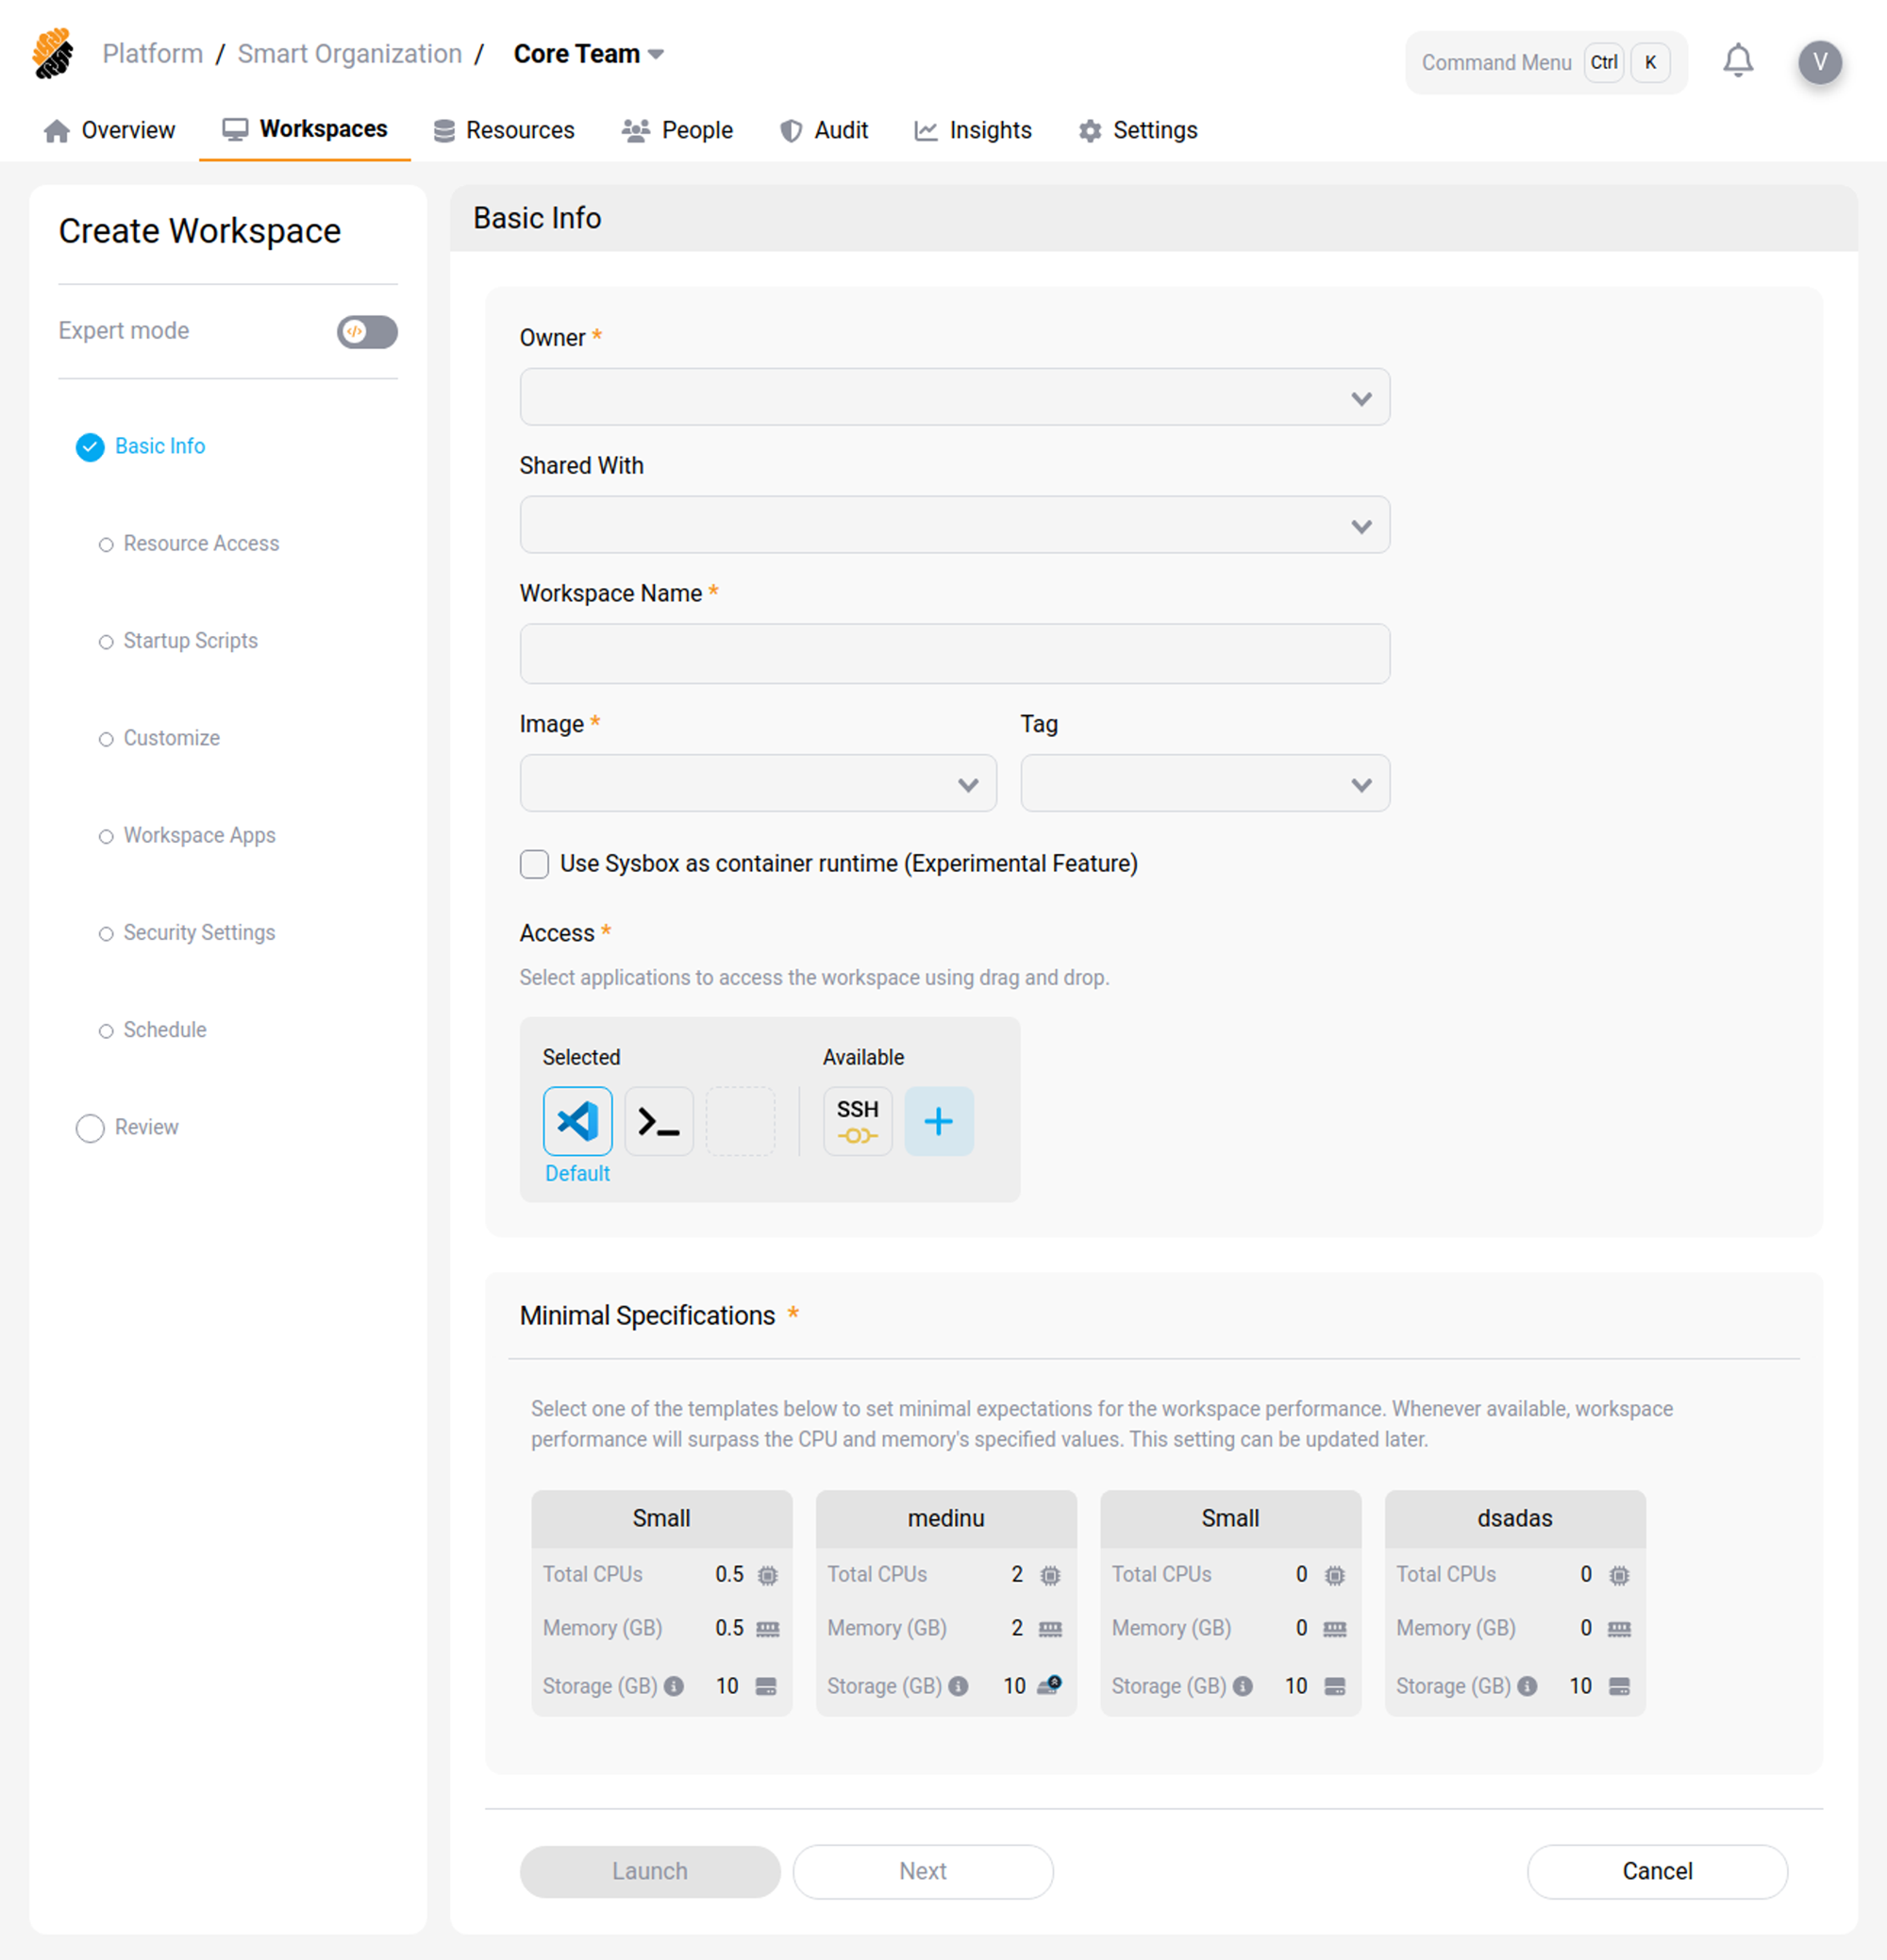
The Basic Info page is the first step of the Create Workspace wizard. It contains the core settings for your workspace, including the container image, access methods, workspace region, and compute resources.
You can change all of these settings later, except for the workspace name and region.
Tip
Toggle Expert mode at the top of the sidebar to switch to the YAML editor and edit your workspace configuration directly.
Owner
Select the user who owns the workspace. The owner has full control over the workspace and its configuration.
Shared with
Select additional project members who can access the workspace alongside the owner for peer coding and review. Shared users have the same access to the workspace as the owner.
Workspace name
Enter a unique name for the workspace. You cannot change the workspace name after it is created.
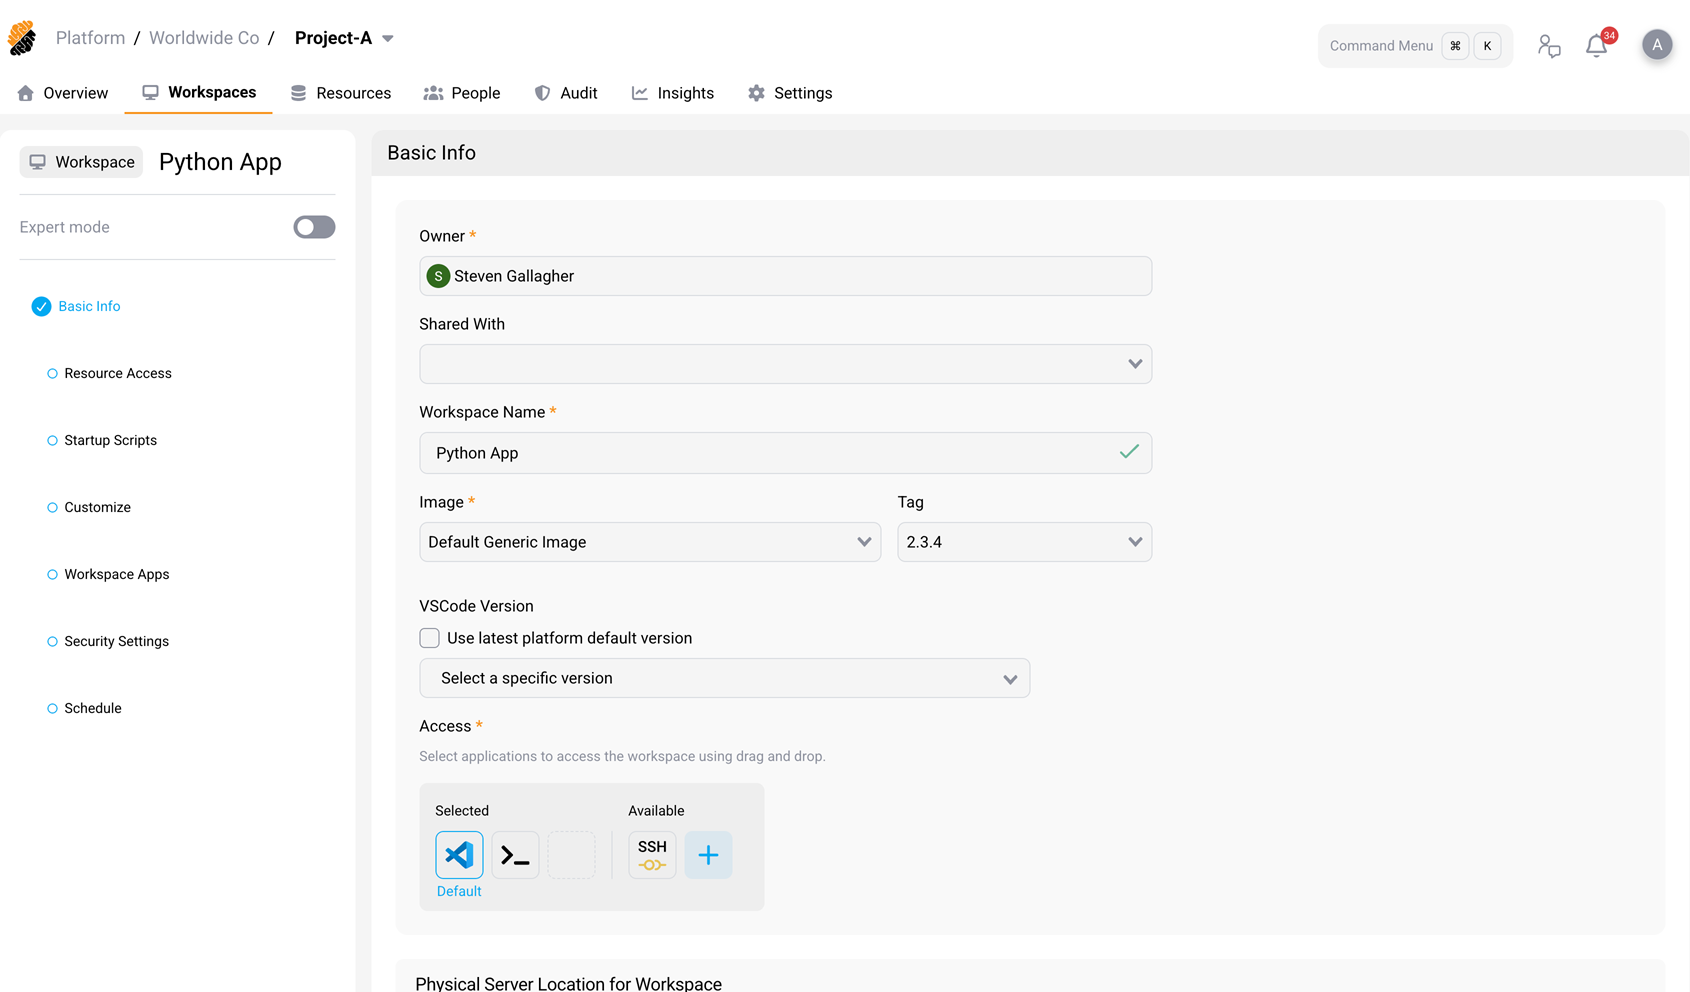
Container image and tag
Choose a preconfigured container image with the tools and dependencies for your project’s needs. Your project owner or administrator maintains the available images.
- Image Select a container image from the list of images available in your project.
- Tag Select the image version (tag) to use.
VSCode Version setting
The VSCode Version setting determines which IDE version runs in the workspace.
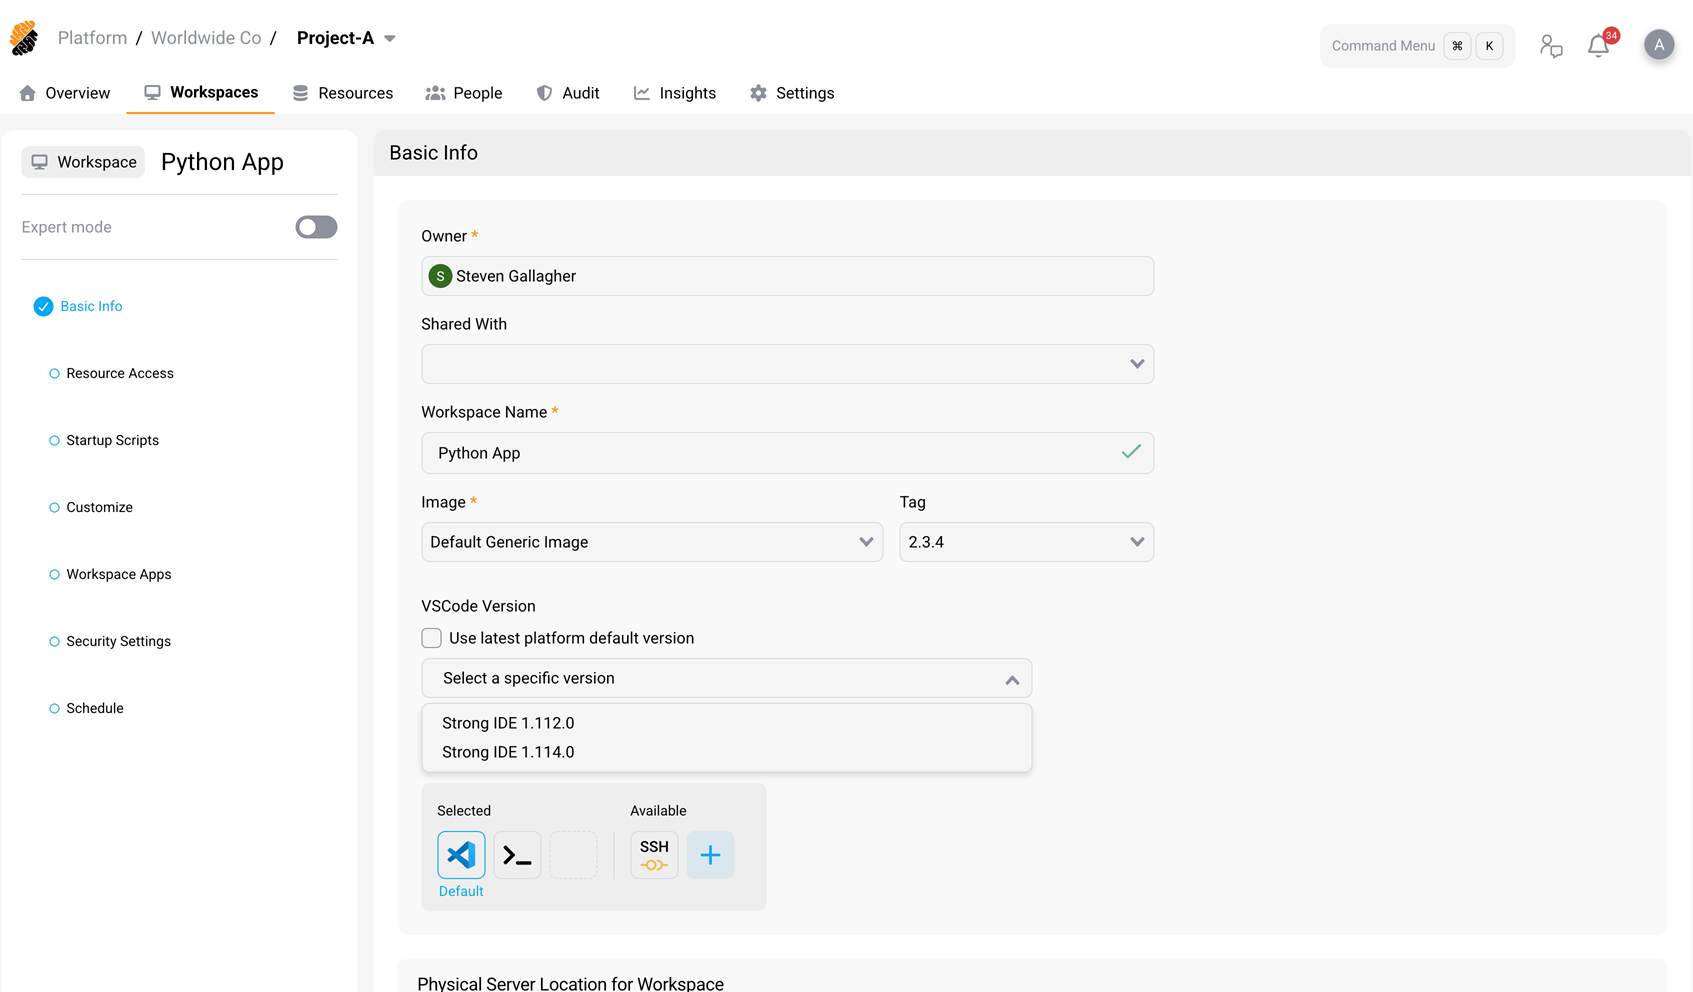
Use the latest platform default version
Select the Use latest platform default version checkbox to automatically keep the workspace on the IDE version designated as the platform default. When the platform default changes (for example, when a newer version is imported and set as default), the workspace uses the new default on its next start.
Select a specific version
Use the Select a specific version dropdown to pin the workspace to a particular IDE version. The dropdown lists all IDE versions imported from the configured registry (for example, “Strong IDE 1.112.0” and “Strong IDE 1.114.0”). Pinning a version prevents the workspace from being updated automatically when the platform default changes.
Behavior
- If no version is selected and the checkbox is not enabled, the workspace uses the IDE version that was current at the time it was created.
- Changing the VSCode Version on an existing workspace takes effect on the next workspace start. The update does not affect the content of the home directory (
/home/developer). - Available versions depend on what has been imported into the platform’s VSCode Versions registry. See VSCode Versions.
Note
The VS Code Configuration step is also available when editing an existing workspace or creating and editing a workspace template.
Access methods
Choose which connection methods are available for this workspace. Each selected item runs as a service in the workspace and appears as a connection option.
- VS Code enables the browser-based IDE.
- Terminal enables the browser-based terminal.
- SSH enables SSH access to the workspace.
You can also create a custom access method by clicking Add and editing the service details.
Custom Access Items
Custom Access Items provide one-click access to a service or tool that runs inside the workspace. Use them when the built-in access methods do not cover a custom development tool, internal service, or application entry point.
When you create or edit a Custom Access Item, provide the following information:
- Name — The label shown to workspace users.
- Port — The port where the service listens inside the workspace.
- Command — The command used to start or connect to the service.
- Icon — An optional image for the access item.
- Health probe — An optional command that checks whether the item is online.
Custom Access Items can also be managed through the REST API for workspaces and workspace templates. For endpoint details, see REST API.
Workspace region
Select the region where your workspace will be deployed. This affects latency and data residency.
For best performance, choose a region near your code repositories, package registries, and other development resources. If you and your resources are in different regions, prioritize the region closer to you.
Important
You cannot change the workspace region after the workspace is created.
Workspace specifications
Choose a compute resource template for your workspace. Performance may exceed these values when capacity is available.
To increase the storage for the selected template, click the disk icon at the bottom of the specification card.
Note
The available specification templates and their resource values depend on how your platform administrator has configured the environment. The values shown above are examples and may differ in your deployment.
After configuring the basic settings, click Launch to create and launch the workspace, click Next to proceed to the next wizard step, or click Cancel to discard the configuration.
Resource Access Control
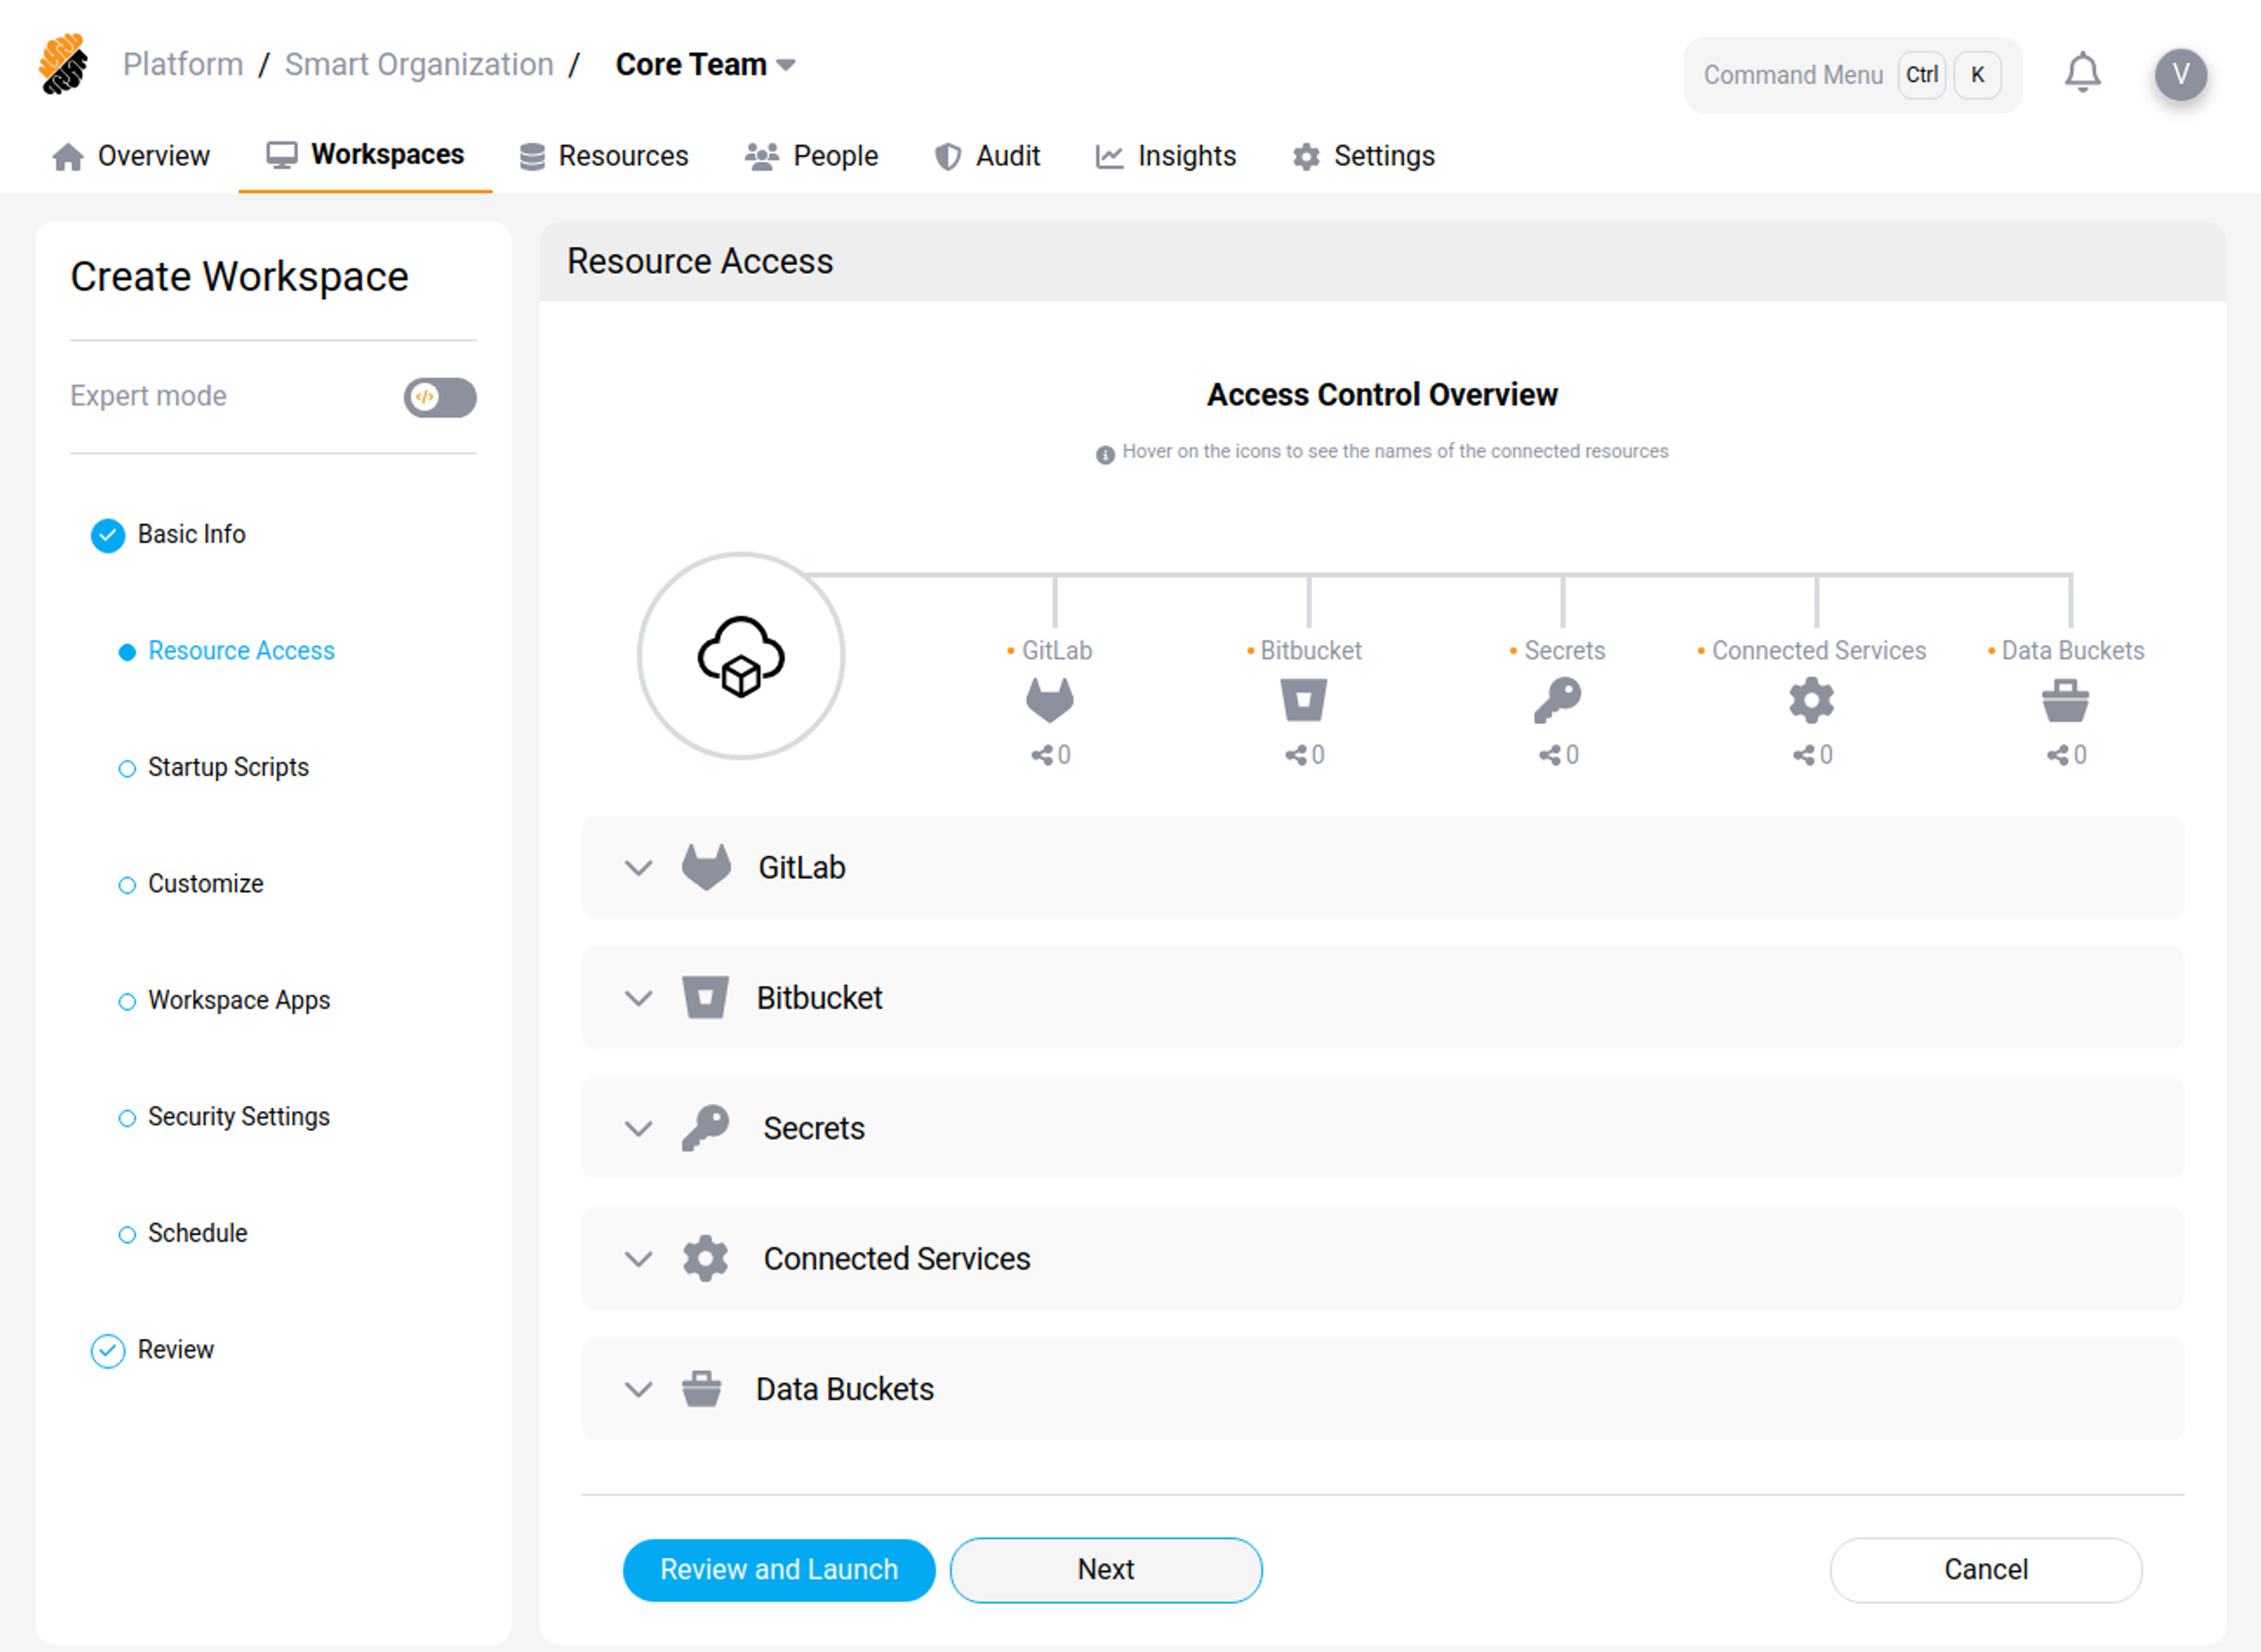
You can attach various project resources to your workspace. Resources must have been previously added to the project. In addition, you might need the appropriate access rights to access them.
You can add the following resource:
- Git Applications And Repositories: You can connect the entire GIT applications available from your platform or single repositories that have been previously imported to the project’s or organization’s resources. Additionally, you can specify a default folder location within your workspace where the Git files will be cloned.
- Secrets: You can import secrets to the workspace as files or environment variables in the workspace. Choose from existing secrets or create a new one.
- Connected HTTP and SSH Services: You can connect services to appear as environment variables in the workspace. Supported and available services are part of the project’s and organization’s resources and depend on the platform’s configuration.
Startup Scripts
While the base container image (Dockerfile) provides core tools like languages and compilers, a startup script handles dynamic configurations. Because these configurations are often user-specific, they shouldn’t be part of the shared image. You can use a startup script to automate environment configuration every time the workspace launches and run it either pre-startup or post-startup, depending on your requirements. This ensures your workspace is ready for development immediately, without requiring manual setup.
Startup scripts are useful for tasks such as:
Manage dynamic dependencies
Dependencies often change frequently or are specific to a branch, which makes them unsuitable for a static container image. You can use a script to:
-
Install dependencies: Run commands like
npm installorapt update. This ensures the environment has the latest libraries that match the code in your current branch. - Build binaries: Compile the latest version of the application or helper tools so they are ready to run.
Initialize services
A startup script can boot necessary background services that the container runtime doesn’t automatically manage. Use the script to:
- Start databases: Launch local instances of services like PostgreSQL, Redis, or MongoDB if you need them for development.
- Run daemons: Start background processes, such as file watchers, test runners, or local servers.
Run status checks
Scripts can provide feedback to let you know when the environment is fully ready. You can configure the script to:
- Perform health checks: Verify that all required services are running before giving you control of the terminal.
- Print a welcome message: Display a “Ready to code!” message or a list of available commands.
Data Loss Prevention Permission: _Security::Manage_
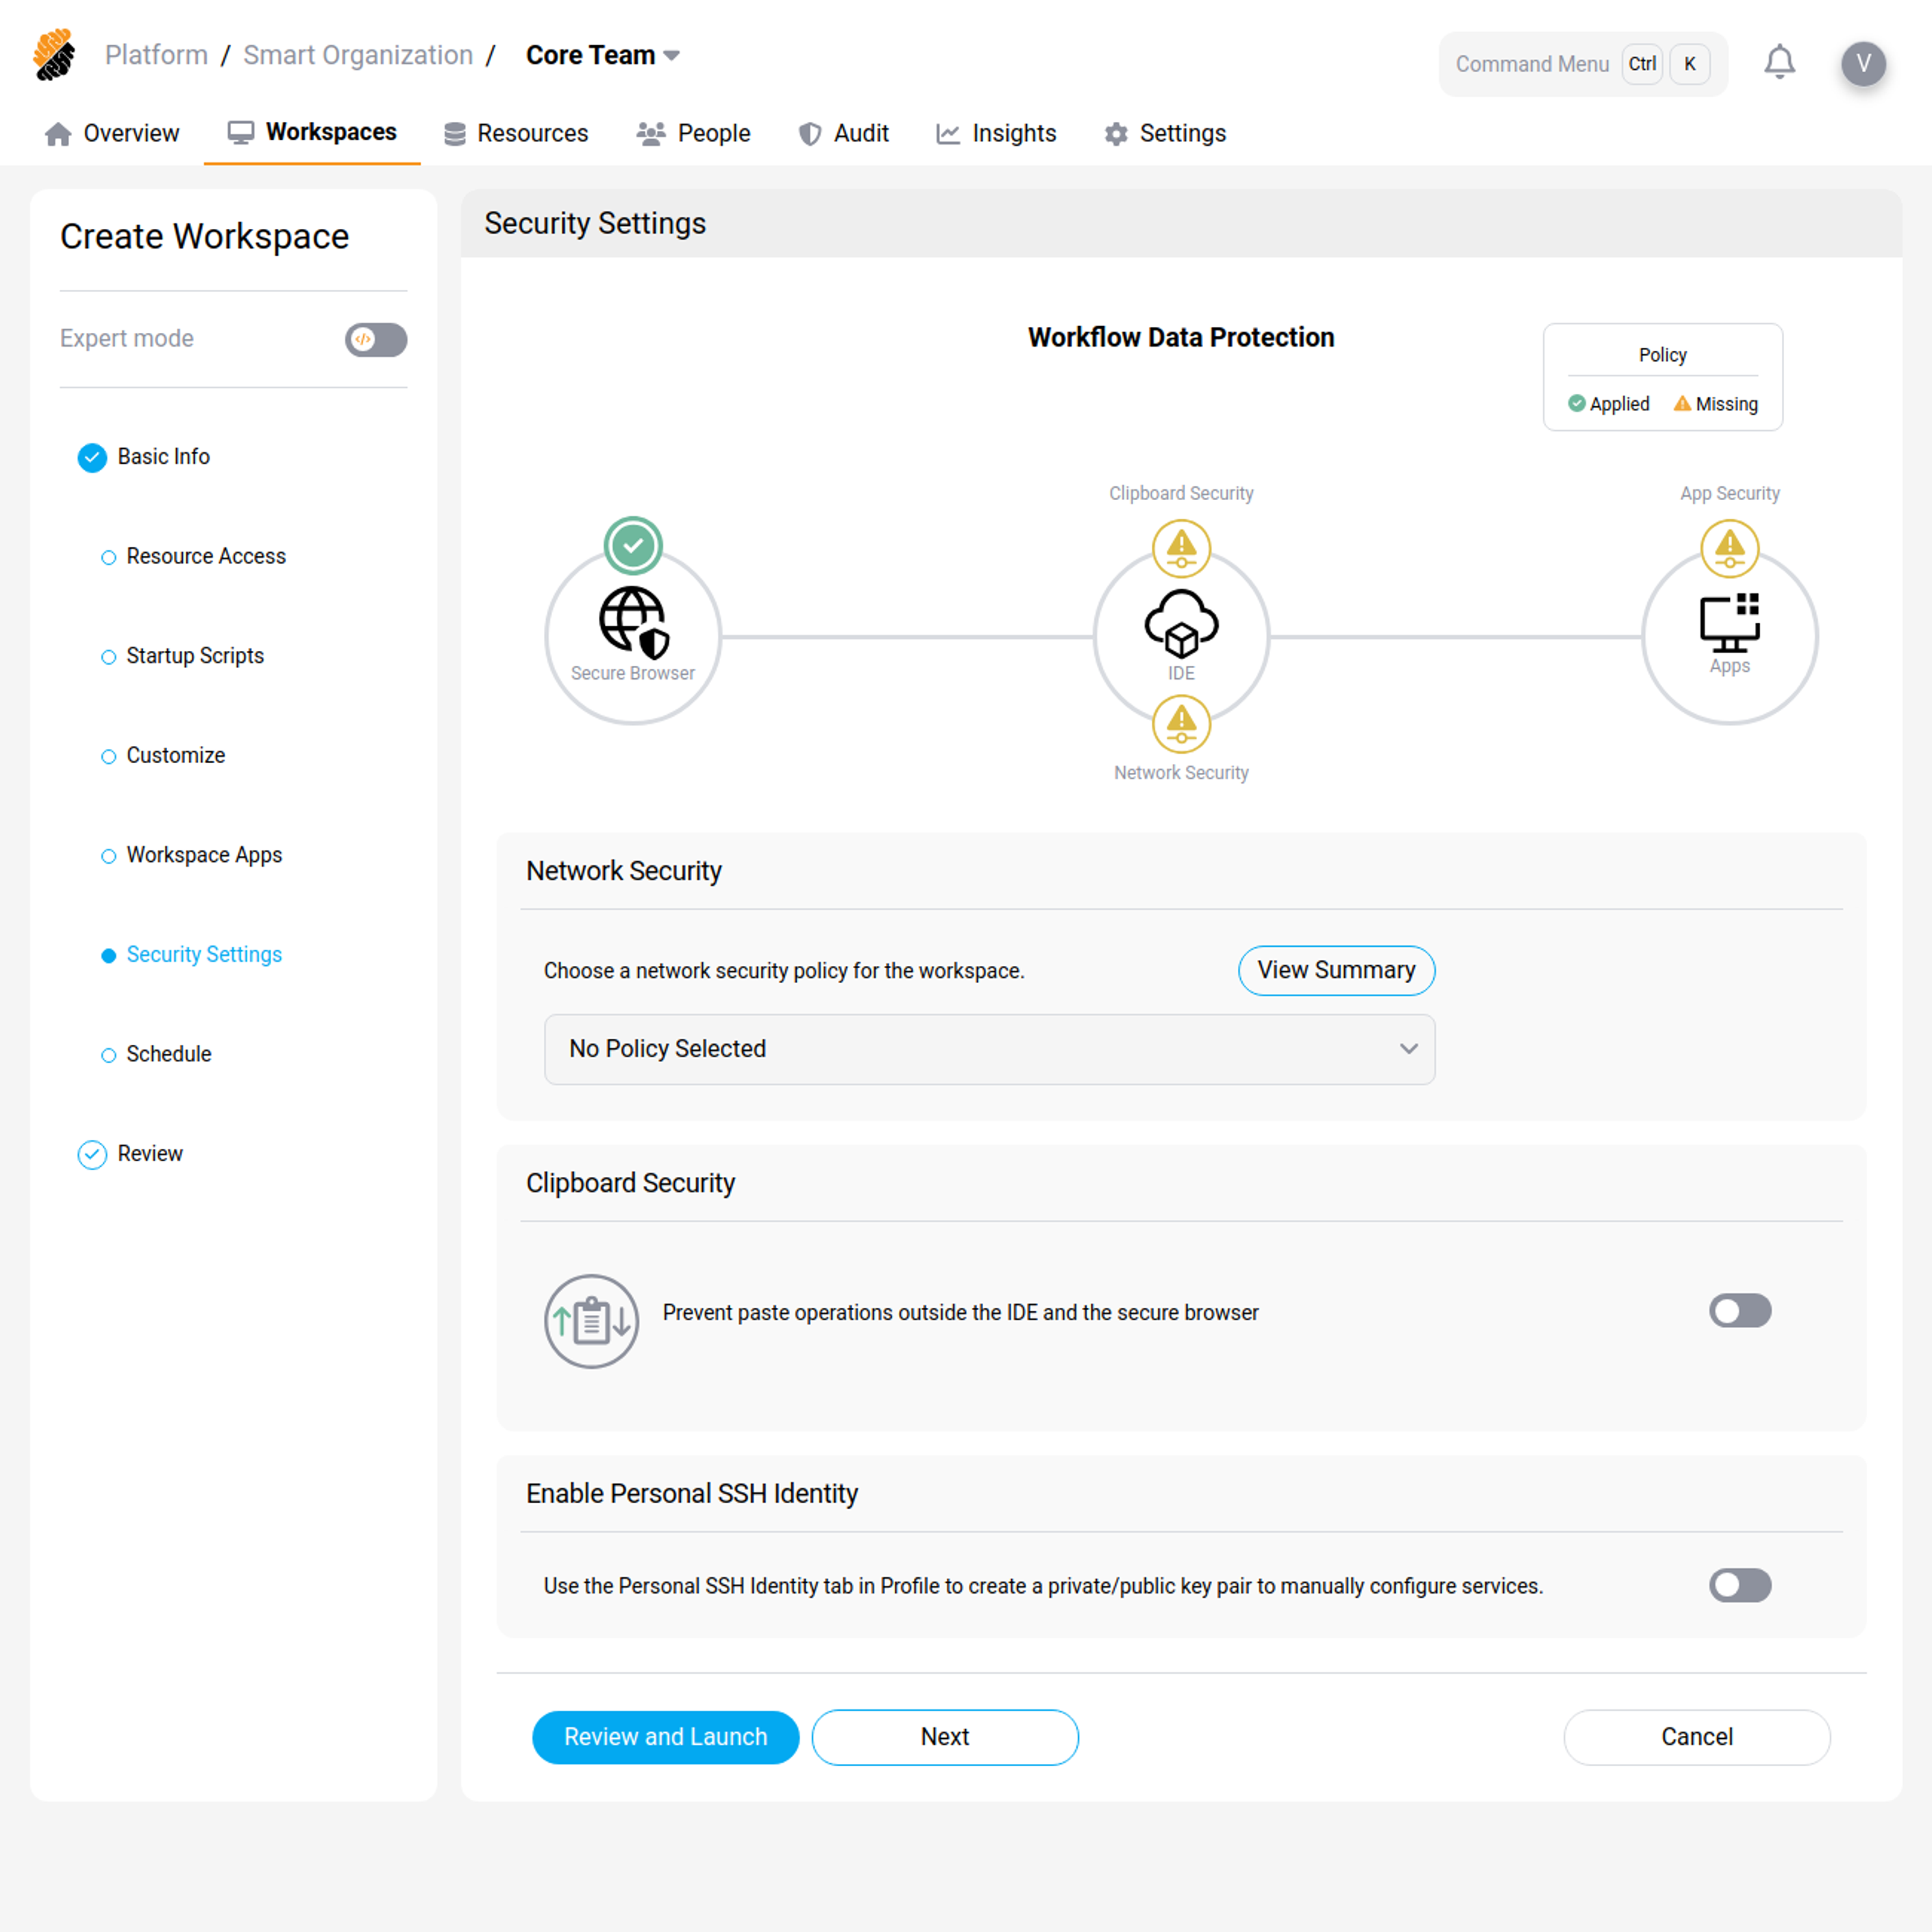
In the Data Loss Prevention section you can configure the security of your workspace.
Under Security Settings you can configure:
- Network Policy: Select a network policy to enforce on the workspace. Network policies are part of the project’s and organization’s resources and are defined by the user with the Security::Manage permission. In particular, policies allow you to control outbound network traffic from the workspace.
- Clipboard Security: Prevent pasting outside of the IDE and the Secure Browser for this workspace.
- Apps Security: Configure Workspace Apps to be accessed only through the Secure Browser.
Under Secure Access Management you can configure:
-
Enable Remote Development Over SSH: Allow connection to the workspace via SSH.
-
Enable Personal SSH Identity: Allow users to use their personal SSH identity from within the workspace.
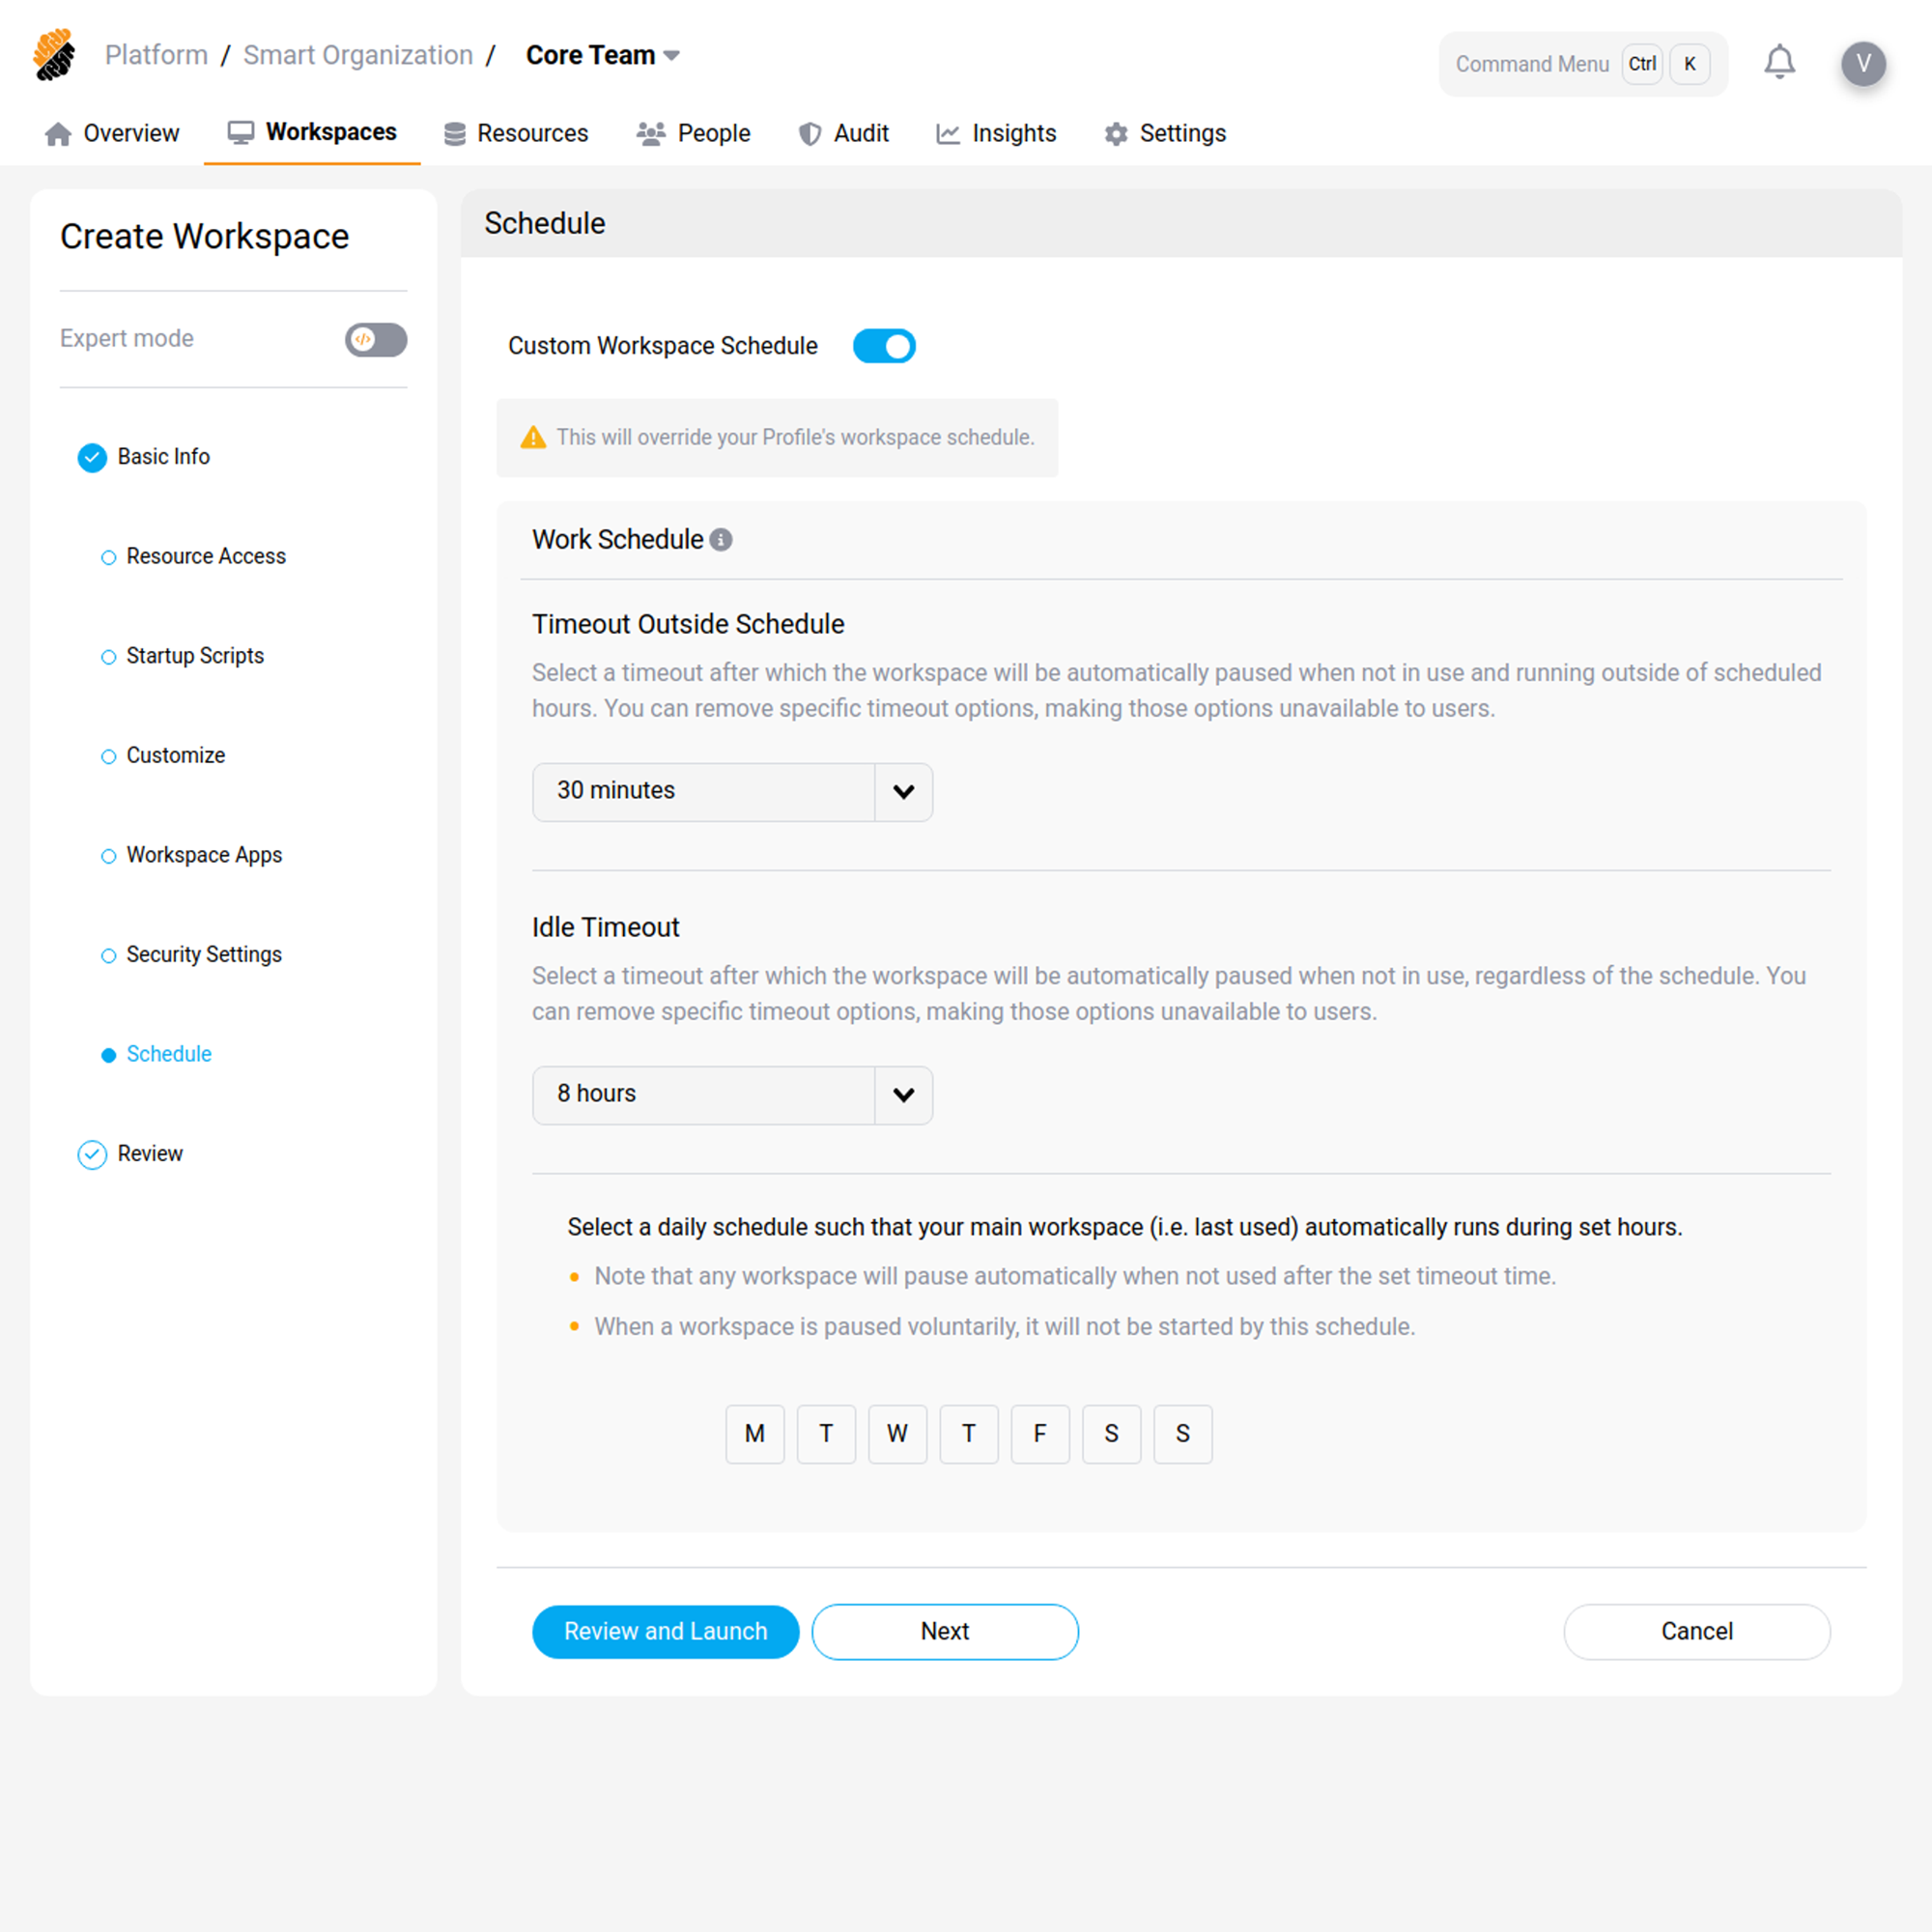
Custom Work Schedule
You can define a custom work schedule for your workspace.
Launch it
Finally, review your Workspace configuration, and launch it. Your workspace will be automatically deployed. You can edit its configuration at any time from the Overview or Workspaces pages.
From an existing Workspace
You can create a workspace from an existing one by pressing the “Create from Existing” button on the drop-down button of the “Create Workspace” button.
You will need to provide the following information:
- Workspace to Copy
- Owner for the Workspace
Tip:
Click on “Customize” to edit the workspace as if you were creating it from scratch.
- Once done, press the “Launch” button.
From a template
You can create a workspace from an existing one by pressing the “Create from Template” button on the drop-down button of the “Create Workspace” button.
You will need to provide the following information:
- Template Name
- Owner for the Workspace
Tip:
Click on “Customize” to edit the workspace as if you were creating it from scratch.
- Once done, press the “Launch” button.