Templates
Workspace Templates help streamline project onboarding by eliminating the need for manual workspace setup. Each template defines all required configuration parameters including Workspace settings, repositories, secrets, startup scripts, and security policies, ensuring consistency across all Workspaces within a project. Use the Quickstart feature to create a new Workspace with a single click from an external source, such as a code repository or engineering portal.
- View Templates
- Built-in Templates
-
Create a Template
Permission: Workspaces::Manage Project - Create a new version of a Template
- Quickstart
- Duplicate a template
- Create a Workspace from a Template
View Templates
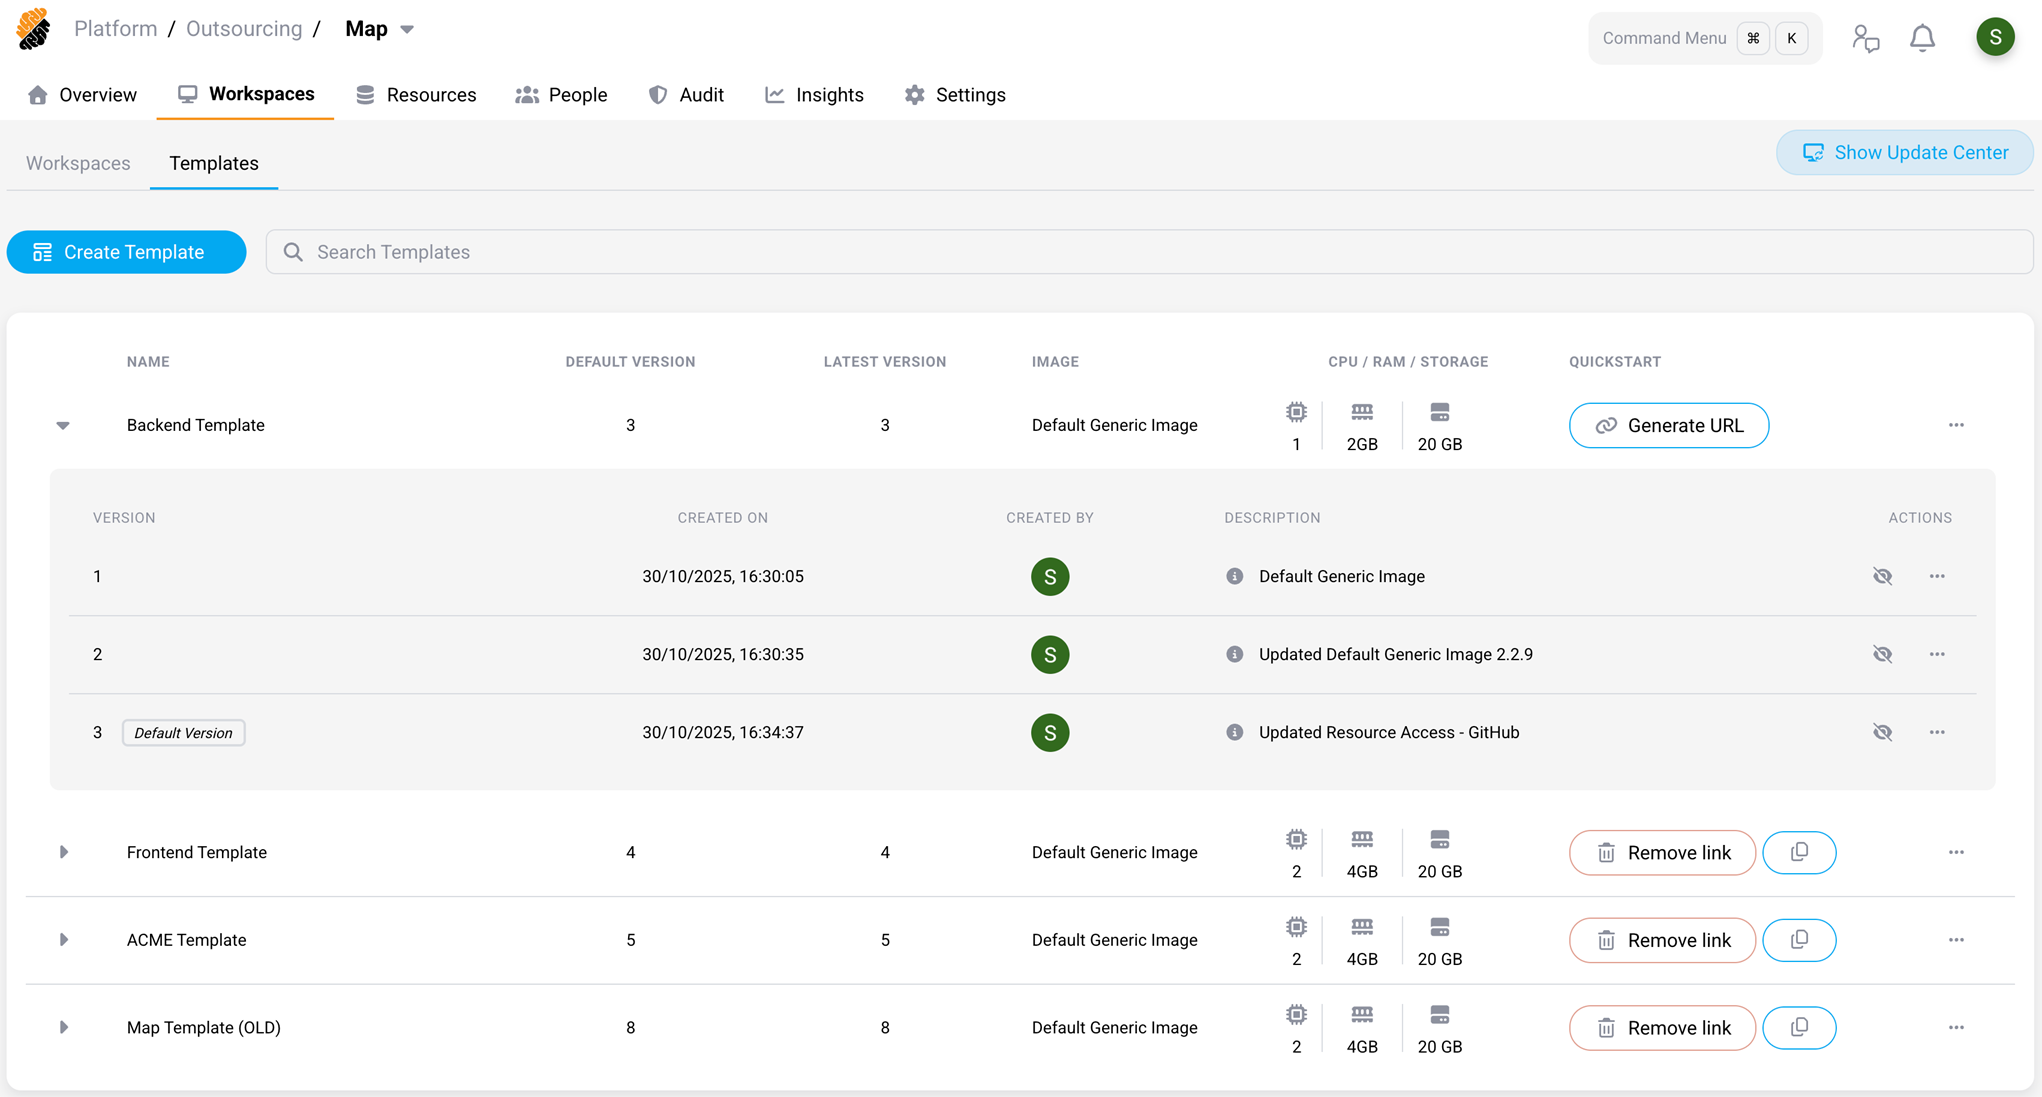
Templates are displayed in the Templates section of the Workspaces Page. Each template can have multiple versions, which are visible when expanding the chevron on the left-hand side of the screen.
A template is defined by the following characteristics:
- Basic Information: Name, container image, CPU/RAM/Storage settings, and description.
- Class Level: Confidential or regulated.
- Workspace Configuration: All the other elements describing a workspace.
Built-in Templates
There are a few example templates provided in a standard project: Monitored VSCode, Restricted VSCode and Inspected VSCode. They are provided as examples with the characteristics below:
| Name | Image | CPU / RAM / Storage | Description |
|---|---|---|---|
| Monitored VSCode Template | Default Generic Image | 2 CPU / 4 GB / 20 GB | This is a standard template to create an instance of a fully-updated Ubuntu container with monitored traffic and clipboard. |
| Restricted VSCode Template | Default Generic Image | 2 CPU / 4 GB / 20 GB | This is a standard template to create an instance of a fully-updated Ubuntu container with restricted traffic with a series of exceptions (apt, npm, pip) and monitored clipboard. |
Warning
For the Inspected VSCode Template, applications using certificates in custom locations (folders) in the container will likely fail. Contact your administrator for more details.
Create a Template Permission: _Workspaces::Manage Project_
On the Workspaces Page, in the Templates section, you can create a template by clicking on the Create Template button. You would follow the same steps as during the initial setup of a Workspace.
Tip
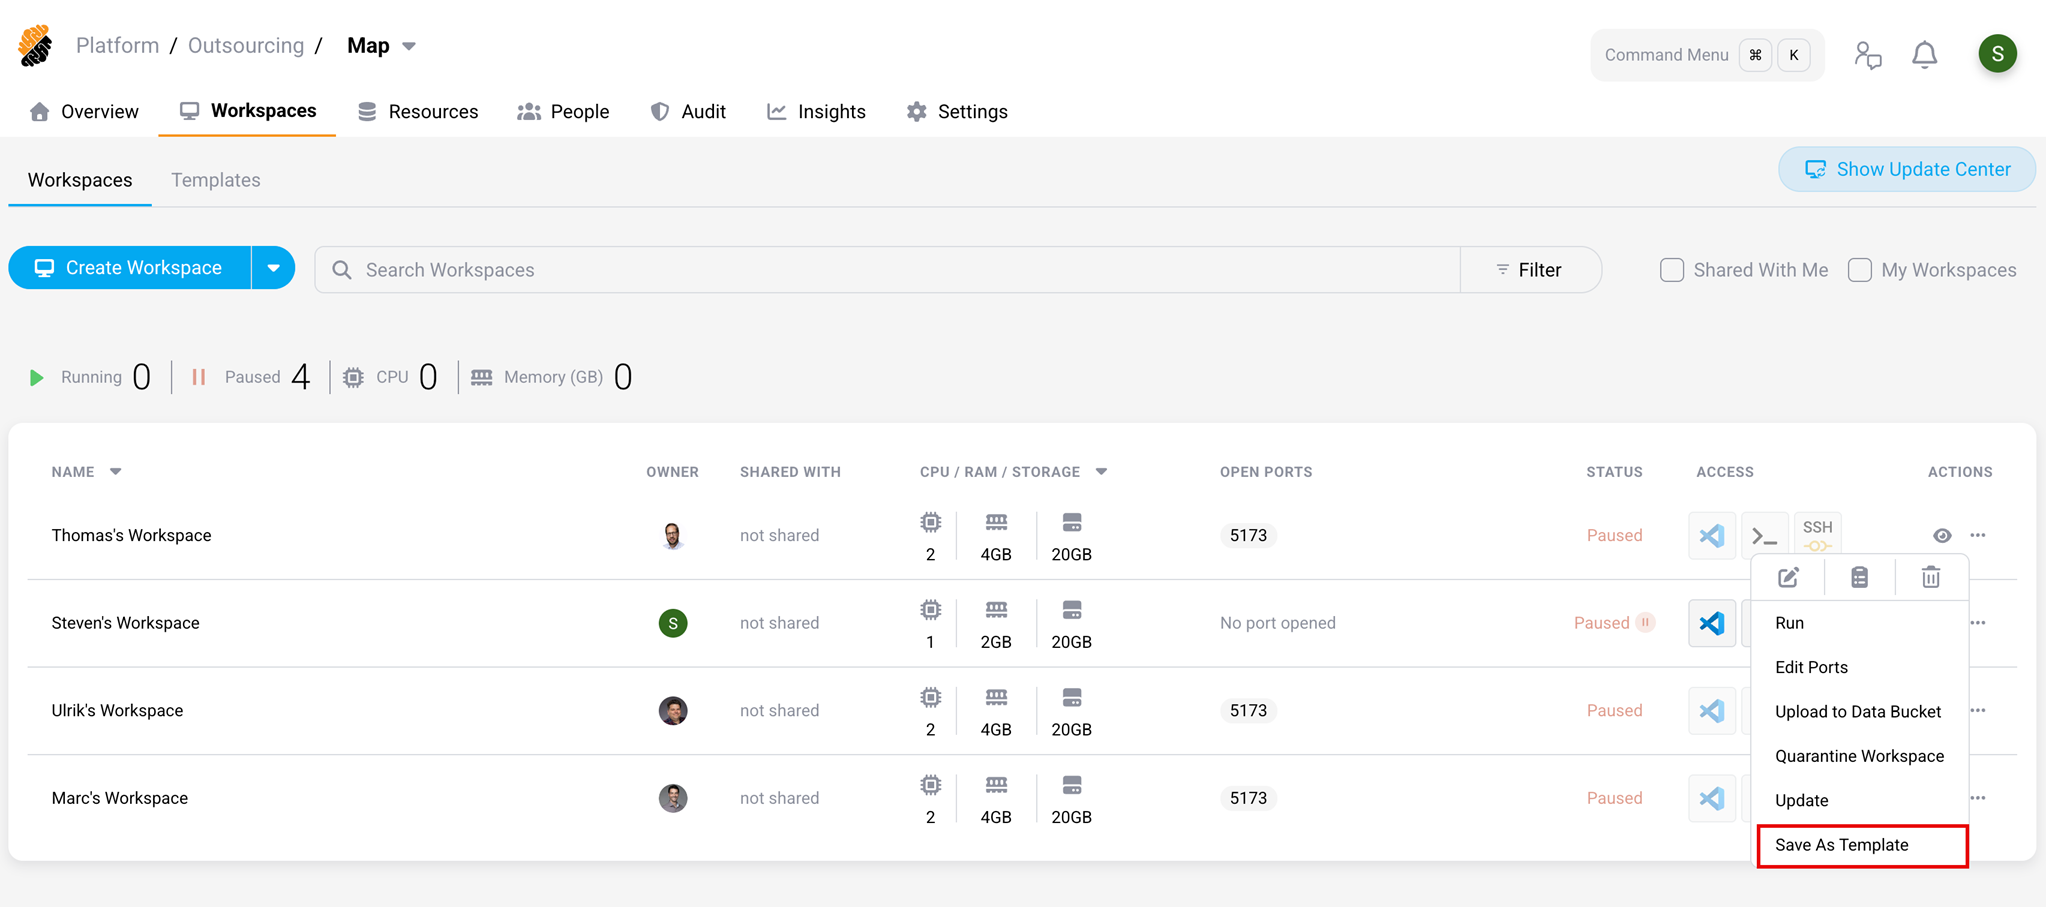
You can save a Workspace as a Template by clicking on the “…” button and on Save As Template.
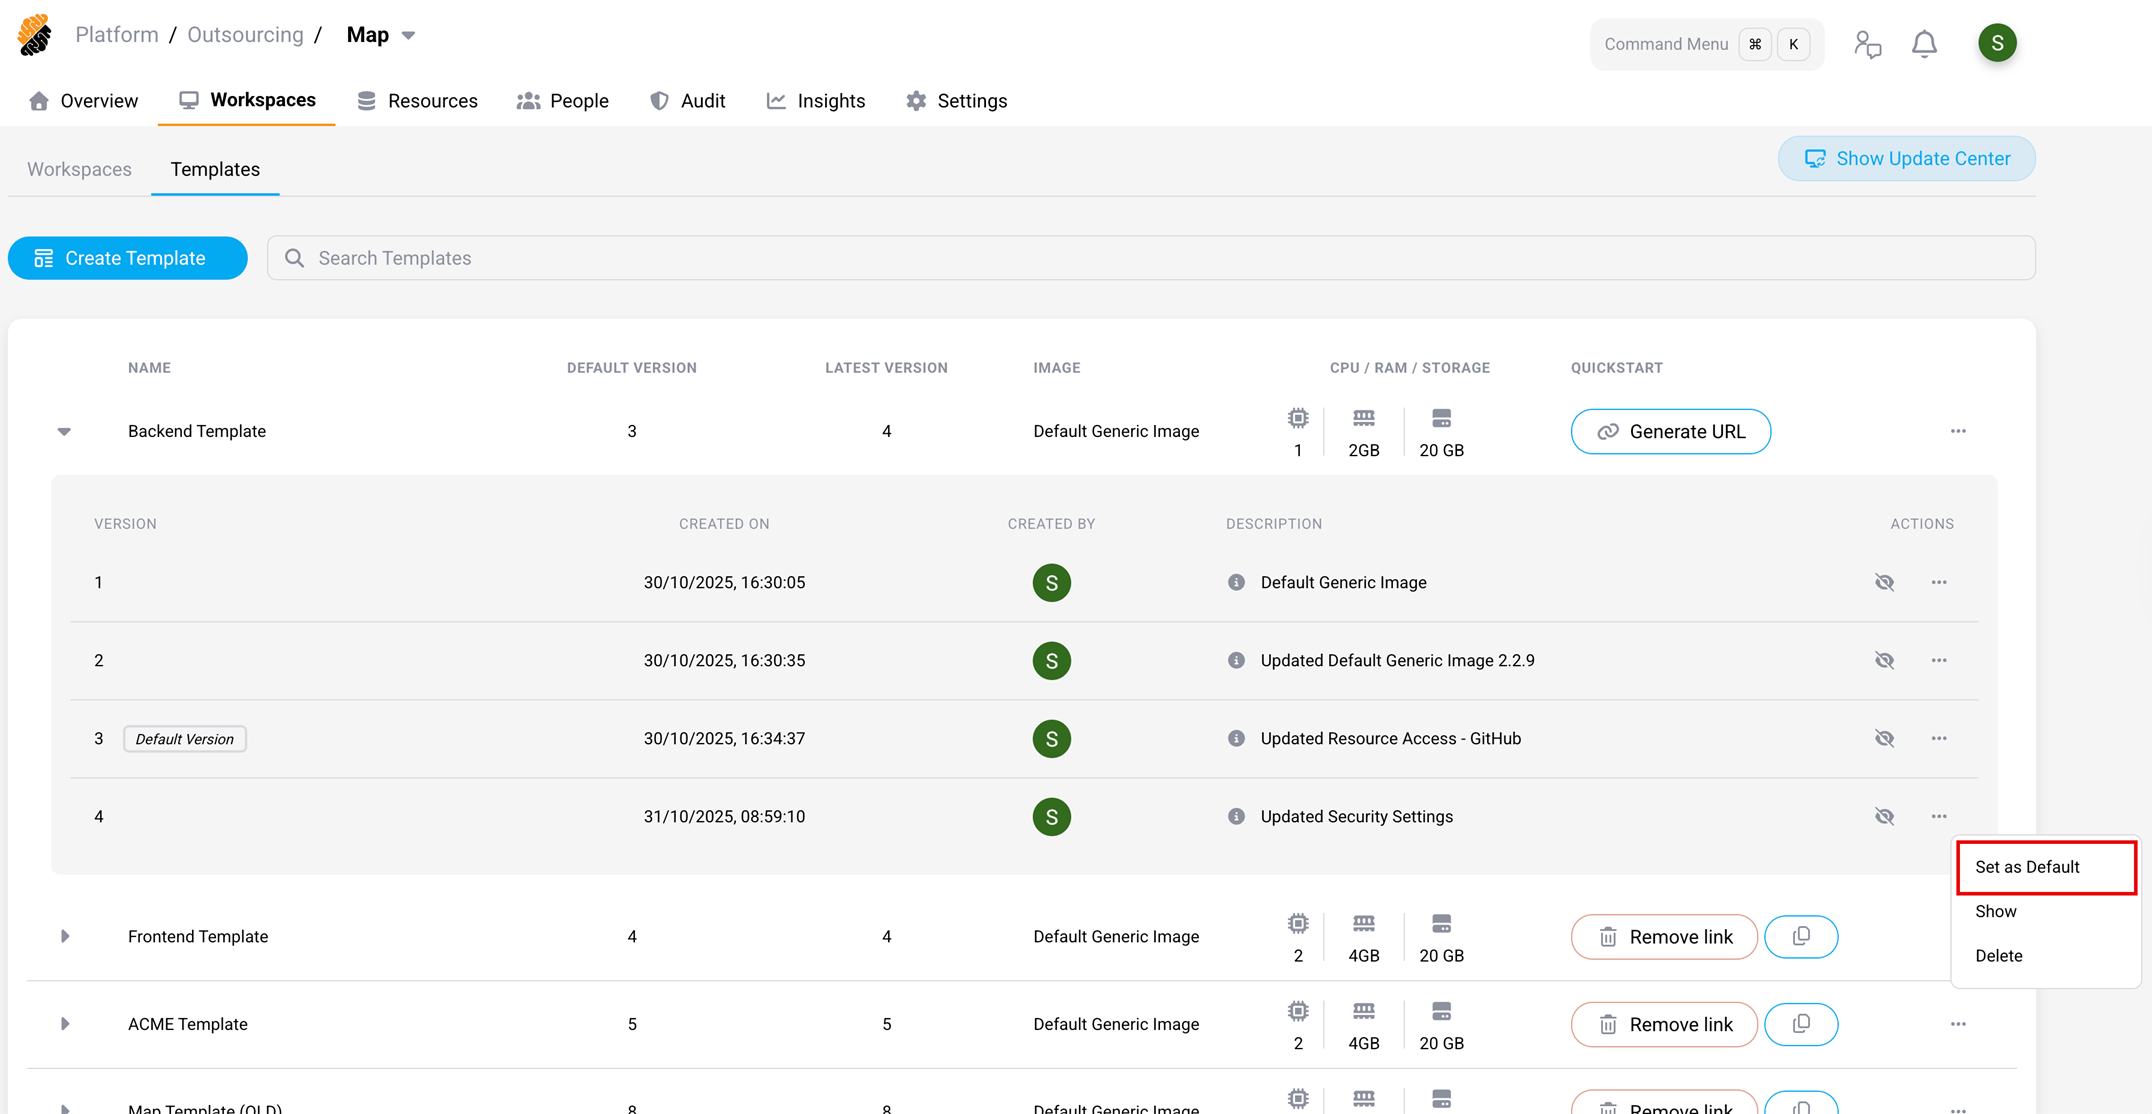
Create a new version of a Template
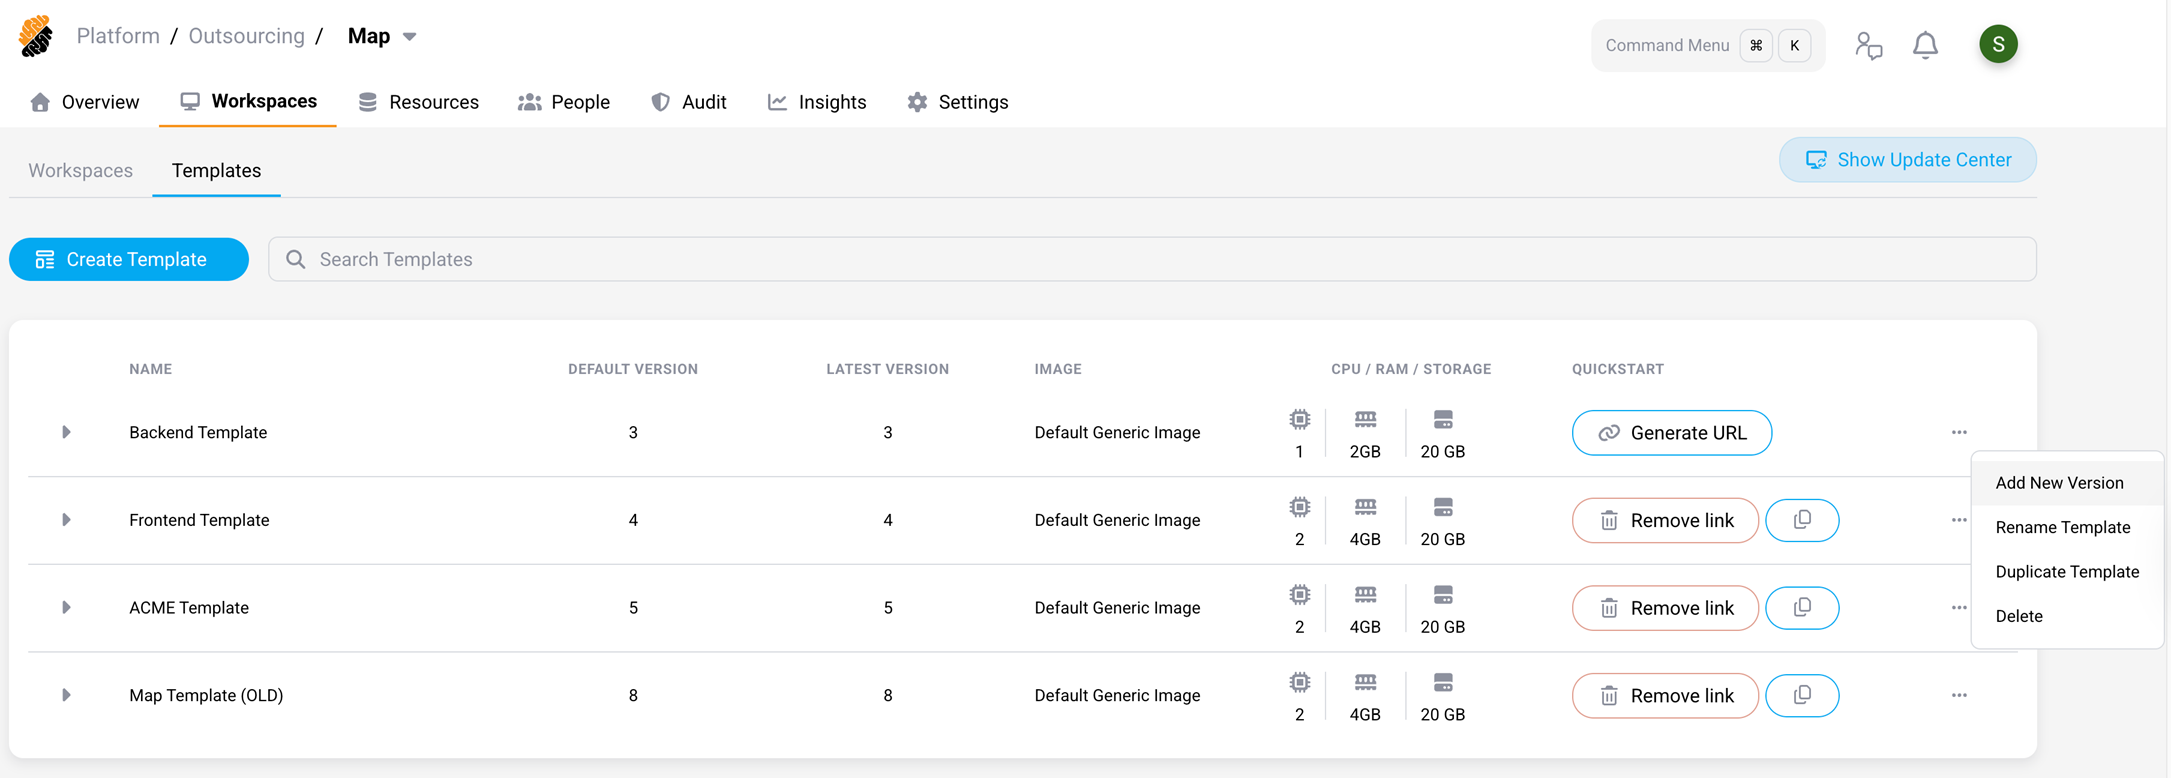
Template versions allow you to adjust the configuration of a template programmatically. A new version can be created by clicking on the “…” button on the right of a template and select Add new version.
This opens the same configuration UI as for creating a new Workspace or template, but with all current configurations, specified in the most recent version of the template, loaded.
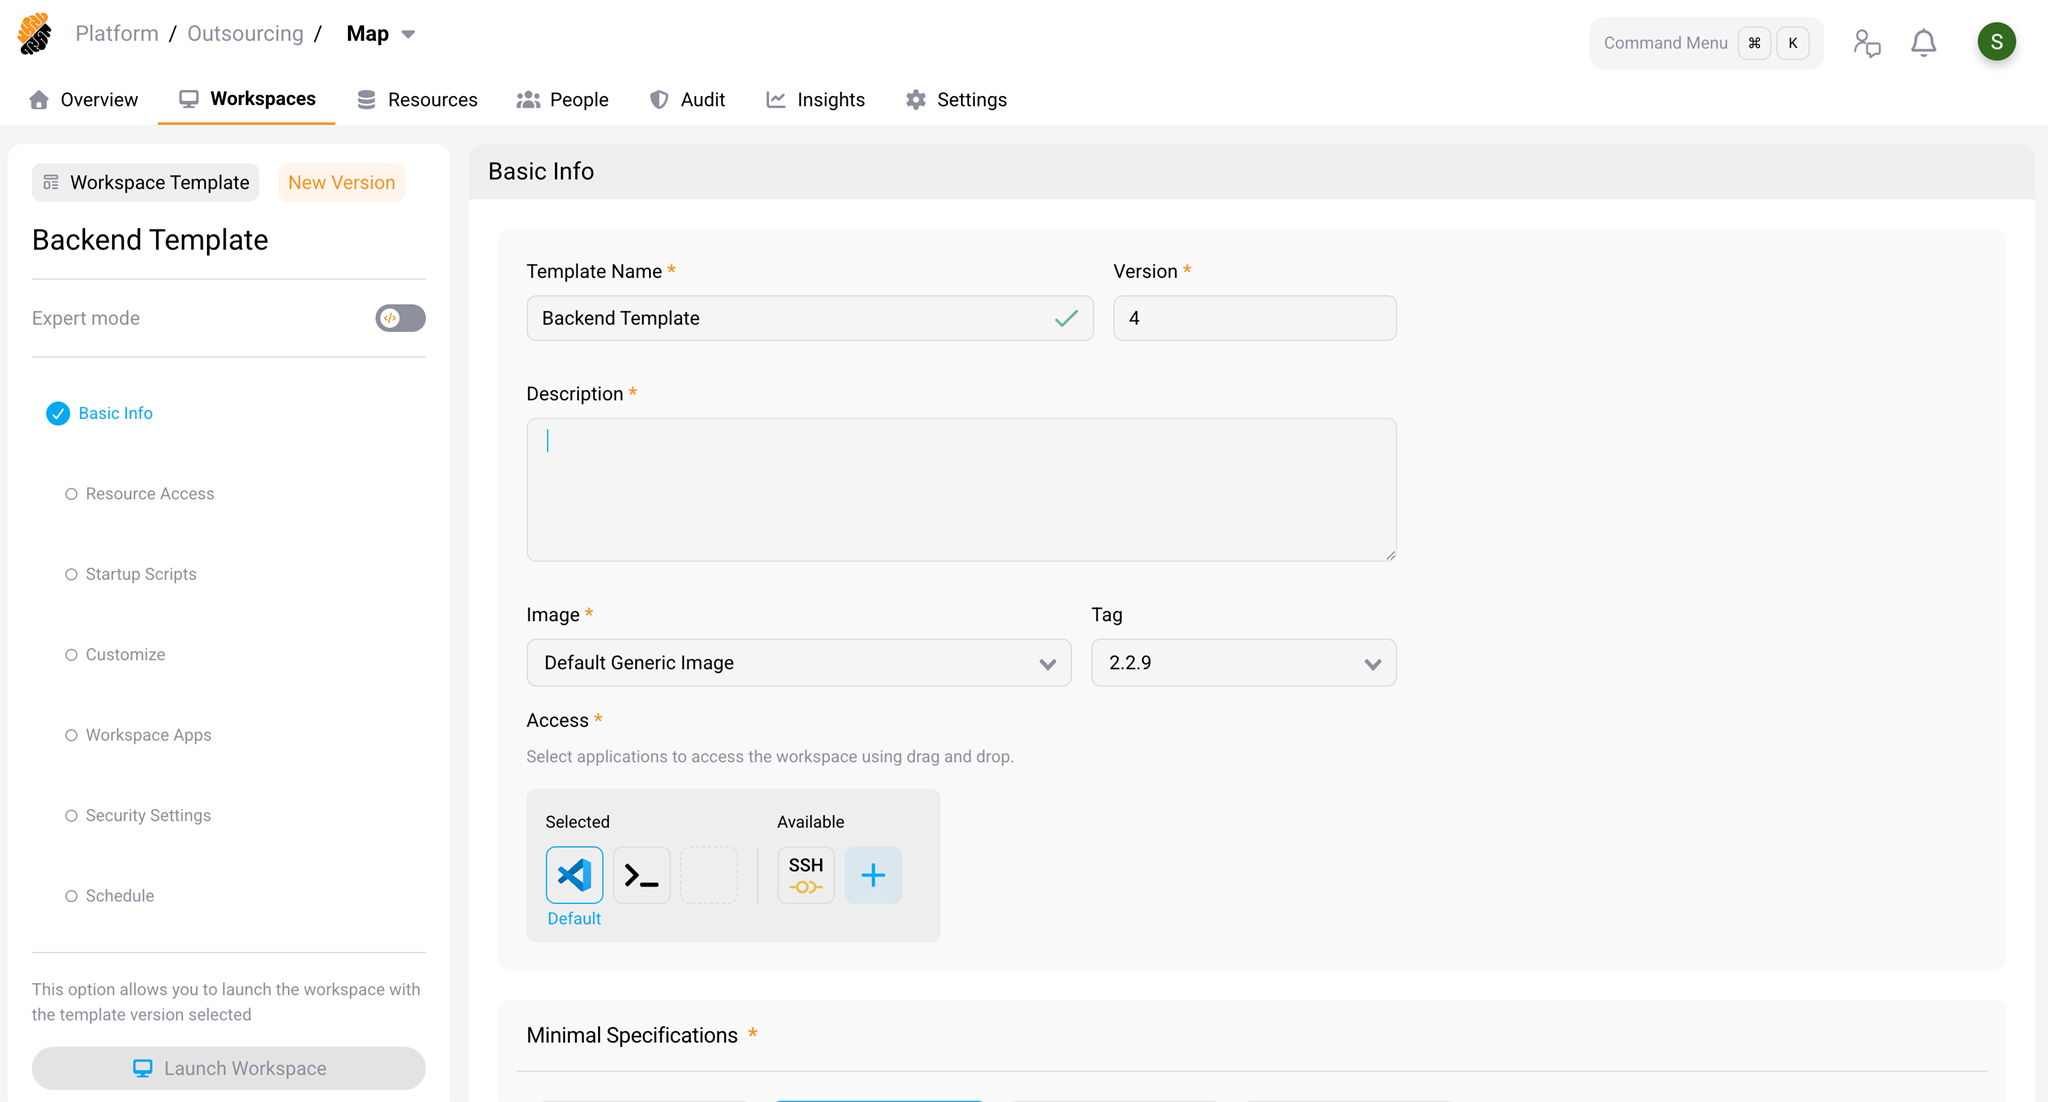
After making the necessary changes, you can either save the new version as a draft, which allows further modifications, or save it as a final template version right away, which cannot be changed afterwards.
A draft or new template version can be tested by either:
- Selecting Launch Workspace right within the template editor.
- Clicking on the “…” button on the right of a template and select Test.
- Manually selecting it from the list of version in the Create Workspace from Template wizard.
After finalizing a draft version, it can be published as a new template version by clicking on the “…” button on the right of a template and select Publish Version.

To ensure the new version of the template is automatically selected for newly created workspaces, click on the “…” button on the right of a template and select Set as Default.
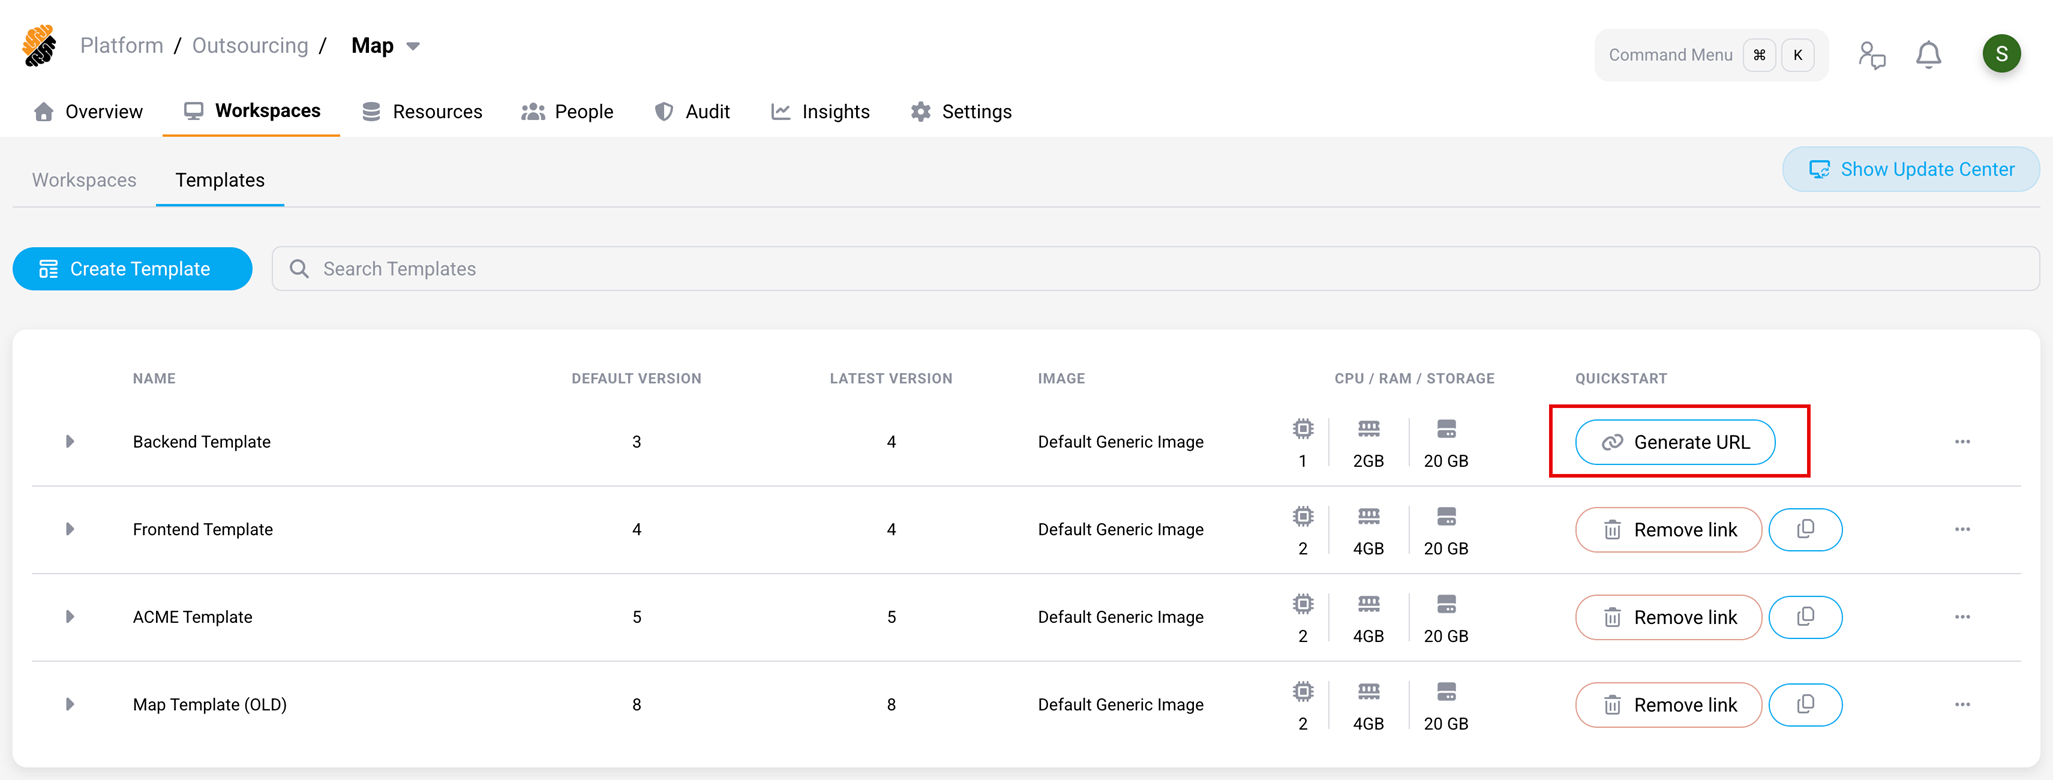
Quickstart
The Quickstart functionality allows developers to create a new workspace with a single click from a code repo, engineering portal or any other location outside of SDS.
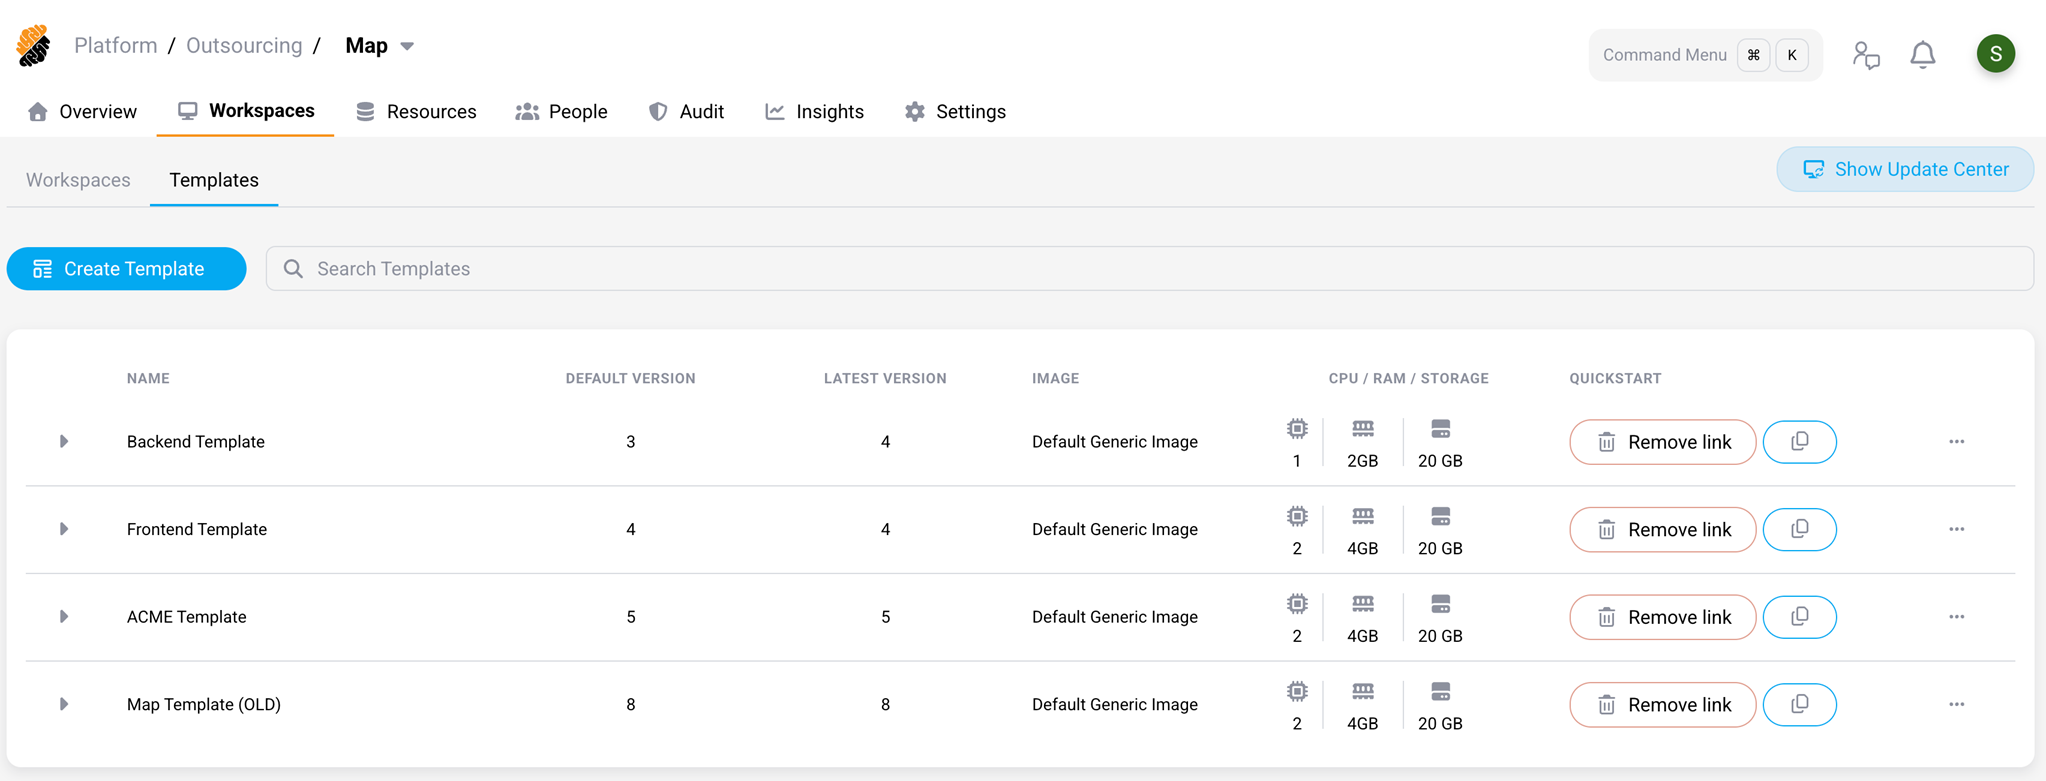
Create a Quickstart link by clicking the Generate URL button on the right of a template.
Then click the Copy icon.
Select any of the available options.
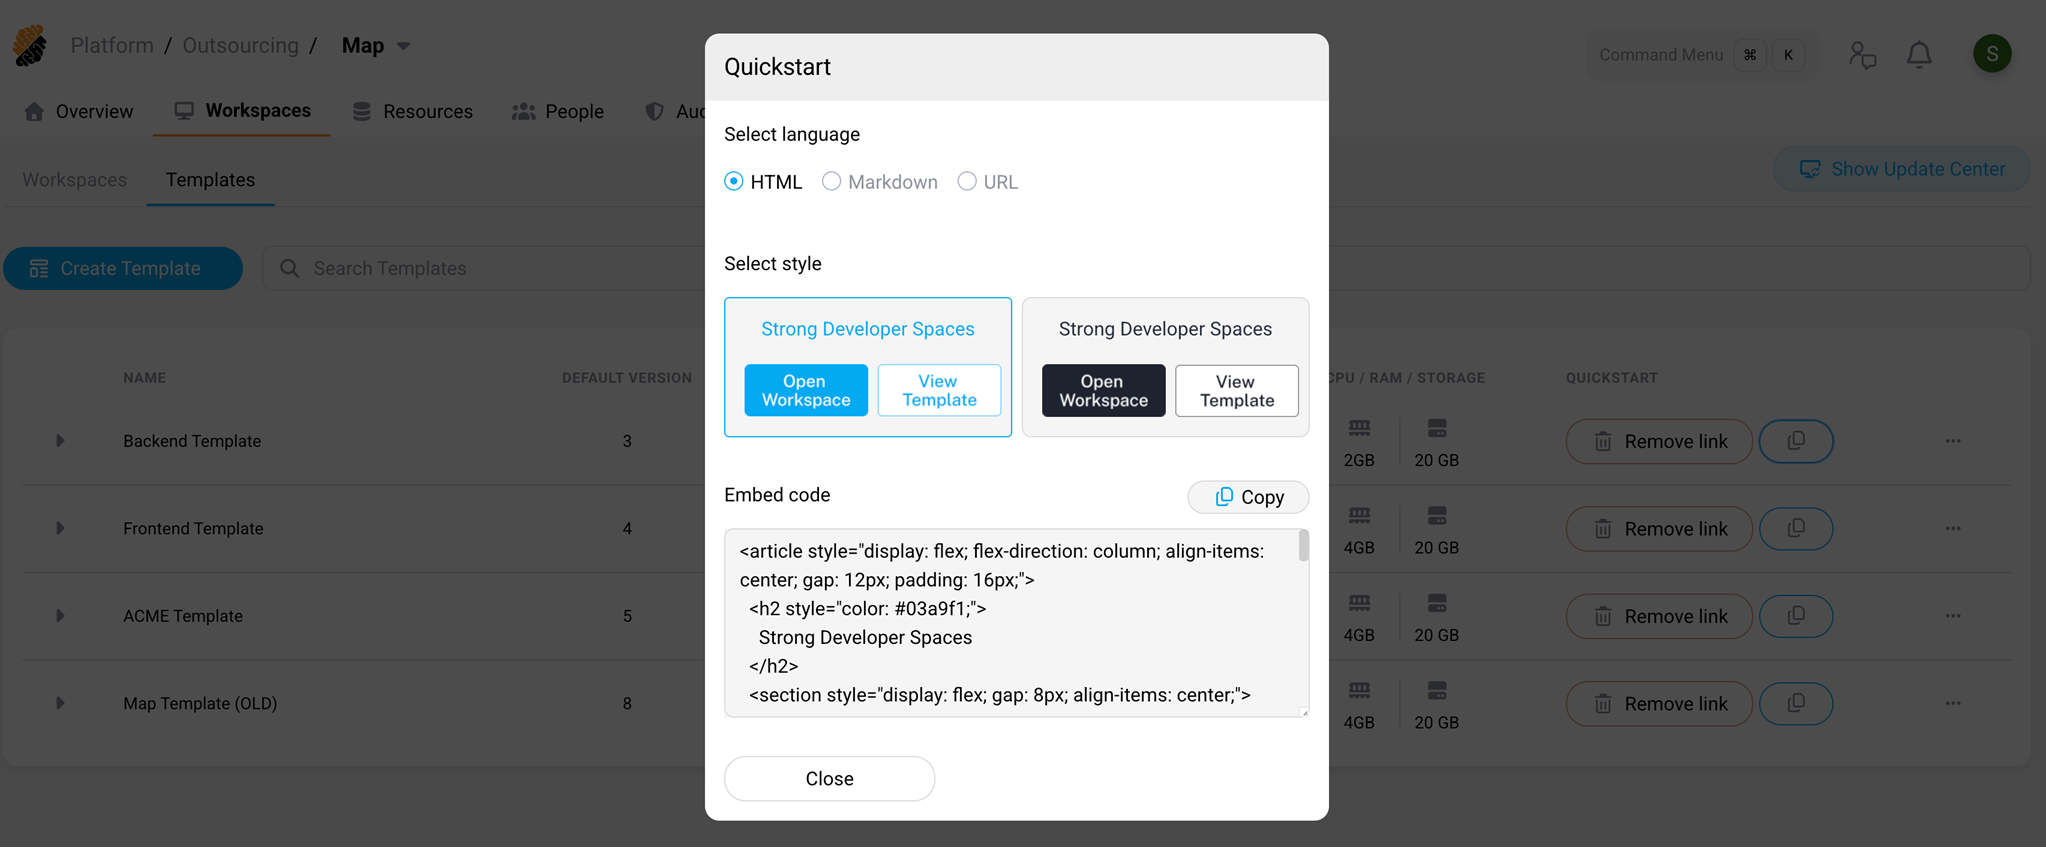
When a user accesses the Quickstart URL SDS initiates the creation of a new Workspace, unless the user already has a Workspace based on this particular template. In this case, the user will be forwarded to the respective Workspace automatically.
When a new Workspace needs to be created the user can configure the name of the Workspace and finalize the creation flow, by selecting Create and Open.
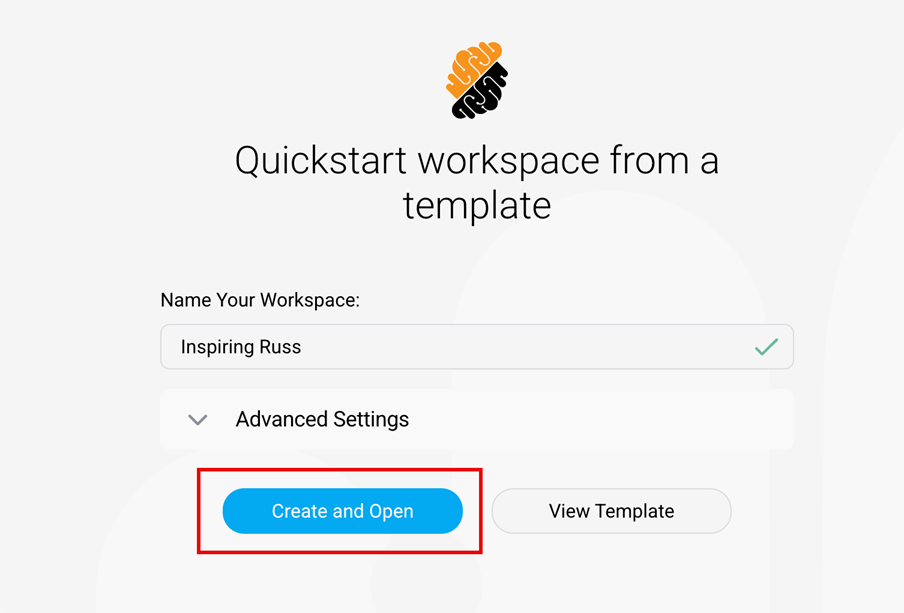
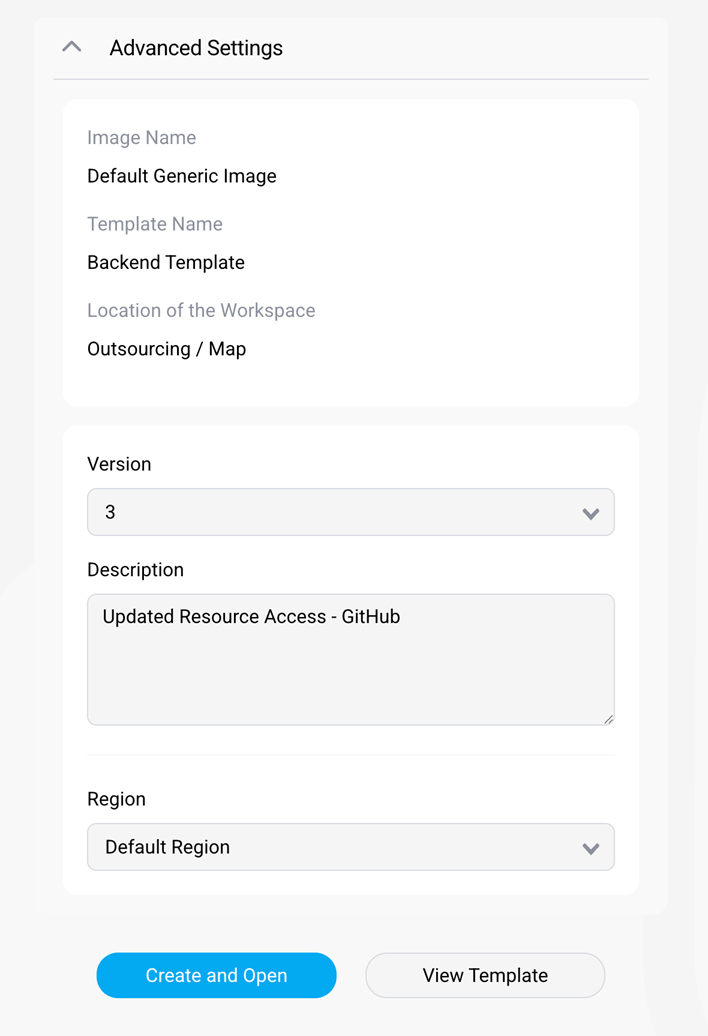
Via the Advanced Settings menu, configuration details, such as base template or related SDS project, can be verified and template version as well as deployment region can be configured.
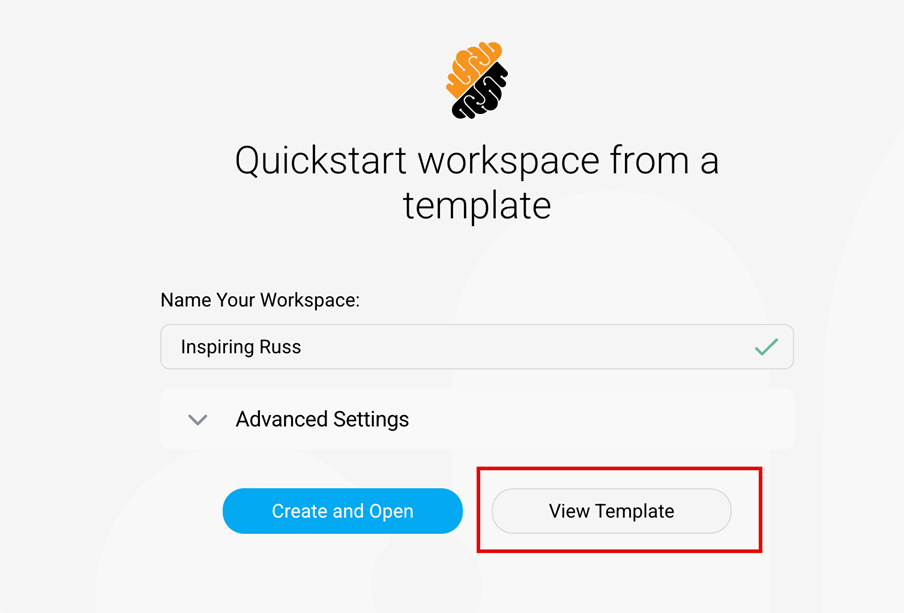
The View Template button opens the Workspace Template editor for the selected version, to verify further configuration details.
Automate Quickstart links with the REST API
You can also manage Quickstart links through the REST API. Use the API when you need to publish template launch links in a developer portal, repository README file, or internal onboarding workflow.
The Quickstart link API can:
- Enable a Quickstart link for a workspace template.
- Return the raw URL, view-template URL, and generated Markdown or HTML embed snippets.
- Generate light or dark embed snippets.
- Revoke a Quickstart link when it must no longer be used.
For endpoint details, see REST API.
Include Custom Access Items in templates
Workspace templates can include Custom Access Items. Use Custom Access Items to provide one-click access to tools or services that run inside workspaces created from the template.
Custom Access Items can be managed in the workspace template configuration or through the REST API. Each item defines a display name, port, command, and optional health check settings.
For endpoint details, see REST API.
Duplicate a template
A Workspace Template can be duplicated by clicking on the “…” button on the right of a template and select Duplicate. This allows quickly creating new templatized configurations based on existing templates.
Create a Template from a Workspace
You can create a Template using an existing Workspace by clicking on the “…” button on the right of a Workdpace and select Save As Template.