Configuring an on-premises Device Health Attestation server
You can enable Device Health Attestation (DHA) for Windows 10 and Windows 11 mobile devices through an on-premises Windows server. To enable DHA on-premises, you first configure a DHA server.
After you configure the DHA server, you create an Citrix Endpoint Management policy to enable the on-premises DHA service. For information, see Device Health Attestation device policy.
Prerequisites for a DHA server
- A server running Windows Server Technical Preview 5 or later, installed using the Desktop Experience installation option.
- One or more Windows 10 and Windows 11 client devices. These devices must have TPM 1.2 or 2.0 running the latest version of Windows.
- These certificates:
-
DHA SSL certificate: An x.509 SSL certificate that chains to an enterprise trusted root with an exportable private key. This certificate protects DHA data communications in transit including:
- server to server (DHA service and MDM server) communications
- server to client (DHA service and a Windows 10 or Windows 11 device) communications
- DHA signing certificate: An x.509 certificate that chains to an enterprise trusted root with an exportable private key. The DHA service uses this certificate for digital signing.
- DHA encryption certificate: An x.509 certificate that chains to an enterprise trusted root with an exportable private key. The DHA service also uses this certificate for encryption.
-
DHA SSL certificate: An x.509 SSL certificate that chains to an enterprise trusted root with an exportable private key. This certificate protects DHA data communications in transit including:
- Choose one of these certificate validation modes:
- EKCert: EKCert validation mode is optimized for devices in organizations that are not connected to the Internet. Devices connecting to a DHA service running in EKCert validation mode do not have direct access to the Internet.
- AIKCert: AIKCert Validation Mode is optimized for operational environments that do have access to the Internet. Devices connecting to a DHA service running in AIKCert validation mode must have direct access to the Internet and can get an AIK certificate from Microsoft.
Add the DHA server role to the Windows server
- On the Windows server, if the Server Manager is not already open, click Start and then click Server Manager.
- Click Add roles and features.
- On the Before you begin page, click Next.
- On the Select installation type page, click Role-based or feature-based installation, and then click Next.
- On the Select destination server page, click Select a server from the server pool, select the server, and then click Next.
- On the Select server roles page, select the Device Health Attestation checkbox.
- Optional: Click Add Features to install other required role services and features.
- Click Next.
- On the Select features page, click Next.
- On the Web Server Role (IIS) page, click Next.
- On the Select role services page, click Next.
- On the Device Health Attestation Service page, click Next.
- On the Confirm installation selections page, click Install.
- When the installation is done, click Close.
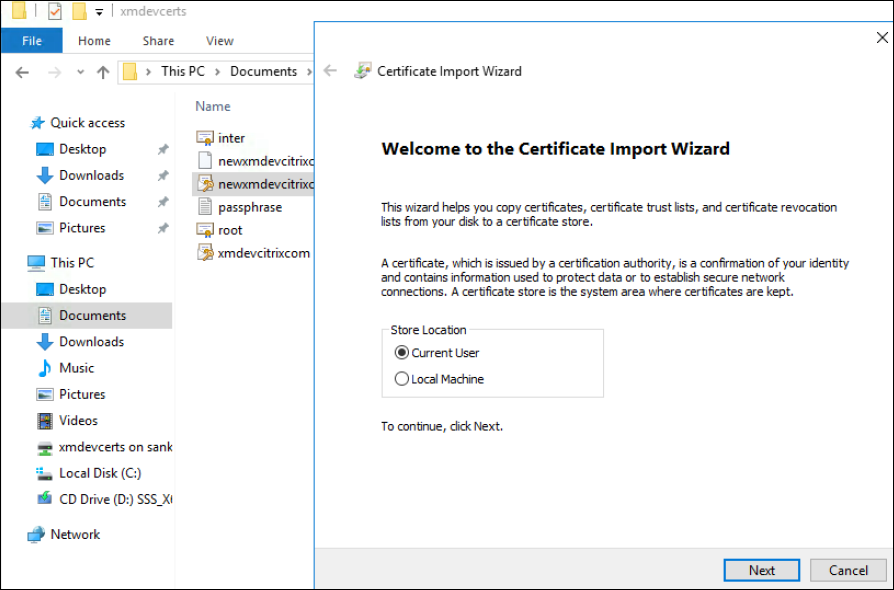
Add the SSL certificate to the certificate store of the server
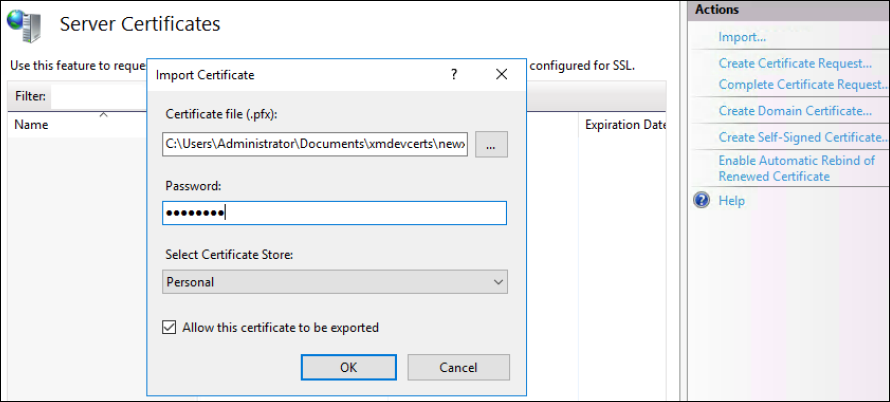
- Go to the SSL certificate file and select it.
-
For the store location, select Current user and then click Next.
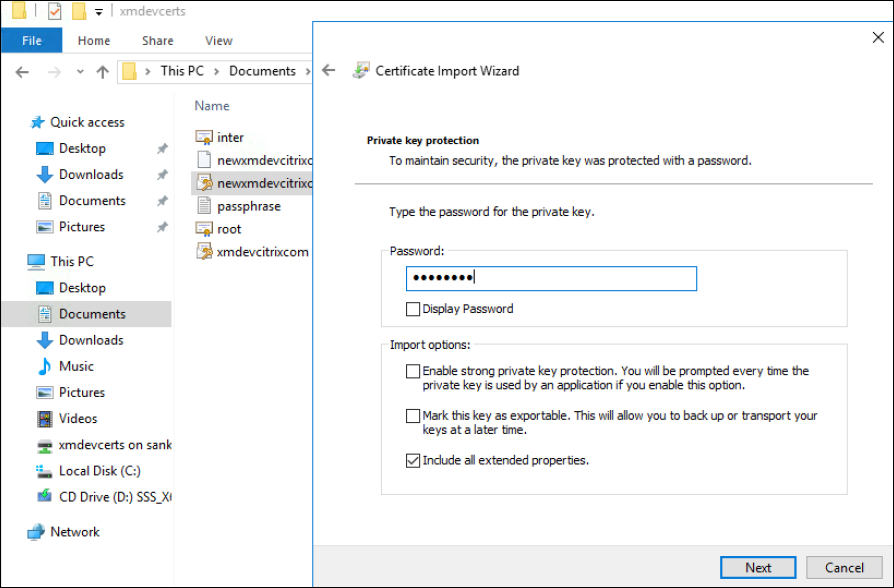
-
Type the password for the private key.
-
Make sure that the import option Include all extended properties is selected. Click Next.
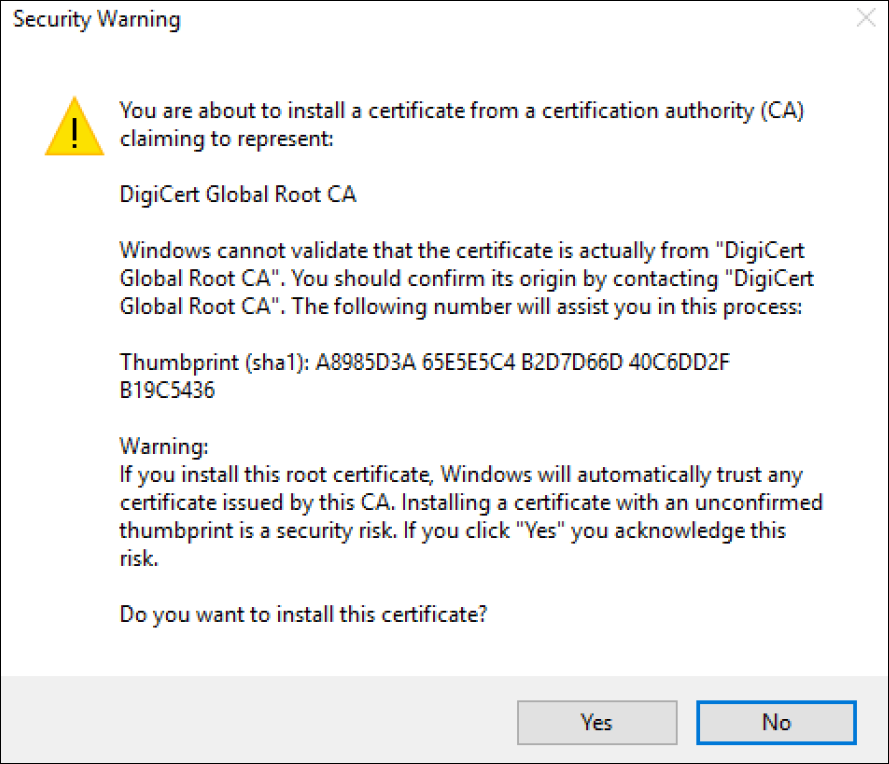
-
When this window appears, click Yes.
-
Confirm that the certificate is installed:
-
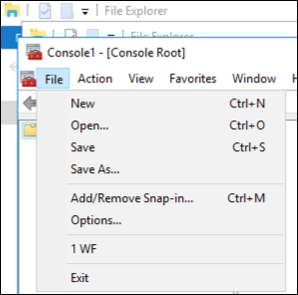
Open a Command Prompt window.
-
Type
mmcand press the Enter key. To view certificates in the local machine store, you must be in the Administrator role. -
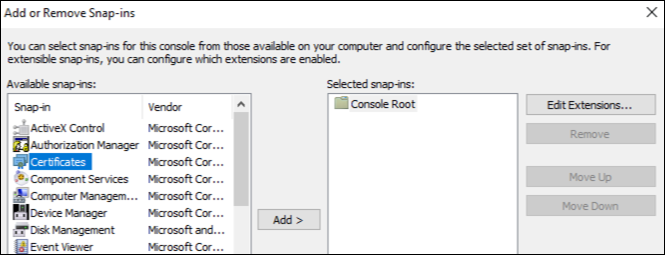
On the File menu, click Add/Remove Snap In.
-
Click Add.
-
In the Add Standalone Snap-in dialog box, select Certificates.
-
Click Add.
-
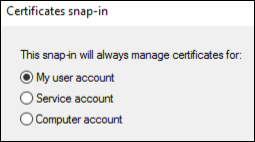
In the Certificates snap-in dialog box, select My User account. (If you are signed in as a service account holder, select Service account.)
-
In the Select Computer dialog box, click Finish.
-
-
Go to Server Manager > IIS and select Server Certificates from the list of icons.
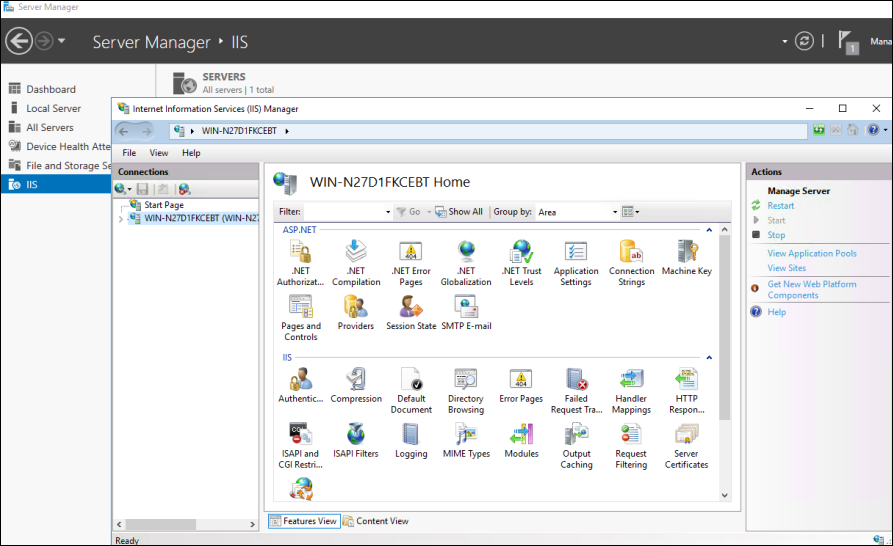
-
From the Action menu, select Import… to import the SSL certificate.
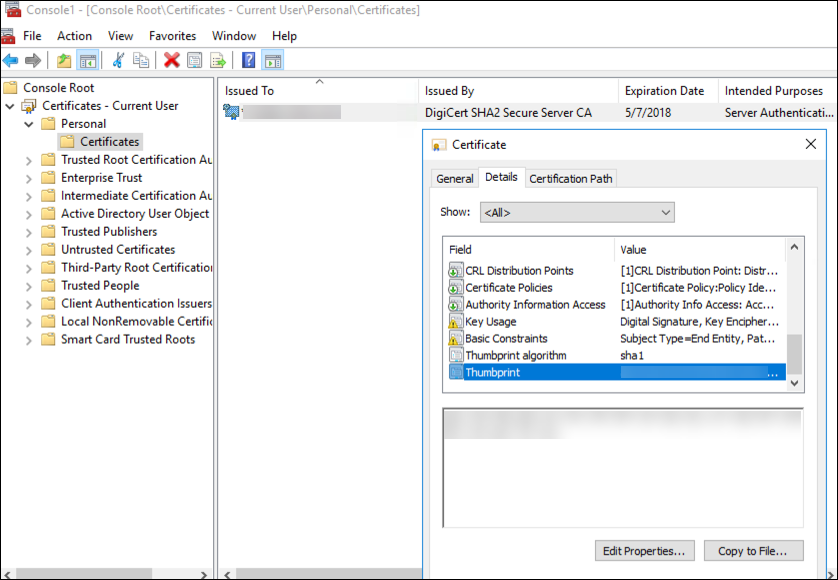
Retrieve and save the thumbprint of the certificate
- In the File Explorer search bar, type
mmc. -
In the Console Root window, click File > Add/Remove Snap-in.
-
Select the certificate from an available snap-in and add it to the selected snap-ins.
-
Select My user account.
-
Select the certificate and click OK.
-
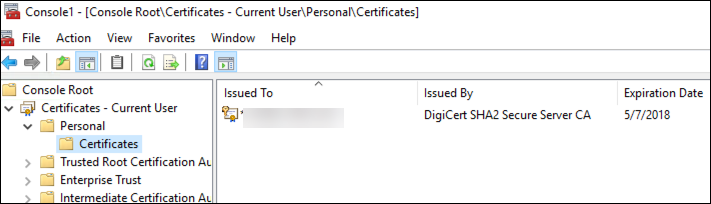
Double-click on the certificate and select the Details tab. Scroll down to see the certificate thumbprint.
- Copy the thumbprint to a file. Remove the spaces when using the thumbprint in PowerShell commands.
Install the signing and encryption certificates
Run these PowerShell commands on the Windows server to install the signing and encryption certificates.
Replace the placeholder ReplaceWithThumbprint and enclose it inside double-quotation marks as shown.
$key = Get-ChildItem Cert:\LocalMachine\My | Where-Object {$_.Thumbprint -like "ReplaceWithThumbprint"}

$keyname = $key.PrivateKey.CspKeyContainerInfo.UniqueKeyContainerName

$keypath = $env:ProgramData + "\Microsoft\Crypto\RSA\MachineKeys\" + $keyname icacls $keypath /grant IIS_IUSRS`:R

<!--NeedCopy-->
Extract the TPM roots certificate and install the trusted certificate package
Run these commands on the Windows server:
mkdir .\TrustedTpm

expand -F:\* .\TrustedTpm.cab .\TrustedTpm

cd .\TrustedTpm

.\setup.cmd
<!--NeedCopy-->
Configure the DHA service
Run this command on the Windows server to configure the DHA service.
Replace the placeholder ReplaceWithThumbprint.
Install-DeviceHealthAttestation -EncryptionCertificateThumbprint ReplaceWithThumbprint

-SigningCertificateThumbprint ReplaceWithThumbprint

-SslCertificateStoreName My -SslCertificateThumbprint ReplaceWithThumbprint

-SupportedAuthenticationSchema "AikCertificate"
<!--NeedCopy-->
Run these commands on the Windows server to set up the certificate chain policy for the DHA service:
$policy = Get-DHASCertificateChainPolicy

$policy.RevocationMode = "NoCheck"

Set-DHASCertificateChainPolicy -CertificateChainPolicy $policy
<!--NeedCopy-->
Respond to these prompts as follows:
  Confirm

    Are you sure you want to perform this action?

    Performing the operation "Install-DeviceHealthAttestation" on target "[Machine Name]".

    [Y] Yes  [A] Yes to All  [N] No  [L] No to All  [S] Suspend  [?] Help (default is "Y"): A

    Adding SSL binding to website 'Default Web Site'.

    Add SSL binding?

    [Y] Yes  [N] No  [S] Suspend  [?] Help (default is "Y"): Y

    Adding application pool 'DeviceHealthAttestation_AppPool' to IIS.

    Add application pool?

    [Y] Yes  [N] No  [S] Suspend  [?] Help (default is "Y"): Y

    Adding web application 'DeviceHealthAttestation' to website 'Default Web Site'.

    Add web application?

    [Y] Yes  [N] No  [S] Suspend  [?] Help (default is "Y"): Y

    Adding firewall rule 'Device Health Attestation Service' to allow inbound connections on port(s) '443'.

    Add firewall rule?

    [Y] Yes  [N] No  [S] Suspend  [?] Help (default is "Y"): Y

    Setting initial configuration for Device Health Attestation Service.

    Set initial configuration?

    [Y] Yes  [N] No  [S] Suspend  [?] Help (default is "Y"): Y

    Registering User Access Logging.

    Register User Access Logging?

    [Y] Yes  [N] No  [S] Suspend  [?] Help (default is "Y"): Y
<!--NeedCopy-->
Check the configuration
To check whether the DHASActiveSigningCertificate is active, run this command on the server:
Get-DHASActiveSigningCertificate
If the certificate is active, the certificate type (Signing) and thumbprint are displayed.
To check whether the DHASActiveSigningCertificate is active, run these commands on the server
Replace the placeholder ReplaceWithThumbprint and enclose it inside double-quotation marks as shown.
Set-DHASActiveEncryptionCertificate -Thumbprint "ReplaceWithThumbprint" -Force

Get-DHASActiveEncryptionCertificate
<!--NeedCopy-->
If the certificate is active, the thumbprint appears.
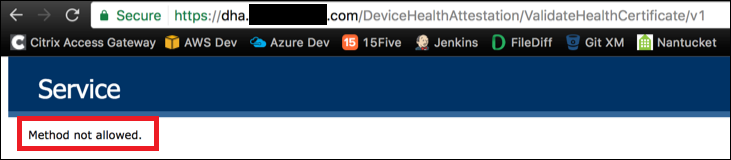
To do a final check, go to this URL:
https://<dha.myserver.com>/DeviceHeathAttestation/ValidateHealthCertificate/v1
If the DHA service is running, “Method not allowed” appears.
In this article
- Prerequisites for a DHA server
- Add the DHA server role to the Windows server
- Add the SSL certificate to the certificate store of the server
- Retrieve and save the thumbprint of the certificate
- Install the signing and encryption certificates
- Extract the TPM roots certificate and install the trusted certificate package
- Configure the DHA service
- Check the configuration