Support for client-server apps
With Citrix Secure Private Access, you can now access all private apps including TCP/UDP and HTTPS apps either using a native browser or a native client application via the Citrix Secure Access client running on your machine.
With the additional support of client-server applications within Citrix Secure Private Access, you can now eliminate the dependency on a traditional VPN solution to provide access to all private apps for remote users.
Preview features
Support for DNS suffixes to resolve FQDNs to IP addresses.
How it works
End users can easily access all their sanctioned private apps by just installing the Citrix Secure Access client on their client devices.
-
For Windows, the client version (22.3.1.5 and later) can be downloaded from https://www.citrix.com/downloads/citrix-gateway/plug-ins/citrix-secure-access-client-for-windows.html.
-
For macOS, the client version (22.02.3 and later) can be downloaded from the App Store.
Admin Configuration – Citrix Secure Access client-based access to TCP/UDP apps
Prerequisites
Ensure that the following requirements are met to access TCP/UDP apps.
- Access to Citrix Secure Private Access in Citrix Cloud.
- Citrix Cloud Connector - Install a Citrix Cloud Connector for Active Directory domain configuration as captured in Cloud Connector Installation.
- Identity and access management - Complete the configuration. For details, see Identity and access management.
- Connector Appliance – Citrix recommends installing two Connector Appliances in a high availability set-up in your resource location. The connector can be installed either on-premises, in the data center hypervisor, or in public cloud. For more information on Connector Appliance and its installation, see Connector Appliance for Cloud Services.
- You must use a Connector Appliance for TCP/UDP apps.
Important:
For a complete end-to-end configuration of an app, see Admin guided workflow for easy onboarding and set up.
- On the Citrix Secure Private Access tile, click Manage.
-
Click Continue and then click Add an app.
Note:
The Continue button appears only for the first time that you use the wizard. In the subsequent usages, you can directly navigate to the Applications page and then click Add an app.
App is a logical grouping of destinations. We can create an app for multiple destinations – Each destination means different servers in the back end. For example, one app can have one SSH, one RDP, one Database server, and one Web server. You don’t have to create one app per destination, but one app can have many destinations.
- In the Choose a template section, click Skip to configure the TCP/UDP app manually.
-
In the App Details section, select Inside my corporate network, enter the following details, and click Next.
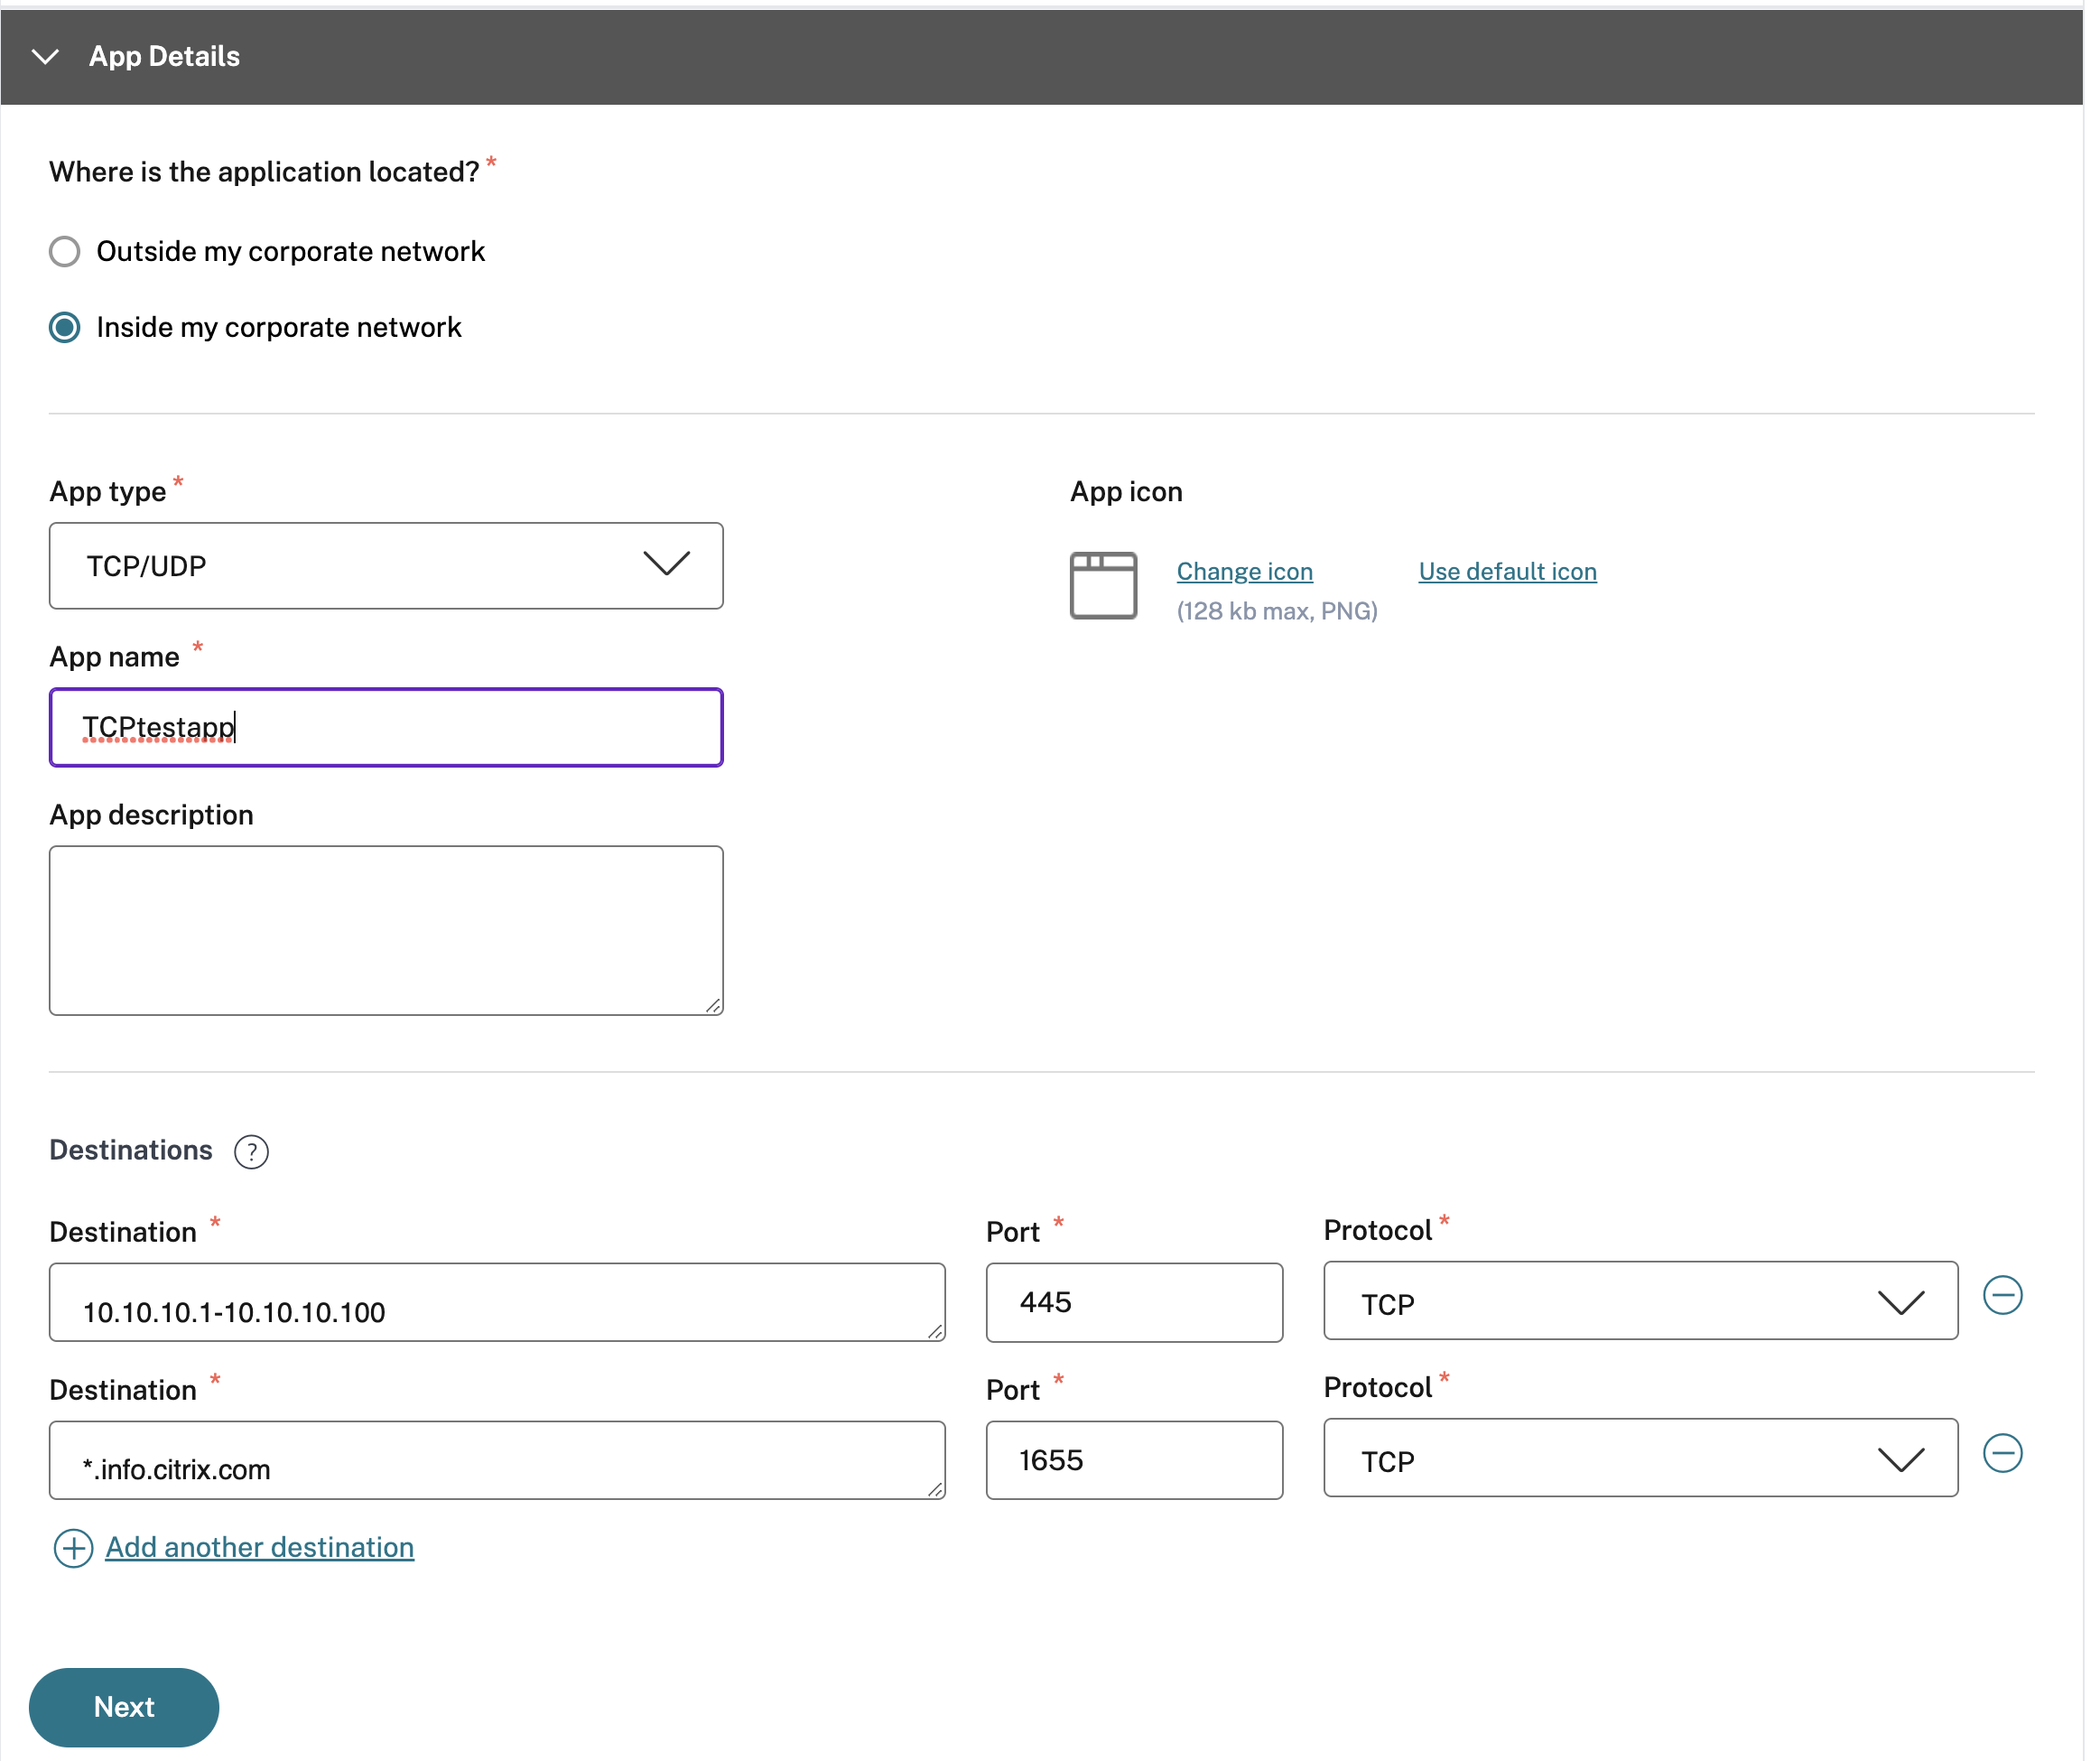
- App type – Select TCP/UDP.
- App name– Name of the application.
- App icon– An app icon is displayed. This field is optional.
- App description – Description of the app you are adding. This field is optional.
-
Destinations – IP Addresses or FQDNs of the back-end machines residing in the resource location. One or more destinations can be specified as follows.
- IP address v4
- IP address Range – Example: 10.68.90.10-10.68.90.99
- CIDR – Example: 10.106.90.0/24
-
FQDN of the machines or Domain name – Single or wildcard domain. Example: ex.destination.domain.com, *.domain.com
Important:
End users can access the apps using FQDN even if the admin has configured the apps using the IP address. This is possible because the Citrix Secure Access client can resolve an FQDN to the real IP address. The following table provides examples of various destinations and how to access the apps with these destinations:
Destination input How to access the app 10.10.10.1-10.10.10.100 End user is expected to access the app only through IP addresses in this range. 10.10.10.0/24 End user is expected to access the app only through IP addresses configured in the IP CIDR. 10.10.10.101 End user is expected to access the app only through 10.10.10.101 *.info.citrix.comEnd user is expected to access subdomains of info.citrix.comand alsoinfo.citrix.com(the parent domain). For example,info.citrix.com, sub1.info.citrix.com, level1.sub1.info.citrix.comNote: The wildcard must always be the starting character of the domain and only one *. is allowed.info.citrix.com End user is expected to access info.citrix.comonly and no subdomains. For example,sub1.info.citrix.comis not accessible.
-
Port – The port on which the app is running. Admins can configure multiple ports or port ranges per destination.
The following table provides examples of ports that can be configured for a destination.
Port input Description * By default, the port field is set to “*”(any port). The port numbers from 1 to 65535 are supported for the destination.1300–2400 The port numbers from 1300 to 2400 are supported for the destination. 38389 Only the port number 38389 is supported for the destination. 22,345,5678 The ports 22, 345, 5678 are supported for the destination. 1300–2400, 42000-43000,22,443 The port number range from 1300 to 2400, 42000–43000, and ports 22 and 443 are supported for the destination. Note:
Wildcard port (*) cannot co-exist with port numbers or ranges.
- Protocol – TCP/UDP
- In the App Connectivity section, a mini version of the Application Domains table is available to make the routing decisions. For each destination, you can choose a different or same resource location. Destinations configured in the previous step are populated under the DESTINATION column. Destinations added here are also added to the main Application Domains table. The Application Domains table is the source of truth for making the routing decision to direct connection establishment and traffic to the correct resource location. For more information on the Application Domains table and possible IP conflict scenarios, see Application Domains - IP address conflict resolution section.
-
For the following fields, select an input from the drop-down menu and click Next.
Note:
Only the Internal route type is supported.
-
RESOURCE LOCATION – From the drop-down menu, you must connect to a resource location with at least one Connector Appliance installed.
Note:
Connector Appliance installation is supported from the App Connectivity section. You can also install it under the Resource Locations section in the Citrix Cloud portal. For more information on creating a Resource Location, see Set up resource locations.

-
RESOURCE LOCATION – From the drop-down menu, you must connect to a resource location with at least one Connector Appliance installed.
-
Click Finish. The app is added to the Applications page. You can edit or delete an app from the Applications page after you have configured the application. To do so, click the ellipsis button on an app and select the actions accordingly.
- Edit Application
- Delete
Note:
- To grant access to the apps for the users, admins are required to create access policies. In access policies, admins add app subscribers and configure security controls. For details, see Create access policies.
To configure the authentication methods required for the users, see Set up identity and authentication.
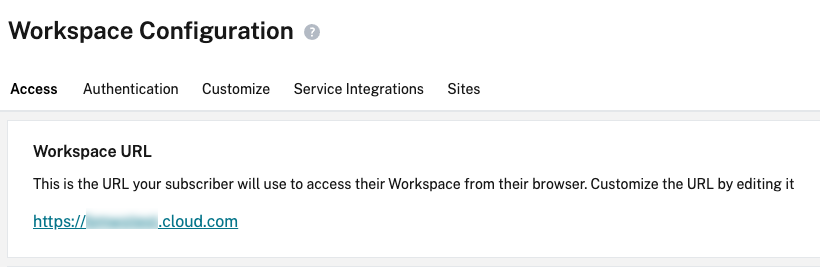
- To obtain the Workspace URL to be shared with the users, from the Citrix Cloud menu, click Workspace Configuration, and select the Access tab.
Admin Configuration – Citrix Secure Access client-based access to HTTP/HTTPS apps
Note:
To access existing or new HTTP/HTTPS apps using the Citrix Secure Access client, you must install at least one (recommended two for high-availability) Connector Appliance in your resource location. The connector appliance can be installed on-premises, in the data center hypervisor, or in the public cloud. For details of Connector Appliance and its installation, see Connector Appliance for Cloud Services.
Prerequisites
- Access to Citrix Secure Private Access in Citrix Cloud.
Points to note
- Internal web apps enforced with enhanced security controls cannot be accessed through the Citrix Secure Access client.
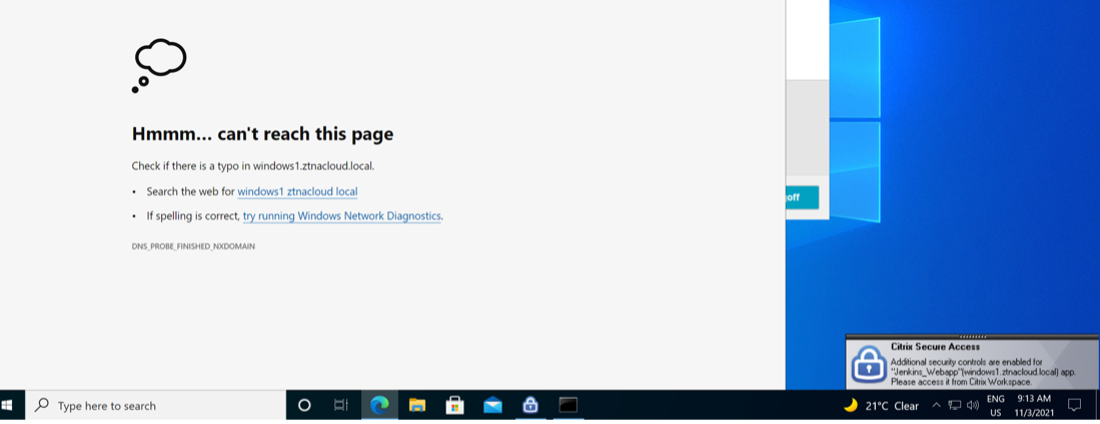
-
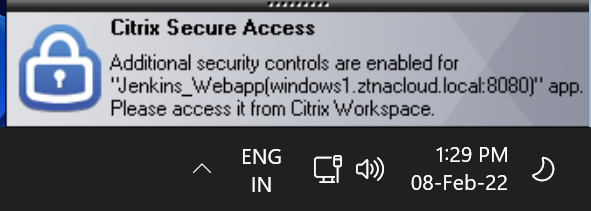
If you try to access an HTTP(S) application which has enhanced security controls enabled, then the following pop-up message is displayed. Additional security controls are enabled for <”app name”(FQDN) > app. Please access it from Citrix Workspace.
- If you want to enable SSO experience, access the web apps using Citrix Workspace app or web portal.
The steps to configure HTTP(S) apps remain the same as existing functionality explained under Support for Enterprise web apps.
Adaptive access to TCP/UDP and HTTP(S) apps
Adaptive access provides the ability for admins to govern access to business-critical apps based on multiple contextual factors like device posture check, user geo-location, user role, and the Citrix Analytics service provided risk score.
Note:
You can deny access to TCP/UDP applications, admins create policies based on the users, user groups, the devices from which the users access the applications, and the location (country) from where an application is accessed. Access to applications is allowed by default.
The user subscription made for an app is applicable for all the TCP/UDP app destinations configured for the TCP/UDP applications.
To create an adaptive access policy
Admins can use the admin-guided workflow wizard to configure Zero Trust Network Access to SaaS apps, internal web apps, and TCP/UDP apps in the Secure Private Access service.
Note:
- For details on creating an adaptive access policy, see Create access policies.
- For an end-to-end configuration of Zero Trust Network Access to SaaS apps, internal web apps, and TCP/UDP apps in the Secure Private Access service, see Admin guided workflow for easy onboarding and set up.
Points to note
- Access to an existing web app for which enhanced security is enabled is denied via the Secure Access client. An error message suggesting to log in using Citrix Workspace app is displayed.
- Policy configurations for web app based on user risk score, device posture check and so on via Citrix Workspace app are applicable while accessing the app via the Secure Access client.
- The policy bound to an application is applicable for all the destinations in the application.
DNS resolution
The connector appliance must have a DNS server configuration for DNS resolution.
Steps to install Citrix Secure Access client on a Windows machine
Supported OS versions:
Windows – Windows 11, Windows 10, Windows Server 2016, and Windows Server 2019.
Following are the steps to install the Citrix Secure Access client on a Windows machine.
- Download the Citrix Secure Access client from https://www.citrix.com/downloads/citrix-gateway/plug-ins/citrix-secure-access-client-for-windows.html.
- Click Install to install the client on your Windows machine. If you have an existing Citrix Gateway client, the same gets upgraded.
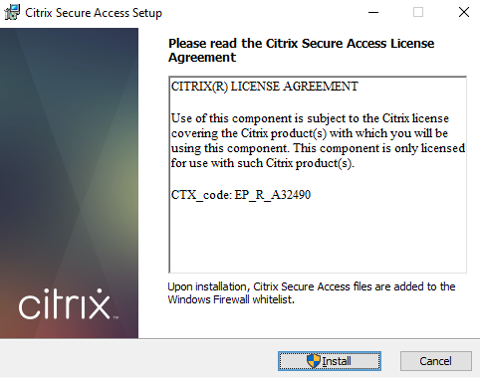
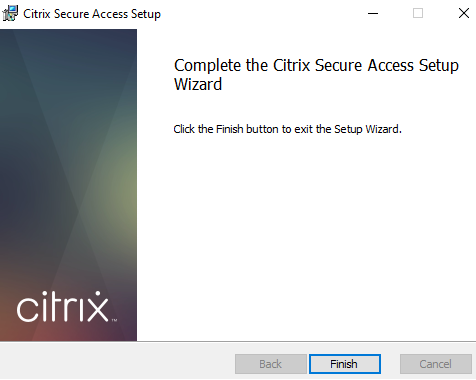
- Click Finish to complete the installation.
Note:
Multi-user sessions in Windows is not supported.
Microsoft Edge Runtime installation steps
Microsoft Edge Runtime is now required for the authentication UI on the Secure Access client. It is installed by default in the latest Windows 10 and Windows 11 machines. For machines on earlier versions, perform the following steps.
- Go to the following link, https://go.microsoft.com/fwlink/p/?LinkId=2124703.
- Download and install Microsoft Edge. If the user system doesn’t have the Microsoft Edge runtime installed, the Citrix Secure Access client prompts you to install when you try to connect to the Workspace URL.
Note:
You can use an automated solution like SCCM software or a group policy to push the Citrix Secure Access client or Microsoft Edge Runtime to the client machines.
Steps to install Citrix Secure Access client on a macOS machine
Prerequisites:
- Download the Citrix Secure Access client for macOS from the App Store. This app is available from macOS 10.15 (Catalina) and later.
- Preview builds are available in the TestFlight app only for macOS Monterey (12.x).
- If you are switching between the App Store app and the TestFlight preview app, you must recreate the profile you want to use with the Citrix Secure Access app. For example, if you have been using a connection profile with
blr.abc.company.com, delete the VPN profile, and create the same profile again.
Supported OS versions:
-
macOS: 12.x (Monterey). 11.x (Big Sur), and 10.15 (Catalina) are supported.
-
Mobile devices: iOS and Android is not supported.
Launch a configured app - End-user flow
- Launch the Citrix Secure Access client on the client device.
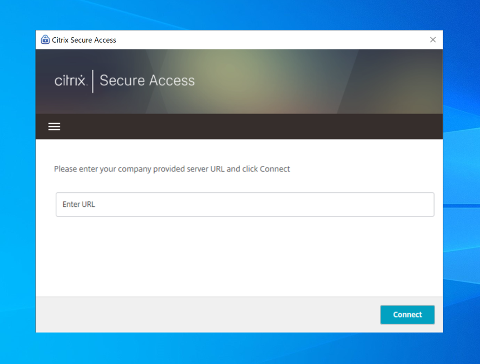
- Enter the Workspace URL provided by the customer admin in the URL field in the Citrix Secure Access client and click Connect. It is a one-time activity and the URL is saved for subsequent use.
- User is prompted for authentication based on the authentication method configured in Citrix Cloud. Upon successful authentication, the user can access the configured private apps.
User notification messages
A pop-up notification message appears in the following scenarios:
-
The app is not authorized by the admin for the user.
Cause: The application configured for the accessed destination IP address or FQDN is not subscribed for the logged in user.

-
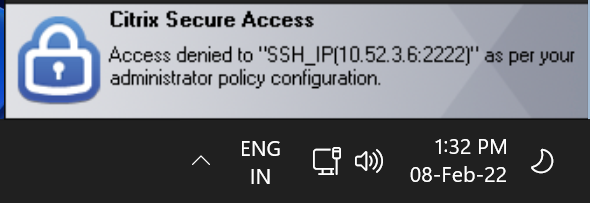
The access policy evaluation results in denial of access.
Cause: Access to the destination IP address or FQDN is denied because the policy bound to the application is evaluated to “Deny Access” to the logged in user.
-
The enhanced security control is enabled for the app.
Cause: The enhanced security control is enabled to the application for the accessed destination. The application can be launched using the Citrix Workspace App.
Additional Information
Application Domains - IP address conflict resolution
Destinations added while creating an app are added to a main routing table. The routing table is the source of truth for making the routing decision to direct connection establishment and traffic to the correct resource location.
- The destination IP address must be unique across resource locations.
- Citrix recommends that you avoid overlap of the IP addresses or domains in the routing table. In case you encounter an overlap, you must resolve it.
Following are the types of conflict scenarios. Complete Overlap is the only error scenario that restricts admin configuration until the conflict is resolved.
| Conflict Scenarios | Existing application domain entry | New entry from app addition | Behavior |
|---|---|---|---|
| Subset Overlap | 10.10.10.0-10.10.10.255 RL1 | 10.10.10.50-10.10.10.60 RL1 | Allow; Warning info - Subset overlap of IP domain with existing entries |
| Subset Overlap | 10.10.10.0-10.10.10.255 RL1 | 10.10.10.50-10.10.10.60 RL2 | Allow; Warning info - Subset overlap of IP domain with existing entrieS |
| Partial Overlap | 10.10.10.0-10.10.10.100 RL1 | 10.10.10.50-10.10.10.200 RL1 | Allow; Warning info - Partial overlap of IP domain with existing entries |
| Partial Overlap | 10.10.10.0-10.10.10.100 RL1 | 10.10.10.50-10.10.10.200 RL2 | Allow; Warning info - Partial overlap of IP domain with existing entries |
| Complete Overlap | 10.10.10.0/24 RL1 | 10.10.10.0-10.10.10.255 RL1 | Error; <Completely overlapping IP domain's value> IP domain completely overlaps with existing entries. Please change the existing routing IP Entry or configure a different destination |
| Complete Overlap | 10.10.10.0/24 RL1 | 10.10.10.0-10.10.10.255 RL2 | Error; <Completely overlapping IP domain's value> IP domain completely overlaps with existing entries. Please change the existing routing IP Entry or configure a different destination |
| Exact Match | 20.20.20.0/29 RL1 | 20.20.20.0/29 | Allow; Domains exist in the domain routing table. Changes made updates the domain routing table |
Note:
If the destinations added results in a complete overlap, an error is displayed while configuring the app in the App Details section. The admin must resolve this error by modifying the destinations in the App Connectivity section.
If there are no errors in the App Details section, the admin can proceed to save the app details. However, in the App Connectivity section, if the destinations have a subset and partial overlap with each other or existing entries in the main routing table, a warning message is displayed. In this case, the admin can choose to either resolve the error or continue with the configuration.
Citrix recommends keeping a clean Application Domain table. It is easier to configure new routing entries if the IP address domains are broken into appropriate chunks without overlaps.
Login and logout script configuration registries
The Citrix Secure Access client accesses the login and logout script configuration from the following registries when the Citrix Secure Access client connects to the Citrix Secure Private Access cloud service.
Registry: HKEY_LOCAL_MACHINE>SOFTWARE>Citrix>Secure Access Client
- Login script path: SecureAccessLogInScript type REG_SZ
- Logout script path: SecureAccessLogOutScript type REG_SZ
Release notes references
In this article
- Preview features
- How it works
- Admin Configuration – Citrix Secure Access client-based access to TCP/UDP apps
- Admin Configuration – Citrix Secure Access client-based access to HTTP/HTTPS apps
- Adaptive access to TCP/UDP and HTTP(S) apps
- Steps to install Citrix Secure Access client on a Windows machine
- Microsoft Edge Runtime installation steps
- Steps to install Citrix Secure Access client on a macOS machine
- Launch a configured app - End-user flow
- Additional Information
- Login and logout script configuration registries
- Release notes references