CIS Problem Reporting
Citrix Provisioning allows you to report problems you encounter while using the software directly to Citrix Support. The support team uses the information to troubleshoot and diagnose the problem to improve Citrix Provisioning. This feature, along with the Customer Experience Improvement Program (CEIP), is used by Citrix to continually improve the software.
Note:
Participation in programs that help improve Citrix Provisioning™ is voluntary. Problem reporting, along with CEIP, are enabled by default. Use the information in this article to configure and use problem reporting.
How problem reporting works
Problem reporting works by sharing diagnostic information resulting from an event within Citrix Provisioning. It can be performed for a specific Citrix Provisioning server, or for a site:
- If you have an environment with multiple provisioning servers, each has had a different SOAP Service user. In such environments, the SOAP Service user must have read\write permissions to the network share when generating the diagnostic bundle.
- If you are reporting a problem for a specific provisioning server, only that server generates a diagnostic bundle that captures the event.
- If you are reporting a problem for a site, each provisioning server in the site generates a diagnostic bundle.
- Upload the diagnostic bundle directly to Citrix®, or save it to a shared network drive and manually upload it later.
Note:
The diagnostic bundle is manually uploaded to the Citrix CIS website. Log in to this site using your Citrix credentials.
Report a problem using the NETWORK SERVICE user account
You can set up your system to generate problem reports for the NETWORK SERVICE user.
To enable the NETWORK SERVICE user to collect information and read from the registry, first make NETWORK SERVICE a local admin of your Provisioning server. Then give the user read/write permissions to the network share where the report is generated.
To make the NETWORK SERVICE user a local admin of your Provisioning server:
- Log in to the VM as a local administrator.
- From the Start menu, select Administrative tools > Computer Management > Groups > Users.
- Add the user NETWORK SERVICE. From the Select Users dialog box, select Location and verify that you’re adding the user to the local VM.
- Add the user NETWORK SERVICE to the Administrators group. From the Start menu, select Administrative tools > Computer Management > Groups > Administrators. From the Select Users dialog box, select Location and verify that you’re adding the administrator to the local VM.
To give the NETWORK SERVICE user read/write permissions to the network share:
- Right-click the network shared folder and select Folder > Properties. On the Sharing tab, set the folder to Shared.
- On the Security tab, make sure the NETWORK SERVICE user has read/write permissions.
- In the Citrix Provisioning Configuration Wizard, select Network service account as the Stream and SOAP Services user account. This gives the NETWORK SERVICE user read/write access to
ProgramData\Citrix\Provisioning Services, where the report files are generated until upload.
Using a token for the secure communication
When using problem reporting, a token is generated to associate the diagnostic bundle with your My Citrix account login credentials. Once the token is associated with your My Citrix credentials, it’s stored in the database for future problem reporting. This process eliminates the need to store your login credentials.
Note:
If you are using Problem Reporting for the first time and have not yet configured a login token, you are prompted to enter your My Citrix login credentials. Once you enter your login credentials, the token is generated in the database.
Configure the problem reporting feature
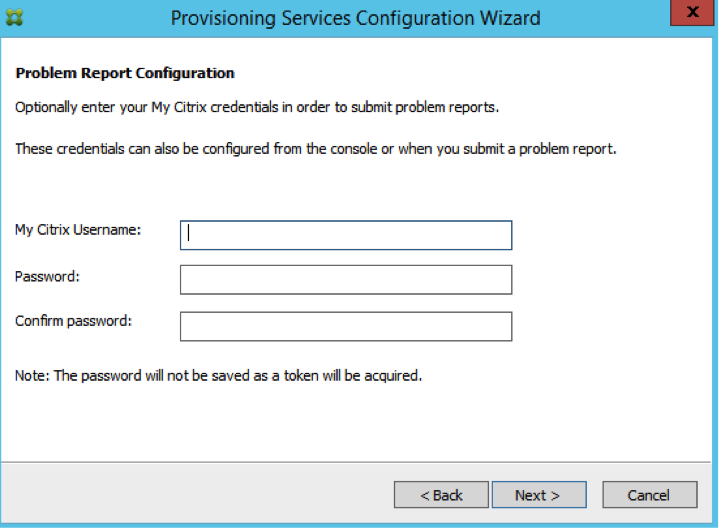
In the Citrix Provisioning Configuration Wizard screen:
- Enter your Citrix user name and password.
- Confirm the password.
- Click Next.
Tip:
If you don’t have a secure token to authenticate your login credentials, the Problem Report Configuration screen indicates that The token required to submit problem reports is empty. Please reconfigure. The token can be generated by entering your credentials here or later using the Citrix Provisioning console.
The password and user name you specify are not saved. The token that is generated is used to associate your diagnostics bundle with your My Citrix account.
Report a problem
To report a problem you must first specify the options to use. You can either upload a bundle of diagnostic information using your Citrix user name, or you can generate diagnostic information locally to a ZIP file. Select an empty folder on a shared network drive accessible to all servers included in this problem report.
To report a problem
-
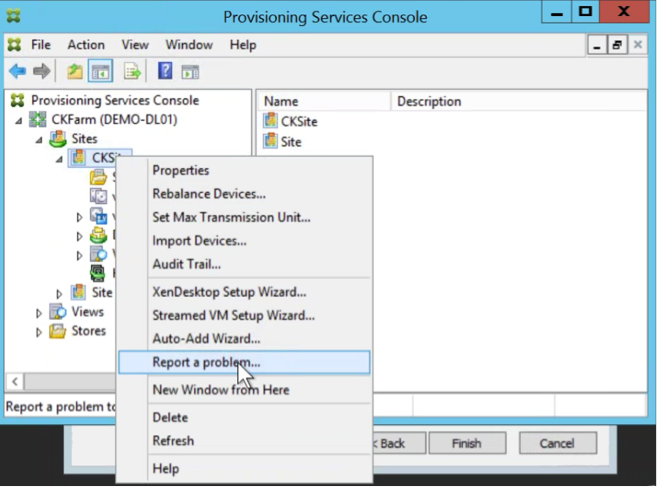
In the Citrix Provisioning console, expand the Sites node to display the server on which you want to report a problem.
-
Select the server, and right-click to display a context menu.
-
Click the Report a problem option.
-
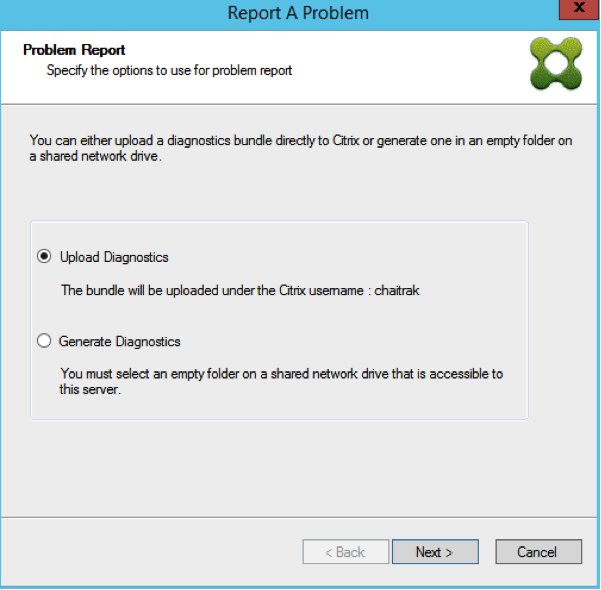
In the Problem Report screen, select how to generate the diagnostic information:
- Upload Diagnostics – Use the generated token to upload a diagnostic bundle (a ZIP file containing numerous files related to the problem).
- Generate Diagnostics – Select an empty folder on a shared network drive that is accessible to the servers you have selected.
-
Click Next.
Note:
Each server in the selected site uploads or generates its own diagnostic bundle.
The token is only required for an automatic upload. If you are generating the bundle locally, the token is not required.
-
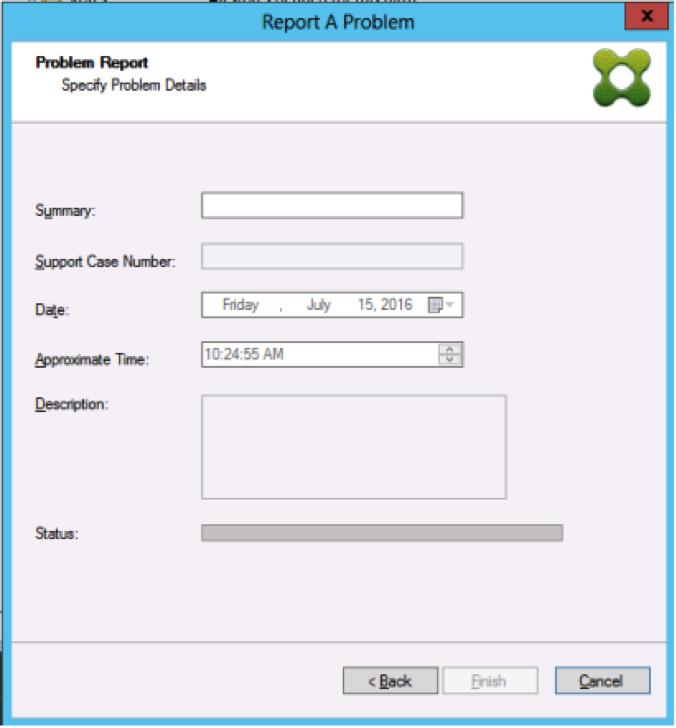
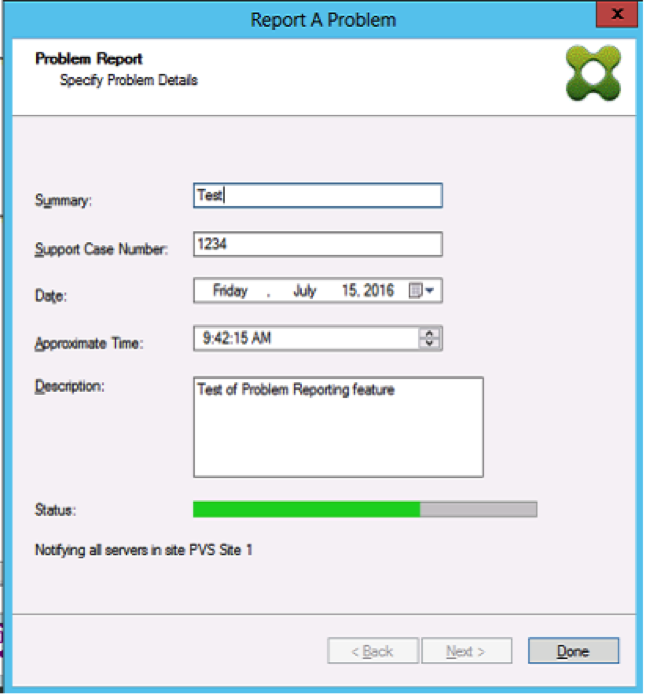
After selecting the method to report a problem, you can specify information to help describe the issue. In the Specify Problem Details screen:
a. Enter a brief description that summarizes the problem. Once you enter the information for this mandatory field the remaining fields become editable.
b. Optionally enter a support case number.
c. Select the date when the problem occurred.
d. Enter an approximate time when the problem occurred.
e. Enter a description that characterizes the problem.
-
Click Finish.
Tip:
After finishing the diagnostic report, the bundle is created on the server and uploaded. You can view the status of the most recent problem report from Server>Property>Problem Report.
After clicking Finish, the problem reporting function reports the issue for either a single server, or for each server in an entire site. Each server generates the problem report as a background task and uploads it to the CIS server. Or, alternately, saves the file to a shared network drive.
The Status field displays information about the state of the reporting mechanism. Once the process starts, use the Done button to dismiss the dialog to allow the process to continue in the background:
If you choose not to dismiss the dialog, the process continues in the foreground. Once completed, the Problem Report screen provides additional information Check each Server’s Properties for results. With this message, each server has completed the problem report generation process and saves the results.
.png)
Once the problem report is generated, you can view the results in the Properties screen. To view the report, select Server>Properties.
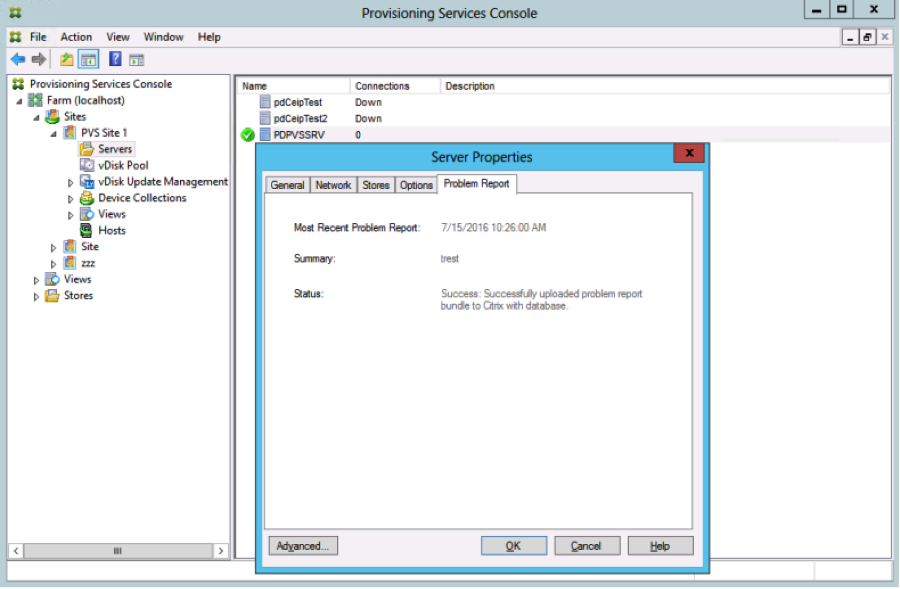
The Problem Report tab displays:
- Most recent problem report. This field displays the date and time of the most recent problem report attempt.
- Summary. This field describes the problem. The information is generated from the mandatory summary field specified when the administrator first created the report.
-
Status. Describes the status of the most recent report. It indicates:
- Success or failure
- Whether the report was uploaded or saved to a shared network drive. If the report was saved to a drive, the full path where the file is located is displayed.