Authentication with Okta through NetScaler Gateway for MAM enrollment
Citrix Endpoint Management supports authentication with Okta credentials through NetScaler Gateway. This authentication method is available only for users enrolling in MAM through Citrix Secure Hub.
Prerequisites
To configure Citrix Endpoint Management to use Okta through NetScaler Gateway as an identity provider (IdP) for devices enrolled with MAM, make sure that the following prerequisites are met:
- Configure Citrix Endpoint Management with Okta through Citrix Cloud as IdP for devices enrolled with MDM. For more information about configuring Okta for MDM, see Authentication with Okta through Citrix Cloud.
- Enable the following relevant feature flags depending on the platform respectively:
- iOS:
- iOS-V3Form-MAM
- iOS-SAMLAuth-MAM
- Android:
- Android-V3Form-MAM
- Android-SAMLAuth-MAM
Note:
To enable this feature, contact your support team.
- iOS:
- Download and install the latest version of Citrix Secure Hub.
- Make sure that the Okta service is available for your organization and the relevant users and groups are created or imported to Okta.
Configure NetScaler Gateway in Citrix Endpoint Management
-
Sign in to the Citrix Endpoint Management console and then click the Settings
 icon.
icon. -
Click NetScaler Gateway under Server.
-
Enable the Authentication toggle button.
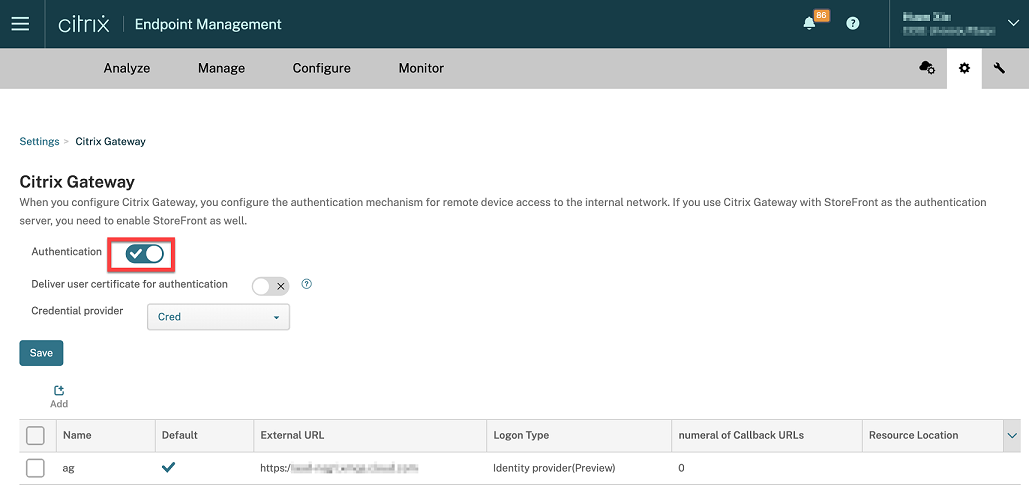
-
Make sure that the Logon Type of the gateway is the Identity provider.
-
Click Save.
Prepare on-premises NetScaler Gateway
-
If you do not have an on-premises NetScaler Gateway configured for Citrix Endpoint Management, then do the following steps:
-
In the Citrix Endpoint Management console. click the Settings
icon. -
Click NetScaler Gateway under Server.
-
Click Edit.
-
Click the Logon Type drop-down menu and select Domain only.
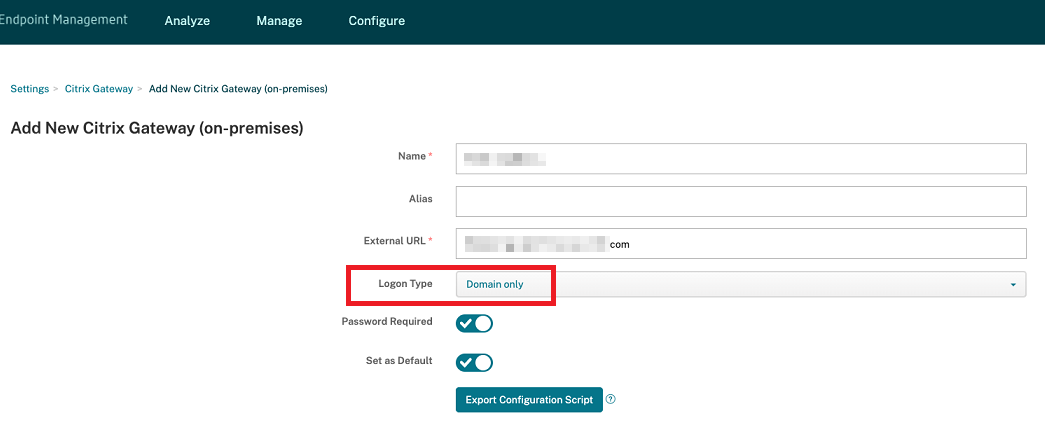
-
Click Export Configuration Script.
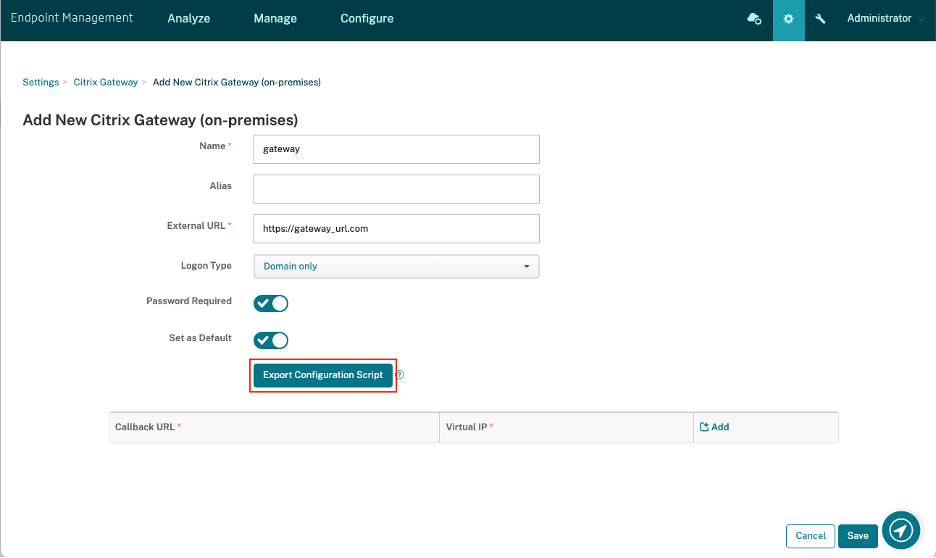 The Export Configuration Script is downloaded.
 -
Click the Logon Type drop-down menu and select Identity provider.
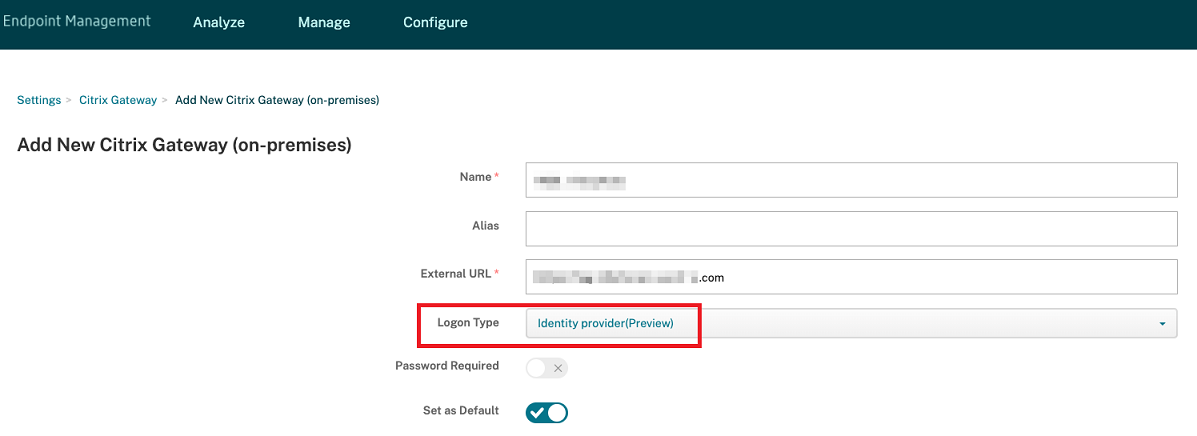
-
Click Save.
-
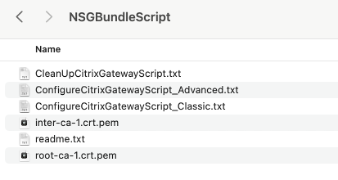
Open the downloaded zip file and extract the files from it.
-
Run the scripts in the extracted .txt files to prepare the on-premises NetScaler Gateway.
-
-
Sign in to the Citrix ADC management console and then navigate to NetScaler Gateway > Virtual Servers.
-
Click the gateway relevant to your Citrix Endpoint Management setup.
-
Unbind any existing authentication policies on the on-premises NetScaler Gateway.
Configure Okta
-
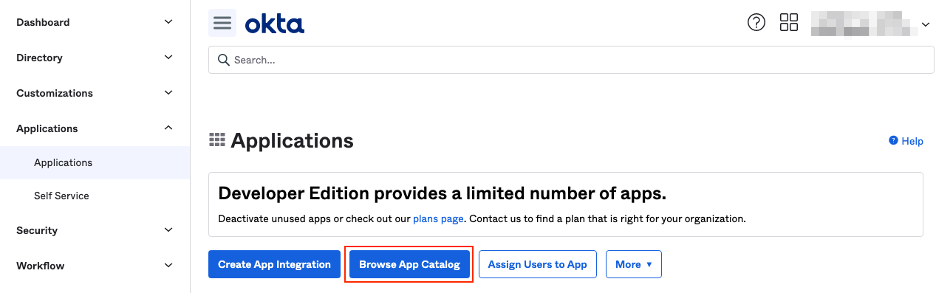
Sign in to Okta as administrator.
-
Click Applications > Applications > Browse App Catalog.
-
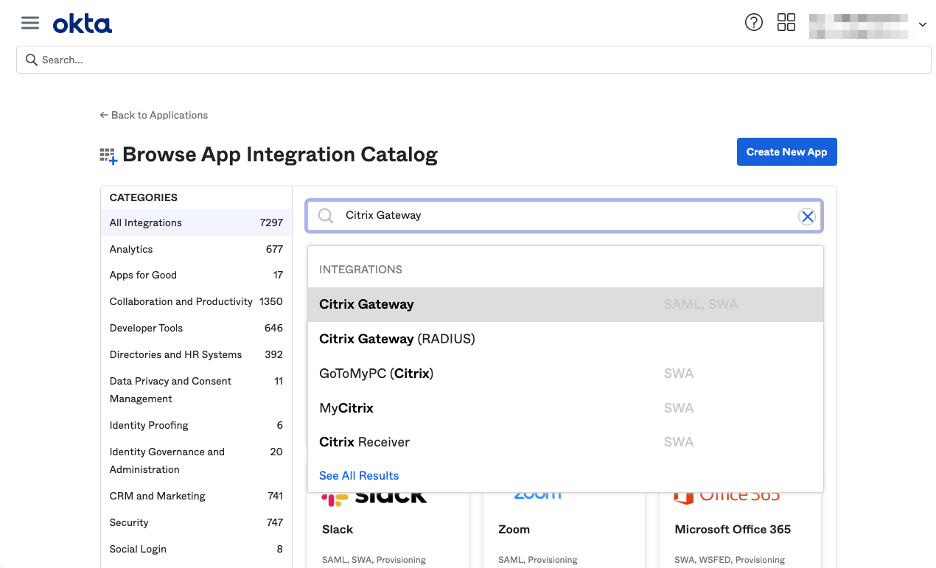
Type NetScaler Gateway in the search bar under Browse App Integration Catalog and then select NetScaler Gateway (SAML, SWA).
-
Click Add Integration.
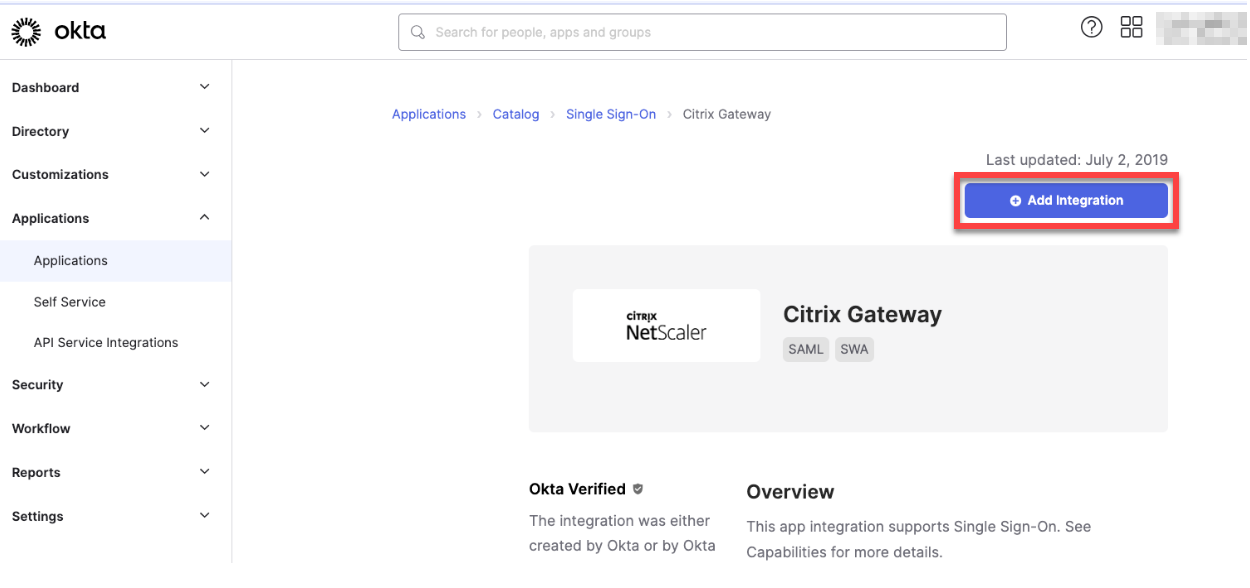
-
Enter the relevant name in the Application label field.
-
Enter the gateway virtual server URL in the Login URL field and then click Next.
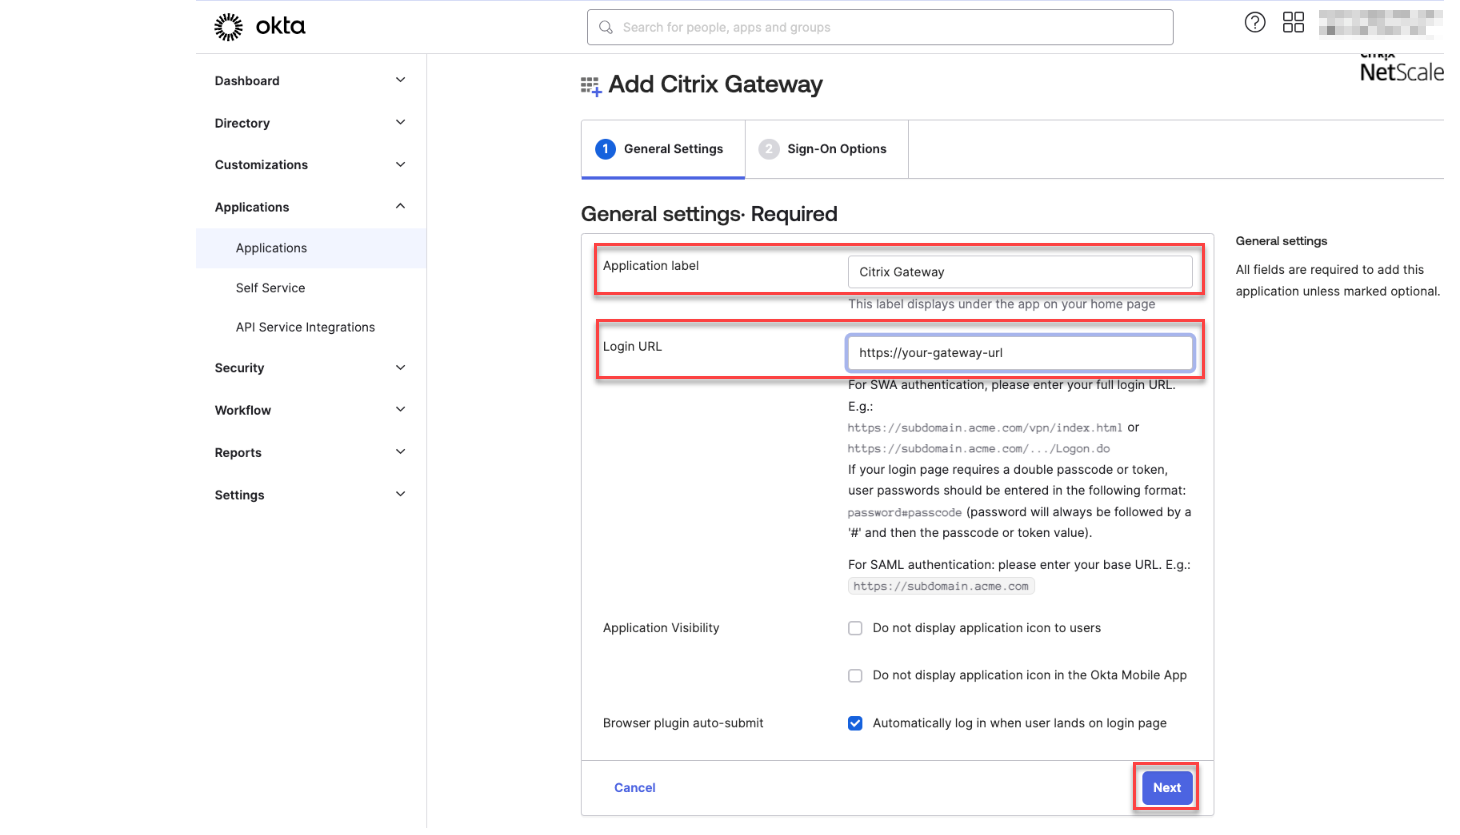
Note:
The URL entered in the Login URL field must be the same as the NetScaler Gateway URL for Citrix Endpoint Management settings.
-
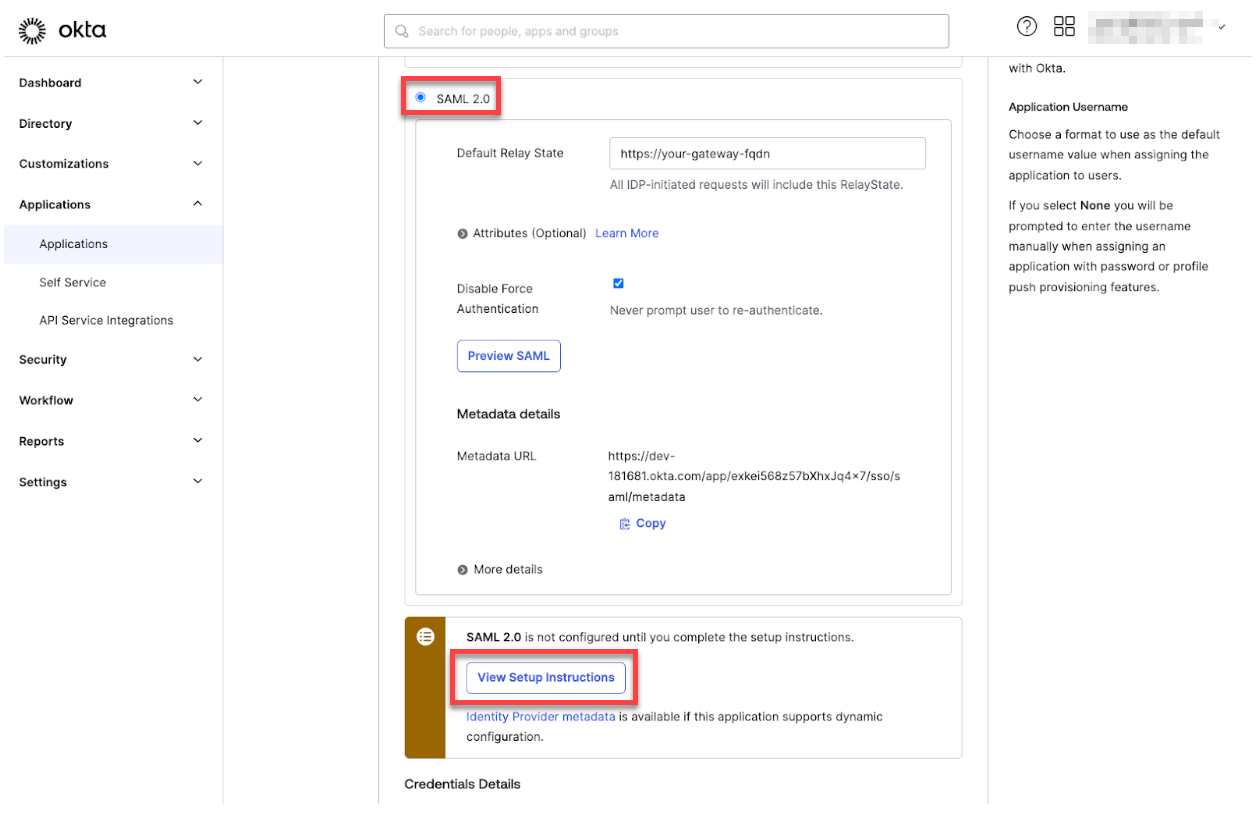
Under Sign-On Options Required > Sign on methods, select SAML 2.0.
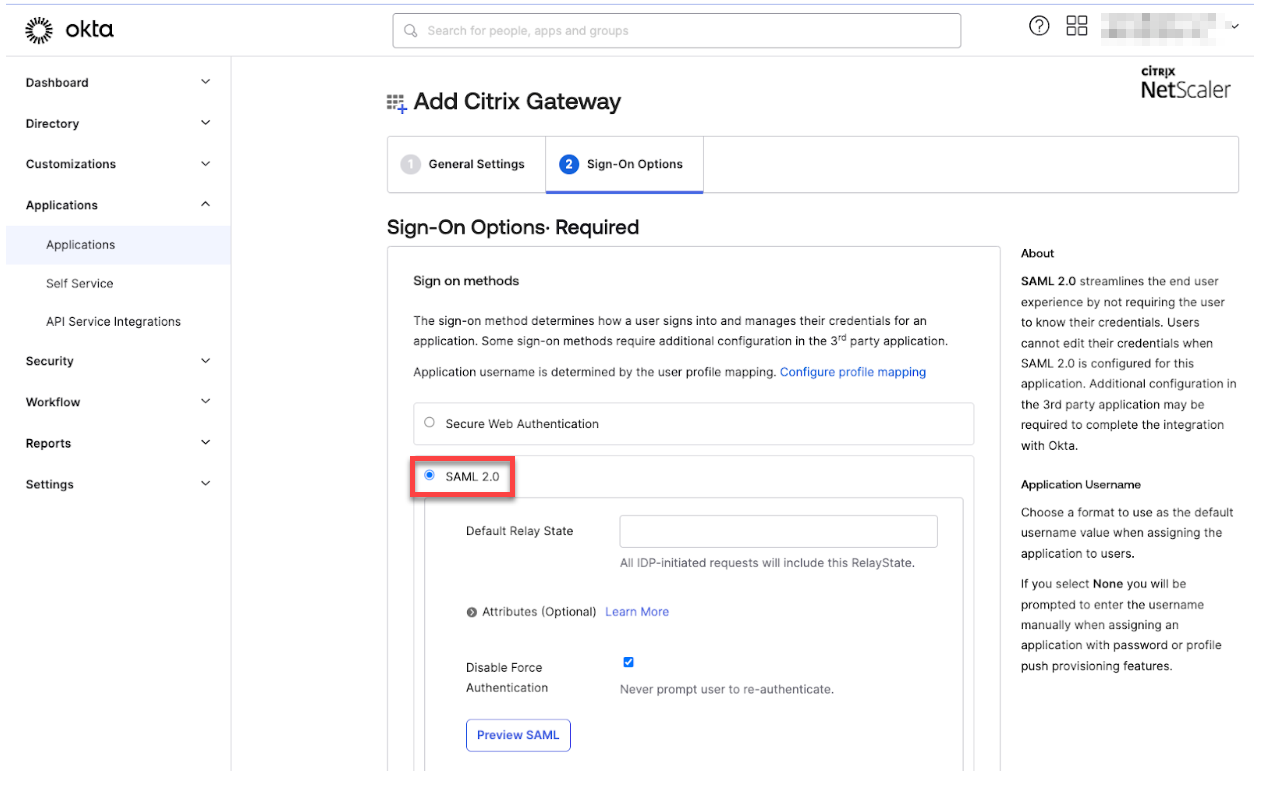
-
Click View Setup Instructions and follow the instructions provided in the page to create the SAML policy in the Citrix® on-premises gateway admin console.
Note:
- After installing the CA certificate while configuring NetScaler Gateway versions 11.1 or later, create a SAML action. To create SAML action, navigate to Security > AAA - Application Traffic > Policies > Authentication > Advanced Policies > Actions > SAML Actions. Click Add and fill the information as provided in the preceding page. Don’t follow the navigation provided in the page that is, Netscaler Gateway > Policies > Authentication > SAML > Servers.
- Also, don’t follow the steps provided to create SAML policy as those steps are using classic policy. We are using advanced policy now. Do the following step 9 to create a SAML policy using an advanced policy.
-
Create a corresponding SAML policy for the SAML action, and bind the policy to the authentication virtual server as follows:
-
Navigate to Security > AAA-Application Traffic > Policies > Authentication > Advanced Policies and click Add.
-
On the Create Authentication Policy page, provide the following details:
- Name - Specify a name for the SAML policy.
- Action Type - Select SAML as the authentication action type.
- Action - Select the SAML server profile to bind the SAML policy with.
-
Expression - Displays the name of the rule or expression that the SAML policy uses to determine if the user must authenticate with the SAML server. On the text box, set the value rule =
truefor the SAML policy to take effect and the corresponding SAML action to be run.
-
Bind the SAML policy to the VPN virtual server and link the VPN virtual server to the authentication virtual server through an authentication profile. For more information about the binding procedure, see Bind the authentication policy.
-
-
Create a AAA virtual server by using To set up an authentication virtual server by using the GUI.
-
Configure the AAA virtual server by using Configure the authentication virtual server.
-
Create and configure the authentication profile by using Authentication profiles.
-
Bind the authentication profile with the Gateway virtual server and save all the configurations.
-
After creating the SAML policy in the Citrix on-premises gateway admin console, click Done.
Now, you can see two applications for Citrix Endpoint Management integration that is, a web application for Citrix Cloud and a SAML application for Citrix Endpoint Management MAM authentication.
-
Assign the relevant users and groups to the SAML application that you created.
Now, Okta is added as an identity provider for devices enrolled with MAM and you can authenticate them using Okta.
Expected behavior
The following example is using an Android device:
-
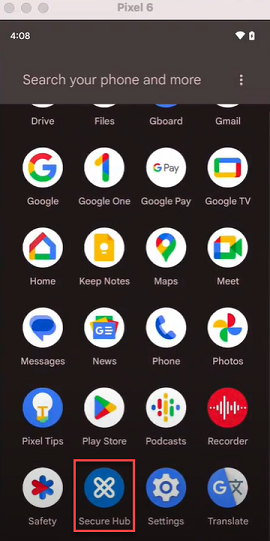
On your mobile device, open the Citrix Secure Hub app.
-
Provide the required permissions.
-
On the sign-in page, enter the credentials provided by your organization and then tap Next.
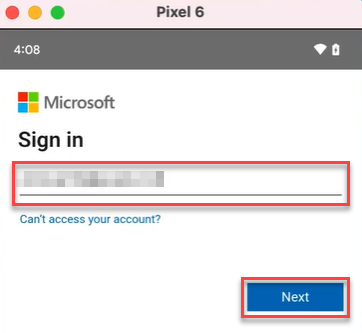
You are redirected to the Okta sign in page.
-
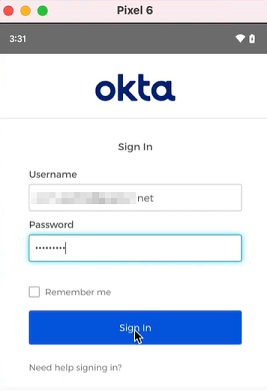
On the Okta sign in page, enter your credentials and then tap Sign in.
-
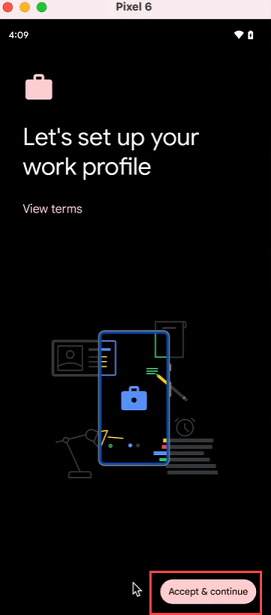
On the Let’s set up your work profile page, tap Accept & continue.
-
Create the pin for the Citrix Secure Hub app and confirm the same.
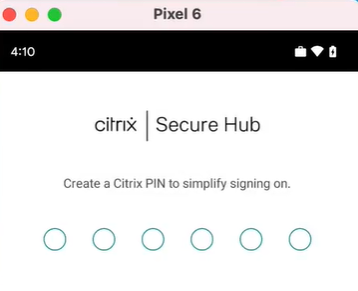
You are successfully redirected to the Citrix Secure Hub home page.