Device management
Citrix Endpoint Management can provision, manage, secure, and inventory a broad range of device types within a single management console.
-
Use a common set of device policies to manage supported devices. For a quick look at the device policies available by platform:
- Go to the Citrix Endpoint Management console and navigate to Configure > Device Polices.
-
Click Add and then select the platforms you want to view.
For more information, see Filter the list of added device policies.
-
Protect business information with strict security for identity, corporate-owned and BYO devices, apps, data, and network. Specify the user identity to use to authenticate to devices. Configure how to keep enterprise and personal data separate on devices.
-
Deliver any app to end users, whatever device or operating system. Protect your information at the app level and provide enterprise-grade mobile application management.
-
Use provisioning and configuration controls to set up devices. Those controls include device enrollment, policy application, and access privileges.
-
Use security and compliance controls to create a customized security baseline with actionable triggers. For example, lock, wipe, or notify a device in violation of defined compliance standards.
-
Use OS update controls to prevent or enforce operating system updates. This feature is critical for data loss prevention against targeted operating system vulnerabilities.
To access articles about each supported platform, expand the “Device management” section in the contents list. Those articles provide details specific to each device platform. The rest of this article describes how to do general device management tasks.
Device management workflows
The workflow diagrams in this section provide a suggested sequence for device management tasks.
-
Recommended prerequisites for adding devices and apps: Performing the following setup in advance lets you configure devices and apps without interruption.
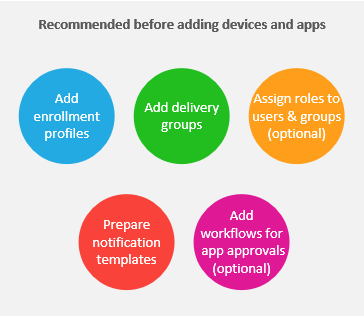
See:
-
Add devices:
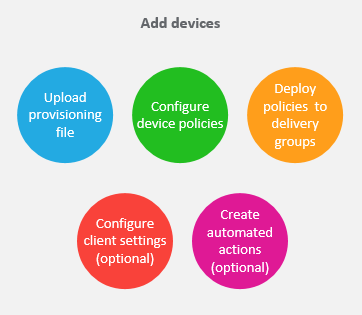
See:
-
Prepare enrollment invitations: You can send enrollment invitations to users with iOS, iPadOS, macOS, Android Enterprise, and legacy Android devices. Do the following if you plan to use enrollment invitations.
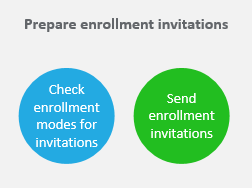
See:
-
Add apps:
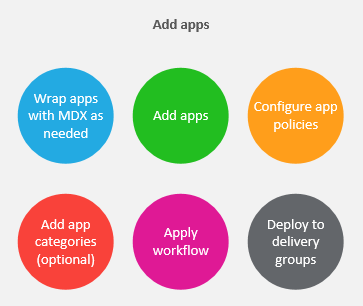
See:
-
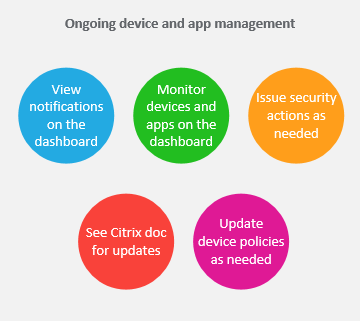
Perform ongoing device and app management: In addition to using the Citrix Endpoint Management dashboard, we encourage you to review the What’s new content for each version. What’s new provides information about any needed actions, such as configuring new device policies.
See:
Enrollment invitations
To manage user devices remotely and securely, you enroll user devices in Citrix Endpoint Management. The Citrix Endpoint Management client software is installed on the user device and the user identity is authenticated. Then, Citrix Endpoint Management and the user profile are installed. For enrollment details for supported device platforms, see the device articles under this section.
In the Citrix Endpoint Management console:
- You can send an enrollment invitation to users with iOS, iPadOS, macOS, Android Enterprise, and legacy Android devices. Enrollment invitations aren’t available for Windows devices.
- You can send an invitation URL to users with iOS, iPadOS, Android Enterprise, or legacy Android devices. Invitation URLs aren’t available for Windows devices.
Enrollment invitations are sent as follows:
- If Active Directory users have an email address in Active Directory, they receive the invitation. Local users receive the invitation at the email specified in user properties.
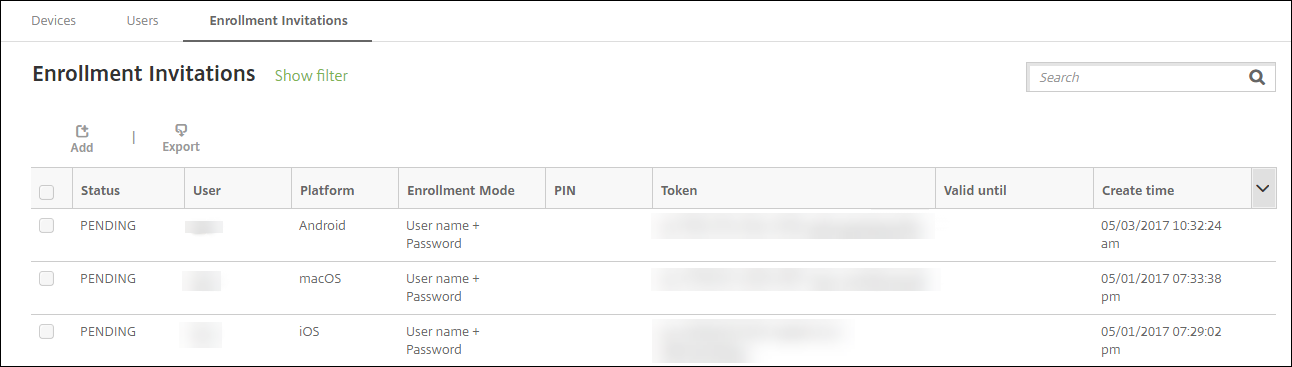
After users enroll, their devices appear as managed on Manage > Devices. The status of the invitation URL is shown as Redeemed.
Prerequisites
- LDAP configured
-
If using local groups and local users:
-
One or more local groups.
-
Local users assigned to local groups.
-
Delivery groups are associated with local groups.
-
-
If using Active Directory:
- Delivery groups are associated with Active Directory groups.
Create an enrollment invitation
-
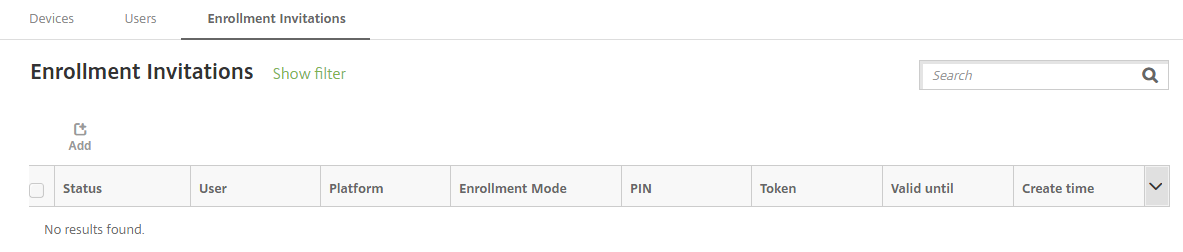
In the Citrix Endpoint Management console, click Manage > Enrollment Invitations. The Enrollment Invitations page appears.
-
Click Add. A menu of enrollment options appears.
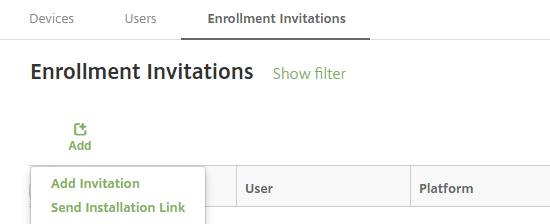
- To send an enrollment invitation to a user or group, click Add Invitation.
- To send an enrollment installation link to a list of recipients over SMTP, click Send Installation Link.
Sending enrollment invitations and installation links are described after these steps.
-
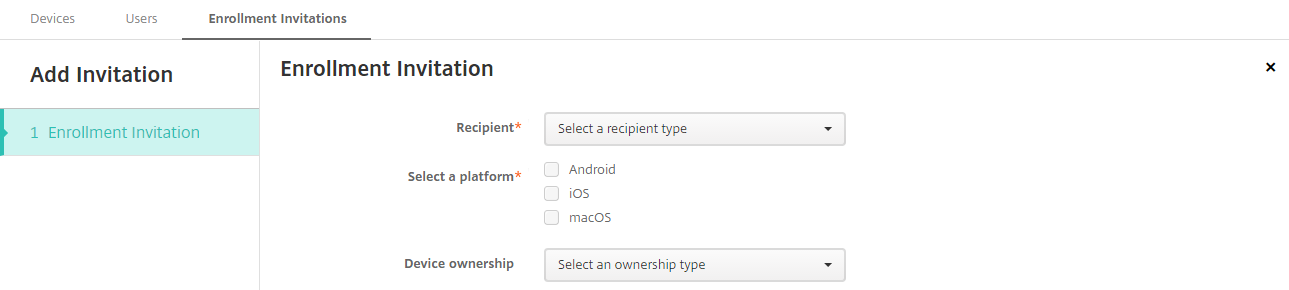
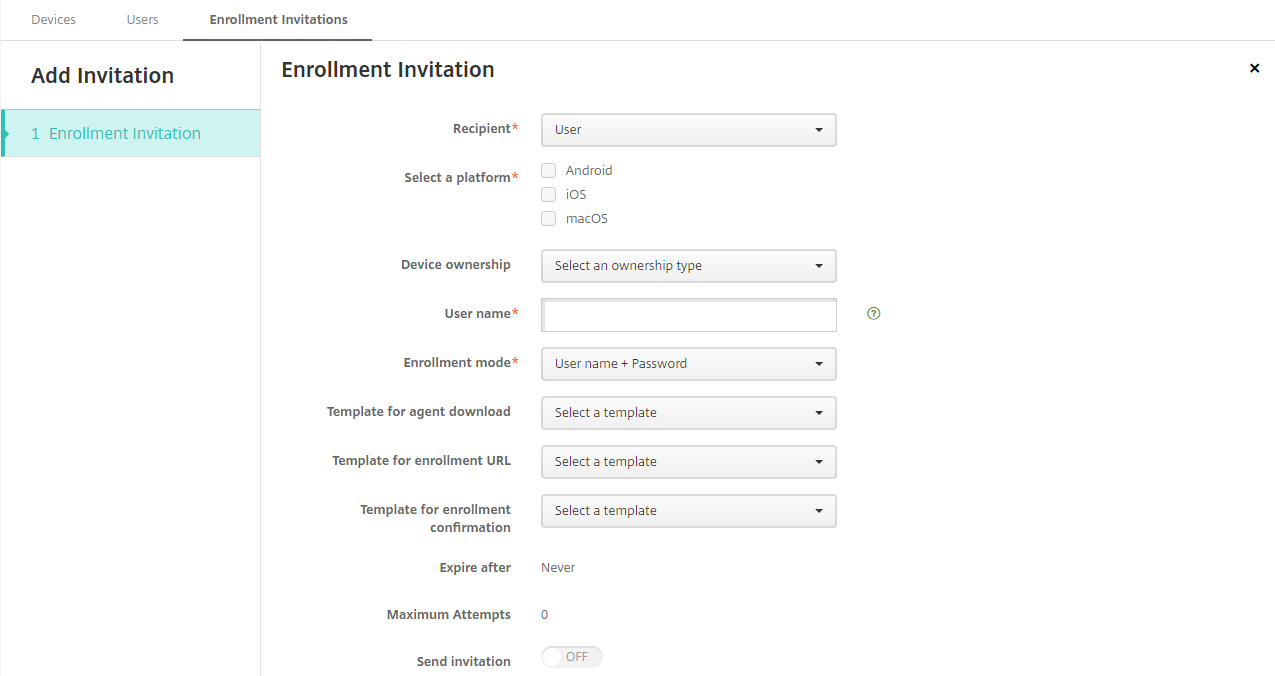
Click Add Invitation. The Enrollment Invitation screen appears.
-
Configure these settings:
- Recipient: Choose Group or User.
-
Select a platform: If Recipient is Group, all platforms are selected. You can change the platform selection. If Recipient is User, no platforms are selected. Select a platform.
To create an enrollment invitation for Android Enterprise devices, select Android.
- Device ownership: Select Corporate or Employee.
Settings for users or groups appear, as described in the following sections.
To send an enrollment invitation to a user
-
Configure these User settings:
- User name: Type a user name. The user must exist in Citrix Endpoint Management as a local or Active Directory user. If the user is local, set the email property of the user so you can send that user notifications. If the user is in the Active Directory, provided that LDAP is configured.
- Phone number: This setting doesn’t appear if you select more than one platform or if you select only macOS. Optionally, type the phone number of the user.
- Carrier: This setting doesn’t appear if you select more than one platform or if you select only macOS. Choose a carrier to associate to the phone number of the user.
-
Enrollment mode: Choose the enrollment security mode for users. The default is User name + Password. Some of the following options aren’t available for all platforms:
- User name + Password
- Invitation URL
- Invitation URL + PIN
- Invitation URL + Password
- Two Factor
- User name + PIN
We deprecated support for High Security enrollment mode. To send enrollment invitations, you can use only Invitation URL, Invitation URL + PIN, or Invitation URL + Password enrollment security modes. For devices enrolling with User name + Password, Two Factor, or User name + PIN, users must download Citrix Secure Hub and manually enter their credentials.
For more information, see Enrollment security modes by platform. A PIN for enrollment is also called a one-time PIN. Such PINs are valid only when the user enrolls.
Note:
When you select any enrollment security mode that includes a PIN, the Template for enrollment PIN field appears. Click Enrollment PIN.
- Template for agent download: Choose the download link template named Download link. That template is for all supported platforms.
- Template for enrollment URL: Choose Enrollment Invitation.
- Template for enrollment confirmation: Choose Enrollment Confirmation.
- Expire after: This field is set when you configure the enrollment security mode and indicates when the enrollment expires. For more information about configuring enrollment security modes, see Configure enrollment security modes.
- Maximum Attempts: This field is set when you configure the enrollment security mode and indicates the maximum number of times the enrollment process occurs.
- Send invitation: Select On to send the invitation immediately. Select Off to add the invitation to the table on the Enrollment Invitations page, but not send it.
-
Click Save and Send if you enabled Send invitation. Otherwise, click Save. The invitation appears in the table on the Enrollment Invitations page.
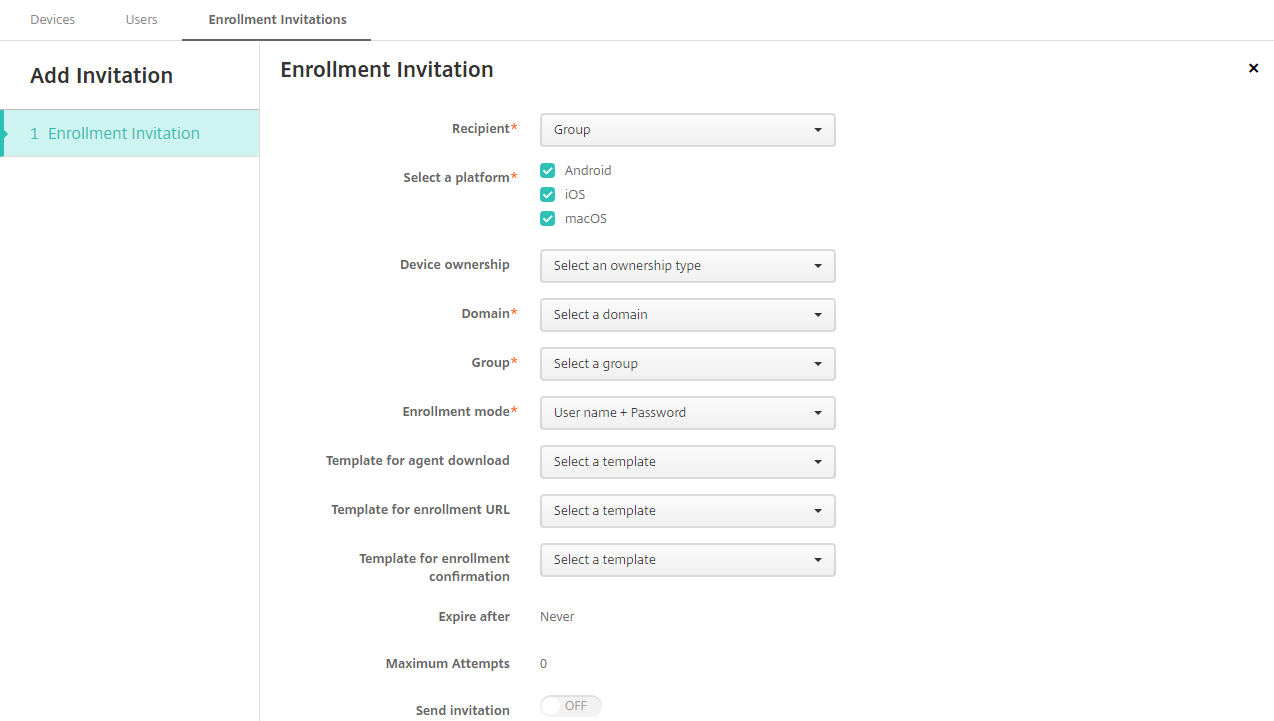
To send an enrollment invitation to a group
The following figure shows the settings for configuring an enrollment invitation to a group.
-
Configure these settings:
- Domain: Choose the domain of the group to receive the invitation.
- Group: Choose the group to receive the invitation. Citrix Endpoint Management gets the user list from Active Directory. The list includes users whose names have special characters.
-
Enrollment mode: Choose how you want users in the group to enroll. The default is User name + Password. Some of the following options aren’t available for all platforms:
- User name + Password
- Invitation URL
- Invitation URL + PIN
- Invitation URL + Password
- Two Factor
- User name + PIN
We deprecated support for High Security enrollment mode. To send enrollment invitations, you can use only Invitation URL, Invitation URL + PIN, or Invitation URL + Password enrollment security modes. For devices enrolling with User name + Password, Two Factor, or User name + PIN, users must download Citrix Secure Hub and manually enter their credentials.
Only the enrollment security modes that are valid for each of the selected platforms appear. For more information, see Enrollment security modes by platform.
Note:
When you select any enrollment security mode that includes a PIN, the Template for enrollment PIN field appears. Click Enrollment PIN.
- Template for agent download: Choose the download link template named Download link. That template is for all supported platforms.
- Template for enrollment URL: Choose Enrollment Invitation.
- Template for enrollment confirmation: Choose Enrollment Confirmation.
- Expire after: This field is set when you configure the enrollment security mode and indicates when the enrollment expires. For more information about configuring enrollment security modes, see Configure enrollment security modes.
- Maximum Attempts: This field is set when you configure the enrollment security mode and indicates the maximum number of times the enrollment process occurs.
- Send invitation: Select On to send the invitation immediately. Select Off to add the invitation to the table on the Enrollment Invitations page, but not send it.
-
Click Save and Send if you enabled Send invitation. Otherwise, click Save. The invitation appears in the table on the Enrollment Invitation page.
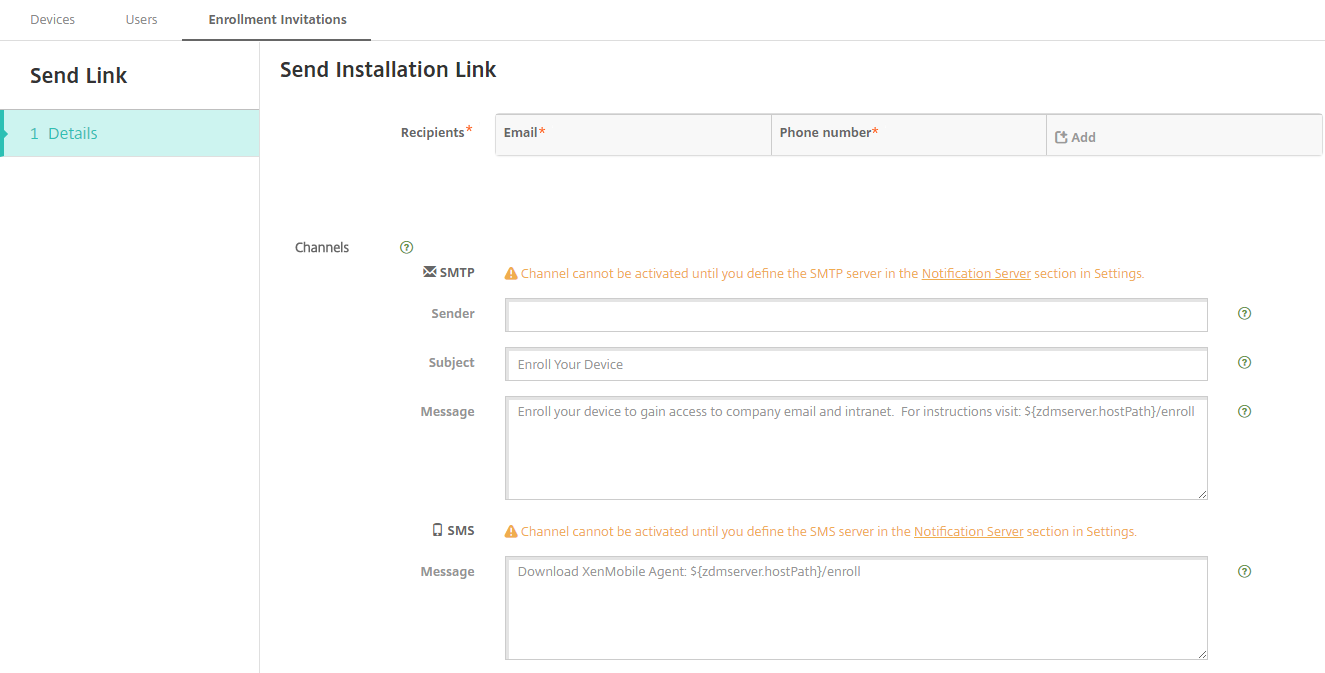
To send an installation link
Before you can send an enrollment installation link, you must configure channels (SMTP) on the notification server from the Settings page. For details, see Notifications
-
Configure these settings and then click Save.
-
Recipient: For each recipient that you want to add, click Add and then do the following:
- Email: Type the email address of the recipient. This field is required.
- Phone number: Type the phone number of the recipient. This field is required.
Note:
To delete a recipient, hover over the line with the listing and then click the trash icon on the right side. A confirmation dialog box appears. Click Delete to delete the listing or click Cancel to keep the listing.
To edit a recipient, hover over the line with the listing. Then, click the pen icon on the right side. Update the listing and then click Save to save the changed listing or Cancel to leave the listing unchanged.
- Channels: Select a channel to use for sending the enrollment installation link. You can send notifications over SMTP. These channels cannot be activated until you configure the server settings on the Settings page in Notification Server. For details, see Notifications.
-
SMTP: Configure these optional settings. If you do not type anything in these fields, the default values specified in the notification template configured for the platform you selected are used:
- Sender: Type an optional sender.
- Subject: Type an optional subject for the message. For example, “Enroll your device.”
- Message: Type an optional message to be sent to the recipient. For example, “Enroll your device to gain access to organizational apps and email.”
-
Recipient: For each recipient that you want to add, click Add and then do the following:
-
Click Send.
Note:
If your environment uses sAMAccountName: After users receive the invitation and click the link, they must edit the user name to complete the authentication. The user name appears in the form of
sAMAccountName@domainname.com. Users must remove the@domainname.comportion.
Enrollment security modes by platform
The following table displays security modes that you can use to enroll user devices. In the table, Yes indicates which device platforms support specific enrollment and management modes with different enrollment profiles.
| MDM enrollment security mode | MAM enrollment security mode on NetScaler Gateway | Management modes | Support different enrollment profiles | Android (legacy) | Android Enterprise | iOS (user enrollment mode) | iOS | macOS | Windows |
|---|---|---|---|---|---|---|---|---|---|
| Azure AD and Okta as identity providers through Citrix Cloud | Client certificate | MDM+MAM or MDM | Yes | Yes | Yes | Yes | Yes | No | No |
| User name + Password | LDAP, LDAP + client certificate, and client certificate only | MDM+MAM, MDM, or MAM (MAM-only mode doesn’t support client certificates on NetScaler Gateway) | Yes | Yes | Yes | Yes | Yes | Yes | Yes |
| Invitation URL | Client certificate | MDM+MAM or MDM | Yes | Yes | Yes | No | Yes | No | No |
| Invitation URL + PIN | Client certificate | MDM+MAM or MDM | Yes | Yes | Yes | No | Yes | No | No |
| Invitation URL + Password | LDAP, LDAP + client certificate, and client certificate only | MDM+MAM or MDM | Yes | Yes | Yes | No | Yes | No | No |
| Two-factor authentication (user name + password + PIN) | LDAP, LDAP + client certificate, and client certificate only | MDM+MAM or MDM | Yes | Yes | Yes | No | Yes | Yes | No |
| User name + PIN | Client certificate | MDM+MAM or MDM | Yes | Yes | Yes | No | Yes | Yes | No |
The following describes how the enrollment security modes behave on iOS, Android, and Android Enterprise devices:
-
User name + Password (default)
- Sends a user a single notification that has an enrollment URL. When the user clicks the URL, Citrix Secure Hub opens. The user then types a user name and password to enroll the device in Citrix Endpoint Management.
-
Invitation URL
- Sends a user a single notification that has an enrollment URL. When the user clicks the URL, Citrix Secure Hub opens. The Citrix Endpoint Management server name and the Yes, Enroll button appear. The user taps Yes, Enroll to enroll the device in Citrix Endpoint Management.
-
Invitation URL + PIN
- Sends a user the following emails:
- An email with an enrollment URL, which lets the user enroll the device in Citrix Endpoint Management through Citrix Secure Hub.
- An email with a one-time PIN that the user must type when enrolling the device, along with the user’s Active Directory (or local) password.
- With this mode, the user enrolls only by using the enrollment URL in the notification. If the user loses the notification invitation, the user can’t enroll. However, you can send another invitation.
- Sends a user the following emails:
-
Invitation URL + Password
- Sends a user a single notification that has an enrollment URL. When the user clicks the URL, Citrix Secure Hub opens. The Citrix Endpoint Management server name appears, along with a field that lets the user type a password.
-
Two Factor
- Sends a user a single notification that has an enrollment URL and a one-time PIN. When the user clicks the URL, Citrix Secure Hub opens. The Citrix Endpoint Management server name appears, along with two fields that let the user type a password and the PIN.
-
User name + PIN
- Sends a user the following emails:
- An email with an enrollment URL, which lets the user download and install Citrix Secure Hub. After Citrix Secure Hub opens, the user is prompted to type a user name and password to enroll the device in Citrix Endpoint Management.
- An email with a one-time PIN that the user must type when enrolling the device, along with the user’s Active Directory (or local) password.
- If the user loses the notification invitation, the user can’t enroll. However, you can send another invitation.
- Sends a user the following emails:
The following describes how the enrollment security modes behave on macOS devices:
-
User name + Password
- Sends a user a single notification that has an enrollment URL. When the user clicks the URL, the Safari browser opens. A sign-in page appears, prompting the user to type a user name and password to enroll the device in Citrix Endpoint Management.
-
Two Factor
- Sends a user a single notification that has an enrollment URL and a one-time PIN. When the user clicks the URL, the Safari browser opens. A sign-in page appears, displaying two fields that let the user type a password and the PIN.
-
User name + PIN
- Sends a user the following emails:
- An email with an enrollment URL. When the user clicks the URL, the Safari browser opens. A sign-in page appears, prompting the user to type a user name and password to enroll the device in Citrix Endpoint Management.
- An email with a one-time PIN that the user must type when enrolling the device, along with the user’s Active Directory (or local) password.
- If the user loses the notification invitation, the user can’t enroll. However, you can send another invitation.
- Sends a user the following emails:
You can’t send enrollment invitations to Windows devices. Windows users enroll directly through their devices. For information about enrolling Windows devices, see Windows devices.
Security actions
You do device and app security actions from the Manage > Devices page. Device actions include revoke, lock, unlock, and wipe. App security actions include app lock and app wipe.
-
Activation Lock Bypass: Removes the Activation Lock from supervised iOS devices before device activation. This command doesn’t require the personal Apple ID or password for a user.
-
App lock: Denies access to all apps on a device. On Android, after an app lock, users can’t sign in to Citrix Endpoint Management. On iOS, users can sign in, but they can’t access any apps.
-
App wipe: Removes the user account from Citrix Secure Hub and unenrolls the device. Users can’t reenroll until you use the App unwipe action.
-
ASM Deployment Program Activation Lock: Creates an Activation Lock bypass code for iOS devices enrolled in Apple School Manager.
-
Certificate renewal: For supported iOS, macOS, and Android devices, the Certificate Renewal security action starts certificate renewal. The next time that devices connect back to Citrix Endpoint Management, the Citrix Endpoint Management server issues new device certificates based on the new certificate authority.
-
Clear restrictions: On supervised iOS devices, this command allows Citrix Endpoint Management to clear the restrictions password and restrictions settings configured by the user.
-
Enable/disable Lost Mode: Puts a supervised iOS device in Lost Mode and sends the device a message, phone number, and a footnote to display. The second time that you send this command takes the device out of Lost Mode.
-
Enable tracking: On Android or iOS devices, this command allows Citrix Endpoint Management to poll the location of specific devices at a frequency you define. To view device coordinates and location on a map, go to Manage > Devices, select a device, and then click Edit. The device info is on the General tab under Security. Use Enable tracking to track the device continuously. Citrix Secure Hub reports the location periodically when the device is running.
-
Full wipe: Immediately erases all data and apps from a device, including from any memory cards. Wiped devices stay in the device list on the Manage > Devices page for auditing purposes. You can remove a wiped device from the device list.
-
For Android devices, this request can also include the option to wipe memory cards.
-
For Android Enterprise fully managed devices with a work profile (COPE devices), you can do a full wipe after a selective wipe removes the work profile.
-
For iOS and macOS devices, the wipe occurs immediately, even if the device is locked.
For iOS 11 devices and iPadOS 12 devices (minimum version): When you confirm the full wipe, you can choose to preserve the cellular data plan on the device.
For iOS 11.3 devices (minimum version): When you confirm the full wipe, you prevent iOS devices from doing proximity setup. When setting up a new iOS device, users can normally use an already configured iOS device to set up their own. You can block proximity setup on devices that are Citrix Endpoint Management managed and have been wiped.
For iOS 17 devices (minimum version): When you confirm the full wipe, the device automatically wipes all user data, connects to the specified Wi-Fi network, and re-enrolls itself back into the MDM server using the provided enrollment profile.
-
If the device user turns off the device before the memory card content is deleted, the user might still have access to device data.
-
You can cancel the wipe request until the request is sent to the device.
-
-
Locate: Locates a device and reports the device location, including a map, on the Manage > Devices page, under Device details > General. Locate is a one-time action. Use Locate to display the current device location at the time you do the action. To continuously track the device over a period, use Enable tracking.
- When applying this action to Android (except for Android Enterprise) devices or to Android Enterprise (corporate-owned or BYOD) devices, be aware of the following behavior:
- Locate requires the user to grant location permission during enrollment. The user can choose not to grant location permission. If the user doesn’t grant the permission during enrollment, Citrix Endpoint Management again requests location permission when sending the Locate command.
- When applying this feature to iOS or Android Enterprise devices, be aware of the following limitations:
- For Android Enterprise devices, this request fails unless the Location device policy has set the location mode for the device to High Accuracy or Battery Saving.
- For iOS devices, the command succeeds only if the devices are in MDM Lost Mode.
- When applying this action to Android (except for Android Enterprise) devices or to Android Enterprise (corporate-owned or BYOD) devices, be aware of the following behavior:
-
Lock: Remotely locks a device. A lock is useful if a device is stolen and must be locked. Citrix Endpoint Management then generates a PIN code and sets it in the device. To access the device, the user types the PIN code. Use Cancel Lock to remove the lock from the Citrix Endpoint Management console.
-
Lock and Reset Password: Remotely locks a device and resets the passcode.
- Not supported for devices that are:
- enrolled in Android Enterprise in work profile mode and
- running Android versions earlier than Android 7.0
- On devices enrolled in Android Enterprise in work profile mode and that are running Android 7.0 or greater:
- The passcode locks the work profile. The device is not locked.
- If a passcode isn’t sent, or the passcode sent doesn’t meet requirements and the work profile doesn’t have a passcode: The device is locked.
- If a passcode isn’t sent, or the passcode sent doesn’t meet requirements, but the work profile has a passcode: The work profile is locked but the device isn’t locked.
Note:
The reset password functionality is only supported for BYOD Samsumg devices and console admin should have
DEVICE_ACTION_CONTAINER_PASSWORD_RESETpermissions. - Not supported for devices that are:
-
Notify (Ring): Plays a sound on the devices.
Note:
This functionality is only supported for iOS devices.
-
Reboot: Restarts Windows 10 and Windows 11 devices. For Windows Tablet and PCs, a message about the pending reboot appears. The reboot occurs in five minutes.
-
Request/Stop AirPlay Mirroring: Starts and stops AirPlay mirroring on supervised iOS devices.
-
Restart/Shut Down: Immediately restarts or shuts down supervised devices.
Note:
This functionality is only supported for iOS devices.
-
Revoke: Prohibits a device from connecting to Citrix Endpoint Management.
-
Revoke/Authorize: Performs the same actions as a Selective Wipe. After revocation, you can reauthorize the device to reenroll it.
-
Ring: If the device is in Lost Mode, Ring plays a sound on a supervised iOS device. The sound plays until you removed the device from Lost Mode or the user disables the sound.
-
Rotate personal recovery key: If you’ve enabled the FileVault device policy, this action generates a new personal recovery key and replaces the old key with this new key. You can cancel this request while the request is still pending. To do so, click Cancel Rotate personal recovery key.
-
Selective wipe: Erases all corporate data and apps from a device, leaving personal data and apps in place. After a selective wipe, use the Authorize action to reauthorize the device so a user can reenroll it. Wiped devices stay in the device list on the Manage > Devices page for auditing purposes. You can remove a wiped device from the device list.
- Selectively wiping an Android device does not disconnect the device from Device Manager and the corporate network. To prevent the device from accessing Device Manager, you must also revoke the device certificates.
- Selectively wiping an Android device also revokes the device. You can reenroll the device only after reauthorizing it or deleting it from the console.
- For Android Enterprise fully managed devices with a work profile (COPE devices), you can do a full wipe after a selective wipe removes the work profile. Or, you can re-enroll the device with the same user name. Re-enrolling the device recreates the work profile.
- For iOS and macOS devices, this command removes any profile installed through MDM.
- A selective wipe on a Windows device also removes the contents of the profile folder for any currently signed on user. A selective wipe doesn’t remove any web clips that you deliver to users through a configuration. To remove web clips, users manually unenroll their devices. You can’t reenroll a selectively wiped device.
- Unlock: Clears the passcode sent to the device when it was locked. This command doesn’t open the device.
In Manage > Devices, the Device details page also lists device Security properties. Those properties include Strong ID, Lock Device, Activation Lock Bypass, and other information for the platform type. The Full Wipe of Device field includes the user PIN code. The user must enter that code after the device is wiped. If the user forgets the code, you can look it up here.
You can automate some actions. For more information, see Automated actions.
Remove a device from the Citrix Endpoint Management console
Important:
When you remove a device from the Citrix Endpoint Management console, managed apps and data stay on the device. To remove managed apps and data from the device, see “Delete a device” later in this article.
To remove a device from the Citrix Endpoint Management console, go to Manage > Devices, select a managed device, and then click Delete.

Selectively wipe a device
-
Go to Manage > Devices, select a managed device, and then click Secure.
-
In Security Actions, click Selective wipe.
-
For Android devices only, disconnect the device from the corporate network: After the device is wiped, in Security Actions, click Revoke.
To withdraw a selective wipe request before the wipe occurs, in Security Actions, click Cancel selective wipe.
Delete a device
This procedure removes managed apps and data from the device and deletes the device from the Devices list in the Citrix Endpoint Management console. You can use the Citrix Endpoint Management Public REST API to delete devices in bulk.
-
Go to Manage > Devices, select a managed device, and then click Secure.
-
Click Selective Wipe. When prompted, click Perform Selective Wipe.
-
To verify that the wipe command succeeded, refresh Manage > Devices. In the Mode column, the amber color for MDM and MAM indicates that the wipe command succeeded.

-
On Manage > Devices, select the device, and then click Delete. When prompted, click Delete again.
Lock, unlock, wipe, or unwipe apps
-
Go to Manage > Devices, select a managed device, and then click Secure.
-
In Security Actions, click the app action.
You can also use the Security Actions box to check the device status for a user whose account is disabled or deleted from Active Directory. The presence of the App Unlock or App Unwipe actions indicate apps that are locked or wiped.
App wipe and unwipe
-
Go to Manage > Devices. Select a device.
- App wipe
- Click Secure > App Wipe. A dialog box with the following message appears: Are you sure you want to app wipe this device? Click App Wipe.
- App unwipe
- Click Secure > App Unwipe. A dialog box with the following message appears: Are you sure you want to app unwipe this device? Click Device App Unwipe.
-
Re-enroll the device as the same user, in the same mode.
-
Launch an MDX app from My Apps page.
- Launch Citrix Secure Hub.
Get information about devices
The Citrix Endpoint Management database stores a list of mobile devices. To populate the Citrix Endpoint Management console with your devices, you can add the devices manually or you can import a list of devices from a file. For more information about device provisioning file formats, see Device provisioning file formats later in this article.
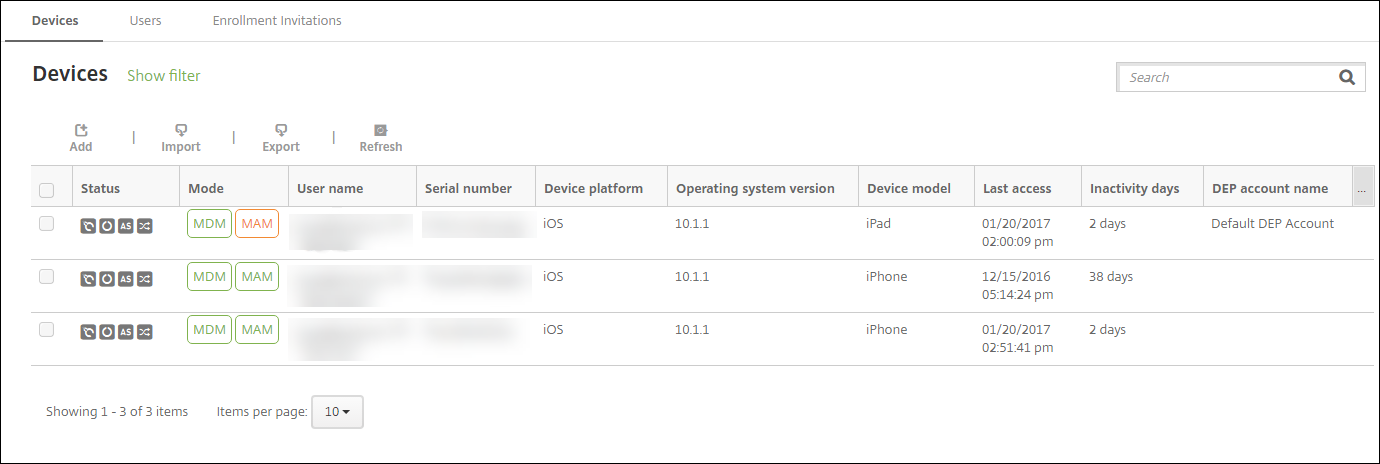
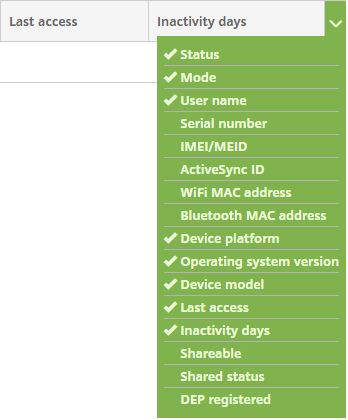
The Manage > Devices page in the Citrix Endpoint Management console lists each device and the following information:
- Status: Icons indicate whether the device is jailbroken, is managed, whether ActiveSync Gateway is available, and the deployment state.
- Mode: Indicates the device mode, such as MDM or MDM+MAM.
- Other information about the device, such as User name, Device platform, Last access, and Inactivity days. Those headings are the defaults shown.
To customize the Devices table, click the down arrow on the last heading. Then, select the additional headings you want to see in the table or clear any headings to remove them.
You can add devices manually, import devices from a device provisioning file, edit device details, customize the Active Directory user properties, do security actions, and send notifications to devices. You can also export all device table data to a .csv file to create a custom report. The server exports all device attributes. If you apply filters, Citrix Endpoint Management uses the filters when creating the .csv file.
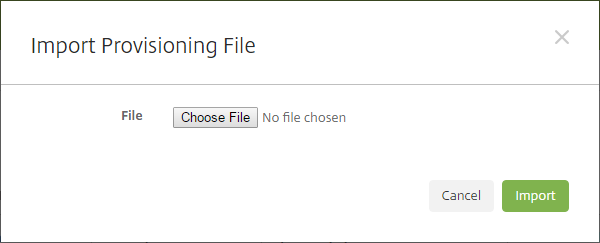
Import devices from a provisioning file
You can import a file supplied by mobile operators or device manufacturers, or you can create your own device provisioning file. For details, see Device provisioning file formats later in this article.
-
Go to Manage > Devices and then click Import. The Import Provisioning File dialog box appears.
-
Click Choose File and then navigate to the file you want to import.
-
Click Import. The Devices table lists the imported file.
-
To edit the device information, select it and then click Edit. For information about the Device details pages, see Get information about devices.
Deploy to a device
You can force one or several devices to connect with Citrix Endpoint Management. The selected devices immediately receive resources without waiting for the next scheduled check-in.
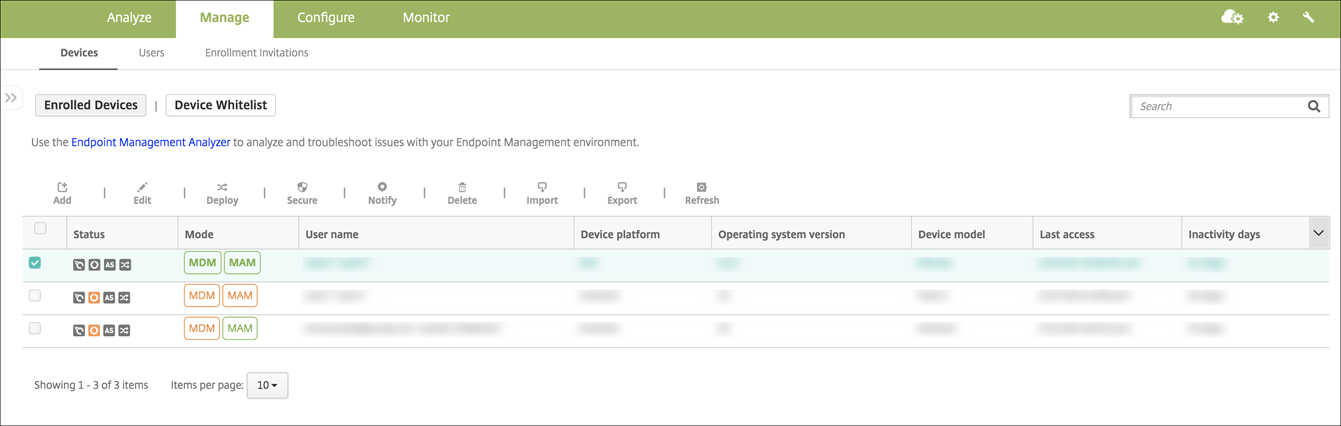
- Go to Manage > Devices, select an MDM or MDM+MAM managed device, and then click Deploy.
- In the dialog box, click Deploy to confirm your action.
Send a notification to devices
You can send notifications to devices from the Devices page. For more information about notifications, see Notifications.
-
On the Manage > Devices page, choose the device or devices to which you want to send a notification.
-
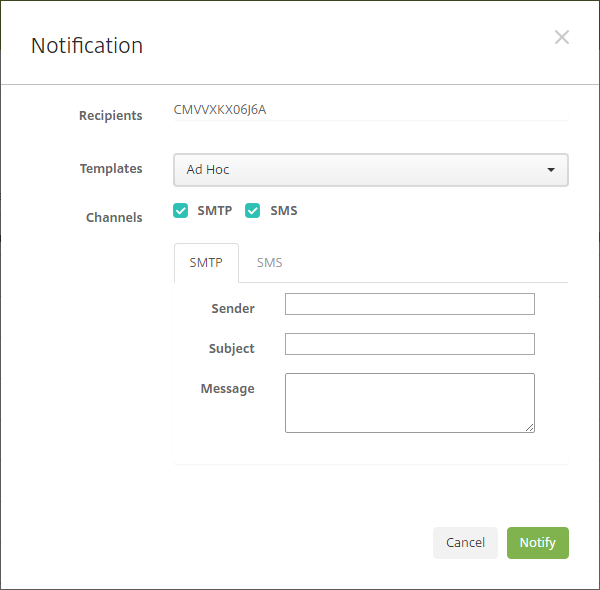
Click Notify. The Notification dialog box appears. The Recipients field lists all devices to receive the notification.
-
Configure these settings:
- Templates: Click the type of notification that you want to send in the drop-down list. For each template except for Ad Hoc, the Subject and Message fields show the text configured for the template that you choose.
- Channels: Select how to send the message. The default is SMTP. Click the tabs to see the message format for each channel.
- Sender: Enter an optional sender.
- Subject: Enter a subject for a Ad Hoc message.
- Message: Enter the message for an Ad Hoc message.
-
Click Notify.
Export the Devices table
-
Filter the Devices table according to what you want to appear in the export file.
-
Click the Export button above the Devices table. Citrix Endpoint Management extracts the information in the filtered Devices table and converts it to a .csv file.
-
When prompted, open or save the .csv file.
Tag user devices manually
You can manually tag a device in Citrix Endpoint Management in the following ways:
- During the invitation-based enrollment process.
- During the Self-Help Portal enrollment process.
- By adding device ownership as a device property
You have the option of tagging the device as either corporate- or employee-owned. When using the Self-Help Portal to self-enroll a device, you can tag the device as corporate- or employee-owned. You can also tag a device manually, as follows.
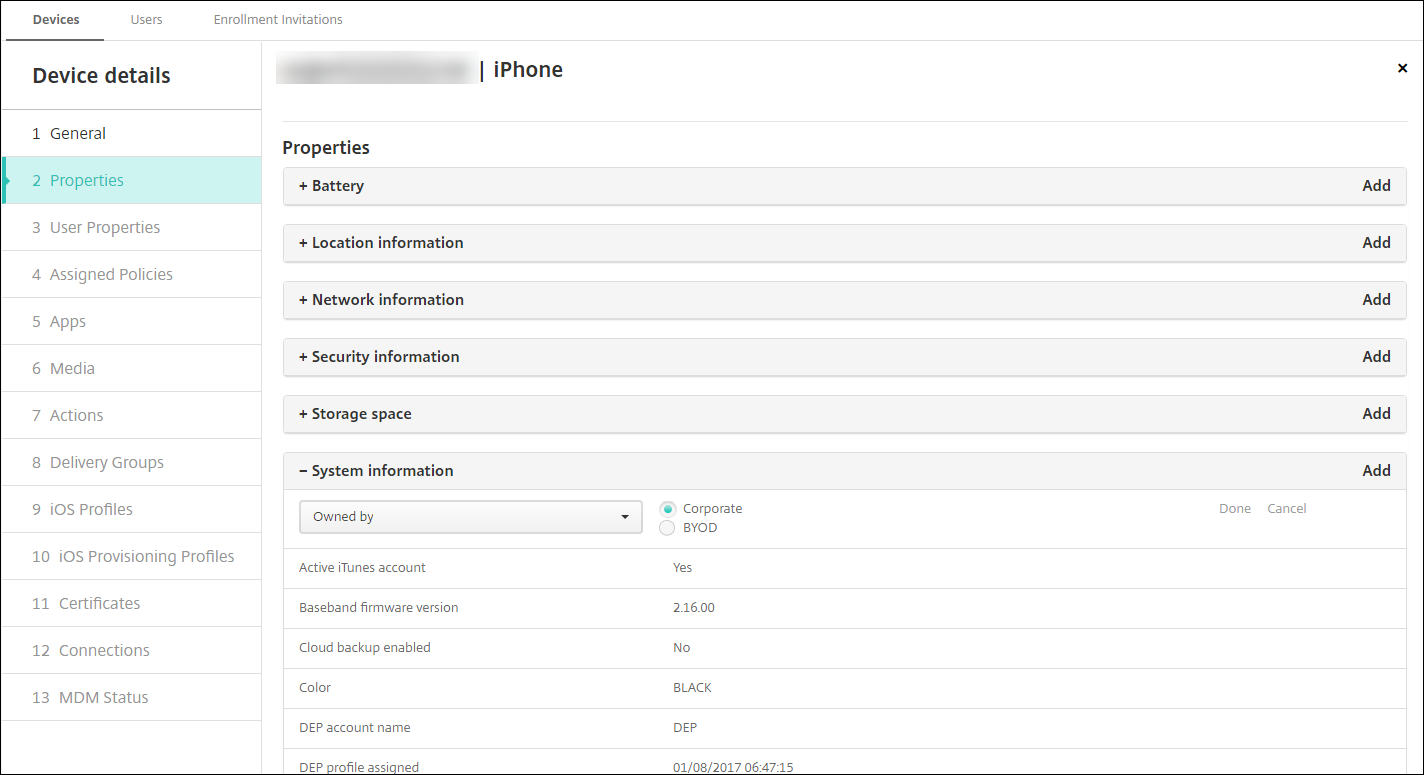
- Add a property to the device from the Devices tab in the Citrix Endpoint Management console.
-
Add the property named Owned by and choose either Corporate or BYOD (employee-owned).
Customize Active Directory user attributes
You can customize certain Active Directory user attributes to define which attributes Citrix Endpoint Management can access to create a user account.
To view the list of attributes, add the optional.user.identity.attributes server property as a custom key in Settings > Server Properties. In the Values field, you can remove and later restore the optional Active Directory user attributes that Citrix Endpoint Management provides by default. For more information, see Server properties.
After you edit the list of default values and save the changes, you can view the updated Active Directory user attributes in Manage > Devices > User properties. Citrix Endpoint Management updates the console after the user signs in to the device or during the next scheduled device check-in. If you make a spelling error or add a value that’s not supported, Citrix Endpoint Management ignores your changes.
Removing the optional Active Directory user attributes can affect the following functionality:
- Provisioning of the user account: If you remove the first and last name values, Citrix Endpoint Management can’t provision the user account for ShareFile and Salesforce.
- Enrollment invitations: If you remove the user’s email or mobile phone details, the user can’t receive an enrollment invitation.
- Device notification actions: If you remove the user’s email details, the user can’t receive the notifications through SMTP.
- Single sign-on to Citrix Secure Mail: If you remove the display name value, the user can’t sign in to Citrix Secure Mail using single sign-on.
- User property and deployment rules: If you remove any of the optional attributes that you use to configure the user property and deployment rules, you can affect existing configurations.
- Actions: If you remove any of the optional attributes that you use to set an automated action in Configure > Actions, you can affect existing configurations.
- Custom reports: If you remove any of the optional attributes that you use in custom reports, you can affect existing configurations.
Search for devices
For fast searching, the default search scope includes the following device properties:
- Serial Number
- IMEI
- Wi-Fi MAC address
- Bluetooth MAC address
- Active Sync ID
- User Name
You can configure the search scope through a server property include.device.properties.during.search, which defaults to false. To include all device properties in a device search, go to Settings > Server Properties and change the setting to true.
Device provisioning file formats
Many mobile operators or device manufacturers provide lists of authorized mobile devices. You can use these lists to avoid having to enter a long list of mobile devices manually. Citrix Endpoint Management supports an import file format that is common to these supported device types: Android, iOS, and Windows.
A provisioning file that you create manually must be in the following format:
SerialNumber;IMEI;OperatingSystemFamily;propertyName1;propertyValue1;propertyName2;propertyValue2; ... propertyNameN;propertyValueN
Keep in mind the following:
- For valid values for each property, see the PDF Device property names and values
- Use the UTF-8 character set.
-
Use a semi-colon (;) to separate the fields within the provisioning file. If part of a field has a semi-colon, escape it with a backslash character (\).
For example, for this property:
propertyV;test;1;2Escape it as follows:
propertyV\;test\;1\;2 - The serial number is required for iOS devices because the serial number is the iOS device identifier.
- For other device platforms, you must include either the serial number or the IMEI.
- Valid values for OperatingSystemFamily are WINDOWS, ANDROID, or iOS.
Example of a device provisioning file:
`1050BF3F517301081610065510590391;15244201625379901;WINDOWS;propertyN;propertyV\;test\;1\;2;prop 2
2050BF3F517301081610065510590392;25244201625379902;ANDROID;propertyN;propertyV$*&&ééétest
3050BF3F517301081610065510590393;35244201625379903;iOS;test;
4050BF3F517301081610065510590393;;iOS;test;
;55244201625379903;ANDROID;test.testé;value;`
Each line in the file describes a device. The first entry in that sample means the following:
- SerialNumber:
1050BF3F517301081610065510590391 - IMEI:
15244201625379901 - OperatingSystemFamily:
WINDOWS - ProertyName:
propertyN - PropertyValue:
propertyV\;test\;1\;2;prop 2
In this article
- Device management workflows
- Enrollment invitations
- Security actions
- Get information about devices
- Import devices from a provisioning file
- Deploy to a device
- Send a notification to devices
- Export the Devices table
- Tag user devices manually
- Customize Active Directory user attributes
- Search for devices
- Device provisioning file formats