Client internal IP address pools - Preview
The client internal IP address pools contain IP address ranges that are assigned to the logged-in users. Each user and their device receive a unique internal IP address, which is required for identification and session management within Secure Private Access. This internal client IP address is only accessible within the customer’s resource location.
Using this internal IP addresses, devices in the customer resource location can tunnel traffic directly to a specific logged-in user’s device, enabling server-to-client connections. The client internal IP address also supports source IP stickiness for existing client-to-server tunnel traffic, ensuring stable and consistent connections.
Note:
Client internal IP address pools feature is in preview. To get this feature enabled, contact Citrix® Support.
Use cases of client internal IP address pools
-
Enable server-to-client connections: Certain tasks such as pushing configurations, providing remote assistance, or installing software require servers to initiate connections to client devices. Client internal IP address pools make this possible by assigning a defined range of IP addresses used to identify client devices. These internal IP pools are allocated based on user context and location. For example, a specific IP address range can be dedicated to a user group like the HR team.
To enable server-to-client communication, you must create a server-to-client app and specify the client device’s port and protocol details, along with the back-end IP address range that is used to reach the client. For details, see Server-to-client app configuration.
-
Enable client internal IP address stickiness: To maintain consistent connections, some applications require a continuous session with the same client. For enabling client IP address persistence, see Client IP address stickiness.
Important:
To use the source IP address as the internal IP address or the server-initiated connection functionality, ensure the following:
- The switch or the router connected to the Connector Appliance’s subnet supports Gratuitous ARP.
- The Port security and Dynamic ARP Inspection (DAI) configuration does not affect the source IP address or server-initiated connection functionality.
IP address pool limitations
Following are some of the limitations of the IP address pool:
- All Connector Appliances in a resource location must reside within the same IP subnet.
- The internal IP address pools must consist of IP addresses from the Connector Appliance subnet in the same resource location.
- The IP addresses within the internal IP address pools must not overlap with any used IP addresses of the Connector Appliances or other devices within the same subnet.
- If the IP addresses in the pool are exhausted, IP addresses are not assigned to the users and hence server-to-client connections and client internal IP stickiness features cannot be used.
- A maximum of 3 different IP addresses can be assigned to a user, allowing logins from up to 3 different devices. If the same user logs in from a fourth device, no IP address is assigned, preventing the use of server-to-client initiated connections and client internal IP stickiness.
- The assigned internal IP address is sticky and remains the same for daily logins and logouts on the same device. However, if a user is inactive for 15 consecutive days, their sticky internal IP address is released and reassigned to a different user.
Create an intranet IP address pool
-
Navigate to Settings > IP Pools and then click Create IP Pool.
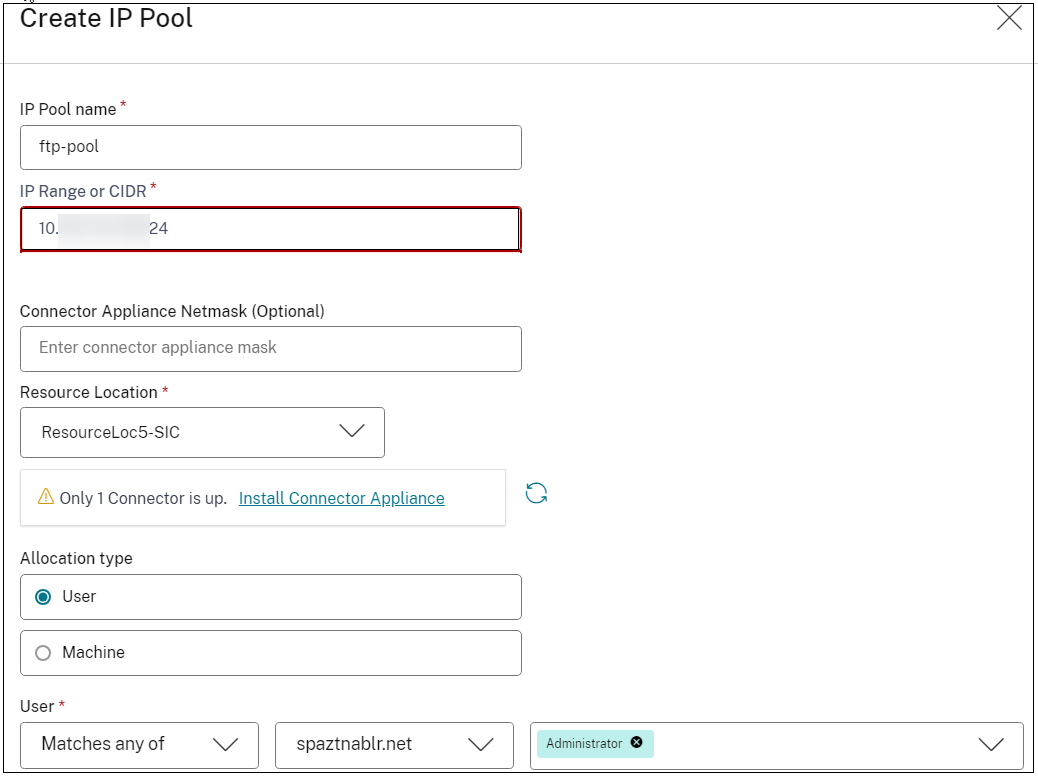
- IP Pool name: Enter a name for the IP pool.
- IP Range or CIDR: Enter the range of IP addresses reserved for clients. One of these IP addresses is assigned to the client machines.
- Connector Appliance Netmask: (Optional). In case the Connector Appliance network subnet is different from the Internal IP address subnet, the Connector appliance netmask must be entered.
- Resource Location: Select the resource location where the back-end server is located. Ensure that at least one Connector Appliance is up.
- Allocation type: Select User and select the condition, domain, and the user or user groups to which this pool is applicable.
- Click Create.
The IP address pool that you created is listed in the IP Pools page.
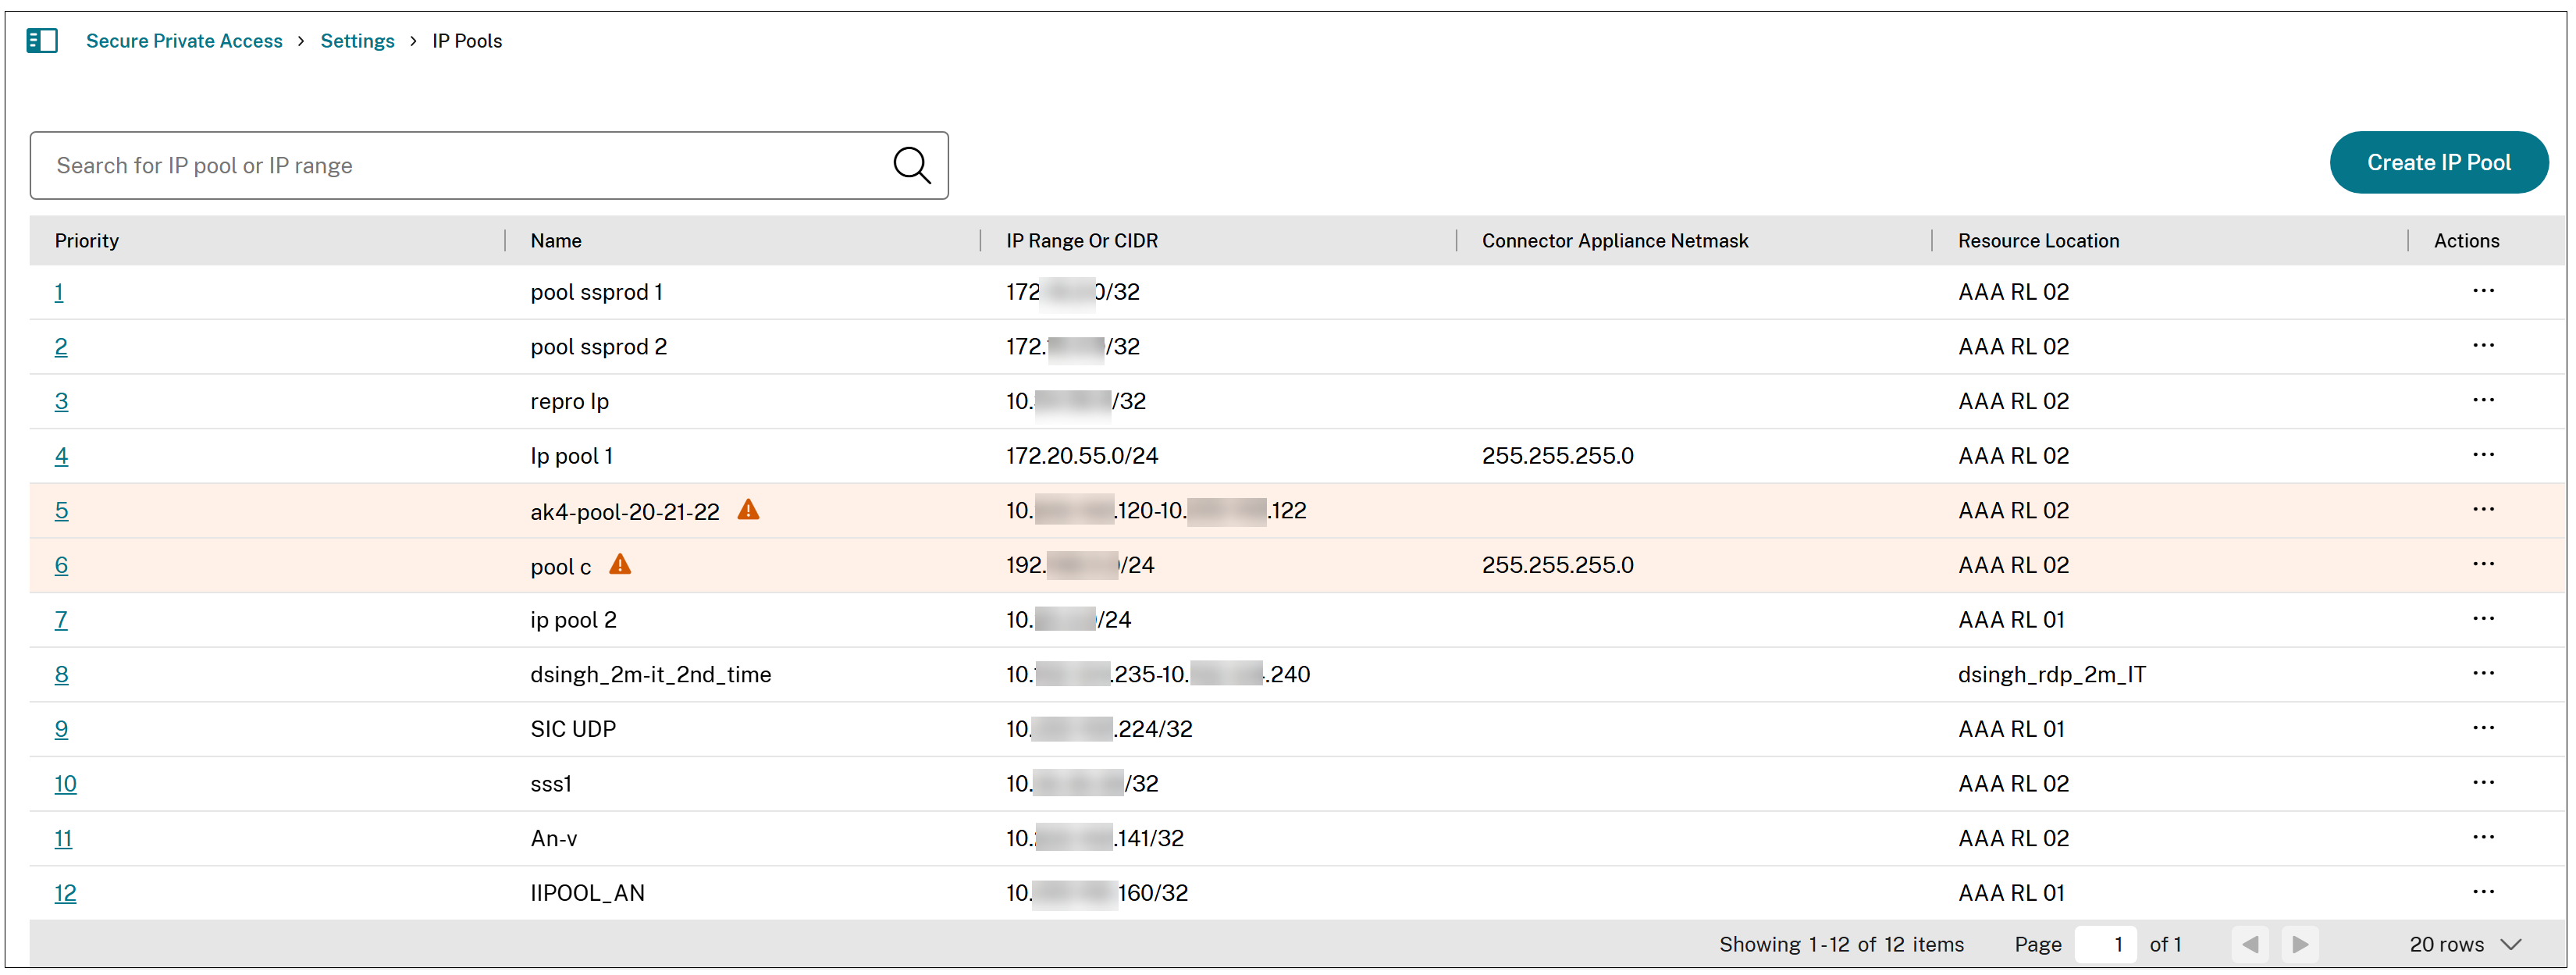
Once the client login is successful, an intranet IP address is assigned to the user from the client internal IP address pool.
As shown in the preceding image, administrators can use the prioritization mechanism to control the priority of the pool. Administrators can define explicit priority levels for each IP pool. The Secure Private Access service allocates IP addresses from highest to lowest priority (top to bottom), ensuring predictable assignment and operational control.
Note:
The priority with a lower value has the highest preference.
Delete an IP address pool
IP address pools can be immediately deleted or over time by using one of the following options.
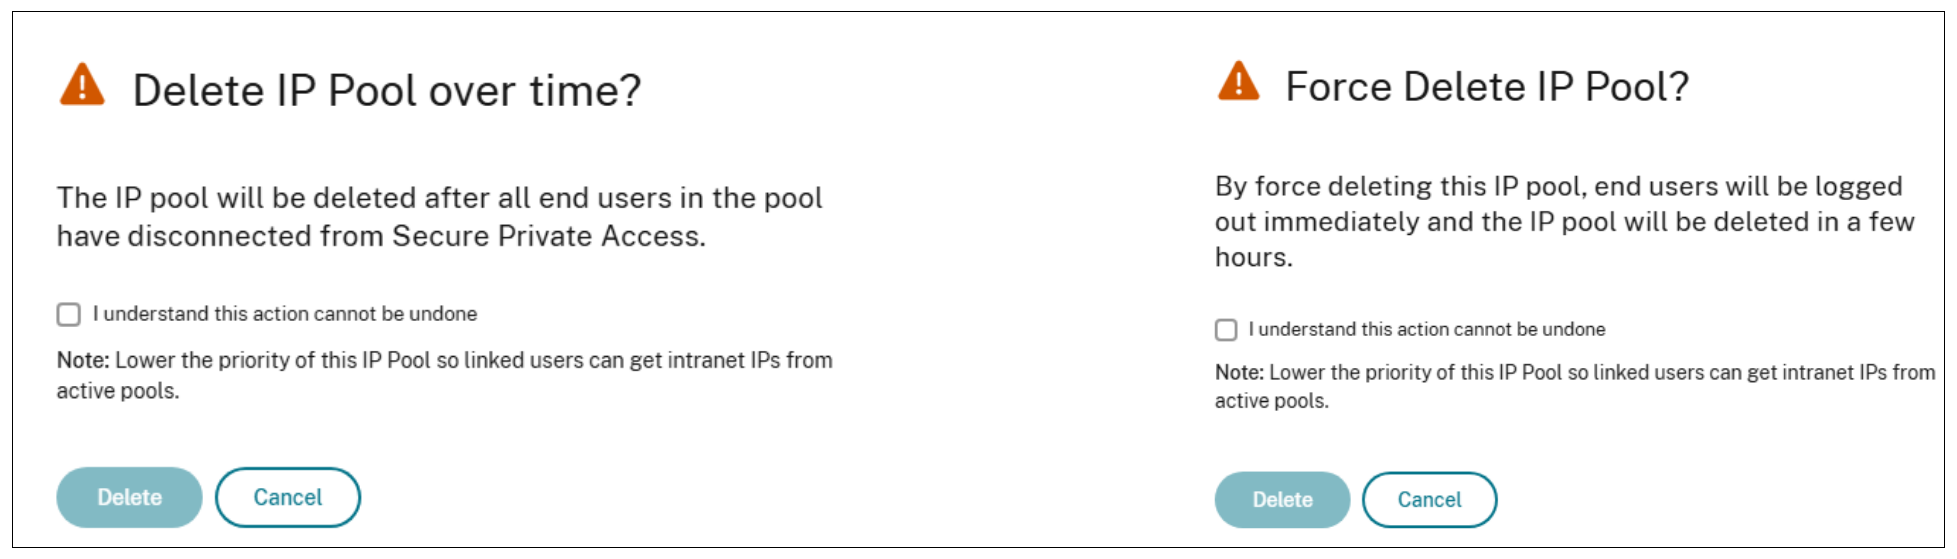
- Delete IP Pool by force: Stops allocating IP addresses to new users and releases unused IP addresses immediately. Active user sessions using the deleted IP addresses might be terminated, resulting in abrupt closures and forced logouts. Users with terminated sessions are allocated new IP addresses only after a different IP address pool is created.
- Delete IP Pool over time: Stops allocating IP addresses to new users and releasing unused IP addresses immediately. The system waits for the active sessions to log out or expire before fully deleting the pool. Users with terminated sessions are allocated new IP addresses only after a different IP address pool is created.
Note:
We recommend that you schedule a maintenance window and notify users to log out and then initiate deletion of the IP pool over time. If most IP addresses are freed up after the scheduled time, you can force delete the remaining in-use IP addresses. However, we recommend that you do not force delete large IP address pools.
Perform the following steps to delete an IP pool:
-
Navigate to Settings > IP Pools.
The list of IP address pools and their details are displayed.
-
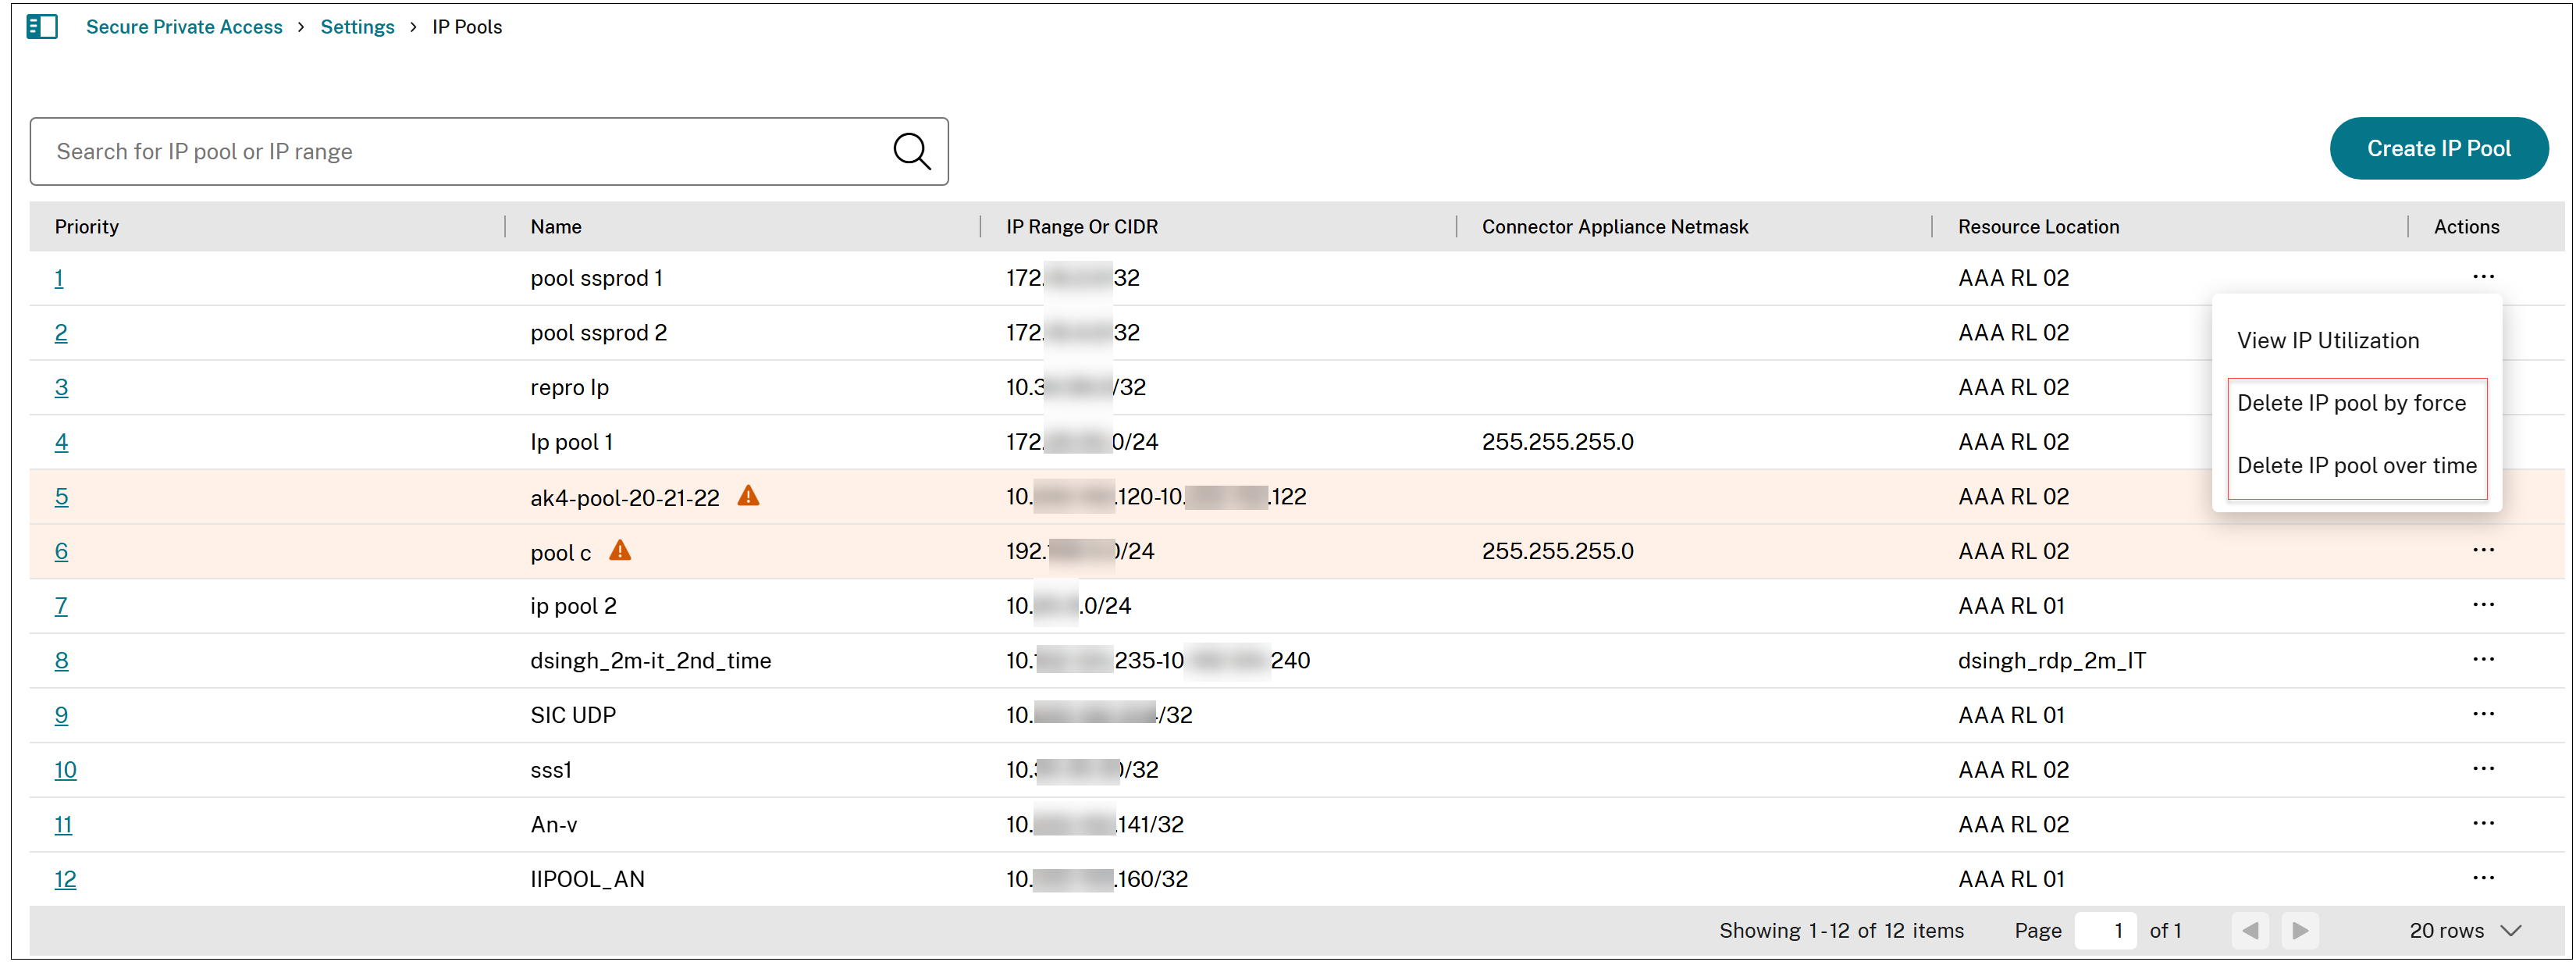
Click the ellipsis (…) next to the address pool that you want to delete, then select either Delete IP pool by force or Delete IP pool over time.
Note:
When a pool is deleted or scheduled for deletion, the administrator must lower its priority. The priority for this pool must be lower than the other active pools to ensure that Secure Private Access stops allocating new IP addresses from that pool. IP address assignment automatically falls back to the higher priority pools.
View the IP address utilization data
You can monitor the IP address utilization data from the IP Pool Utilization page. This page provides an overview of the status of the IP addresses.
- A list of users and the IP addresses allocated to these users.
- The percentage of available IP addresses that are already allocated and the total number of IP addresses available for allocation.
Administrators can use this data to monitor IP address consumption and ensure that enough IP addresses are available for the users.
Perform the following steps to view the IP address utilization details:
-
Navigate to Settings > IP Pools.
The list of IP address pools along with their details are displayed in a tabular format.
-
Click the ellipsis (…) next to the address pool and then click View IP Utilization.