HDX™ Screen Sharing
Overview
Citrix VDA for macOS has the (HDX Screen Sharing) capability so you can share the screen of your macOS desktop to other session users (could be Windows or Linux VDA users on their respective virtual desktops) by generate secure screen sharing code & pass to others, so he/she could assist the session live; alternatively, Citrix VDA for macOS also allow you to assist/access others screen once you had acquired the code been generated in similar process; keyboard and mouse control is also part of the HDX Screen Sharing capabilities.
System requirements
- Install Qt 5 framework.
To align the unified user experience crossing all VDA regarding HDX Screen Sharing, you need install Qt framework, the minimal compatible version is Qt 5 (rev. 5.15.13 or later) ; install Qt 5 can be performed using, for example, homebrew by run following command:
brew install qt@5
- There must be network connectivity between the VDA hosting the session and the machines connecting to the shared sessions. Network port requirements are based on ICA ports in use (TCP/UDP 1494 or 2598) and the Screen sharing policy configuration (TCP 52525 to 52625 by default).
Configuration
-
Enable HDX Screen Sharing
HDX screen sharing feature is disabled by default for security & privacy reasons. To enable it, complete the following settings:
-
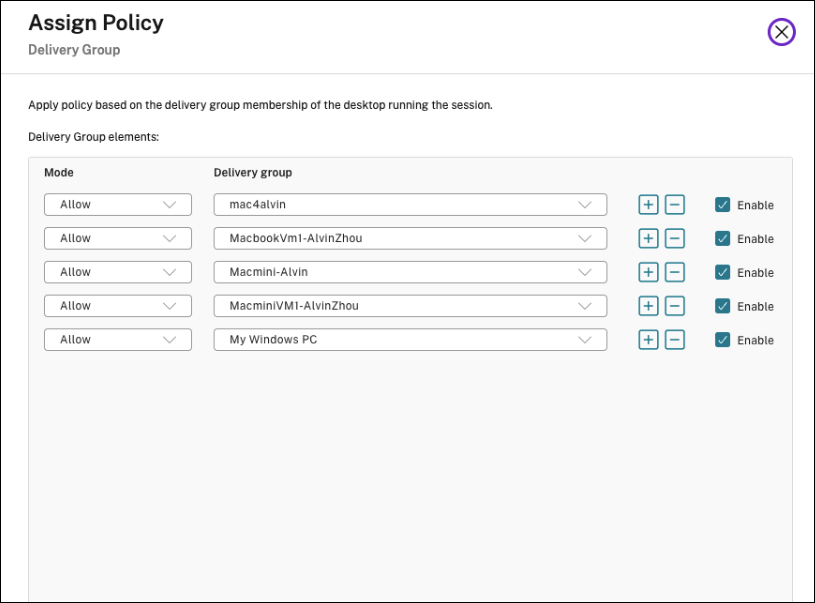
Enable the “Screen Sharing” policy in DaaS Console or CVAD Web Studio, the policy shall be configured for both “sharee” and “sharer” for sessions involved as below picture indicated.
-
Allow TCP ports 52525–52625 inbound/outbound in your firewall. Refer Screen Sharing for more details.
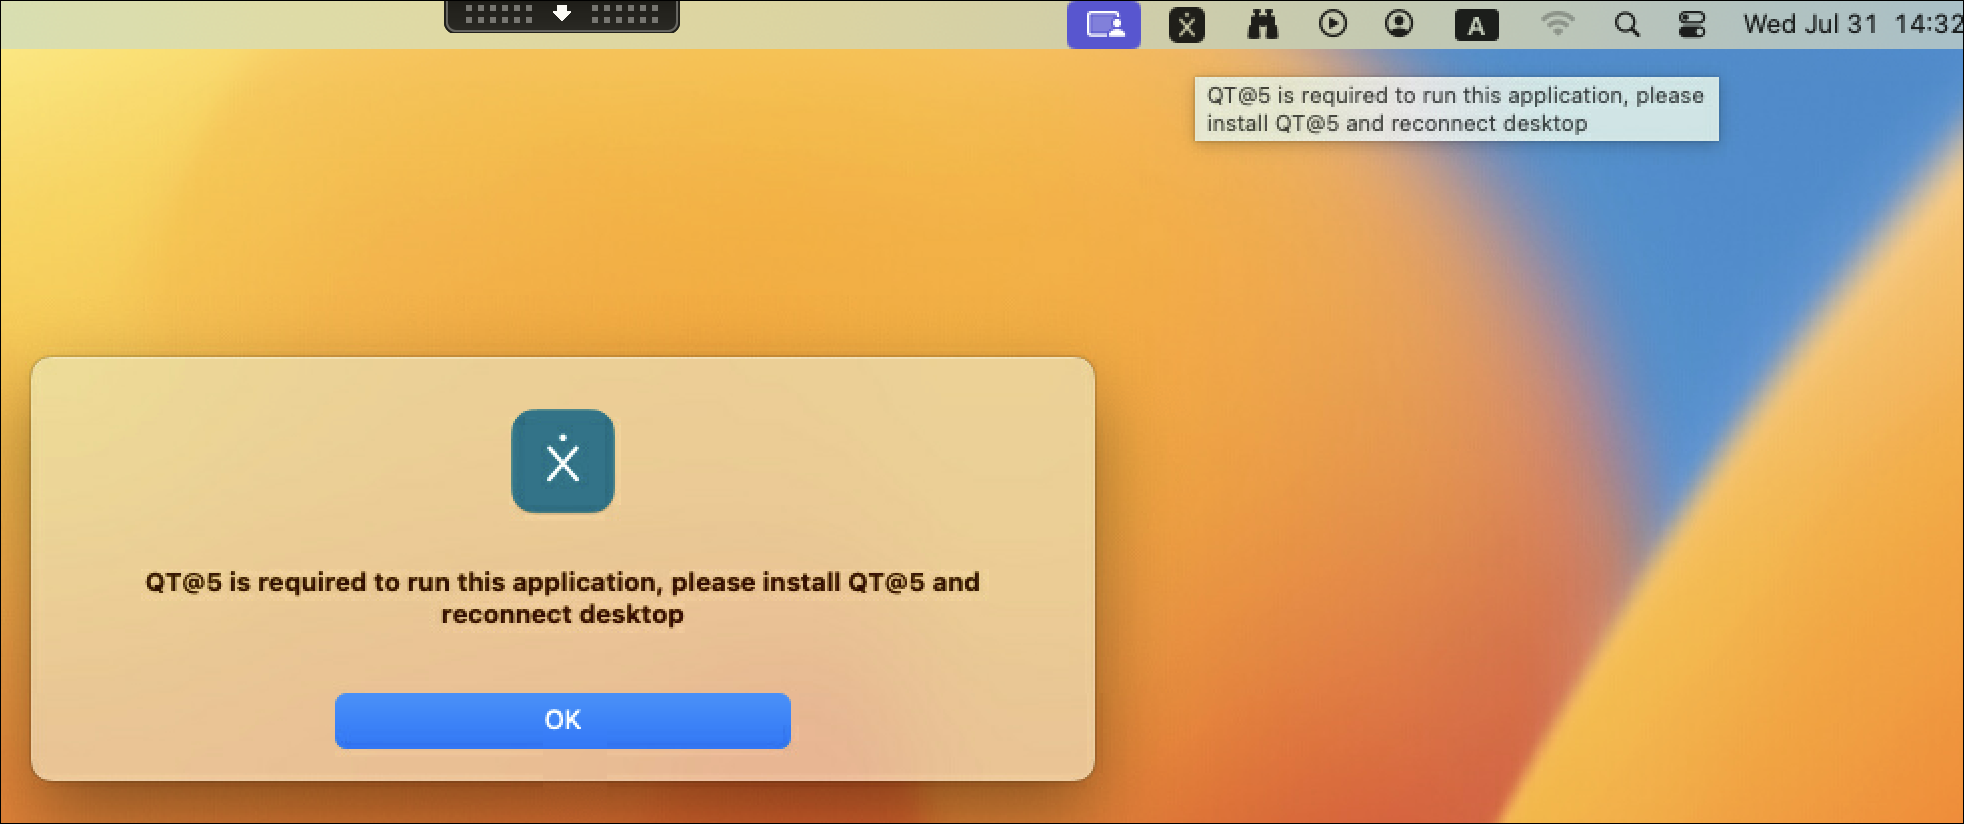
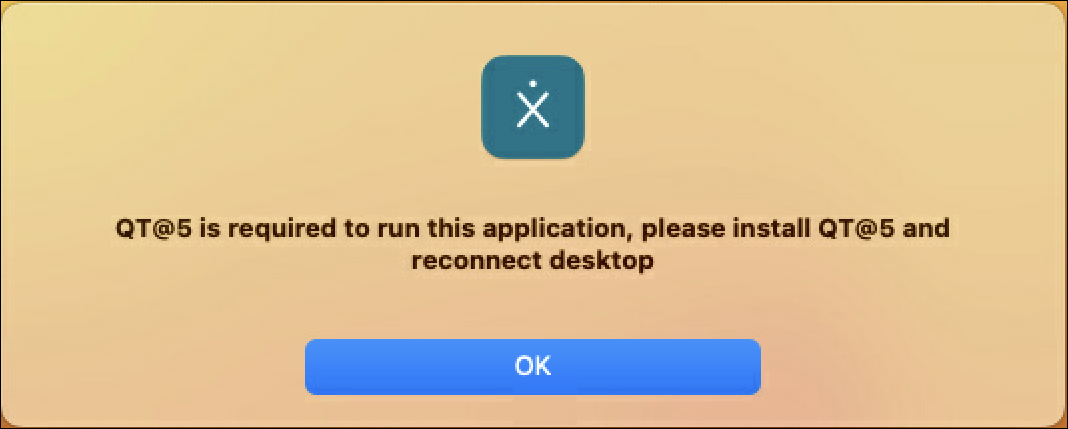
When you enabled HDX Screen Sharing without install correctly Qt 5, when click the Screen Sharing icon in status as indicated.
The following example walks you through the procedure of sharing a screen and viewing someone else’s screen.
-
-
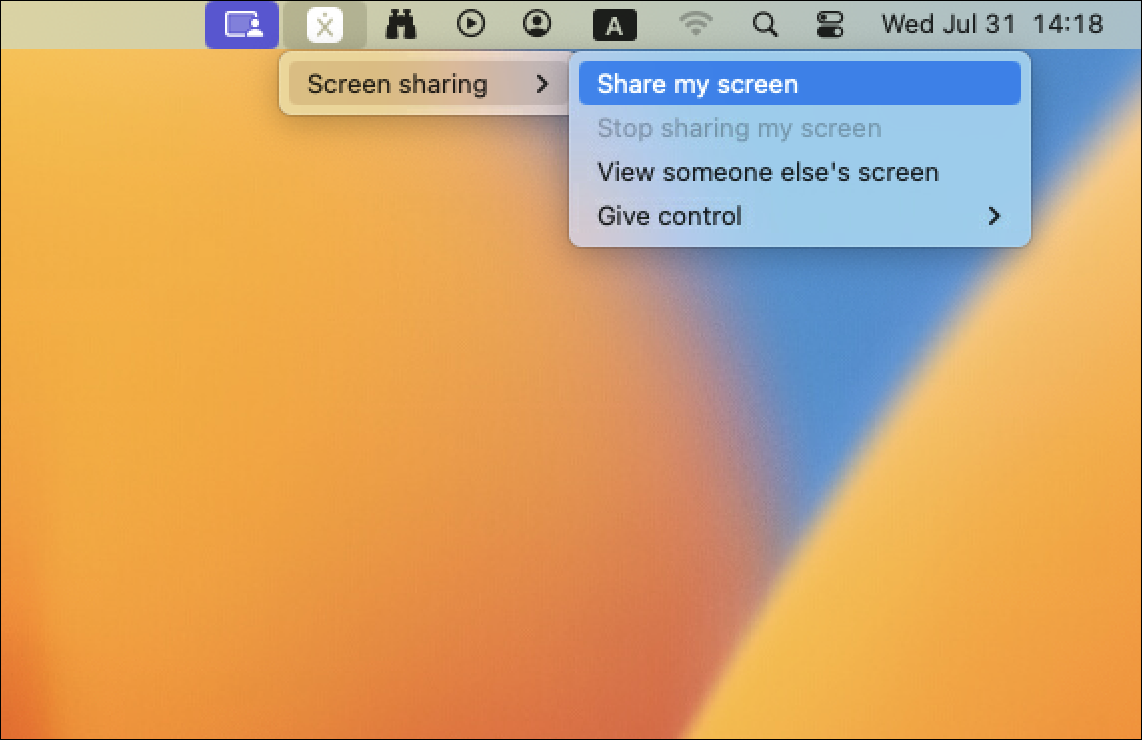
To share a screen.
-
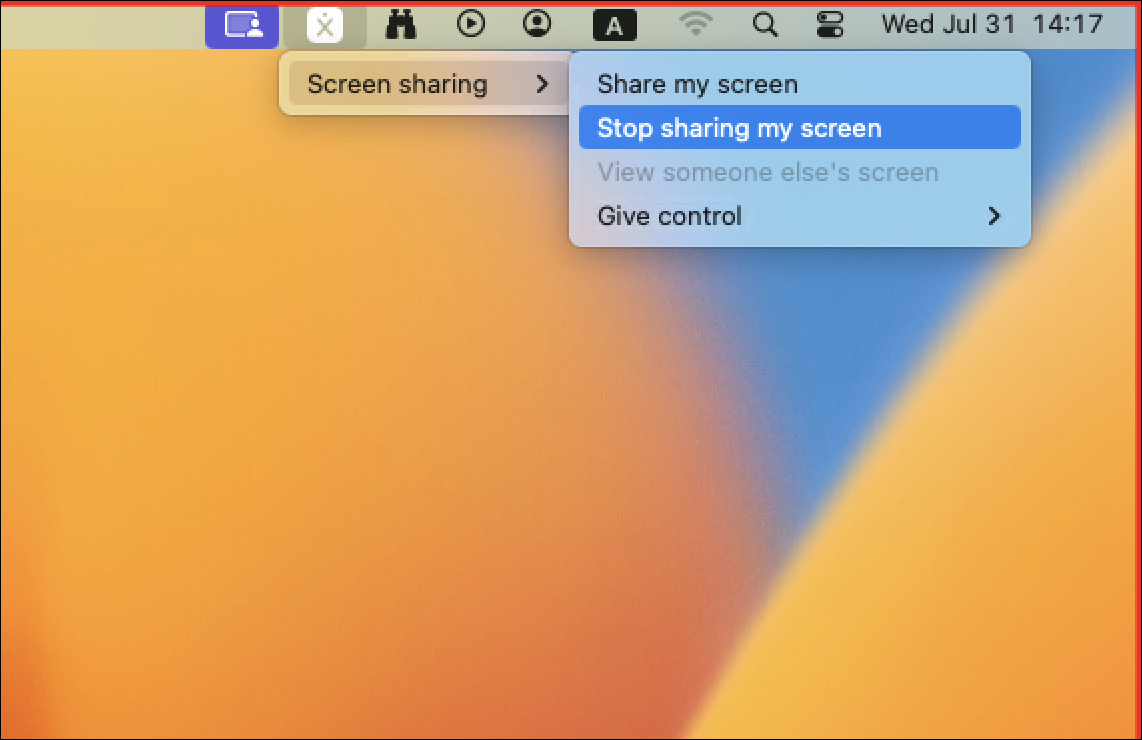
In the status bar of your virtual desktop, click the following system tray icon and select Screen sharing > Share my screen.
-
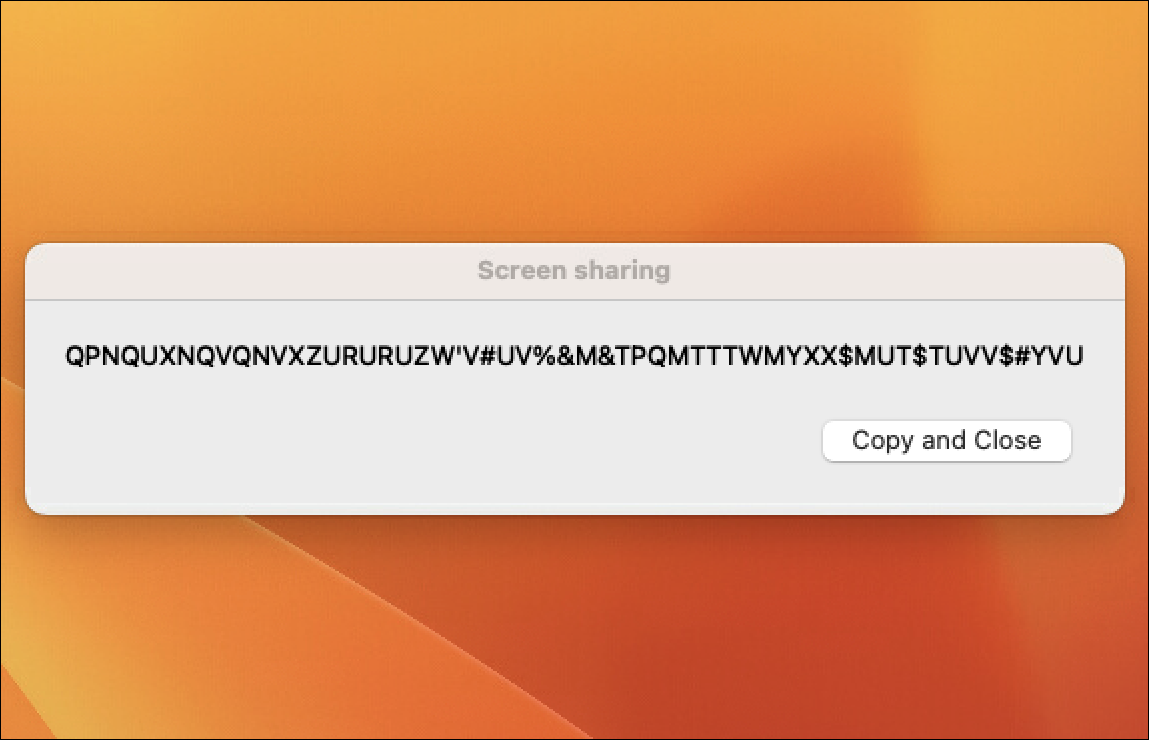
Click Copy and Close.
The current screen sharing code persists until you stop and restart sharing your screen.
Note:
While you are sharing your screen, there is a red border around it, indicating that sharing is in progress.
-
Share the copied code with session users on other virtual desktops that you want to share your screen with.
-
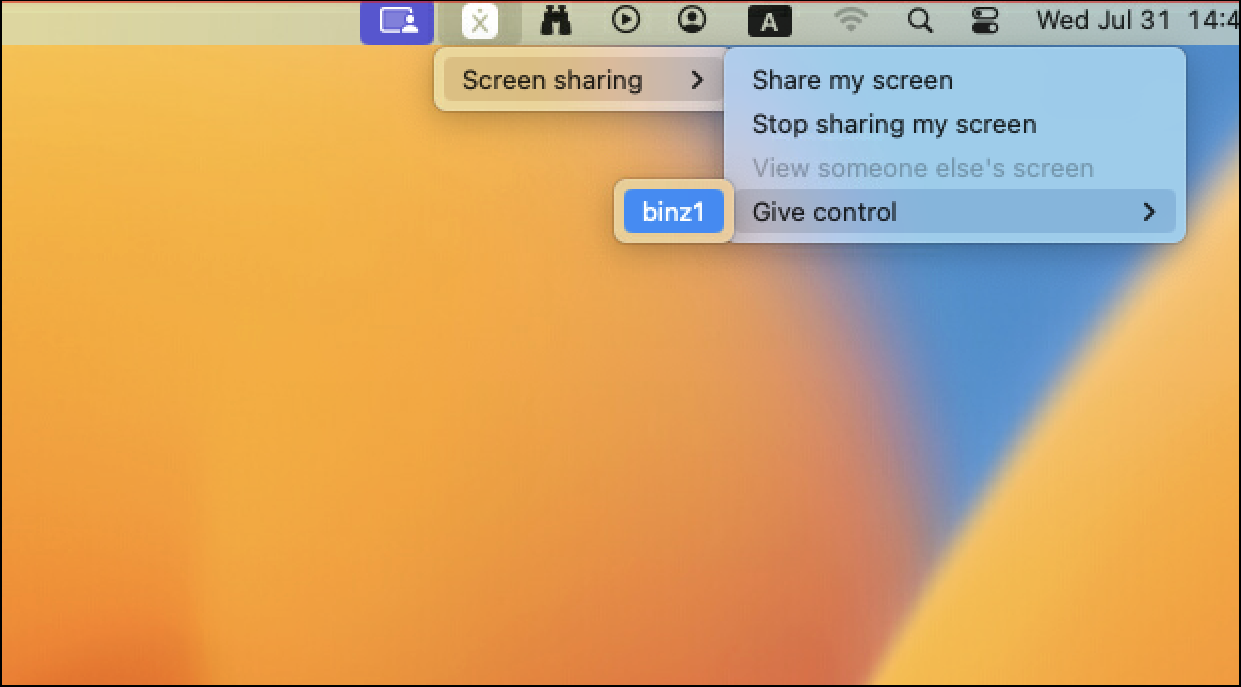
To let a viewer control your screen, select Give control and then the viewer’s name. To stop giving control, clear the viewer’s name.
-
To stop sharing your screen, select Stop sharing my screen.
-
-
To view someone else’s screen.
-
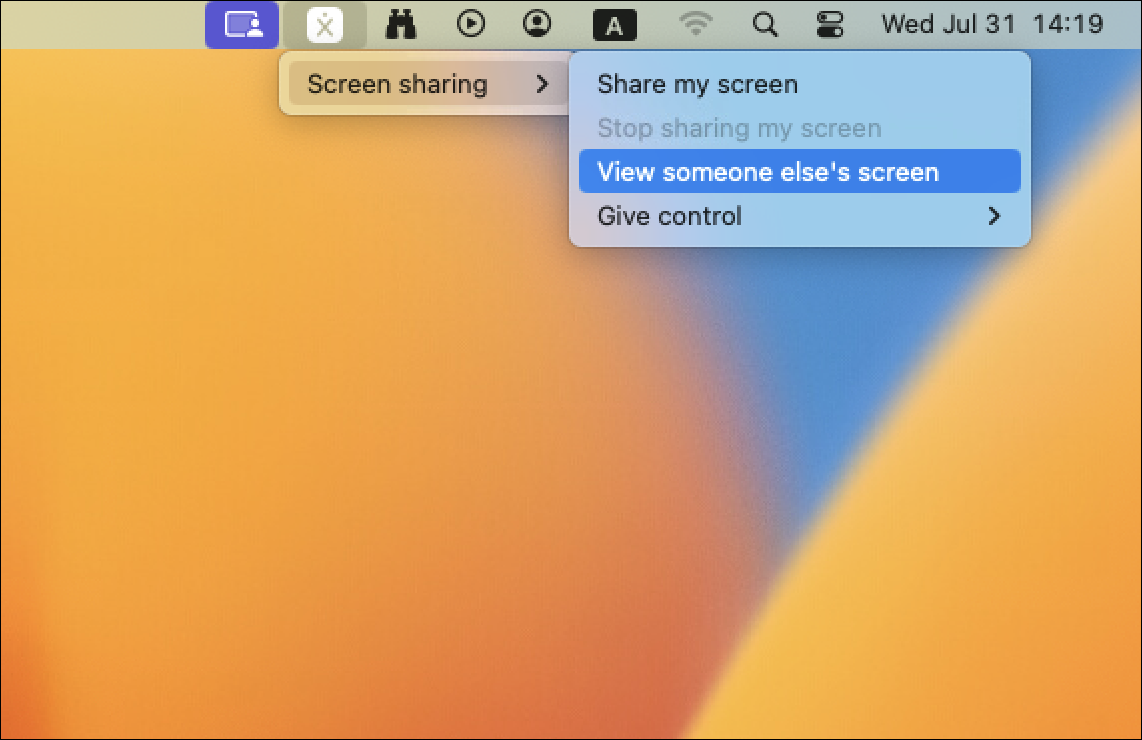
In the status bar of your virtual desktop, click the screen sharing icon and select View someone else’s screen.
-
Enter the connection code of the screen that you want to view and then click Connect.

-
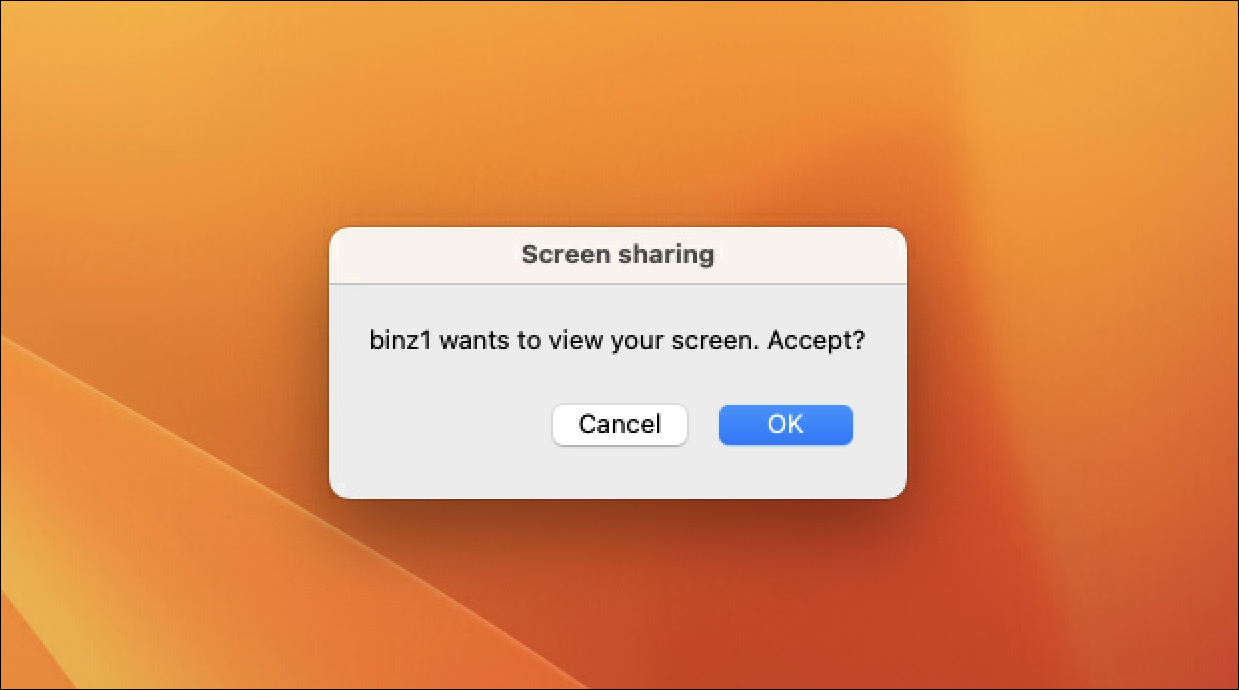
Wait for the screen sharer to accept your request. For example:
Note:
On the sharer side, the MacOS system issues a notification of your request.
If the sharer does not accept your request within 30 seconds, your request expires and a prompt appears.
-
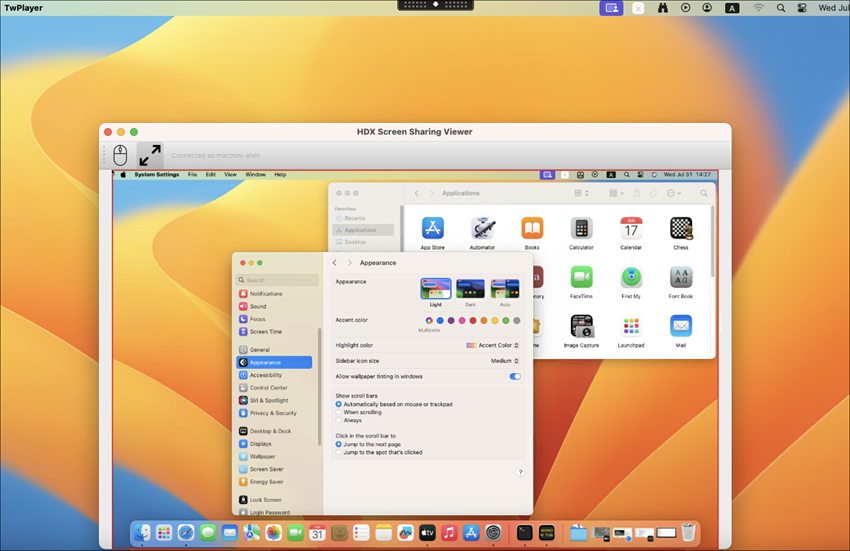
After the screen sharer accepts your request by clicking OK, the shared screen appears in your Desktop Viewer. You are connected as a viewer with an automatically assigned user name.
-
To request control over the shared screen, click the mouse icon in the upper left corner. Click the mouse icon again to release control over the shared screen.

Note:
If the sharer does not accept your request within 30 seconds, your request expires.
Only one viewer is allowed to control a shared screen at a time.
-
To disable display scaling or scale to the window size, click the icon next to the mouse icon.

-
Considerations
The screen sharing feature does not support the H.265 video codec.
Users of desktop sessions can share their session screens with up to 10 viewers by default. The maximum number of viewers is configurable through ctxreg update -k "HKLM\System\CurrentControlSet\Control\Citrix\Thinwire" -v "ScreenSharingViewerMaxNum" -d <hex_value>.
When the maximum number is reached, a prompt appears when users try to accept extra connection requests.
Note:
The ScreenSharing Icon is shown as a menubar icon on the top right, the system would hide the last icon if there’s not enough space on the menu bar when resizing the cwa viewer to a small one. To reveal the icon, it is recommended to resize the viewer to maximum and move the ScreenSharing icon to the right most by holding “Command” and then drag the icon to the right most, thus the ScreenSharing icon would be the last icon to be hidden if resolution decreased.
The viewer needs to ensure that the Citrix Graphics Status Indicator is enabled in macOS System Settings -> Privacy & Security -> Local Network.