Prepare in On-Premises CVAD
Before proceeding, please make sure your CVAD product is revision CR2407 or later, and key components such as Web Studio are all installed correctly.
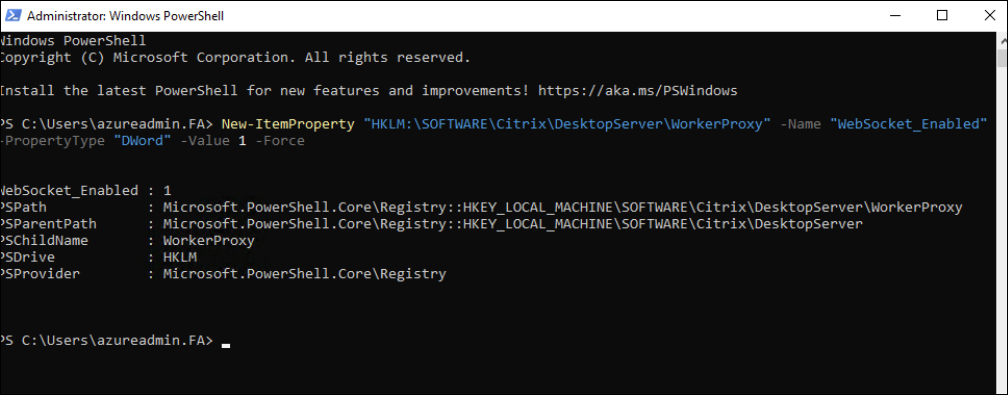
Step 1: Enable WebSocket Feature in DDC
Open a powershell and run follow command, then reboot the DDC New-ItemProperty "HKLM:\SOFTWARE\Citrix\DesktopServer\WorkerProxy" -Name "WebSocket_Enabled" -PropertyType "DWord" -Value 1 -Force.
Step 2: Create the Machine Catalog and generate enrollment token for VDA
-
Create an empty Single-session OS catalog with no PVS/MCS and no power managed from the web studio. Right click the empty catalog, click Manage Enrollment Tokens.
-
Click Generate and Input the token name, select the Start date and End data. Input the times the token can be used. Click Generate, copy or download the token.
Note:
You can refer to the 1st step of DaaS part for screenshots that are mostly similar.
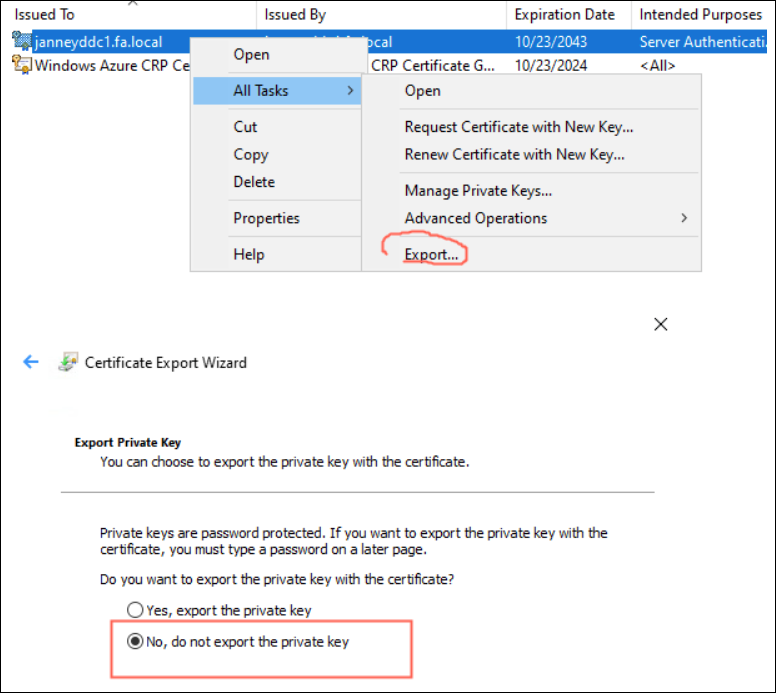
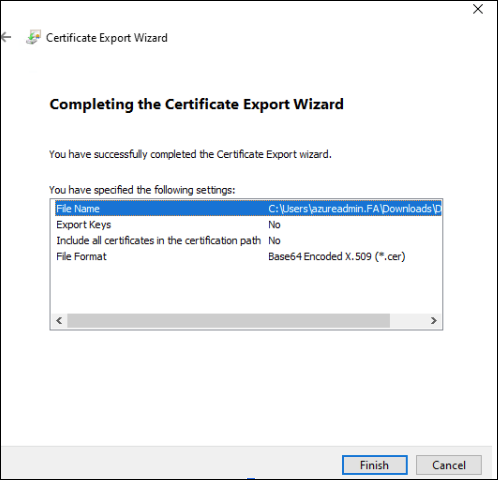
Step 3: Export self-signed certificate on DDC machines, and then install certs on each VDA machine
-
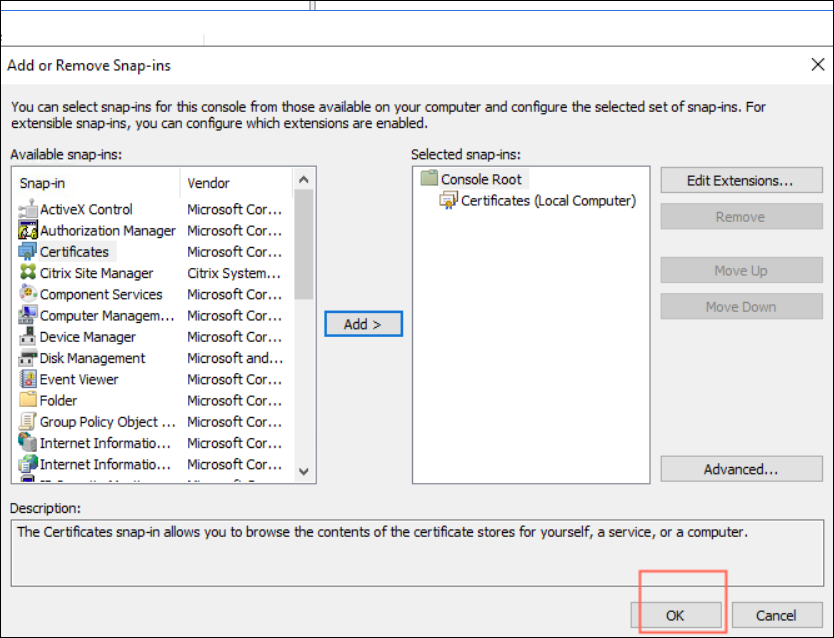
Run MMC to open the console, and then
File>Add/Remove Snap-in..>Certificates>Add>Computer account>Next>Finish>OK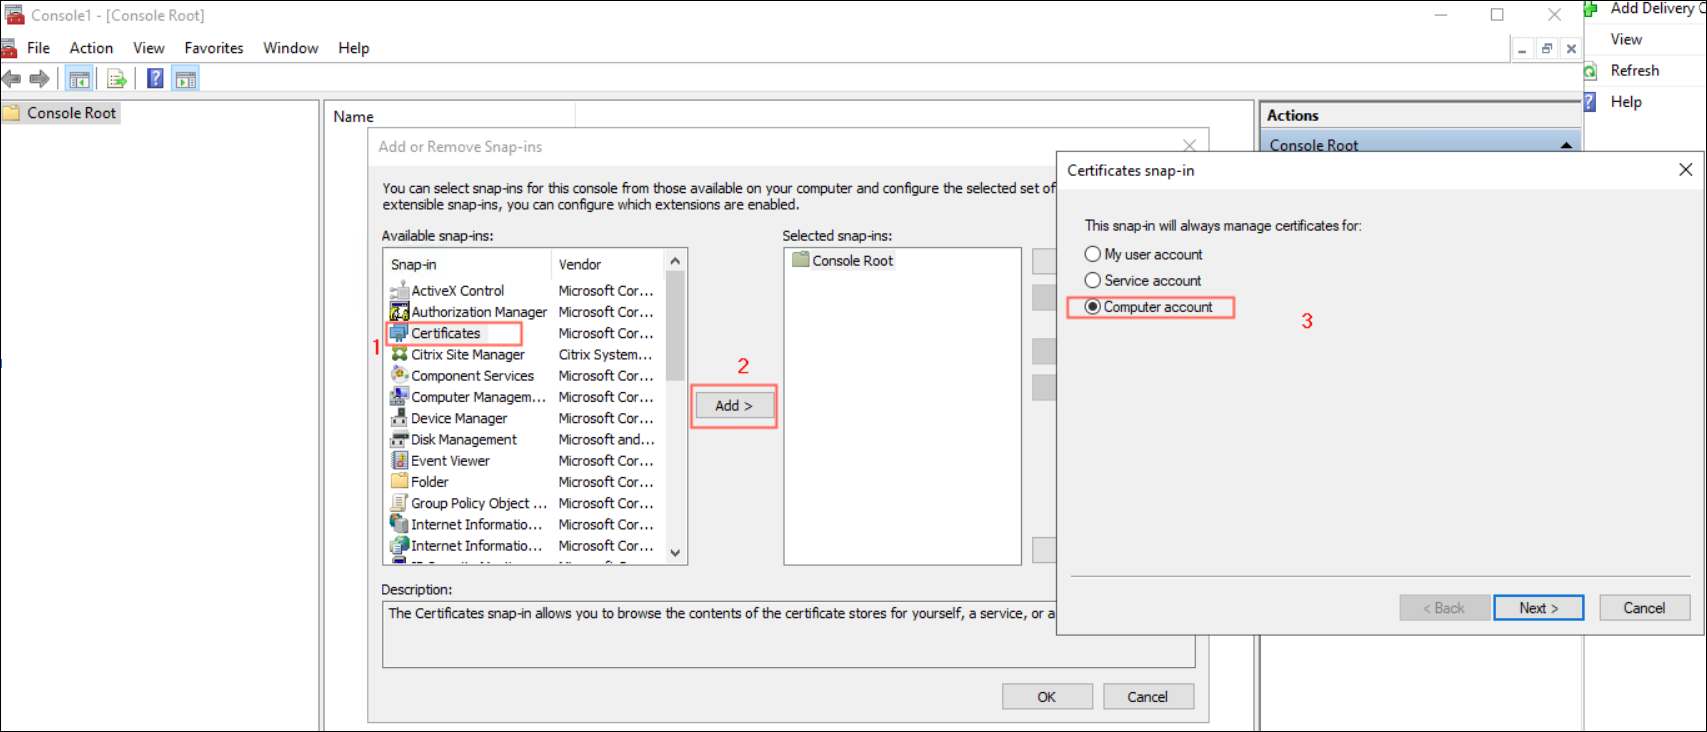
-
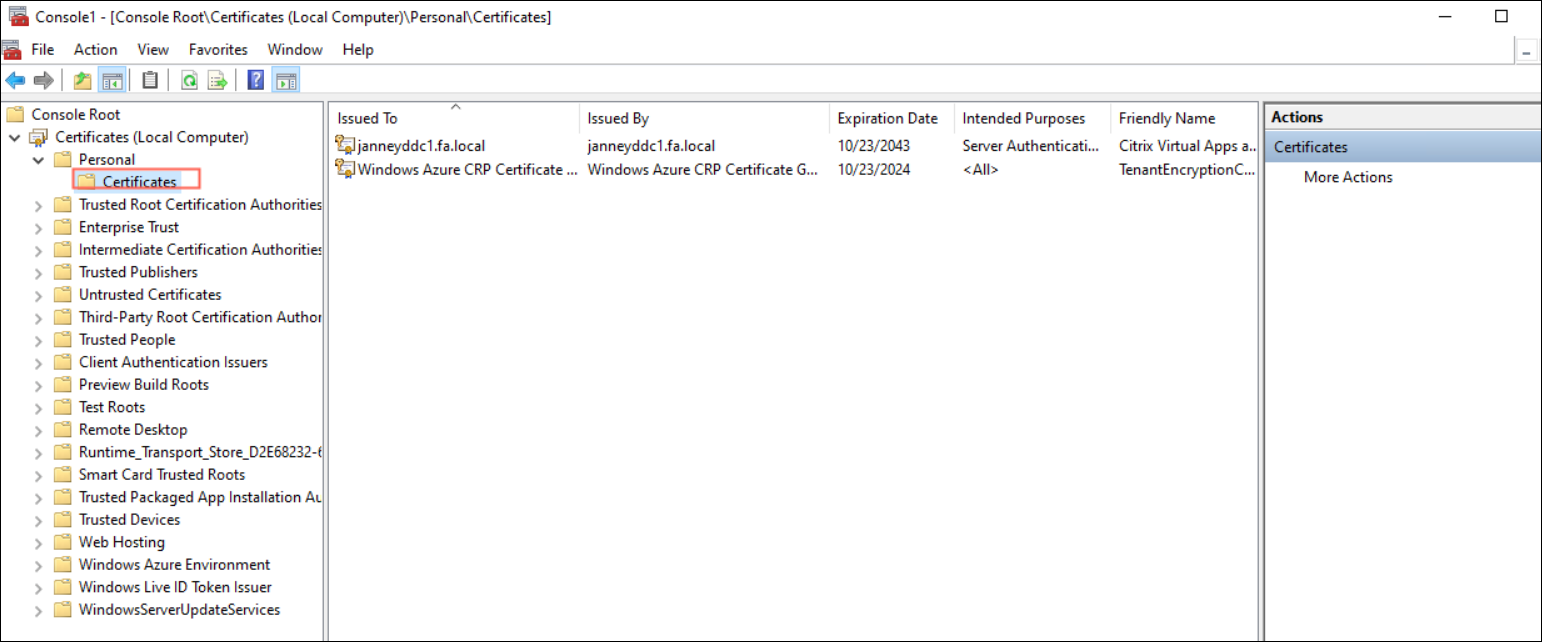
Export Certificates with Certificates(Local Computer)>Personal>Certificates.
-
Select the certificate > All Tasks > Export.

Execute steps 2.1-2.3 in other DDCs on the same site.
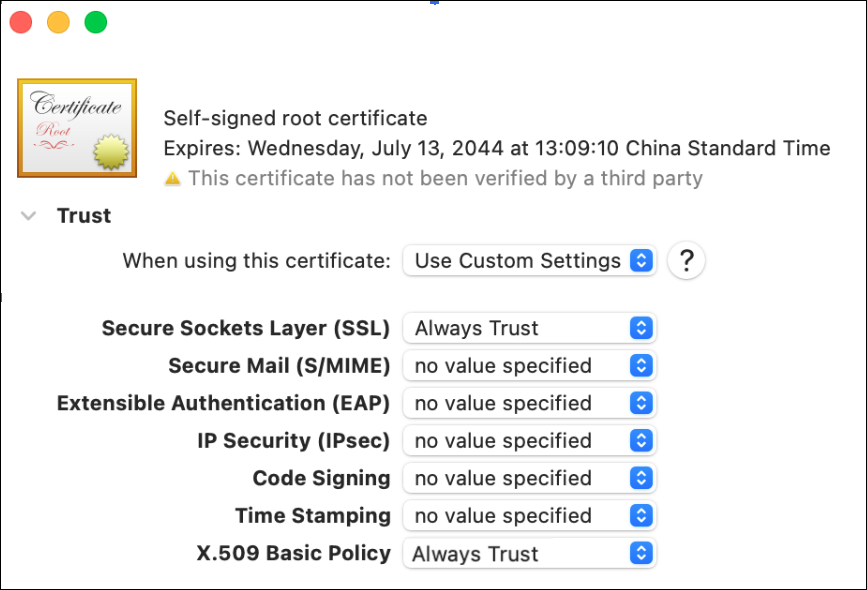
Step 4: Trust the certificates in Citrix VDA for macOS machine
-
Open the certificates by Keychain Access app, and make sure the certificates are added to the System keychain.

-
Find the certificate in System keychain, and select “Always Trust” for Secure socket Layer(SSL)
You can also run the commands in Terminal App to trust the certificates:
-
Add one certificate into System keychain and trust it.
security add-trusted-cert -d -r trustRoot -k /Library/Keychains/System.keychain <cert file name> -
Verify if the certificate is trusted.
security verify-cert -c <cert file name>
Step 5: Configure DNS on Citrix VDA for macOS machine
-
Add DNS server to your Mac to resolve DDCs’ FQDN, or add the host entry into
/etc/hosts -
Self-check if the DNS configuration and Certificates are OK
curl -v https://<FQDN of On-Premises Delivery Controllers>
You will get the http response with code 200.
Other steps such as Create Delivery Group are the same as you manage Windows and Linux VDA.
In this article
- Step 1: Enable WebSocket Feature in DDC
- Step 2: Create the Machine Catalog and generate enrollment token for VDA
- Step 3: Export self-signed certificate on DDC machines, and then install certs on each VDA machine
- Step 4: Trust the certificates in Citrix VDA for macOS machine
- Step 5: Configure DNS on Citrix VDA for macOS machine