Manage machine catalogs
Note:
This article describes how to manage catalogs using Studio and PowerShell commands. If you created the catalog using the Quick Deploy node, and continue using that node to manage the catalog, then follow Manage catalogs in Quick Deploy.
Introduction
You can add or remove machines from a machine catalog, and rename, change the description, or manage a catalog’s Active Directory computer accounts.
Catalog maintenance can also include the tasks of making sure that each machine has the latest OS updates, antivirus software updates, operating system upgrades, or configuration changes.
- Catalogs containing pooled random machines created using Machine Creation Services™ (MCS) maintain machines by updating the image used in the catalog and then updating the machines. This method lets you update large numbers of user machines efficiently.
- For catalogs containing static, permanently assigned machines, you can manage the image or template that those catalogs currently use but only the machines you add to the catalogs later are created using the new image or template.
- For Remote PC Access catalogs, you manage updates to users’ machines outside of Studio. Perform this task individually or collectively using third-party software distribution tools.
For information about creating and managing connections to host hypervisors and cloud services, see Create and manage connections and resources.
Note:
MCS does not support Windows 10 IoT Core and Windows 10 IoT Enterprise. Refer to the Microsoft site for more information.
About persistent instances
When updating the master image for an MCS catalog containing persistent machines, any new machines added to the catalog use the updated image. Existing machines continue to use the original master image. The process of updating an image is done the same way for any other type of catalog. Consider the following:
- With persistent disk catalogs, the pre-existing machines are not updated to the new image, but any new machines added to the catalog use the new image.
- For non-persistent disk catalogs, the machine image is updated the next time only if the machine is restarted within Studio or PowerShell. If the machine is restarted from the hypervisor outside of Studio, the disk is not reset.
- For catalogs that do not persist, if you want different images for different machines, the images must reside in separate catalogs.
Manage Machine Catalogs
You can manage a machine catalog in two ways:
Use Studio
This section details how you can manage catalogs using Studio:
- View catalog details
- Add machines to a catalog
- Delete machines from a catalog
- Edit a catalog
- Rename a catalog
- Delete a catalog
- Manage Active Directory computer accounts in a catalog
- Change the master image for a catalog
- Convert MCS-provisioned catalogs from using master images to using prepared images.
- Change the functional level or undo the change
- Clone a catalog
- Organize catalogs using folders
- Upgrade VDAs
- Manage experience optimization settings for a catalog
- Retry catalog creation
- (Non-Citrix® provisioned VDAs only) Generate and manage enrollment tokens
View catalog details
- Use the search function to locate a specific machine catalog. Refer to Search for instances for instructions.
- From the search results, select a catalog as necessary.
-
Refer to the following table for descriptions of the catalog columns.
Column Description Machine Catalog
The name and the allocation type of the catalog. Allocation types include
• Random: Machines in the catalog are allocated to a user randomly.
• Permanent: Machines in the catalog are allocated to a user permanently.Machine Type
The supported session type of the machines in the catalog. Possible values include
• OS type: Multi-session OS (Virtual); User data: Discard.
• OS type: Multi-session OS (Virtual); User data: On local disk
• OS type: Single-session OS (Remote PC Access)
• OS type: Single-session OS (Virtual); User data: Discard
• OS type: Single-session OS (Virtual); User data: On local diskMachine Count The machine count in the catalog and the provisioning method. Possible provisioning methods include: Machine Creation Services (MCS machine), Manual, and Citrix Provisioning™ Services. Allocated Count The number of machines in the catalog assigned to a delivery group. Folder The location of the catalog within the Machine Catalogs tree. It displays the name of the folder that the catalog is in (including the trailing backslash), or -if the catalog is at the root level.VDA Upgrade VDA Upgrade State. Possible values include: Not configured, Scheduled, Available, and Up to date. Image Status The status of the image update of the catalog. Applicable only to non-persistent machine catalogs. Possible values include: Fully updated, Partially updated, Pending updates, Preparing -
Click a tab in the bottom details pane for more information about a selected catalog.
Tab Description Details Summarizes key machine catalog settings, such as machine type, provisioning method, service account, OS, and VDA version, enabling you to quickly view and manage your resources. Template Properties
Available for MCS provisioned catalogs only.
Displays detailed provisioning information for the selected catalog, including
• Machine Template Properties
• Hypervisor-Specific Details
• Machine Profile PropertiesMachines Displays a paginated list of machine names in the selected catalog. Delivery Groups
Available for Remote PC catalogs.
Displays delivery groups associated with the selected catalog. It displays delivery group name and catalog association.Tags
Not available in multi-tenant environments.
Displays tag name and description of the tags assigned to the selected machine catalog.Workspace Environment Management
Only visible when WEM service is provisioned and accessible.
Displays Workspace Environment Management System optimization settings.Cost Insights
Applicable to only Azure MCS catalogs, this displays
• Total cost incurred over the past 30 days.
• A comparison between the current 30-day total cost and the previous 30-day period.
Access requires the Citrix Cost Management > Manage > Read cost permission (default for Cloud Administrators) to view the tab, and theMicrosoft.CostManagement/query/readAzure permission to view cost details.Troubleshoot Displays catalog errors or warnings with recommended actions.
Add machines to a catalog
Before you start:
- Make sure the virtualization host (hypervisor or cloud service provider) has sufficient processors, memory, and storage to accommodate the additional machines.
- Make sure that you have enough unused Active Directory computer accounts. If you are using existing accounts, the number of machines you can add is limited by the number of accounts available.
- If you use Studio to create Active Directory computer accounts for the additional machines, you must have appropriate domain administrator permission.
Tip:
If the Citrix DaaS account used to add machines to the machine catalog has restricted AD permissions, add all Cloud Connectors you intend to use in the Log on to.. screen.
To add machines to a catalog:
- From Studio, select Machine Catalogs in the left pane.
- Select a machine catalog and then select Add machines in the action bar.
- On the Virtual Machines page, select the number of virtual machines to add.
-
On the Machine Identities page, configure the settings as follows:
-
Select an identity from the list.
-
If applicable, indicate whether to create accounts or use existing ones, and the location (domain) for those accounts.
If there are insufficient existing Active Directory accounts for the number of VMs you are adding, select the domain and location where the accounts are created.
If you use existing Active Directory accounts, browse to the accounts or select Import and specify a
.csvfile containing account names. Make sure that there are enough accounts for all the machines you are adding. Studio manages these accounts. Allow that interface to reset the passwords for all the accounts, or specify the account password, which must be the same for all accounts. -
If this identity pool is used by other catalogs, you can’t change it to a different pool using Studio. Instead, use the Set-ProvScheme PowerShell cmdlet. For more information, see the Citrix Virtual Apps and Desktops SDK Documentation.
-
Specify an account naming scheme, using hash marks to indicate where sequential numbers or letters appear. For example, a naming scheme of PC-Sales-## (with 0-9 selected) results in computer accounts named PC-Sales-01, PC-Sales-02, PC-Sales-03, and so on.
-
Optionally, you can specify what the account names start with.
When specifying what the account names start with, be aware of the following scenario: If the starting numbers or letters are already in use, the first account created is named using the nearest unused numbers or letters thereafter.
See Manage the sequence number of the machine name to customize the sequence number of machines, which are deployed using MCS, through PowerShell commands.
-
- On the Domain Credentials page, select Enter credentials and enter user credentials with sufficient permissions to create machine accounts.
The machines are created as a background process, and can take much time when creating many machines. Machine creation continues even if you close the Studio.
Use CSV files to bulk add machines to a catalog
You can bulk add machines by using CSV files. The feature is available for all catalogs except catalogs provisioned through MCS.
To bulk add machines to a catalog, complete the following steps:
- From Studio, select Machine Catalogs in the left pane.
- Select a machine catalog and then select Add Machines in the action bar. The Add Machines window appears.
- Select Add CSV File. The Add Machines in Bulk window appears.
- Select Download CSV Template.
- Fill out the template file.
- Drag or browse to the file to upload it.
- Select Validate to perform validation checks on your import.
- Select Import to complete the process.
Considerations when using CSV files to add machines
Note:
- For non-Active Directory users, you must type their names in this format:
<identity provider>:<user name>. Example:AzureAD:username.- VM names are case sensitive. When entering VM paths, make sure that you enter the VM names correctly.
When editing the CSV template file, keep the following in mind:
-
The feature gives you more flexibility to bulk add machines through a CSV file. In the file, you can add only machines (for use with user auto-assignments) or add machines along with user assignments. Type your data in the following format:
-
For machine account and user name (samName) pairs:
- Domain\ComputerName1, Domain\Username1
- Domain\ComputerName2, Domain\Username1;Domain\Username2
-
Domain\ComputerName3, AzureAD:username
-
For machine accounts only:
- Domain\ComputerName1
-
Domain\ComputerName2
-
For VM and user name pairs:
- XDHyp:\Connections\ConnectionName\RegionName\vm.folder\VMName1.vm,Domain\ComputerName1,Domain\Username1
-
XDHyp:\Connections\ConnectionName\RegionName\vm.folder\VMName2.vm,Domain\ComputerName2,Domain\Username2
-
For VMs only:
- XDHyp:\Connections\ConnectionName\RegionName\vm.folder\VMName1.vm,Domain\ComputerName1
-
XDHyp:\Connections\ConnectionName\RegionName\vm.folder\VMName2.vm,Domain\ComputerName2
For example:
XDHyp:\Connections\xpace-scale\East US.region\vm.folder\wsvdaV3-2.vmwhere,
-
xpace-scaleis the ConnectionName: The name of the connection that you entered in Hosting > Add Connections and Resources. For more information, see Create a connection and resources. -
East US.regionis the RegionName: The name of the region with.regionas extension. -
wsvdaV3-2.vmis the VMName: The name of the virtual machine with.vmas extension.
-
-
The maximum number of machines that a file can contain is 1,000. To import more than 1,000 machines, spread them across different files and then import those files one by one. We recommend that you import no more than 1,000 machines. Otherwise, catalog creation can take a long time to complete.
You can also export machines from a catalog on the same Add Machines page. The exported CSV of machines can then be used as a template when adding machines in bulk. To export machines:
- From Studio, select Machine Catalogs in the left pane.
- Select a machine catalog and then select Add Machines in the action bar. The Add Machines window appears.
- Select Export to CSV file. A CSV file containing a list of the machines is downloaded.
- Open the CSV file to add or edit machines as needed. To add machines in bulk using the saved CSV file, see the previous section, Use CSV files to bulk add machines to a catalog.
Note:
This feature is not available for Remote PC Access and MCS-provisioned catalogs.
Export and import of machines in CSV files is only supported between catalogs of the same type.
Enroll machines to catalogs using the WebSocket VDA enrollment tool
The WebSocket VDA enrollment tool facilitates token-based enrollment for VDA machines. This tool helps you convert a connection to a WebSocket connection by adding the VDA to the machine catalog using the enrollment token.
Note:
This tool is designed to enroll VDA machines that haven’t been enrolled in any machine catalog.
Follow the instructions to run the enrollment tool:
- Log in to the VDA.
- Locate the tool
EnrollMachine.exe, inC:\Program Files\Citrix\Virtual Desktop Agent\Web Socket Vda Enrollment Tool. - Run the tool with the appropriate input parameters. For example,
EnrollMachine.exe -websocket_token_string:xxxxxxxxx
The following table describes the input parameters of the enrollment tool:
| Parameter Name | Required | Description | Example |
|---|---|---|---|
-websocket_token_stdin |
Yes
|
Reads the enrollment token. | .\EnrollMachine.exe -websocket_token_stdin |
-websocket_token_string |
Reads the enrollment token directly from the command line parameter. | .\EnrollMachine.exe -websocket_token_string:<token> |
|
-websocket_token_file:[token-file-path] |
Reads the enrollment token from the path provided. | .\EnrollMachine.exe -websocket_token_file:C:\token\test2.txt |
|
log:[log-file-path] |
No | Shows the Enrollment tool logs. | .\EnrollMachine.exe log:[C:\ProgramData\Citrix\EnrollMachine\EnrollMachine.txt] |
-help |
No | Shows a brief help text. | .\EnrollMachine.exe -help |
After successful enrollment, you will receive a success message on the tool and in the logs. Ensure to sign in to Studio to verify that the VDA machine is added to the catalog and that the status of the machine is registered.
Troubleshooting
By default, you can find the logs of the enrollment tool at:
C:\ProgramData\Citrix\EnrollMachine\EnrollMachine.txt
If you have specified a different path for the logs, you can use log:[log-file-path] to retrieve your logs.
The following table lists the codes returned by the enrollment tool:
| Code | String | Description |
|---|---|---|
| 0 | Success | VDA is successfully added to the machine catalog. |
| -1 | InvalidArgument | The input parameter in the enrollment token is invalid. |
| -2 | BrokerAgentNotFound | The broker agent service is not found. |
| -3 | TokenInvalid | The token entered is invalid. |
| -4 | TokenMissingRequiredClaims | The required claims for the token are missing, for example, CustomerId, or Enrollment URIs. |
| -5 | InternalError | A general error has occurred. |
| -6 | TimedOut | The task has timed out. |
| -7 | FailedToDetermineMachineADJoinedStatus | The service that returns the machine AD joined status failed. |
| -8 | ADMachineFailedToFindSid | The service that returns the AD machine Sid failed. |
| -9 | EnrollRequestFailed | The request failed due to an HTTP error. |
| -10 | EnrollResponseMissingRequiredFields | The enrollment tool response is missing the parameter VirtualSiteId. |
| -11 | InsufficientPermission | You do not have the required permission to run the task. |
| -12 | FailedToDetermineMachineAadJoinedStatus | The service that checks the machine AD join status throws an error. |
| -13 | AadMachineFailedToFindDeviceId | The additional parameter AAD device id added by the system is empty. |
| -14 | AadDeviceIdNotValid | The additional parameter AAD device id added by the system is not a valid GUID. |
| -15 | NoValidMacAddress | Invalid MAC address. |
| -16 | FailedToGetComputerHostNameForVdaInstanceName | Failed to get the computer host name to set the additional parameter VdaInstanceName. |
| -17 | VirtualDesktopAgentRegistryKeyFailedToOpen | Failed to open the VDA registry key to write the list of Delivery controllers. |
| -18 | Failed Token reached the max count | Failed Token reached the max count. |
Delete machines from a catalog
After you delete a machine from a machine catalog, users can no longer access it, so before deleting a machine, ensure that:
- User data is backed up or no longer required.
- All users are logged off. Turning on maintenance mode stops new connections from being made to a machine.
- Machines are powered off.
To delete machines from a catalog:
- From Studio, select Machine Catalogs in the left pane.
- Select a catalog and then select View Machines in the action bar.
- Select one or more machines and then select Delete in the action bar.
- If you are deleting persistent machines from the catalog, choose whether to delete them from the hypervisor or cloud service as well. If you choose to delete them, indicate whether to retain, disable, or delete their Active Directory accounts.
When you delete persistent machines from an Azure Resource Manager catalog, the machines and associated resource groups are deleted from Azure, even if you choose to retain them.
When you delete non-persistent machines from a catalog, they are automatically deleted from the hypervisor or cloud service.
Edit a catalog
- From Studio, select Machine Catalogs in the left pane.
- Select a catalog and then select Edit Machine Catalog in the action bar.
- On the Scopes page, change the scopes.
-
On the NIC page, perform the following actions:
- To change the subnet mapping of an NIC, select a network from the Associated Network field.
- To add a subnet mapping, select Add NIC, select a network from the Associated Network field, and click Save.
Only those subnets present in the host associated with the catalog appear in the Associated Network field.
You can only add NIC to Azure machine catalogs without machine profiles.
Note:
- For AWS machine catalogs, you cannot map the same subnet to more than one NIC.
- For machine catalogs with machine profiles, the number of NICs on the catalog must be equal to the number of NICs on the machine profile.
- This feature is not supported for IBM Cloud hypervisors.
- This feature is supported only for Nutanix Prism Element in Nutanix hypervisors.
- On the VDA Upgrade page, change or select the VDA version to upgrade to. For more information, see VDA upgrade.
-
You might see additional pages depending on the catalog type.
For catalogs created using an Azure Resource Manager image, the following pages are visible. Keep in mind that the changes you make apply only to machines you add to the catalog later. Existing machines remain unchanged.
-
On the Virtual Machines page, change the machine size and availability zones where you want to create machines.
Note:
- Only the machine sizes that the catalog supports are shown.
- If necessary, select Show only machine sizes used in other machine catalogs to filter the machine size list.
- For Azure catalogs, if ZRS is the Storage redundancy on the Storage and License Types page, then you get a warning suggesting to clear the zone selection and let Azure manage the VM availability zones.
-
On the Machine Profile page, choose whether to use or change a machine profile.
Note:
For Azure catalogs, when you modify a machine profile that includes availability zones and choose ZRS for storage redundancy, a warning suggests you to clear the zone selection.
-
(Only when the catalog is configured with a dedicated group host) On the Dedicated host group page, choose whether to change a host group.
-
On the Storage and License Types page, choose whether to change the storage redundancy type (for Azure catalog), storage type, license type, and Azure Computer Gallery settings (available only when Place prepared image in Azure Gallery is in use).
Note:
If the newly selected setting doesn’t support the current machine size, a warning dialog box appears, informing you that changing the setting, resets the machine size setting. If you choose to continue, a red dot appears next to the Virtual Machines menu, prompting you to select a new machine size.
For more information about settings available on the pages, see Create a machine catalog using an Azure Resource Manager image.
For Remote PC Access catalogs, the following pages are visible:
- On the Power Management page, change the power management settings and select a power management connection.
- On the Organizational Units page, add or remove Active Directory OUs.
-
- On the Description page, change the catalog description.
- Click Apply to apply the changes you made and click Save to exit.
Rename a catalog
- From Studio, select Machine Catalogs in the left pane.
- Select a catalog and then select Rename Machine Catalog in the action bar.
- Enter the new name.
Delete a catalog
Before deleting a catalog, ensure that:
- All users are logged off and no disconnected sessions are running.
- Maintenance mode is turned on for all machines in the catalog so that new connections cannot be made.
- All machines in the catalog are powered off.
- The catalog is not associated with a delivery group. In other words, the delivery group does not contain machines from the catalog.
To delete a catalog:
- From Studio, select Machine Catalogs in the left pane.
- Select a catalog and then select Delete Machine Catalog in the action bar.
- If the catalog contains persistent machines, indicate whether to delete those machines from the hypervisor or cloud service as well. If you choose to do so, choose whether to retain, disable, or delete their Active Directory computer accounts.
- If necessary, select Hide progress to run the deletion in the background.
Note:
- When you delete an Azure Resource Manager catalog, the associated machines and resource groups are deleted from Azure, even if you choose to retain them.
- When you delete a catalog containing non-persistent machines, those machines are deleted from the hypervisor or cloud service.
- When the hypervisor or cloud service is unreachable during catalog deletion, both catalog and VM deletion fail. If needed, you can choose to delete the VM records only from your Citrix site database. To do so, select the machine catalog in the Machine Catalogs node, and then perform the deletion shown on the Troubleshoot tab. Keep in mind that this action leaves the VMs intact on the host.
Manage Active Directory computer accounts in a catalog
To manage Active Directory accounts in a machine catalog, you can:
- Free unused machine accounts by removing Active Directory computer accounts from single-session and multi-session catalogs. Those accounts can then be used for other machines.
- Add accounts so that when more machines are added to the catalog, the computer accounts are already in place. Do not use a forward slash (/) in an OU name.
To manage Active Directory accounts:
- From Studio, select Machine Catalogs in the left pane.
- Select a catalog and then select Manage AD accounts in the action bar.
-
Choose whether to add or delete computer accounts. If you add accounts, specify what to do with the account passwords: either reset them all or enter a password that applies to all accounts.
You might reset passwords if you do not know the current account passwords; you must have permission to perform a password reset. If you enter a password, the password is changed on the accounts as they are imported. If you delete an account, choose whether the account in an Active Directory is to be kept, disabled, or deleted.
You can also indicate whether Active Directory accounts are to be retained, disabled, or deleted when you remove machines from a catalog or delete a catalog.
Change the master image for a catalog
We recommend that you save copies or snapshots of images before you change the master image for a catalog. The database keeps a historical record of the images used with each machine catalog. If users encounter problems with the new image you deployed to their desktops, you can roll it back to the previous version, minimizing user downtime. Do not delete, move, or rename images. Otherwise, you cannot roll back the master image.
Important:
When changing the master image for a persistent catalog, consider the following: only machines you add to the catalog later are created using the new image. We do not roll out the new image to existing machines in the catalog.
After a machine is updated, it restarts automatically.
Convert MCS-provisioned catalogs from using master images to using prepared images
To convert an MCS-provisioned catalog from using a master image to using a prepared image, follow these steps:
- Click Machine Catalogs in the left pane and select a machine catalog that you want to convert. Right-click and select Convert To Prepared Image.
- On the Image page, select a prepared image.
- On the Rollout strategy page, select when you want to update this catalog with the selected prepared image.
- On the Summary page, verify the details and click Finish.
- Verify the details of the converted machine catalog in Template Properties.
Currently, this feature is available only for Azure and VMware virtualization environments.
Update or create an image
Before you change the master image for a catalog, prepare a new image on your host hypervisor by either updating an existing image or creating one.
- On your hypervisor or cloud service provider, take a snapshot of the current VM and give the snapshot a meaningful name. This snapshot can be used to roll back the master image.
- If necessary, power on the image, and log on.
- Install updates or make any required changes to the image.
- If the image uses a Personal vDisk, update the inventory.
- Power off the VM.
- Take a snapshot of the VM, and give the snapshot a meaningful name that is recognized when you change the master image.
Note:
Although you can create a snapshot using the management interface, we recommend that you create a snapshot using the hypervisor management console, and then select that snapshot in Studio. This enables you to provide a meaningful name and description rather than an automatically generated name. For GPU images, you can change the image only through the XenServer XenCenter® console.
Change the master image
To roll out a new master image to all machines in a catalog:
- From Studio, select Machine Catalogs in the left pane.
- Select a catalog and then select Change Master Image in the action bar.
-
On the Image page, select the host and the image you want to roll out.
Tip:
For an MCS-created catalog, you can annotate its image by adding a note for the image. A note can contain up to 500 characters. Each time you change the master image, a note-related entry is created whether you add a note. If you update a catalog without adding a note, the entry appears as null (-). To view note history for the image, select the catalog, click Template Properties in the low pane, and then click View note history.
-
On the Rollout Strategy page, choose when the machines in the machine catalog are changed with the new image: on the next shutdown or immediately.
Note:
The Rollout Strategy page is not available for persistent VMs because rollout is only applicable to non-persistent VMs.
-
Verify the information on the Summary page and then select Finish. Each machine restarts automatically after it is updated.
To track the progress of the update, locate the catalog in Machine Catalogs to view the inline progress bar and the step-by-step progress graph. For a non-persistent catalog, you can track its image update statuses through the Image Update column, including Fully updated, Partially updated, Pending update, and Preparing image.
Tip:
To show the Image Update column, select the Columns to Display icon in the action bar, select Machine Catalog > Image Status, and then click Save.
If you are updating a catalog using the PowerShell SDK, you can specify a hypervisor template (VMTemplates), as an alternative to an image or a snapshot of an image.
To roll out a new master image to the Azure based machine catalog:
- From Studio, select Machine Catalogs in the left pane.
- Select an Azure catalog and then select Change Master Image in the action bar.
- On the Change Master Image page, select an image under Master image. The blade lists all the images that belong to the same region as those of Resources.
Rollout strategy
Changing the image on the next shutdown will immediately affect any machines not currently in use, that is, machines that do not have an active user session. A system that is in use receives the update when the current active session ends.
Note:
Rollout strategy is only applicable to non-persistent VMs.
Consider the following:
- New sessions cannot be launched until the update has completed on applicable machines.
- For single-session machines, machines are immediately updated when the machine is not in use, or when users are not logged in.
- For a multi-session OS with child machines, restarts don’t occur automatically. To apply the updated master image, restart the machines using Studio, PowerShell, or Workspace. Restarting from the machines or the hypervisors doesn’t apply the update.
Tip:
Limit the number of machines being rebooted by using the advanced settings for a host connection. Use these settings to modify the actions taken for a given catalog; advanced settings vary depending on the hypervisor.
Roll back the master image
After you roll out an updated or new image, you can roll it back. This might be necessary if issues occur with the newly updated machines. When you roll back, machines in the catalog are rolled back to the last working image. Any new features that require the newer image are no longer available. As with the rollout, rolling back a machine includes a restart.
- From Studio, select Machine Catalogs in the left pane.
- Select the catalog and then select Roll Back Master Image in the action bar.
- Specify when to apply the earlier image to machines, as described for the rollout operation.
The rollback is applied only to machines that need to be reverted. For machines that have not been changed to the new or updated image (for example, machines with users who have not logged off), users do not receive notification messages and are not forced to log off.
To track the rollback progress, locate the catalog in Machine Catalogs to view the inline progress bar and the step-by-step progress graph.
You cannot roll back in certain scenarios, including the following. (The Roll Back Master Image option is not visible).
- You do not have permission to roll back.
- The catalog was not created using MCS.
- The catalog was created using an image of the OS disk.
- The snapshot used to create the catalog has become corrupted.
- User changes to the machines in the catalog do not persist.
- Machines in the catalog are running.
Change the functional level or undo the change
Change the functional level for the machine catalog after you upgrade the VDAs on the machines to a newer version. We recommend upgrading all VDAs to the latest version to enable access to all the newest features.
Before changing the functional level for a machine catalog:
- Start the upgraded machines so that they register with Citrix DaaS. This lets the management interface determine that the machines in the catalog need upgrading.
To change the functional level for a catalog:
- From Studio, select Machine Catalogs in the left pane.
- Select the catalog. The Details tab in the lower pane displays version information.
- Select Change Functional Level. If the management interface detects that the catalog must change the functional level, it displays a message. Follow the prompts. If one or more machines cannot be changed, a message explains why. To ensure that all machines function properly. We recommend you resolve those issues before clicking Change.
After the catalog upgrade completes, you can revert the machines to their previous VDA versions by selecting the catalog and then selecting Undo Functional Level Change in the action bar.
Clone a catalog
Before cloning a catalog, be aware of the following considerations:
-
You cannot change settings associated with operating system and machine management. The cloned catalog inherits those settings from the original.
Note:
If you select an Azure catalog to clone and select a Master image, the blade lists all the images that belong to the same region as those of Resources.
- Cloning a catalog can take some time to complete. If necessary, select Hide progress to run the cloning in the background.
- The cloned catalog inherits the name of the original and has a suffix
Copy. You can change the name. See Rename a catalog. - After cloning completes, be sure to assign the cloned catalog to a delivery group.
- You can create an empty catalog by cloning. During catalog cloning, you can set the number of machines to zero for MCS-provisioned catalogs and add no machines for non-MCS-provisioned catalogs.
- From Studio, select Machine Catalogs in the left pane.
- Select a catalog and then select Clone in the action bar.
- In the Clone Selected Machine Catalog window, view the settings for the cloned catalog and configure settings as applicable. Select Next to proceed to the next page.
- On the Summary page, view a summary of the settings and select Finish to start cloning.
- If necessary, select Hide progress to run the cloning in the background.
Organize catalogs using folders
You can create folders to organize catalogs for easy access. For example, you can organize catalogs by image type or by organization structure.
Tip:
You can set your preferred default view (folder or list view) for the Machine Catalogs node by clicking the Folder icon on the top right of the action bar.
Required roles
By default, you need to have the following built-in role to create and manage catalog folders: Cloud Administrator, Full Administrator, or Machine Catalog Administrator. If necessary, you can customize roles for creating and managing catalog folders. For more information, see Required permissions.
Create a catalog folder
Before you start, first plan how to organize your catalogs. Consider the following:
- You can nest folders up to five levels deep (excluding the default root folder).
- A catalog folder can contain catalogs and subfolders.
-
All nodes in Studio (such as Machine Catalogs, Delivery Groups, Applications, and Application Groups) share the same folder tree in the back end. To avoid name conflicts when renaming or moving folders, use unique names for first-level folders across different nodes.
If you create a folder using the
New-BrokerAdminFolderSDK cmdlet and want it to appear under the Machine Catalogs node, you must add theContainsMachineCatalogsmetadata using theSet-BrokerAdminFolderMetadatacmdlet.Example:
 Set-BrokerAdminFolderMetadata -AdminFolderId {adminFolderUid} -Name ContainsMachineCatalogs -Value true
 <!--NeedCopy-->
To create a catalog folder, follow these steps:
- From Studio, select Machine Catalogs in the left pane.
- In the folder hierarchy, select a folder and then select Create Folder in the Action bar.
- Enter a name for the new folder, and then click Done.
Tip:
If you create a folder in an unintended location, you can drag it to the correct location.
Move a catalog
You can move a catalog between folders. Detailed steps are as follows:
- From Studio, select Machine Catalogs in the left pane.
- View catalogs by folder. You can also turn on View all above the folder hierarchy to view all catalogs at a time.
- Right-click a catalog and then select Move Machine Catalog.
- Select the folder to which you want to move the catalog, and then click Done.
Tip:
You can drag a catalog to a folder.
Manage catalog folders
You can delete, rename, and move catalog folders.
You can delete a folder only if it and its subfolders don’t contain catalogs.
To manage a folder, follow these steps:
- From Studio, select Machine Catalogs in the left pane.
-
In the folder hierarchy, select a folder, and then select an action in the Action bar as needed:
- To rename the folder, select Rename Folder.
- To delete the folder, select Delete Folder.
- To move the folder, select Move Folder.
- Follow the onscreen instructions to complete the remaining steps.
Required permissions
The following table lists the permissions required to do actions on catalog folders.
| Action | Required permissions |
|---|---|
| Create catalog folders | Create Machine Catalog Folder |
| Delete catalog folders | Remove Machine Catalog Folder |
| Move catalog folders | Move Machine Catalog Folder |
| Rename catalog folders | Edit Machine Catalog Folder |
| Move catalogs to folders | Edit Machine Catalog Folder and Edit Machine Catalog Properties |
Upgrade VDAs
You can use the Studio interface to upgrade VDAs with ease. For more information and step-by-step guidance, see Citrix VDA Upgrade Service documentation.
Manage experience optimization settings for a catalog
Before you start, make sure that your Workspace Environment Management (WEM) service deployment is set up. For more information, see Get started with Workspace Environment Management service.
Required permissions
By default, creating and managing configuration sets for machine catalogs requires the WEM Full Administrator role, along with one of the following roles:
- Full Access Administrator
- Cloud Administrator
- Machine Catalog Administrator
To allow other roles to manage configuration sets, assign them both the Manage configuration sets permission and the WEM Full Administrator role.
Edit the experience optimization settings
Select an Experience Optimization option to apply to the catalog:
-
Apply default settings: Select this option to apply the default optimization settings, including automatic CPU spike protection and intelligent CPU optimization.
-
Apply custom settings: Enter a name to create a configuration set, then customize the optimization settings according to your requirements. Alternatively, you can select an existing configuration set.
Retry catalog creation
Note:
This feature applies only to MCS catalogs.
Failed catalogs are marked with an error icon. To see the details, go to the Troubleshoot tab of each catalog. Before retrying catalog creation, be aware of the following considerations:
- Check the troubleshooting information first and resolve the issues. The information describes the issues found and provides recommendations for resolving them.
- You cannot change settings associated with Operating system and machine management. The catalog inherits those settings from the original.
- The creation can take some time to complete. If necessary, select Hide progress to run the creation in the background.
To retry creating a catalog, do the following:
- From Studio, select Machine Catalogs in the left pane.
- Select the catalog and then go to its Troubleshoot tab.
- Click the retry hyperlink to retry creating the catalog.
- In the wizard that appears, change settings where necessary. If there is no need to make changes, you can go to the Summary page directly.
- After you finish, select Finish to start the creation.
(Non-Citrix provisioned VDAs only) Generate and manage enrollment tokens
Note:
To perform this task, you must have the Cloud Administrator role.
After you decide to adopt token-based enrollment for non-Citrix provisioned machines, generate tokens on a per-machine catalog basis, and then share them with VDA installation administrators.
An enrollment token features:
- Registration range: 1 to 5000 VDA machines
- Validity period: up to 14 days
To generate a token for a catalog using Studio, follow these steps:
- In Machine Catalogs, locate a non-MCS-provisioned catalog, which has Provisioning method: Manual displayed in the Machine Count column.
- Right-click the catalog, and then select Manage Enrollment Tokens.
- On the Generate enrollment token page that appears, provide the following token information:
- Type a name for the token.
- Enter its validity period. The period must be no more than 14 days. The token is valid only for the specified period.
- (Optional) Select a host connection for power management of VDAs enrolled with the token. Options include all host connections under this catalog’s zone.
- Enter the token usage limits (between 1–5000).
- Click Generate.
-
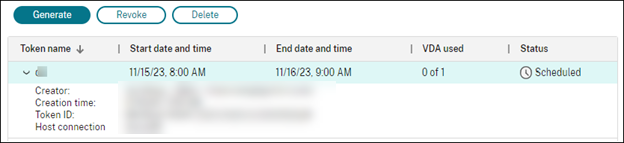
In the Token successfully generated window that appears, copy the token and save it in a safe place, or click Download to download it to the Downloads folder.
A token record appears in the token list.
-
Share the token with VDA installation administrators.
For more information about how to install VDA and a token on machines, see Install VDAs.
Manage tokens
You have two options to revoke a token and make it unavailable for VDA enrollment:
- Revoke: Revoke the token but retain it in the list for logging purposes.
- Delete: Revoke the token and delete it from the list.
Note:
Expired tokens are automatically deleted in 14 days.
Use PowerShell
This section details how you can manage catalogs using PowerShell:
- Use PowerShell to check VDA upgrade status and VDA version
- Manage the sequence number of the machine name
- Add descriptions to an image
- Reset OS disk
- Repair the identity information of active computer accounts
- Change the network setting for an existing machine catalog
- Manage versions of a machine catalog
- Change cache configuration of an existing machine catalog
- Convert a non-machine profile-based machine catalog to machine profile-based machine catalog
- Retrieve warnings and errors associated with a catalog
- Delete machines without hypervisor access
- Update properties of individual VMs
Manage the sequence number of the machine name
To customize the sequence number of machines, which are deployed using MCS, through PowerShell commands, do the following:
- Open PowerShell as an administrator on the Delivery Controller.
- Run the command
asnp citrix*to load the Citrix modules. -
Run the following command to check the start count for the identity pool of the catalog:
Get-AcctIdentityPool -IdentityPoolName xxxThe
IdentityPoolNameis the name of the catalog. -
If you want to set this count to a different value, run the following command and specify the StartCount as X:
Set-AcctIdentityPool -IdentityPoolName xxx -StartCount X - Add the machines to the catalog so that the machines are created with the required count.
-
After creating the machines, run the following command to set it back to the original value Y:
Set-AcctIdentityPool -IdentityPoolName xxx -StartCount Y
Add descriptions to an image
You can add informative descriptions about changes related to image updates for machine catalogs. Use this feature to add a description when creating a catalog, or when you update an existing master image for a catalog. You can also display information for each master image in the catalog. This functionality is useful for administrators who want to add descriptive labels when updating a master image used by a catalog, for example, Office 365 installed. Use the following commands to add or view image descriptions:
-
NewProvScheme. A new parameter,masterImageNoteenables you to add a note to an image. For example:
C:\PS>New-ProvScheme -ProvisioningSchemeName XenPS -HostingUnitName XenHu -IdentityPoolName idPool1 -MasterImageVM XDHyp:\HostingUnits\XenHU\Base.vm\Base.snapshot -MasterImageNote "Office365 installed"
<!--NeedCopy-->
-
Publish-ProvMasterVMImage. Use this parameter to publish the note. For example:
C:\PS>Publish-ProvMasterVMImage -ProvisioningSchemeName MyScheme -MasterImageVM XDHyp:\HostingUnits\HostUnit1\RhoneCC_baseXP.vm\base.snapshot -MasterImageNote "Visual Studio 2019 installed"
-
Get-ProvSchemeMasterVMImageHistory. Display information for each image. For example:
`C:\PS>Get-ProvSchemeMasterVMImageHistory -ProvisioningSchemeName MyScheme -Showall
VMImageHistoryUid : 3cba3a75-89cd-4868-989b-27feb378fec5
ProvisioningSchemeUid : 7585f0de-192e-4847-a6d8-22713c3a2f42
ProvisioningSchemeName : MyScheme
MasterImageVM : /Base.vm/base.snapshot
Date : 17/05/2021 09:27:50
MasterImageNote : Office365 installed`
Reset OS disk
Use the PowerShell command Reset-ProvVMDisk to reset the OS disk of a persistent VM in an MCS created machine catalog. Currently, this feature is applicable to AWS, Azure, Google Cloud, SCVMM, VMware, and XenServer® virtualization environments.
To successfully run the PowerShell command, make sure that:
- The target VMs are in a persistent MCS catalog.
- The MCS machine catalog is functioning properly. This implies that the provisioning scheme and host exist, and the provisioning scheme has correct entries.
- Hypervisor is not in maintenance mode.
- Target VMs are powered-off and in maintenance mode.
Perform the following steps to reset the OS disk:
- Open a PowerShell window.
- Run
asnp citrix*to load the Citrix-specific PowerShell modules. -
Run the PowerShell command
Reset-ProvVMDiskin any one of the following ways:-
Specify the list of VMs as a comma-separated list, and perform the reset on each VM:
Reset-ProvVMDisk -ProvisioningSchemeName "xxx" -VMName ("abc","def") -OS <!--NeedCopy--> -
Specify the list of VMs as an output from
Get-ProvVMcommand, and perform the reset on each VM:(Get-ProvVM -ProvisioningSchemeName "xxx") | Reset-ProvVMDisk "abc" -OS <!--NeedCopy--> -
Specify a single VM by name:
Reset-ProvVMDisk -ProvisioningSchemeName "xxx" -VMName "abc" -OS <!--NeedCopy--> -
Create separate reset tasks for each of the VMs returned by the
Get-ProvVMcommand. This is less efficient because each task will perform the same redundant checks, such as hypervisor capability check, connection check for each VM.Get-ProvVM -ProvisioningSchemeName "xxx" | Reset-ProvVMDisk -ProvisioningSchemeName "xxx" -OS <!--NeedCopy-->
-
-
A confirmation prompt appears that lists the VMs to be reset along with a warning message that it is an unrecoverable operation. If you do not provide an answer and press Enter, no further action takes place.
You can run the PowerShell command
-WhatIfto print the action it would take and exit without performing the action.You can also bypass the confirmation prompt using one of the following methods:
-
Provide the
-Forceparameter:Reset-ProvVMDisk -ProvisioningSchemeName "xxx" -VMName "abc" -OS -Force <!--NeedCopy--> -
Provide the
-Confirm:$falseparameter:Reset-ProvVMDisk -ProvisioningSchemeName "xxx" -VMName "abc" -OS -Confirm:$false <!--NeedCopy--> -
Before running the
Reset-ProvVMDisk, change$ConfirmPreferenceto ‘None’:PS C:\Windows\system32> $ConfirmPreference='None' PS C:\Windows\system32> $ConfirmPreference None PS C:\Windows\system32> Reset-ProvVMDisk -ProvisioningSchemeName "xxx" -VMName "abc" -OS <!--NeedCopy-->
Note:
Do not take VMs out of the maintenance mode or power them on until the completion of the reset process.
-
- Run
Get-ProvTaskto get the status of the tasks returned byReset-ProvVMDiskcommand.
Repair the identity information of active computer accounts
You can reset the identity information of active computer accounts that have identity-related problems. You can choose to reset only the machine password and trust keys, or reset all configuration of the identity disk. This implementation is applicable to both persistent and non-persistent MCS machine catalogs.
Note:
Currently, the feature is supported only for AWS, Azure, GCP, SCVMM, VMware, and XenServer virtualization environments.
Conditions
Ensure the following to successfully reset the identity disk:
- Turn off and set the VM to maintenance mode
- Do not include the parameter -OS in the PowerShell command
Reset identity information
To reset identity information:
- Open the PowerShell window.
- Run
asnp citrix*to load the Citrix-specific PowerShell modules. -
Reset the identity information.
-
To reset only the machine password and trust keys, run the following command:
 Repair-AcctIdentity -IdentityAccountName TEST\VM1 -PrivilegedUserName TEST\admin1 -PrivilegedUserPassword $password -Target IdentityInfo
 <!--NeedCopy-->
The description of the parameters used in the command is as follows:
-
IdentityAccountName: The name of the identity account that must be repaired. -
PrivilegedUserName: User account that has write permission on identity provider (AD or Microsoft Entra ID). -
PrivilegedUserPassword: Password for PrivilegedUserName. -
Target: Target for the repair action. It can be IdentityInfo to repair account password/trust key, and UserCertificate to repair user certificate attributes of Microsoft Entra hybrid joined machine identities.
-
-
To reset all configuration of the identity disk, run the following commands in the following order:
 Repair-AcctIdentity -IdentityAccountName TEST\VM1 -PrivilegedUserName TEST\admin1 -PrivilegedUserPassword $password -Target IdentityInfo
 <!--NeedCopy-->
Reset-ProvVMDisk ProvisioningSchemeName <name> -VMName <name> -Identity <!--NeedCopy--> -
To completely recreate the identity disk:
 Reset-ProvVMDisk -ProvisioningSchemeName <name> -VMname <name> -Identity -Recreate
 <!--NeedCopy-->
Note:
If the machine is on a VDA version of 2511 (Update 1) or later and has the registry key set for enabling unique
MachineGuid(HKLM:\Software\Citrix\MachineIdentityServiceAgent\EnableUniqueMachineGuid), it keeps using the sameMachineGuidas before regardless of the-Recreatesetting
-
-
Type y to confirm the action. You can also skip the confirmation prompt using the
-Forceparameter. For example:Reset-ProvVMDisk -ProvisioningSchemeName <name> -VMName <name> -Identity -Force <!--NeedCopy--> - Run
Get-ProvVM -ProvisioningSchemeName <name -VMName <name>to check the updated identity disk setting. The attributes of the identity disk (for example,IdentityDiskId) must be updated. TheStorageIdandIdentityDiskIndexmust not change.
Change the network setting for an existing machine catalog
You can change the network setting for an existing machine catalog so that the new VMs are created on the new subnetwork. Use the parameter -NetworkMapping in the Set-ProvScheme command to change the network setting.
To change the network setting for an existing provisioning scheme, do the following:
- In the PowerShell window, run the command
asnp citrix*to load the PowerShell modules. - Run
(Get-Provscheme -ProvisioningSchemeName "name").NetworkMapsto get to the network path that you want to change. -
Assign a variable to the new network setting. For example:
$NewNetworkMap = @{"0"= "XDHYP:\HostingUnits\MyNetworks\Network 0.network"} <!--NeedCopy--> - Run
Set-ProvScheme -ProvisioningSchemeName "name" -NetworkMapping $NewNetworkMap. - Run
(Get-Provscheme -ProvisioningSchemeName "name").NetworkMapsto verify the new network setting for the existing provisioning scheme.
Manage versions of a machine catalog
When an MCS machine catalog is updated with the Set-ProvScheme command, the current configuration is saved as a version. You can then manage the various versions of the machine catalog using PowerShell commands. You can:
- See the list of versions of a machine catalog.
- Use any previous version to update the machine catalog.
- Manually delete a version if it is not used by a VM of that machine catalog.
- Change the maximum number of versions to be retained by the machine catalog (the default is 99).
A version includes the following information of a machine catalog:
- VMCpuCount
- VMMemoryMB
- CustomProperties
- ServiceOffering
- MachineProfile
- NetworkMapping
- SecurityGroup
Run the following commands (provided as examples) to manage the various versions of a machine catalog.
-
To see the configuration details of the various versions of a machine catalog:
Get-ProvSchemeVersion -ProvisioningSchemeName AzureCatalog <!--NeedCopy--> -
To see the configuration details of a particular version of a machine catalog:
Get-ProvSchemeVersion -ProvisioningSchemeName AzureCatalog -Version 2 <!--NeedCopy--> -
To see the total number of versions associated with a machine catalog:
(Get-ProvSchemeVersion -ProvisioningSchemeName AzureCatalog).Count <!--NeedCopy--> -
To use any previous version to update the machine catalog:
Set-ProvScheme -ProvisioningSchemeName AzureCatalog -Version 2 <!--NeedCopy--> -
To manually delete a version if it is not used by a VM of that machine catalog:
Remove-ProvSchemeVersion -ProvisioningSchemeName AzureCatalog -Version 3 <!--NeedCopy--> -
To set the maximum number of versions to be retained by the machine catalog (the default is 99). This setting is applied across all the catalogs. For example, in this case, a maximum of 15 versions will be retained for all the MCS provisioned catalogs.
 Set-ProvServiceConfigurationData -Name "MaxProvSchemeVersions" -Value 15
 <!--NeedCopy-->
If the number of versions reaches the maximum number of versions, then a new version cannot be created if older versions are in use by any of the VMs in the machine catalog. In that case, do one of the following:
- Increase the limit of the maximum number of versions to be retained by the machine catalog.
- Update some VMs that are on older versions so that those older versions are no longer referenced by any VMs, and can be deleted.
Change cache configuration of an existing machine catalog
After creating a non-persistent catalog with MCSIO enabled, you can use the Set-ProvScheme command to modify the following parameters:
- WriteBackCacheMemorySize
- WriteBackCacheDiskSize
This feature is currently applicable to:
- GCP and Microsoft Azure environments, and
- a non-persistent catalog with MCSIO enabled
Requirements
The requirements to modify the cache configuration are:
- Update to the latest version of VDA (2308 or later).
-
Enable the parameter
UseWriteBackCachefor the existing machine catalog. UseNew-ProvSchemeto create a machine catalog withUseWriteBackCacheenabled. For example:New-ProvScheme -ProvisioningSchemeName $CatalogName -HostingUnitUid $HostingUnitUid ` -IdentityPoolUid $acctPool.IdentityPoolUid -CleanOnBoot ` -MasterImageVM $MasterImage ` -ServiceOffering $ServiceOffering ` -NetworkMap $NetworkMap ` -SecurityGroup $SecurityGroup ` -UseWriteBackCache -WriteBackCacheDiskSize 8 <!--NeedCopy-->
Change the cache configuration
Run the Set-ProvScheme command. For example:
Set-ProvScheme -ProvisioningSchemeName $provScheme.ProvisioningSchemeName -WriteBackCacheDisk32 -WriteBackCacheMemorySize 128
<!--NeedCopy-->
Note:
- The value of
WriteBackCacheDiskSizemust be more than zero because at least 1 GB of cache disk storage is required.- The value of
WriteBackCacheMemorySizemust be less than the machine catalog memory size.- These changes only affect new VMs added to the catalog after the change is made. Existing VMs are not affected by these changes.
Convert a non-machine profile-based machine catalog to a machine profile-based machine catalog
You can use a VM, template spec (in case of Azure), or launch template (in case of AWS), or VMware template (in case of VMware) as a machine profile input to convert a non-machine profile-based machine catalog to machine profile-based machine catalog. New VMs added to the catalog take property values from the machine profile.
Note:
An existing machine profile-based machine catalog cannot be changed to a non-machine profile-based machine catalog.
To do this:
- Create a persistent or non-persistent machine catalog with VMs and without a machine profile.
- Open the PowerShell window.
-
Run the
Set-ProvSchemecommand to apply the property values from the machine profile to the new VMs added to the machine catalog. For example:-
In the case of Azure:
Set-ProvScheme -ProvisioningSchemeName xxxx -MachineProfile XDHyp:\HostingUnits\<HostingUnitName>\machineprofile.folder\<ResourceGroupName>\<TemplateSpecName>\<VersionName> <!--NeedCopy--> -
In the case of AWS:
Set-ProvScheme -ProvisioningSchemeName xxxx -MachineProfile "XDHyp:\HostingUnits\<hosting-unit>\<launch-template>.launchtemplate\<launch-template-version>.launchtemplateversion" <!--NeedCopy--> -
In the case of VMware:
 Set-ProvScheme -ProvisioningSchemeName "my-prov-scheme" -MachineProfile "XDHyp:\HostingUnits\my-hosting-unit\my-template.template"
 <!--NeedCopy-->
Note:
Set the
FolderIDas the custom property to avoid derivingFolderIDfrom the VMware template.
-
Retrieve warnings and errors associated with a catalog
You can get historical errors and warnings to understand issues with your MCS machine catalog and fix those issues.
Using PowerShell commands, you can:
- Get a list of errors or warnings
- Change the warning state from New to Acknowledged
- Delete the errors or warnings
To run the PowerShell commands:
- Open a PowerShell window.
- Run
asnp citrix*to load the Citrix-specific PowerShell modules.
To get a list of errors and warnings:
Run Get-ProvOperationEvent command.
- With no parameters: Gets all errors and warnings
- With
LinkedObjectTypeandLinkedObjectUidparameter: Gets all errors and warnings associated with a specific provisioning scheme - With
EventIdparameter: Gets a specific error or warning that matches this event ID - With
Filterparameter: Gets errors or warnings by a customized filter
To change the state of errors or warnings from New to Acknowledged:
Run Confirm-ProvOperationEvent command.
- With
EventIdparameter: Sets the state of a specific error or warning that matches this event ID. You can get theEventIdof a specific error or warning as an output fromGet-ProvOperationEventcommand - With
LinkedObjectTypeandLinkedObjectUidparameters: Sets the state of all the errors and warnings associated with a specific provisioning scheme - With
Allparameter: Sets the state of all errors and warnings as Acknowledged
To delete the errors or warnings:
Run Remove-ProvOperationEvent command.
- With
EventIdparameter: Removes a specific error or warning that matches this event ID. You can get theEventIdof a specific error or warning as an output fromGet-ProvOperationEventcommand - With
LinkedObjectTypeandLinkedObjectUidparameters: Removes all errors and warnings associated with a specific provisioning scheme - With
Allparameter: Removes all errors and warnings
For more information, see the Citrix PowerShell SDK.
Delete machines without hypervisor access
When deleting a VM or a provisioning scheme, MCS needs to remove tags from the VM, and sometimes from the base disk as well, so that the resources included in the deletion options are no longer tracked or identified by MCS. However, some of these resources are only accessible through hypervisor. Use the PurgeDBOnly option in Remove-ProvVM PowerShell to delete VM resource objects such as VM, base disk, image in ACG, and so on from the database even when there is no hypervisor access.
This option is enabled on:
- all supported hypervisors
- persistent and non-persistent VMs
Limitations
You cannot use the commands -PurgeDBOnly and -ForgetVM at the same time.
Use the PurgeDBOnly command
When running the PowerShell command Remove-ProvVM -ProvisioningSchemeName SCVMM-MC -VMName SCVMM01 -ForgetVM the deletion operation might fail in the following scenarios:
- The host connection is in maintenance mode
- Invalid credentials
- Authentication failure
- Unauthorized operation
- The hypervisor is unreachable
Note:
Remove-provVM -ForgetVM targets only persistent VMs. If one of the VMs in the list is non-persistent, the operation fails.
When the operation fails because the hypervisor is unreachable, the following prompt appears:
Try to use -PurgeDBOnly option to clean DDC database.
Use the -PurgeDBOnly option in the Remove-ProvVM PowerShell command to delete references of a VM from MCS database. For example,
Remove-ProvVM -ProvisioningSchemeName SCVMM-MC -VMName SCVMM01 -PurgeDBOnly
Update properties of individual VMs
You can update properties of individual VMs in a persistent MCS machine catalog using the PowerShell command Set-ProvVM. However, the updates are not applied immediately. You must set the time window using the PowerShell command Set-ProvVMUpdateTimeWindow for the updates to apply.
This implementation helps you to manage individual VMs efficiently without updating the entire machine catalog. Currently, this feature is applicable to Azure and VMware environments.
Currently, the properties that you can update are:
CustomProperties-
ServiceOffering(Not applicable to VMware) MachineProfileCpuCountMemory
Using this feature, you can:
- Update the properties of a VM
- Retain the properties updated on a VM after the machine catalog is updated
- Revert the configuration updates applied to a VM
Before updating properties of a VM:
- Open a PowerShell window.
- Run
asnp citrix*to load the Citrix-specific PowerShell modules. -
Check the configuration of the existing machine catalog. For example:
Get-ProvScheme -ProvisioningSchemeName <catalog name> <!--NeedCopy--> -
Check the configuration of the VM on which you want to apply the updates. For example:
Get-ProvVM -ProvisioningSchemeName <catalog name> -VMName machine1
<!--NeedCopy-->
Update properties of a VM
Do the following to update the properties on a VM:
- Turn off the VM on which you want to apply the updates.
-
Update the properties of the VM. For example, if you want to update storage type (
StorageType) custom property of the VM, run the following:Set-ProvVM -ProvisioningSchemeName <catalog name> -VMName machine1 -CustomProperties "...<Property Name='StorageType' Value='Premium_LRS' />..." <!--NeedCopy-->You can update properties of two VMs in a machine catalog simultaneously. For example:
Set-ProvVM -ProvisioningSchemeName <catalog name> -VMName machine1 -CustomProperties "...<Property Name='StorageType' Value='Premium_LRS' />..." <!--NeedCopy-->Set-ProvVM -ProvisioningSchemeName <catalog name> -VMName machine2 -CustomProperties "...<Property Name='StorageType' Value='StandardSSD_LRS' />..." <!--NeedCopy-->Note:
The updates are not applied immediately.
-
Get the list of properties that are specified to be updated and the configuration version. For example:
Get-ProvVMConfiguration -ProvisioningSchemeName <catalog name> -VMName machine1
<!--NeedCopy-->
Check the property value of
Versionand the properties to be updated (in this case,StorageType). -
Check the configuration version. For example:
Get-ProvVM -ProvisioningSchemeName <catalog name> -VMName machine1
<!--NeedCopy-->
Check the property value of
ProvVMConfigurationVersion. The update is not yet applied. The VM is still in the old configuration. -
Request scheduled update. For example:
 Set-ProvVMUpdateTimeWindow -ProvisioningSchemeName <catalog name> -StartsNow -DurationInMinutes -1
 <!--NeedCopy-->
For more information on scheduled updates, see Update provisioned machines to current provisioning scheme state.
Note:
Any pending provisioning scheme update is also applied.
-
Restart the VM. For example:
New-BrokerHostingPowerAction -MachineName machine1 -Action TurnOn <!--NeedCopy--> -
Check the configuration version. For example:
Get-ProvVM -ProvisioningSchemeName AzureCatalog -VMName machine1
<!--NeedCopy-->
Check the property value of
ProvVMConfigurationVersion. The update is now applied. The VM now has the new configuration. - To apply further configuration updates on the VM, turn off the VM, and repeat the steps.
Retain the properties updated on a VM after the machine catalog is updated
Do the following to retain the properties updated on a VM:
- Turn off the VM on which you want to apply the updates.
-
Update the machine catalog. For example, if you want to change the VM size (
ServiceOffering) and storage type (StorageType), run the following:Set-ProvScheme -ProvisioningSchemeName <catalog name> -ServiceOffering Standard_E4_v3 -CustomProperties "...<Property Name='StorageType' Value='StandardSSD_LRS' />..." <!--NeedCopy--> -
Get the configuration details of the machine catalog. For example:
Get-ProvScheme -ProvisioningSchemeName <catalog name>
<!--NeedCopy-->
The
ProvisioningSchemeVersionis now incremented by one. The VM size and storage type are also updated. -
Update the properties of the VM. For example, provide a machine profile to the VM.
Set-ProvVM -ProvisioningSchemeName <catalog name> -VMName machine1 -MachineProfile "XDHyp:\HostingUnits\<hosting-unit>\machineprofile.folder\<resource-group>.resourcegroup\<template-spec>.templatespec\<template-spec-version>.templatespecversion"
<!--NeedCopy-->
Note:
The machine profile input has a tag and a different VM size (
ServiceOffering) specified. -
Get the list of properties that the VM will have after merging the configuration updates on the VM with the machine catalog updates. For example:
Get-ProvVMConfigurationResultantSet -ProvisioningSchemeName <catalog name> -VMName machine1
<!--NeedCopy-->
Note:
Any updates on the VM will override the updates done on the machine catalog.
-
Request scheduled update for the VM. For example:
Set-ProvVMUpdateTimeWindow -ProvisioningSchemeName <catalog name> -VMName machine1 -StartsNow -DurationInMinutes -1 <!--NeedCopy--> -
Restart the VM. For example:
New-BrokerHostingPowerAction -MachineName machine1 -Action TurnOn
<!--NeedCopy-->
The VM keeps its updated VM size as derived from the machine profile. The tag values as specified in the machine profile are also applied to the VM. However, the storage type is derived from the latest provisioning scheme.
-
Get the configuration version of the VM. For example:
Get-ProvVM -ProvisioningSchemeName <catalog name> -VMName machine1
<!--NeedCopy-->
The
ProvisioningSchemeVersionandProvVMConfigurationVersionnow shows the latest version.
Revert the configuration updates applied to a VM
- After applying the updates to a VM, turn off the VM.
-
Run the following command to remove the updates that are applied on the VM. For example:
Set-ProvVM -RevertToProvSchemeConfiguration -ProvisioningSchemeName <catalog name> -VMName machine1 <!--NeedCopy--> -
Request scheduled update for the VM. For example:
Set-ProvVMUpdateTimeWindow -ProvisioningSchemeName <catalog name> -VMName machine1 -StartsNow -DurationInMinutes -1 <!--NeedCopy--> -
Restart the VM. For example:
New-BrokerHostingPowerAction -MachineName machine1 -Action TurnOn <!--NeedCopy--> -
Check the configuration version of the VM. For example:
Get-ProvVM -ProvisioningSchemeName <catalog name> -VMName machine1
<!--NeedCopy-->
The
ProvVMConfigurationVersionvalue is now the configuration version of the machine catalog.
Storage migration of VMs
You can move the disk storage of existing VMs from an old storage to a new storage in VMware and XenServer environments. During migration, MCS retains the VM capabilities such as power management, reset OS disk, and so on. You can also add new VMs to the machine catalog using the new disk storage. To do this, use the PowerShell command Move-ProvVMDisk.
You can migrate full clone persistent VMs and non-persistent VMs.
- For persistent Full Clone VMs: OS Disk, Identity Disk, and non-MCS provisioned disks.
- For non-persistent VMs: OS Disk, Identity Disk, and Write-back Cache (WBC) disk.
The new storage must satisfy the following conditions:
- It must be within the same cluster of the old storage.
- The host on which the VM is running must have access to both the old and new datastores.
Migrate the disk storage
To migrate the disk storage:
-
Add a destination storage to an existing hosting unit. You can run the PowerShell command
Add-Hyphostingunitstorageto add the destination storage:If you do not want to add new VMs to the old storage, then change the old storage to Superseded. You can do this using Studio or PowerShell commands. For Studio, see Edit storage. Alternatively, run
Set-Hyphostingunitstorageand setSupersededastrueto disable new VM creation in the old storage.Note:
For non-persistent VMs:
- If WBC is used, then configure the WBC destination storage in the hosting unit.
- If OS destination storage is configured, then WBC (if used) must be compatible with OS destination storage.
- If OS destination storage is not configured, then WBC (if used) must be compatible with the current OS storage.
- Turn off the VMs and turn on the Maintenance Mode.
-
Get the information about the provisioning scheme, hosting unit, OS disk storage, and WBC disk storage.
-
Run
ProvResourceInStoragefor OS storage information. For example:$result=Get-ProvSchemeResourceInStorage -ProvisioningSchemeName xxxxx $result $result.ProvResourceInStorage | Format-List -Property * <!--NeedCopy--> -
Run
TemporaryStorageInfofor WBC storage information. For example:$result=Get-ProvSchemeResourceInStorage -ProvisioningSchemeName xxxxx $result $result.TemporaryStorageInfo | Format-List -Property * <!--NeedCopy-->
-
-
Migrate the OS disk, Identity disk, and WBC disk (applicable to non-persistent VMs) to the destination storage using the
Move-ProvVMDiskPowerShell command.Note:
- Always provide the OS and Identity disks in the DiskType and
DestinationStorageIdparameters. - The
DestinationStorageIdfor OS disk and Identity disk must be the same.
Example:
Persistent VMs:
(Get-ProvVM -ProvisioningSchemeName xxxxx) | Move-ProvVMDisk -ProvisioningSchemeName "myFullCloneProvScheme" -VMName "machine01" -DiskType OS,Identity -DestinationStorageId datastore1,datastore1
<!--NeedCopy-->
Important:
For persistent VM, all disks are moved. You cannot select which disks to move.
Non-persistent VMs:
(Get-ProvVM -ProvisioningSchemeName xxxxx) | Move-ProvVMDisk -ProvisioningSchemeName "myCleanOnBootProvScheme" -VMName "machine01" -DiskType OS,Identity,WBC -DestinationStorageId None,None,datastore1
<!--NeedCopy-->
Important:
- If you don’t want to migrate a specific disk, set the value as
Nonefor theDestinationStorageIdparameter. - If the VM has WBC disk, then add the WBC disk in
DiskTypeparameter and add the required information inDestinationStorageIdparameter.
- Always provide the OS and Identity disks in the DiskType and
Troubleshoot
If one of the disks fails to migrate, then none of the disks are migrated to the destination storage. You can get the failure report using the following command:
(Get-ProvTask -TaskID xxxxxxxxx).DiskMoveFailedVirtualMachines
<!--NeedCopy-->
Important considerations for migration of non-persistent VMs in VMware
- If you try to move the OS and Identity disk to a new storage, the VM specific files are also moved to the new storage.
- VMware doesn’t support moving the disk if it has the snapshot.
Migrate existing MCS provisioned catalogs to prepared image machine catalog
You can convert an existing MCS provisioned machine catalog into a prepared image machine catalog using a PowerShell command Set-ProvSchemeImage. However, you cannot revert to the legacy catalog after migration. Currently, this feature is applicable to Azure and VMware virtualization environments.
Limitations
Consider the following limitations:
- If the MCS catalog uses a persistent data disk, the catalog cannot be migrated to use a prepared image.
- If the MCS catalog uses unmanaged disks, the catalog cannot be migrated to use a prepared image.
Migrate to prepared image machine catalog
To migrate, do the following:
-
Create an image definition and image versions using Studio or PowerShell commands. See the steps to create image definitions and image versions in:
-
Azure:
-
VMware:
-
-
Run
Get-ProvSchemecommand to get the provisioning scheme UID. For example:Get-ProvScheme -ProvisioningSchemeName <name> | select ProvisioningSchemeName, ProvisioningSchemeUid <!--NeedCopy--> -
Run
Get-ProvImageVersionSpeccommand to get the Image definition name, image version spec uid. For example:Get-ProvImageVersionSpec -ImageDifinitionName <name> -Filter {IsPrepared -eq $true} | select ImageDefinitionName ImageVersionSpecUId <!--NeedCopy--> -
Run
Set-ProvSchemeImagecommand to migrate an existing MCS provisioned machine catalog into a prepared image machine catalog. For example:Set-ProvSchemeImage -ProvisioningSchemeName [ProvisioningSchemeName] -ImageVersionSpecUid [ImageVersionSpecUid] <!--NeedCopy--> -
Run
Get-ProvSchemecommand to check that the catalog is migrated. For example:Get-ProvScheme -ProvisioningSchemeName <name> | select ProvisioningSchemeName, ProvisioningSchemeUid, ImageVersionSpecUid <!--NeedCopy-->
Troubleshoot
- For machines with
Power State Unknownstatus, see CTX131267 for guidance. - To fix VMs that continuously show an unknown power state, see How to fix VMs that continuously show an unknown power state.
- If a Cloud Connector is not operating properly, MCS provisioning operations (such as catalog updates) take longer than usual and the management console performance degrades significantly.
Where to go next
For information on managing specific hypervisor catalogs, see:
In this article
- Introduction
- About persistent instances
- Manage Machine Catalogs
- Use Studio
- View catalog details
- Add machines to a catalog
- Delete machines from a catalog
- Edit a catalog
- Rename a catalog
- Delete a catalog
- Manage Active Directory computer accounts in a catalog
- Change the master image for a catalog
- Convert MCS-provisioned catalogs from using master images to using prepared images
- Change the functional level or undo the change
- Clone a catalog
- Organize catalogs using folders
- Upgrade VDAs
- Manage experience optimization settings for a catalog
- Retry catalog creation
- (Non-Citrix provisioned VDAs only) Generate and manage enrollment tokens
- Use PowerShell
- Manage the sequence number of the machine name
- Add descriptions to an image
- Reset OS disk
- Repair the identity information of active computer accounts
- Change the network setting for an existing machine catalog
- Manage versions of a machine catalog
- Change cache configuration of an existing machine catalog
- Convert a non-machine profile-based machine catalog to a machine profile-based machine catalog
- Retrieve warnings and errors associated with a catalog
- Delete machines without hypervisor access
- Update properties of individual VMs
- Storage migration of VMs
- Migrate existing MCS provisioned catalogs to prepared image machine catalog
- Troubleshoot
- Where to go next