Cloud Health Check
Note:
Cloud Health Check is integrated into Citrix DaaS. The integration is available as the Run Health Check action in Studio. For more information, see Troubleshoot VDA registration and session launch issues.
Cloud Health Check allows you to run checks that gauge the health and availability of the site and its components. You can run health checks for Virtual Delivery Agents (VDAs), StoreFront™ servers, and Profile Management. VDA health checks identify possible causes for common VDA registration and session launch issues.
If issues are present during the checks, Cloud Health Check provides a detailed report and the actions to fix the issues. Each time Cloud Health Check starts, it checks for the latest version of scripts on the Content Delivery Network (CDN) and automatically downloads the scripts if they do not exist on the local machine. Cloud Health Check always chooses the latest local version of scripts to run health checks.
Note:
Cloud Health Check does not update every time it runs.
In a Citrix Cloud™ environment, run Cloud Health Check from a domain-joined machine to run checks on one or more VDAs or StoreFront servers.
Note:
You cannot install or run Cloud Health Check on a Cloud Connector.
The log for the Cloud Health Check application is stored in C:\ProgramData\Citrix\TelemetryService\CloudHealthCheck.log. You can use this file for troubleshooting.
View an introduction to Cloud Health Check.
View when to use Cloud Health Check.
Installation
To prepare your environment for installation of Cloud Health Check, you must have a domain-joined Windows machine.
Note:
You cannot install or run Cloud Health Check on Cloud Connector.
- On the domain-joined machine, download the Cloud Health Check installer.
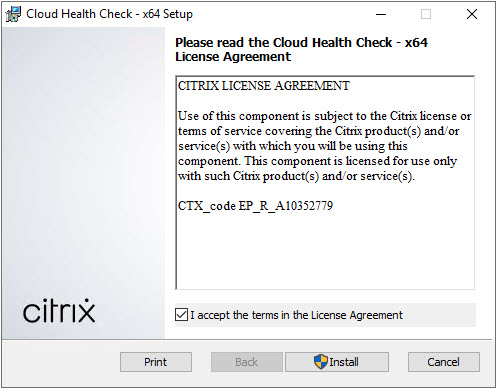
- Double-click the CloudHealthCheckInstaller_x64.msi file.
- Click the box to accept the terms.
-
Click Install.
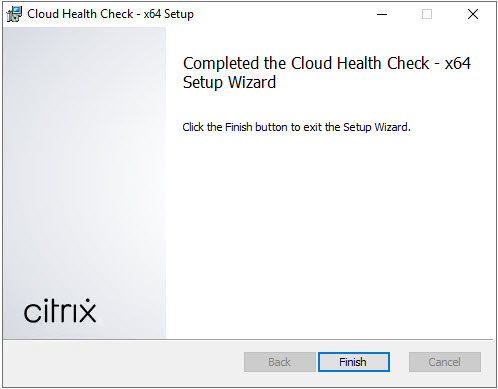
-
After installation has completed, click Finish.
Permissions and requirements
Permissions:
-
To run health checks:
- You must be a member of the domain users group.
- You must be a full administrator or have a custom role with read-only and Run Environment Tests permissions for the site.
- Set the script execution policy to at least
RemoteSignedto allow the scripts to run. For example:Set-ExecutionPolicy RemoteSigned. Note: other script execution permissions can work as well.
-
Use Run as administrator when launching Cloud Health Check.
For each VDA or StoreFront machine that you run health checks on:
- The OS must be 64-bit.
- The machine must be joined to the same Active Directory domain forest as the health check host.
- Cloud Health Check must be able to communicate with the machine.
- File and printer sharing must be turned on.
- PSRemoting and WinRM must be enabled. The machine must also be running PowerShell 3.0 or later.
- Windows Management Infrastructure (WMI) access must be enabled on the machine.
About health checks
Health check data is stored in folders under C:\ProgramData\Citrix\TelemetryService\.
VDA health checks
For registration on the VDA, Cloud Health Check checks:
- VDA software installation
- VDA machine domain membership
- VDA communication port availability
- VDA service status
- Windows firewall configuration
- Communication with Controller
- Time sync with Controller
- VDA registration status
For session launches on VDAs, Cloud Health Check checks:
- Session launch communication port availability
- Session launch services status
- Session launch Windows firewall configuration
- VDA Remote Desktop Services Client Access Licenses
- VDA application launch path
- Session launch registry settings
- Citrix Universal™ Injection Driver (CTXUVI) status
For Profile Management on VDAs, Cloud Health Check checks:
- Hypervisor detection
- Provisioning detection
- Citrix Virtual Apps and Desktops™
- Personal vDisk configuration
- User store
- Profile Management Service status detection
- Winlogon.exe hooking test
To run checks on Profile Management, you must install and enable Profile Management on the VDA. For more information on Profile Management configuration checks, see Knowledge Center article CTX132805.
StoreFront health checks
StoreFront checks verify whether:
- Citrix Default Domain service is running
- Citrix Credential Wallet service is running
- The connection from the StoreFront server to Active Directory is port 88
- The connection from the StoreFront server to Active Directory is port 389
- The connection from the StoreFront server to Active Directory is port 464
- The base URL has a valid FQDN
- The correct IP address from the base URL can be retrieved
- The IIS application pool is using .NET 4.0
- The certificate is bound to the SSL port for the host URL
- The certificate chain is complete
- The certificates have expired
- A certificate is expiring within 30 days
Running Cloud Health Check
To run Citrix Cloud Health Check:
-
Select Citrix > Citrix Cloud Health Check from the machine’s Start menu, or run
CloudHealthCheck.exeinC:\Program Files\Citrix\CloudHealthCheck.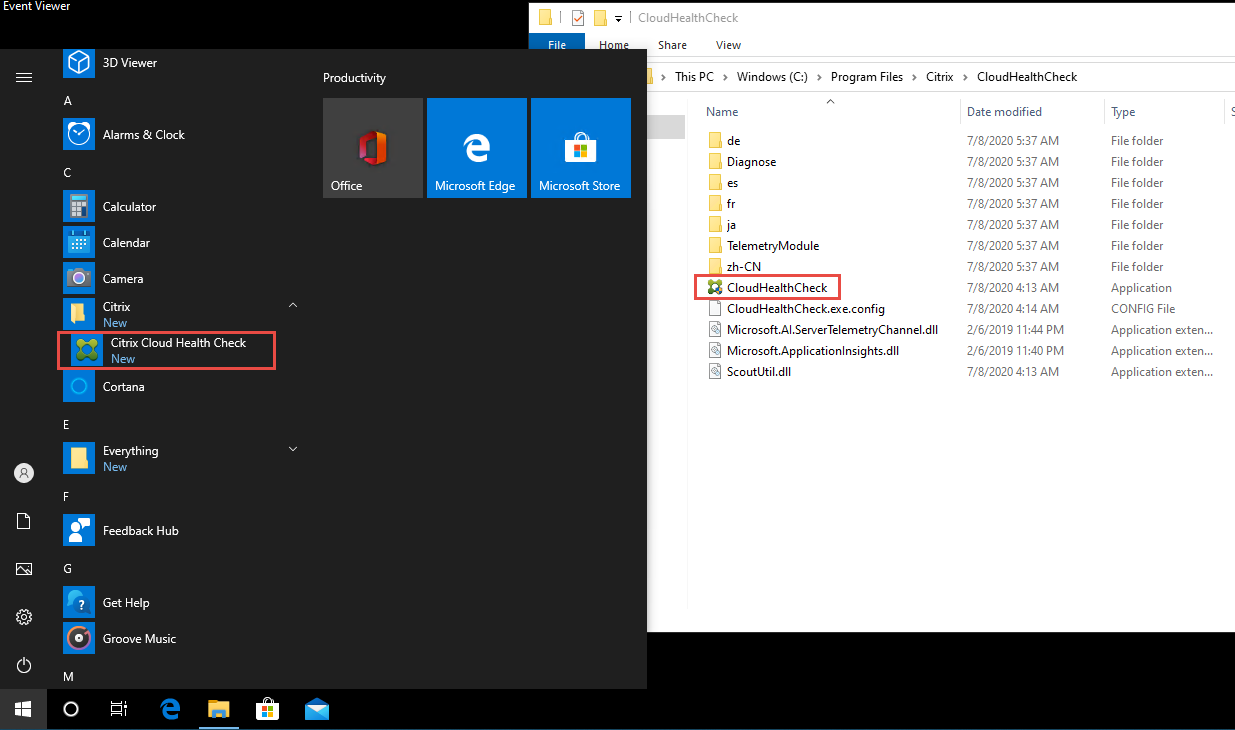
-
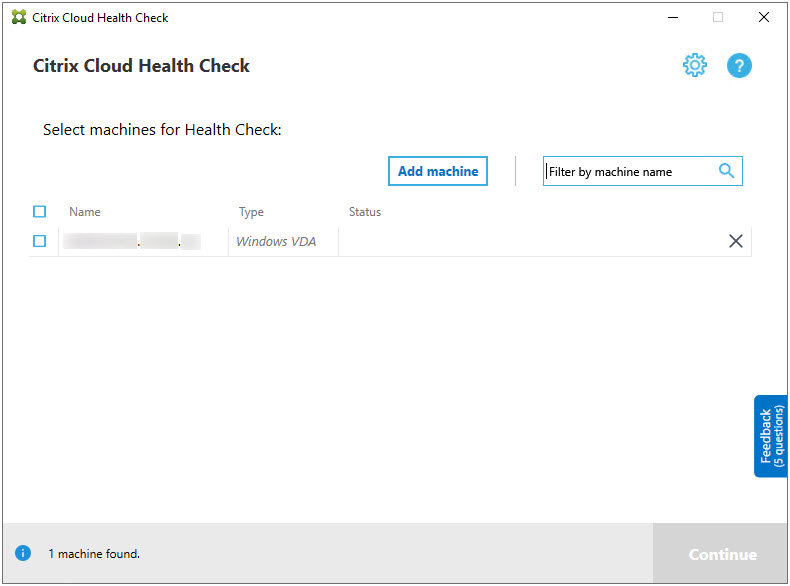
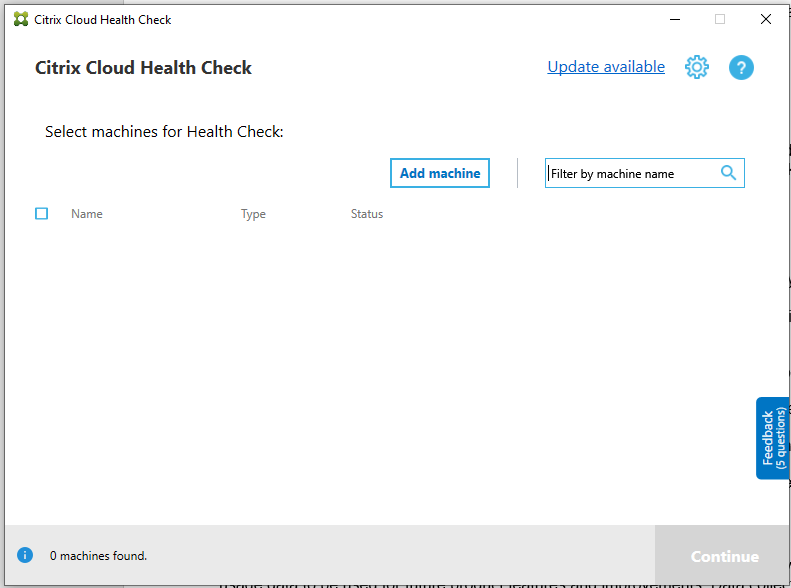
On the main Cloud Health Check screen, click Add machine.

- Type the FQDN of the machine you want to add. Note: Although entering a DNS alias instead of an FQDN can appear valid, the health checks might fail.
- Click Continue.
-
Repeat to add other machines as needed.
- To remove a manually added machine, click the X on the right end of the row and confirm the deletion. Repeat to delete other manually added machines.
Cloud Health Check remembers manually added machines until you remove them. When you close and then reopen Cloud Health Check, the manually added machines are still listed at the top of the list.
Import VDA machines
You can import VDA machines in the deployment when running health checks.
- On Connector, generate the machine list file with the following PowerShell command. On Connector, you must input Citrix credentials and select the customer in the pop-up dialog.
Get-BrokerMachine| foreach { $_.DnsName } | out-file C:\machineList.txt
- Copy the machineList.txt file to the domain-joined machine you want to run Cloud Health Check on.
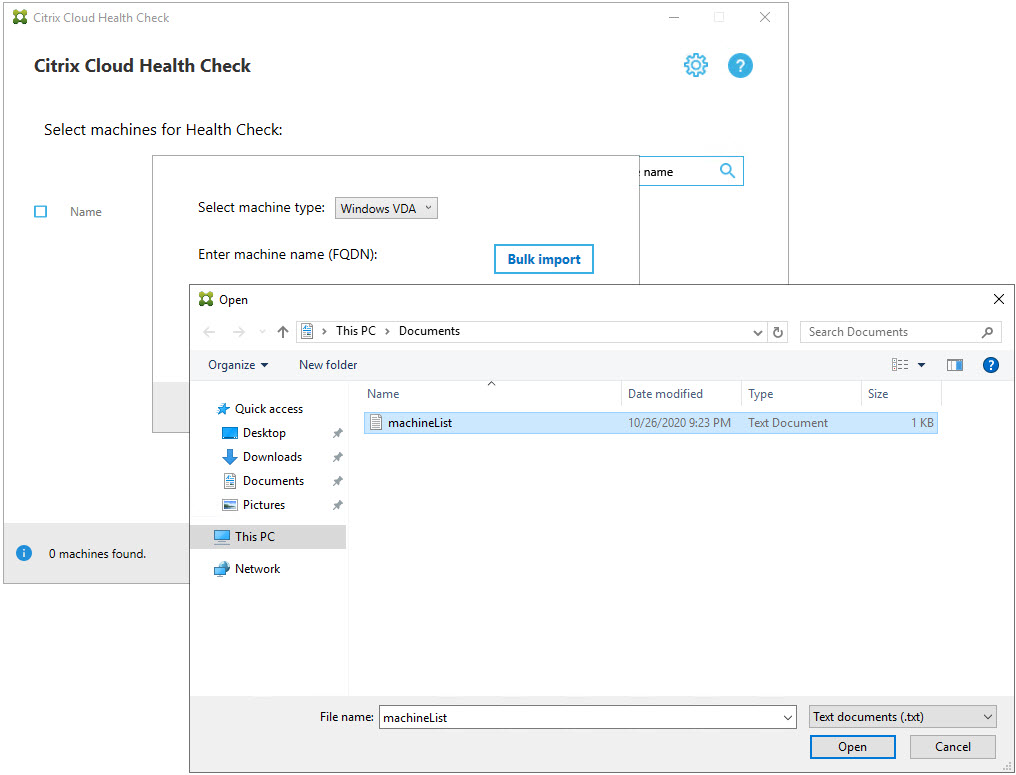
- On the Cloud Health Check page, click Add Machine.
- Select the Windows VDA machine type.
- Click Import VDA machines.
- Select the machineList.txt file.
-
Click Open.
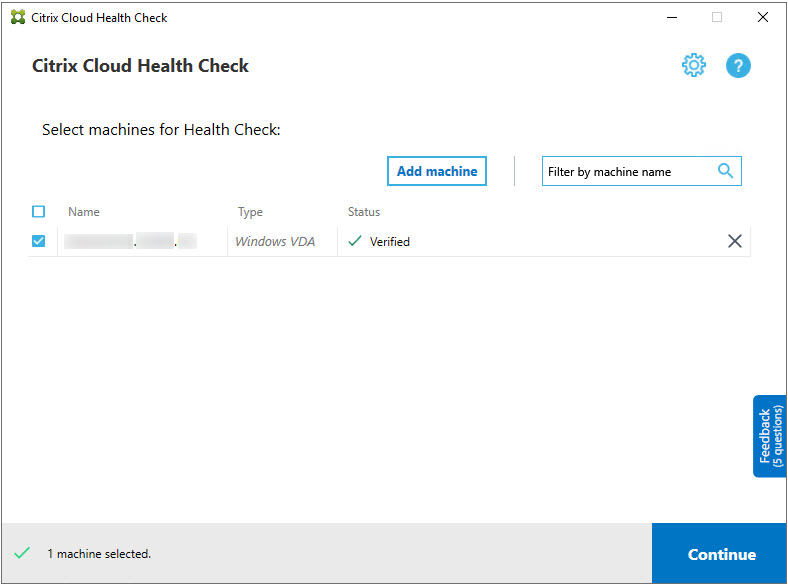
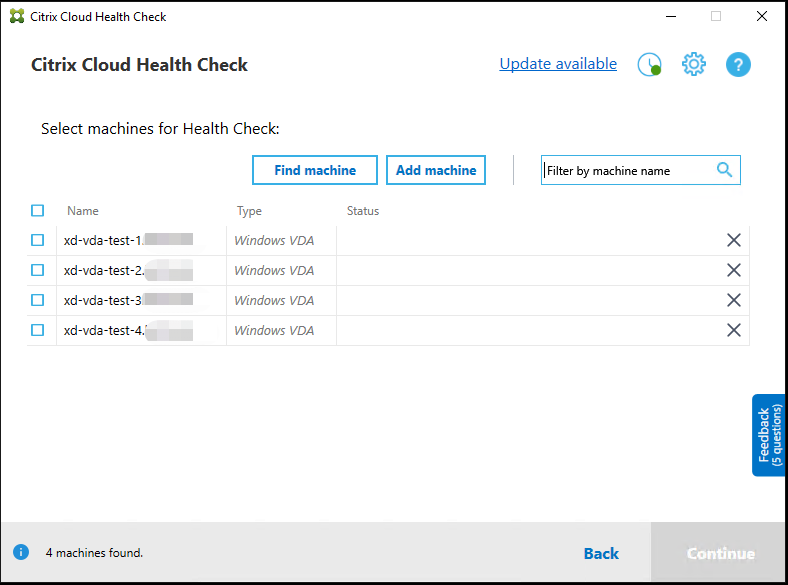
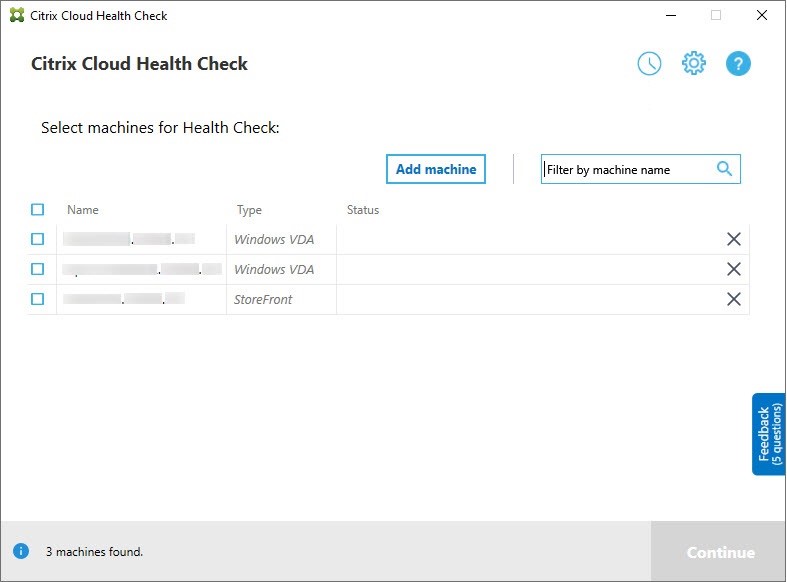
The imported VDA machines are listed on the Cloud Health Check page.
-
Select the check box next to each machine you want to run health checks on.
Cloud Health Check automatically launches verification tests on each selected machine, making sure it meets the criteria listed in verification tests. If verification fails, a message appears in the Status column, and that machine’s check box is cleared. You can then:
- Resolve the issue and then select the machine’s check box again. This triggers a retry of the verification tests.
- Skip that machine by leaving its check box unselected. Health checks are not run for that machine.
-
When the verification tests are complete, click Continue.
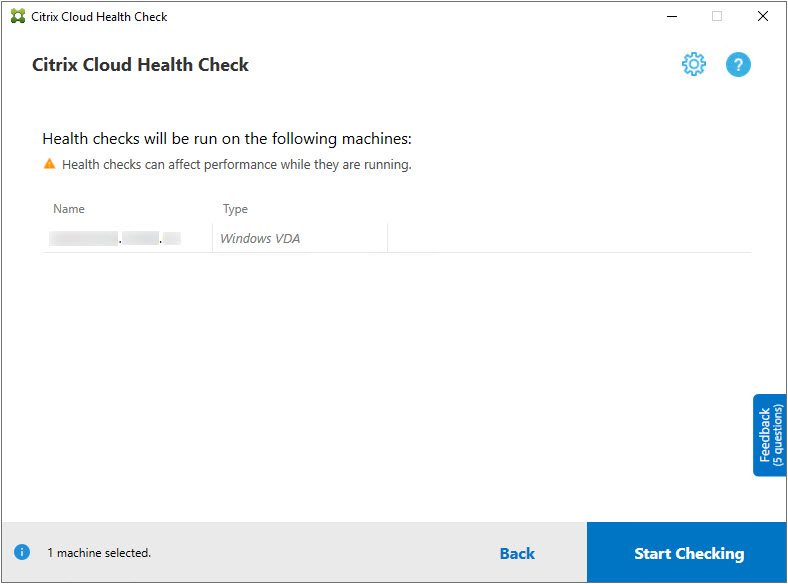
-
Run the health checks on the selected machines. The summary lists the machines where the tests run (the machines you selected that passed the verification tests).
-
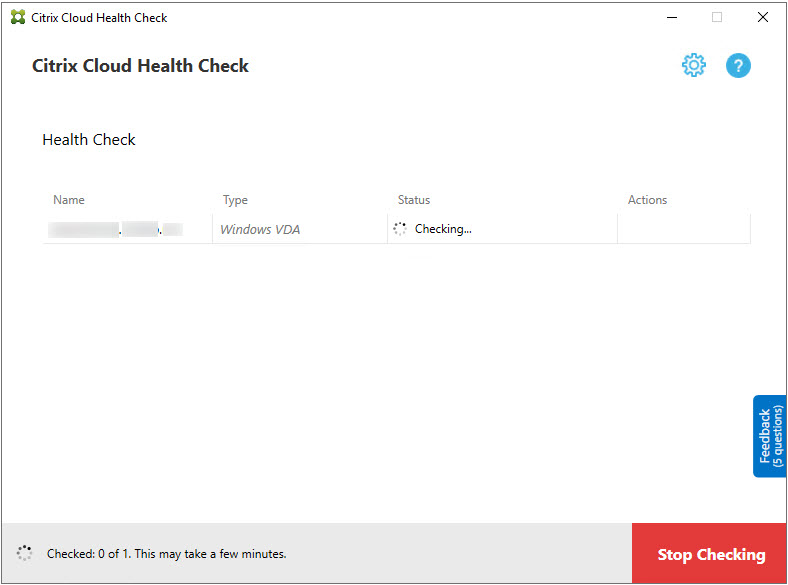
Click Start Checking.
During and after checking, the Status column indicates the current checking state for a machine.
-
To stop all in-progress checks, click Stop Checking in the lower right corner of the page. You can’t cancel a single machine’s health check, you can only cancel the check for all selected machines.
-
When the checks are complete for all selected machines, the Stop Checking button in the lower right corner changes to Done.
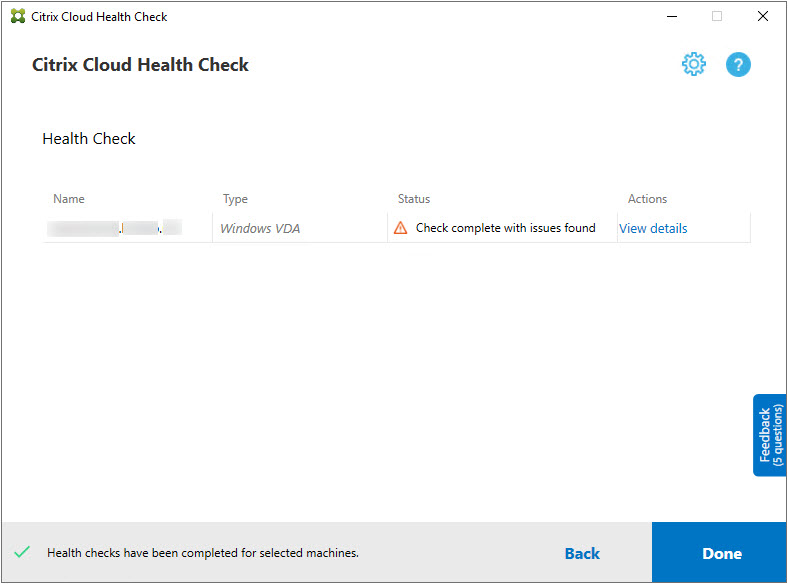
- If a check fails, you can click Retry in the Action column.
- If a check completes with no issues found, the Action column is empty.
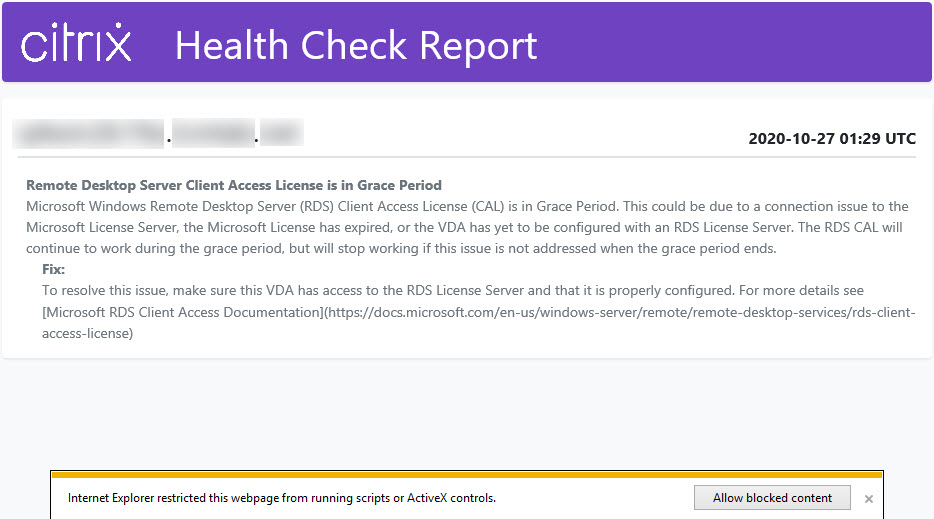
- If a check finds issues, click View Details to view the results.

If you use Internet Explorer to view the report, you must click Allow blocked content to display the hyperlink.
After the check completes for all selected machines, clicking Back causes you to lose your check results.
When the checks complete, click Done to return to the Cloud Health Check main screen.
Retrieve VDA machines
Cloud Health Check can automatically detect and retrieve VDAs from your Citrix DaaS (formerly Citrix Virtual Apps and Desktops service) deployments.
To retrieve your VDAs:
- Prepare a new machine that is joined to the same domain forest as the machine Cloud Health Check runs on.
-
Open Cloud Health Check and click Find machine to sign in to Citrix Cloud.
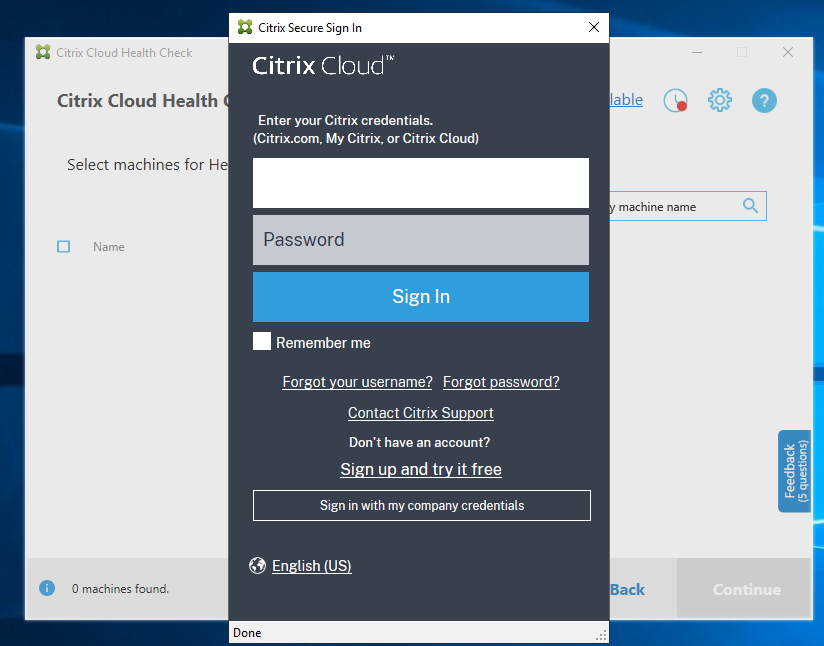
-
Select the customer with the cloud site you want to retrieve.
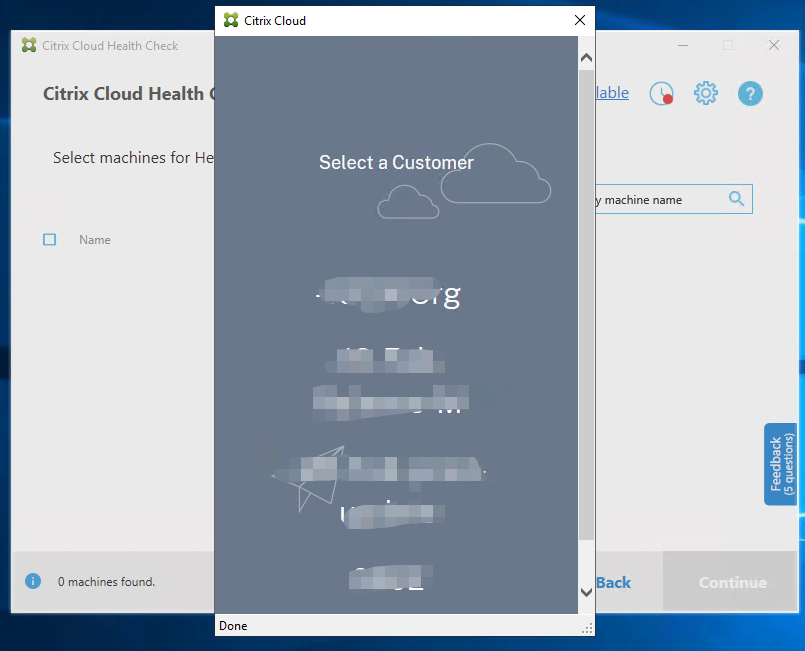
The VDA list displays in Cloud Health Check. The list is also saved in a local file located at \ProgramData\Citrix\TelemetryService\ChcDiscovery\ChcDiscoveredMachineList.json.
Your machine list loads the local cache when you open Cloud Health Check again. If you have made any updates in your deployment, you must click Find machine to refresh the machine list.
Note:
- Cloud Health Check finds machines only in the same domain forest as the machine Cloud Health Check runs on.
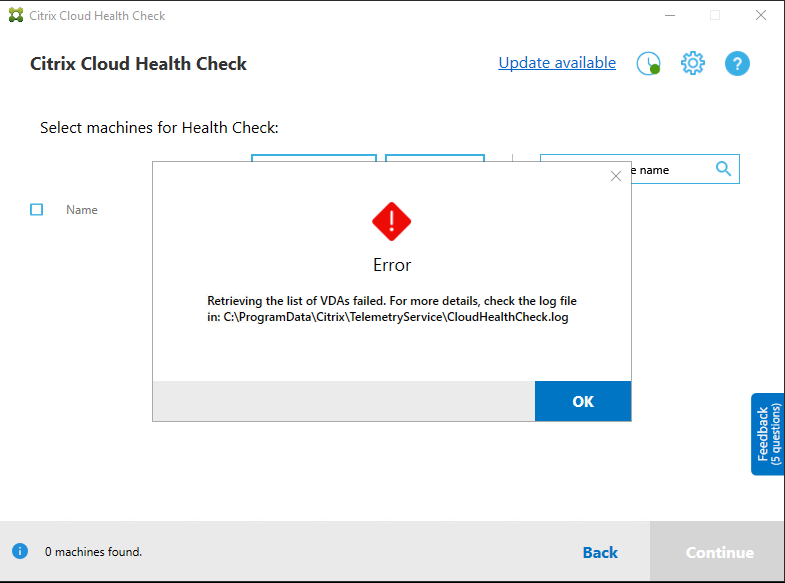
- Citrix Cloud sessions expire in one hour. After one hour, you must click Find machine again to get the latest VDA list.
- An error message pops up if retrieving the VDA list fails. You can check the details in
C:\ProgramData\Citrix\TelemetryService\CloudHealthCheck.log.
Heath check results
Health checks that generate reports contain the following elements:
- Time and date when the results report was generated
- FQDNs of the machines that were checked
- Conditions checked on the target machines
Running Cloud Health Check on the command line
Cloud Health Check can be run on the command line to help customers to perform health checks. To use Cloud Health Check on the command line, you must be an administrator on the machine Cloud Health Check is running on.
Note:
When using Cloud Health Check on the command line, only one machine can be checked at a time. Only one instance of
CloudHealthCheck.execan be run at the same time on the target machine. If you want to check multiple machines, the machines must be checked one by one, by wrapping the cmdlets in a loop in cmdlet/PowerShell scripts. Any opened UI instance of Cloud Health Check must also be closed.
Command-line arguments
The supported command-line arguments are:
-
MachineFQDN- This argument is mandatory. This is the fully qualified domain name of the target machine. -
MachineType- This argument is optional. The argument value can be the Windows VDA (default value) or StoreFront. -
ReportName- This argument is optional. The argument value must be a valid file name on Windows. The default value isHealthCheckReport. -
SkipAdminCheck- This argument is optional. This can be added to skip the checks that require administrator permissions. -
UpdateScripts- This argument is optional. This can be added to update the check scripts from CDN server. -
DisableCeip- This argument is optional if CEIP is enabled on the UI, add it to disable CEIP. -
Help- Show help information about parameters.
Examples:
HealthCheckCLI.exe -MachineFQDN machine.domain.local
HealthCheckCLI.exe -MachineFQDN machine.domain.local -ReportName checkreport
HealthCheckCLI.exe -MachineFQDN machine.domain.local -SkipAdminCheck
HealthCheckCLI.exe -MachineFQDN machine.domain.local -UpdateScripts
HealthCheckCLI.exe -MachineFQDN machine1.domain.local,machine2.domain.local,machine3.domain.local
HealthCheckCLI.exe -Help
Note:
Parameter names are not case sensitive.
By default, the console output is not shown in the command line console window. You can manually display the output by appending |more to the argument.
Example: HealthCheckCLI.exe -MachineFQDN machine.domain.local|more
The command line default needs administrator permissions to run. Add the parameter -SkipAdminCheck to override the need for administrator permissions.
Exit codes
Exit codes explain the result of Cloud Health Check checks within the command line. To get the exit code, you must add start /wait before the command line.
Example: start /wait HealthCheckCLI.exe -MachineFQDN machine.domain.local
Exit codes are:
- 0 - Normal, check completed and passed.
- 1 - Failure, check completed with issues.
- 2 - Error, check not completed with errors.
You can also use the argument echo %errorlevel% to get the exit code for the last ran command.
Reports
Cloud Health Check creates folders with the name of the machine in HealthCheckDataFolder for the target machine. An .html file and a .json file are created on the machine Cloud Health Check is installed on. Health check reports are located in the HealthCheckDataFolder in %ProgramData%\Citrix\TelemetryService\HealthCheck\Data.
Reports are only created when issues exist on the target machine.
Note:
The report files are overwritten if the specified report name exists.
Alerts and basic information are stored in the .json report.
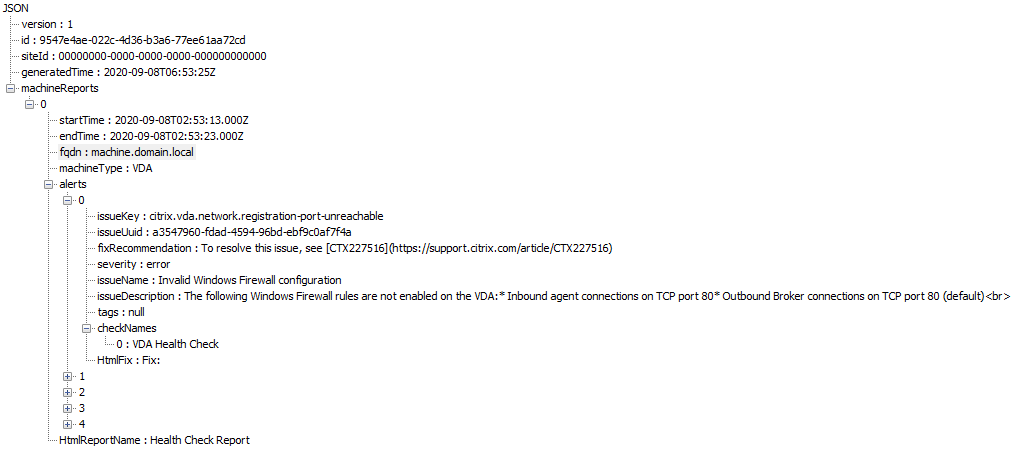
Report codes are:
- issueKey: a plain text description of the issue.
- issueUuid: a unique identifying string for the issue.
- fixRecommendation: the fix recommendation for the issue.
- severity: indicates if the issue must be fixed. An error can indicate that the component (VDA or StoreFront) malfunctioned, and a warning indicates that the component can work but might have some potential issues.
- issueName: the title of the issue.
- issueDescription: a detailed description of the issue.
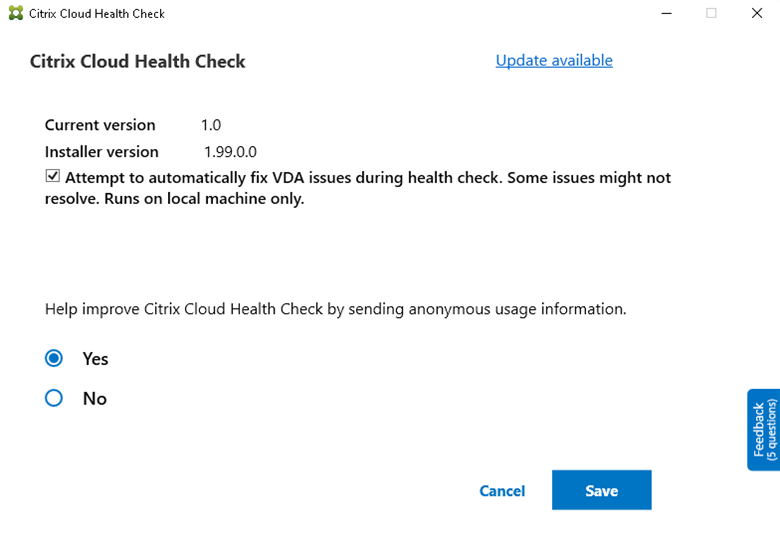
Updating Cloud Health Check
If there is a new version of Cloud Health Check available, an Update available link displays on the top right of the Cloud Health Check window. Click the link to go to Citrix Downloads to get the new version.
Cloud Health Check scheduler
Use the Cloud Health Check scheduler to perform periodic health checks.
Set up the schedule
-
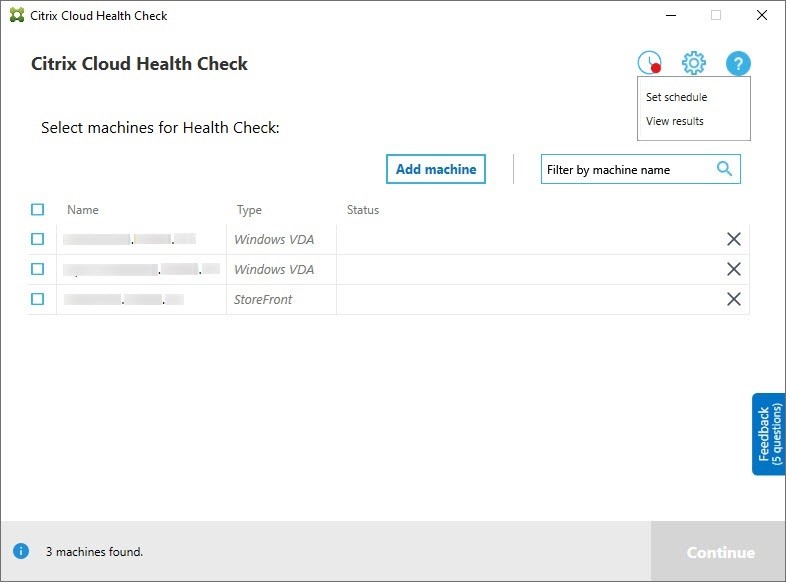
Click Add machine in the Cloud Health Check main window to add machines that you want to run periodic checks on.
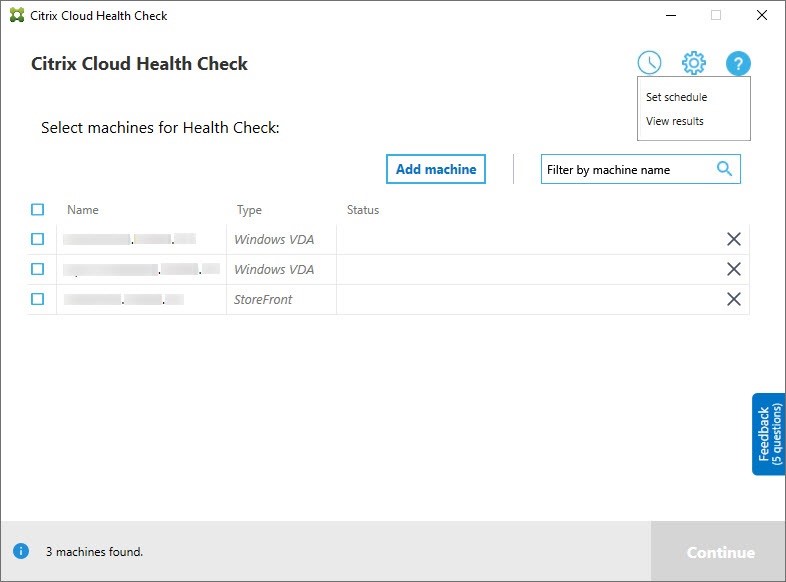
-
Click the clock icon, then click Set schedule.
- Select a time for your schedule, then click Next. The task can be set to repeat by selecting the Repeat task every check box.
- Choose to output results to Windows Event Log. The task can be set to write the results to Windows Event Log.
- Choose to trigger a custom PowerShell script after the scheduled check finishes, and then click Next.
- Click Edit to edit the script content in Windows PowerShell ISE if needed.
- Click Locate to open the file location and to use a different editor to open the file to edit the script.
- Click Reset to reset the script to its original setting.
Note:
- You cannot change the script name and path for the script.
- You can implement custom actions using the ChcShceduledTrigger.ps1 script, such as sending an email after the scheduled check report is ready. Add the following code to the end of the script. Customize the code to add the correct email accounts and the SMTP server address. An email notification is sent using the credentials of the account that the scheduled task runs.
#Sending email example code:
$body = "CreatedTime: $($report.CreatedTime)"
$body = $body + "`nStatusCode: $($report.StatusCode)"
$body = $body + "`nMachineCount: $($report.MachineReports.Count)"
$from = "mock_email_accout"
$to = "mock_email_accout"
$smtpServer = "mock_smtp_server"

Send-MailMessage -Subject "Citrix Cloud Health Check Scheduler Report" -Body $body -From $from -To $to -SmtpServer $smtpServer
<!--NeedCopy-->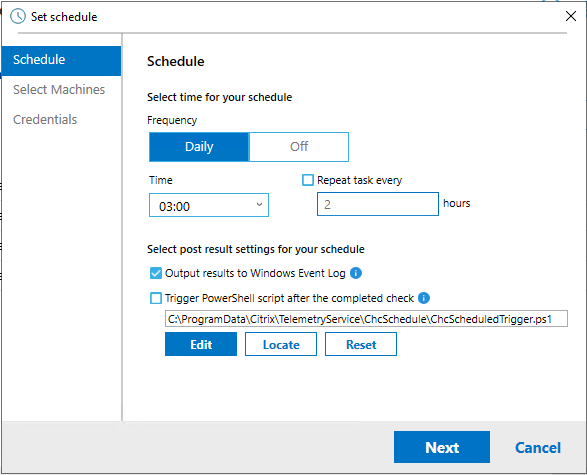
-
Select the machines for your schedule, then click Next.

-
Input the credentials of the account that the task runs on, then click Finish.
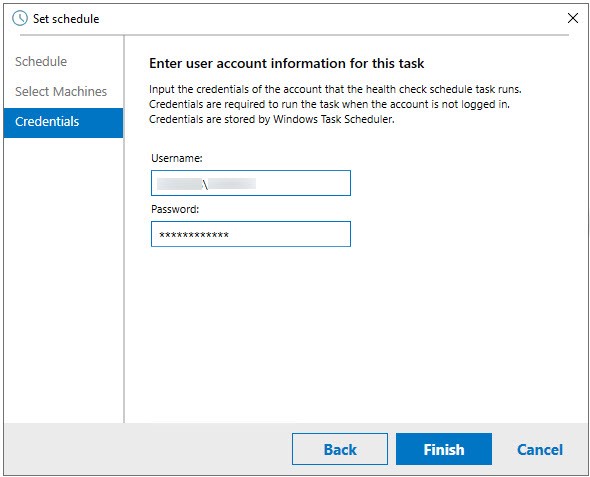
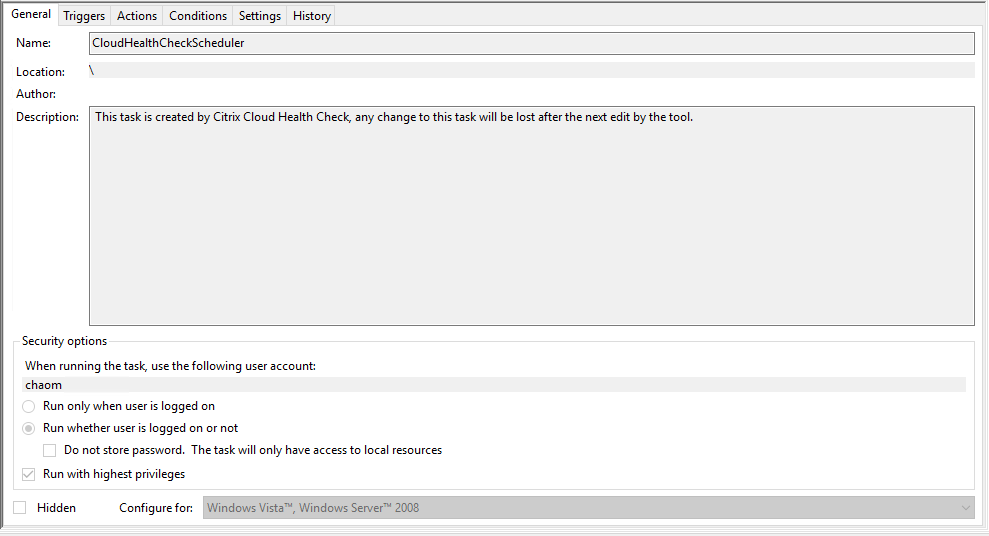
-
A CloudHealthCheckScheduler task is created in Windows Task Scheduler.
View schedule results
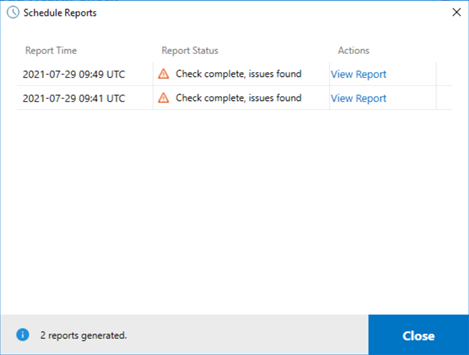
The clock icon with a red dot indicates that issues were found in the last check. To view the results, click the clock icon, then click View results.
The Schedule Reports page shows the results for all the scheduled health check tasks. Click View Report to check the report for each schedule.
The html report lists the overall report for each schedules. An example of the report is below:
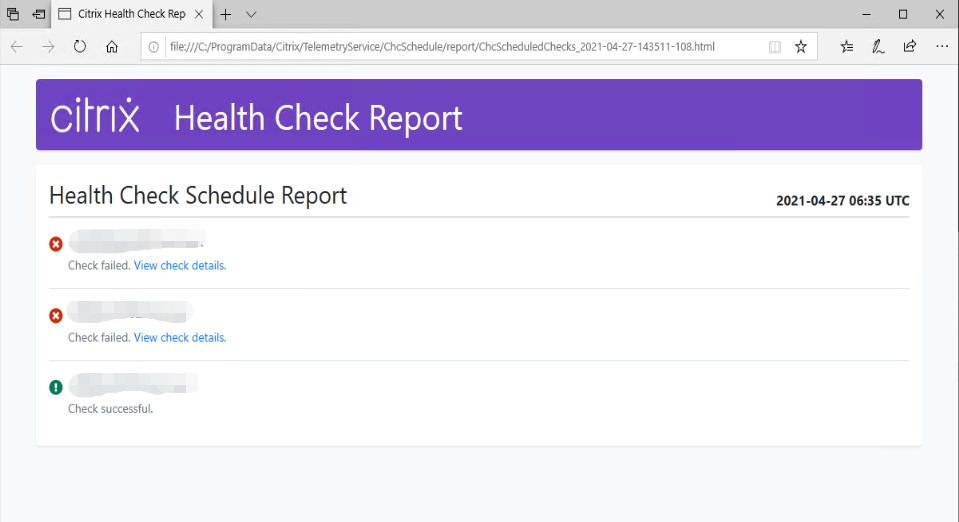
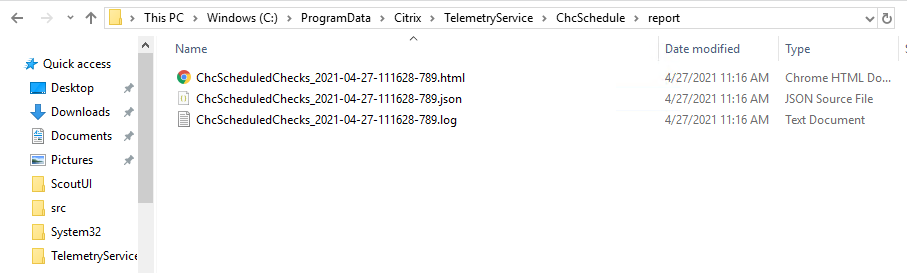
All health check results are stored in a folder called ChcSchedule. Cloud Health Check creates three files during each check run. Up to 500 iteration logs are kept.

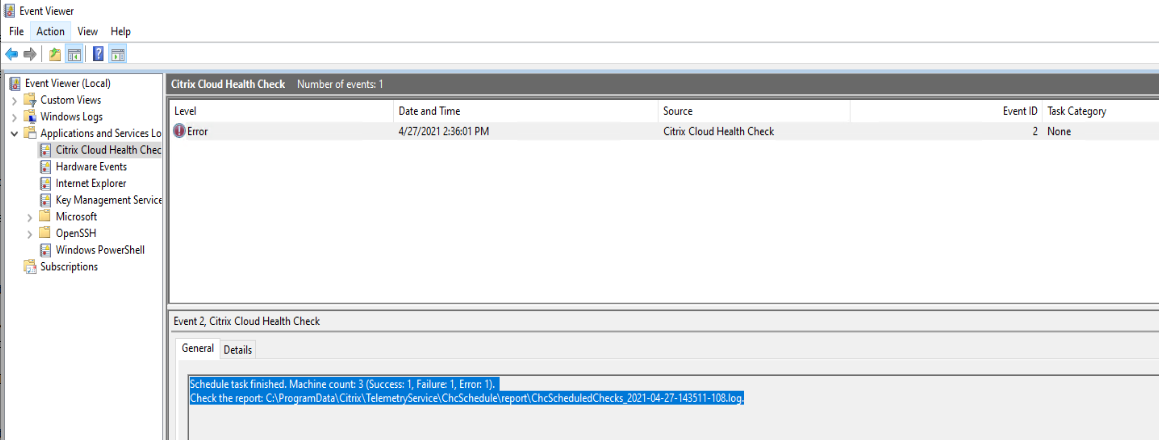
If the Output results to Windows Event Log checkbox is selected, the check result is also sent to Window Event Log.
Disable schedules
-
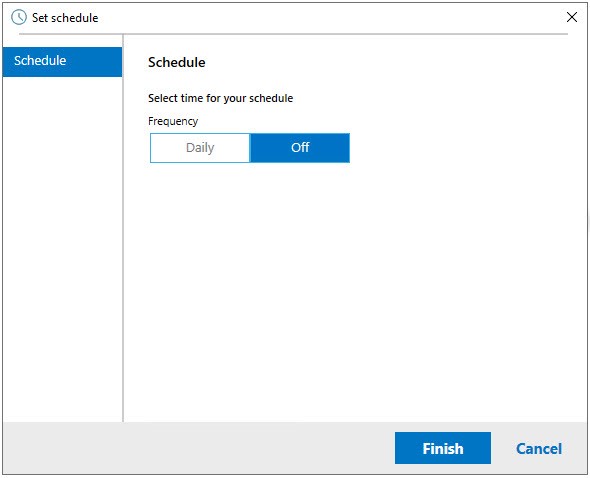
Click the clock icon, then click Set schedule.

-
Click Off, then click Finish to disable the scheduler.
More information
- You must add or import VDAs to Cloud Health Check first. For more information, see Import VDA Machines.
- The Cloud Health Check scheduler can only schedule one task at a time on a domain-joined machine. If you set the schedule multiple times, only the latest one takes effect.
Verification tests
Before a health check starts, verification tests run automatically for each selected machine. These tests make sure that the requirements are met for a health check to run. If a test fails for a machine, Cloud Health Check displays a message with suggested corrective actions.
-
Cloud Health Check cannot reach this machine - Ensure that:
- The machine is powered on.
- The network connection is working properly. (This can include verifying that your firewall is properly configured.)
- File and printer sharing is turned on. See the Microsoft documentation for instructions.
- Enable PSRemoting and WinRM - You can enable PowerShell remoting and WinRM by running PowerShell as an administrator, then running the Enable-PSRemoting cmdlet. For details, see the Microsoft help for the cmdlet.
- Cloud Health Check requires PowerShell 3.0 or later - Install PowerShell 3.0 or later on the machine, and then enable PowerShell remoting.
- WMI is not running on the machine - Ensure that Windows Management Instrumentation (WMI) access is enabled.
- WMI connections blocked - Enable WMI in the Windows Firewall service.
Usage data collection
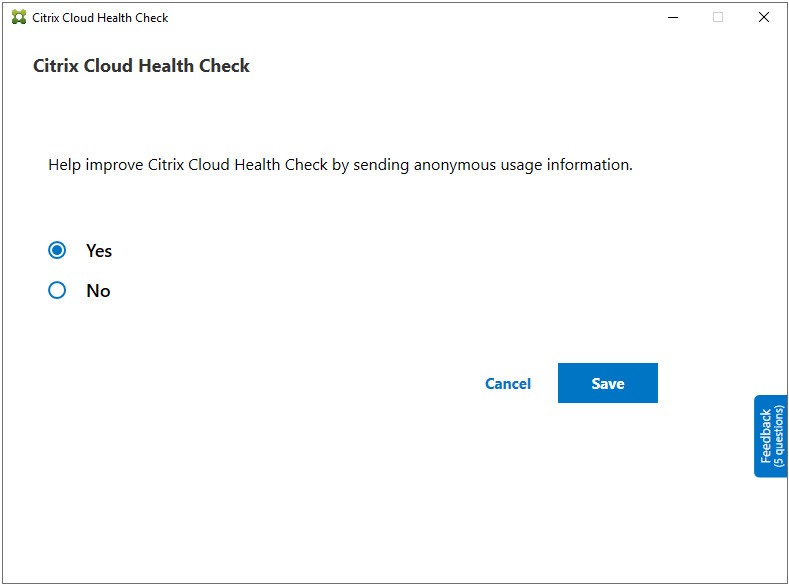
When you use Cloud Health Check, Citrix uses Google Analytics to collect anonymous usage data to be used for future product features and improvements. Data collection is enabled by default.
To change usage data collection and upload, click the Settings gear in the Cloud Health Check UI. You can then choose whether to send the information by selecting Yes or No and then clicking Save.
Automatic fix
Automatic fix allows Cloud Health Check to automatically detect and fix certain issues by changing the settings or restarting the services.
Automatic fix checks the following VDA registration items, with the recommended fixes:
- VDA machine domain membership
- Fix: Test connection security channel with a “repair” model to fix
- VDA services status
- Fix: Restart BrokerAgent service
- Communication with Controller
- Fix: Restart BrokerAgent service
- Time sync with Controller
- Fix: Run W32tm command
For session launches, automatic fix checks the following item, with the recommended fix:
- Session launch service status
- Fix: Restart BrokerAgent service
This feature is enabled by default. To disable it, click the gear icon in the upper right corner of the Cloud Health Check main window and then clear Attempt to automatically fix VDA issues during health check.

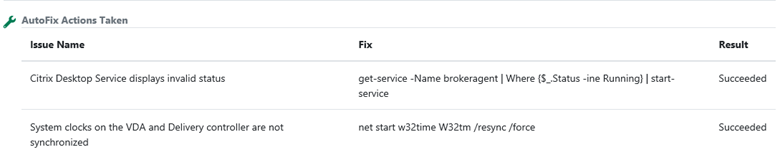
Result report
After running automatic fix, there is a section in the check results report to show all the details:
Troubleshooting
When Cloud Health Check fails to run or any exception occurs, check the Cloud Health Check log in C:\ProgramData\Citrix\TelemetryService\CloudHealthCheck.log.
The Cloud Health Check log for each target machine is in C:\ProgramData\Citrix\TelemetryService\HealthCheck\Data\$TargetMachineFQDN\log.txt.
To enable the debug log:
Edit C:\Program Files\Citrix\CloudHealthCheck\CloudHealthCheck.exe.config, update <add name="TraceLevelSwitch" value="3" /> to <add name="TraceLevelSwitch" value="4" />, save the file and reopen Cloud Health Check.
Feedback
To leave feedback on Cloud Health Check, fill out the Citrix survey.
In this article
- Installation
- Permissions and requirements
- About health checks
- Running Cloud Health Check
- Import VDA machines
- Retrieve VDA machines
- Heath check results
- Running Cloud Health Check on the command line
- Updating Cloud Health Check
- Cloud Health Check scheduler
- Verification tests
- Usage data collection
- Automatic fix
- Troubleshooting
- Feedback