Citrix Endpoint Management integration with Microsoft Endpoint Manager
Citrix Endpoint Management integration with Microsoft Endpoint Manager (MEM) adds the value of Citrix Endpoint Management micro VPN to Microsoft Intune aware apps, such as the Microsoft Edge browser.
To activate the integration, contact the Citrix Cloud Operations team.
This release supports the following use cases:
-
Intune MAM with Citrix Endpoint Management MDM+MAM.
This article focuses on the Intune MAM + Citrix Endpoint Management MDM+MAM use case. After you add Citrix as your MDM provider, configure Intune managed apps for delivery to devices.
Important:
- For this use case, Citrix Secure Mail doesn’t support integration with Intune.
- The Citrix Secure Mail integration with Intune is deprecated and will be removed in a future release. Refer to What’s new in Secure Mail for more details.
- Intune MAM and Citrix Endpoint Management MDM.
- Intune MAM.
- Intune MAM and Intune MDM. Citrix Secure Mail for iOS supports single sign-on for this use case.
For an easy-to-follow, graphical guide to setting up Citrix Endpoint Management integration with MEM, see Getting Started Guide.
For information on integrating with Azure AD Conditional Access, see Integrate with Azure AD Conditional Access.
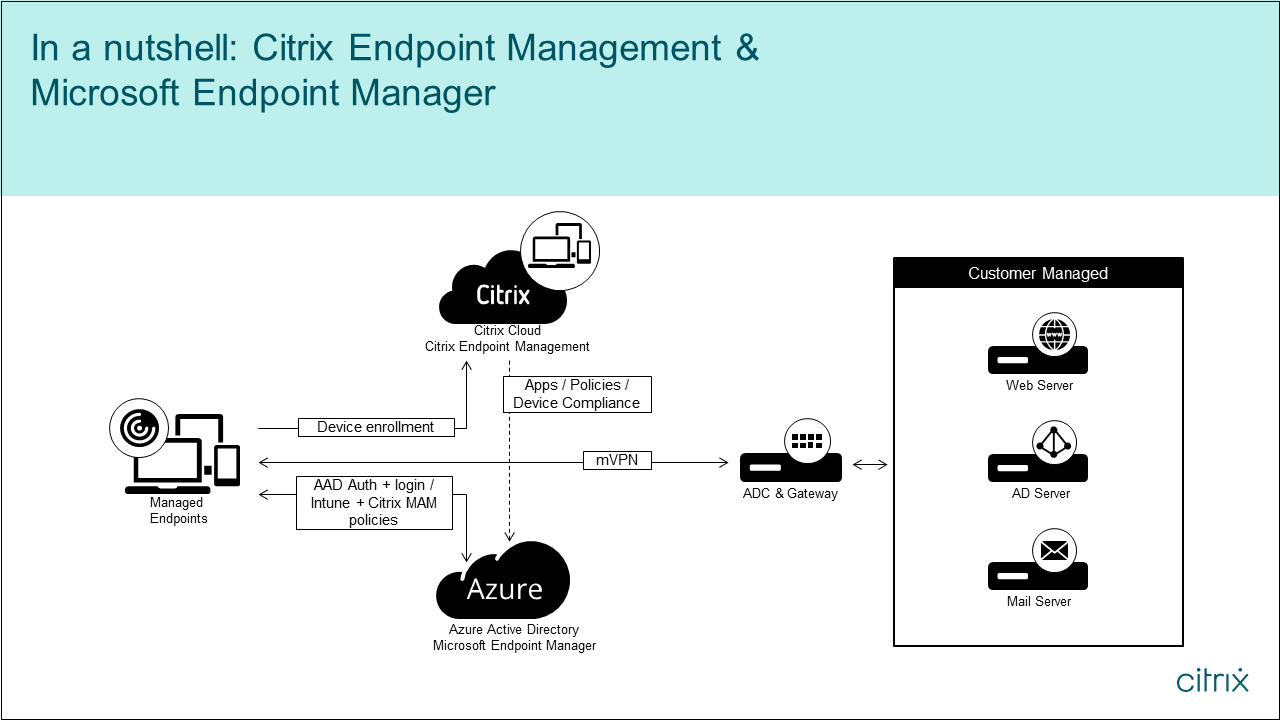
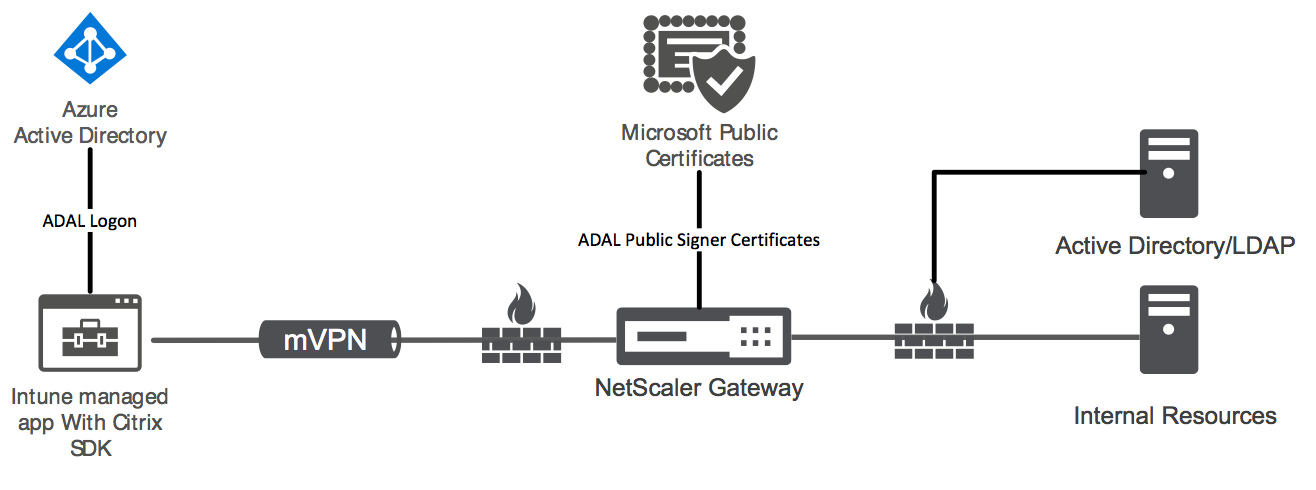
The following diagram provides an overview of Citrix Endpoint Management integration with Microsoft Endpoint Manager.
System requirements
MDX-enable
Microsoft
- Azure Active Directory (AD) access (with Tenant Admin privileges)
- Intune-enabled tenant
Firewall rule
- Enable a firewall rule to allow DNS and SSL traffic from a NetScaler Gateway subnet IP to
*.manage.microsoft.com,https://login.microsoftonline.com, andhttps://graph.windows.net(port 53 and 443)
Prerequisites
- Microsoft Edge browser: The Mobile Apps SDK is integrated within the Microsoft Edge browser app for iOS and Android. For more information about Microsoft Edge, see the Microsoft Edge documentation.
-
Citrix Cloud account: To sign-up for a Citrix account and request a Citrix Endpoint Management trial, contact your Citrix Sales Representative. When you’re ready to continue, go to https://onboarding.cloud.com. For more information on requesting a Citrix Cloud account, see Sign-up for Citrix Cloud.
Note:
The email you supply must be an address that is not associated with Azure AD. You can use any free email service.
- APNs certificates for iOS: Ensure that you configure APNs certificate for iOS. To learn more about setting up these certificates, see this Citrix blog post: Creating and Importing APNs Certificates.
- Azure AD sync: Set up synchronization between Azure AD and on-premises Active Directory. Do not install the AD sync tool on the domain controller machine. For more information on setting up this sync, see the Microsoft documentation on Azure Active Directory.
Configuring NetScaler Gateway
If you’re setting up a new Citrix Endpoint Management deployment, install one of these NetScaler Gateway appliances:
- NetScaler® Gateway VPX 3000 series or greater
- NetScaler Gateway MPX or dedicated SDX instance
To use NetScaler Gateway with Citrix Endpoint Management integration with MEM:
- Configure NetScaler Gateway with a management interface and a subnet IP.
- Use TLS 1.2 for all client to server communication. For information about configuring TLS 1.2 for NetScaler Gateway, see CTX247095.
If you’re using Citrix Endpoint Management integration with MEM with an Citrix Endpoint Management MDM+MAM deployment, configure two Citrix Gateways. MDX app traffic is routed through one NetScaler Gateway. Intune app traffic is routed through the other NetScaler Gateway. Configure:
- Two public IPs.
- Optionally, one network address translated IP.
- Two DNS names. Example:
https://mam.company.com. - Two public SSL certificates. Configure certificates that match the reserved public DNS name or use wildcard certificates.
- A MAM load balancer with an internal non-routable RFC 1918 IP address.
- An LDAP Active Directory service account.
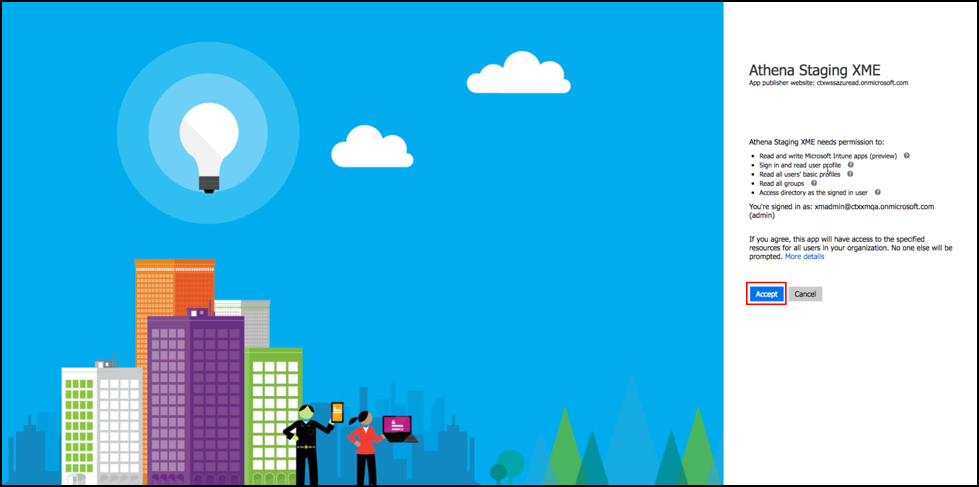
Consenting to delegated permission prompts
For managed apps that require users to authenticate, the apps request application permissions exposed by Microsoft Graph. By consenting to these permission prompts, the app can access the required resources and APIs. Some apps require consent by the global administrator for Microsoft Azure AD. For these delegated permissions, the global administrator must grant Citrix Cloud permission to request tokens. The tokens then enable the following permissions. For more information, see Microsoft Graph permissions reference.
- Sign in and read user profile: This permission allows users to sign in and connect to Azure AD. Citrix® can’t view user credentials.
- Read all users’ basic profiles: The app reads profile properties for users in the organization. The properties include the display name, first and last name, and email address and photo of users in the organization.
- Read all groups: This permission enables Azure AD groups to be specified for app and policy assignment.
- Access directory as the signed-in user: This permission verifies the Intune subscription and enables NetScaler Gateway and VPN configurations.
-
Read and write Microsoft Intune apps: The app can read and write the following:
- Microsoft-managed properties
- Group assignments and the status of apps
- App configurations
- App protection policies
Also, during the NetScaler Gateway configuration, the Azure AD global administrator must:
-
Approve the Active Directory chosen for micro VPN. The global administrator must also generate a client secret that NetScaler Gateway uses to communicate with Azure AD and Intune.
-
Not have the role of Citrix administrator. Instead, the Citrix administrator assigns Azure AD accounts to users with appropriate Intune application admin privileges. The Intune administrator then serves the role of a Citrix Cloud admin to manage Intune from within Citrix Cloud.
Note:
Citrix only uses the Intune Global Administrator password during setup and redirects the authentication to Microsoft. Citrix can’t access the password.
To configure Citrix Endpoint Management integration with MEM
-
Log on to the Citrix Cloud site and request a trial for Citrix Endpoint Management.
-
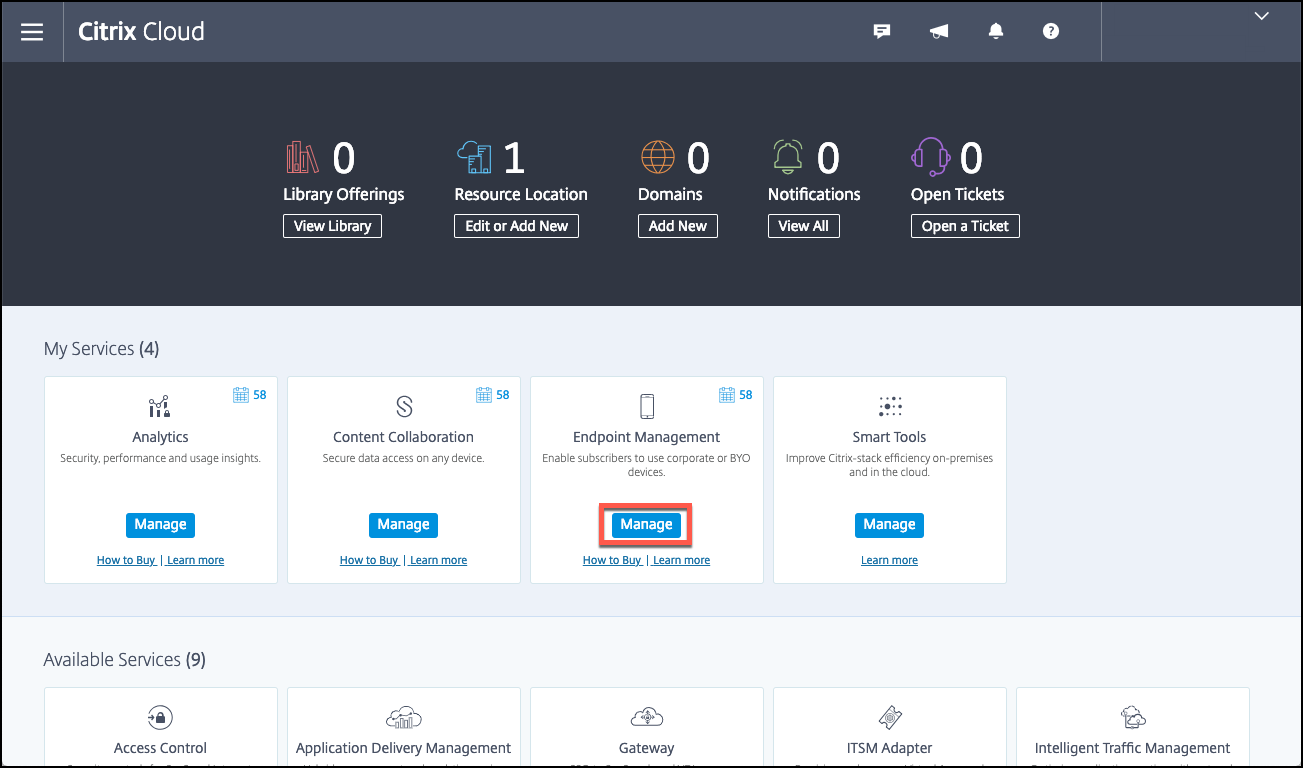
A sales engineer schedules an onboarding meeting with you. Let them know that you want Citrix Endpoint Management integration with MEM. When your request is approved, click Manage.
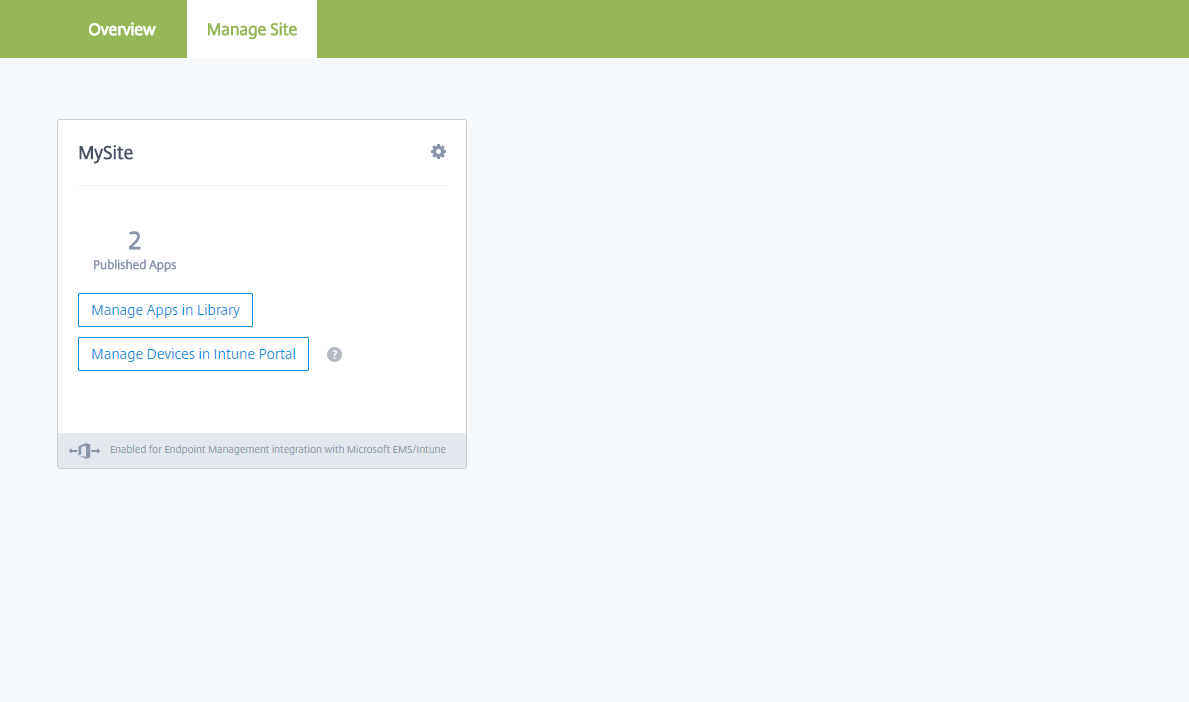
-
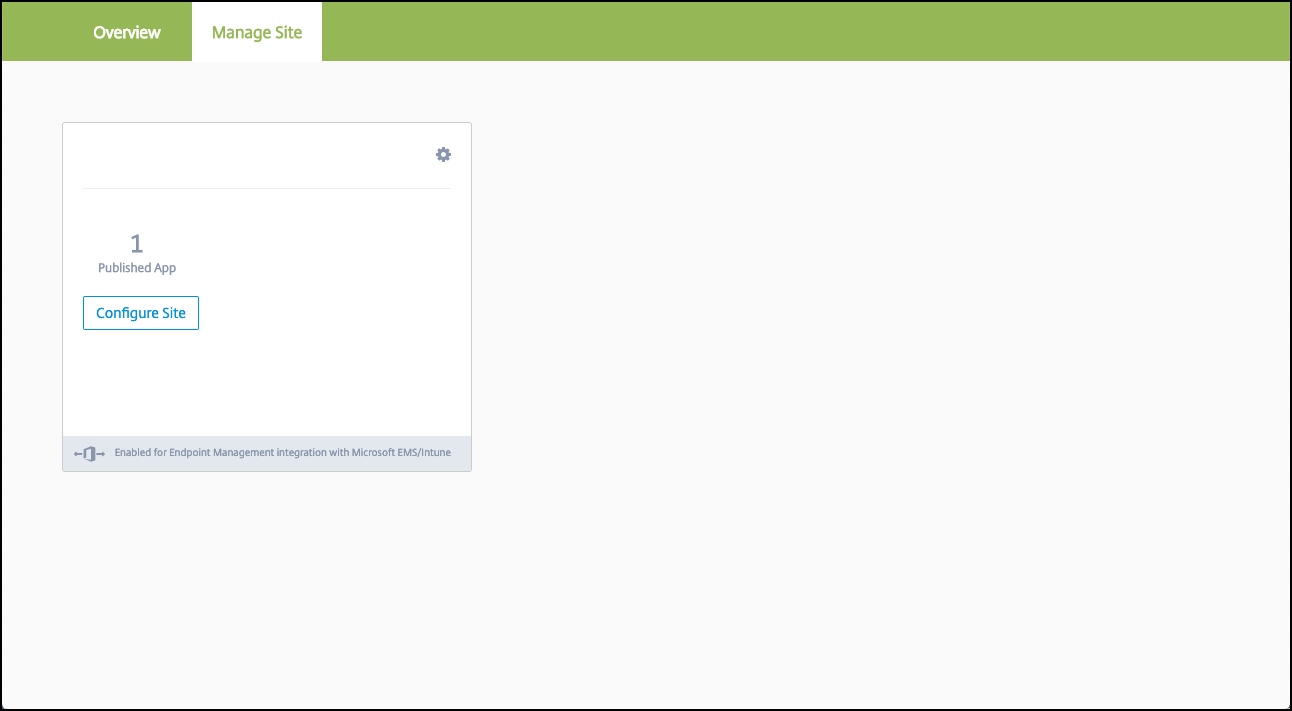
From here you can click the cog in the upper right of your site or you can click Configure Site.
-
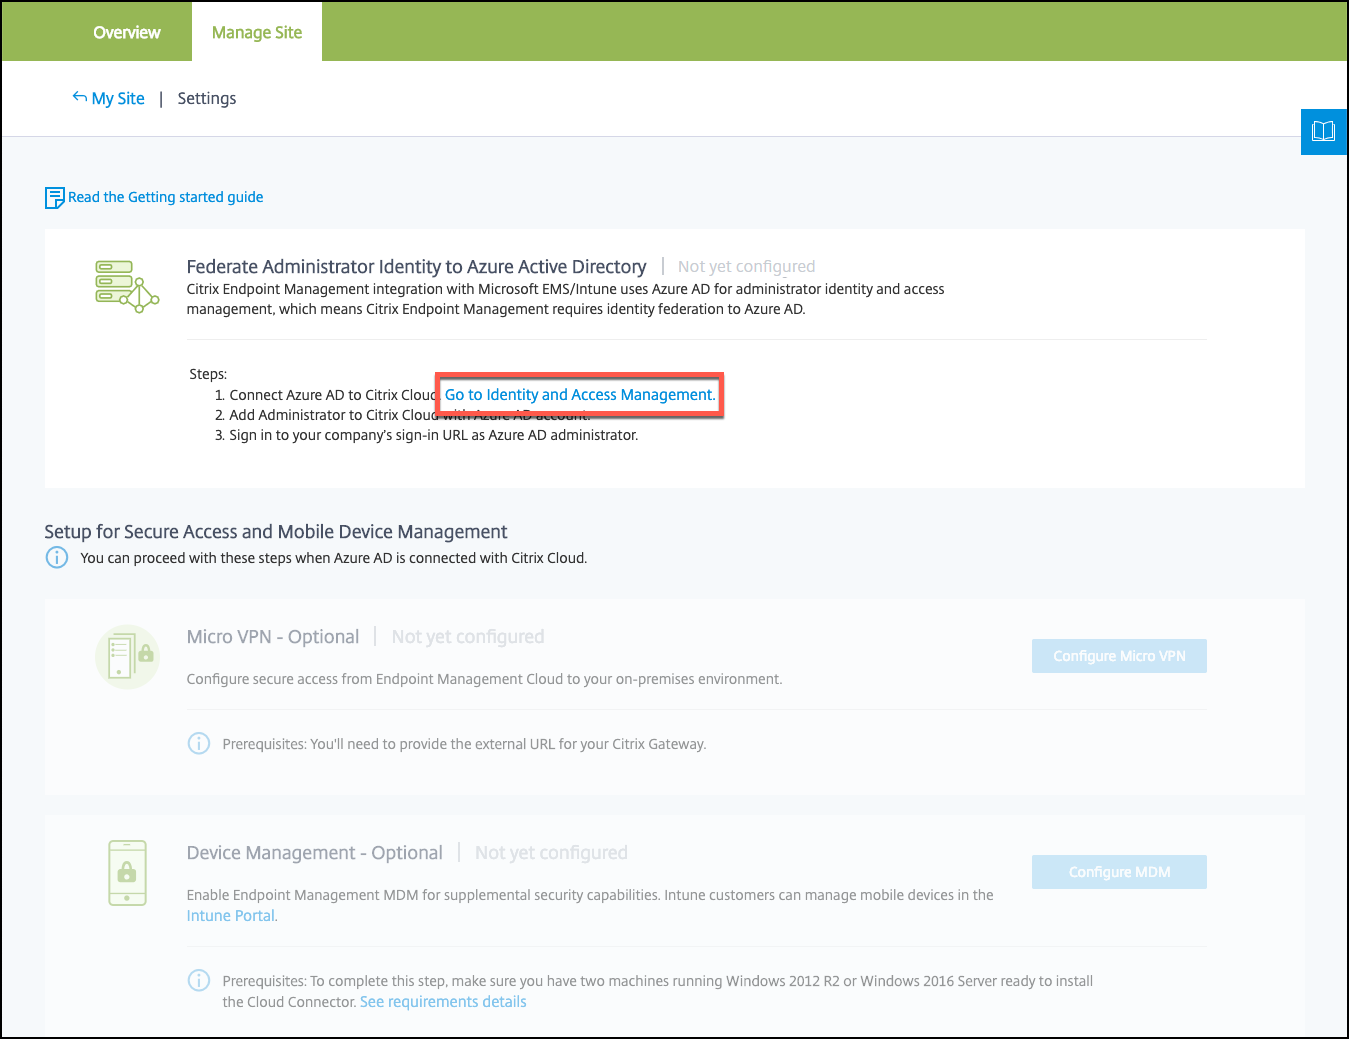
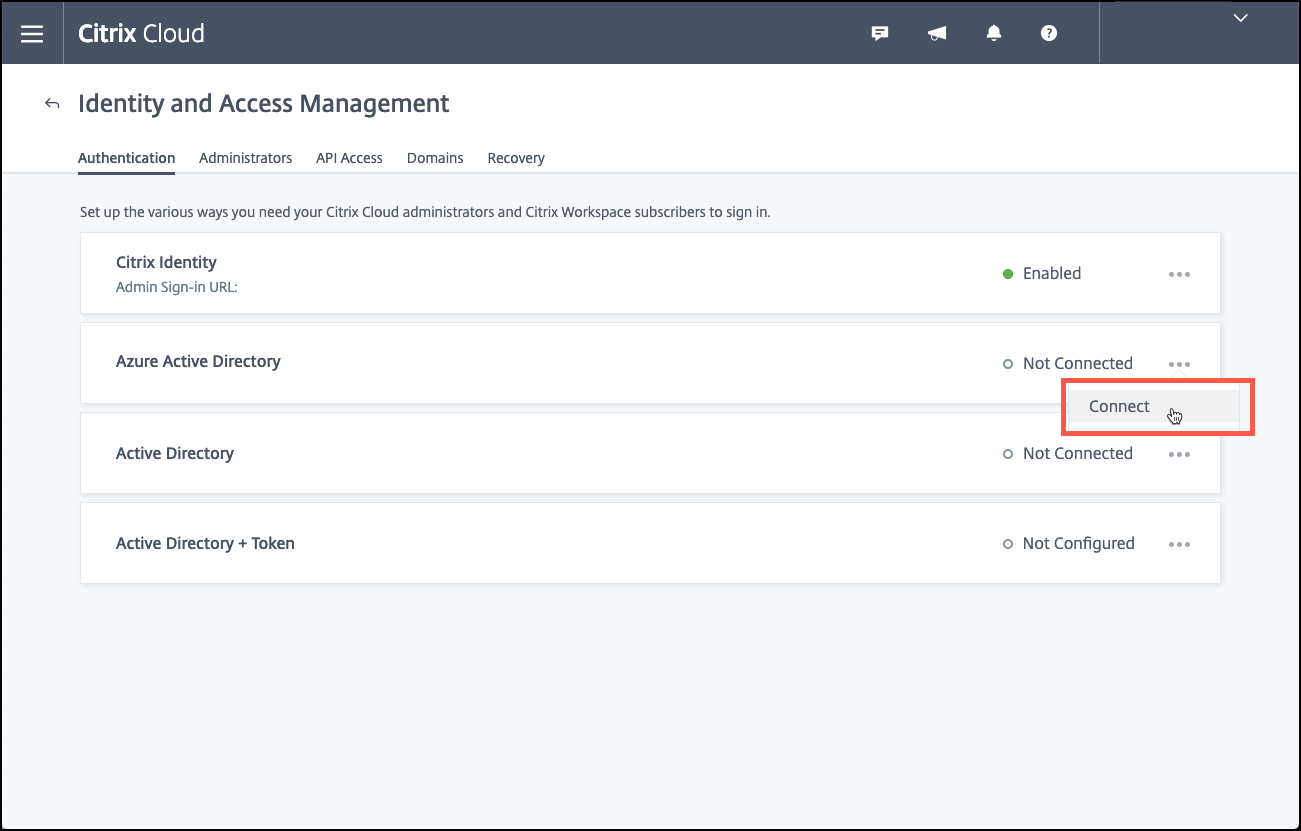
Follow the link in the first step to the Identity and Access Management page.
-
Click Connect to connect your Azure AD installation.
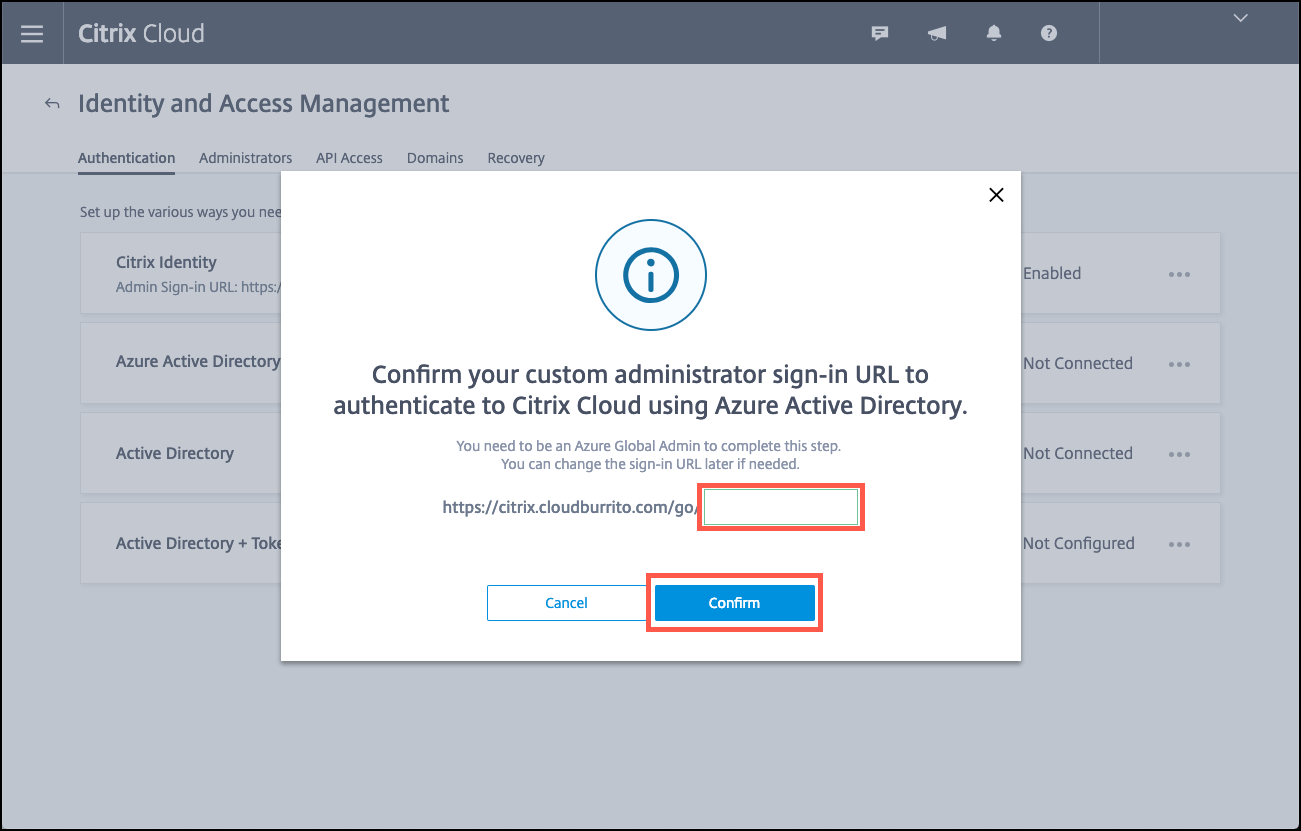
-
Enter a unique logon URL that the Azure AD administrator uses to log on and then click Confirm.
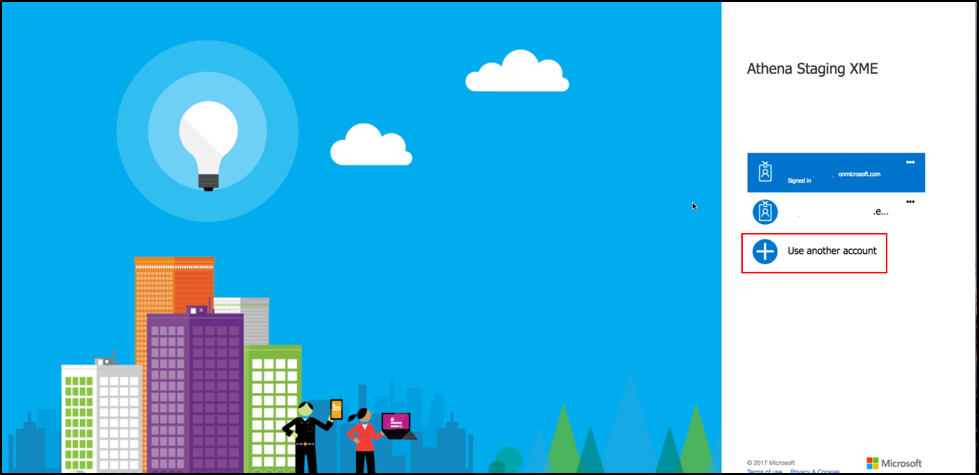
-
Add an Azure AD global administrator account and then accept the permission request.
-
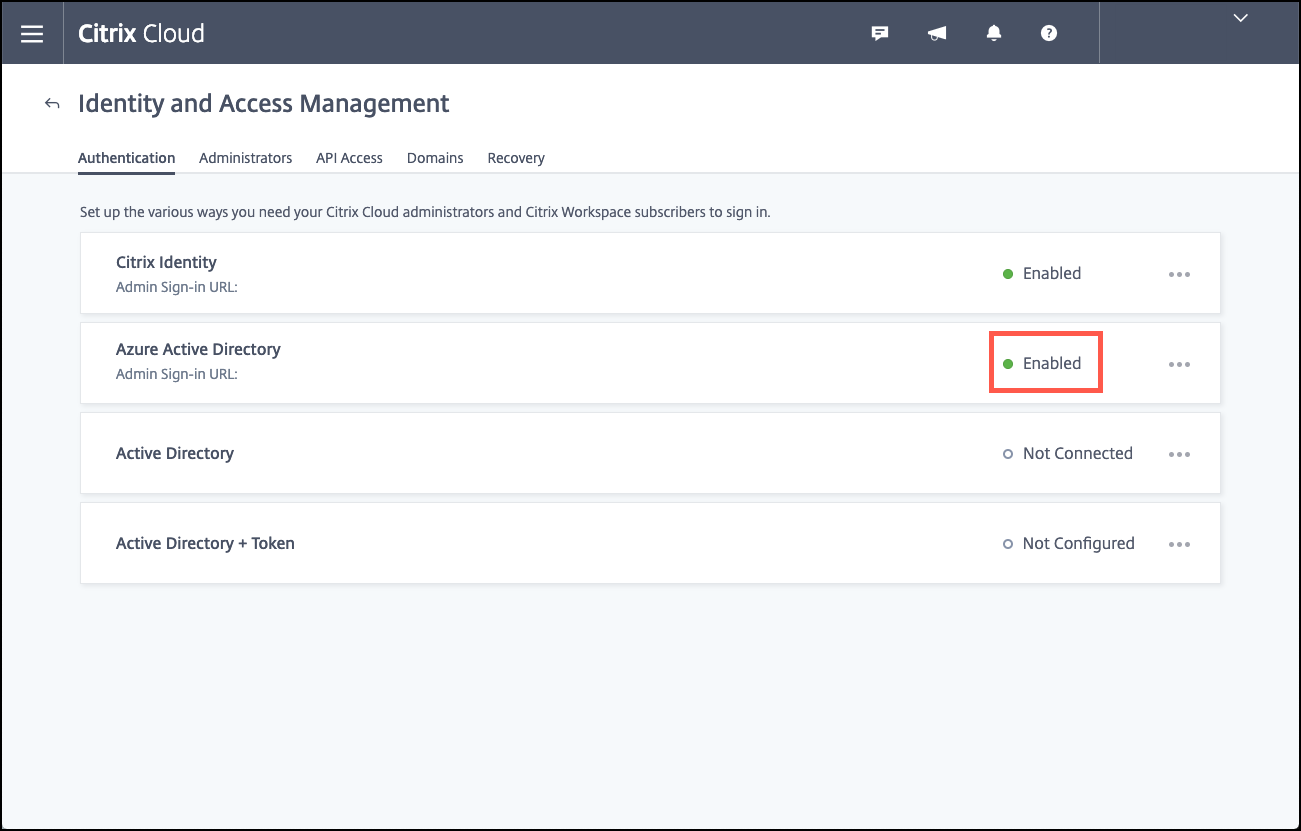
Confirm that your Azure AD instance connects successfully. To indicate a successful connection, the Not Connected text changes to say Enabled.
-
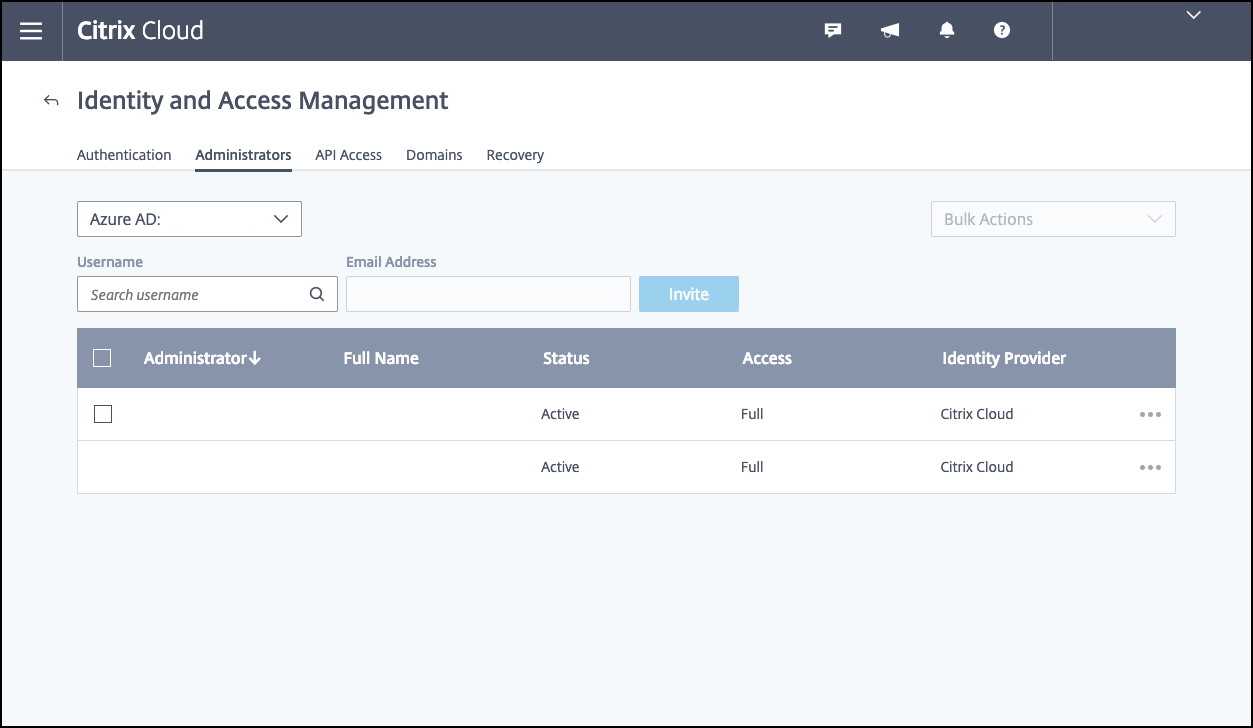
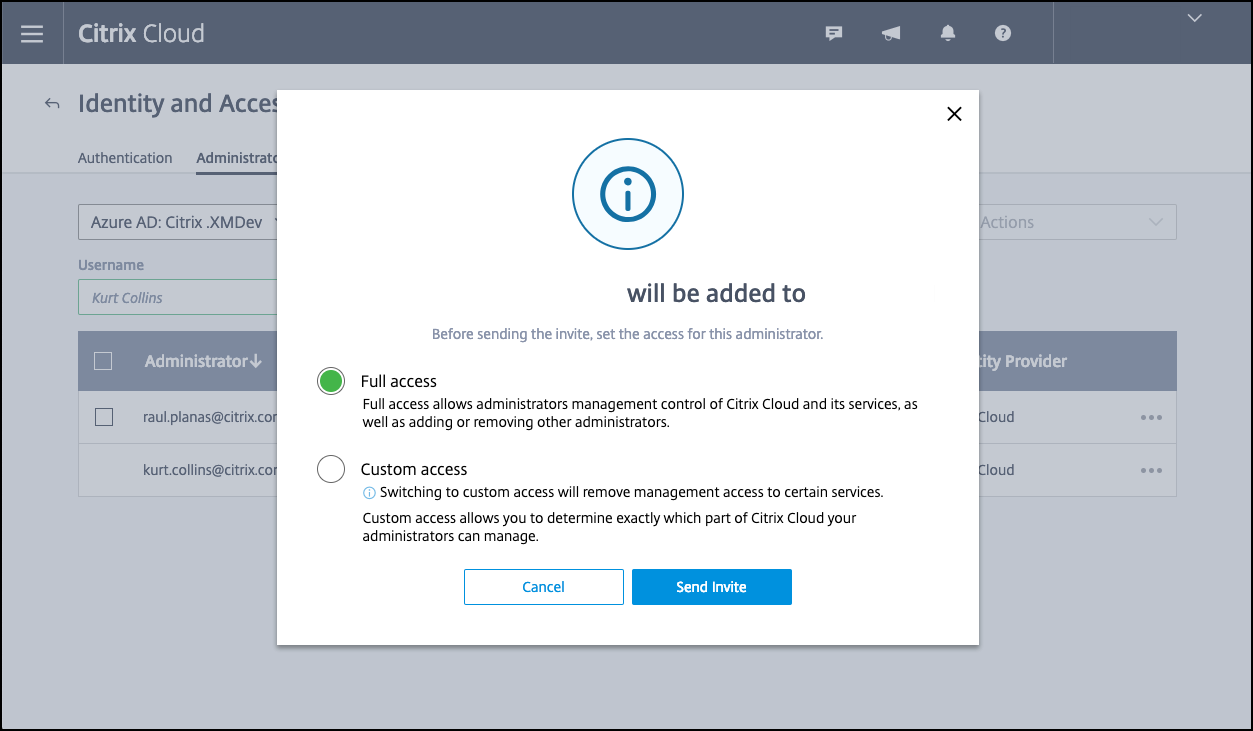
Click the Administrators tab and then add your Azure AD Intune administrator as a Citrix Cloud administrator. Select Azure AD or Citrix Identity from the drop-down menu, and then search for the user name you want to add. Click Invite and then grant the user Full Access or Custom Access before clicking Send Invite.
Note:
Citrix Endpoint Management requires the following rules for Custom Access: Library and Citrix Endpoint Management.
As a result, the Azure AD Intune administrator receives an email invitation to create a password and sign in to Citrix Cloud. Before the administrator signs in, make sure that you sign out of all other accounts.
The Azure AD Intune administrator must follow the remaining steps in this procedure.
-
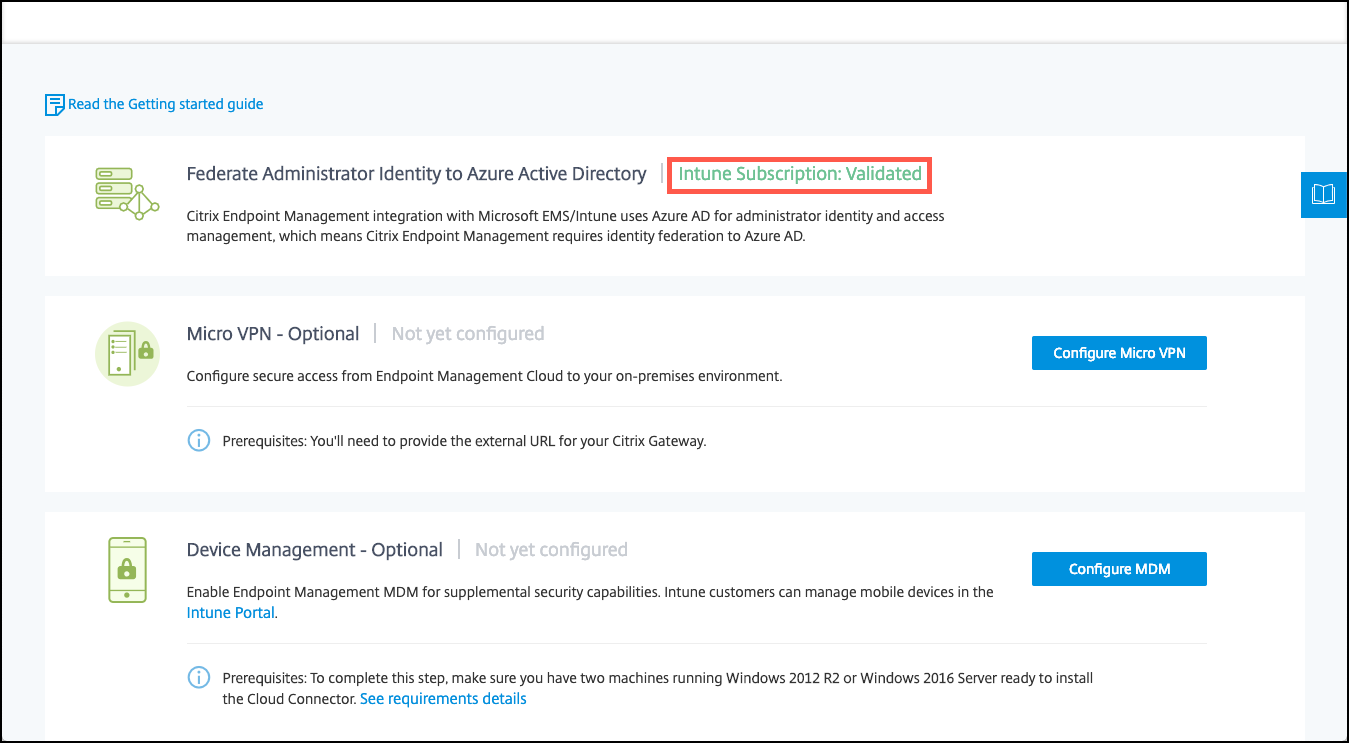
After signing in with the new account, under Citrix Endpoint Management, click Manage. If you configure everything correctly, the page shows that the Azure AD administrator is signed in and that your Intune subscription is valid.
To configure NetScaler Gateway for micro VPN
To use micro VPN with Intune, you must configure NetScaler Gateway to authenticate to Azure AD. An existing NetScaler Gateway virtual server does not work for this use case.
First, configure Azure AD to sync with the on-premises Active Directory. This step is necessary to make sure that authentication between Intune and NetScaler Gateway occurs properly.
-
From the Citrix Cloud console, under Citrix Endpoint Management, click Manage.
-
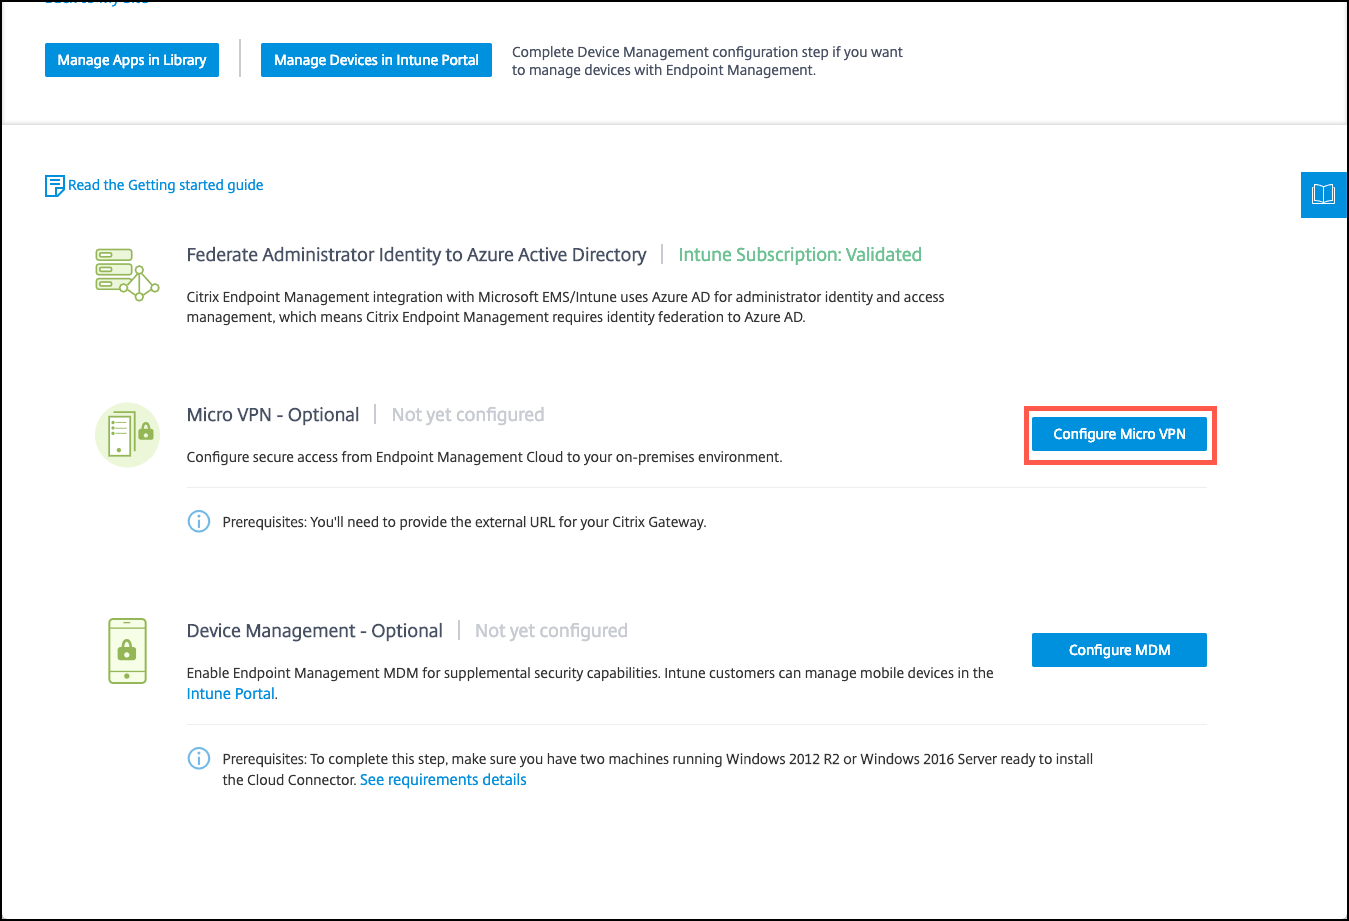
Next to Micro VPN, click Configure Micro VPN.
-
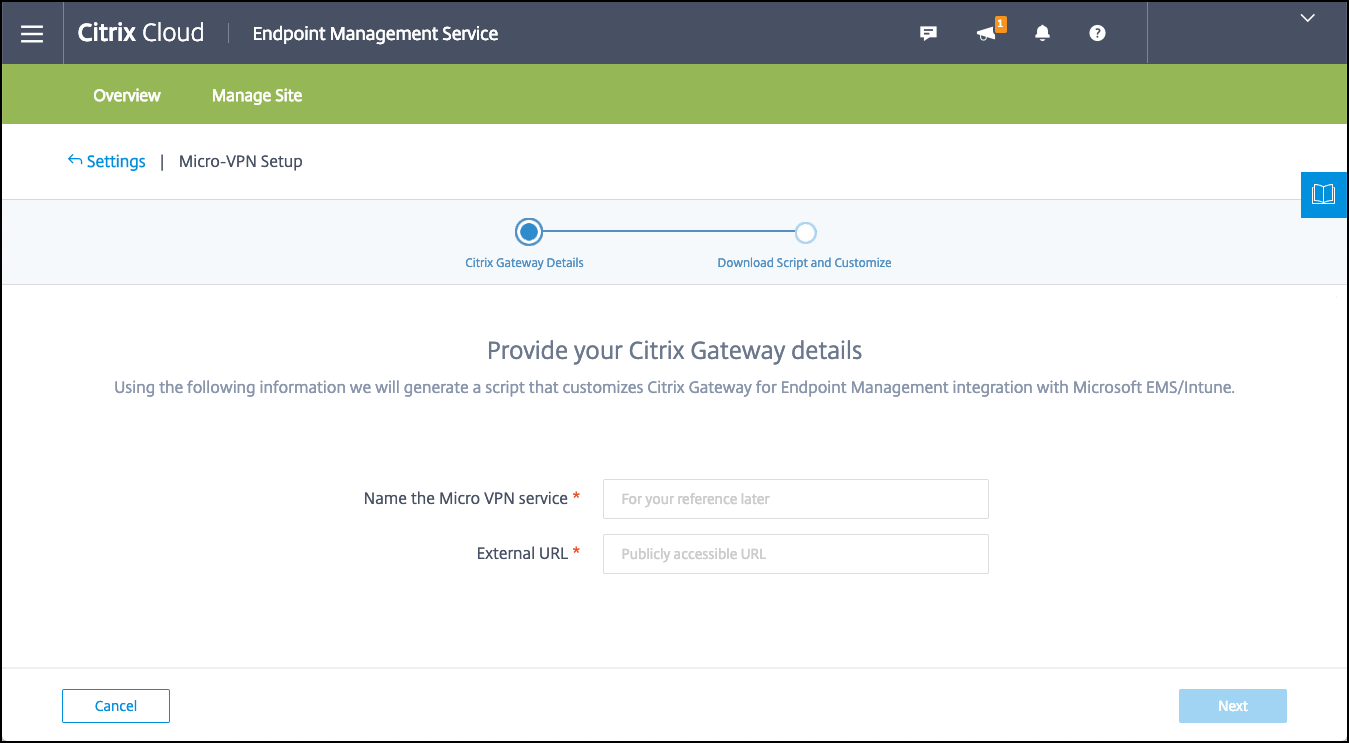
Enter a name for the micro VPN service and the external URL for your NetScaler Gateway and then click Next.
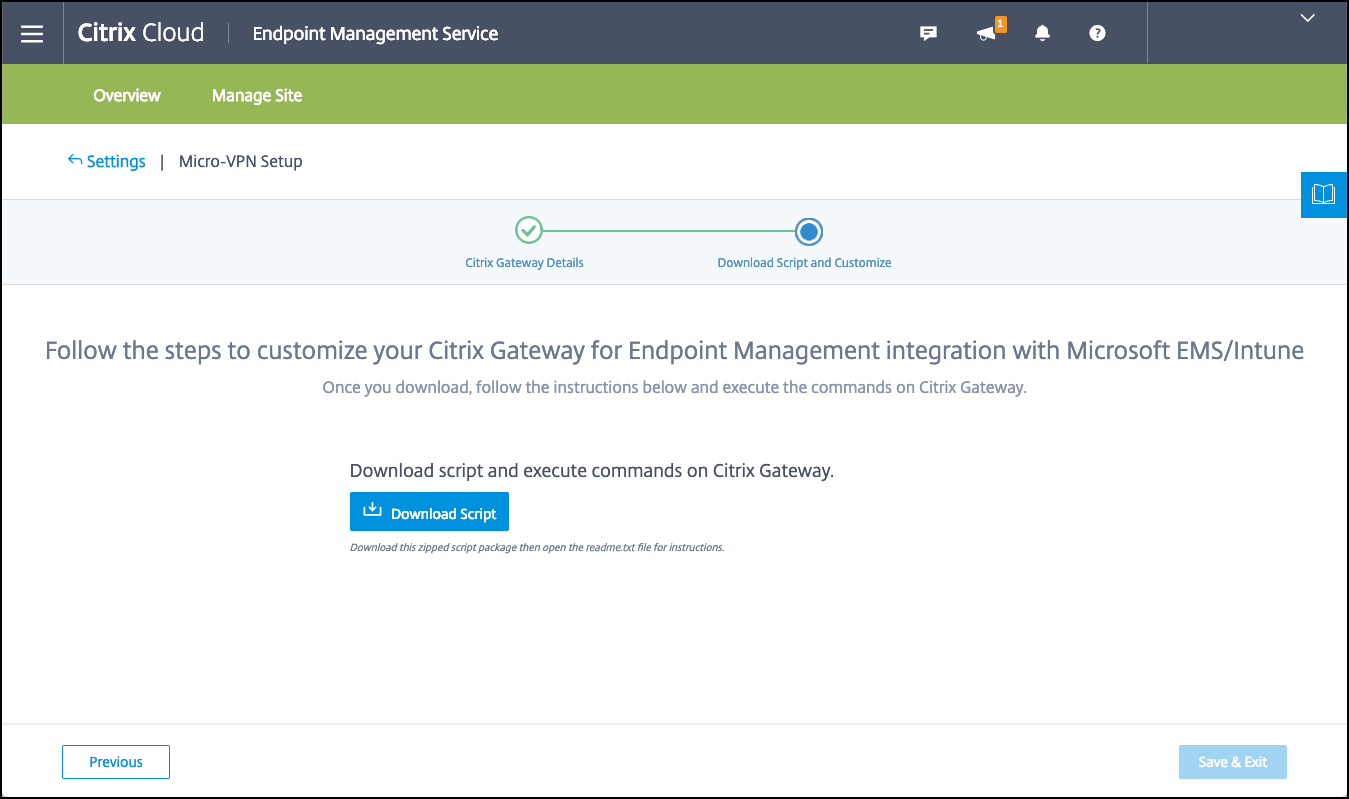
This script configures NetScaler Gateway to support Azure AD and the Intune apps.
-
Click Download Script. The .zip file includes a readme with instructions for implementing the script. Even though you can Save and Exit from here, the Micro VPN isn’t set up until you run the script on your NetScaler Gateway installation.
Note:
When you finish the NetScaler Gateway configuration process, if you see an OAuth Status other than COMPLETE, see the Troubleshooting section.
To configure device management
If you want to manage devices in addition to apps, choose a method of device management. You can use Citrix Endpoint Management MDM+MAM or Intune MDM.
Note:
The console defaults to Intune MDM. To use Intune as your MDM provider, see the Microsoft Intune documentation.
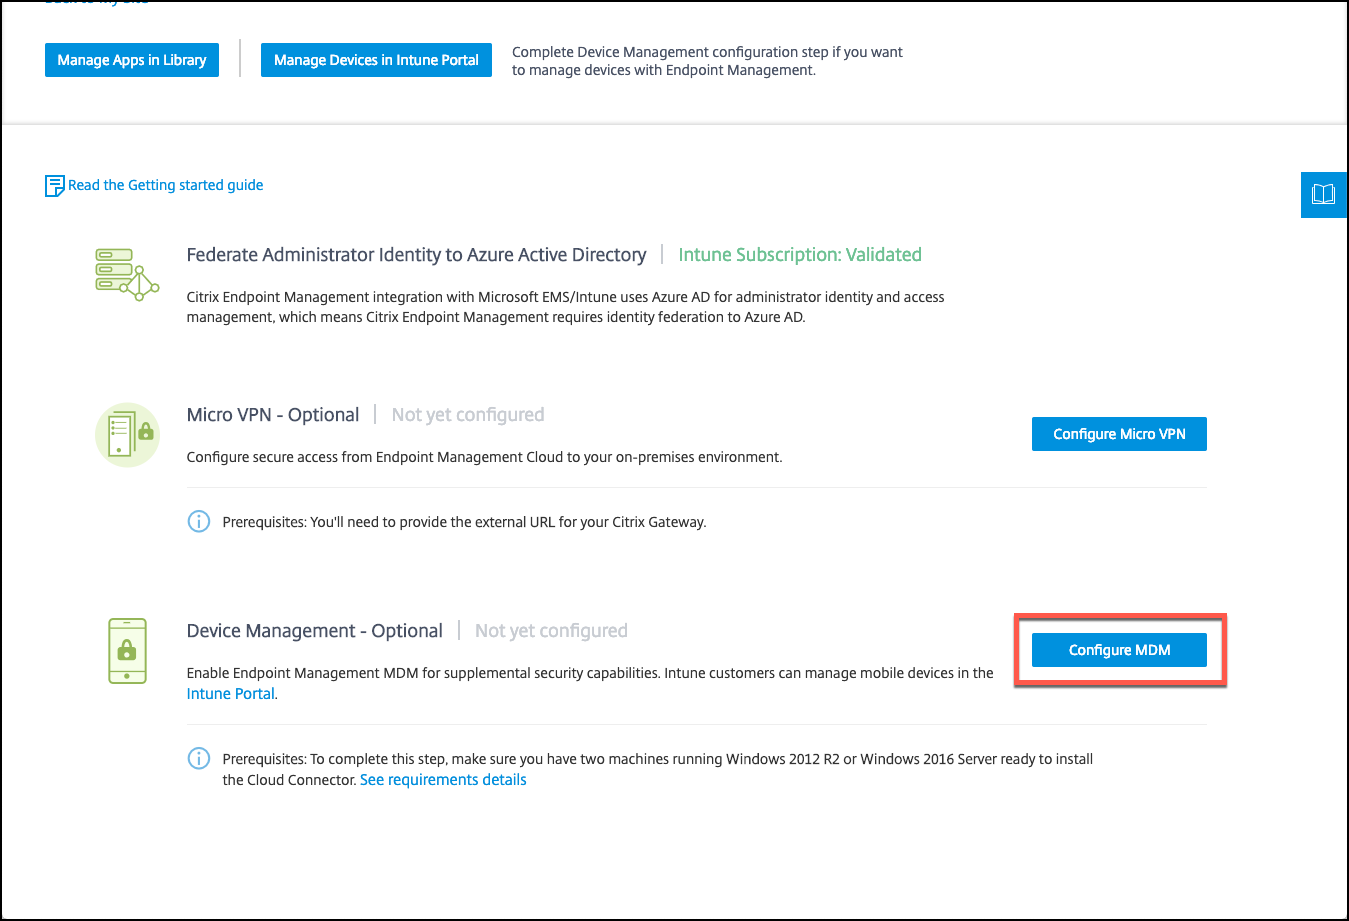
-
From the Citrix Cloud console, under Citrix Endpoint Management integration with MEM, click Manage. Next to Device Management - Optional, click Configure MDM.
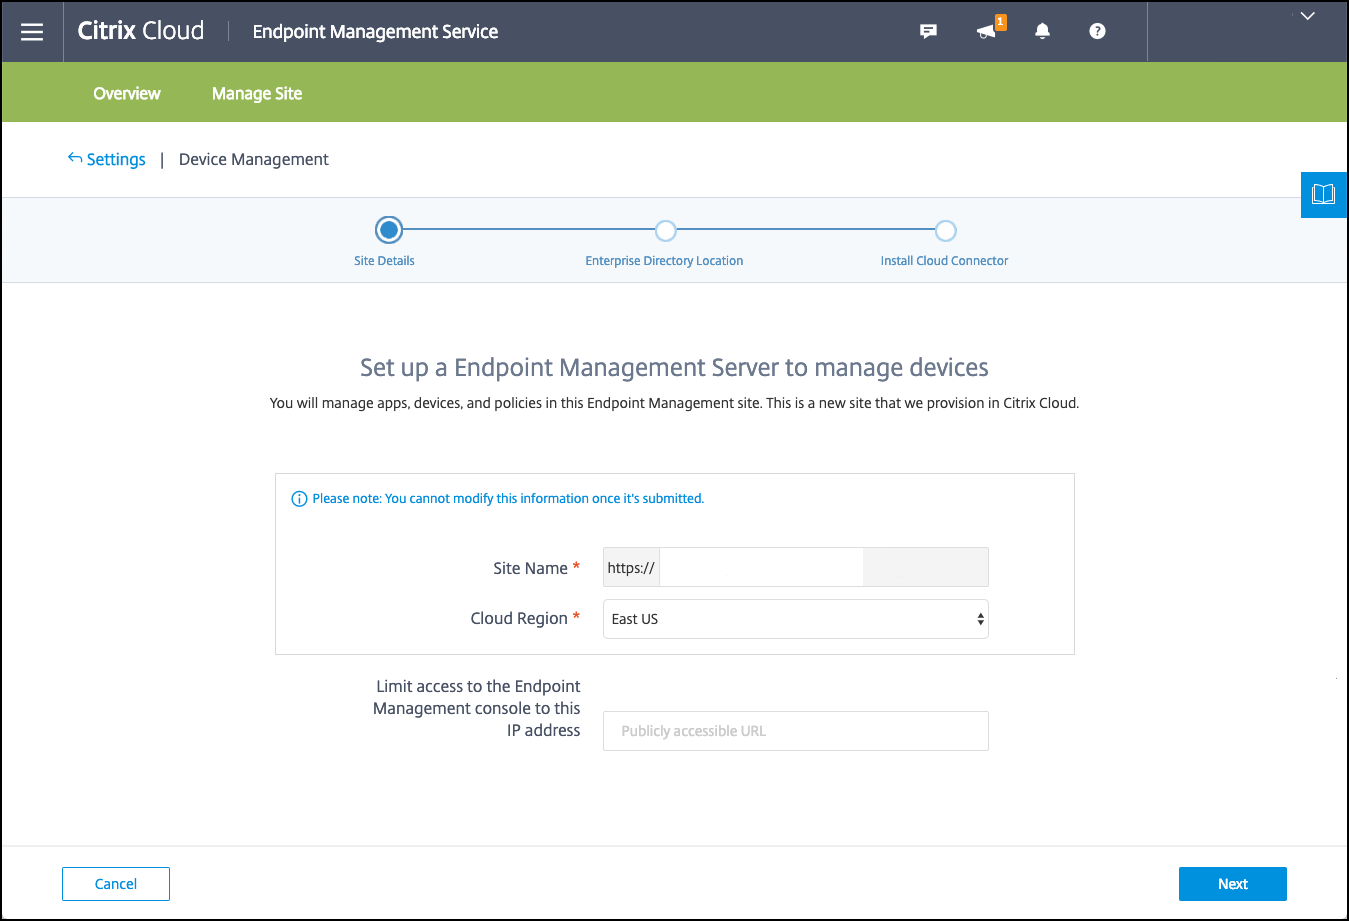
-
Enter a unique site name, select the Cloud region closest to you, and then click Request a Site. You receive an email when your site is ready.
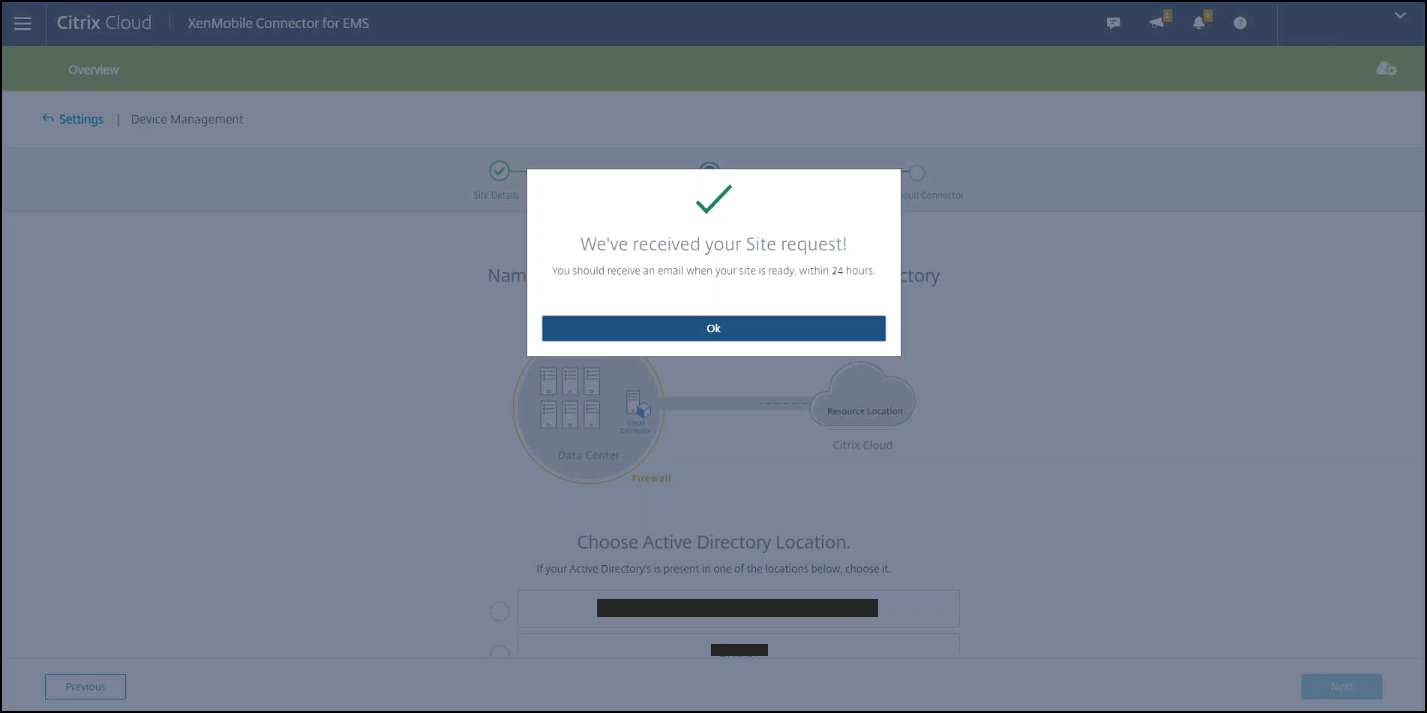
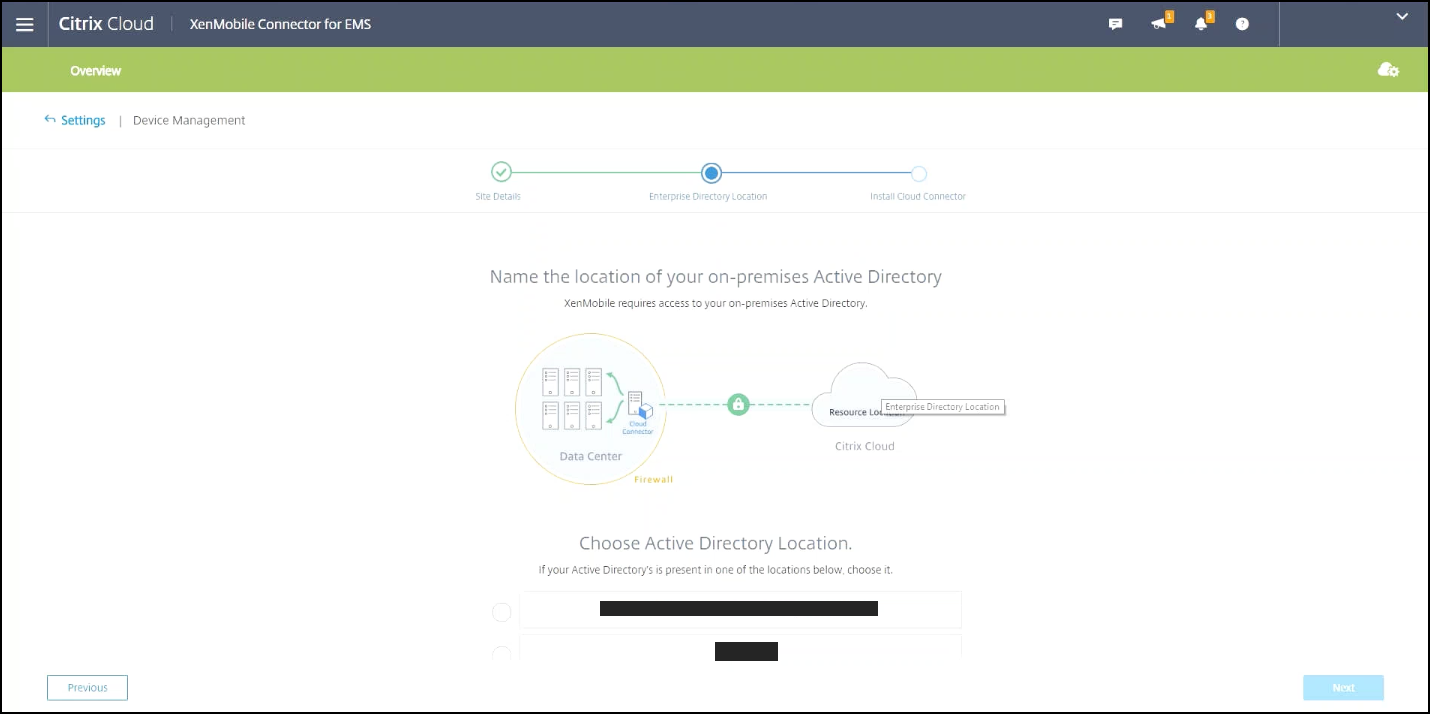
-
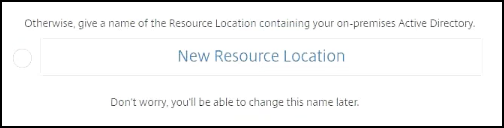
Click OK to close the prompt. Select an Active Directory Location to associate with your site or create a resource location and then click Next.
-
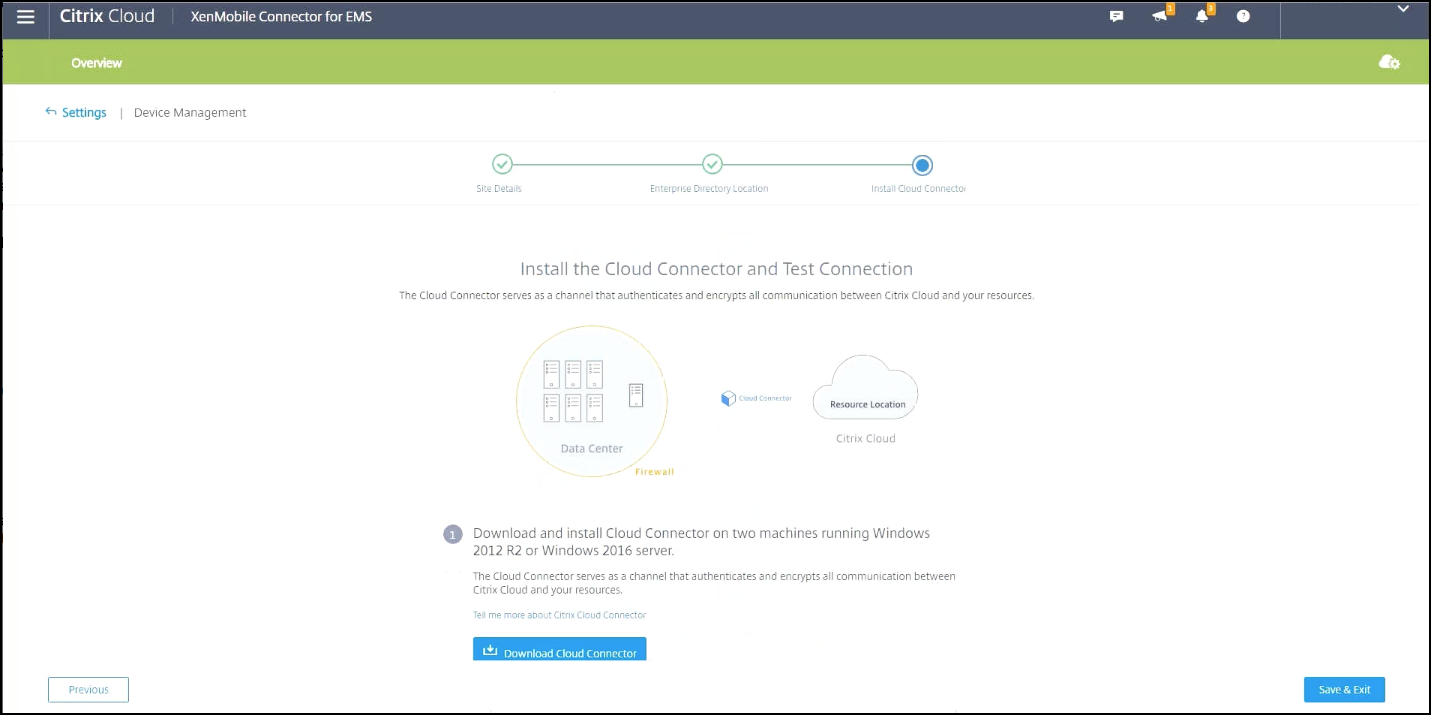
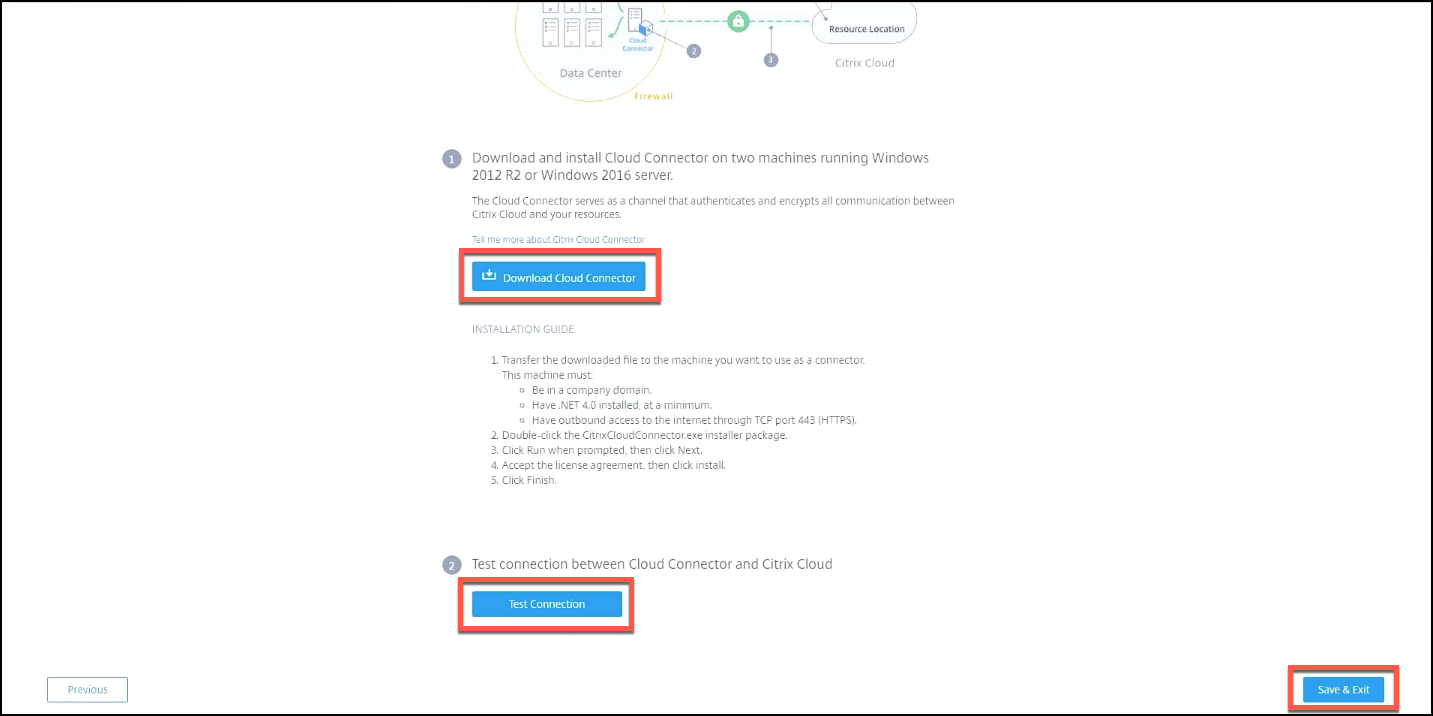
Click Download Cloud Connector and follow the on-screen instructions to install the cloud connector. After installation, click Test Connection to verify the connection between Citrix Cloud and the Cloud Connector.
-
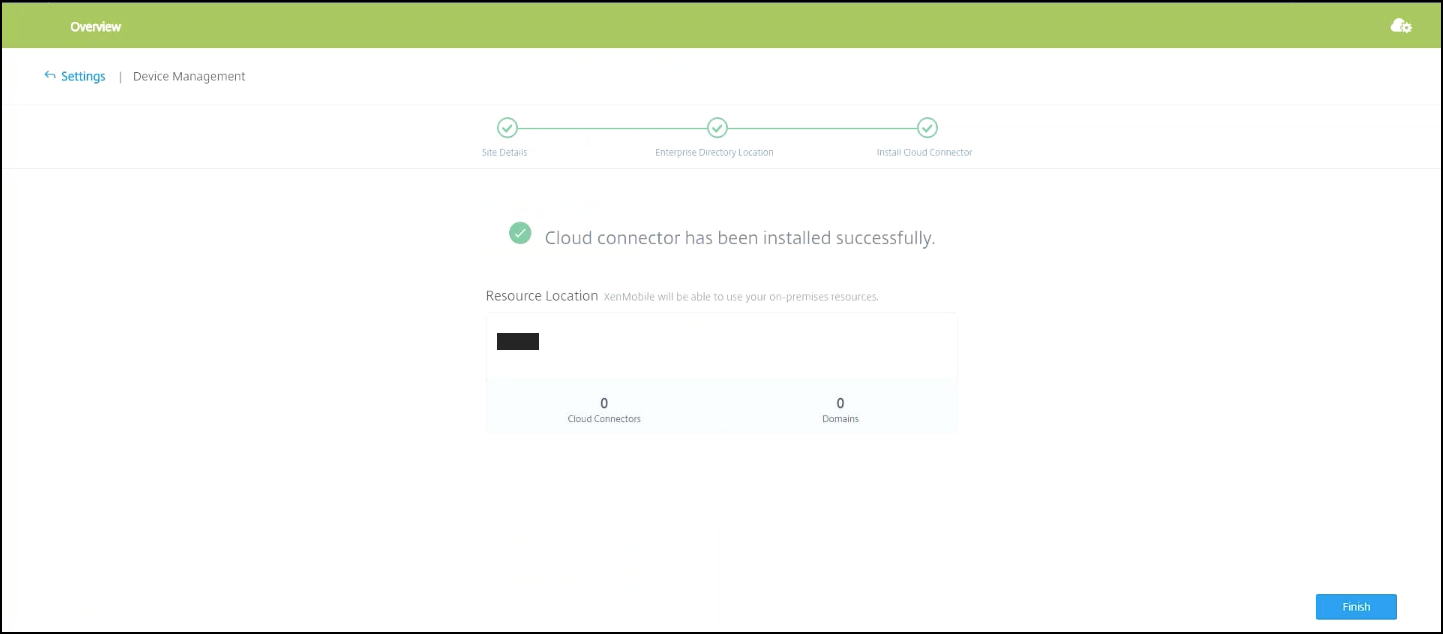
Click Save & Exit to finish. Your resource location appears. Clicking Finish takes you back to the settings screen.
-
You can now access the Citrix Endpoint Management console from your site tile. From here, you can do MDM management tasks and assign device policies. For more information on device policies, see Device Policies.
Configure Intune managed apps for delivery to devices
Note:
Starting from April 1, 2025, managing Microsoft Intune apps through the Library is no longer available. If you need assistance with relevant services, contact Citrix Support to enable this feature.
To configure Intune managed apps for delivery:
- Add the apps to the Citrix Cloud library
- Create Citrix Endpoint Management device policies to control the flow of data
- Create a delivery group for the apps and policies
Add Microsoft Intune apps to the Citrix Cloud library
For each app you want to add:
-
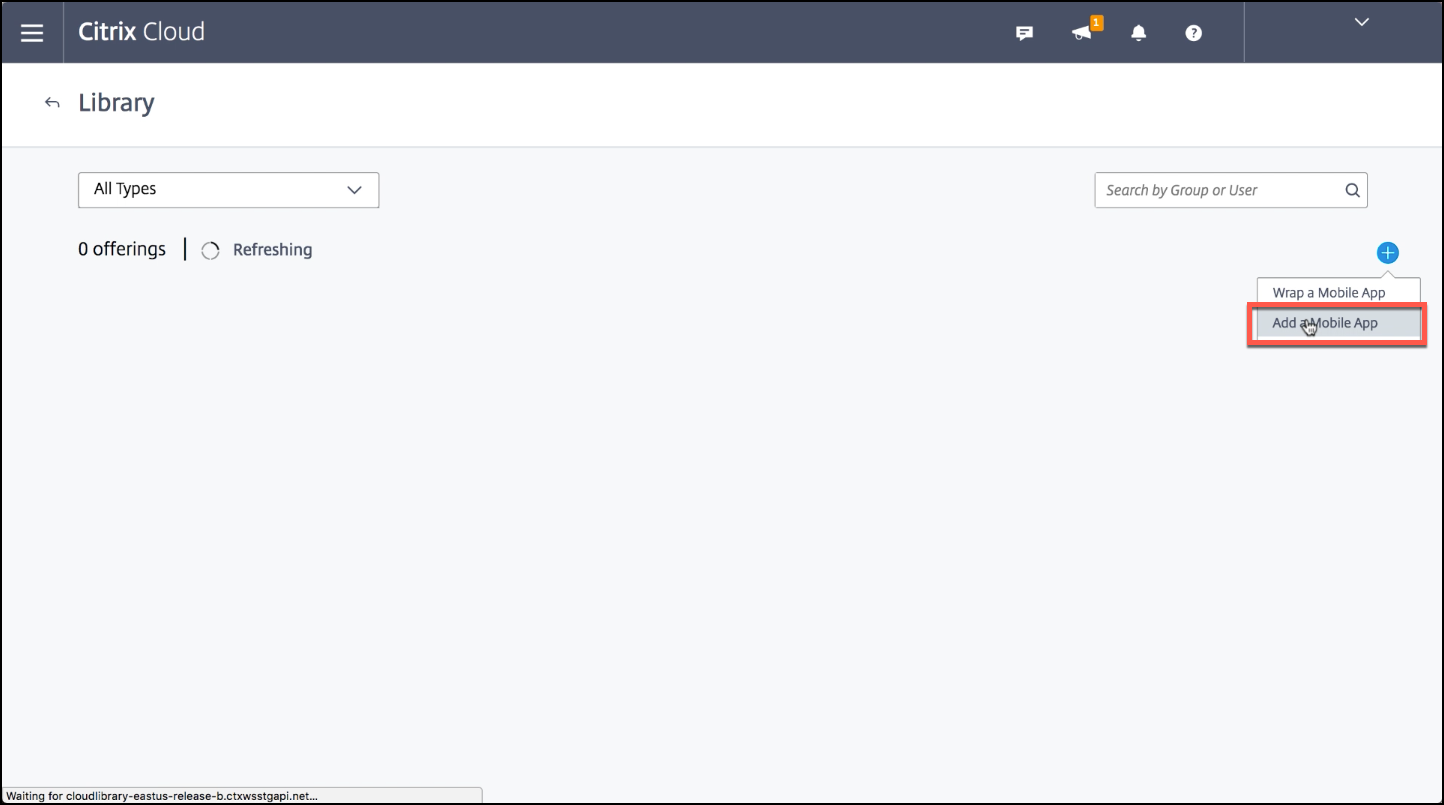
From the Citrix Cloud console, click the menu icon and then click Library.

-
Click the plus sign icon on the upper-right, and then click Add a Mobile app.
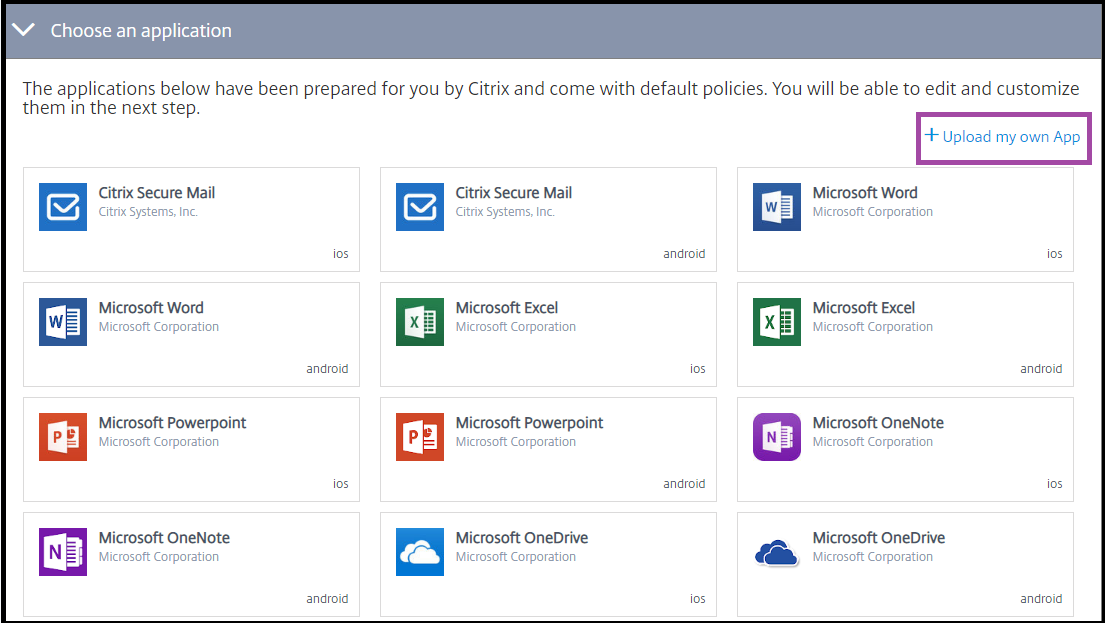
-
If you have Android Enterprise configured in the Citrix Endpoint Management console, select Microsoft Intune Apps under Choose an application. Select an app template to customize or click Upload my own App.
Citrix supplies the existing app templates, each of which comes with a set of preconfigured default policies. For apps that customers upload, the following policies apply:
-
MDX Files: Includes MAM SDK enabled apps or MDX-wrapped apps, such as:
- Intune app protection policies and the default MDX policies in the package
- Public store apps, such as Intune app protection policies and default MDX policies that match the bundle ID or package ID
- IPA Files: Intune app protection policies.
- APK Files: Intune app protection policies.
Note:
If the app isn’t wrapped with Intune, Intune app protection policies do not apply.
-
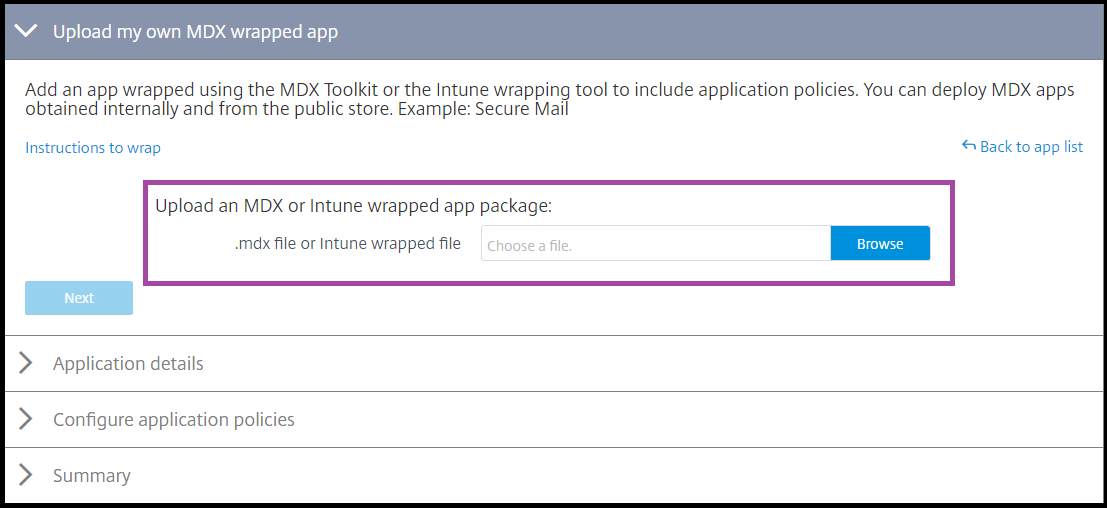
MDX Files: Includes MAM SDK enabled apps or MDX-wrapped apps, such as:
-
Click Upload my own App and upload your .mdx or Intune wrapped file.
-
Enter a name and description for the app, choose whether the app is optional or required, and then click Next.
-
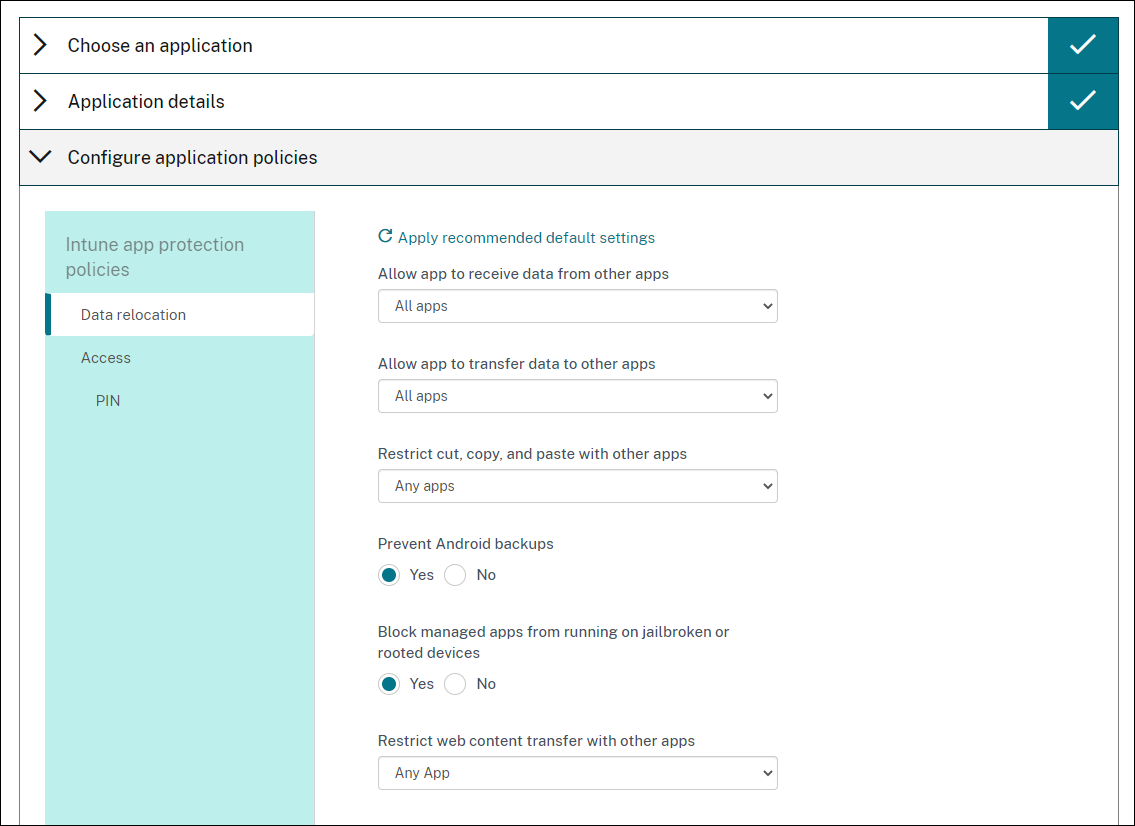
Configure the application settings. The following configurations enable Citrix Endpoint Management and Intune containers to transfer data to each other.
- Allow apps to receive data from other apps: Select Policy managed apps.
- Allow app to transfer data to other apps: Select All apps.
- Restrict cut, copy, paste with other apps: Select Policy managed apps.
-
Configure the storage repositories for saved data. For Select which storage services corporate data can be saved to, select LocalStorage.
-
Optional: Set Data Relocation, Access, and PIN policies for the app. Click Next.
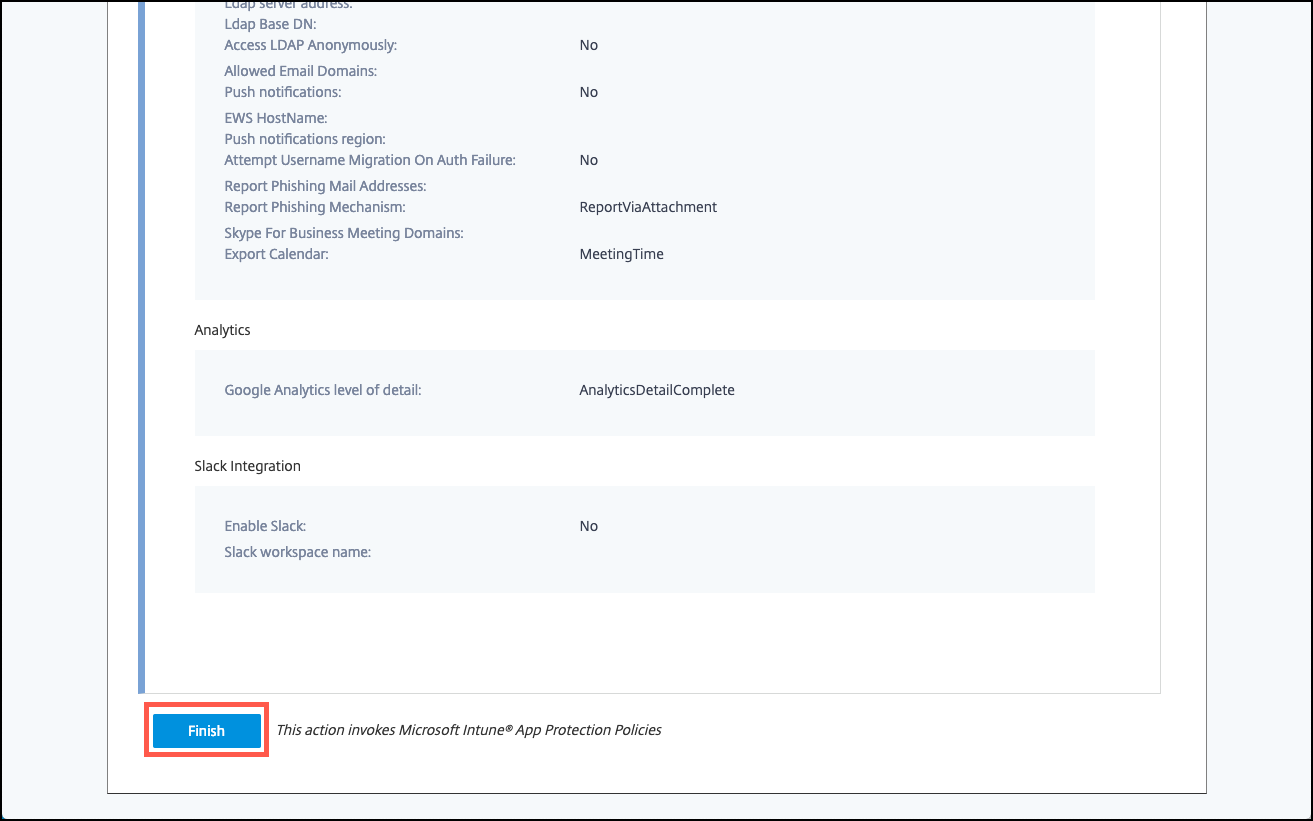
-
Review the summary of the app, and then click Finish.
The app configuration process might take a few minutes. When the process completes, a message indicates that the app has been published to the library.
-
To assign user groups to the app, click Assign Users.

-
In the search box, search for user groups and click to add them. You can’t add individual users.
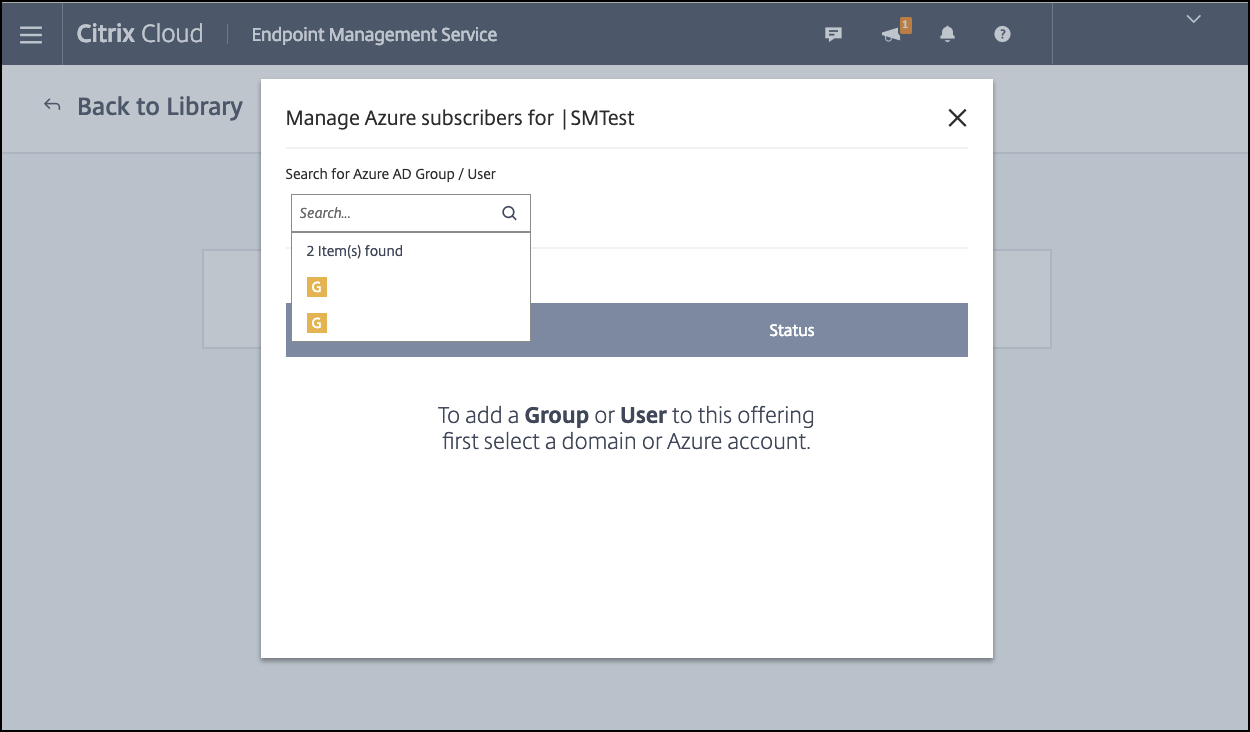
-
When you’ve added all the groups you want, close the window by clicking the X.
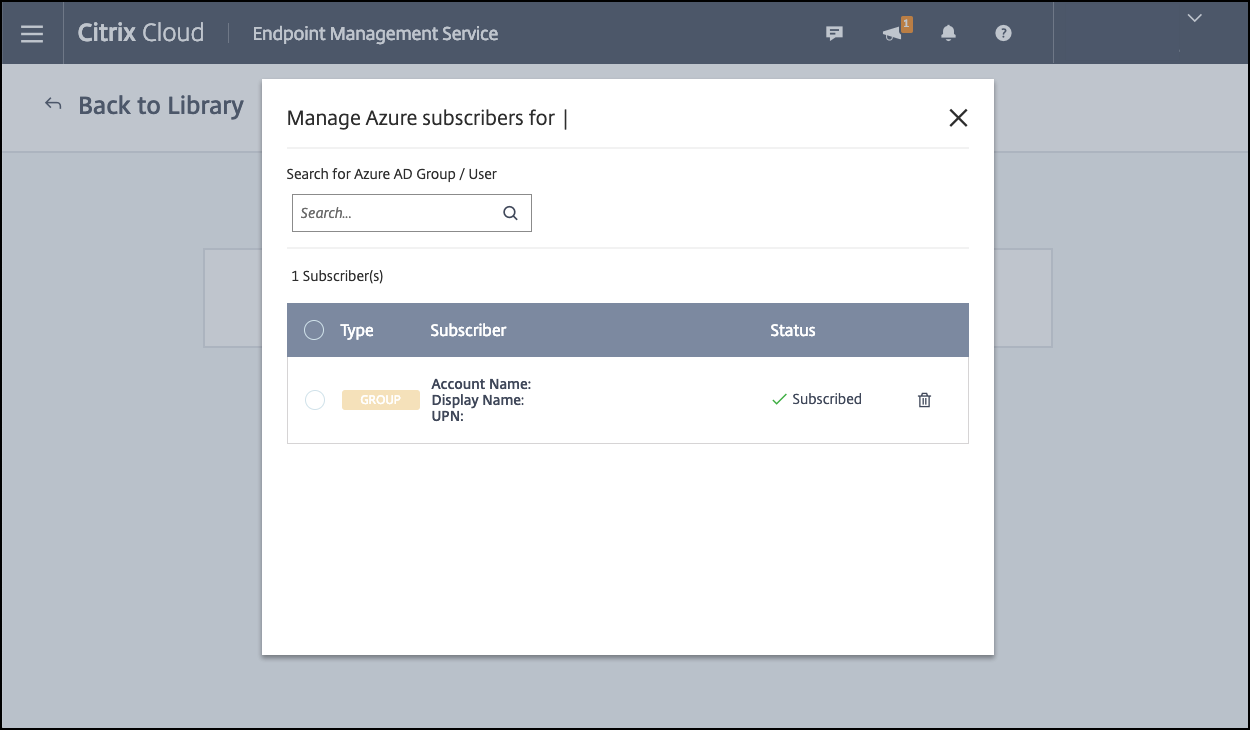
You might see an error when adding user groups. This error occurs when the user group hasn’t been synchronized to the Local Active Directory.
Add Android Enterprise apps to the Citrix Cloud Library
To add Android Enterprise apps to the Citrix Cloud Library and set Intune app protection policies, configure your cloud environment with the following:
- Federate Citrix Cloud with your Azure Active Directory (AAD) account. See Connect Azure Active Directory to Citrix Cloud.
- Configure LDAP and Cloud Connector in Citrix Endpoint Management.
- Set up Android Enterprise in Citrix Endpoint Management. Make sure that Android Enterprise devices enroll in MDM+MAM. To set up Android Enterprise, see Android Enterprise.
Following this procedure adds Android Enterprise apps to the Citrix Endpoint Management console and the Intune console simultaneously. For each Android Enterprise app you want to add:
-
From the Citrix Cloud console, click the menu icon and then click Library.
-
Click the plus sign icon on the upper-right, and then click Add a Mobile app.
-
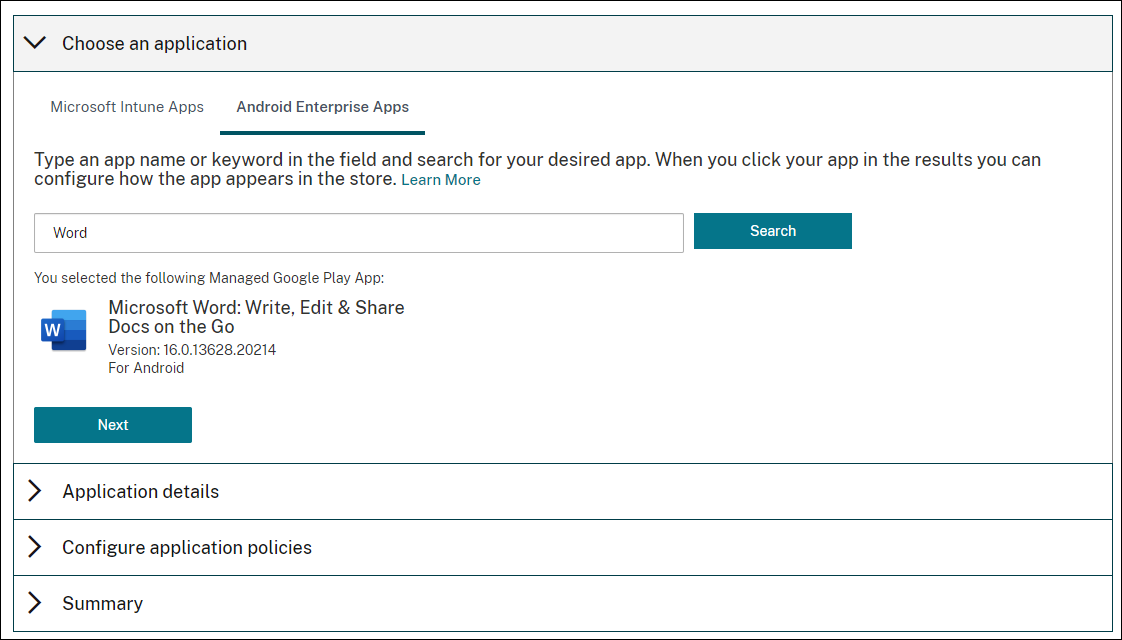
Under Choose an application, select Android Enterprise Apps.
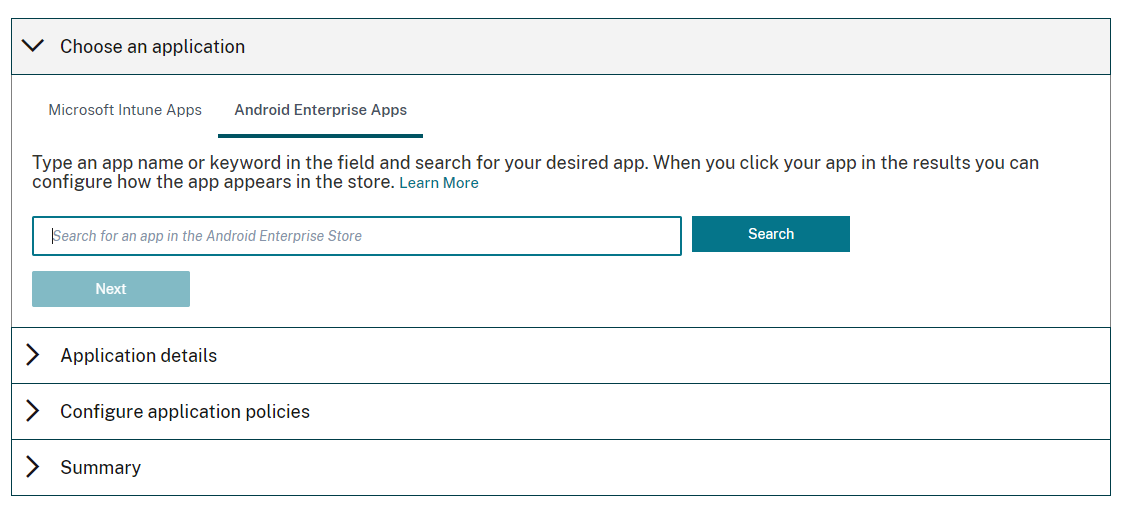
-
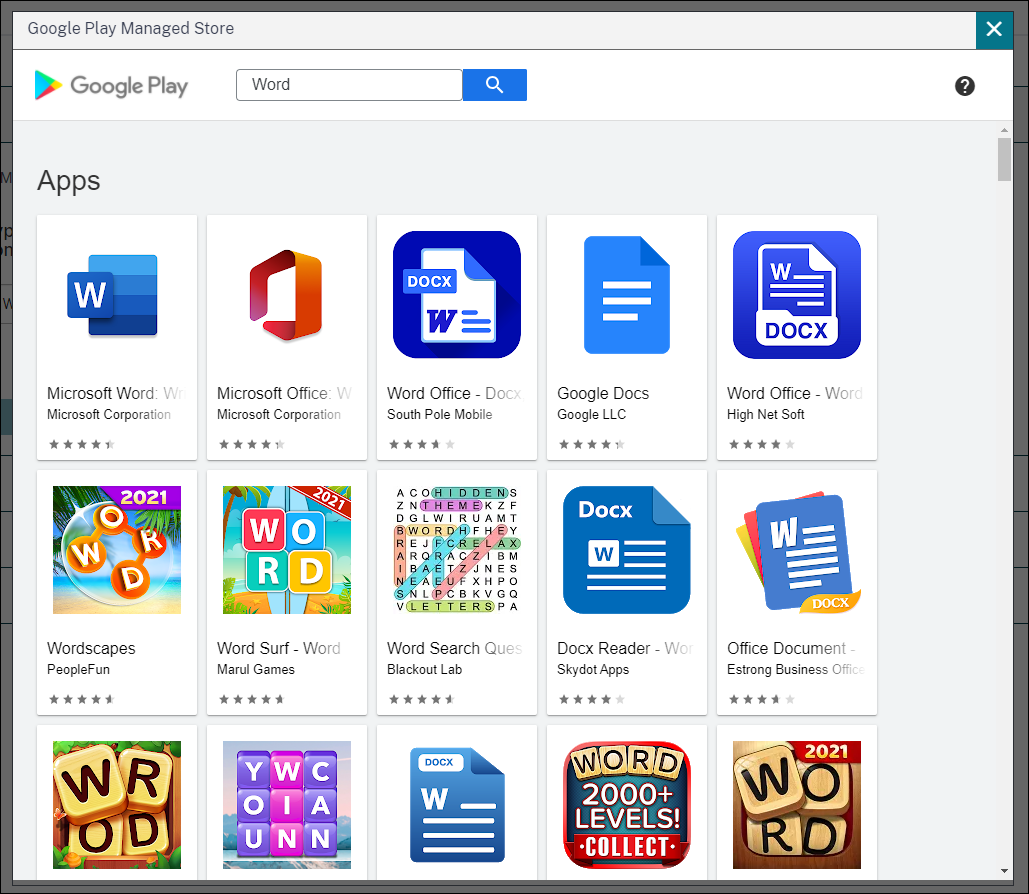
Search for an app and approve it in the Managed Google Play store window. After the Google window closes, click Next.
-
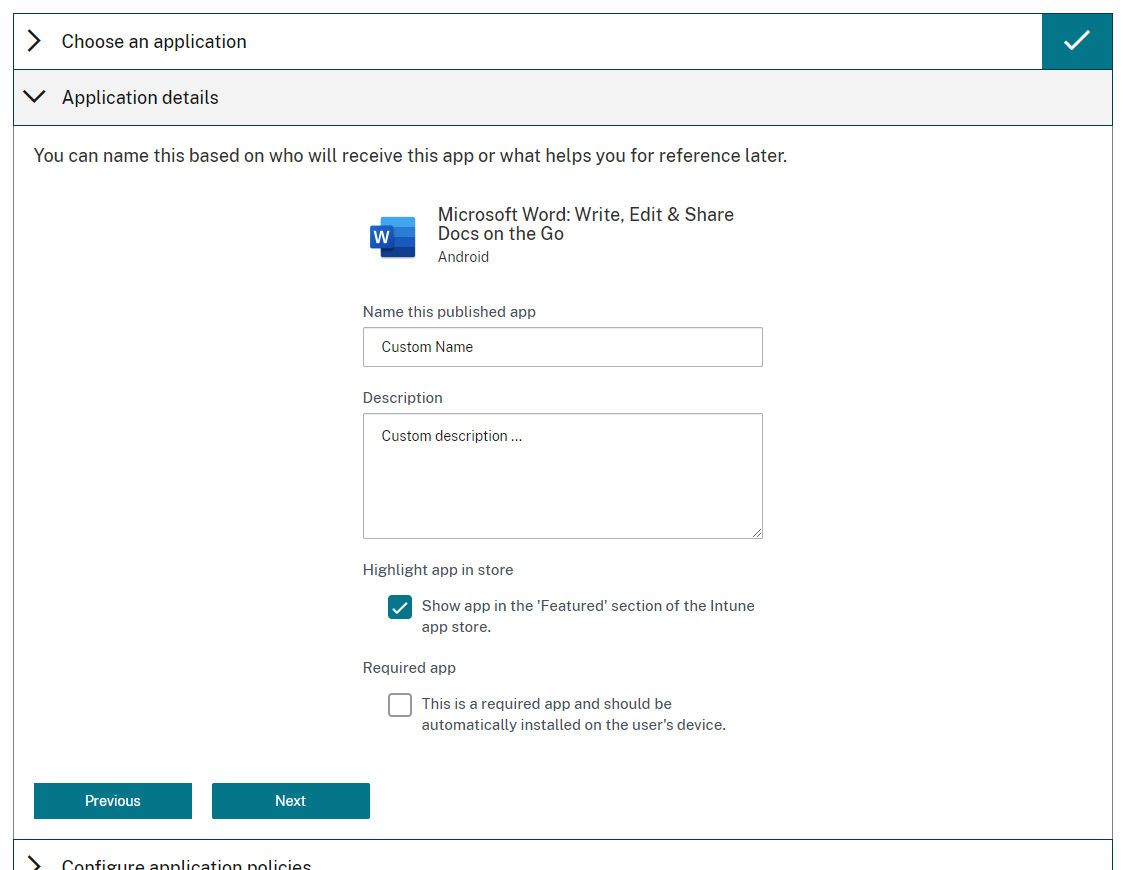
Add application details, and then click Next.
-
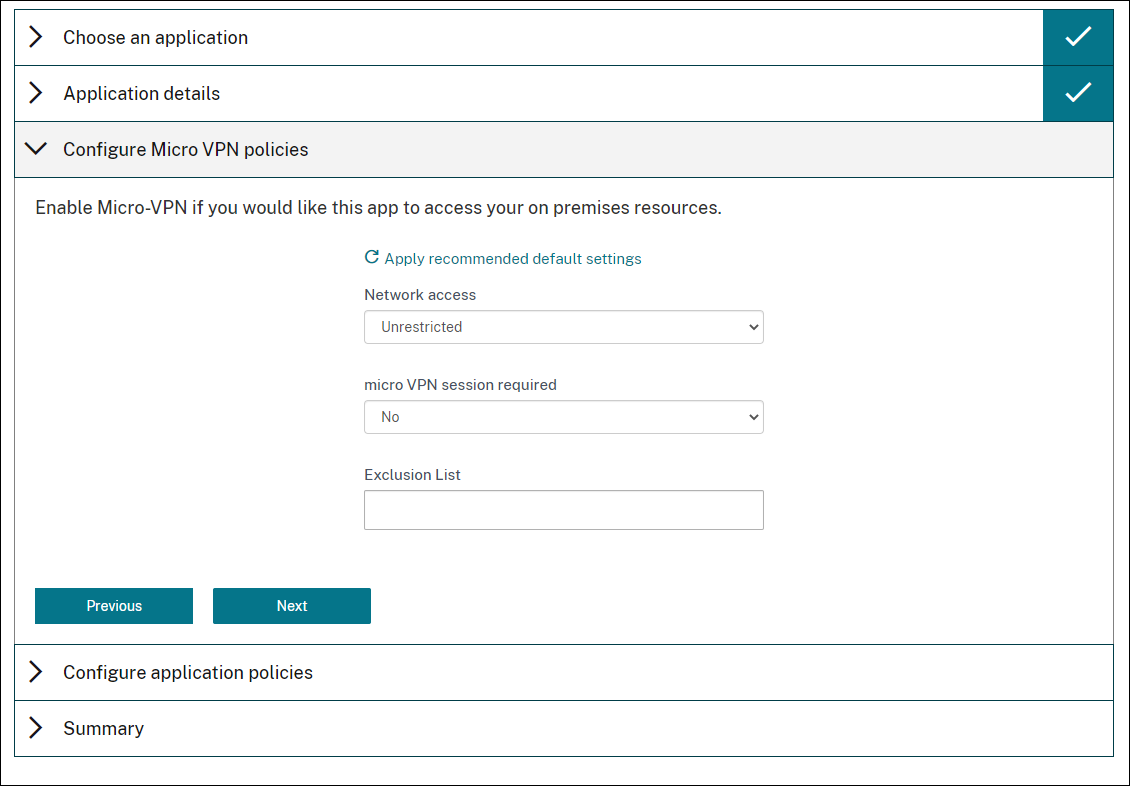
If you searched for and selected a Citrix mobile productivity app, you can configure Micro VPN policies. After you configure those policies, click Next.
-
Configure Intune app protection policies. Click Next.
-
Configure the application settings. The following configurations enable Citrix Endpoint Management and Intune containers to transfer data to each other.
- Allow apps to receive data from other apps: Select Policy managed apps.
- Allow app to transfer data to other apps: Select All apps.
- Restrict cut, copy, paste with other apps: Select Policy managed apps.
-
Configure the storage repositories for saved data. For Select which storage services corporate data can be saved to, select LocalStorage.
-
Optional: Set Data Relocation, Access, and PIN policies for the app. Click Next.
-
Review the summary of the app, and then click Finish.
The app configuration process might take a few minutes. When the process completes, a message indicates that the app has been published to the library. The app is available in the Citrix Endpoint Management and Intune consoles. In the Citrix Endpoint Management console, the app is part of a new delivery group and is identified as a public app store app.
-
To assign user groups to the app, click Assign Users.
-
In the search box, search for user groups and click to add them. You can’t add individual users.
-
When you’ve added all the groups you want, close the window by clicking the X.
You might see an error when adding user groups. This error occurs when the user group hasn’t been synchronized to the Local Active Directory.
Control the type of data transferred between managed apps
Control the type of data can transfer between managed apps within the Citrix Endpoint Management or Intune containers using Citrix Endpoint Management device policies. You can configure a Restrictions policy to allow only data tagged as “corporate”. Configure an App Configuration policy to tag the data.
To configure the Restrictions device policy:
-
In the Citrix Endpoint Management console, click Configure > Device Policies.
-
On the Device Policies page, click Add. The Add a New Policy page appears.
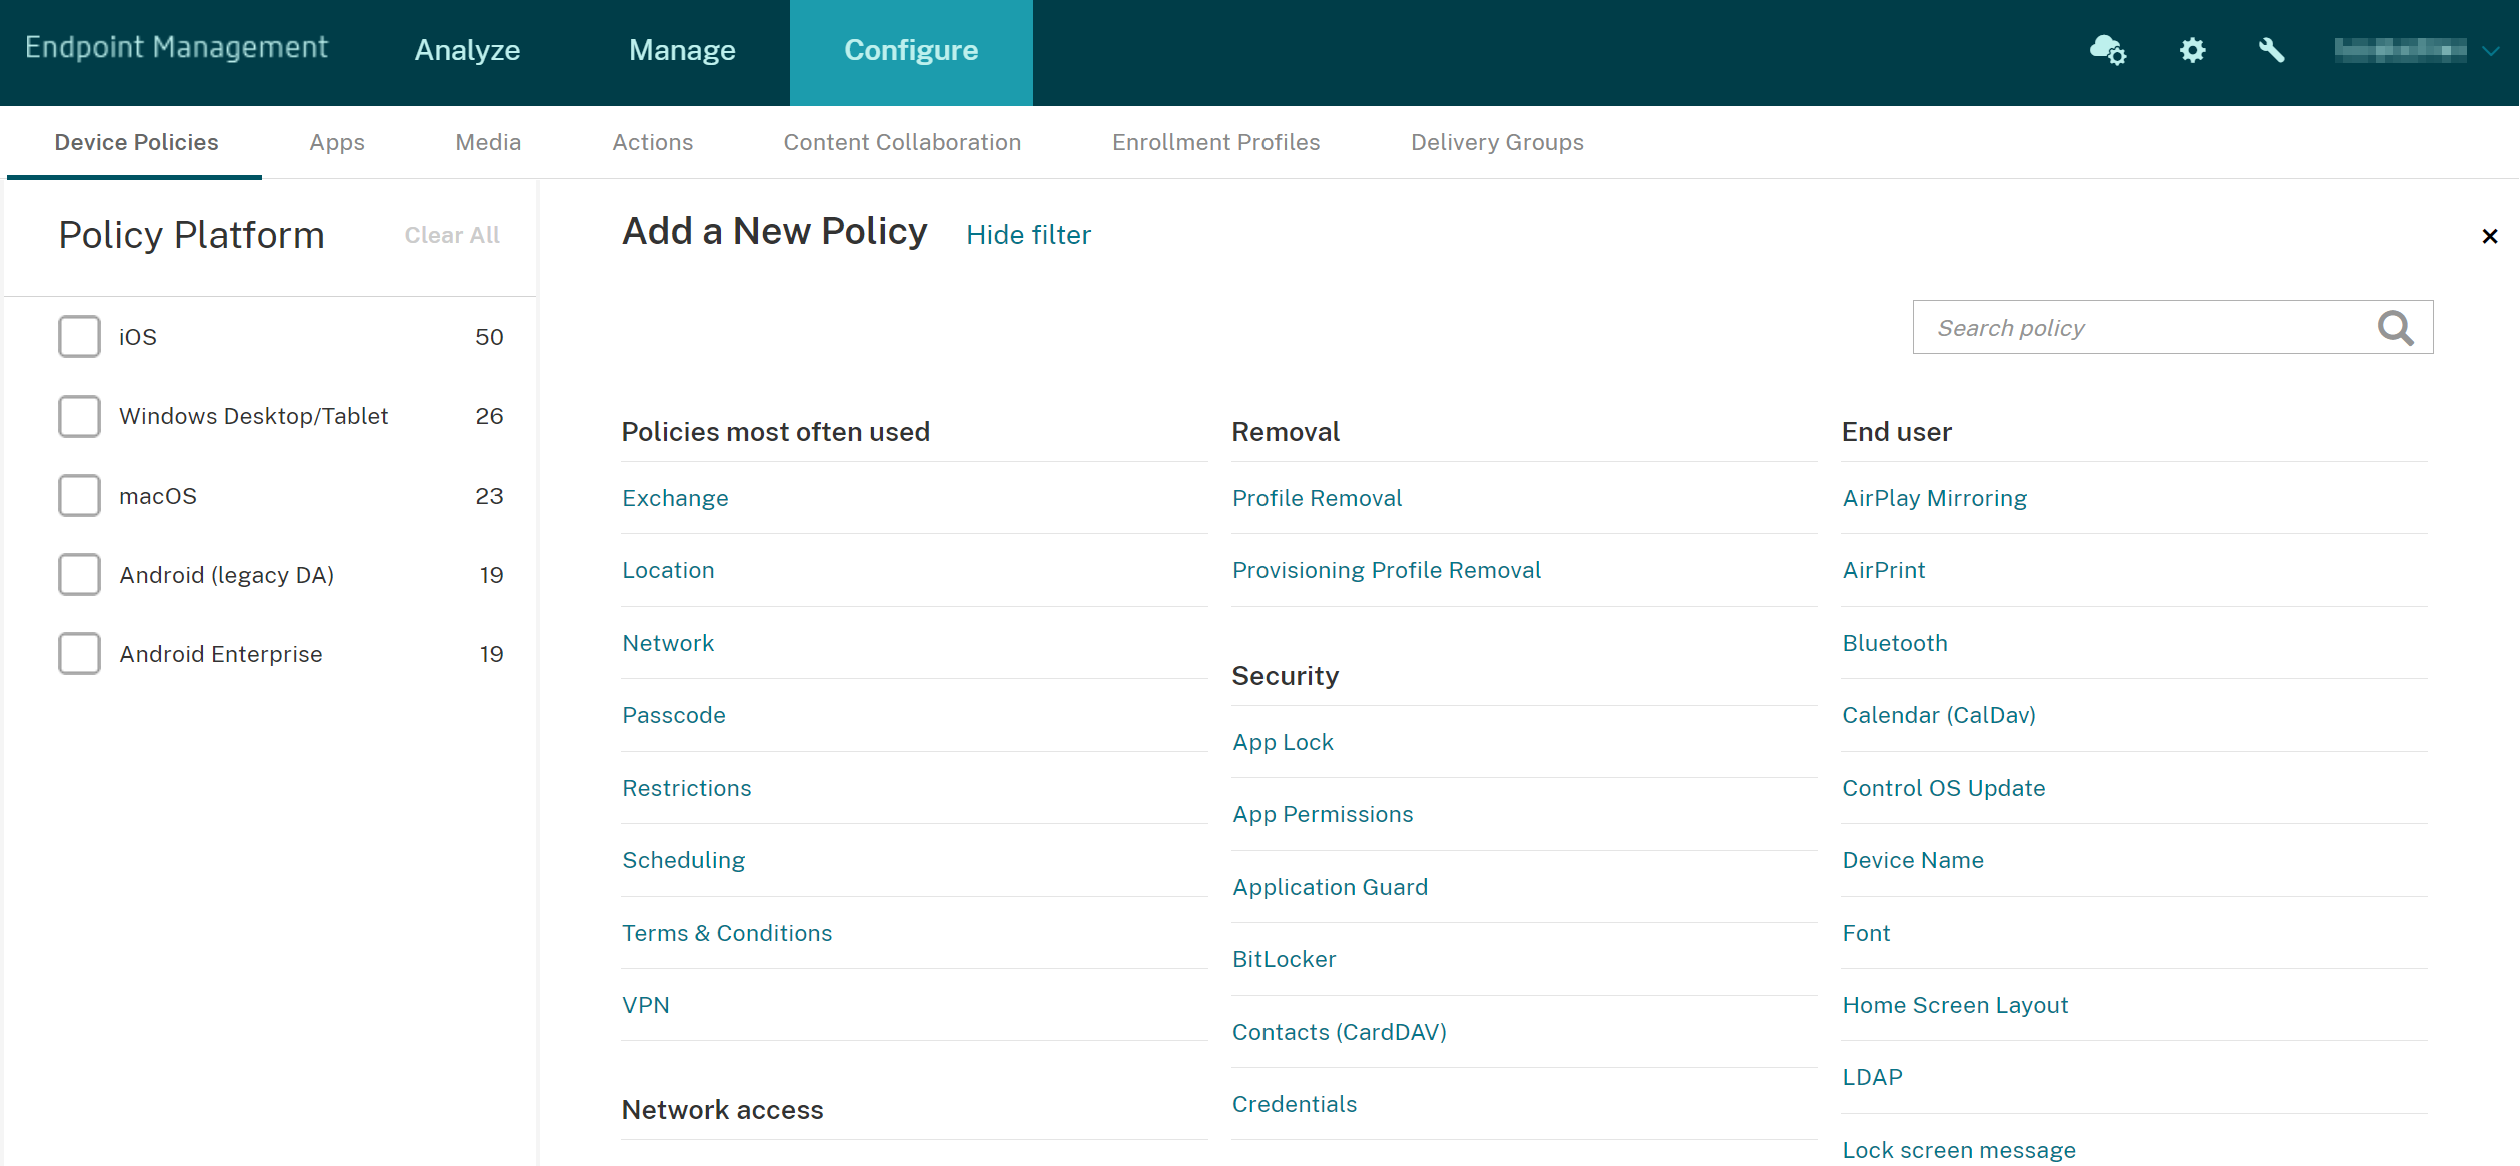
-
Click Restrictions from the list of policies.
-
On the Policy Information page, type a name and (optionally) a description for the policy. Click Next.
-
To create a device policy for iOS apps, select iOS in the Platforms pane.
-
Under Security - Allow, set Documents from managed apps in unmanaged apps to Off. Turning this setting Off also sets Unmanaged apps read managed contacts and Managed apps write unmanaged contacts to Off. Click Next.
-
Click Next until the Save button appears. Click Save.
Configure the App Configuration device policy for each app:
-
In the Citrix Endpoint Management console, click Configure > Device Policies.
-
Click Add. The Add a New Policy page appears.
-
Click App Configuration from the list of policies.
-
On the Policy Information page, type a name and (optionally) a description for the policy. Click Next.
-
To create a device policy for an iOS app, select iOS in the Platforms pane.
-
Select the identifier for the app to be configured.
-
For iOS apps, add the following text to Dictionary content:
<dict> <key>IntuneMAMUPN</key> <string>${user.userprincipalname}</string> </dict> <!--NeedCopy--> -
Click Check Dictionary.
-
Click Next.
-
Click Save.
Configure delivery groups for the apps and device policies
-
In the Citrix Endpoint Management console, click Configure > Delivery Groups.
-
On the Delivery Groups page, click Add. The Delivery Group Information page appears.
-
On the Delivery Group Information page, type a name and (optionally) a description for the delivery group. Click Next.
-
On the Assignments page, specify how you want to deploy the delivery group: Choose In Citrix Endpoint Management or In Citrix Cloud.
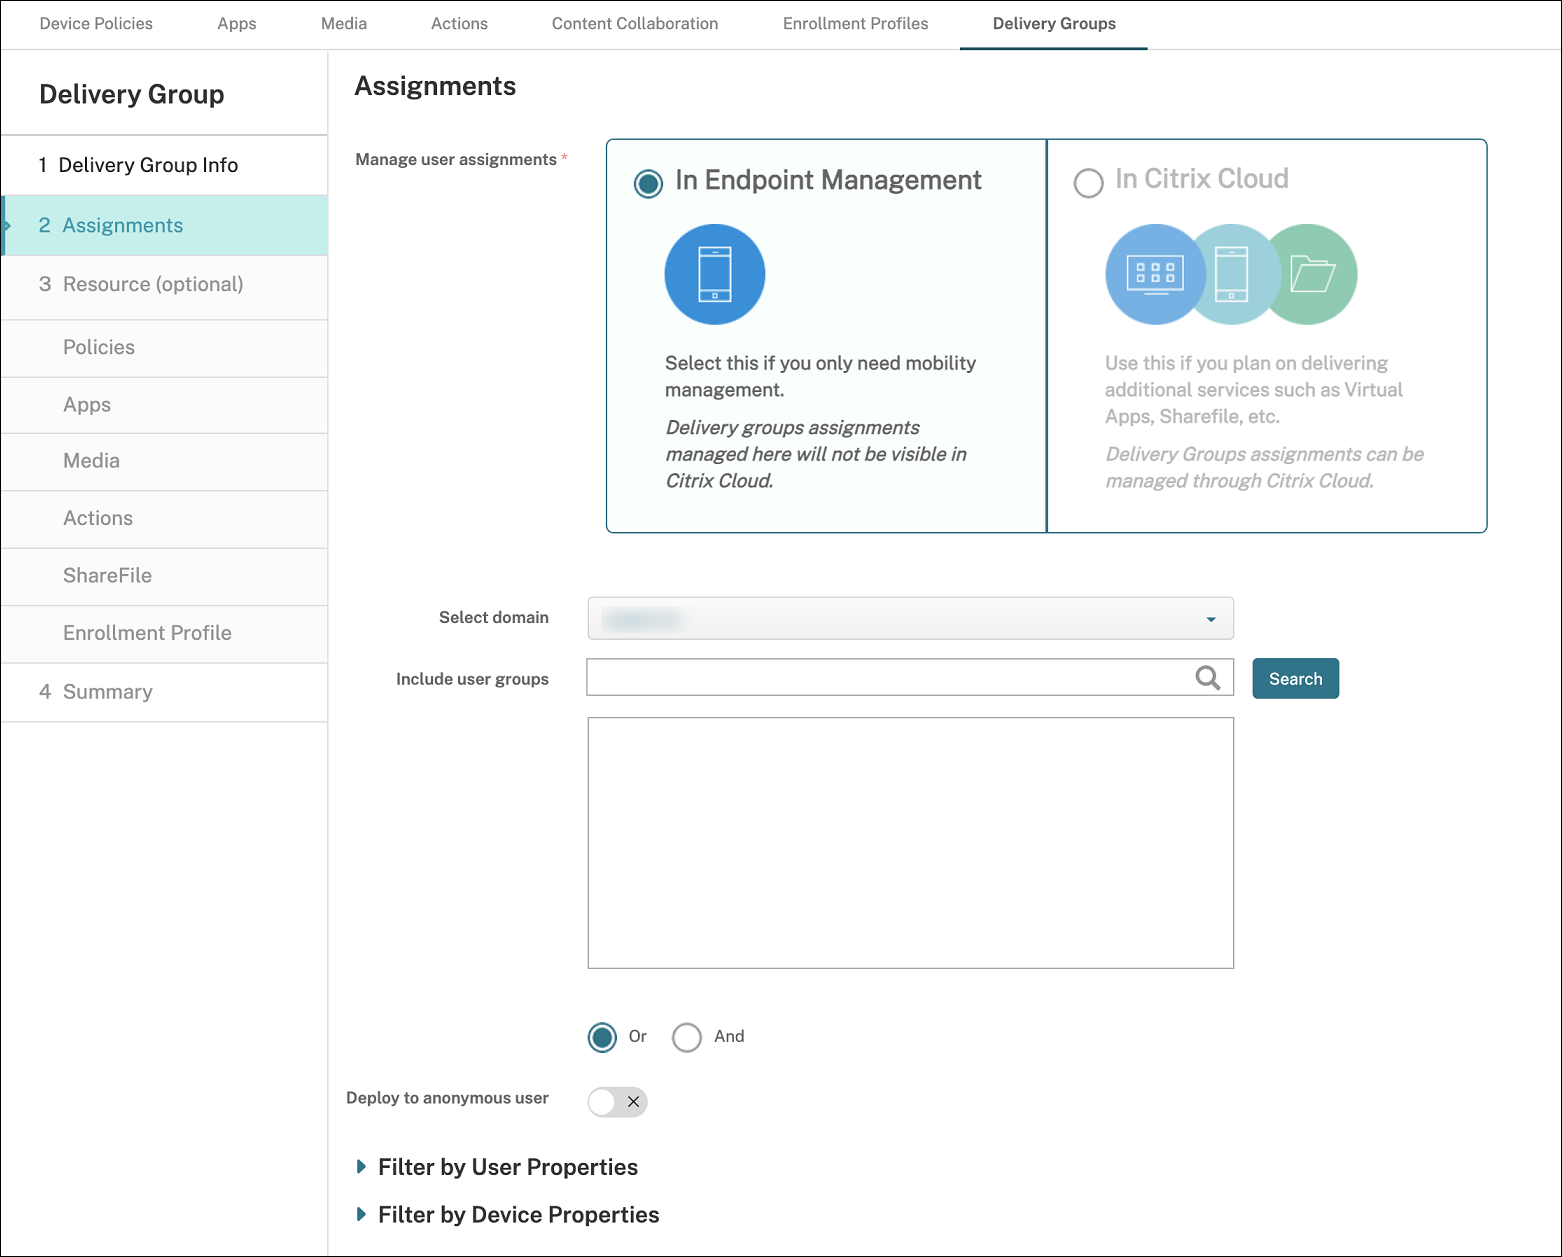
-
If you chose In Citrix Endpoint Management:
- Select domain: From the list, select the domain from which to choose users.
-
Include user groups: Do one of the following:
- In the list of user groups, click the groups you want to add. The selected groups appear in the Selected user groups list.
- Click Search to see a list of all user groups in the selected domain.
- Type a full or partial group name in the search box, and then click Search to limit the list of user groups.
To remove a user group from the Selected user groups list, do one of the following:
- In the Selected user groups list, click the X next to each of the groups you want to remove.
- Click Search to see a list of all user groups in the selected domain. Scroll through the list and clear the checkbox of each of the groups you want to remove.
- Type a full or partial group name in the search box, and then click Search to limit the list of user groups. Scroll through the list and clear the checkbox of each of the groups you want to remove.
-
Click Next.
-
In the Policies page, drag the Restrictions policy and the App Configuration policy you create from the left to right. Click Next.
-
In the Apps page, drag the apps you want to deliver from the left side of the page to Required Apps or Optional Apps. Click Next.
-
Optional, configure the settings on the Media page, Actions page, and Enrollments page. Or accept the defaults on each page and click Next.
-
On the Summary page, review the delivery group settings and click Save to create the delivery group.
When publishing the app in the Intune console, select Force apps to be managed. Users on unsupervised devices are prompted to allow management of the app. If users accept the prompt, the app is managed on the device. If users decline the prompt, the app isn’t available on the device.
Configure Citrix Secure Mail
Note:
The Citrix Secure Mail integration with Intune is deprecated and will be removed in a future release. Refer to What’s new in Secure Mail for more details.
Citrix Secure Mail now supports various configurations. You can wrap Citrix Secure Mail in an Intune MAM container connecting to an on-premises Exchange Server. You can connect Citrix Secure Mail to hosted Exchange or Office 365 accounts. This release does not support certificate-based authentication, however, so use LDAP instead.
Important:
To use Citrix Secure Mail in MDX mode, you must use Citrix Endpoint Management MDM+MAM.
Citrix Secure Mail also automatically populates user names. To enable this feature, you must configure the following custom policies first.
-
From your Citrix Endpoint Management console, go to Settings > Server Properties and then click Add.
-
In the list, click Custom Key and then in the Key field, type
xms.store.idpuser_attrs. -
Set the value to true and then in Display name, type
xms.store.idpuser_attrs. Click Save. -
Click Client Properties and then click Add.
-
Select Custom Key and then type SEND_LDAP_ATTRIBUTES in the Key field.
-
Type
userPrincipalName=${user.userprincipalname},email=${user.mail},displayname=${user.displayname},sAMAccountName=${user.samaccountname},aadupn=${user.id_token.upn},aadtid=${user.id_token.tid}in the Value field. Enter a description and then click Save.The following steps only apply for iOS devices.
-
Go to Configure > Device Policies, click Add, and then select the App Configuration policy.
-
Enter a policy name and then click Next.
In the Identifier list, click Add new. In the text box that appears, enter the bundle ID for your Citrix Secure Mail app.
-
In the Dictionary content box, type the following text.
<dict> <key>XenMobileUserAttributes</key> <dict> <key>userPrincipalName</key> <string>${user.userprincipalname}</string> <key>email</key> <string>${user.mail}</string> <key>displayname</key> <string>${user.displayname}</string> <key>sAMAccountName</key> <string>${user.samaccountname}</string> <key>aadupn</key> <string>${user.id_token.upn}</string> <key>aadtid</key> <string>${user.id_token.tid}</string> </dict> <key>IntuneMAMUPN</key> <string>${user.id_token.upn}</string> </dict> -
Clear the Windows Desktop/Tablet checkbox and then click Next.
-
Select the user groups to which you want the policy deployed and then click Save.
Troubleshooting
General issues
Issue: When opening an app, the following error message appears: App Policy Required.
Resolution: Add policies in the Microsoft Graph API.
Issue: You have policy conflicts.
Resolution: Only a single policy per app is allowed.
Issue: Your app can’t connect to internal resources.
Resolution: Ensure that the correct firewall ports are open, you use the correct tenant ID, and so on.
NetScaler Gateway issues
The following table lists common issues with NetScaler Gateway configurations and their solutions. For troubleshooting, enable more logs and check them by doing the following:
- In the command-line interface, run the following command:
set audit syslogParams -logLevel ALL - Check the logs from the shell using
tail -f /var/log/ns.log
| Issue | Solution |
|---|---|
| The permissions required to be configured for the Gateway App on Azure are unavailable. | Check if a proper Intune license is available. Try using the manage.windowsazure.com portal to see if the permission can be added. Contact Microsoft support if the issue persists. |
NetScaler Gateway can’t reach login.microsoftonline.com and graph.windows.net. |
From NS Shell, check if you can reach the following Microsoft website: curl -v -k https://login.microsoftonline.com. Then, check whether DNS is configured on NetScaler Gateway and that the firewall settings are correct (in case DNS requests are firewalled). |
| An error appears in ns.log after you configure OAuthAction. | Check if Intune licensing is enabled and the Azure Gateway app has the proper permissions set. |
| Sh OAuthAction command does not show OAuth status as complete. | Check the DNS settings and configured permissions on the Azure Gateway App. |
| The Android or iOS device does not show the dual authentication prompt. | Check if the Dual Factor Device ID logonSchema is bound to the authentication virtual server. |
OAuth error condition and status
| Status | Error Condition |
|---|---|
| COMPLETE | Success |
| AADFORGRAPH | Invalid secret, URL not resolved, connection timeout |
| MDMINFO | *manage.microsoft.com is down or unreachable |
| GRAPH | Graph endpoint is down unreachable |
| CERTFETCH | Cannot talk to “Token Endpoint: https://login.microsoftonline.com because of a DNS error. To validate this configuration, go to shell and type curl https://login.microsoftonline.com. This command must validate. |
Limitations
The following items describe some limitations of using MEM with Citrix Endpoint Management.
- When you deploy apps with Citrix and Intune to support micro VPN: When users provide their user name and password to access digest sites, even though their credentials are valid, an error appears. [CXM-25227]
- After changing Split tunnel from On to Off and waiting for the current gateway session to expire: External traffic passes directly on without going through NetScaler Gateway until the user launches an internal site in Full VPN mode. [CXM-34922]
- After changing the Open-in policy from Managed apps only to All apps, users can’t open documents in unmanaged apps until they close and relaunch Citrix Secure Mail. [CXM-34990]
- When split tunneling is On in Full VPN mode, and the split DNS changes from local to remote, internal sites fail to load. [CXM-35168]
Known issues
When the mVPN policy Enable http/https redirection (with SSO) is disabled, Citrix Secure Mail does not function. [CXM-58886]
Third-party known issues
On Citrix Secure Mail for Android, when a user taps Create New Event, the new event creation page does not display. [CXM-23917]
When you deploy Citrix Secure Mail for iOS with Citrix and Intune to support micro VPN: The app policy that obscures the Citrix Secure Mail screen when users move the app to the background isn’t enforced. [CXM-25032]