Citrix Cloud™ account management
This article walks you through the process of onboarding a Citrix Cloud Account and managing licenses for an account.
Create a Citrix Cloud account
-
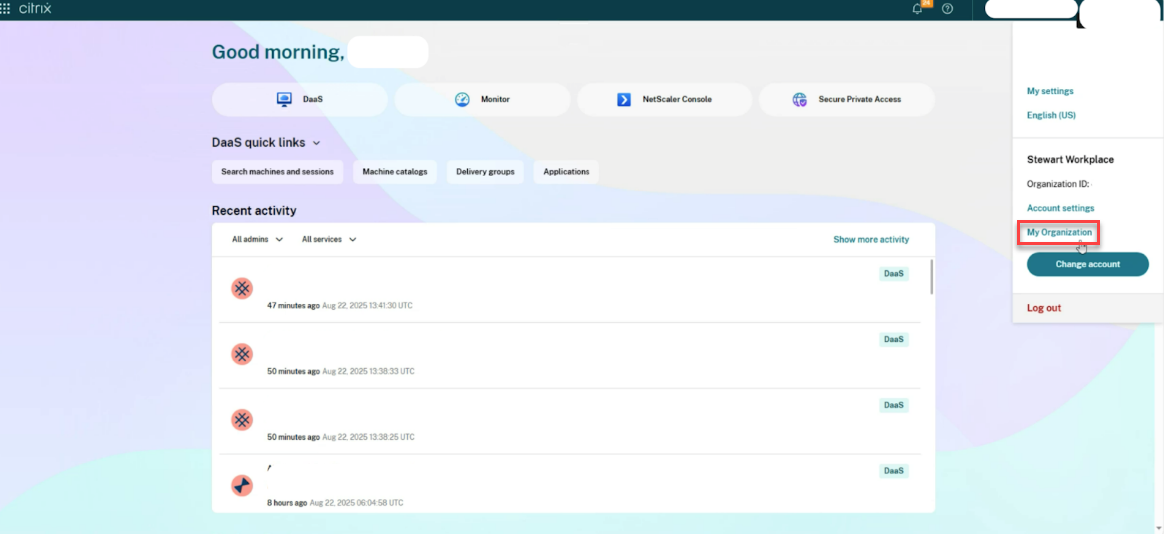
From the Citrix Cloud console, In the profile menu, click My Organization to begin.
Note:
If you don’t see My Organization option, then you don’t have the right privilege to access it. Request your MyCitrix Account admin to add you as the correct admin for managing the licenses. For more information, refer to the Support link.
If you are an existing Citrix customer and don’t have a Citrix Cloud account, onboard the cloud tenant by visiting My Organization and follow the steps in Citrix Cloud account management.
If you’re new to Citrix®, sign up by contacting the account representatives to have your OrgID created.
-
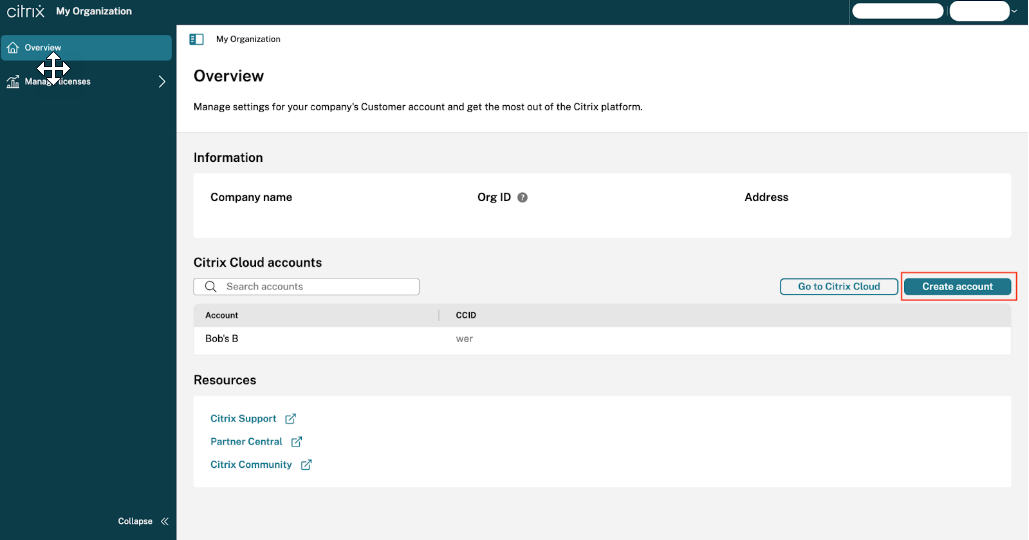
From My Organization home page, click Create account.
Note:
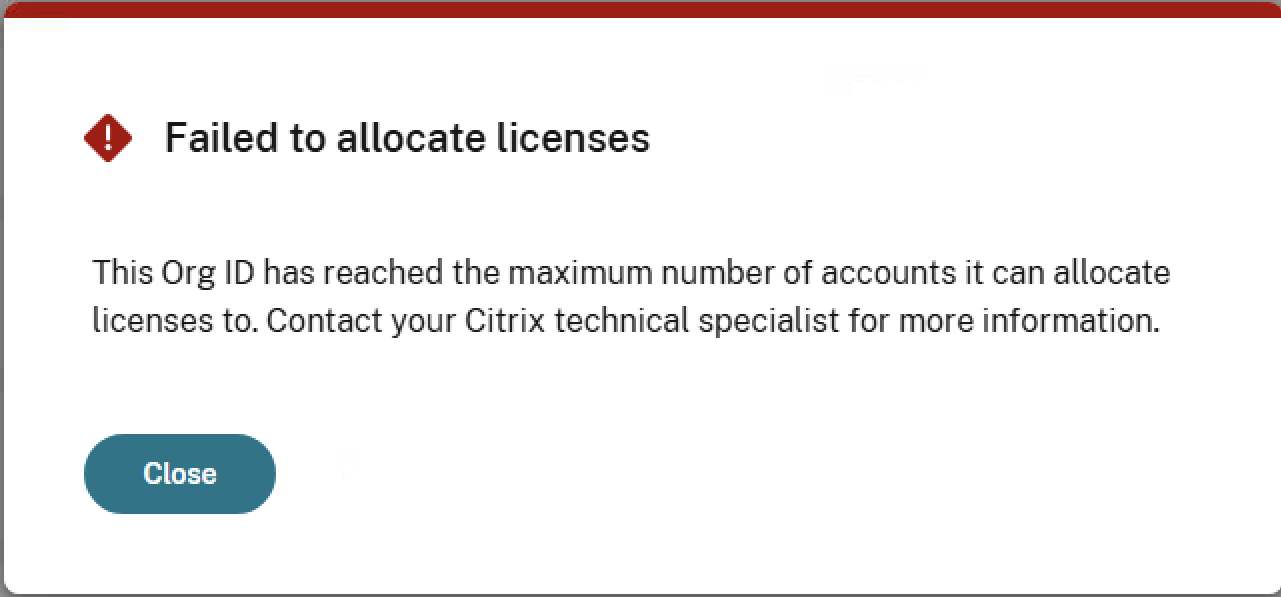
Citrix Customers can independently create new cloud tenants and manage licenses within My Organization. If you see the below message while allocating the licenses to onboarded cloud tenants, then you have reached the maximum number of accounts you can allocate licenses to, based on your total license quantities. For more information, get in touch with your Citrix Contact.
Citrix Partner is allowed to onboard only their first partner Citrix Cloud Account from My Organization . For onboarding any new customers, refer to My customers Dashboard.
-
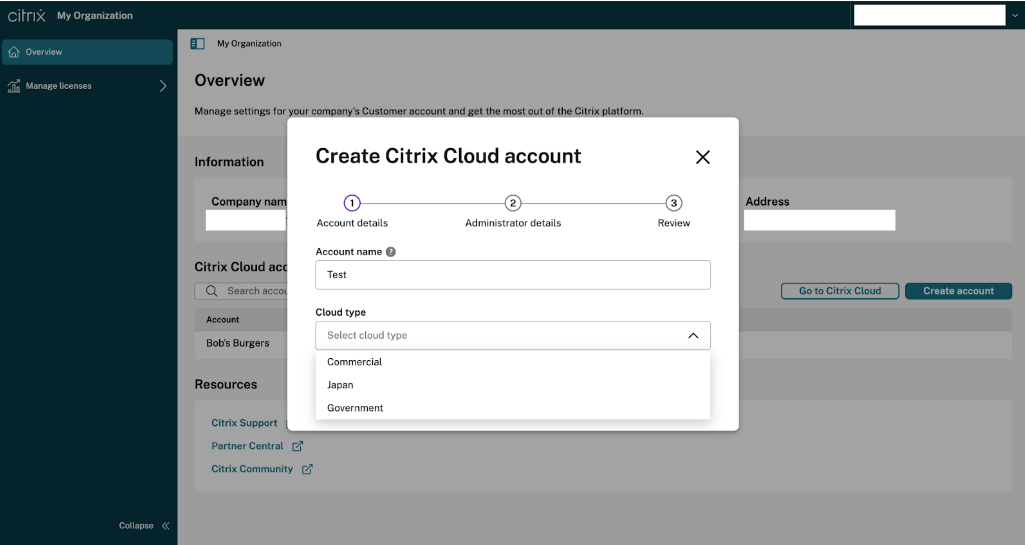
Enter the Account name and Select the Cloud type from the drop-down list options and click Next.
Note:
The Cloud type available options are Government, Japan, and Commercial.
-
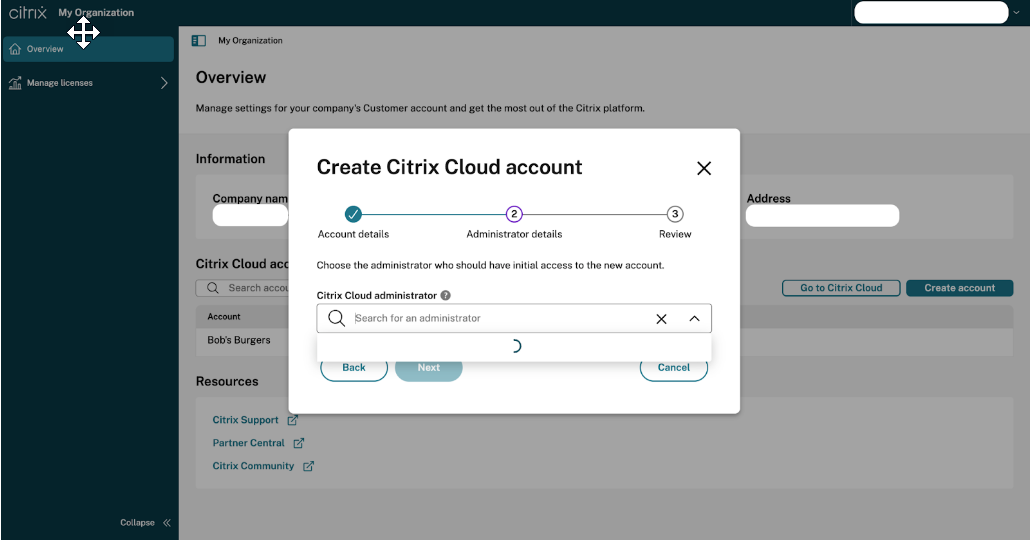
Select the Citrix Cloud administrator who should have initial access to the account. This administrator receives the initial login information. Then click Next.
-
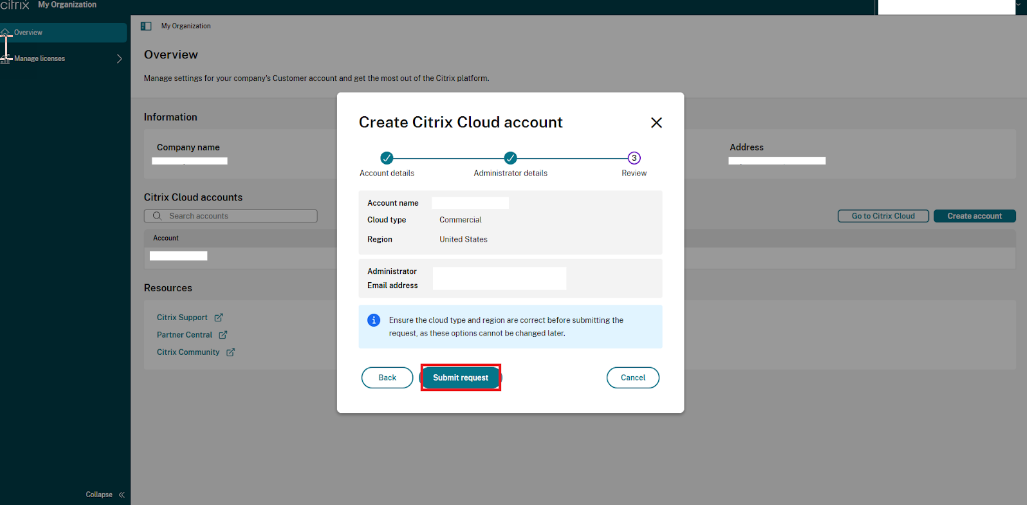
Confirm the Account name, Cloud type, and Administrator details, and then click Submit request.
-
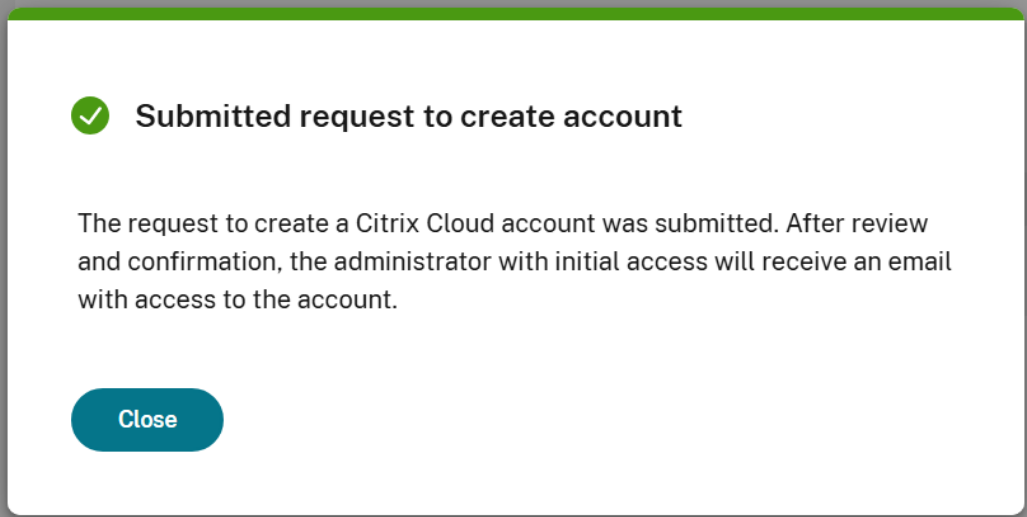
You notice a pop-up message stating that the Account is successfully created.
Note:
If the submission to create a Citrix Cloud account fails, contact the Customer support team for assistance.
License Management
A. Cloud License Management
License Allocation
The user now has access to allocate the licenses to their Citrix Cloud customer accounts.
Note:
License allocation across different control planes (such as Government, Japan, and Commercial) from legacy license models (excluding UHMC and CPL) is not supported.
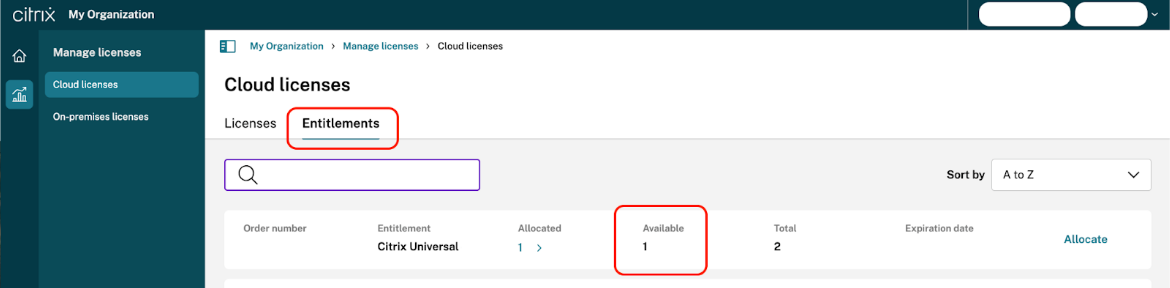
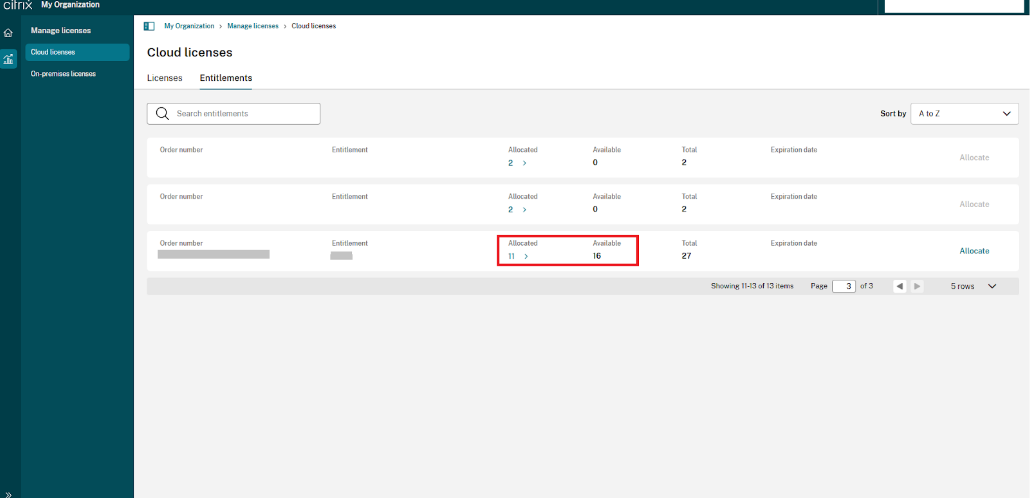
Make sure you have the required licenses available to be allocated to the Citrix Cloud account. Please check the same from My Organization > Manage Licenses > Cloud Licenses > Entitlements. Otherwise, make licenses available by performing Deallocation from suitable Entitlements. Refer to the License Deallocation section to learn more on Deallocation steps.
To allocate licenses to an account, use the following steps:
-
Navigate to the Manage Licenses section and click Cloud Licenses.
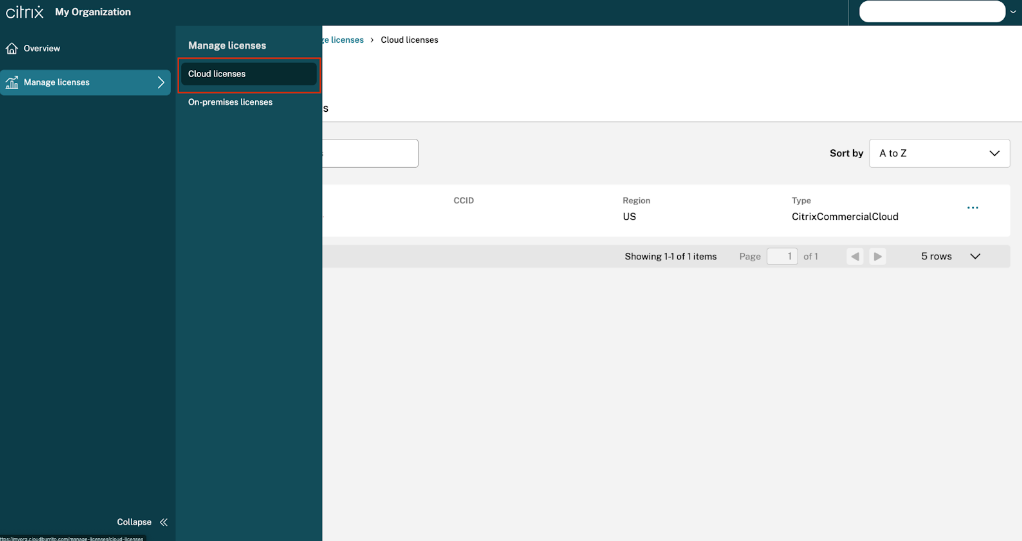
-
Click the ellipses for the new account and select Allocate.
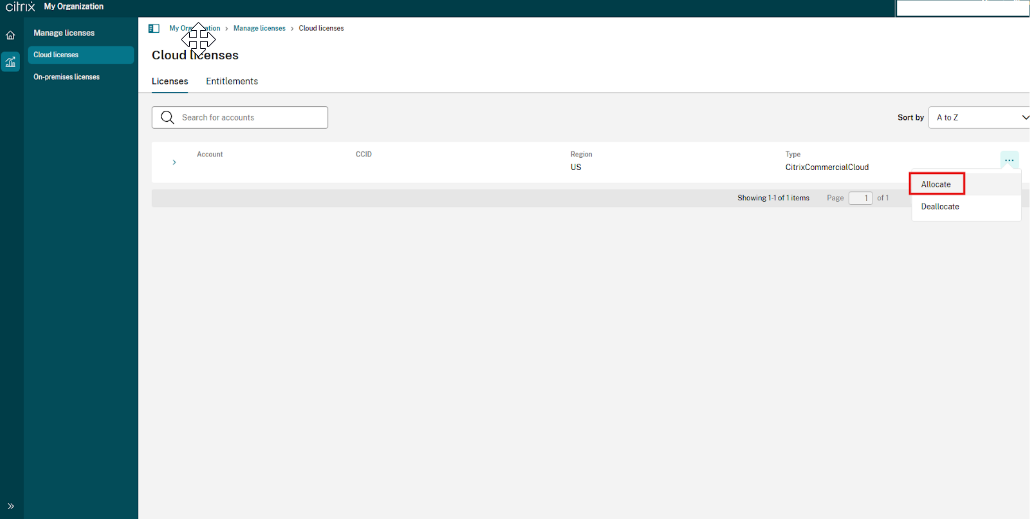
-
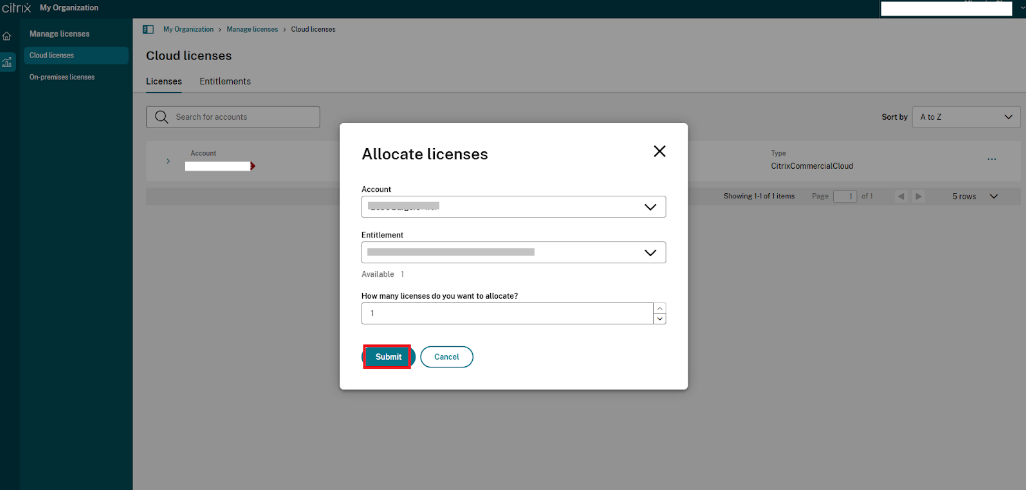
Select the Entitlement from the available list in the drop-down list options.
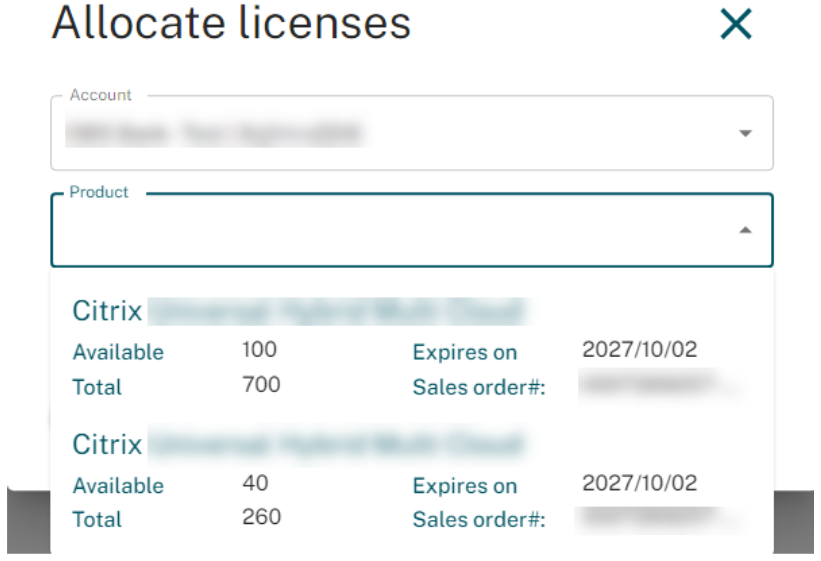
-
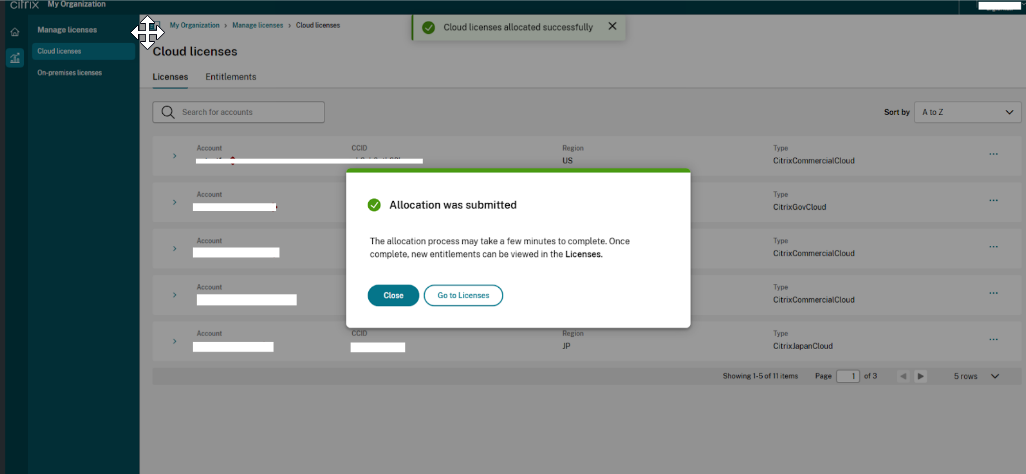
Specify the quantity of each product to allocate at the account level and click Submit.
-
After successfully submitting the Allocation request, click Close.
-
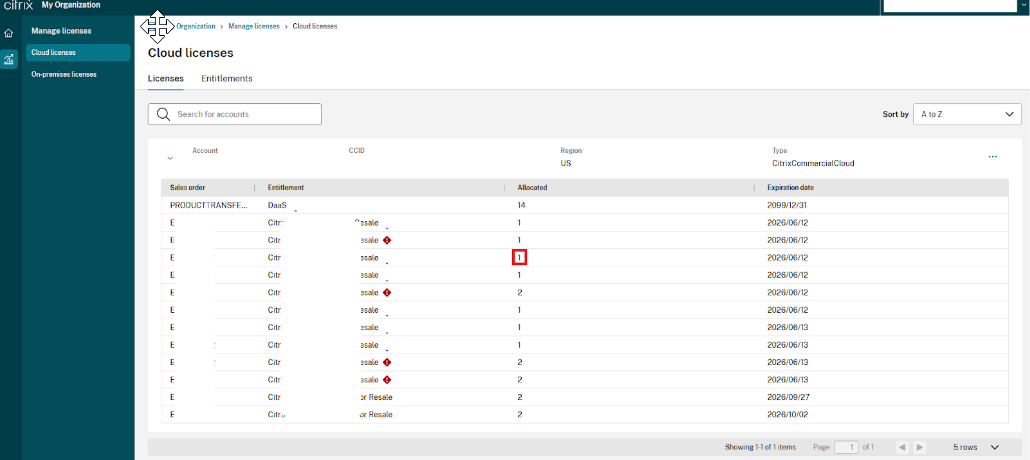
To verify the allocation, from Manage Licenses > Cloud Licenses, extend the account to see the quantity after allocation.
Note:
After completing the procedure, allocations will be in progress for a few hours to enable all services and assign licenses to the account. During this time, customers notice an icon indicating the processing status. Once the allocation is completed, the icon disappears, allowing them to proceed to the Cloud Admin console and start using the services. If an allocation fails, contact Citrix Customer Support for assistance.
License Deallocation
To deallocate licenses from an account, use the following steps:
-
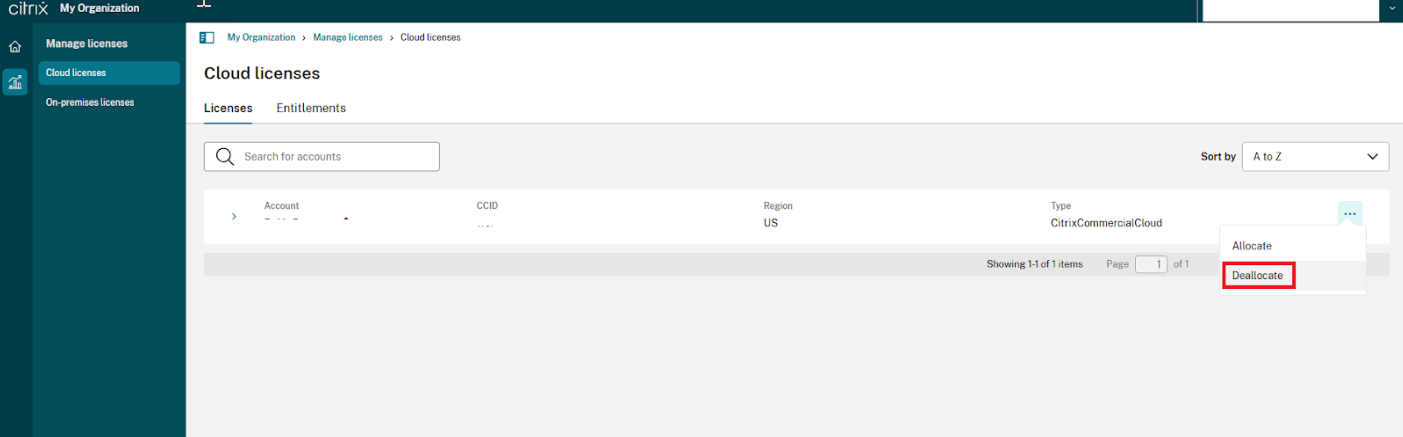
Navigate to the Manage Licenses page and click Cloud Licenses.
-
Click the ellipses for the new account and select Deallocate.
-
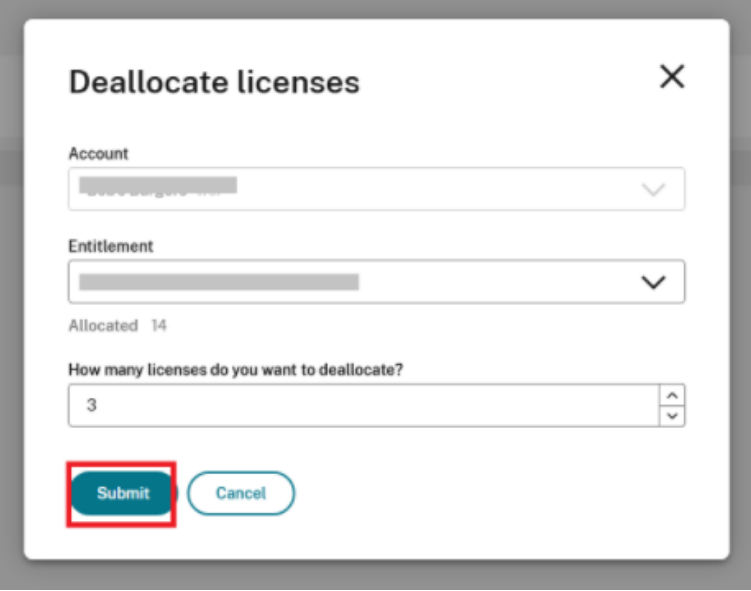
Select the Account from the drop-down list. Ensure that you select the correct account.
-
Select the Entitlement from the drop-down list, enter the number of licenses to deallocate in the Quantity tab and click Submit.
-
Verify the deallocation. From Manage Licenses > Cloud Licenses>Entitlements, extend the account to see the quantity after deallocation.
Known issue
Duplication of Products (Manage Licenses > Cloud Licenses) Customers might encounter duplicate product records with the same license quantities associated with a single sales order. These duplicates can show up under Entitlements (Manage Licenses > Cloud Licenses> Entitlements) or be directly allocated to their Citrix Cloud account. As a result, customers might be incorrectly entitled to create an additional Citrix Cloud account with the “Create account” button, or to allocate additional licenses from the duplicated products to a new Citrix Cloud account.
Recommendation This is a known issue, and Citrix is actively working to resolve it by removing ineligible duplicate orders. If a customer creates cloud tenants and performs license allocation or deallocation to and from these tenants, the upcoming fix from Citrix might affect their services. Therefore, if customers find themselves in this situation, they should contact the Citrix Customer Service team to verify their eligibility for creating new Citrix Cloud tenants and to ensure they have the correct privileges for cloud tenant creation and/or for any license allocation or deallocation.
Rebranded Order Customers might notice multiple allocations for a rebranded product in the Manage License. The original product allocation appears alongside two or three additional products, all sharing license quantity, expiry dates, and sales order.
Customers can identify the rebranded orders if they see more than one allocation for the same asset that has identical license quantities and expiry dates. All duplicate allocations display “DaaS” as the product name. Customers can check if they have a rebranded order by:
- Reviewing their purchased assets in Manage Licenses > Cloud Licenses > Entitlements and comparing them with the packages listed for allocation.
- By examining the network trace in a browser, you can see multiple IDs in the allocations list following the pattern
<Random_GUID>-<OrderId>, where theOrderIdrepeats but theRandom_GUIDdoes not.
Recommendation This is a known issue, and Citrix is actively working to resolve it by removing any invalid orders. Before creating an account, customers are expected to follow the steps outlined in Create a Citrix Cloud account to ensure that they are creating an account they are eligible for and to avoid creating an account, which they are not eligible for. If customers notice any invalid or duplicate orders on their account, they can contact the Customer Service team.Additionally, any Citrix Cloud customer instances created due to eligibility from invalid orders are removed, potentially affecting customer operations.