Configure an On-Premise PingFederate Server as the SAML Provider for stores and Citrix Cloud™
This article was written by collaboration between both Citrix® and Ping engineers and has been reviewed by both parties to ensure technical accuracy at the time of writing. Refer to Ping documentation for instructions on how to provision, configure and licence an on premise PingFederate server for use as a SAML provider as this is beyond the scope of this article.
This document was written using PingFederate versions 11.3 and 12.
Prerequisites
This article specifically addresses SAML configuration and ensure that the following conditions are fulfilled.
- You have already provisioned an on-premise PingFederate server within your organization and obtained the necessary license. For more information, see PingFederate Installation.
- You need to have installed a supported version of Java on to the PingFederate server. Refer to Ping Identity documentation for the supported Java versions. For more information, see Java PingFederate Requirement.
- You have configured the required networking and firewall rules to allow Citrix Cloud to redirect to the on premise PingFederate server during the store/Citrix Cloud admin console SAML logon process. For more information, see PingFederate Network Requirements.
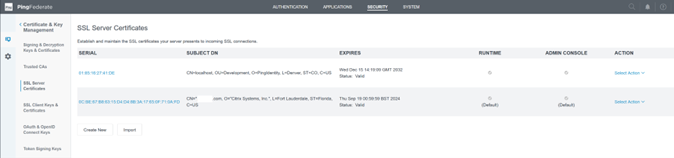
- You have imported a publicly signed x509 certificate onto your PingFederate server that can act as server certificate for the PingFederate server.
- You have imported a publicly signed x509 certificate onto your PingFederate server that can act as a SAML signing certificate for the IdP. This certificate must be uploaded to Citrix Cloud during the SAML connection process.
- You have connected your on-premise Active Directory to PingFederate. For more information, see PingFederate LDAP Datastore
Note:
While configuring PingFederate for use with Citrix Cloud and store, refer to PingFederate documentation to understand what individual SAML settings do and to help supplement the instructions provided here.
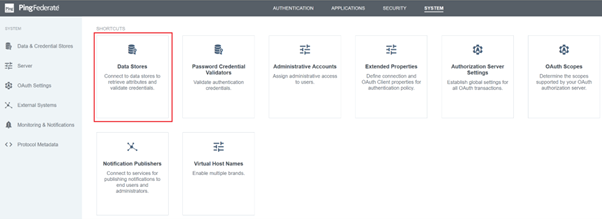
Configure an Active Directory Connection to your AD domain using a DataStore within PingFederate
-
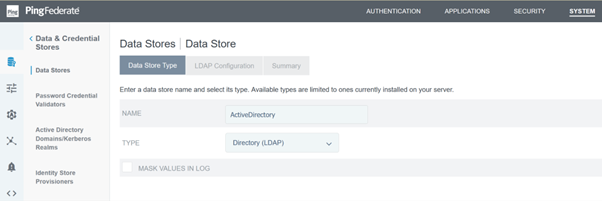
Configure an Active Directory connection within Data Stores.
-
Select Type as Directory (LDAP).
-
Configure your domain controllers for LDAPS connections and add your list of domain controller FQDNs within the hostnames field. Then click Test Connection.
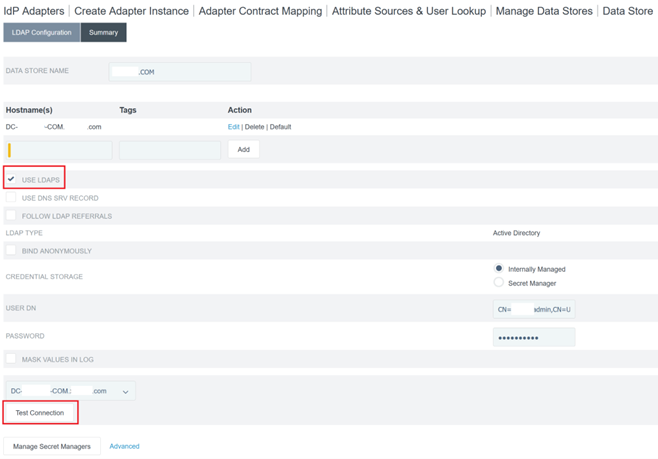
-
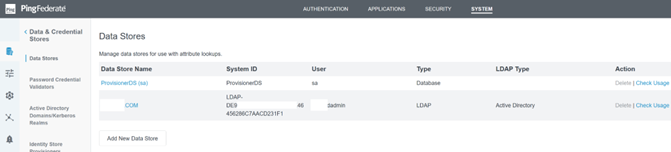
Once configured, the Active Directory Connection should resemble the following example:
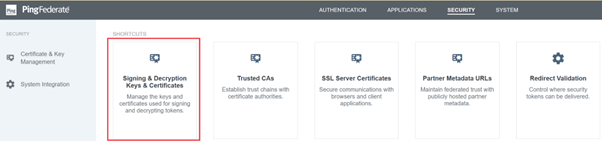
Upload the Citrix Cloud SAML Signing Certificate
- Click the Security tab
-
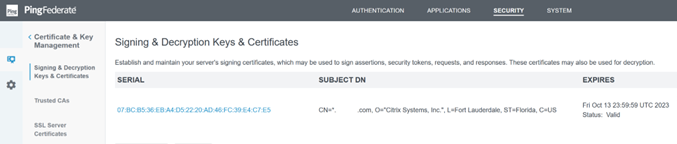
Upload the SAML signing certificate you wish PingFederate to use within Signing & Decryption Keys and Certificates.
Note:
The certificate used is a publicly signed Digicert
pingfederateserver.domain.comcertificate in this example. -
Upload any CA certificates used to sign your PingFederate server SAML signing certificate.
Note:
The PingFederate server certificate and SAML signing certificate can be the same SSL cert or you can use different SSL certs. You need to provide a copy of the SAML signing certificate to Citrix Cloud when you configure the SAML connection.
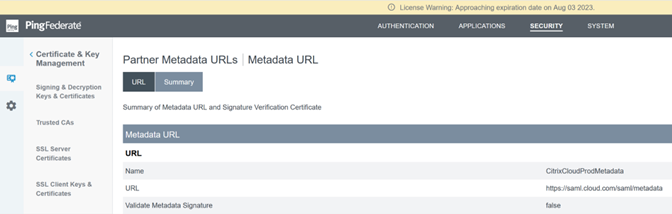
Upload the Citrix Cloud Metadata
-
Provide a name for the Citrix Cloud metadata and enter the metadata URL corresponding to the Citrix Cloud region where your Citrix Cloud tenant is located.
- https://saml.cloud.com/saml/metadata - Commercial EU, US and APS
- https://saml.citrixcloud.jp/saml/metadata - Japan
- https://saml.cloud.us/saml/metadata - Governement
-
Once configured, the Citrix Cloud metadata configuration should resemble the following example.

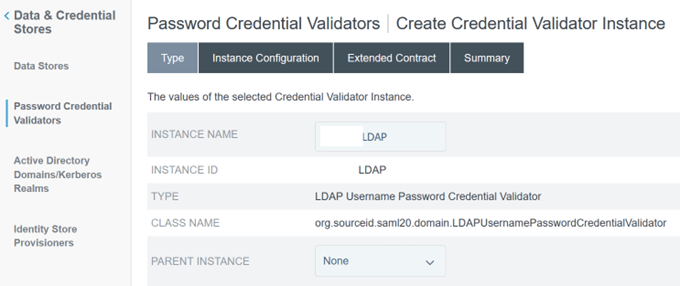
Configure a password credential validator within PingFederate
For more information, see PingFederate Password Credential validator
-
Configure the password credential validator type as LDAP username and password.
-
Configure the Instance Configuration. Select the AD domain connection and data store that you configured earlier Configure an Active Directory Connection to your AD domain using a DataStore within PingFederate. Enter a suitable LDAP filter as shown in the example.
(((sAMAccountName=${username})(userPrincipalName=${username}))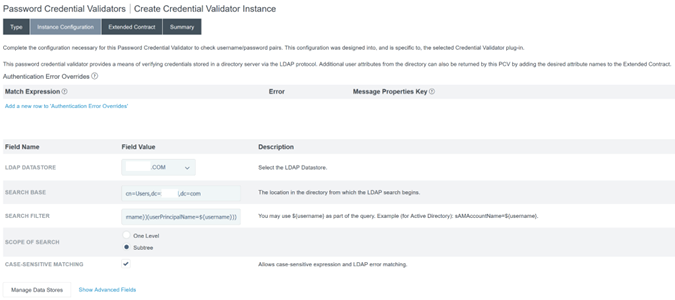
Note:
The example filter accommodates both sAMAccountName and userPrincipalName AD username formats, enabling end users to sign in to store or Citrix Cloud using either of these formats.
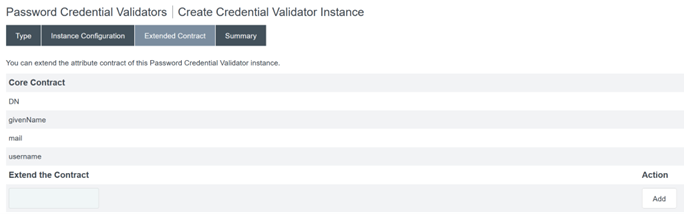
-
Configure the Extended Contract.
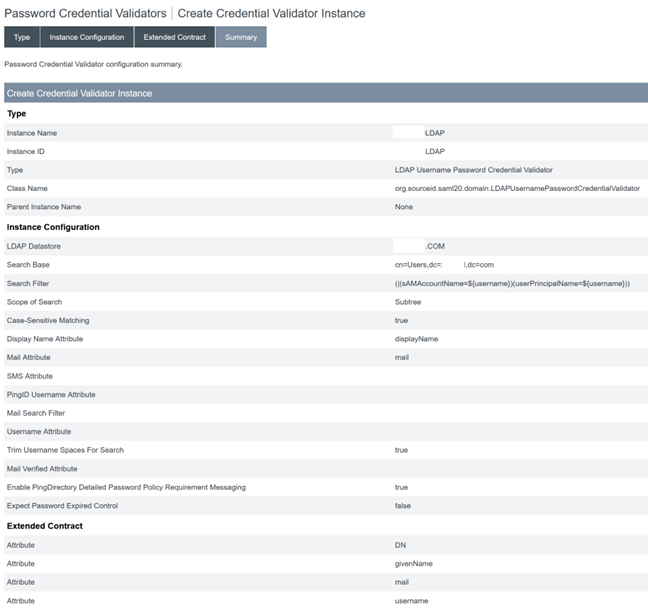
-
The Password Credential Validator summary should resemble this example.
Configure the IDP Adapter within PingFederate
For more information, see PingFederate HTML form adapter
-
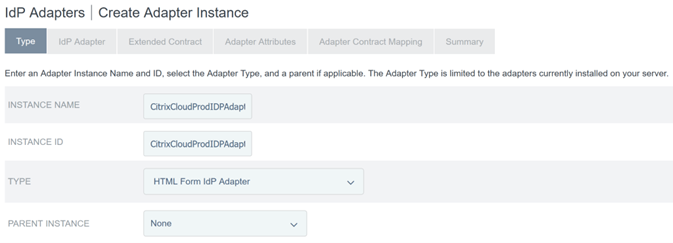
Create a new IDP adapter of type HTML Form IdP Adapter.
-
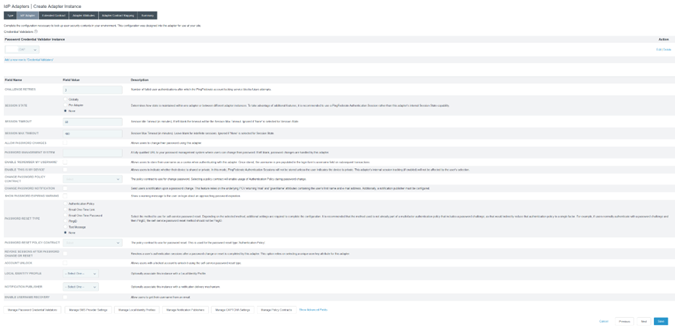
Select the existing Password Credential Validator you configured earlier and configure the IDP Adapter. For more information, see Configure a password credential validator within PingFederate.
-
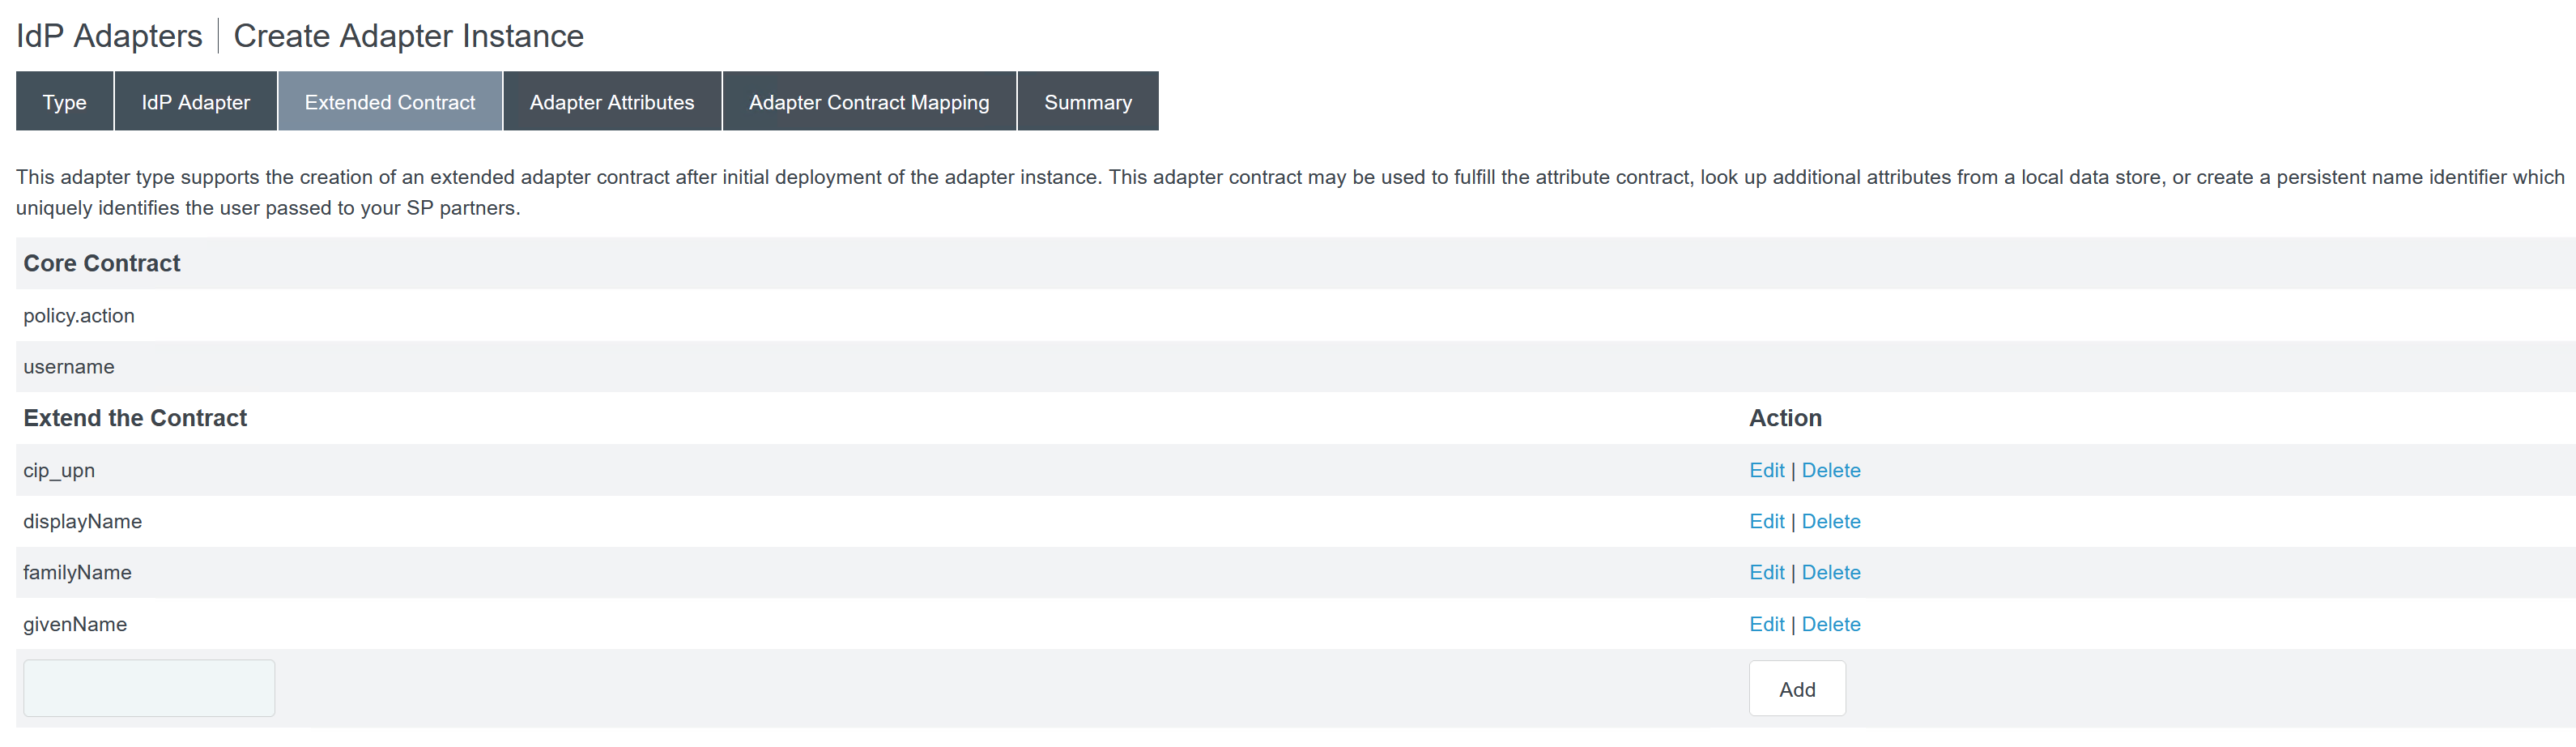
Configure the Extended Contract with SAML attributes that are passed to Citrix Cloud or stores during SAML logon.
-
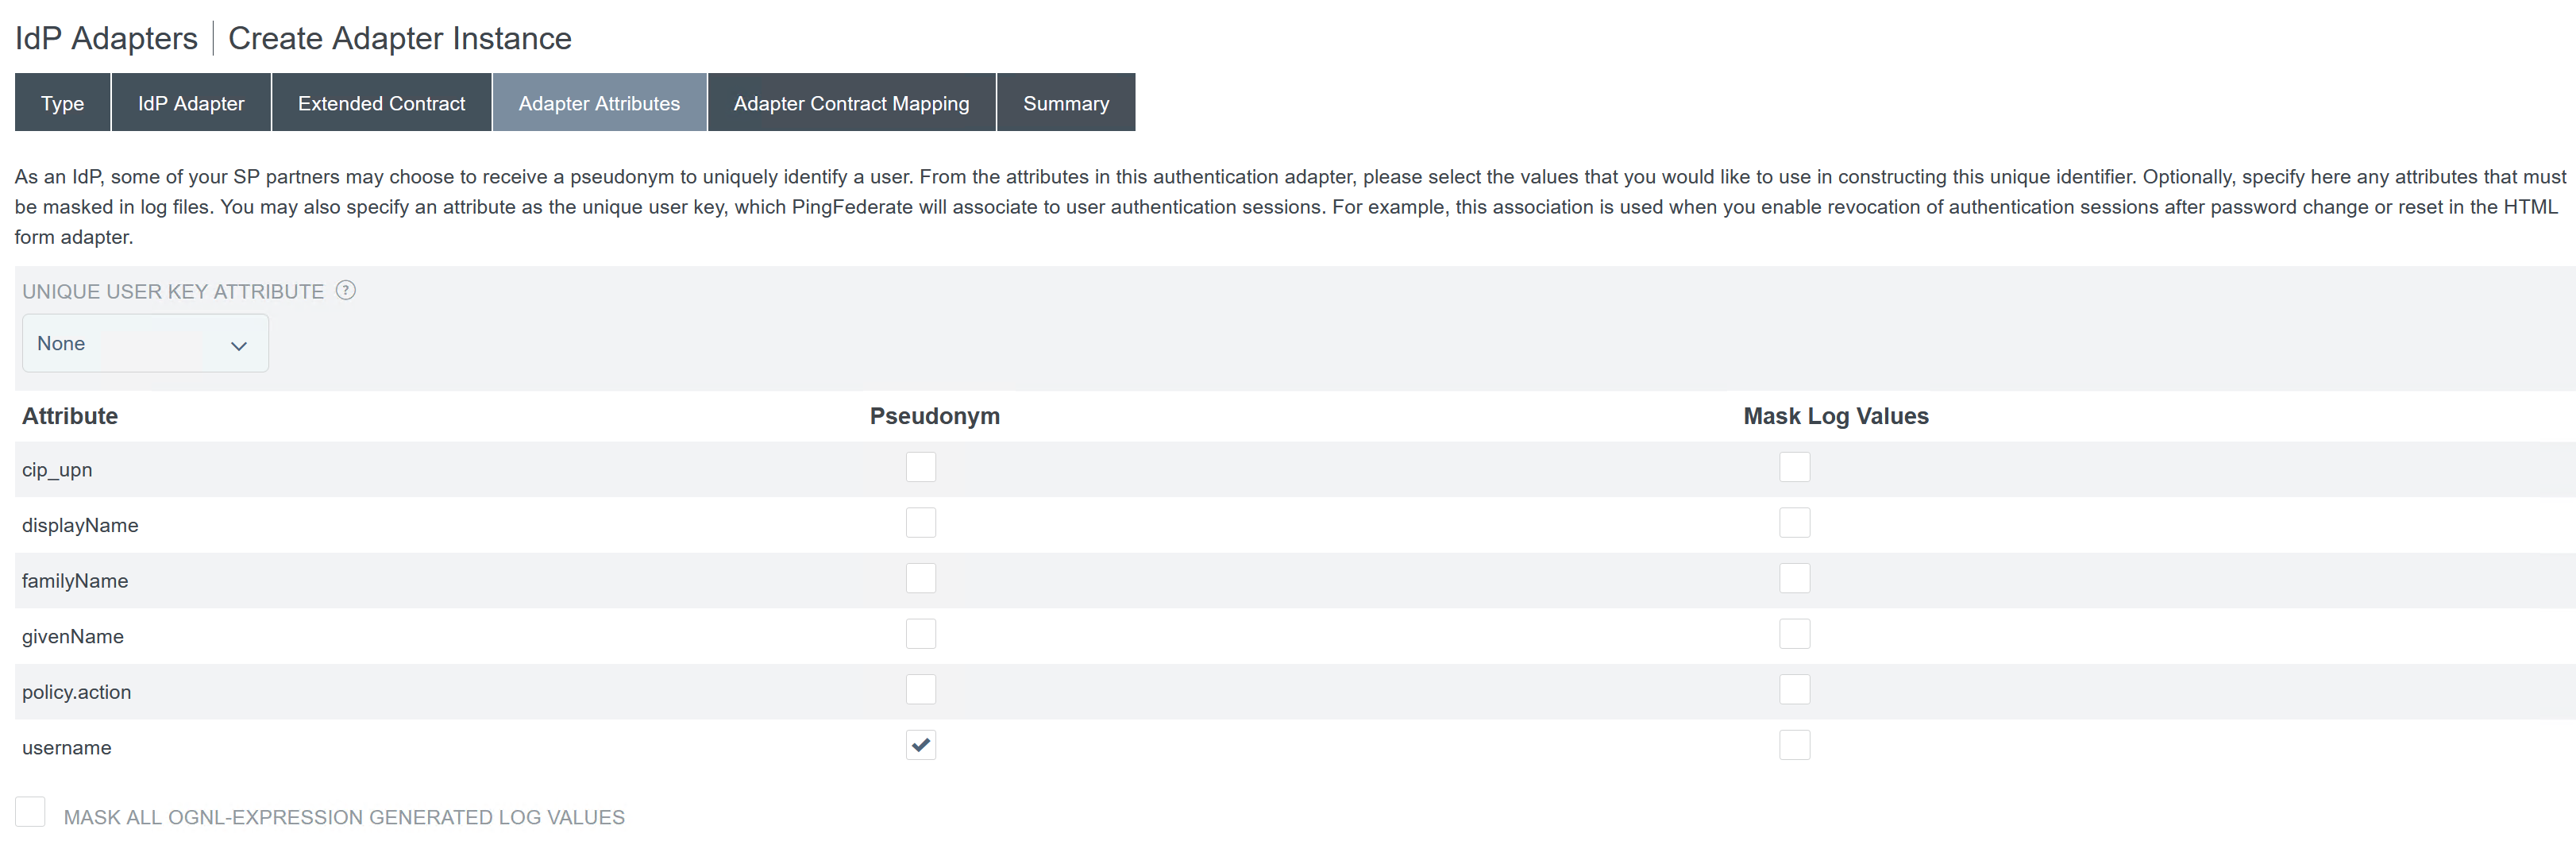
Configure the Adapter Attributes.
- Configure the Adapter Contract Mapping where SAML attributes are mapped to LDAP user attributes from AD identities. Click Configure the adapter contract.
-
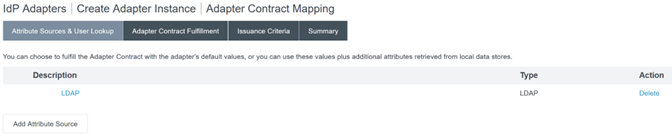
Configure Attribute Sources & User Lookup.
-
Configure Adapter Contract Fulfilment. Select LDAP and the name of your active directory data store as the source of the user attribute data. Value is the active directory attribute for the user such as
objectGUIDorobjectSid.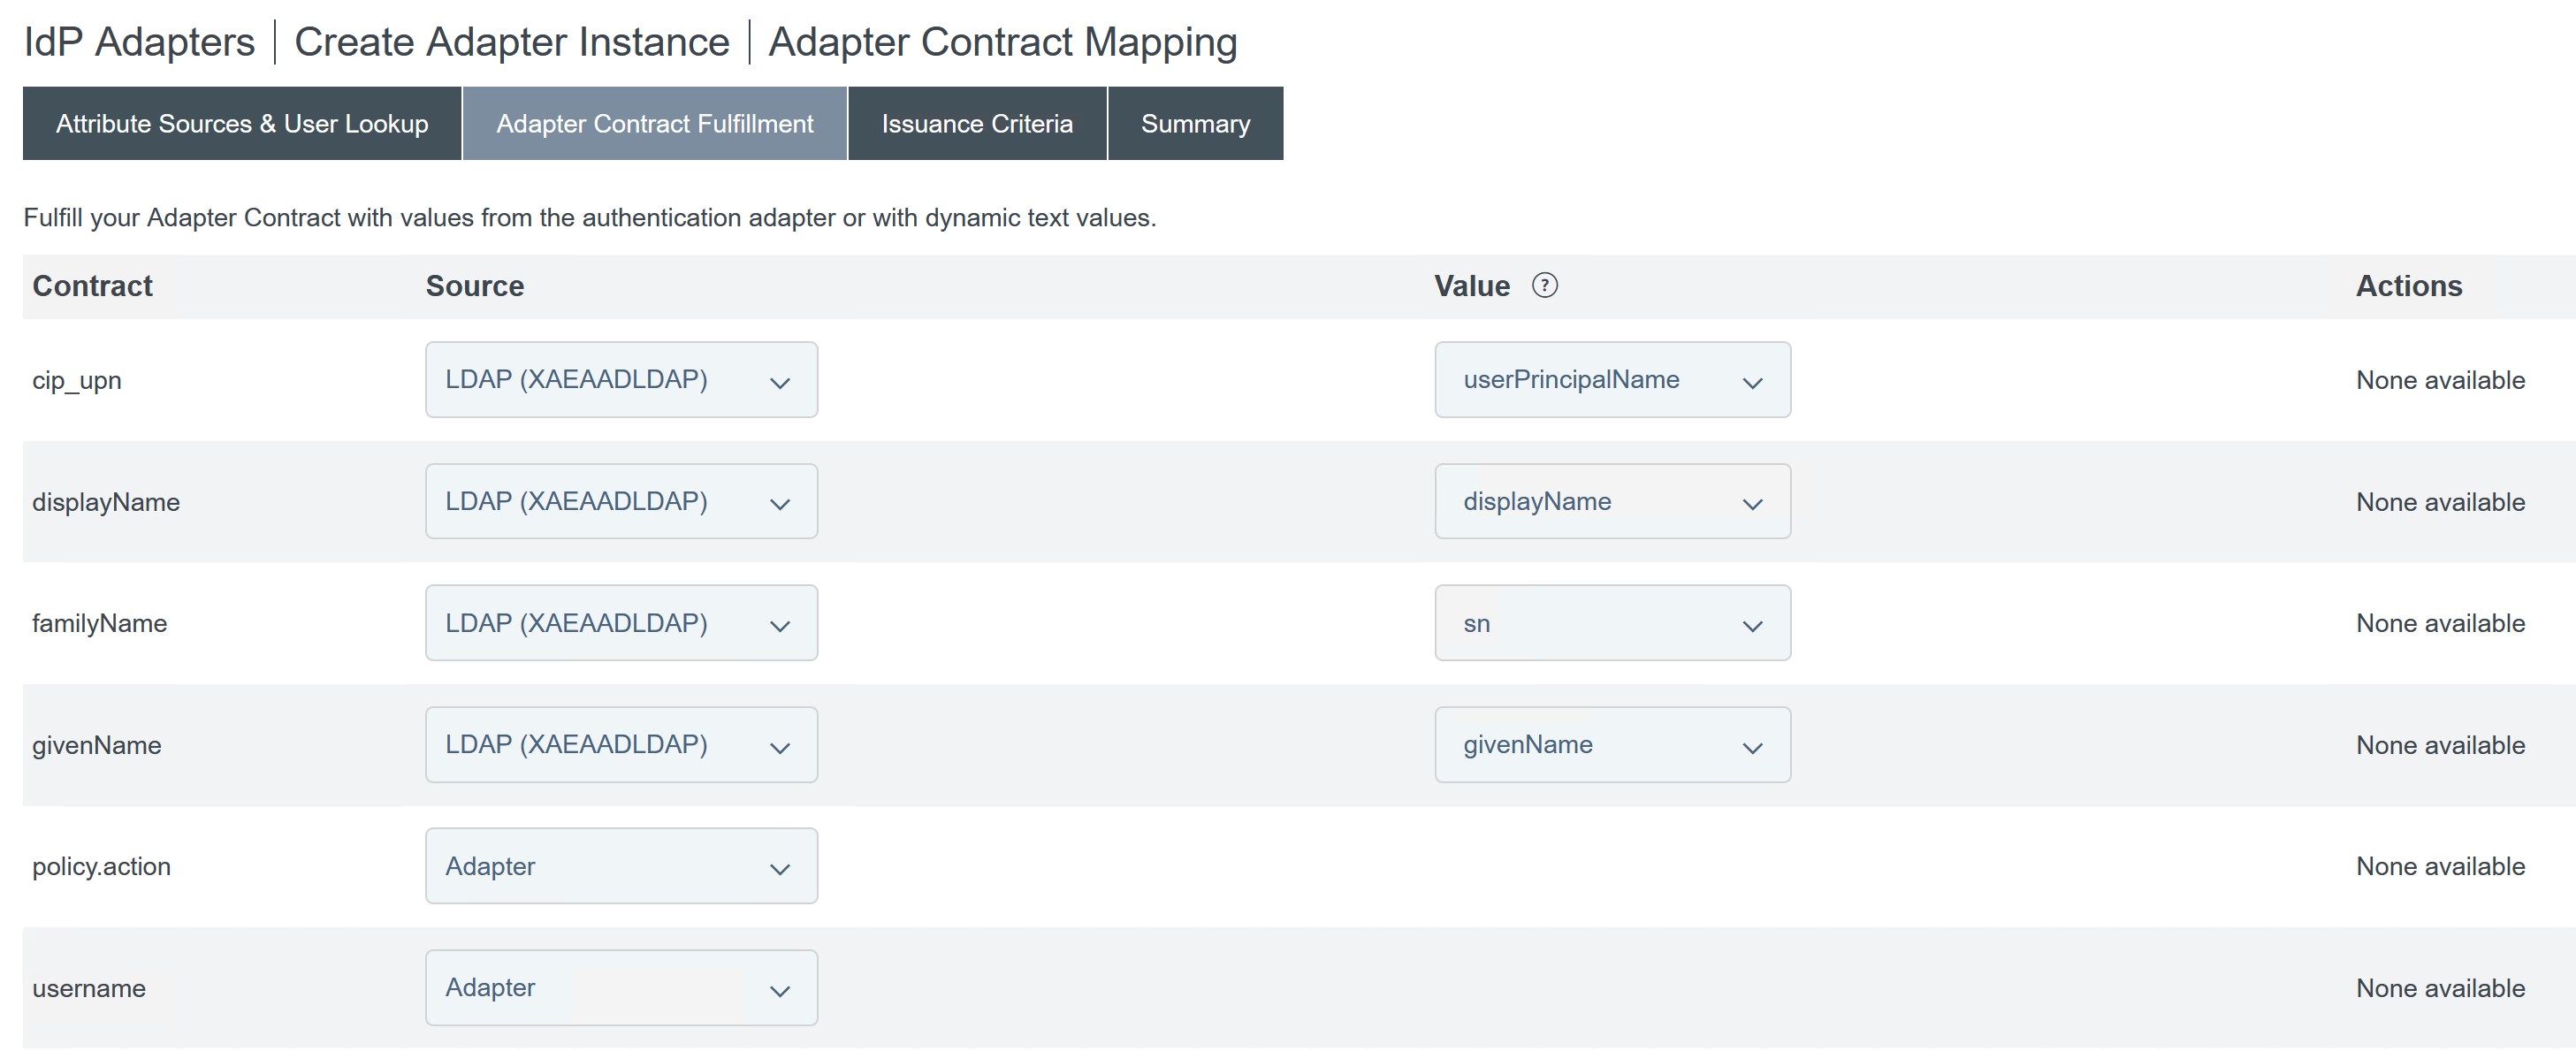
Configuring the Service Provider Connection (SAML application) for Citrix Cloud or stores
The sample PingFederate configuration provided below assumes the following SAML authentication requirements within your organisation.
- SAML authentication requests sent from store/Citrix Cloud admin console MUST be signed.
- SAML HTTP POST bindings will be used for both SSO and SLO requests.
- Single Logout (SLO) is a requirement within your organisation. When an end user signs out of store or the Citrix Cloud admin console, a SAML SLO request is sent from Citrix Cloud to the SAML provider (IdP) to sign out the user.
-
PingFederate requires signed HTTP POST requests to initiate sign out. SAML provider requires Signed SLO requests.
For more information, see PingFederate SP Management
Procedure
-
Configure the Connection Template.

-
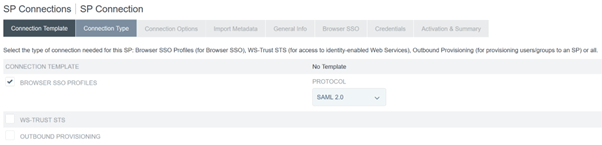
Configure the Connection Type and select Browser SSO profiles and SAML 2.0.
-
Configure the Connection Options.
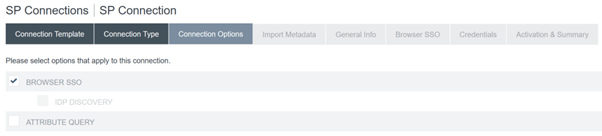
-
Import the Citrix Cloud Metadata. Select URL and the
CitrixCloudProdMetadataURL you created earlier and click Load Metadata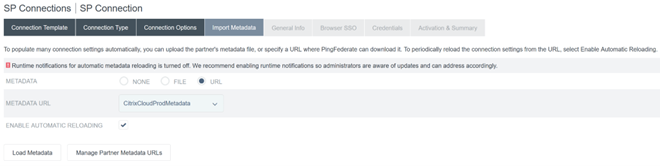
-
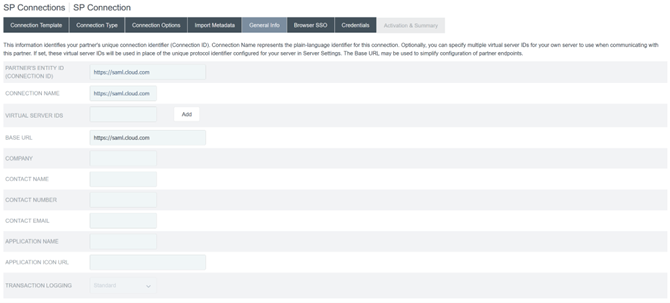
Configure General Info. Set the Service Provider Connection Entity ID, Base URL and Connection Name to the Citrix Cloud SAML endpoint for your Citrix Cloud customer region.
- https://saml.cloud.com - Commercial EU, US and APS
- https://saml.citrixcloud.jp - Japan
- https://saml.cloud.us - Gov
-
Configure Protocol Settings.

-
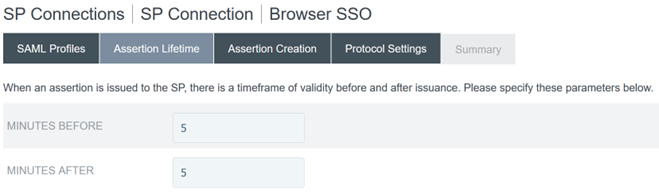
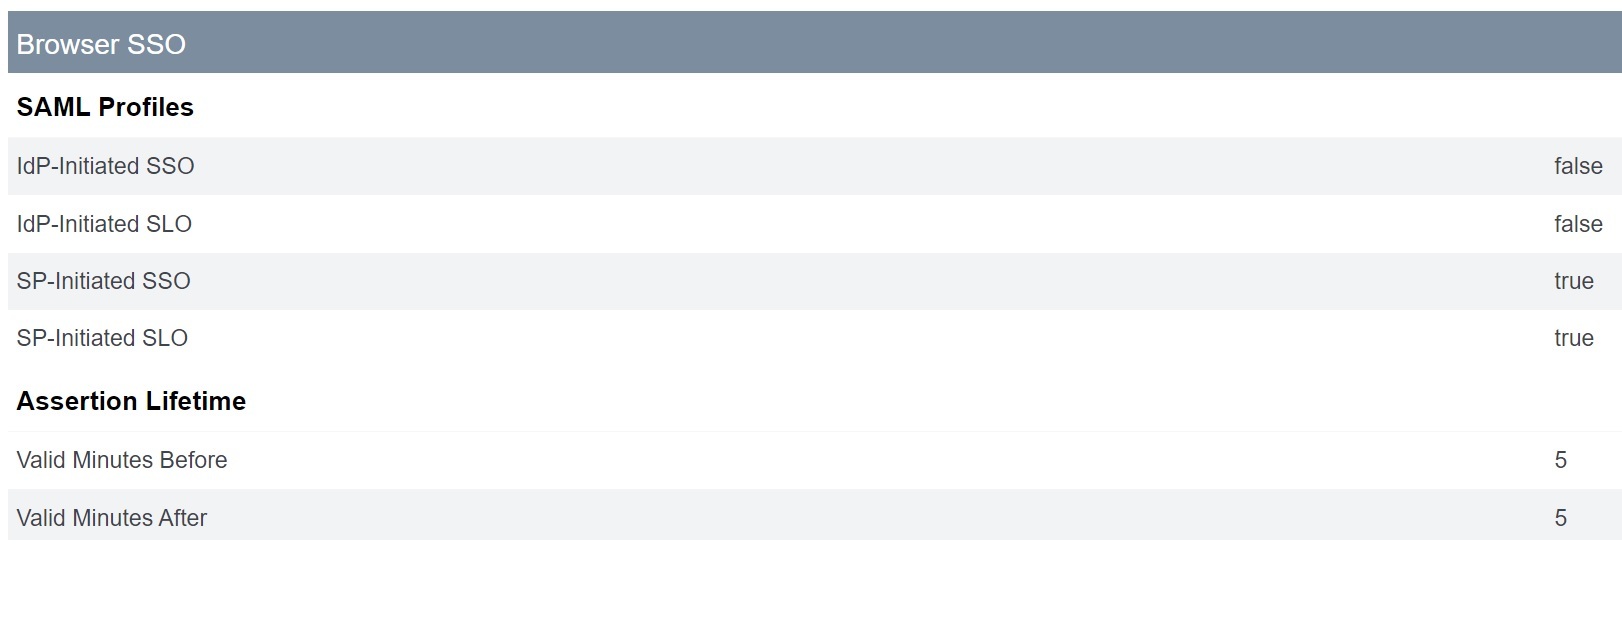
Use the default Assertion Lifetime settings.
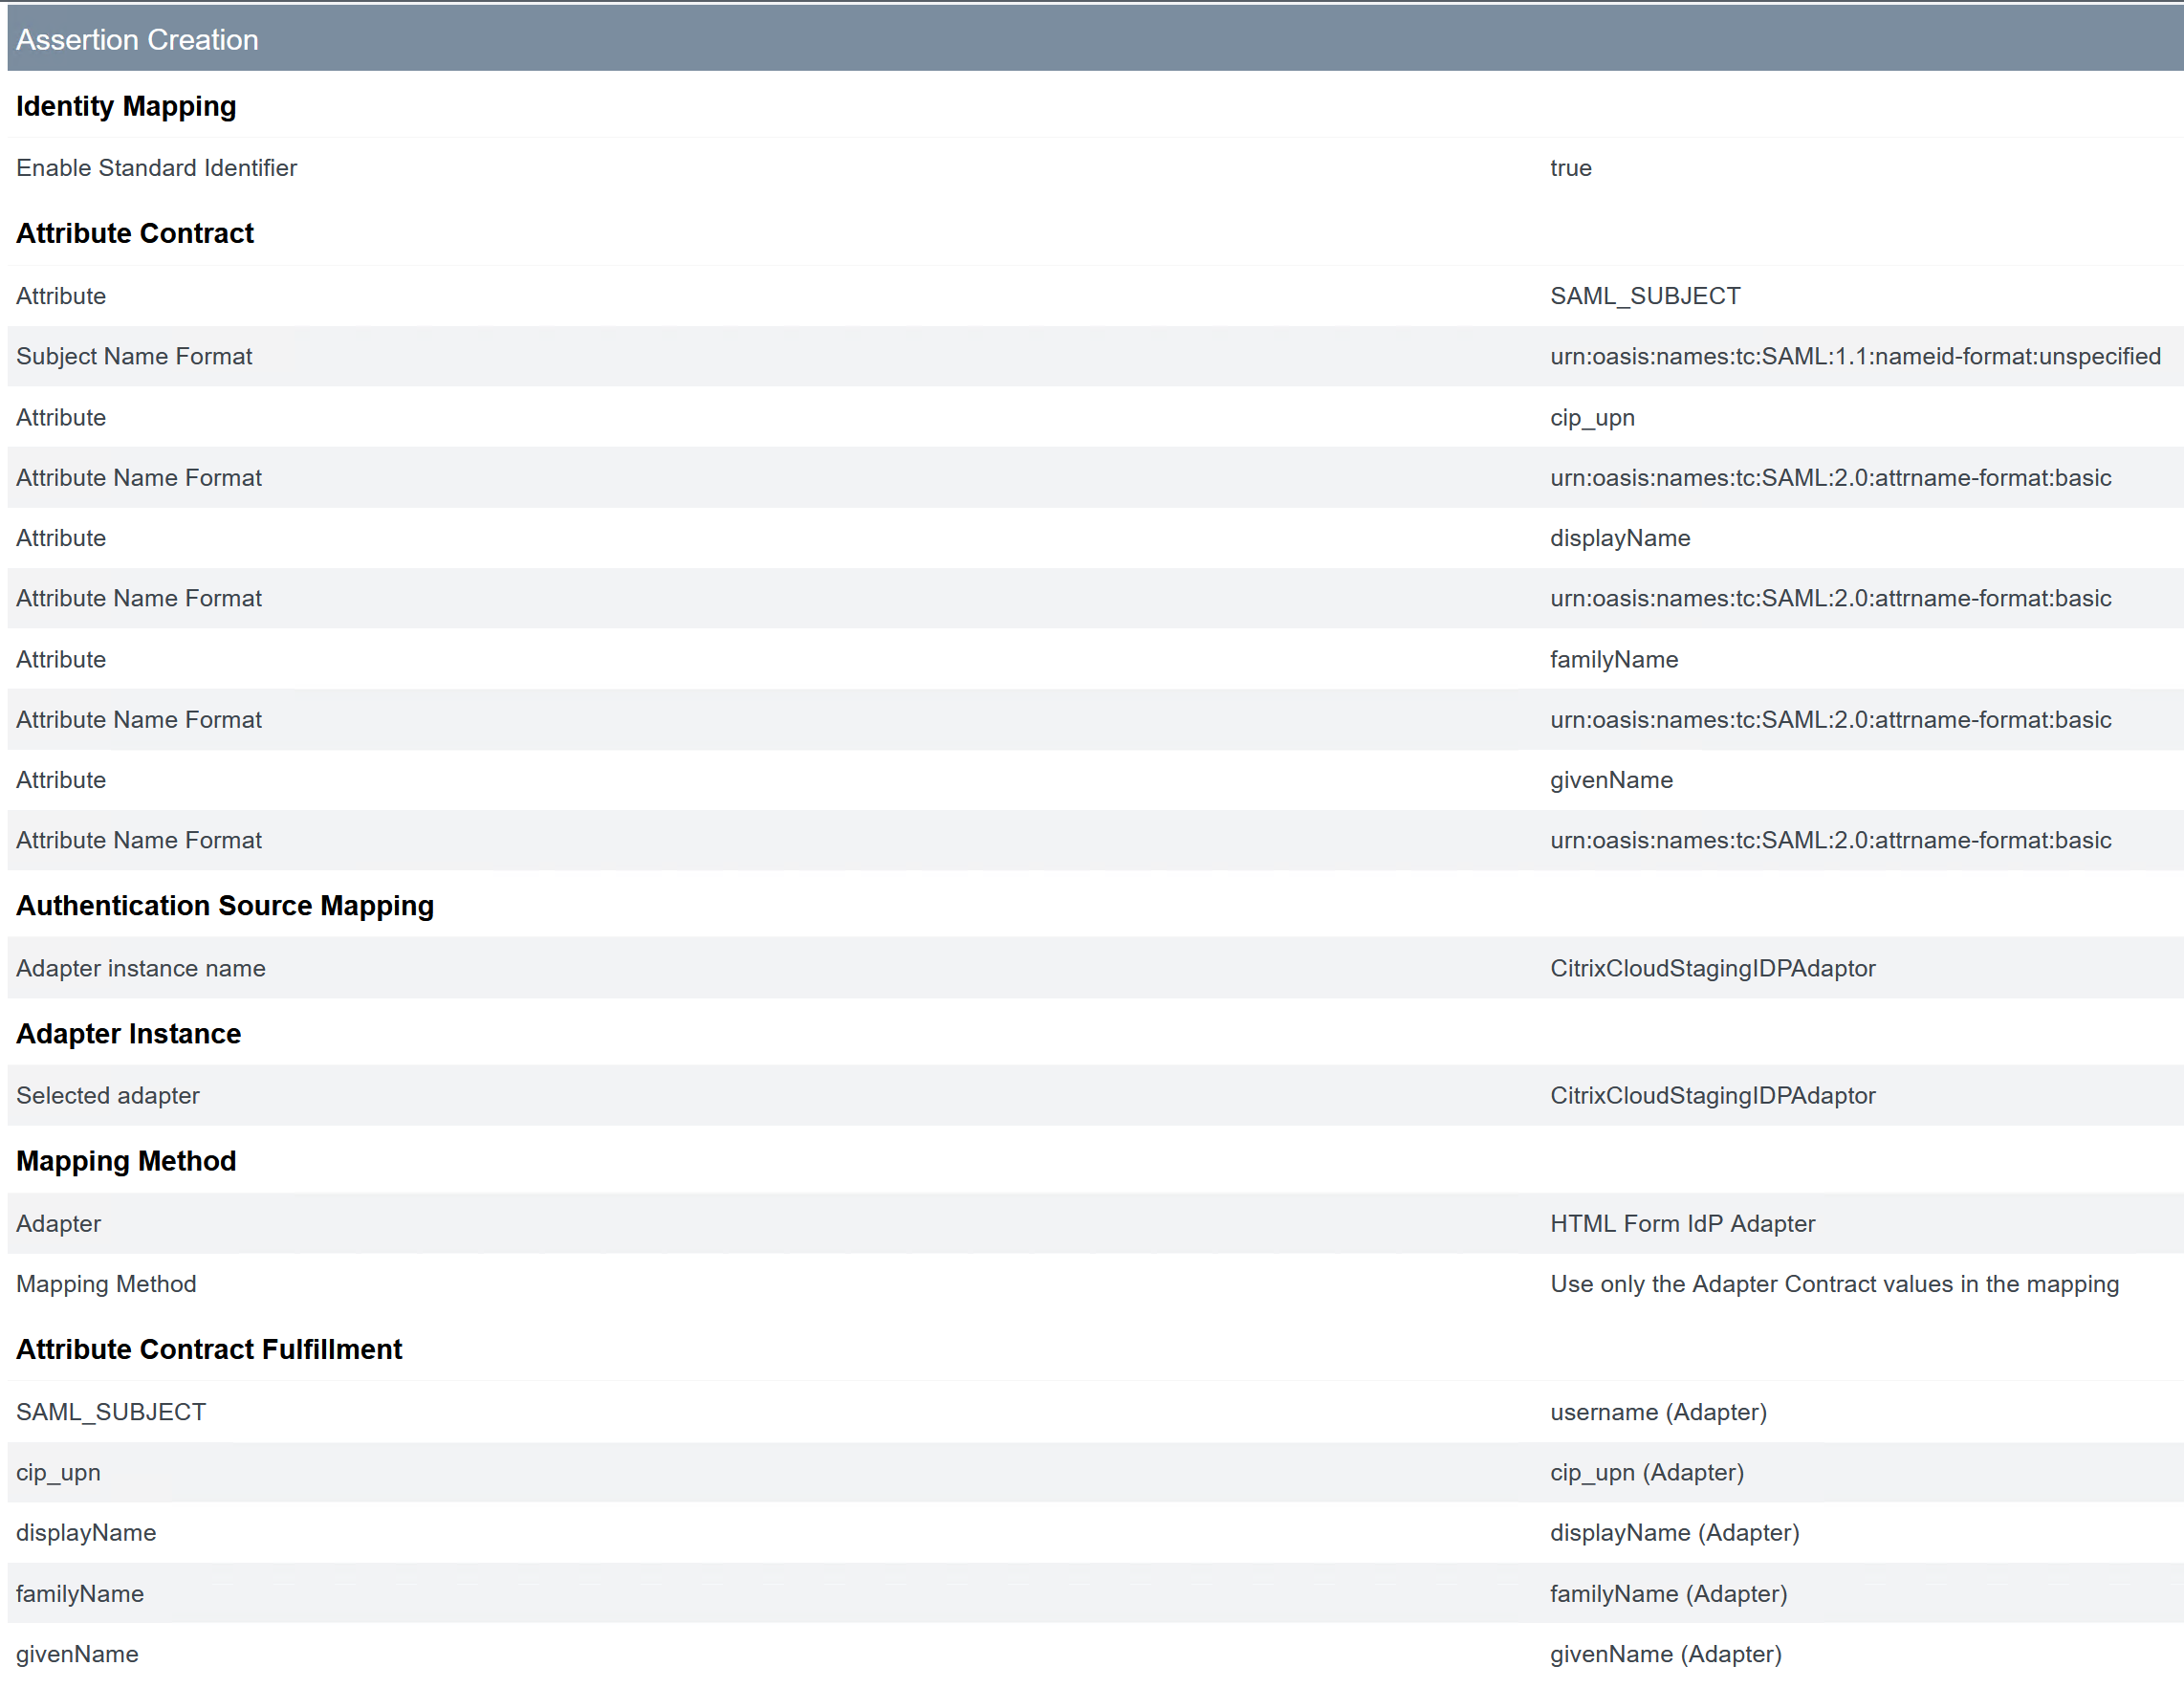
- Configure SAML Assertion Creation.
-
Click Configure Assertion Creation
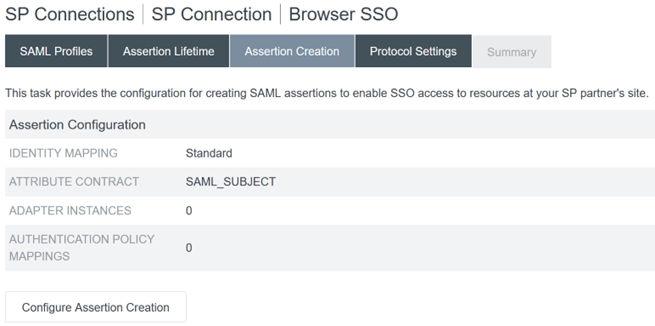
-
Select Standard.

-
-
Configure Attribute Contract.
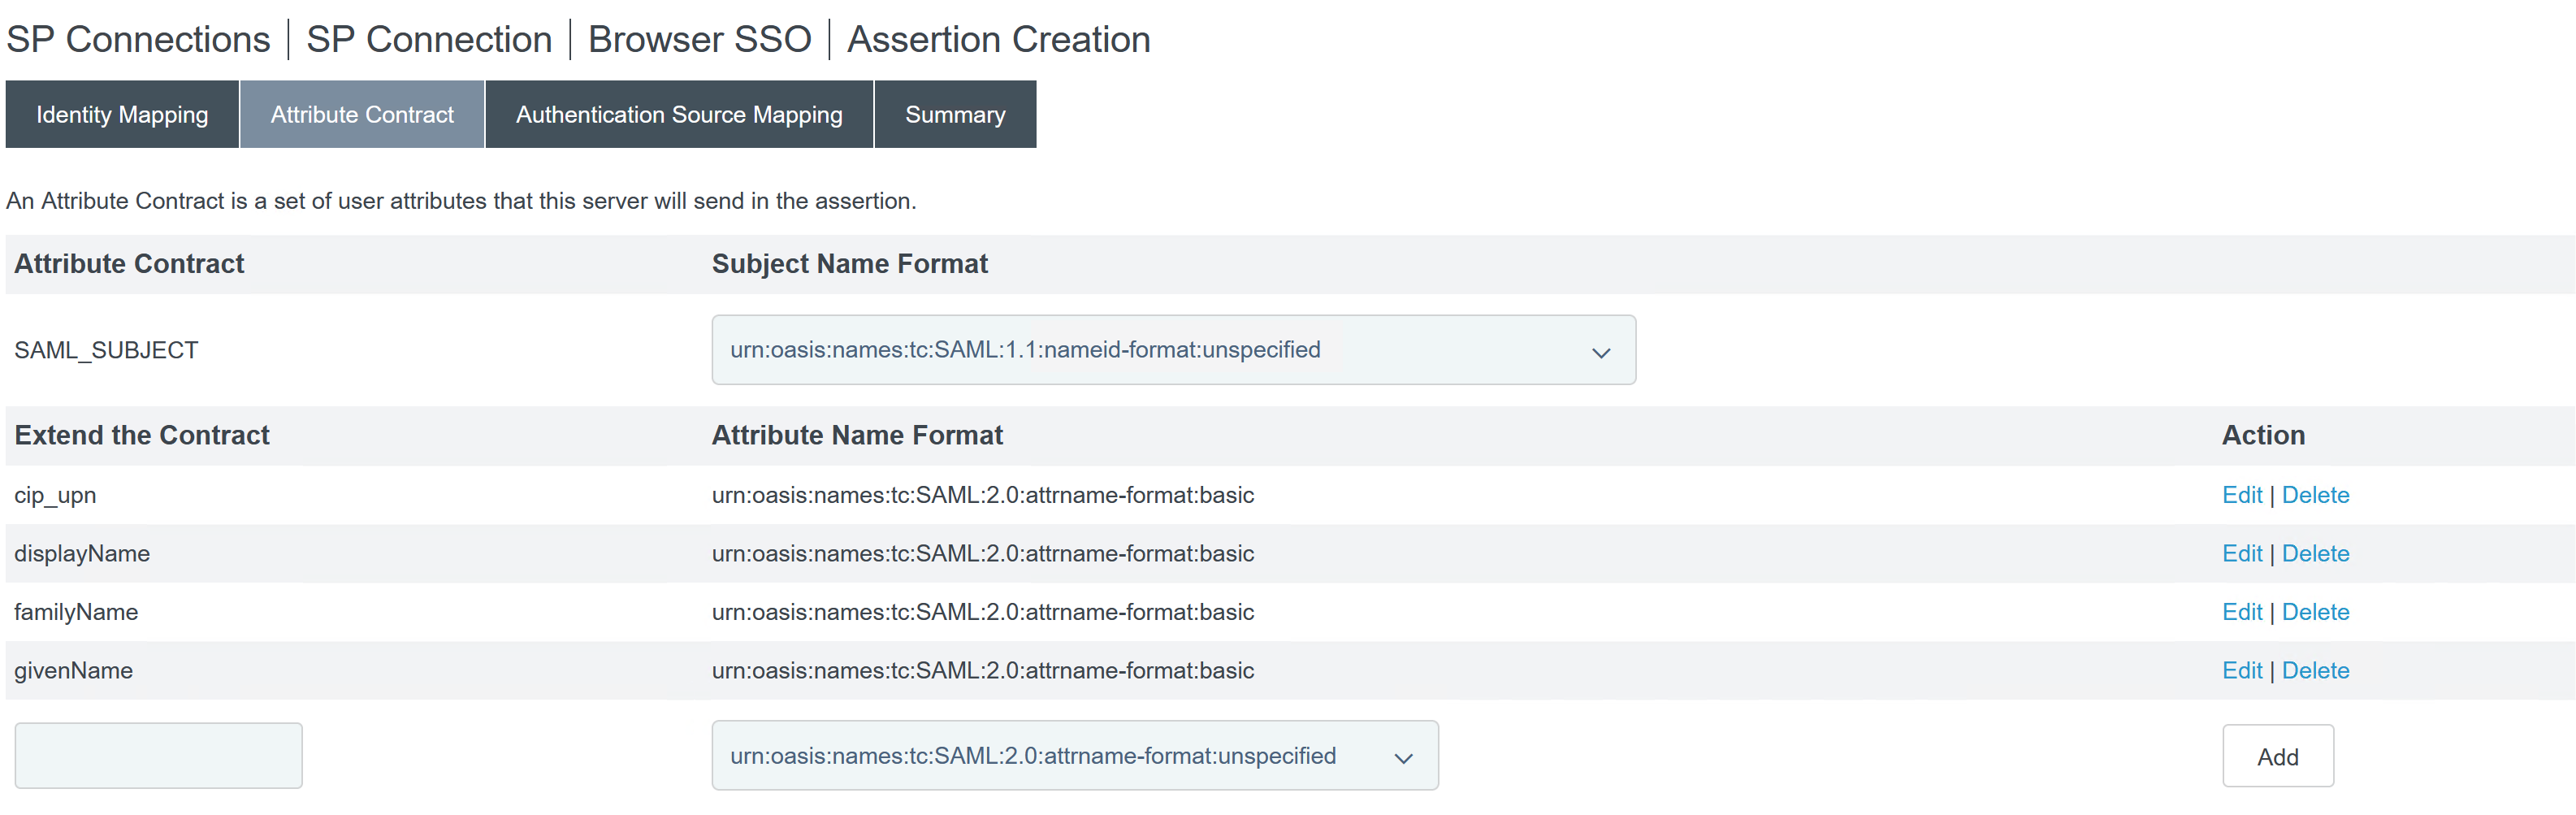
-
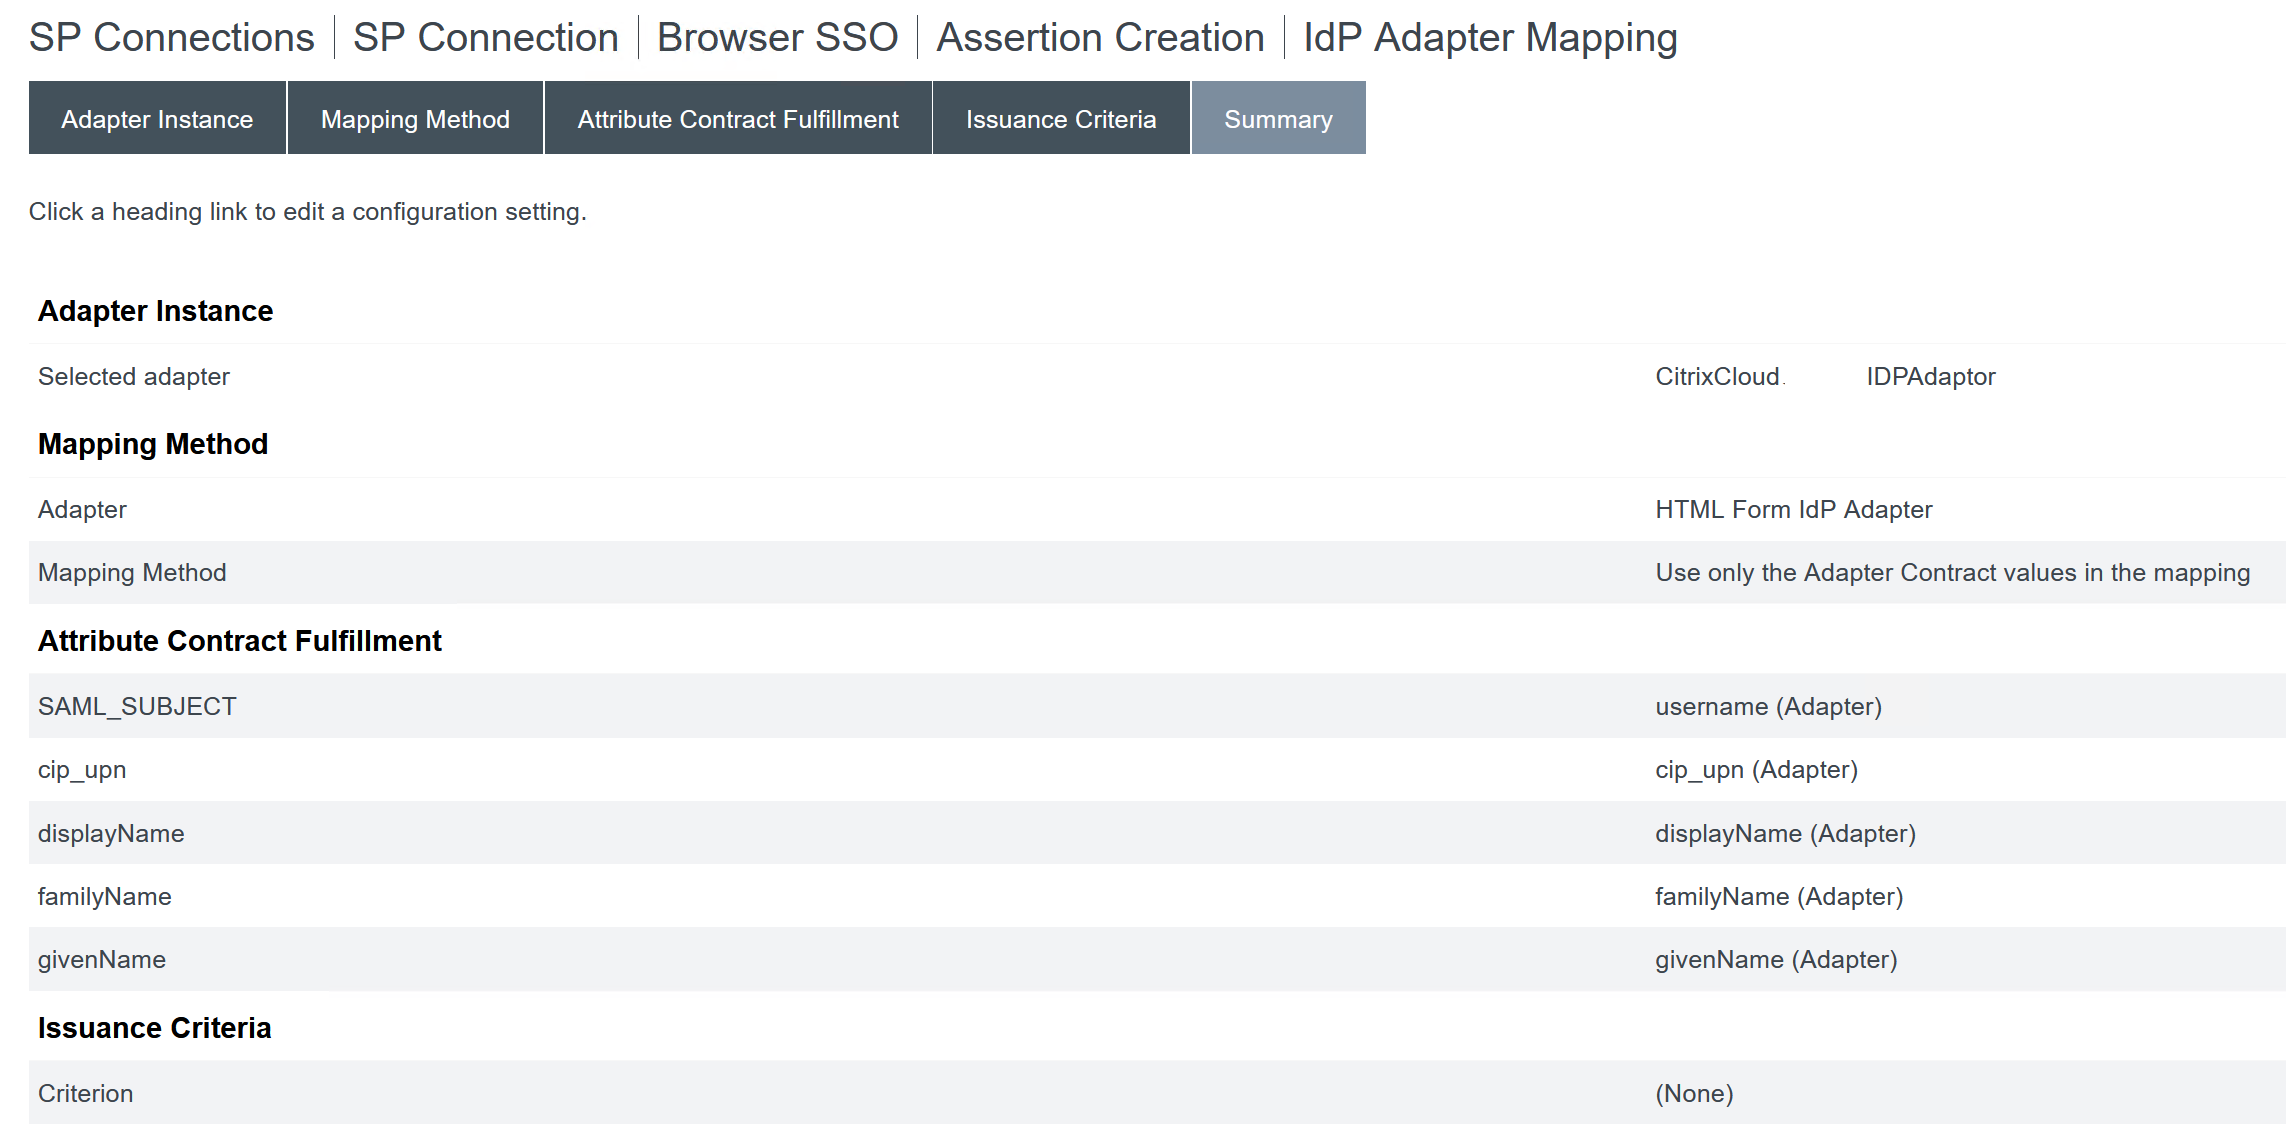
Configure Adapter Instance.
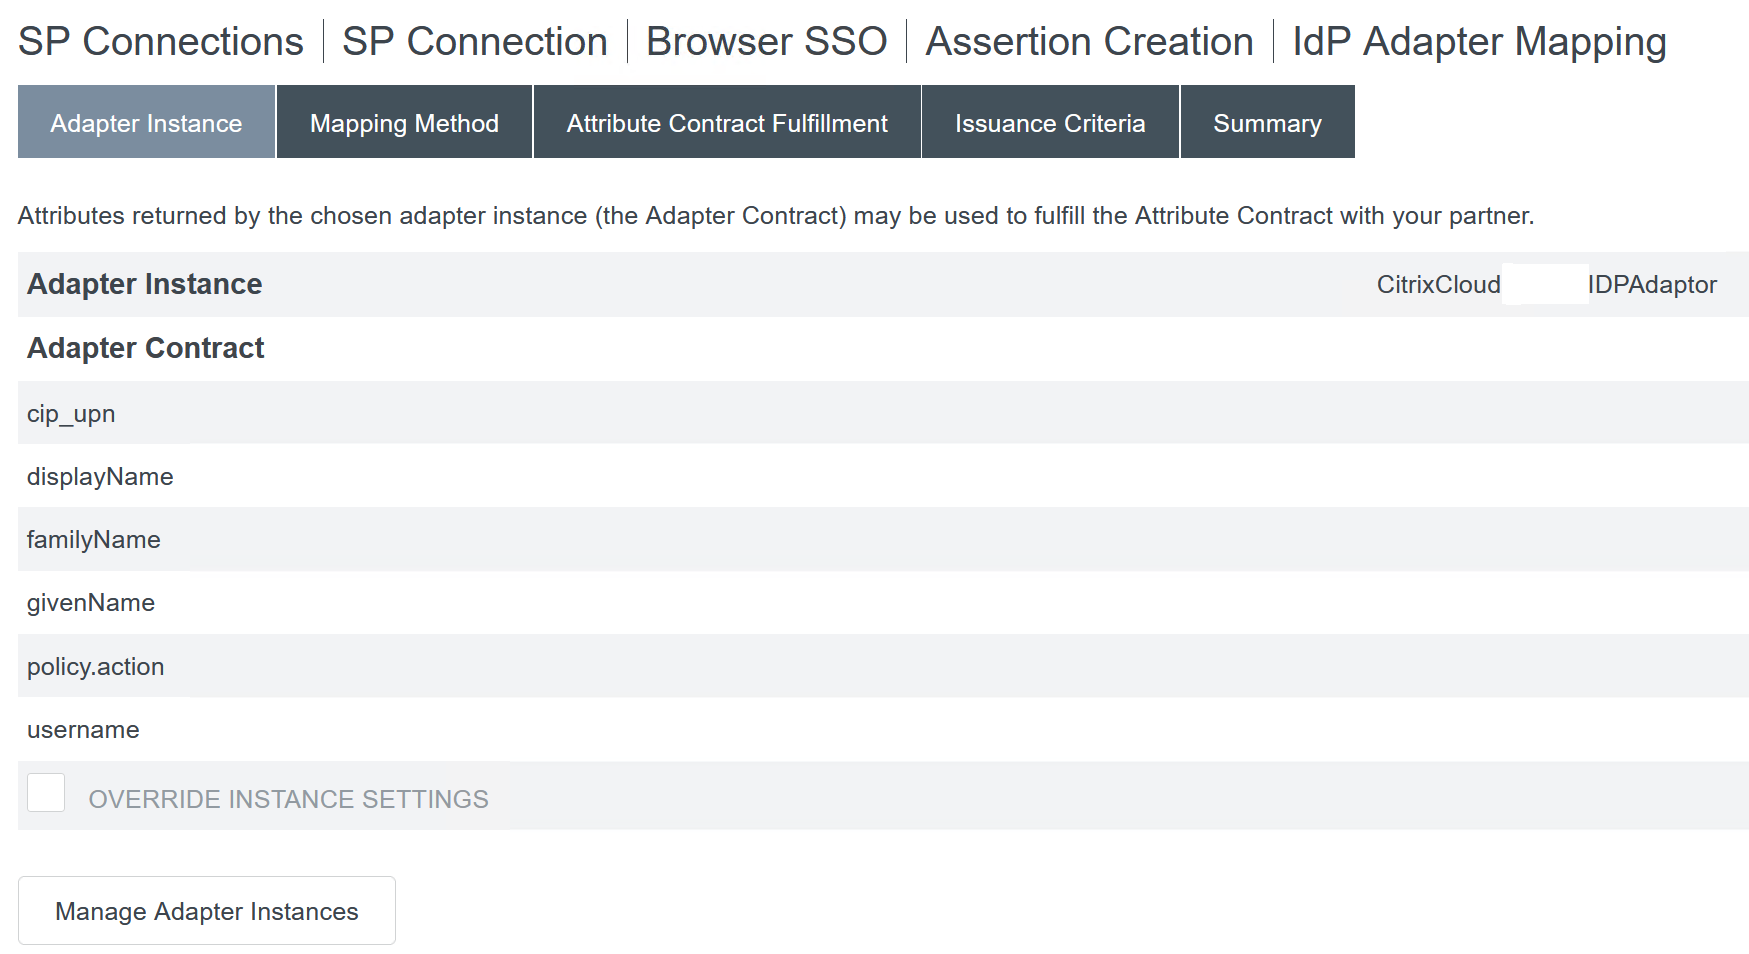
-
Configure Mapping Method.
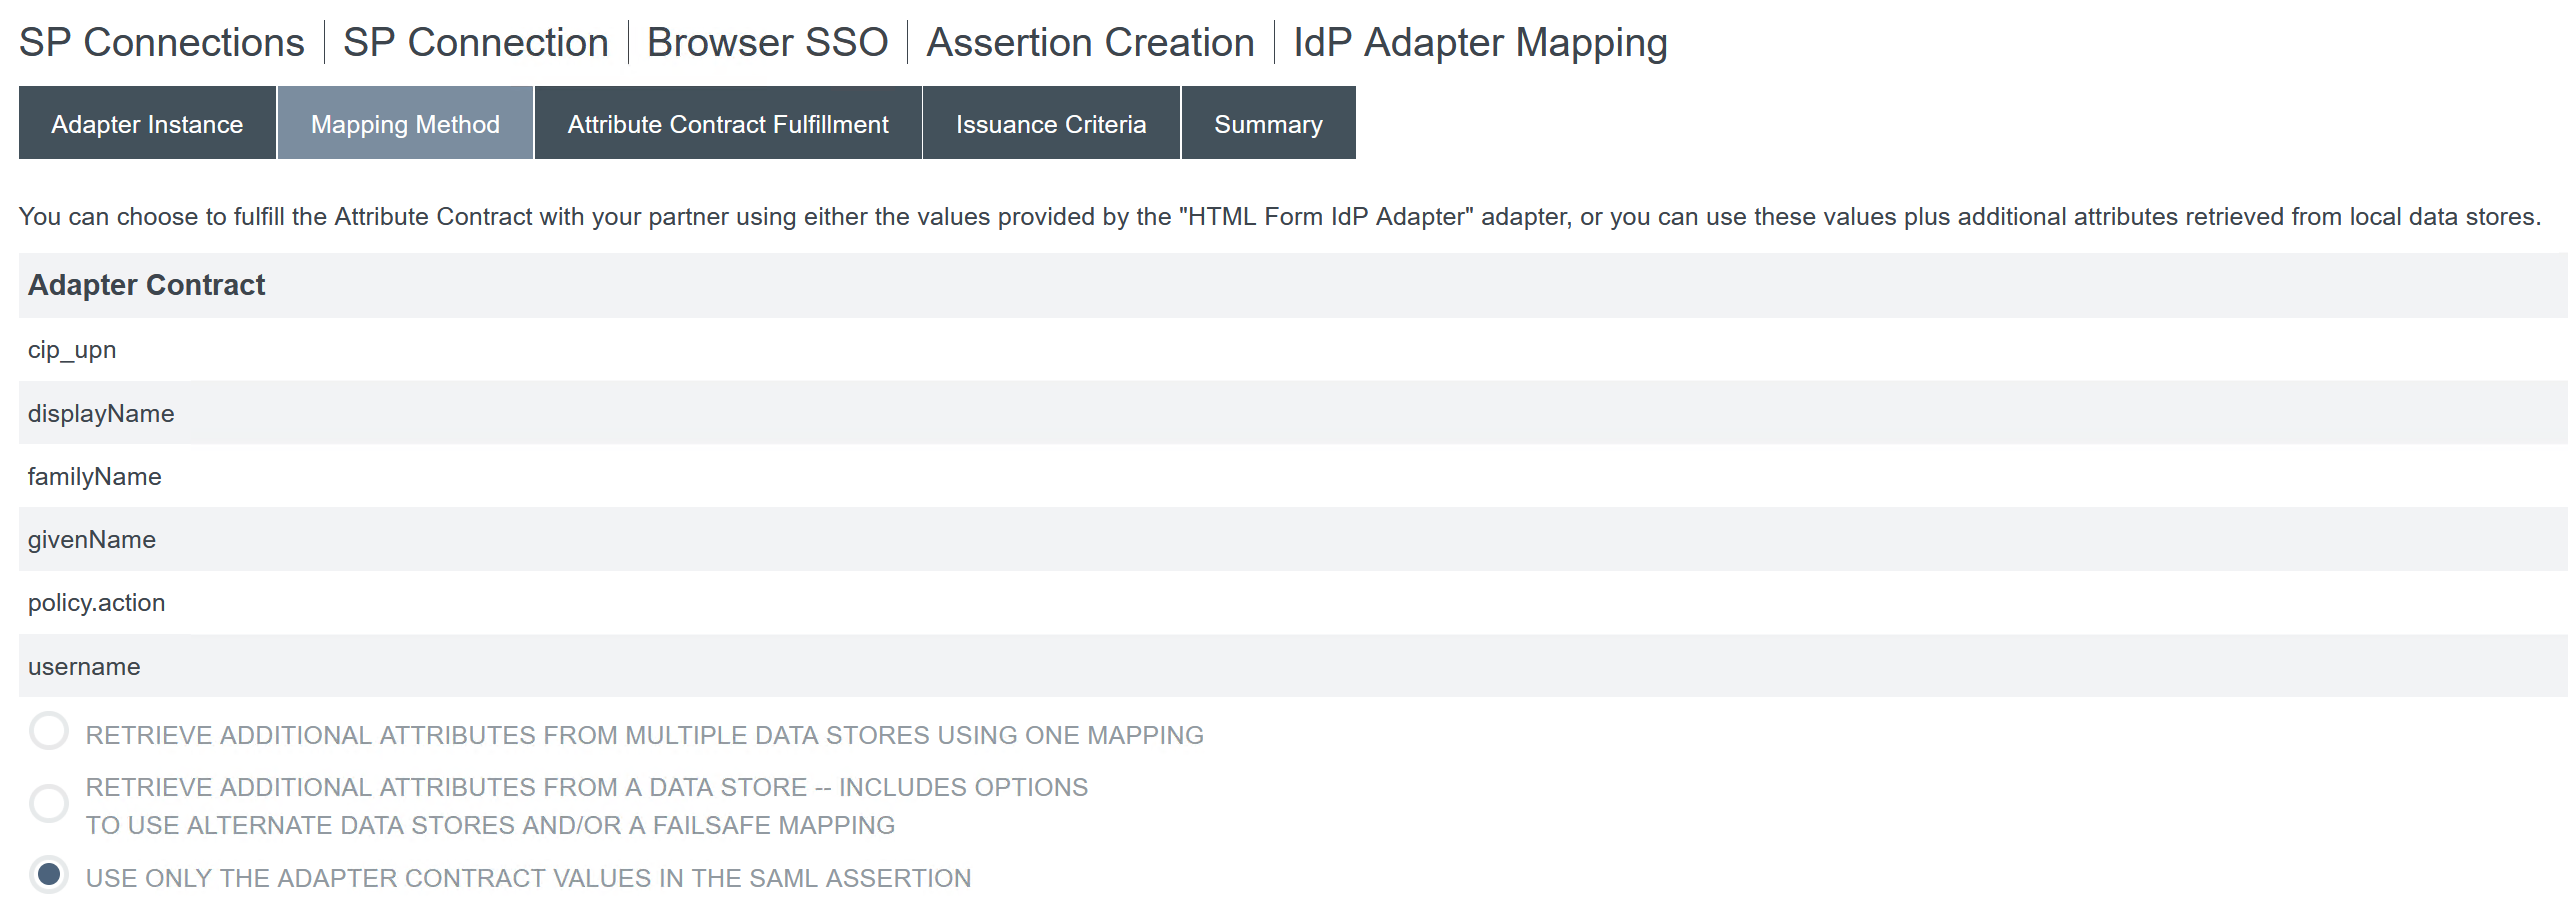
-
Configure Attribute Contract Fulfilment.

-
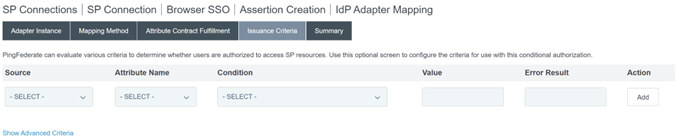
Configure Issuance Criteria as the defaults with no conditions.
-
The completed IDP Adapter Mapping appears as follows:
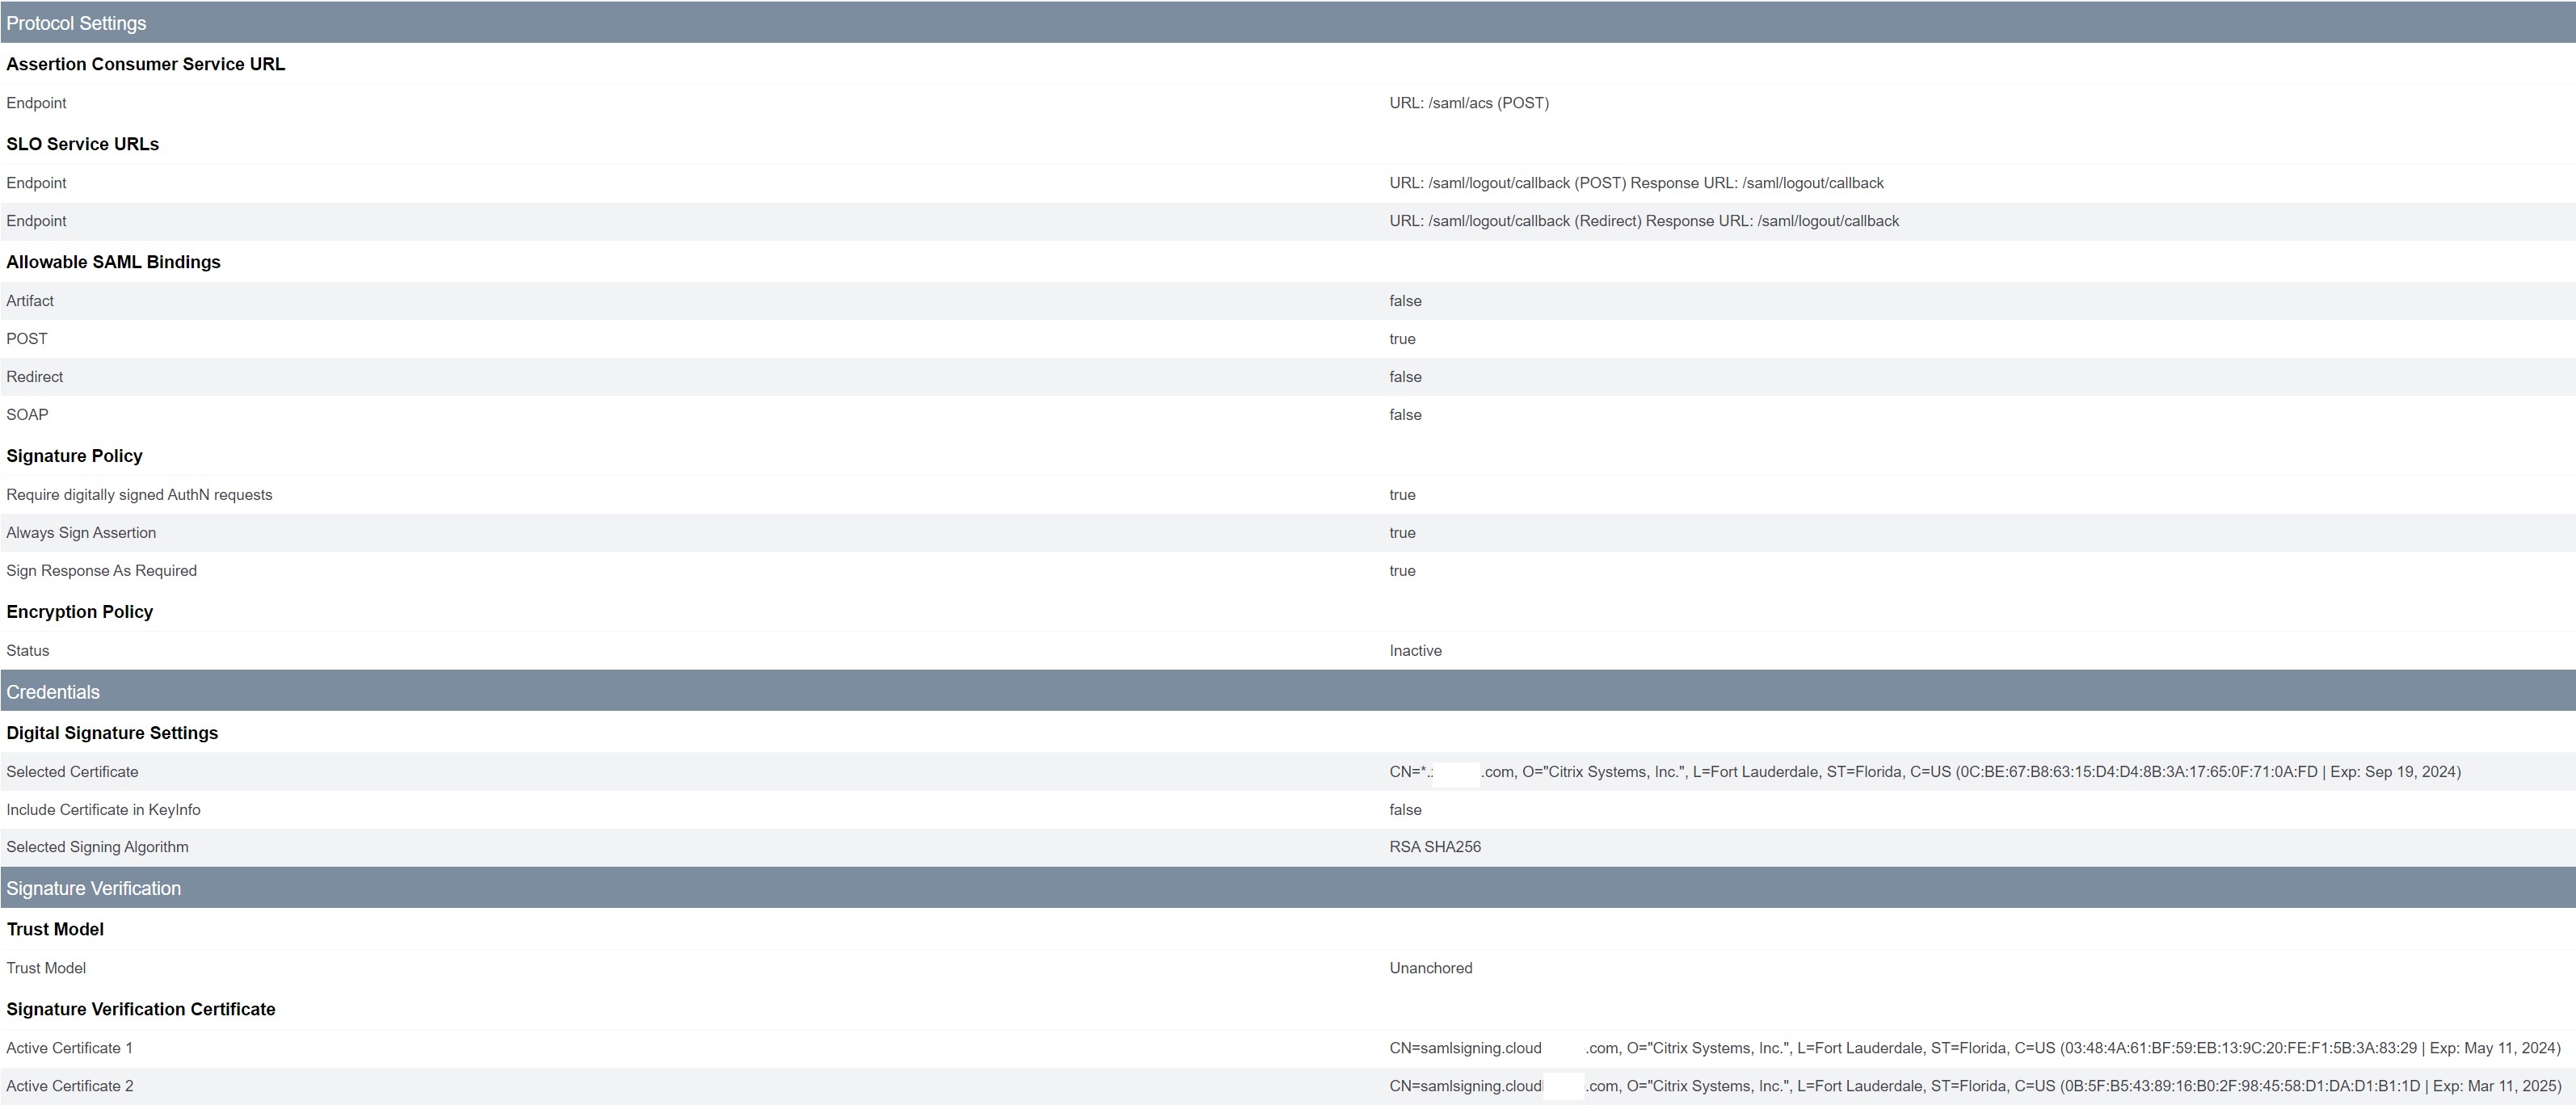
- Configure Protocol Settings. SAML paths required by Citrix Cloud will be appended to your PingFederate server base URL. It is possible to override the base URL by entering a full path within the endpoint URL field but this is usually unnecessary and undesirable.
Base URL - https://youpingfederateserver.domain.com
-
Configure the Assertion Consumer Service URL which appends the SAML path to the PingFederate server base URL. EndpointURL -
/saml/acs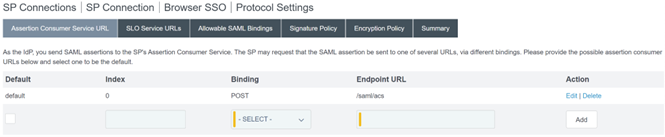
-
Configure SLO Service URL. EndpointURL -
/saml/logout/callback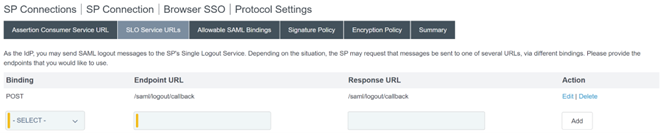
Important:
The Citrix Cloud SAML connection requires a PingFederate Logout URL to be configured to match this if you wish to perform SLO when signing out of store or Citrix Cloud. Failing to configure the Logout URL within your SAML connection will cause end users to just sign out of store but not PingFederate.
-
Configure Allowable SAML Bindings.

-
Configure Signature Policy.
Important:
SAML signing settings must be configured consistently on both sides of the SAML connection. store or Citrix Cloud (SP) must be configured to send signed SSO and SLO requests.
-
PingFederate (IDP) must be configured to perform enforcement of signed requests using the Citrix Cloud SAML signing verification certificate.

-
Configure the Encryption Policy.
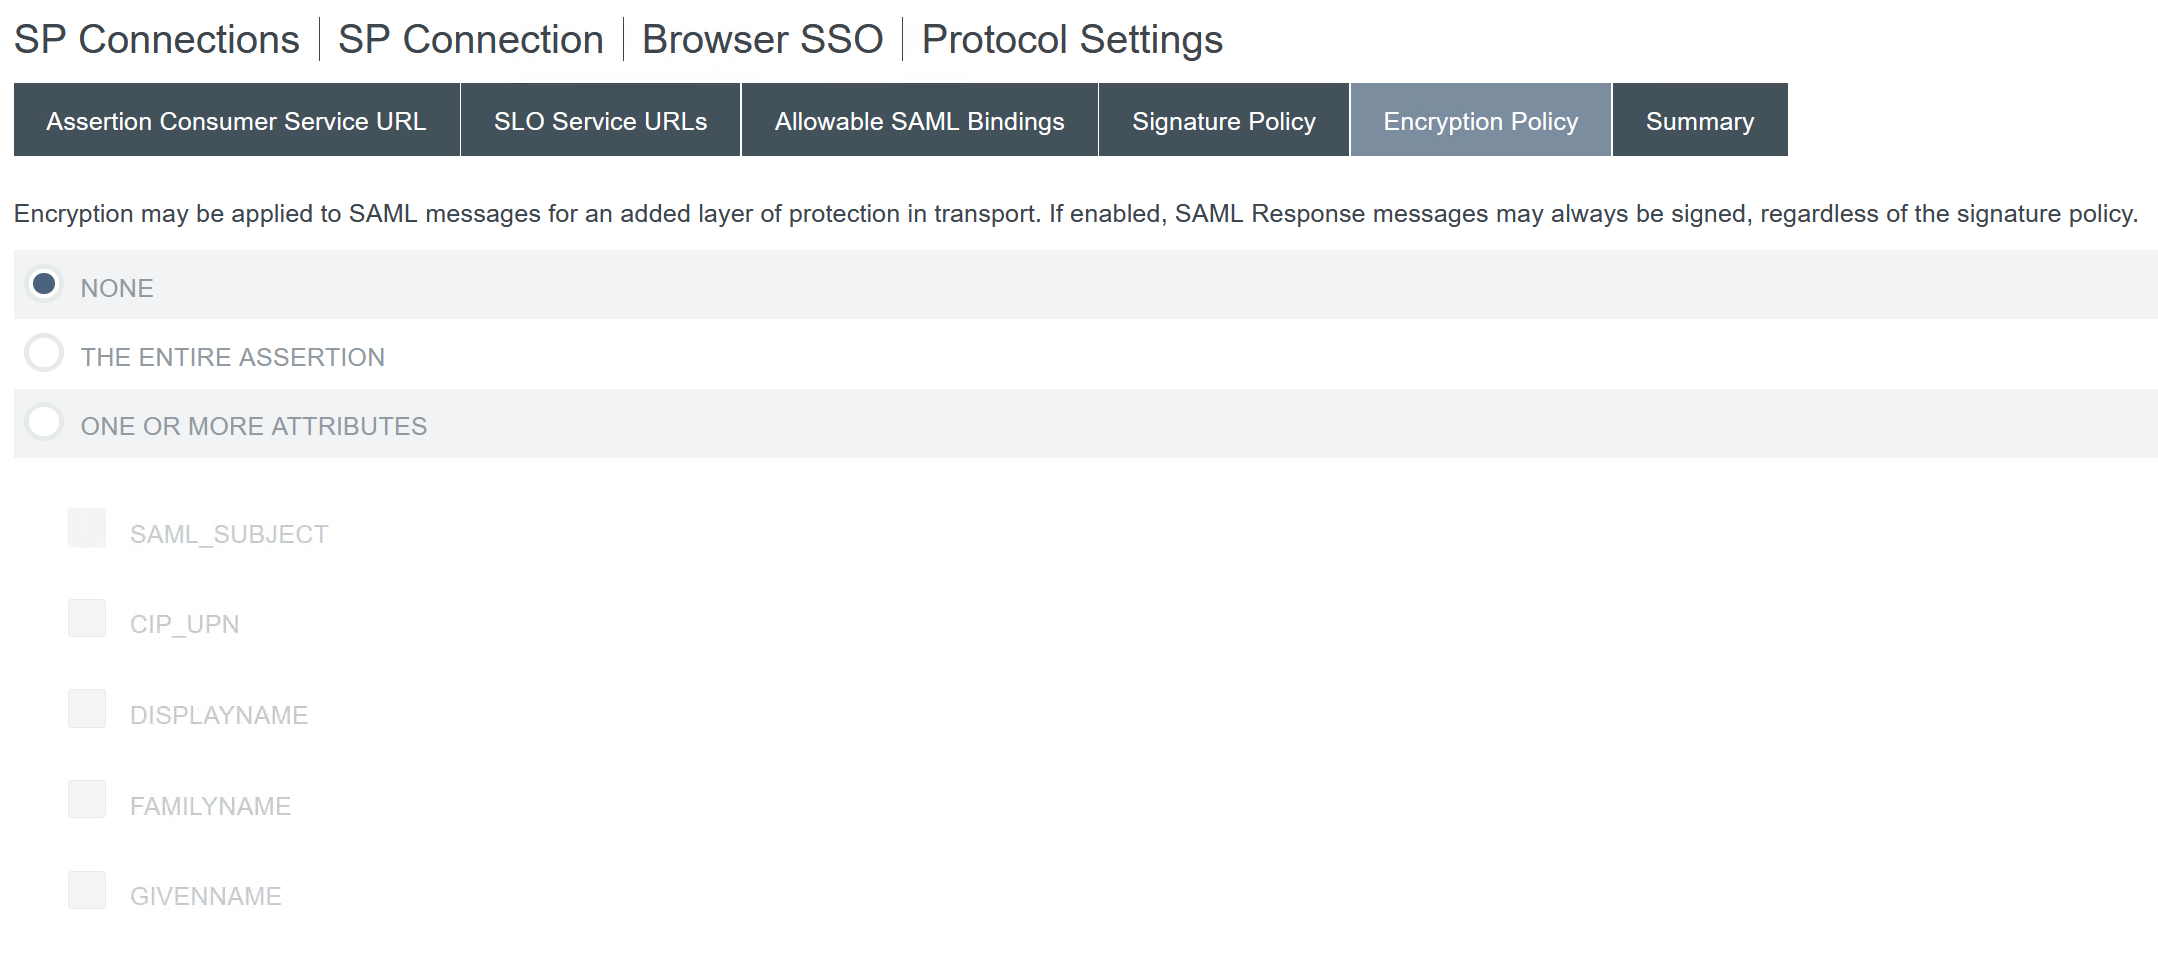
Note:
It is recommended to set Encryption to NONE during initial setup and testing so you can debug any issues with missing or incorrect SAML attributes in the assertion. If you require encrypted assertions, it is recommended that you enable encryption after proving that the logon to store or Citrix Cloud is successful and all resources have been successfully enumerated and can be launched. Debugging issues with SAML whilst encryption is enabled will be impossible if you cannot view the plaintext contents of the SAML assertion.
-
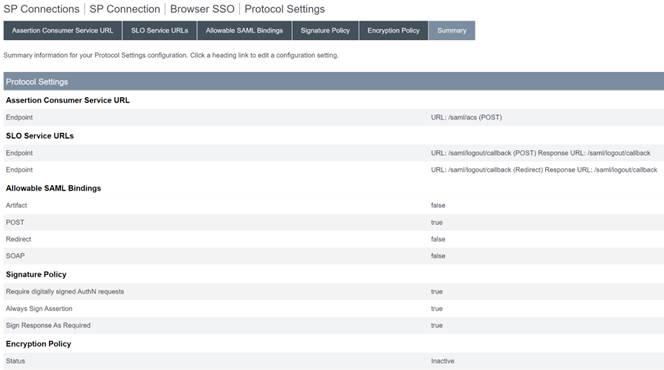
Review the Summary tab.
-
Review the Citrix Cloud Service Provider (SP) Connection. Once the Citrix Cloud SP connection is configured it should look like this example:
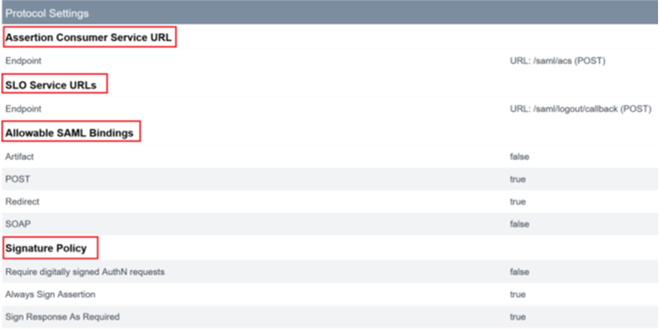
Userful tip:
Use the SP Connection Activation and Summary page to review your SAML application and for debugging purposes as it allows quick and easy configuration changes to be made. The SP Connection Activation and Summary page allows you to navigate to any of the SAML configuration sub sections by clicking on the title of that section. Click on any of the titles highlighted in red to update these settings.
-
-
The completed Citrix Cloud SP connection should appear in the list like this.

-
It is possible to export the SP connection in the form of an XML file. Citrix recommends taking a backup of your SP connection once you have tested it with Citrix Cloud and store.

Configure the Citrix Cloud SAML connection
All Citrix logon flows need to be Service Provider initiated using either a store URL or a Citrix Cloud GO URL.
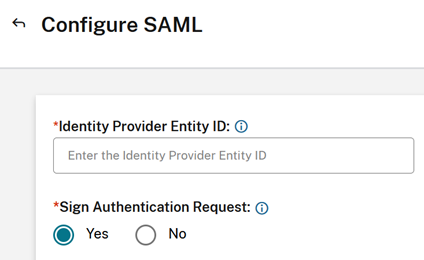
Use the default recommended values for the SAML connection within Identity and Access Management → Authentication →Add an identity provider → SAML.
| In this field in Citrix Cloud | Enter this value |
|---|---|
| Entity ID |
https://yourpingfedbaseurl.domain.com, where yourpingfedbaseurl.domain.com is your PingFederate server domain. |
| Sign Authentication Request | Yes |
| SSO Service URL |
https://yourpingfedbaseurl.domain.com/idp/SSO.saml2 where yourpingfedbaseurl.domain.com is your PingFederate server domain. |
| SSO Binding Mechanism | HTTP Post |
| SAML Response | Sign Either Response Or Assertion |
| Authentication Context | Unspecified, Exact |
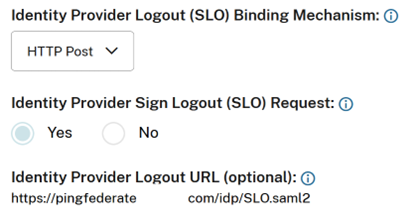
| Logout URL |
https://yourpingfedbaseurl.domain.com/idp/SLO.saml2 where yourpingfedbaseurl.domain.com is your PingFederate server domain. |
| Sign Logout Request | Yes |
| SLO Binding Mechanism | HTTP Post |
Important:
- The use of the incorrect PingFederate IDP-initiated SSO endpoint
https://yourpingfederateserver.domain.com/idp/startSSO.ping?PartnerSpId=https://saml.cloud.comis not supported. Citrix Cloud and store do not support IDP-initiated SSO.- The following extract is taken from PingFederate documentation: This is the path used to initiate an unsolicited IdP-initiated single sign-on (SSO) transaction during which a SAML response containing an assertion is sent to a service provider (SP).
- The use of the incorrect SAML endpoint is known to cause SAML logon failures and the following error within Citrix Cloud’s authentication platform.
ExceptionMessage=An IdP-initiated SAML response from YourSAMLApp was received unexpectedly.
In this article
- Prerequisites
- Configure an Active Directory Connection to your AD domain using a DataStore within PingFederate
- Upload the Citrix Cloud SAML Signing Certificate
- Upload the Citrix Cloud Metadata
- Configure a password credential validator within PingFederate
- Configure the IDP Adapter within PingFederate
- Configuring the Service Provider Connection (SAML application) for Citrix Cloud or stores
- Configure the Citrix Cloud SAML connection