Manage administrator groups
You can add administrators to your Citrix Cloud™ account using groups in your Active Directory, Azure Active Directory (AD), or Google Cloud Identity. You can then manage service access permissions for all administrators in the group.
AD prerequisites
Citrix Cloud supports AD group authentication through SAML 2.0. Before adding members of your AD administrator groups to Citrix Cloud, you need to configure a connection between Citrix Cloud and your SAML provider. For more information, see Connect SAML as an identity provider to Citrix Cloud.
If you already have a SAML connection in Citrix Cloud, you must reconnect your SAML provider to Citrix Cloud before adding AD administrator groups. If you don’t reconnect SAML, adding AD administrator groups might fail. For more information, see Using an existing SAML connection for administrator authentication.
Azure AD prerequisites
Using Azure AD group authentication requires the latest version of the Azure AD application for connecting your Azure AD to Citrix Cloud. Citrix Cloud acquired this application when you connected your Azure AD for the first time. If you connected your Azure AD to Citrix Cloud before May 2019, Citrix Cloud might not be using the most current application to connect with Azure AD. Citrix Cloud can’t display your Azure AD groups if your account isn’t using the most current application.
Before using Azure AD groups in Citrix Cloud, perform the following tasks:
- Verify that you’re using the latest application for your Azure AD connection. Citrix Cloud displays a notification if you’re not using the most current application.
-
If the application must be updated, reconnect your Azure AD to Citrix Cloud. By reconnecting to your Azure AD, you grant application-level read-only permissions to Citrix Cloud and allow Citrix Cloud to reconnect to your Azure AD on your behalf. During reconnection, a list of these permissions is displayed for your review. For more information about the permissions Citrix Cloud requests, see Azure Active Directory Permissions for Citrix Cloud.
Important:
To complete this task, you must be a Global Admin in Azure AD. Also, you must be signed in to Citrix Cloud using a Full Access administrator account under the Citrix identity provider. If you sign in with your Azure AD credentials, the reconnection fails. If you don’t have any administrators using the Citrix identity provider, you can add one temporarily to perform this task and then delete it afterward.
To verify your connection to Azure AD
- Sign in to Citrix Cloud using a Full Access administrator account under the Citrix identity provider.
- From the Citrix Cloud menu, select Identity and Access Management and then select Authentication.
-
Locate Azure Active Directory. A notification appears if Citrix Cloud must update the application for your Azure AD connection.

If Citrix Cloud is already using the most current application, no notification appears.
To reconnect to Azure AD
- From the Azure AD notification in the Citrix Cloud console, click the reconnect link. A list of the requested Azure permissions appears.
- Review the permissions and then select Accept.
Google Cloud Identity
Citrix Cloud supports administrator group authentication through Google Cloud Identity. Before adding your administrator groups to Citrix Cloud, you must configure a connection between Citrix Cloud and Google Cloud Identity. For more information, see Connect Google Cloud Identity as an identity provider to Citrix Cloud.
Supported permissions
See supported permissions descriptions here, Console permissions.
Limitations
Custom access permissions for the following Citrix Cloud platform features are not available to members of administrator groups:
- Notifications
- Secure clients
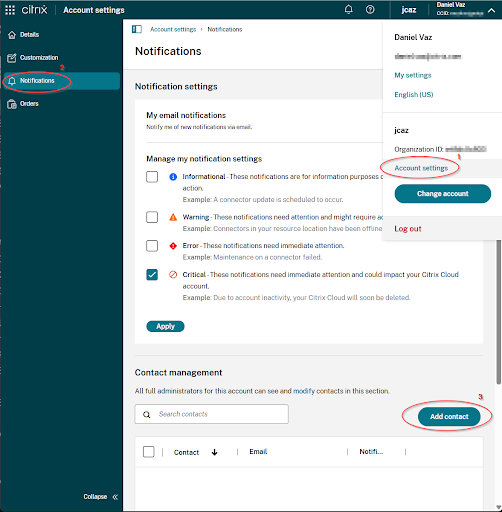
Notifications contacts can be added for members of groups under Notifications Contact Management, as seen below:
Citrix DaaS™ features that rely on Citrix Cloud platform capabilities such as Quick Deploy user assignment are not available.
Permission changes for an administrator group member who’s already signed in will take effect only after they sign out and sign in again.
Resultant permissions for administrators with Citrix®, AD, Azure AD, and Google Cloud identities
When an administrator signs in to Citrix Cloud, only certain permissions might be available if the administrator has both a Citrix identity (the default identity provider in Citrix Cloud) and a single-user or group-based identity through AD, Azure AD, or Google Cloud Identity. The table in this section describes the permissions that are available for each combination of these identities.
Single-user identity refers to AD, Azure AD, or Google Cloud Identity permissions that are granted to the administrator through an individual account. Group-based identity refers to AD, Azure AD, or Google Cloud Identity permissions that are granted as a member of a group.
| Citrix identity | Single-user AD or Azure AD identity | Group-based AD or Azure AD identity | Single-user or group-based Google Cloud Identity | Permissions available after authentication |
|---|---|---|---|---|
| X | X | Administrator has cumulative permissions of both identities after successful authentication with either the Citrix identity, the AD identity, or the Azure AD identity. | ||
| X | X | Each identity is treated as an independent entity. Available permissions depends on whether the administrator authenticates using the Citrix identity or the Azure AD identity. | ||
| X | X | Each identity is treated as an independent entity. Available permissions depends on whether the administrator authenticates using the Citrix identity or Google Cloud Identity. | ||
| X | X | Administrator has cumulative permissions of both identities when authenticating to Citrix Cloud with AD or Azure AD. | ||
| X | X | Each identity is treated as an independent entity. Available permissions depends on whether the administrator authenticates using the Citrix identity or Google Cloud Identity. | ||
| X | X | Each identity is treated as an independent entity. Available permissions depends on whether the administrator authenticates using the Citrix identity or Google Cloud Identity. | ||
| X | X | X | When authenticating with their Citrix identity, the administrator has cumulative permissions of both the Citrix identity and the single-user Azure AD identity. When authenticating with Azure AD, the administrator has cumulative permissions of all three identities. |
Sign-in experience for administrators
After you add a group to Citrix Cloud and define the service permissions, administrators in the group simply sign in by selecting Sign in with my company credentials on the Citrix Cloud sign-in page and entering their sign-in URL for the account (for example, https://citrix.cloud.com/go/mycompany). Unlike adding individual administrators, administrators in the group aren’t explicitly invited, so they won’t receive any emails to accept an invitation to be Citrix Cloud administrators.
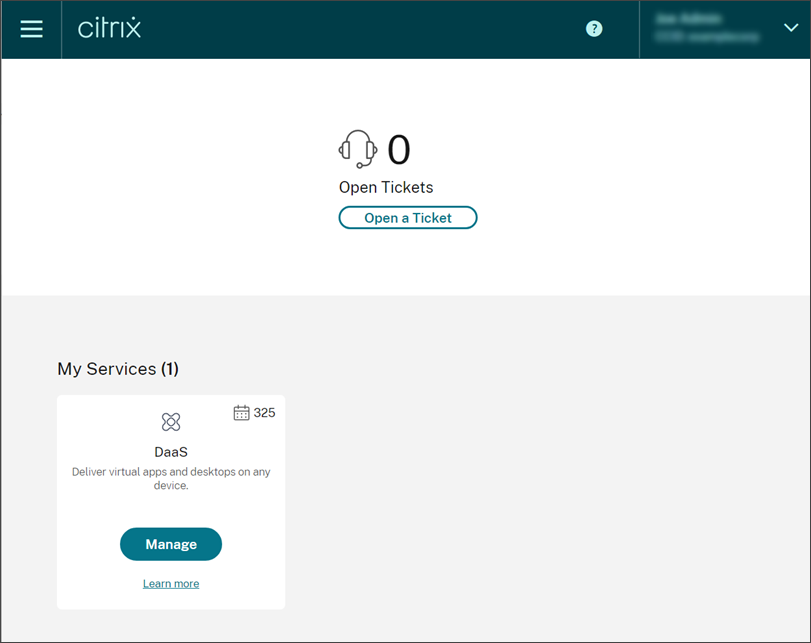
After signing in, administrators select Manage from the service tile to access the service’s management console.
Administrators who are granted permissions only as members of groups can access the Citrix Cloud account using the sign-in URL for the Citrix Cloud account.
Administrators who are granted permissions through an individual account and as a member of a group can choose the Citrix Cloud account they want to access. If the administrator is a member of multiple Citrix Cloud accounts, they can select a Citrix Cloud account from the customer picker after authenticating successfully.
Known issue
After renaming a group in Active Directory, the new name might not be displayed. As a workaround, delete the old group in Citrix Identity and Access Management and add the renamed group.
Limitations
Impact of multiple groups on application performance
Citrix recommends that a single administrator belongs to no more than 20 groups that have been added to Citrix Cloud. Membership in a larger number of groups might result in reduced application performance.
Impact of multiple groups on authentication
If a group-based administrator is assigned to multiple groups in AD or Azure AD, authentication might fail because the number of groups is too large. This issue occurs due to a limitation in Citrix Cloud’s integration with AD and Azure AD. When the administrator attempts to sign in, Citrix Cloud attempts to compress the number of groups that are retrieved. If Citrix Cloud can’t apply the compression successfully, all groups can’t be retrieved and the authentication fails.
This issue might also affect users who authenticate to Citrix Workspace™ through AD or Azure AD. If a user belongs to multiple groups, authentication might fail because the number of groups is too large.
To resolve this issue, review the administrator or user account and verify that they belong only to the groups that are required for their role in the organization.
Adding groups fails due to too many assigned role/scope pairs
When adding a group with multiple role/scope pairs, an error might occur that indicates the group can’t be created. This error occurs because the number of role/scope pairs that are assigned to the group is too large. To resolve this error, divide the role/scope pairs among two or more groups and assign the administrators to those groups.
Add an administrator group to Citrix Cloud
- From the Citrix Cloud menu, select Identity and Access Management and then select Administrators.
- Select Add administrator/group.
- In Administrator details, select the identity provider you want to use. If Azure AD is selected, sign in to your Azure, if needed. Select Next.
- If needed, select the domain you want to use.
- Search for the group you want to add and select the group.
- In Set access, select the roles you want to assign to the group. You must select at least one role.
- When you’re finished, select Save.
Modify service permissions for an administrator group
- From the Citrix Cloud menu, select Identity and Access Management and then select Administrators.
- Locate the administrator group you want to manage and, from the ellipsis menu, select Edit Access.

- Select or clear the check marks next to one or more role and scope pairs as needed.
- When you’re finished, select Save.
Delete an administrator group
- From the Citrix Cloud menu, select Identity and Access Management and then select Administrators.
-
Locate the administrator group you want to manage and, from the ellipsis menu, select Delete Group.

A confirmation message appears.
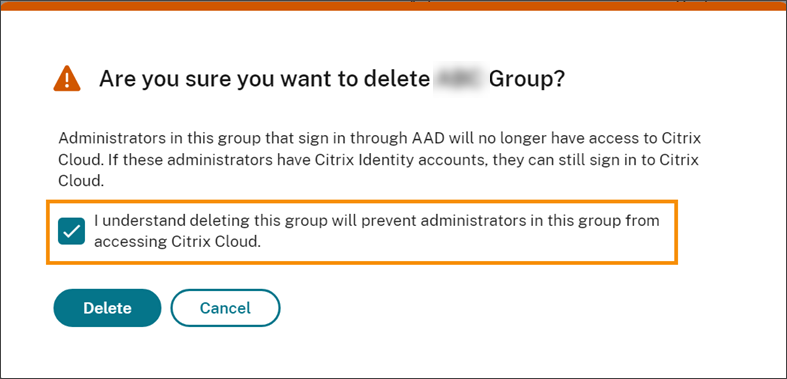
- Choose I understand deleting this group will prevent administrators in the group from accessing Citrix Cloud. to confirm you’re aware of the effects of deleting the group.
- Select Delete.
Switch between multiple Citrix Cloud accounts
Note:
This section describes a scenario that affects members of Azure AD administrator groups only.
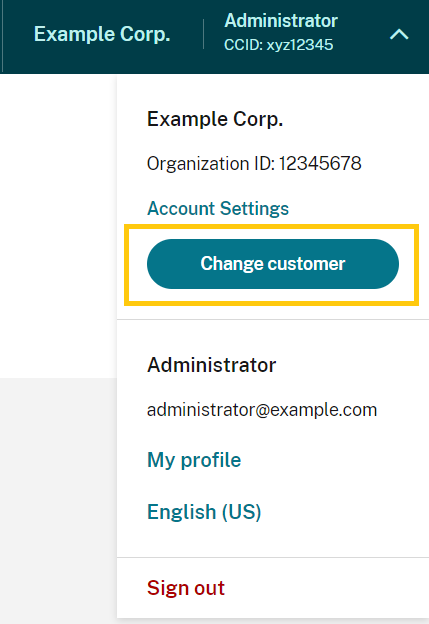
By default, members of Azure AD administrator groups can’t switch between other Citrix Cloud accounts that they can access. For these administrators, the Change Customer option, shown in the image below, doesn’t appear in the Citrix Cloud user menu.
To enable this menu option and allow Azure AD group members to switch between other Citrix Cloud accounts, you must link the accounts that you want to change between.
Linking Citrix Cloud accounts involves a hub-and-spoke-approach. Before linking accounts, decide which Citrix Cloud account will act as the account from which the other accounts are accessed (the “hub”) and which accounts you want to have listed in the customer picker (the “spokes”).
Before linking accounts, ensure you meet the following requirements:
- You have full access permissions in Citrix Cloud.
- You have access to the Windows PowerShell Integrated Scripting Environment (ISE).
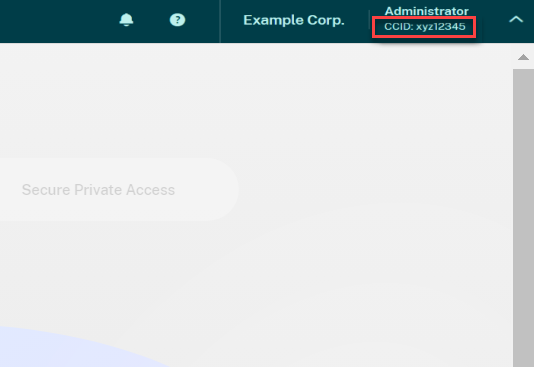
- You have the customer IDs for the Citrix Cloud accounts you want to link. The customer ID appears in the top-right corner of the management console for each account.
- You have the Citrix CWSAuth bearer token for the Citrix Cloud account you want to link as the hub account. To retrieve this bearer token, follow the instructions in CTX330675. You need to supply this information when linking your Citrix Cloud accounts.
To link Citrix Cloud accounts
-
Open the PowerShell ISE and paste the following script into the working pane:
$headers = @{} $headers.Add("Accept","application/json") $headers.Add("Content-Type","application/json") $headers.Add("Authorization","CWSAuth bearer=XXXXXXX") $uri = "https://trust.citrixworkspacesapi.net/HubCustomerID/links" $resp = Invoke-RestMethod -Method Get -Uri $uri -Headers $headers $allLinks = $resp.linkedCustomers + @("SpokeCustomerID") $body = @{"customers"=$allLinks} $bodyjson = $body | ConvertTo-Json $resp = Invoke-WebRequest -Method Post -Uri $uri -Headers $headers -Body $bodyjson -ContentType 'application/json' Write-Host "Citrix Cloud Status Code: $($resp.RawContent)" <!--NeedCopy--> - On Line 4, replace
CWSAuth bearer=XXXXXXXwith your CWSAuth value (for example,CWSAuth bearer=AbCdef123Ghik…). This value is a long hash that resembles a certificate key. - On Line 6, replace
HubCustomerIDwith the customer ID of the hub account. - On Line 9, replace
SpokeCustomerIDwith the customer ID of the spoke account. - Run the script.
- Repeat Steps 3-5 to link additional accounts as spokes.
To unlink Citrix Cloud accounts
- Open the PowerShell ISE. If the PowerShell ISE is already open, clear the working pane.
-
Paste the following script into the working pane:
$headers = @{} $headers.Add("Accept","application/json") $headers.Add("Content-Type","application/json") $headers.Add("Authorization","CWSAuth bearer=XXXXXXX") $uri = "https://trust.citrixworkspacesapi.net/HubCustomerID/links/SpokeCustomerID" $resp = Invoke-WebRequest -Method Delete -Uri $uri -Headers $headers Write-Host "Response: $($resp.RawContent)" <!--NeedCopy--> - On Line 4, replace
CWSAuth bearer=xxxxxxx1with your CWSAuth value (for example,CWSAuth bearer=AbCdef123Ghik…). This value is a long hash that resembles a certificate key. - On Line 6, replace
HubCustomerIDwith the customer ID of the hub account. - On Line 6, replace
SpokeCustomerIDwith the customer ID of the spoke account. - Run the script.
- Repeat Steps 4-6 to unlink additional accounts.
In this article
- AD prerequisites
- Azure AD prerequisites
- Google Cloud Identity
- Supported permissions
- Resultant permissions for administrators with Citrix®, AD, Azure AD, and Google Cloud identities
- Sign-in experience for administrators
- Known issue
- Limitations
- Add an administrator group to Citrix Cloud
- Modify service permissions for an administrator group
- Delete an administrator group
- Switch between multiple Citrix Cloud accounts