Prepare to enroll devices and deliver resources
Important:
Before proceeding, be sure to complete all the tasks described in Onboarding and resource setup.
Keep your users informed about upcoming changes. See Welcome to your Citrix User Adoption Kit.
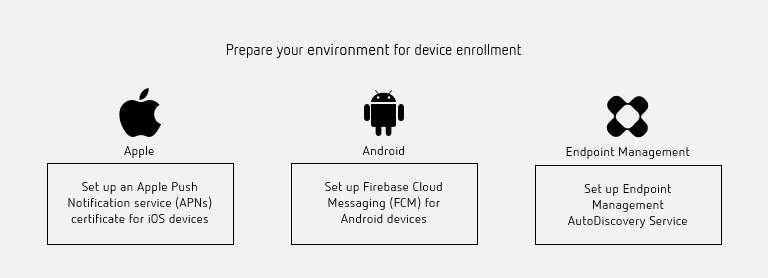
Citrix Endpoint Management supports various enrollment options. This article covers the basic setup required to enable all supported devices to enroll. The following diagram summarizes the basic setup.
For a list of supported devices, see Supported device operating systems.
Set up an Apple Push Notification service (APNs) certificate for iOS devices
Important:
Apple support for the APNs legacy binary protocol ends on March 31, 2021. Apple recommends that you use the HTTP/2-based APNs provider API instead. From version 20.1.0, Citrix Endpoint Management supports the HTTP/2-based API. For more information, see the news update, “Apple Push Notification Service Update” in https://developer.apple.com/. For help with checking connectivity to APNs, see Connectivity checks.
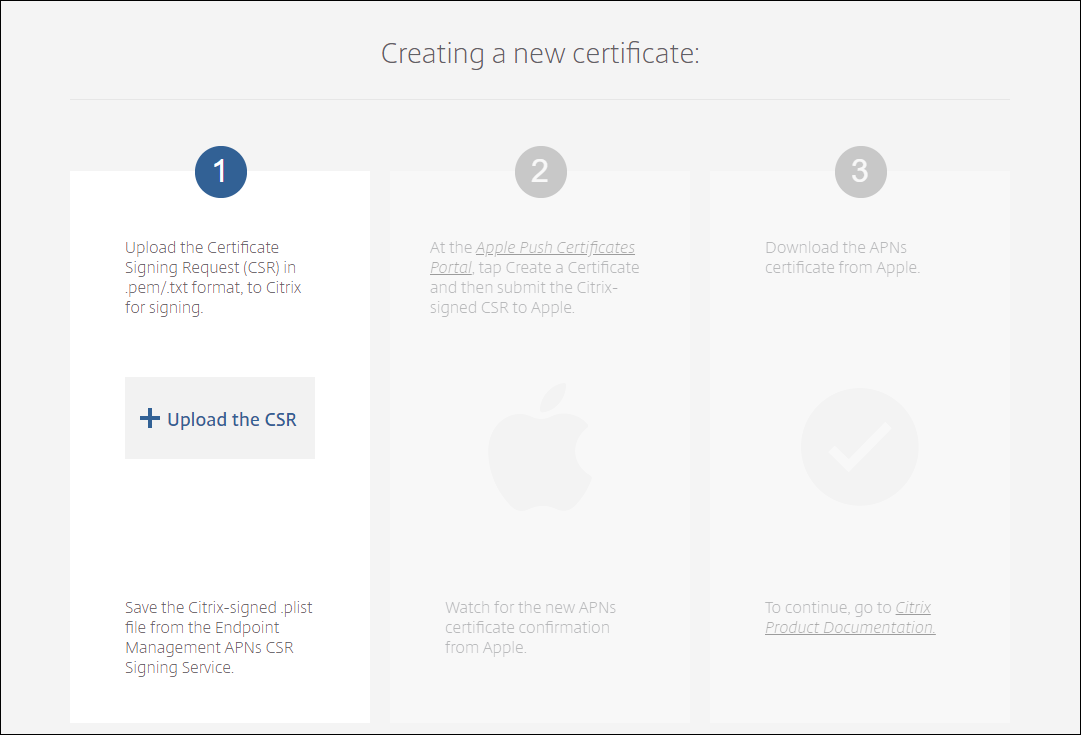
Citrix Endpoint Management requires an Apple Push Notification service (APNs) certificate from Apple to enroll and manage iOS devices. Citrix Endpoint Management also requires an APNs certificate for Citrix Secure Mail for iOS push notifications.
-
To get a certificate from Apple requires an Apple ID and developer account. For details, see the Apple Developer Program website.
-
To get an APNs certificate and import it into Citrix Endpoint Management, see APNs certificates.
-
For more information about Citrix Endpoint Management and APNs, see Push Notifications for Citrix Secure Mail for iOS.
Set up Firebase Cloud Messaging (FCM) for Android devices
Firebase Cloud Messaging (FCM) controls how and when Android devices connect to the Citrix Endpoint Management service. Any security action or deployment command triggers a push notification. The notification prompts users to reconnect to Citrix Endpoint Management.
-
FCM setup requires that you configure your Google account. To create Google Play credentials, see Manage your developer account information. You also use Google Play to add, buy, and approve apps for deployment to the Android Enterprise workspace on a device. You can use Google Play to deploy your private Android apps, public apps, and third-party apps.
-
To set up FCM, see Firebase Cloud Messaging.
Set up Citrix Endpoint Management AutoDiscovery service
The AutoDiscovery service simplifies the enrollment process for users through email-based URL discovery. The AutoDiscovery service also provides features such as enrollment verification, certificate pinning, and other benefits for Citrix Workspace customers. The service, hosted in Citrix Cloud, is an important part of many Citrix Endpoint Management deployments.
With the AutoDiscovery service, users:
- Can use their corporate network credentials to enroll their devices.
- Don’t need to enter details about the Citrix Endpoint Management server address.
- Enter their user name in user principal name (UPN) format. For example,
user@mycompany.com.
We recommend that you use the AutoDiscovery service for high-security environments. The AutoDiscovery service supports public key certificate pinning, which prevents man-in-the-middle attacks. Certificate pinning makes sure that the certificate signed by your enterprise is used when Citrix clients communicate with Citrix Endpoint Management. To configure certificate pinnings for your Citrix Endpoint Management sites, contact Citrix Support. For information about certificate pinning, see Certificate pinning.
To access the AutoDiscovery service, navigate to https://adsui.cloud.com (commercial).
Prerequisites
- The new AutoDiscovery service in Citrix Cloud requires the latest version of Citrix Secure Hub:
- For iOS, Citrix Secure Hub version 21.6.0 or later
-
For Android, Citrix Secure Hub version 21.8.5 or later
Devices running on earlier versions of Citrix Secure Hub might experience interruptions in service.
-
To access the new AutoDiscovery service, you must have a Citrix Cloud administrator account with full access. The AutoDiscovery service doesn’t support administrator accounts with custom access. If you don’t have an account, see Sign-up for Citrix Cloud.
Citrix migrated all existing AutoDiscovery records to Citrix Cloud without a disruption in service. The migrated records don’t automatically appear in the new console. You must reclaim domains in the new AutoDiscovery service to prove ownership. For more information, see CTX312339.
- Before starting using the AutoDiscovery service for your Citrix Endpoint Management deployments, verify and claim your domain. You can claim up to 10 domains. The claim associates the verified domain with the AutoDiscovery service. To claim more than 10 domains, open an SRE ticket or contact Citrix Technical Support.
- Use the MAM Port setting instead of NetScaler Gateway FQDN to direct MAM traffic to your data center. If you enter a fully qualified domain name along with the port of your NetScaler Gateway, the client device uses the configuration from the MAM Port setting.
- If an ad blocker prevents the site from opening, make sure that you disable the ad blocker for the entire website.
Claim a domain
-
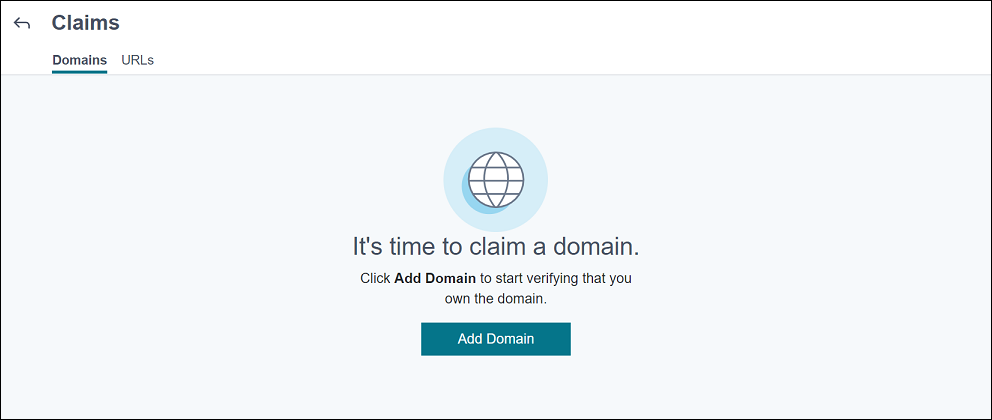
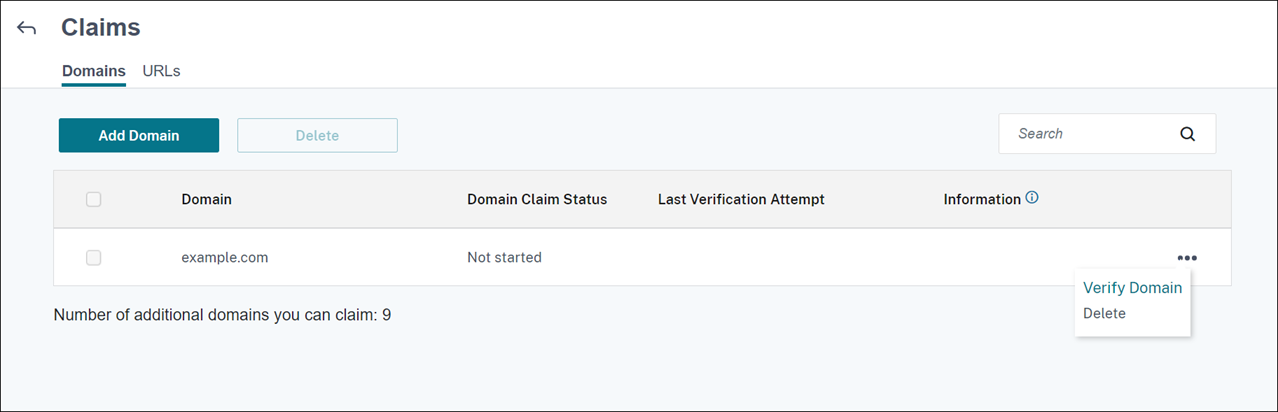
On the Claims > Domains tab, click Add Domain.
-
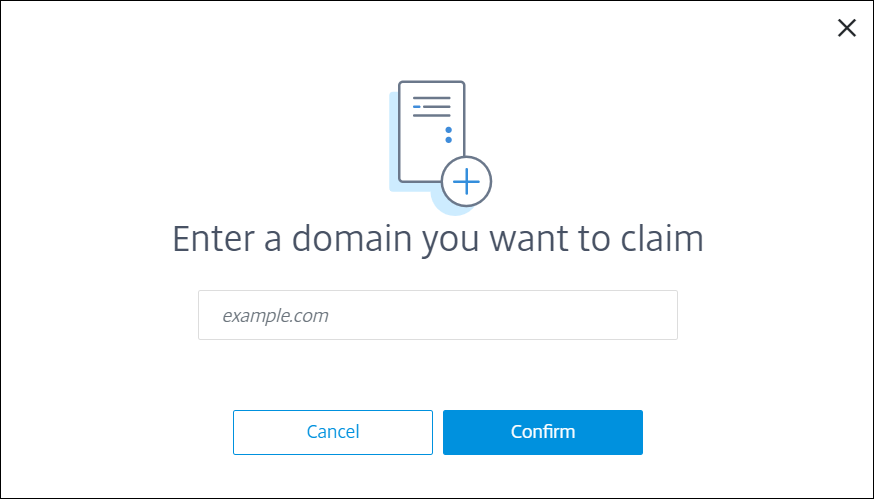
In the dialog box that appears, enter the domain name of your Citrix Endpoint Management environment and then click Confirm. Your domain appears in Claims > Domains.
-
On the domain you added, click the ellipsis menu and select Verify Domain to start the verification process. The Verify your domain page appears.
-
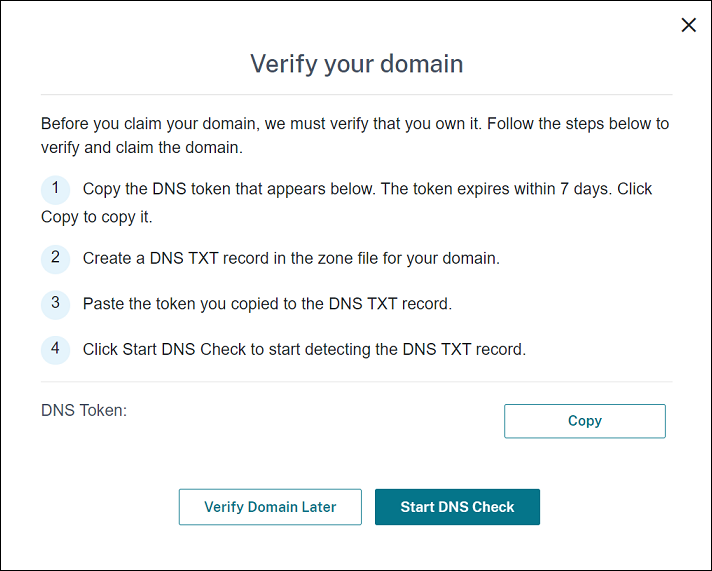
On the Verify your domain page, follow the instructions to verify that you own the domain.
-
Click Copy to copy the DNS token to the clipboard.
-
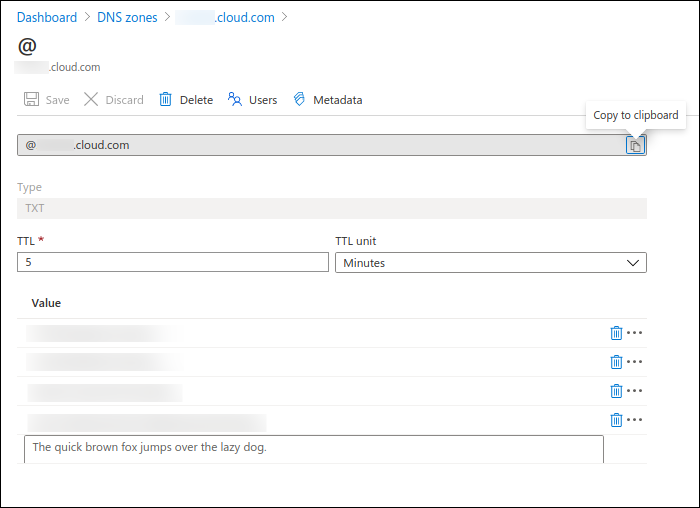
Create a DNS TXT record in the zone file for your domain. To do so, go to your domain hosting provider portal and add the DNS token you copied.
The following screenshot shows a domain hosting provider portal. Your portal might look different.
-
In Citrix Cloud, on the Verify your domain page, click Start DNS Check to start detecting your DNS TXT record. If you want to verify the domain later, click Verify Domain Later.
The verification process generally takes about an hour. However, it can take up to two days to return a response. It is OK for you to log out and log in again during the status check.
After the configuration completes, the status of your domain changes from Pending to Verified.
-
-
After you claim your domain, provide information about the AutoDiscovery service. Click the ellipsis menu on the domain that you added and then click Add Citrix Endpoint Management Info. The AutoDiscovery Service Information page appears.
-
Enter the following information and then click Save.
-
Citrix Endpoint Management Server FQDN: Enter the fully qualified domain name of the Citrix Endpoint Management server. For example:
example.xm.cloud.com. This setting is used for MDM and MAM traffic control. -
NetScaler Gateway FQDN: Enter the fully qualified domain name of NetScaler Gateway, in the form FQDN or FQDN:port. For example:
example.com. This setting is used to direct MAM traffic to your data center. For MDM-only deployments, leave this field blank.Note:
Citrix recommends that you use the MAM Port setting instead of NetScaler Gateway FQDN to control MAM traffic. If you enter a fully qualified domain name along with the port of your NetScaler Gateway, the client device uses the configuration from the MAM Port setting.
-
Instance Name: Enter the instance name of the Citrix Endpoint Management server you configured earlier. If you are unsure about your instance name, leave the default value zdm.
-
MDM Port: Enter the port used for MDM control traffic and MDM enrollment. For cloud-based services, the default is 443.
-
MAM Port: Enter the port used for MAM control traffic, MAM enrollment, iOS enrollment, and app enumeration. For cloud-based services, the default is 8443.
-
Request AutoDiscovery for Windows devices
If you plan to enroll Windows devices, do the following:
-
Contact Citrix Support and create a support request to enable Windows AutoDiscovery.
-
Get a publicly signed, non-wildcard SSL certificate for
enterpriseenrollment.mycompany.com. Themycompany.comportion is the domain that has the accounts that users use to enroll. Attach the SSL certificate in .pfx format and its password to the support request created in the previous step.To use more than one domain to enroll Windows devices, you can also use a multi-domain certificate with the following structure:
- A SubjectDN with a CN that specifies the primary domain it serves (for example, enterpriseenrollment.mycompany1.com).
- The appropriate SANs for the remaining domains (for example, enterpriseenrollment.mycompany2.com, enterpriseenrollment.mycompany3.com, and so on).
-
Create a canonical name (CNAME) record in your DNS and map the address of your SSL certificate (enterpriseenrollment.mycompany.com) to autodisc.xm.cloud.com.
When a Windows device user enrolls using a UPN, the Citrix enrollment server:
- Provides the details of your Citrix Endpoint Management server.
- Instructs the device to request a valid certificate from Citrix Endpoint Management.
At this point, you can enroll all supported devices. Go to the next section to prepare to deliver resources to devices.
Integrate with Azure AD Conditional Access
You can configure Citrix Endpoint Management to apply Azure AD Conditional Access support to Office 365 applications. This feature lets you deploy the Zero Trust methodology to device users when deploying Office 365 applications. You can use device state, risk score, location, and device protections to apply automated actions and define access to the Office 365 applications on managed Android Enterprise and iOS devices.
To enforce Azure AD device compliance, you must configure Conditional Access policies for individual Office 365 applications. You can restrict user access to specific Office 365 applications on non-managed and non-compliant devices and allow access to individual applications only on managed and compliant devices.
Prerequisites
- For this integration, you must have a valid Azure AD premium subscription, including Intune and Microsoft Office 365 licenses.
- Citrix Secure Hub version 21.4.0 and later
- Configure Azure AD as an identity provider (IdP) in Citrix Cloud, and then set Citrix identity as the IdP type for Citrix Endpoint Management. For information, see Authentication with Azure Active Directory through Citrix Cloud.
- Consent to the Citrix multitenant AAD application to allow mobile applications to authenticate with the AAD client app. Only required if the Azure Global Administrator set the value for Users can register applications to No. Configure this setting in the Azure portal under Azure Active Directory > Users > User Settings. To provide consent, see Configure Citrix Endpoint Management for Azure AD Compliance Management.
- Install the Microsoft Authenticator application on the device before starting the Azure AD device registration process.
- For the Android Enterprise platform, configure a web browser app as the required public store app.
- Disable the Security defaults setting in the Azure AD console. When you start Azure AD configuration, you replace security defaults with more granular Azure AD Conditional Access policies. For more information about security defaults, see the Microsoft documentation.
Configure device compliance through Azure AD Conditional Access policies
The general steps to configure device compliance through Azure AD Conditional Access policies are as follows:
-
Citrix Endpoint Management configuration:
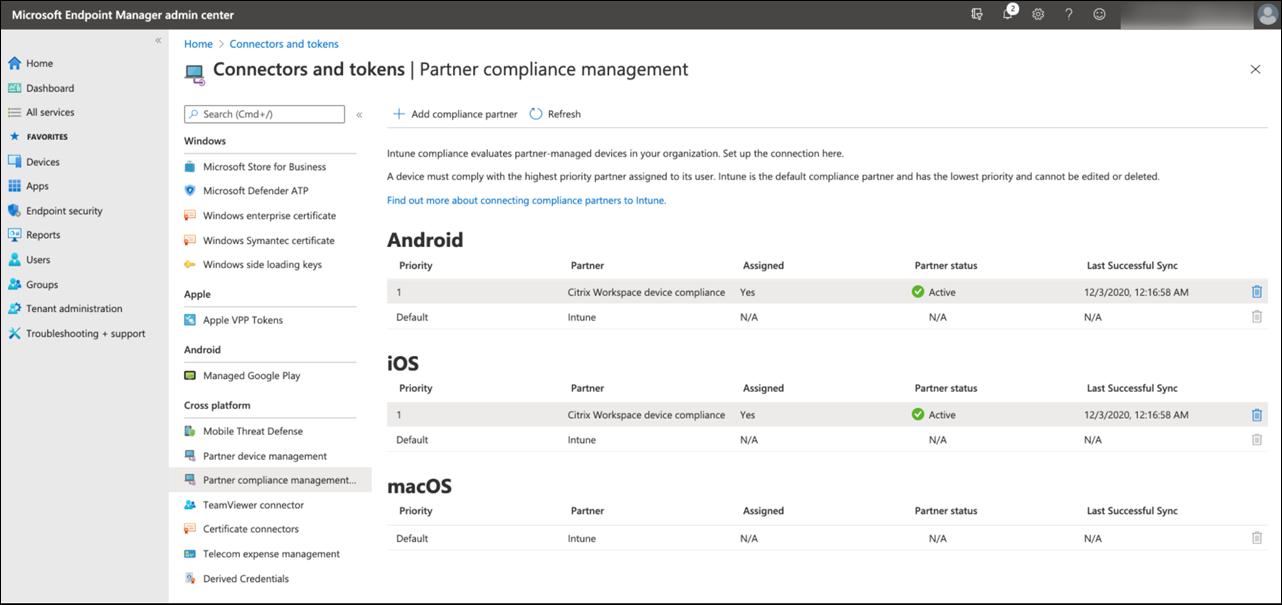
- In the Microsoft Endpoint Manager admin center, add Citrix Workspace device compliance as the compliance partner for each device platform and assign user groups.
- In Citrix Endpoint Management, synchronize information from the Microsoft Endpoint Manager admin center.
-
Azure AD configuration: In the Azure AD portal, set Conditional Access policies for individual Office 365 apps.
- Citrix Endpoint Management configuration: After configuring Conditional Access policies for Office 365 apps, add the Microsoft Authenticator app and Office 365 apps as public app store apps in Citrix Endpoint Management. Assign these public apps to the delivery group and set them as required apps.
Configure Citrix Endpoint Management for Azure AD compliance management
-
Sign in to the Microsoft Endpoint Manager admin center and navigate to Tenant administration > Connectors and tokens > Device compliance management. Click Add compliance partner and choose Citrix Workspace device compliance as the compliance partner for each device platform. Then assign user groups.
- In Citrix Endpoint Management, go to Settings > Azure AD compliance management.
- Optionally, set global consent so that users don’t need to provide consent on each device. Next to Client App consent, click Provide consent. Enter your global admin Azure AD credentials and follow the prompts to provide global consent for the client apps.
-
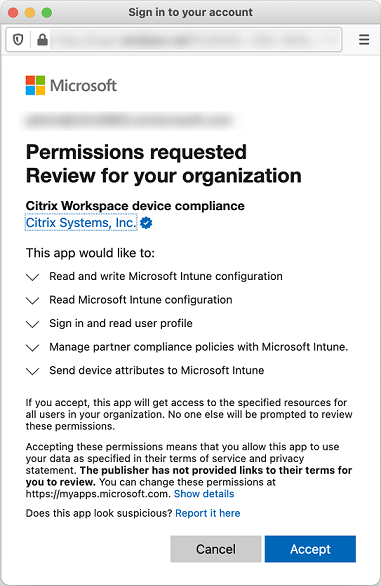
Click Connect to sync information from the Microsoft Endpoint Manager admin center.
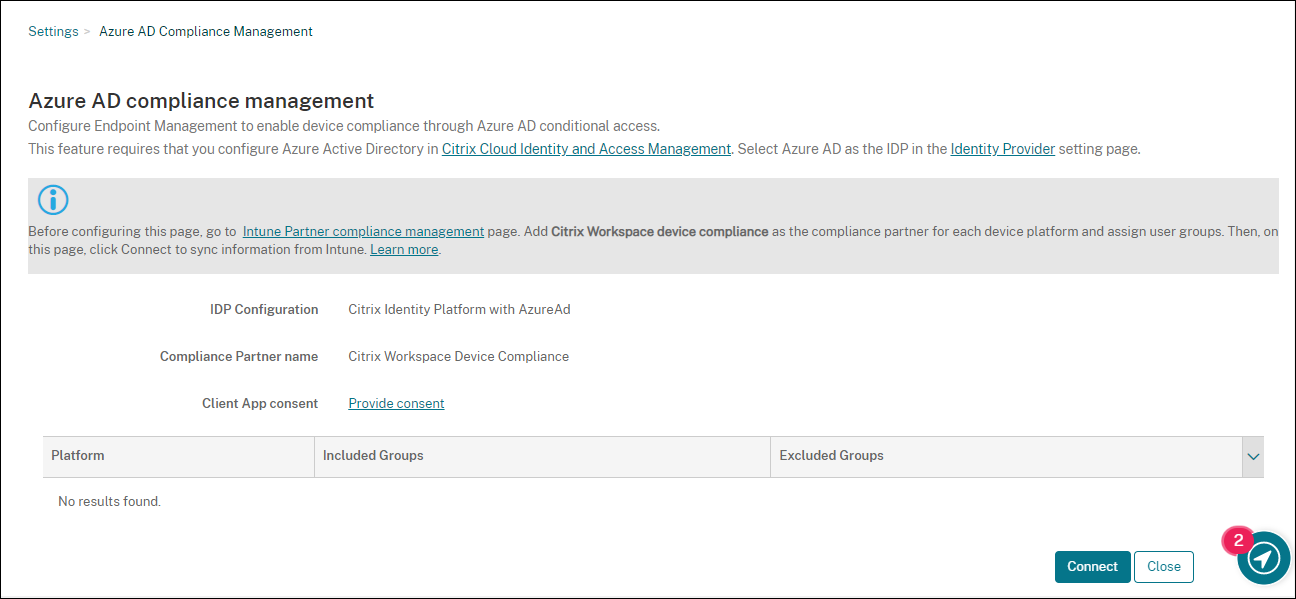
A dialog box prompts you to accept the permissions for this configuration. Click Accept. After the configuration completes, synchronized device platforms appear in the list.
Configure Conditional Access policies in Azure AD
In the Azure AD portal, configure Conditional Access policies for Office 365 apps to enforce device compliance. Go to Devices > Conditional Access > Policies > New policy. For more information, see the Microsoft documentation.
To configure device compliance for Intune managed apps:
- Configure Intune managed apps for delivery to devices
- Require approved client apps
- Require app protection policy and an approved client app for cloud app access
Configure apps in Citrix Endpoint Management
After configuring Conditional Access policies for Office 365 apps, add the Microsoft Authenticator app and Office 365 apps as public app store apps in Citrix Endpoint Management. Assign these public apps to the delivery group and set them as required apps. For information, see Add a public app store app.
User authentication workflow
- Users who enrolled devices with On-premises Active Directory (AD) and later integrated with Citrix identity provider using Microsoft Azure Active Directory (AAD) do not need to re-enroll. You can synchronize accounts from your on-premises Active Directory to Microsoft Azure Active Directory. For more information, see Prepare your Active Directory and Azure AD.
- Citrix Endpoint Management pushes Microsoft Authenticator and configured Office 365 apps to a device as required apps. If you configured a web browser app as the required public store app for the Android platform, Citrix Endpoint Management pushes it to the user device as well.
- Citrix Secure Hub automatically installs and displays all apps managed through Citrix Endpoint Management.
- When a user tries to sign in to any available Office 365 app, the device prompts the user to tap the Azure AD registration link to start the registration process.
- After the user taps the registration link, the Microsoft authenticator app opens. The user enters Azure AD credentials and agrees to the device enrollment terms. Then the Microsoft authenticator app closes and Citrix Secure Hub reopen.
-
Citrix Secure Hub displays a message that Azure AD device registration is complete. The user can now use Microsoft apps to access their cloud resources.
After the registration completes, Azure AD marks the device as managed and compliant in the console.
Default device policies and mobile productivity apps
If you onboard starting with Citrix Endpoint Management 19.5.0 or later, we preconfigure a few device policies and mobile productivity apps. That configuration enables you to:
- Immediately deploy basic functionality to devices
- Start with the recommended baseline configurations for a secure workspace
For the Android, Android Enterprise, iOS, macOS, and Windows Desktop/Tablet platforms, your site has these preconfigured device policies:
-
Passcode device policy: The Passcode device policy is On, with all default passcode settings enabled.
-
App inventory device policy: The App inventory device policy is On.
-
Restrictions device policy: The Restrictions device policy is On, with all default restrictions settings enabled.
Those policies are in the AllUsers delivery group, which has all Active Directory and local users. We recommend that you use the AllUsers delivery group only for initial testing. Then, create your delivery groups and disable the AllUsers delivery group. You can reuse the preconfigured device policies and apps in your delivery groups.
All Citrix Endpoint Management device policies are documented under Device policies. That article includes information about how to use the console to edit device policies. For information about some commonly used device policies, see Device policies and Use Case Behavior.
For the iOS and Android platforms, your site has these preconfigured mobile productivity apps:
- Citrix Secure Mail
- Citrix Secure Web
- Citrix Files
Those apps are in the AllUsers delivery group.
For more information, see About mobile productivity apps.
Continue your Citrix Endpoint Management configuration
After you complete the basic setup for device enrollment, how you configure Citrix Endpoint Management varies widely based on your use cases. For example:
- What are your security requirements and how do you want to balance those requirements with user experience?
- Which device platforms do you support?
- Do users own their devices or use corporate-owned devices?
- What device policies do you want to push to devices?
- What types of apps do you provide users?
This section helps you navigate through the many configuration choices by directing you to the articles in this documentation set.
As you complete configuration in third-party sites, make note of the information and its location, for reference when you configure Citrix Endpoint Management console settings.
-
Security and authentication. Citrix Endpoint Management uses certificates to create secure connections and authenticate users. Citrix provides wildcard certificates for your Citrix Endpoint Management instance.
-
For a discussion of authentication components and recommended configurations by security level, see the “Advanced concepts” article, Authentication. See also, Security and user experience.
-
For an overview of the authentication components used during Citrix Endpoint Management operations, see Certificates and authentication.
-
You can choose from the following types of authentication. Configuring authentication includes tasks in the Citrix Endpoint Management and NetScaler Gateway consoles.
-
To deliver certificates to users, configure:
-
Device enrollment security modes. Device enrollment security modes specify the credential types and use enrollment steps required for users to enroll their devices in Citrix Endpoint Management. For information, see Configure enrollment security modes.
-
To allow users to authenticate with Azure Active Directory credentials, see Authenticate with Azure Active Directory through Citrix Cloud.
-
-
Device enrollment
- Programs are available to enroll large numbers of devices:
-
To enroll Android devices, create an Android Enterprise administrator account. See Android Enterprise. Or, see Legacy Android Enterprise for Google Workspace Customers.
- You can use enrollment invitations or send notifications for enrollment.
- For more information about enrollment, see Device management and articles under that node.
-
Device policies and management
-
Device (MDM) policies. All Citrix Endpoint Management device policies are documented under Device policies. For information about some commonly used device policies, see Device Policies and Use Case Behavior.
-
Client properties. Client properties have information that is provided directly to Citrix Secure Hub on user devices. See Client properties and Citrix Endpoint Management client properties.
-
Delivery groups. For a sample use case related to delivery groups, see User Communities and Add a delivery group.
-
-
Prepare apps for deployment
-
For information about the apps supported by Citrix Endpoint Management, see Add apps.
-
You can manage iOS app licensing by using Apple Volume Purchase. For more information, see Apple Volume Purchase.
-
You can use Citrix Endpoint Management to deploy iBooks that you obtain through Apple Volume Purchase. See Add media.
-
Citrix provides mobile productivity apps, including Citrix Secure Mail and Citrix Secure Web. See About mobile productivity apps.
-
As an alternative to Citrix Secure Mail, you can deliver native mail to devices. See:
-
To allow users to securely transfer docs and data to Microsoft Office 365 apps, see Allowing Secure Interaction with Office 365 Apps and Office device policy.
-
For general information about app policies, see App Policies and Use Case Scenario.
-
The MDX Toolkit is an app wrapping technology that prepares enterprise apps for secure deployment with Citrix Endpoint Management. The MAM SDK replaces the MDX Toolkit. The MDX Toolkit is scheduled to reach EOL in July 2023.
For information about the MAM SDK, see MAM SDK overview.
-
For more information about apps, see other articles under Add apps.
-
-
The Role-Based Access Control (RBAC) feature in Citrix Endpoint Management lets you assign predefined roles, or sets of permissions, to users and groups. These permissions control the level of access users have to system functions. For information, see Configure roles with RBAC.
-
You create automated actions in Citrix Endpoint Management to specify the action to take in reaction to events, certain settings, or the presence of apps on user devices. For information, see Automated actions.
In this article
- Set up an Apple Push Notification service (APNs) certificate for iOS devices
- Set up Firebase Cloud Messaging (FCM) for Android devices
- Set up Citrix Endpoint Management AutoDiscovery service
- Integrate with Azure AD Conditional Access
- Default device policies and mobile productivity apps
- Continue your Citrix Endpoint Management configuration