-
-
-
-
-
SAML Main Metadata URL Mode
-
SAML using Entra ID for Guest and B2B identities for store authentication
-
This content has been machine translated dynamically.
Dieser Inhalt ist eine maschinelle Übersetzung, die dynamisch erstellt wurde. (Haftungsausschluss)
Cet article a été traduit automatiquement de manière dynamique. (Clause de non responsabilité)
Este artículo lo ha traducido una máquina de forma dinámica. (Aviso legal)
此内容已经过机器动态翻译。 放弃
このコンテンツは動的に機械翻訳されています。免責事項
이 콘텐츠는 동적으로 기계 번역되었습니다. 책임 부인
Este texto foi traduzido automaticamente. (Aviso legal)
Questo contenuto è stato tradotto dinamicamente con traduzione automatica.(Esclusione di responsabilità))
This article has been machine translated.
Dieser Artikel wurde maschinell übersetzt. (Haftungsausschluss)
Ce article a été traduit automatiquement. (Clause de non responsabilité)
Este artículo ha sido traducido automáticamente. (Aviso legal)
この記事は機械翻訳されています.免責事項
이 기사는 기계 번역되었습니다.책임 부인
Este artigo foi traduzido automaticamente.(Aviso legal)
这篇文章已经过机器翻译.放弃
Questo articolo è stato tradotto automaticamente.(Esclusione di responsabilità))
Translation failed!
Create a SAML Connection using Metadata URL Mode
Citrix recommends that all new SAML connections be created using metadata URL mode. Obtain the metadata URL for your SAML application from inside your IdP. Citrix Cloud can consume SAML IdP metadata to configure a SAML connection automatically.
Why is Metadata URL mode the recommended way to create a Citrix Cloud SAML connection?
Simplicity. The SAML connection inside Citrix Cloud is set up automatically using a combination of default connection setting values and values obtained from inside the metadata.
IdP metadata contains all the following information required to set up the SAML connection inside Citrix Cloud:
- SAML Entity ID
- SSO Endpoint
- SLO Endpoint (if configured inside the IdP)
- Supported SAML bindings
- Public keys and signing certificates
Reduced Maintenance. Automatic handling of changes made inside the SAML IdP and IdP certificate rotations.
How does Citrix Cloud handle IdP certificate rotations when Metadata URL mode is used?
Automatically. When your SAML IdP admin updates the SAML application to include a new IdP signing certificate, or replace the existing certificate, Citrix Cloud implicitly trusts all SAML signing certificates provided inside the IdP metadata. Metadata URL mode eliminates the need for manual IdP certificate rotations within Citrix Cloud. Any changes made by IdP admins are automatically detected. Your SAML application’s metadata URL is used during each SAML logon to get the latest copy of your SAML application’s signing certificates.
Configure the Citrix Cloud SAML connection using your IdP Metadata URL
-
Obtain the link to your SAML application’s metadata and enter it into a browser to prove it is contactable and there are no firewall rules blocking Citrix Cloud’s access to it.
Example:
https://tenant.okta.com/app/zxv1r8qo70l2q5LNT359/sso/saml/metadata -
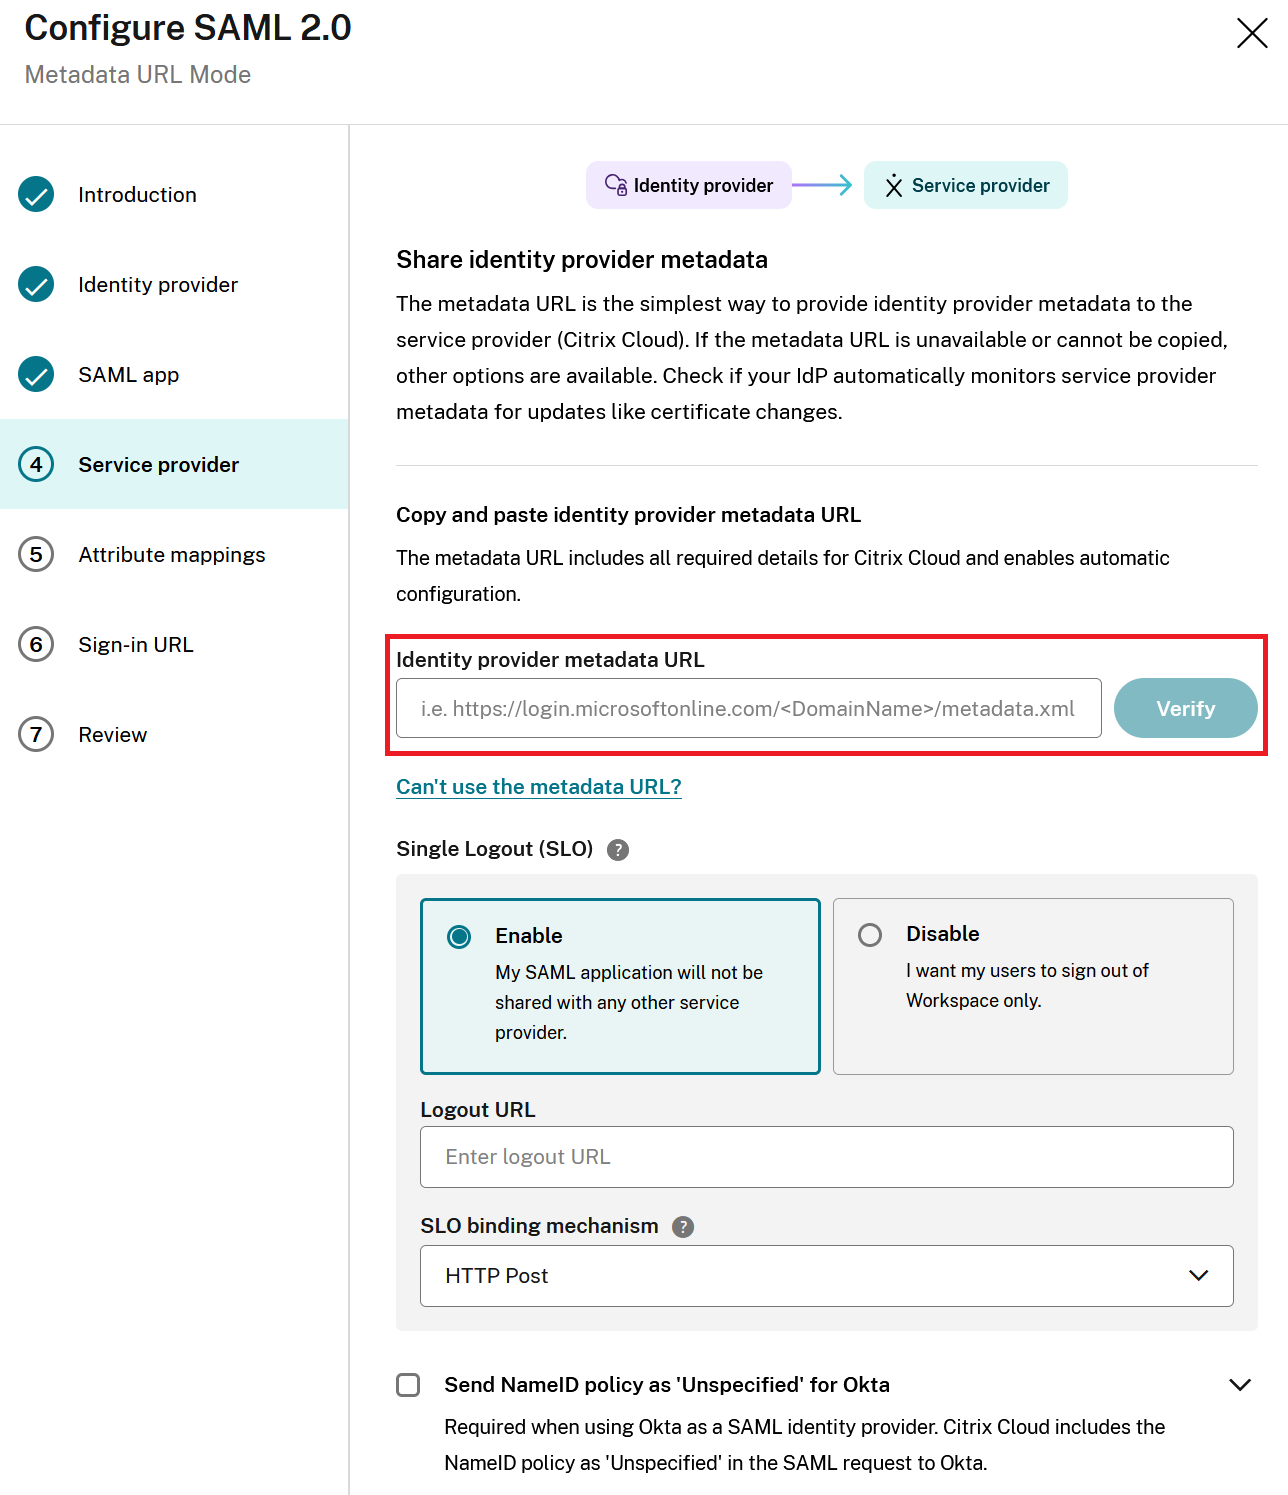
When you reach the Section 4 Service Provider section of the SAML wizard, enter your SAML application’s metadata URL here and click Verify.
IMPORTANT:
If your SAML application exists on an on-premise server such as an ADFS or PingFederate server and SAML IdP metadata URL fails to verify, check your firewall rules. Verify your metadata URL is contactable inside a browser from any client outside of your organization. -
After Citrix Cloud has parsed the metadata URL you should see this success message and Re-Verify.
Here is an Okta example of a successfully imported metadata connection.
- Configure the SAML logout behaviour you want by either enabling or disabling SLO.
Refer to this in-depth article for Logout Considerations.Important:
Okta SAML connections ONLY. If the metadata URL contains an SSO endpoint and a DNS domain string containing “okta” then Send NameID Policy as Unspecified for Okta will be automatically enabled. Okta SAML applications that use an Okta custom domain like mytenant.domain.com cannot be autodetected and Send NameID Policy as Unspecified for Okta must be manually enabled by the Citrix admin by clicking the check box.
-
Accept the default attribute mappings.
-
Configure your Citrix Cloud Admin Sign-In URL.
-
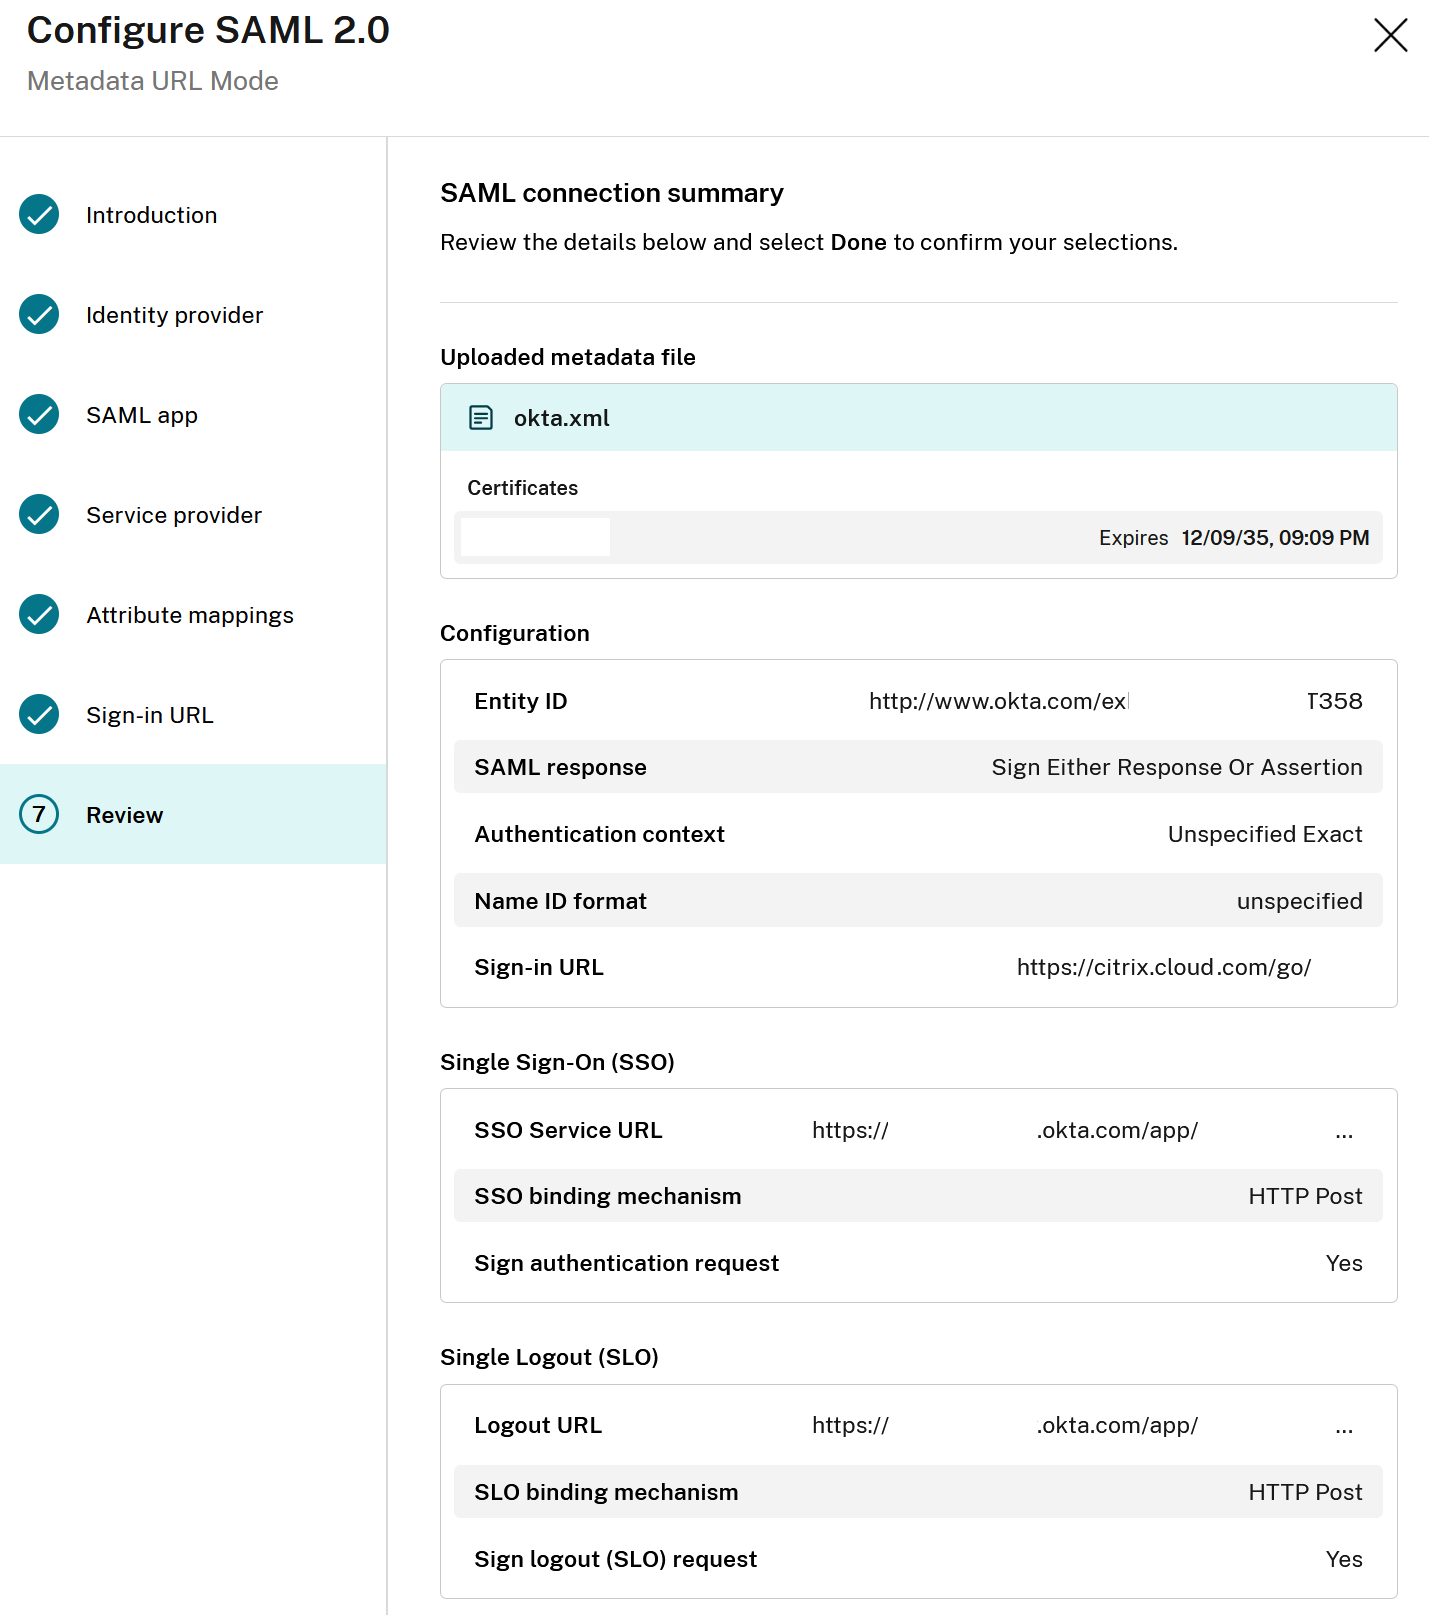
Examine the SAML wizard summary inside the Review section and verify the SAML configuration matches your expectations after parsing of the IdP metadata URL.
Share
Share
This Preview product documentation is Citrix Confidential.
You agree to hold this documentation confidential pursuant to the terms of your Citrix Beta/Tech Preview Agreement.
The development, release and timing of any features or functionality described in the Preview documentation remains at our sole discretion and are subject to change without notice or consultation.
The documentation is for informational purposes only and is not a commitment, promise or legal obligation to deliver any material, code or functionality and should not be relied upon in making Citrix product purchase decisions.
If you do not agree, select I DO NOT AGREE to exit.