User personalization layer
Note:
Starting with version 2511, Citrix Web Studio (web-based) is the only management console for Citrix Virtual Apps and Desktops™. Citrix Studio (MMC-based) has been removed from the installer. This article applies only to Web Studio. For information about Citrix Studio, see the equivalent article in Citrix Virtual Apps and Desktops 7 2212 or earlier.rticle in Citrix Virtual Apps and Desktops 7 2212 or earlier.
The user personalization layer feature for Citrix Virtual Apps and Desktops extends the capabilities of non-persistent machine catalogs to preserve users’ data and locally installed applications across sessions. Powered by underlying Citrix App Layering technology, the user personalization layer feature supports Citrix Provisioning and Machine Creation Services™ (MCS) in a non-persistent machine catalog.
You install the user personalization layer components alongside the Virtual Delivery Agent within the master image. A VHD file stores locally user-installed applications. The VHD mounted on the image acts as the user’s own virtual hard drive.
Important:
You can deploy user personalization layers in Citrix Virtual Apps™ and Desktops, or App Layering user layers enabled in an image template, not both. Don’t install the user personalization layer feature on a layer within App Layering.
This feature replaces Personal vDisk (PvD), while also providing a persistent workspace experience for users in a non-persistent (pooled) desktop environment.
To deploy the user personalization layer feature, install and configure it using the steps detailed in the article.
Application support
Aside from the following exceptions, all applications that a user installs locally on the desktop are supported in the user personalization layer.
Exceptions
The following applications are the exception and are not supported on the user personalization layer:
- Enterprise applications, such as MS Office and Visual Studio.
- Applications that modify the network stack or hardware. Example: a VPN client.
- Applications that have boot level drivers. Example: a virus scanner.
-
Applications with drivers that use the driver store. Example: a printer driver.
Note:
You can make printers available using Windows Group Policy Objects (GPOs).
Do not allow users to install any unsupported applications locally. Rather, install these applications directly on the master image.
Applications that require a local user or administrator account
When a user installs an application locally, the app goes into their user layer. If the user then adds or edits a local user or group, the changes do not persist beyond the session.
Important:
Add any required local user or group in the master image.
Requirements
The user personalization layer feature requires the following components:
- Citrix Virtual Apps and Desktops 7 1909 or later
- Virtual Delivery Agent (VDA), version 1912 or later
- Citrix Provisioning™, version 1909 or later
- Windows File Share (SMB), or Azure Files with on-prem AD authentication enabled
You can deploy the User personalization layer feature on the following Windows versions when the OS is deployed as a single session. Support is limited to a single user on a single session.
- Windows 11 Enterprise x64
- Windows 10 Enterprise x64, version 1607 or later
- Windows Server 2019 (Azure Files supported)
- Windows Server 2022 (Azure Files supported)
For Citrix Virtual Apps and Desktops 7, the use of Azure Files with User personalization layers is supported on Windows Server 2022, Windows Server 2019, and Windows 10 clients.
Note:
If you are using a server OS, only Server VDI is supported. For deployment details, see the Server VDI article.
User personalization layer supports just one user at a time per machine, and then the machine has to reboot to reset the disks. You cannot use the user personalization layer with multi-session server operating systems, only with single-session server systems. User personalization layer is supported for non-persistent desktops only.
Uninstall the user personalization layer feature, if installed. Reboot the master image before installing the latest release.
Set up your file share
The user personalization layer feature requires Windows Server Message Block (SMB) storage. To create a Windows file share, follow the usual steps for the Windows operating system that you are on.
For more about using Azure Files with Azure-based catalogs, see Set up Azure Files storage for User personalization layers.
Recommendations
Follow the recommendations in this section for a successful user personalization layer deployment.
Microsoft System Center Configuration Manager (SCCM)
If you are using SCCM with the user personalization layer feature, follow the Microsoft guidelines for preparing your image in a VDI environment. Refer to this Microsoft TechNet article for more information.
User layer size
A user layer is a thin-provisioned disk that expands as space on the disk is used. The default size allowed for a user layer is 10 GB, the minimum we recommend.
Note:
During installation, if the value is set to zero (0), the default user layer size is set to 10 GB.
If you want to change the user layer size, you can enter a different value for the User Layer Size policy. See Step 5: Create delivery group custom policies, under Optional: Click Select next to User Layer Size in GB.
Tools for overriding the User Layer Size (Optional)
You can override the User Layer Size by using a Windows tool to define a quota on the user layer file share.
Use one of the following Microsoft quota tools to set a hard quota on the user layer directory named Users:
- File Server Resource Manager (FSRM)
- Quota Manager
Note:
Increasing the quota affects new user layers and expands existing ones. Decreasing the quota only affects new user layers. Existing user layers never decrease in size.
Deploy a User personalization layer
When deploying the user personalization feature, you define the policies within Web Studio. You then assign the policies to the delivery group bound to the machine catalog, where the feature is deployed.
If you leave the master image with no user personalization layer configuration, the services remain idle and do not interfere with authoring activities.
If you set the policies in the master image, the services attempt to run and mount a user layer within the master image. The master image exhibits unexpected behaviors and instability.
To deploy the user personalization layer feature, complete the following steps in this order:
- Step 1: Verify the availability of a Citrix Virtual Apps and Desktops environment.
- Step 2: Prepare your master image.
- Step 3: Create a machine catalog.
- Step 4: Create a delivery group.
- Step 5: Create delivery group custom policies.
Note:
Logging in for the first time after upgrading Windows 10 on the image takes longer than usual. The user’s layer needs to update for the new version of Windows 10, which then increases logon time.
Step 1: Verify that the Citrix Virtual Apps and Desktops environment is available
Ensure that your Citrix Virtual Apps and Desktops environment is available to use with this new feature. For setup details, see Install and configure Citrix Virtual Apps and Desktops.
Step 2: Prepare your master image
To prepare your master image:
-
Locate the master image. Install your organization’s enterprise applications and any other apps your users generally find useful.
-
If you are deploying Server VDI, follow the steps in the Server VDI article. Be sure to include the optional component, the User personalization layer. For details, see the Command-line options for installing a VDA.
-
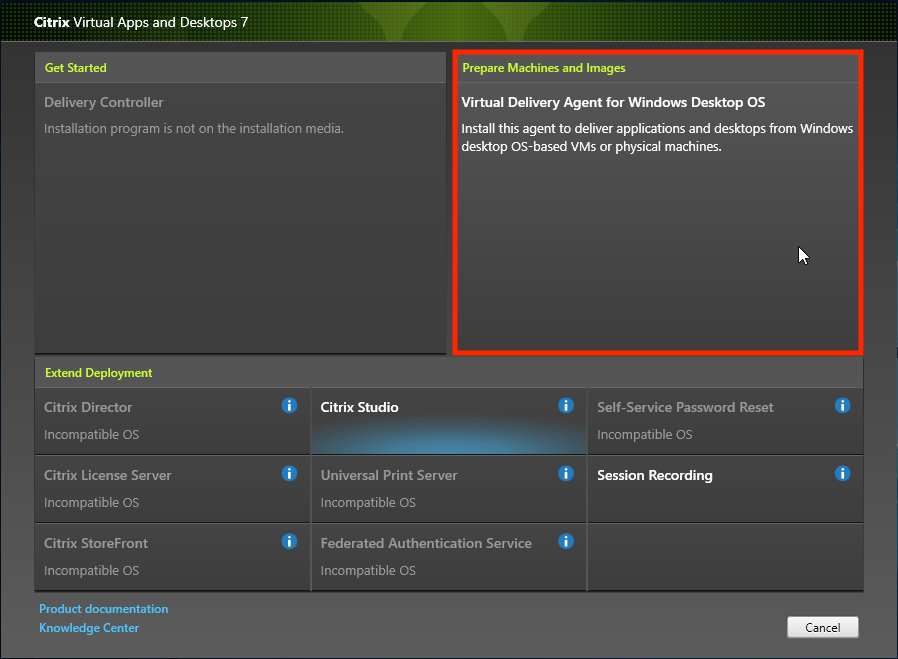
If you are using Windows 10, install Virtual Delivery Agent (VDA) 1912 or later. If an older version of the VDA is already installed, uninstall the old version first. When installing the new version, be sure to select and install the optional component, the Citrix User Personalization Layer, as follows:
- Click the Virtual Delivery Agent for Windows Desktop OS tile:
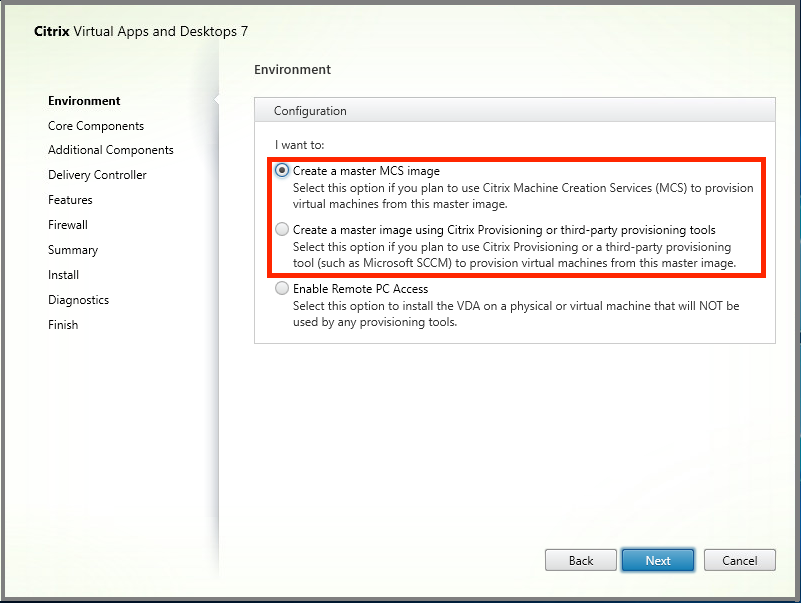
- Environment: Select either Create a master MCS image or Create a master image using Citrix Provisioning or third-party provisioning tools.
-
Core Components: Click Next.
-
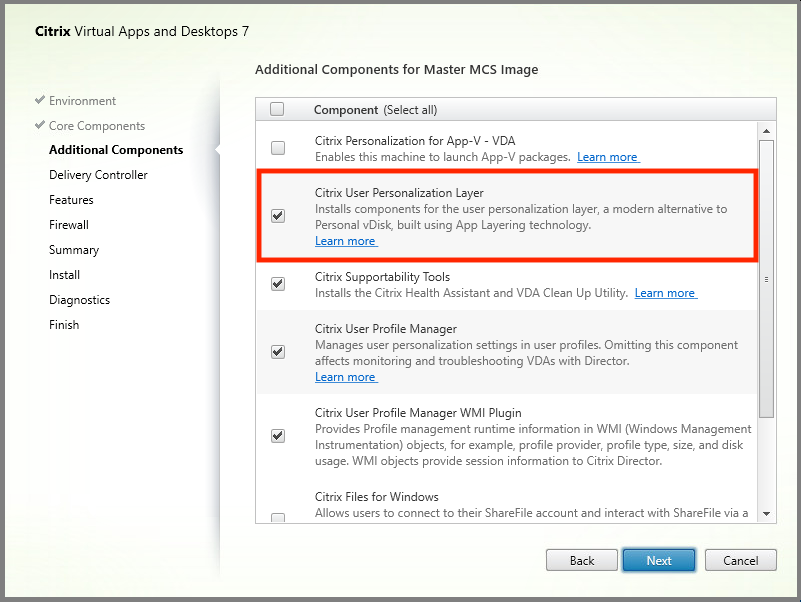
Additional Components: Check Citrix User Personalization Layer.
- Click through the remaining installation screens, configure the VDA as needed, and click Install. The image reboots one or more times during installation.
-
Leave Windows updates disabled. The user personalization layer installer disables Windows updates on the image. Leave the updates disabled.
The image is ready for you to upload into Web Studio.
Note:
If you simply want to upgrade the user personalization layer (UPL), you can do so with a newer version of UPL and the standalone package. You do not need to upgrade the VDA.
Step 3: Create a machine catalog
In Web Studio, follow the steps to create a machine catalog. Use the following options during catalog creation:
-
Select Operating System and set it to Single-session OS.
-
Select Machine Management and set it to Machines that are power managed. For example, virtual machines or blade PCs.
-
Select Desktop Experience and set it to either pooled-random or pooled-static catalog type, as in the following examples:
-
Pooled-random:
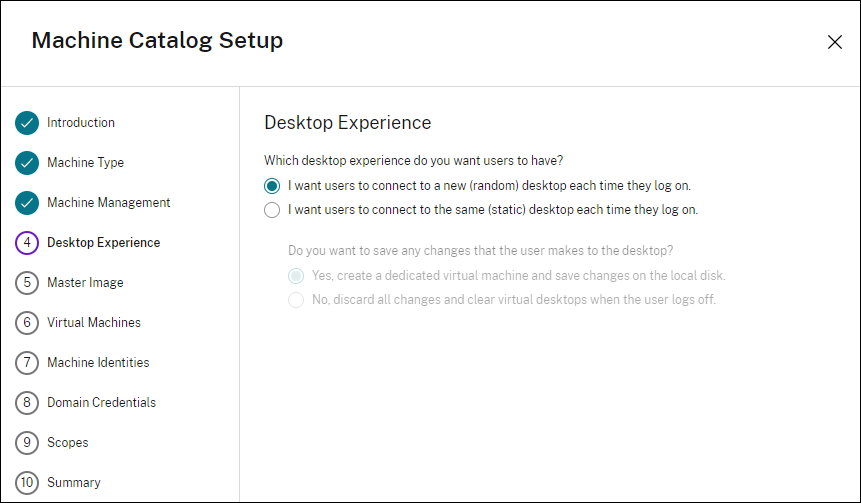
-
Pooled-static: If you select pooled-static, configure desktops to discard all changes and clear virtual desktops when the user logs off, as shown in the following screenshot:
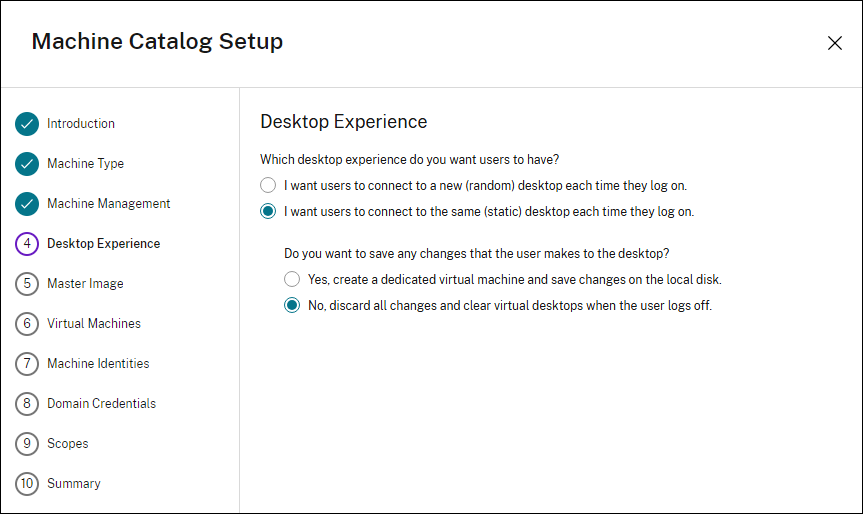
Note:
User personalization layer does not support pooled-static catalogs configured to use Citrix Personal vDisk or assigned as dedicated virtual machines.
-
-
If you are using MCS, select Image and the snapshot for the image created in the previous section.
-
Configure the remaining catalog properties as needed for your environment.
Step 4: Create a delivery group
Create and configure a delivery group, including machines from the machine catalog you created. For details, see the Create Delivery Groups.
Step 5: Create delivery group custom policies
To enable the mounting of user layers within the Virtual Delivery Agents, you use the configuration parameters to specify:
- Where on the network to access the user layers.
- How large to permit the user layer disks to grow.
To define the parameters as custom Citrix policies in Web Studio and assign them to your delivery group.
-
Sign in to Web Studio and select Policies in the left pane:
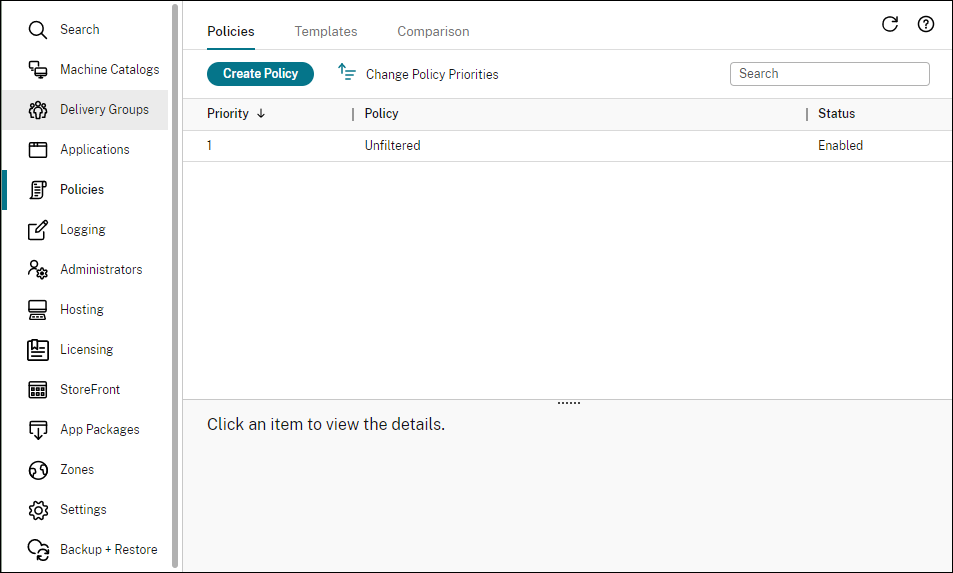
-
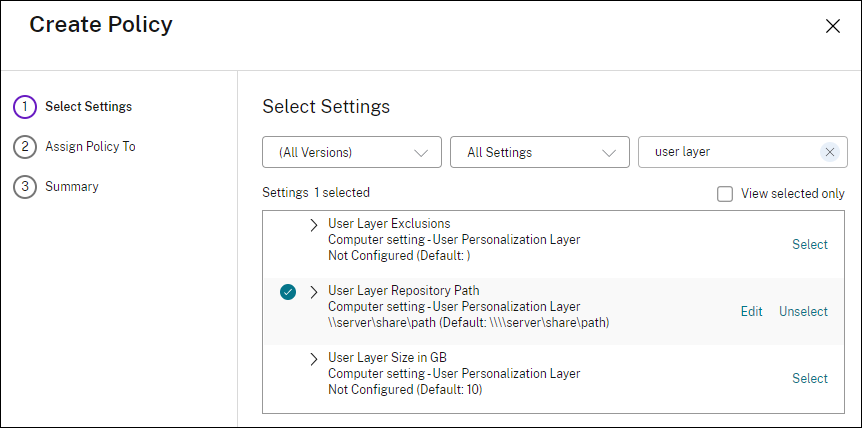
Select Create Policy in the action bar. The Create Policy window appears.
-
Type
user layerinto the search field. The following three policies appear in the list of available policies:- User Layer Exclusions
- User Layer Repository Path
-
User Layer Size GB
Note:
Increasing the size affects new user layers and expands existing user layers. Decreasing the size only affects new user layers. Existing user layers never decrease in size.

-
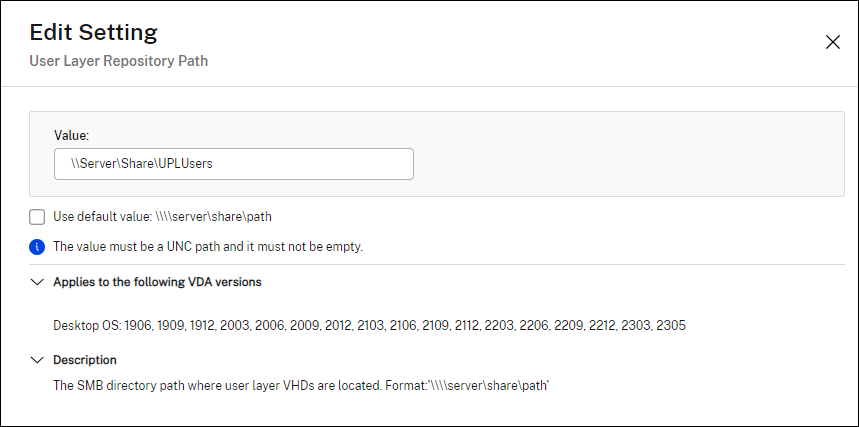
Mark the check box next to User Layer Repository Path and click Edit. The Edit Setting window appears.
-
Enter a path in the Value field, and click Save:
-
Path format:
\\server-name-or-address\share-name\folder -
Path example:
\\Server\Share\UPLUsers -
Resulting paths example: For a user named Alex in CoolCompanyDomain, the path is:
\\Server\Share\UPLUsers\Users\CoolCompanyDomain_Alex\A_OK
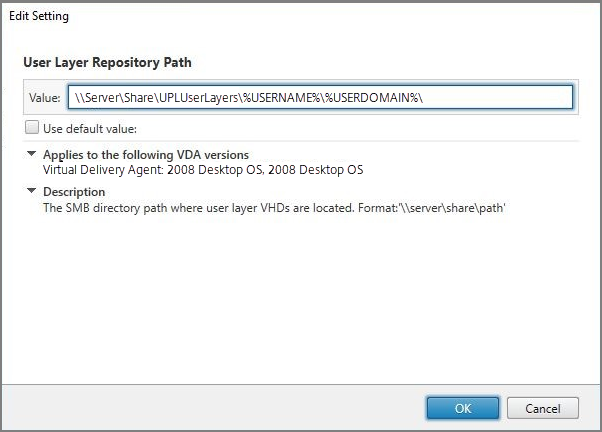
You can customize the path using the
%USERNAME%and%USERDOMAIN%variables, machine environment variables, and Active Directory (AD) attributes. When expanded, these variables result in explicit paths.Example of environment variables:
-
Path format:
\\Server-name-or-address\share-name\folder-with-environment-variables -
Path example:
\\Server\Share\UPLUserLayers\%USERNAME%\%USERDOMAIN% -
Resulting paths example: For a user named Alex in CoolCompanyDomain, the path would be:
\\Server\Share\UPLUserLayers\Alex\CoolCompanyDomain\A_OK
Example of custom AD attributes:
- Path format:
\\Server-name-or-address\share-name\AD-attribute - Path example:
\\Server\share\#sAMAccountName# - Resulting paths example:
\\Server\share\JohnSmith(if #sAMAccountName# resolves to JohnSmith for the current user)
-
Path format:
-
Optional: Mark the check box next to User Layer Size in GB and click Edit:
The Edit Settings window appears.
-
Optional: Change the default value of 10 GB to the maximum size that each user layer can grow. Click Save.
-
Optional: Mark the check box next to User Layer Exclusions and click Edit.

-
Optional: Specify the files and folders to exclude, then click Save. For more information, see the Citrix App Layering documentation.
-
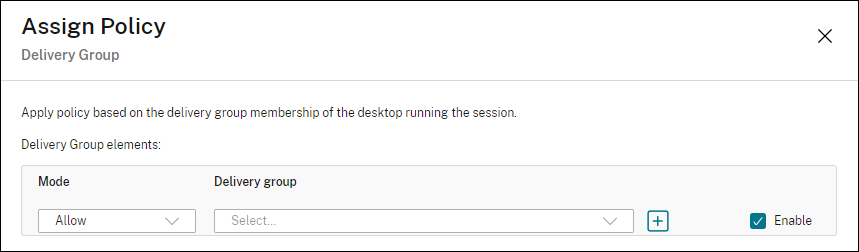
Click Next to configure the users and machines to which you want to assign. Click the Delivery Group Assign link highlighted in this image:
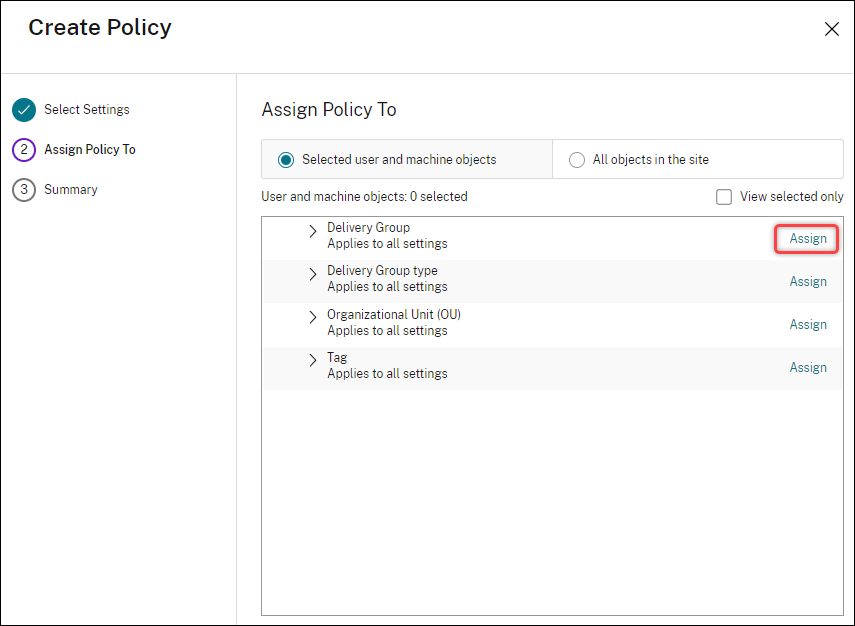
-
In the Delivery Group menu, select the delivery group created in the previous section. Click OK.
-
Enter a name for the policy. Click the check box to enable the policy, and click Finish.

Configure security settings on the user layer folder
As a domain administrator, you can specify more than one storage location for your user layers. Create a \Users subfolder For each storage location (including the default location). Secure each location using the following settings.
| Setting name | Value | Apply to |
|---|---|---|
| Creator Owner | Modify | Subfolders and Files only |
| Owner Rights | Modify | Subfolders and Files only |
| Users or group | Create Folder/Append Data; Traverse Folder/Execute File; List Folder/Read Data; Read Attributes | Selected Folder Only |
| System | Full Control | Selected Folder, Subfolders, and Files |
| Domain Admins, and selected Admin group | Full Control | Selected Folder, Subfolders, and Files |
User layer messages
When a user is unable to access their user layer, they receive one of these notification messages.
-
User Layer In Use
We were unable to attach your user layer because it is in use. Any changes you make to application settings or data will not be saved. Be sure to save any work to a shared network location.<!--NeedCopy--> -
User Layer Unavailable
We were unable to attach your user layer. Any changes you make to application settings or data will not be saved. Be sure to save any work to a shared network location.<!--NeedCopy--> -
System not reset after user sign-out
This system was not shut down properly. Please log off immediately and contact your system administrator.<!--NeedCopy-->
Log files to use when troubleshooting
The log file, ulayersvc.log, contains the output of the user personalization layer software where changes are logged.
C:\ProgramData\Unidesk\Logs\ulayersvc.log
<!--NeedCopy-->
User Layer/UPL space reclamation
You can use User Layer/UPL space reclamation to automatically compress the VHDX files every time the user logs off. For more information, see User Layer/UPL space reclamation
Limitations
Keep the following limitations in mind when installing and using the user personalization layer feature.
-
Do not attempt to deploy the user personalization layer software on a layer within App Layering. Either deploy user personalization layers in Citrix Virtual Apps and Desktops or enable user layers in an App Layering image template, not both. Either process produces the user layers that you need.
-
Do not configure the user personalization layer feature with persistent machine catalogs.
-
Do not use Session hosts.
-
Do not update the machine catalog with an image running a new OS install (even the same version of Windows 10). The best practice is to apply updates to the OS within the same master image used when creating the machine catalog.
-
Do not use boot-time drivers or any other early boot personalization.
-
Do not migrate PvD data to the user personalization layer feature.
-
Do not migrate existing user layers from the full App Layering product to the user personalization layer feature.
-
Do not change the user layer SMB path to access user layers created using a different master OS image.
-
When a user logs out of a session and then logs in again, the new session runs on a different machine in the pool. In a VDI environment, Microsoft Software Center lists an application as Installed on the first machine but shows it as Unavailable on the second machine.
To find out the true status of the application, instruct the user to select the application in the Software Center and click Install. SCCM then updates the status to the true value.
-
Software Center occasionally stops immediately after launching within a VDA that has the user personalization layer feature enabled. To avoid this issue, follow Microsoft’s recommendations for Implementing SCCM in a XenDesktop VDI environment. Also, make sure that the
ccmexecservice is running before you start the Software Center. -
In Group Policies (Computer Settings), User layer settings override settings applied to the master image. Therefore, the changes you make in Computer Settings using a GPO are not always present for the user on the next session login.
To get around this issue, create a User Logon Script that issues the command:
gpupdate /forceFor example, one customer set the following command to run at each user login:
gpudate /Target:Computer /forceFor best results, apply changes to Computer Settings directly on the user layer, after the user has logged in.
-
A domain user account must not be the last user to have logged in to a master image. Otherwise, the machines provisioned from that image might have issues.
-
Custom certificates do not persist when UPL is enabled in a pure Microsoft Entra environment, due to an underlying issue in Windows running on Azure. If Microsoft fixes this issue in a future enhancement, we will update this article.