-
-
How to install and use JetBrains IntelliJ Gateway as a Citrix published application
-
Use Citrix Secure Access and Citrix Secure Developer Spaces with VS Code
-
Configure AI Gateway routing in Citrix Secure Developer Spaces
-
Configure external MongoDB with X.509 authentication in Citrix Secure Developer Spaces
-
This content has been machine translated dynamically.
Dieser Inhalt ist eine maschinelle Übersetzung, die dynamisch erstellt wurde. (Haftungsausschluss)
Cet article a été traduit automatiquement de manière dynamique. (Clause de non responsabilité)
Este artículo lo ha traducido una máquina de forma dinámica. (Aviso legal)
此内容已经过机器动态翻译。 放弃
このコンテンツは動的に機械翻訳されています。免責事項
이 콘텐츠는 동적으로 기계 번역되었습니다. 책임 부인
Este texto foi traduzido automaticamente. (Aviso legal)
Questo contenuto è stato tradotto dinamicamente con traduzione automatica.(Esclusione di responsabilità))
This article has been machine translated.
Dieser Artikel wurde maschinell übersetzt. (Haftungsausschluss)
Ce article a été traduit automatiquement. (Clause de non responsabilité)
Este artículo ha sido traducido automáticamente. (Aviso legal)
この記事は機械翻訳されています.免責事項
이 기사는 기계 번역되었습니다.책임 부인
Este artigo foi traduzido automaticamente.(Aviso legal)
这篇文章已经过机器翻译.放弃
Questo articolo è stato tradotto automaticamente.(Esclusione di responsabilità))
Translation failed!
Custom Actions
Custom Actions let you automate routine platform maintenance. You define a rule made of three parts — an action to run, the conditions that decide which workspaces or users it applies to, and when it runs. A common example is deleting workspaces that have been inactive for a long time.
Find this setting at Settings > General > Custom Actions.
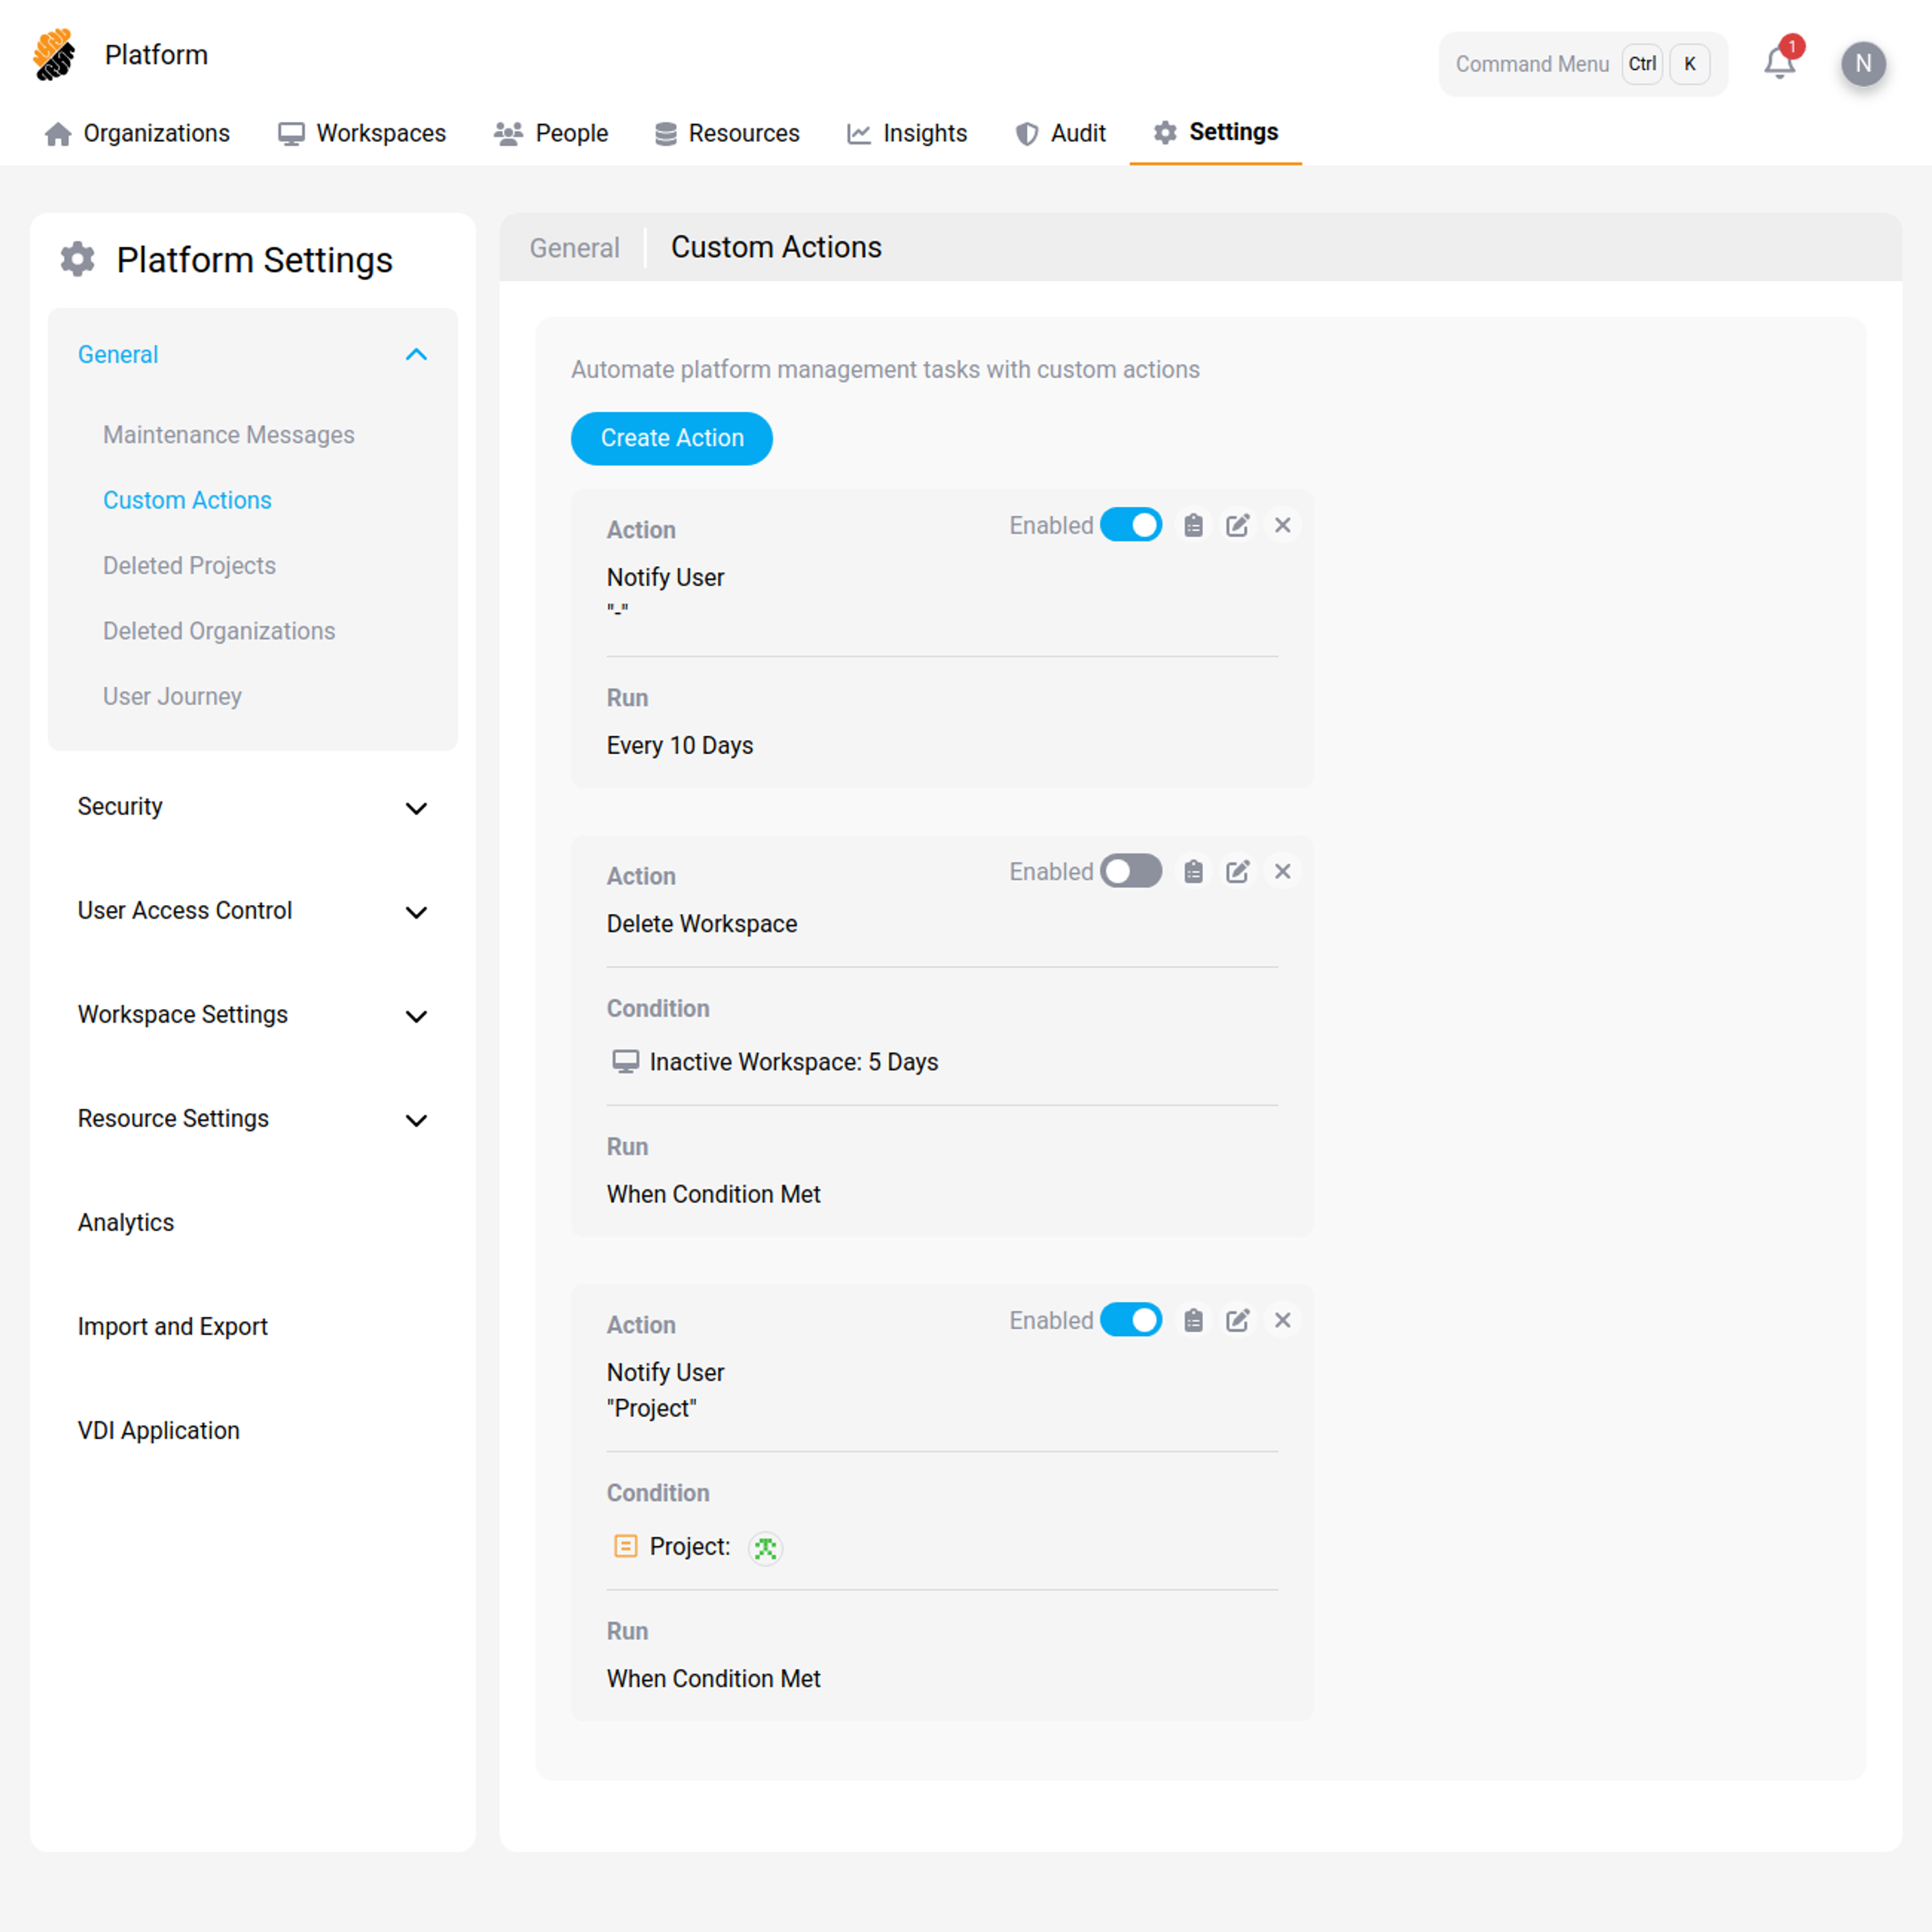
How a custom action is built
Every custom action combines three parts.
Action — what runs
| Action | What it does |
|---|---|
| Update Workspace | Applies an update to each matching workspace, such as an image update. |
| Delete Workspace | Deletes each matching workspace. |
| Notify User | Sends an in-platform notification with a message you write to each matching user. |
Condition — which workspaces or users it applies to
Add one or more conditions to target the action. Available conditions include:
- Organization: Limit to workspaces in specific organizations.
- Project: Limit to workspaces in specific projects.
- User: Limit to workspaces owned by specific users.
- Inactive Workspace: Match workspaces that haven’t been used for a set number of days.
- After and Before: Limit the action to a time window by setting a start date, an end date, or both.
When — how the action is scheduled
The When field controls the schedule. It offers three options:
| Option | Behavior |
|---|---|
| Once | Runs one time, at the date and time you set. |
| Time Period | Runs on a repeating schedule, such as every 30 days. |
| When Condition Met | Runs continuously in the background and applies the action whenever the conditions are met. This option appears only after you add at least one condition. |
“When Condition Met” versus “Time Period”
This is the key choice for a maintenance rule like deleting inactive workspaces, so it’s worth understanding how each option behaves.
When Condition Met evaluates your conditions on a recurring background cycle, roughly every 15 minutes. Each cycle, it finds everything that currently matches and applies the action. It doesn’t wait for a scheduled date. As soon as a workspace crosses your inactivity threshold, it’s picked up in the next cycle.
Time Period runs on the fixed interval you set — for example, every 30 days. The conditions only decide which workspaces are affected when that scheduled run happens. Anything that becomes a match between two scheduled runs waits until the next run.
For a rule like “delete a workspace when it’s been inactive for 365 days,” When Condition Met is the right choice. The action checks continuously and deletes each workspace shortly after it passes 365 days of inactivity — not on a separate schedule you’d have to keep in sync.
Note:
With When Condition Met, the action doesn’t run “once a day until the condition is met.” It re-evaluates on a short background cycle (about every 15 minutes) and acts as soon as something matches. Because a deleted workspace no longer exists, it isn’t matched again — each workspace is deleted once.
Example: delete workspaces inactive for 365 days
- Go to Settings > General > Custom Actions and start a new action.
- For the action, select Delete Workspace.
- Add a condition, select Inactive Workspace, and set the period to 365 days.
- For When, select When Condition Met.
- Save the action.
The platform now checks continuously. Any workspace that reaches 365 days without use is deleted automatically within the next evaluation cycle.
Note:
Inactivity is measured from a workspace’s last recorded use. A workspace that has never been opened isn’t matched by the Inactive Workspace condition.
Related information
Share
Share
This Preview product documentation is Citrix Confidential.
You agree to hold this documentation confidential pursuant to the terms of your Citrix Beta/Tech Preview Agreement.
The development, release and timing of any features or functionality described in the Preview documentation remains at our sole discretion and are subject to change without notice or consultation.
The documentation is for informational purposes only and is not a commitment, promise or legal obligation to deliver any material, code or functionality and should not be relied upon in making Citrix product purchase decisions.
If you do not agree, select I DO NOT AGREE to exit.