Quick start: Create and connect to your workspace
Developer
This guide walks you through creating your first workspace and connecting to it. By the end, you’ll have a running cloud development environment with your IDE connected and ready for coding.
Before you begin
- Complete your account setup. You should have your profile, integrations, and credentials configured. If you haven’t done this yet, start with Quick start: Set up your account.
- Know which template to use. Your Project Owner has set up workspace templates for your project. If you’re unsure which one to use, ask them before proceeding.
Step 1: Create a workspace
A workspace is your personal cloud development environment — a fully configured setup with your IDE, source code, tools, and dependencies, accessible from your browser, a local IDE over SSH, or a terminal session. Your Project Owner has set up workspace templates tailored to your project, with all tools and configurations already in place. Deployment typically takes 30–90 seconds, and you’ll see a progress indicator while the workspace initializes.
How to complete this step
- From the SDS home page, select Create from template.
- Select a template from the list. If you’re unsure which one to use, ask your Project Owner which template fits your role.
- Review the configuration summary. Select Customize if you need to adjust settings before launching (for example, changing the workspace name or resource allocation).
- Select Launch to deploy your workspace.
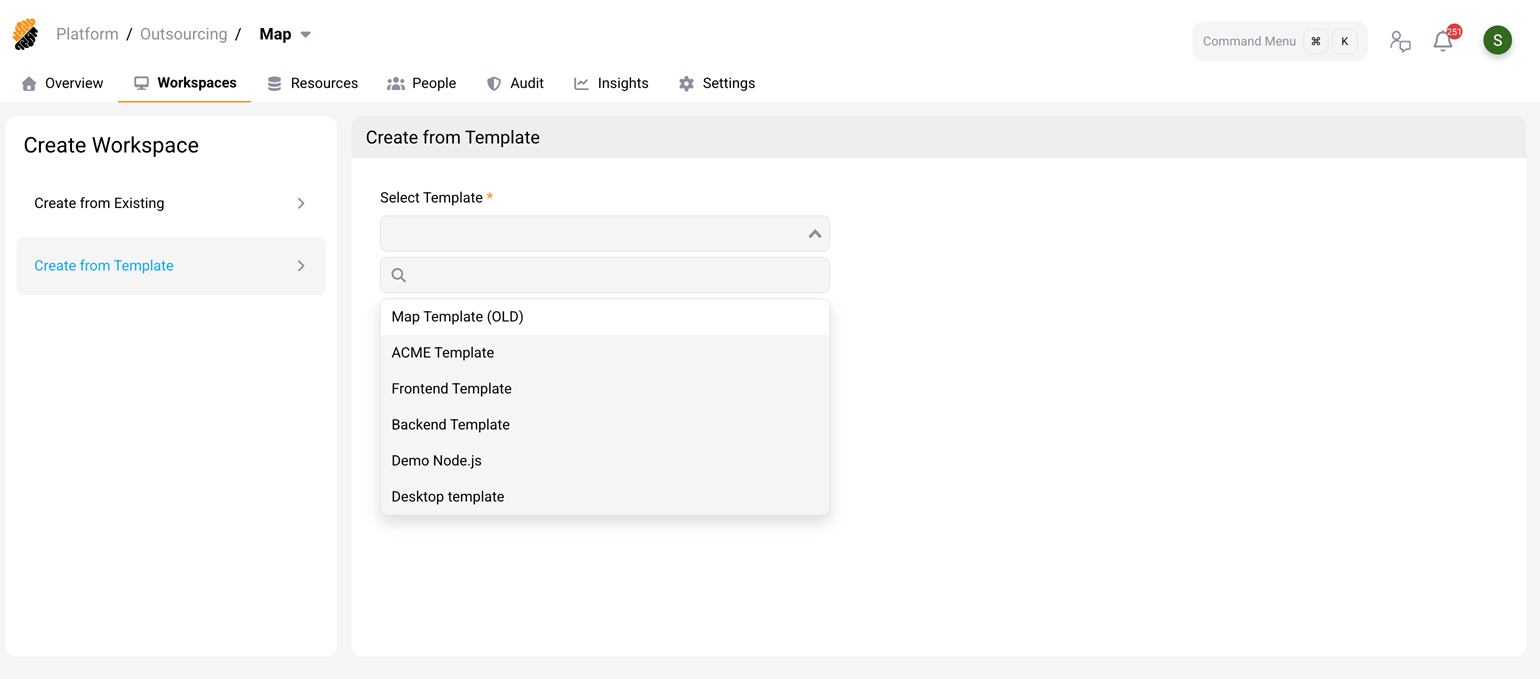
After the status shows Running, you’re ready to connect.
Alternative: Create without a template
If you do not have a workspace template available, you can also create a workspace using Create workspace (without a template), but this requires configuring all settings manually — container image, resources, repositories, and access controls. Templates are recommended for most users.
Step 2: Connect to your workspace
After your workspace is running, you can connect to it in several ways. Choose the method that fits your workflow.
Option A: Cloud IDE (VS Code for Web)
The fastest way to get started — no installation required.
- On the workspace card, select Open (or the VS Code icon).
- VS Code for Web opens in a new browser tab, connected directly to your workspace.
- You’re ready to code. Open the integrated terminal, browse files, install extensions, and run your application.
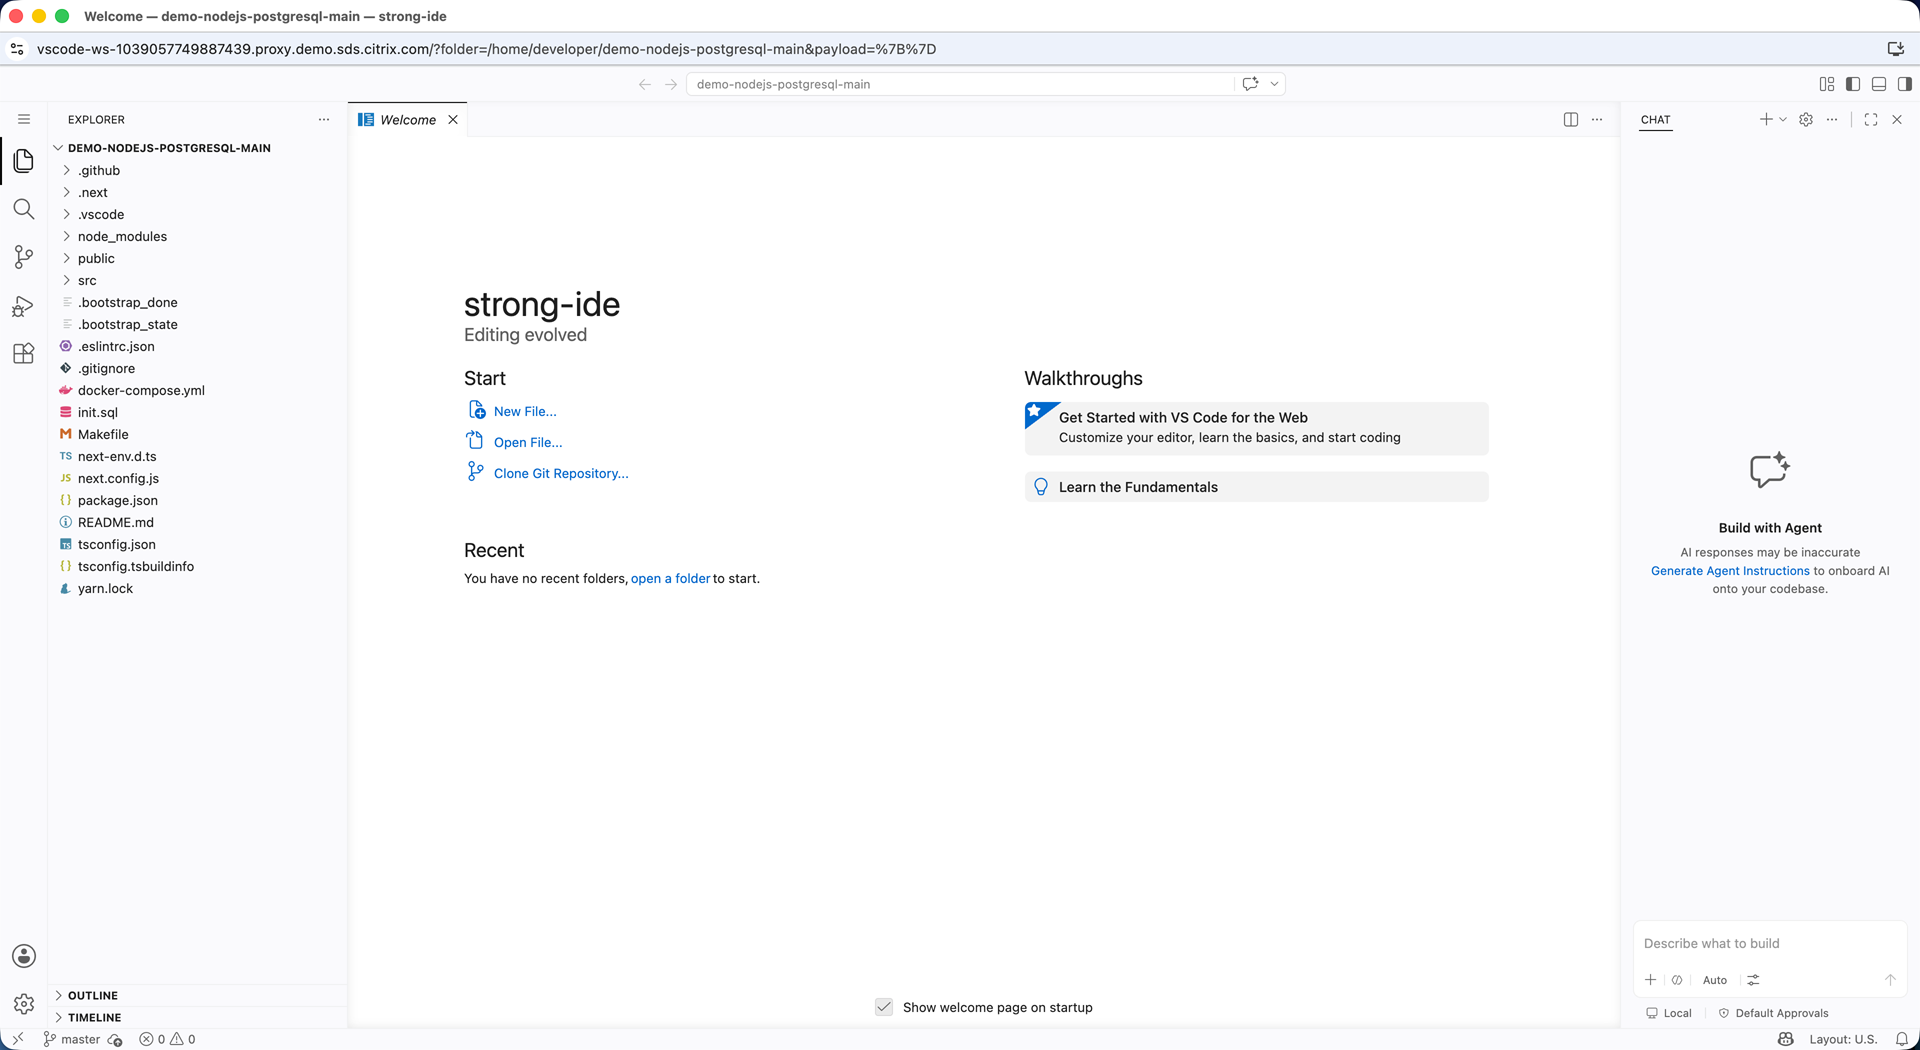
Best for: Getting started quickly, working from any device, light editing sessions.
Option B: Connect from a local IDE over SSH
For a native IDE experience, connect to your workspace over SSH. SDS provides dedicated extensions for VS Code Desktop, Cursor, Windsurf, and Kiro that enable one-click connections. JetBrains Gateway is supported through SSH configuration. You can also connect from any other IDE or tool that supports the SSH protocol.
Prerequisites for SSH
Before connecting over SSH, verify the following:
- Remote Development Over SSH is enabled for your project. Your platform administrator or Project Owner manages this setting. If the SSH icon doesn’t appear on your workspace, ask them to enable it.
- SSH is enabled on the workspace. When creating or editing a workspace, the SSH access method must be selected under Basic Info > Access.
VS Code Desktop, Cursor, Windsurf, or Kiro (one-click)
SDS provides the Citrix Secure Developer Spaces - Remote SSH extension for these IDEs. The fastest way to connect:
- In the SDS console, locate your workspace and select the SSH icon in the Access column.
- In the Connect Via SSH dialog, select your IDE (for example, VS Code Desktop).
- Your local IDE opens. If this is your first connection, you’re prompted to install the SDS extension — select Install Extension and Open URI.
- The extension connects to your workspace automatically.
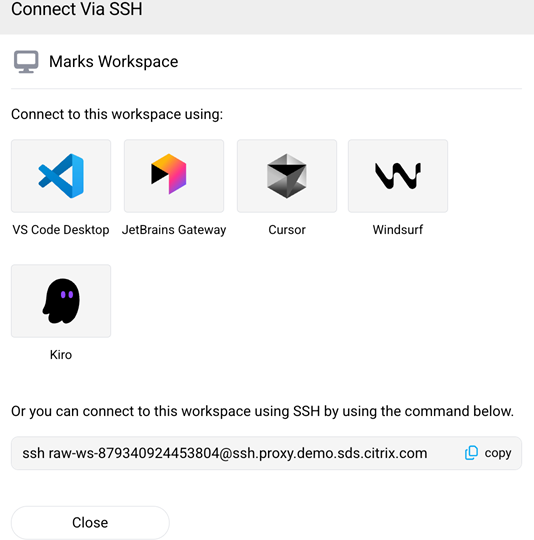
Tip: After the extension is installed, you can also manage workspaces directly from the extension sidebar — start, pause, and connect without switching to the browser.
JetBrains IDEs (using Gateway)
- Download and install JetBrains Gateway.
- In the SDS console, select the SSH icon on your workspace, then select JetBrains Gateway. Note the SSH command displayed at the bottom of the dialog.
- In Gateway, select New Connection under SSH Connection, then add a new SSH configuration using:
-
Host — The part after
@in the SSH command. -
Username — The part before
@. - Authentication type — Select Key Pair and provide the path to your private key.
-
Host — The part after
- Select Test Connection to verify, then continue.
- Choose your JetBrains IDE and project folder, then select Download IDE and Connect.
Manual SSH (any SSH-capable tool)
For IDEs or terminals without a dedicated SDS integration:
- Ensure you have configured an SSH key pair in your profile under Security > Remote access over SSH (see Set up your account, Step 4).
- In the SDS console, select the SSH icon on your workspace to open the Connect Via SSH dialog.
-
Copy the SSH command displayed at the bottom of the dialog and run it in your terminal:
ssh <username>@<hostname> <!--NeedCopy--> - After you connect, open the workspace folder in your IDE’s remote development mode.
Learn more about SSH connections
Step 3: Verify your setup
Before diving into your project work, confirm that your workspace was configured correctly.
Check your repositories
If your workspace template includes pre-configured repositories, they should already be cloned into your workspace automatically. Open a terminal and verify:
ls /home/developer
<!--NeedCopy-->
You should see your project repository folder(s) listed. Open one and confirm the contents look correct:
cd /home/developer/my-project
git status
<!--NeedCopy-->
If a repository wasn’t cloned successfully
- Verify the workspace configuration. In the SDS console, select your workspace and check the resource access control settings. Ensure the correct repository is specified. See Create a Workspace for details.
- Verify your Git provider credentials. Ensure you’ve authenticated with the correct provider and account in your profile integrations. See Set up your account, Step 2.
-
Try cloning manually to isolate the issue:
git clone <your-repository-url>
<!--NeedCopy-->
If this fails with a permission error, the issue is with your credentials. If it succeeds, the issue is with the workspace template configuration — contact your Project Owner.
Important: Workspace persistence
Workspaces are non-persistent by default. Changes made outside of /home/developer are discarded when the workspace is paused or restarted. To preserve your work:
-
Code and files: Store everything under
/home/developer(this is persistent by default). - System-level tools: Use startup scripts to reinstall dependencies automatically on each start.
- Base environment changes: If you need to modify the underlying container image (for example, install a system library), work with your Project Owner or platform administrator to update the workspace template.
Learn more about maintaining persistent changes
Next steps
You’re up and running. Here are some things to explore:
- Share a running application. Expose a dev server to teammates for testing without deploying to staging. See Workspace Apps.
- Customize your environment. Add VS Code extensions, shell aliases, or startup scripts. See Set up your account, Step 3.
- Understand workspace lifecycle. Learn how pausing, resuming, and automatic start work. See Manage Workspaces.
- Set up your preferred IDE in detail. For JetBrains Gateway, Cursor, Windsurf, or Kiro configuration, see Connect to a workspace via SSH.
Get help
If you run into issues not covered above:
- Check the docs: Browse the full SDS documentation for detailed guides.
- Ask your Project Owner: They configured your project’s templates and resources.
- Contact your platform administrator: For account access, network, or platform-level issues.