-
-
How to install and use JetBrains IntelliJ Gateway as a Citrix published application
-
Use Citrix Secure Access and Citrix Secure Developer Spaces with VS Code
-
Configure AI Gateway routing in Citrix Secure Developer Spaces
-
Configure external MongoDB with X.509 authentication in Citrix Secure Developer Spaces
-
-
Create a Workspace Mount Points
This content has been machine translated dynamically.
Dieser Inhalt ist eine maschinelle Übersetzung, die dynamisch erstellt wurde. (Haftungsausschluss)
Cet article a été traduit automatiquement de manière dynamique. (Clause de non responsabilité)
Este artículo lo ha traducido una máquina de forma dinámica. (Aviso legal)
此内容已经过机器动态翻译。 放弃
このコンテンツは動的に機械翻訳されています。免責事項
이 콘텐츠는 동적으로 기계 번역되었습니다. 책임 부인
Este texto foi traduzido automaticamente. (Aviso legal)
Questo contenuto è stato tradotto dinamicamente con traduzione automatica.(Esclusione di responsabilità))
This article has been machine translated.
Dieser Artikel wurde maschinell übersetzt. (Haftungsausschluss)
Ce article a été traduit automatiquement. (Clause de non responsabilité)
Este artículo ha sido traducido automáticamente. (Aviso legal)
この記事は機械翻訳されています.免責事項
이 기사는 기계 번역되었습니다.책임 부인
Este artigo foi traduzido automaticamente.(Aviso legal)
这篇文章已经过机器翻译.放弃
Questo articolo è stato tradotto automaticamente.(Esclusione di responsabilità))
Translation failed!
Create a Workspace — Mount Points (Resource Access)
Resource Access Control — Mount Points
In the Resource Access step of workspace creation, a new Mount Points section is available when the feature is enabled at the platform level.
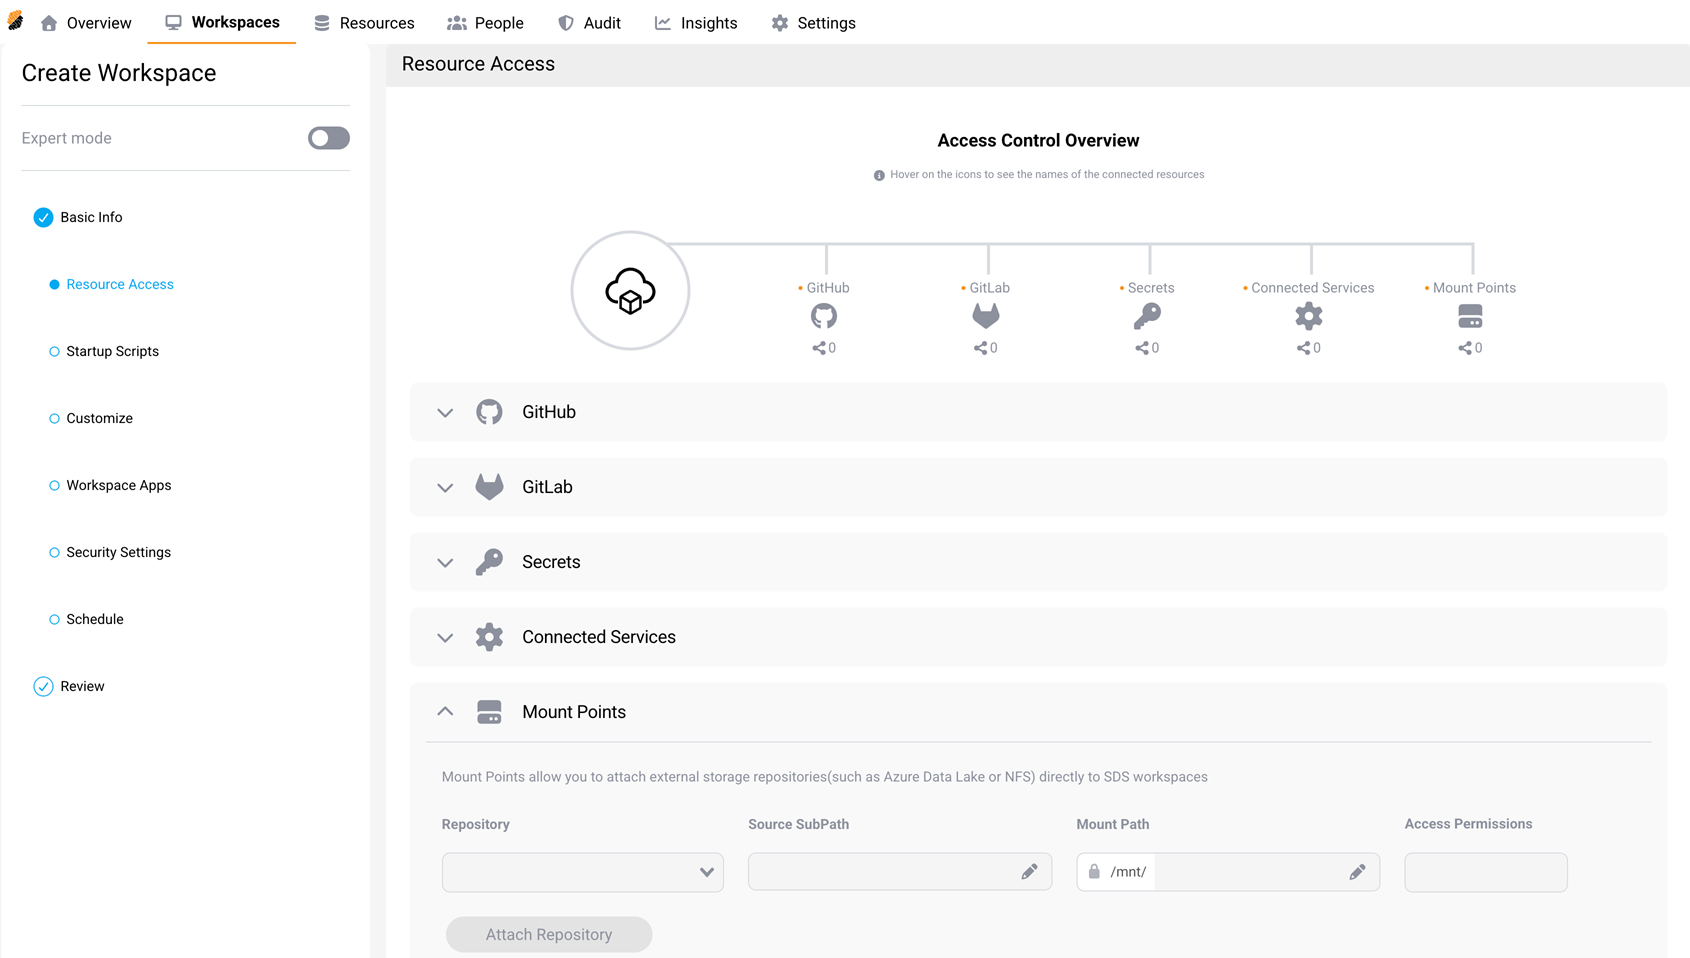
Mount Points let you attach external file-based storage directly to the workspace file system. To attach a Mount Point:
- Expand the Mount Points section.
- Select a Mount Point from the Repository dropdown. Only Mount Points configured for the current project are shown.
- Optionally, specify a Source SubPath to mount a specific subdirectory of the file share.
- Review or customize the Mount Path — the location in the workspace file system where the share is accessible. The path is prefixed with
/mnt/. - Review the Access Permissions (Read/Write or Read Only) assigned to the Mount Point.
- Select Attach Repository to confirm.
Attached Mount Points appear under Configured Repositories below the attachment form.
Important
Mount paths must be unique within a workspace. If two Mount Points share the same path, an error is displayed and the workspace cannot be created until the conflict is resolved.
Note
Mount Points can only be added when the workspace is configured for the primary region. If a non-primary region is selected, the Mount Points section is disabled.
For details on creating and managing Mount Points, see Mount Points.
Share
Share
In this article
This Preview product documentation is Citrix Confidential.
You agree to hold this documentation confidential pursuant to the terms of your Citrix Beta/Tech Preview Agreement.
The development, release and timing of any features or functionality described in the Preview documentation remains at our sole discretion and are subject to change without notice or consultation.
The documentation is for informational purposes only and is not a commitment, promise or legal obligation to deliver any material, code or functionality and should not be relied upon in making Citrix product purchase decisions.
If you do not agree, select I DO NOT AGREE to exit.